
There is simply nothing better at the dinner table than a basket piled high with freshly baked bread. Forget the dry, crumbly sides you’ve endured! I promise you, these are the most reliable fluffy dinner rolls you will ever make. Seriously, if you can activate yeast, you can master this recipe. I developed this method because I wanted that classic, comforting flavor without spending three days fussing, and this enriched dough gives us exactly what we want.
We are aiming for light and airy bread buns here, folks, and trust me, achieving that pillowy soft texture is simple when you follow the rhythm of the dough. This isn’t about being a professional baker; it’s about knowing the right steps to coax richness and air into every single bun. Get ready to impress everyone at your next meal!

- Why You Will Make These Fluffy Dinner Rolls Every Time
- Ingredients for Perfect Fluffy Dinner Rolls
- Step-by-Step Instructions for Fluffy Dinner Rolls
- Aria's Yeast Roll Baking Tips for Maximum Softness
- Making Best Dinner Rolls for Holidays and Gatherings
- Storage and Reheating Instructions for Classic Buttery Dinner Rolls
- Serving Suggestions for Your Fluffy Dinner Rolls
- Frequently Asked Questions About How to Make Soft Rolls
- Nutritional Estimate for These Light and Airy Bread Buns
Why You Will Make These Fluffy Dinner Rolls Every Time
I know you’ve tried recipes that promise the world and deliver hockey pucks, but these rolls are different. This isn’t just another recipe; it’s a blueprint for success when you need truly soft homemade bread rolls. The secret, honestly, lies in the richness we build into the dough from the beginning.
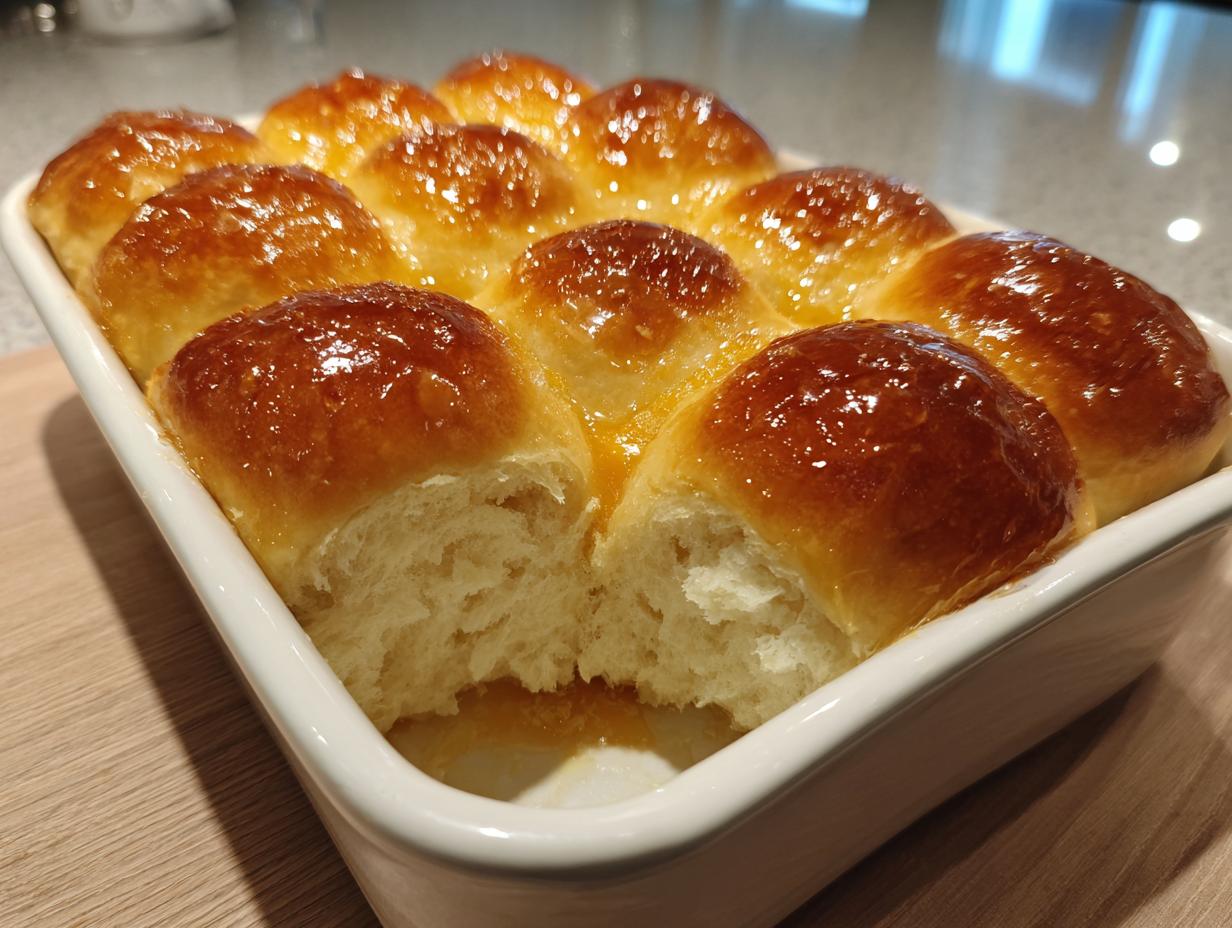
- Guaranteed Light and Airy Bread Buns: We aren’t messing around with dry dough here. The combination of warm milk and the egg creates steam while baking, which pushes the dough up and out, giving you those taller, lighter results. You won’t be able to stop admiring how they spread into each other; that’s the sign of truly fluffy dinner rolls. For another soft bread inspiration, check out my recipe for easy condensed milk bread!
- Classic Buttery Dinner Rolls Flavor Profile: These rolls aren’t overwhelmingly sweet; they hit that perfect spot between savory and sweet. The butter melts right into the crumb, making them rich and perfect for dipping into gravy or just slathering with a little extra melted butter the moment they come out of the oven. They are the real deal for any holiday table!
- Simple Technique for Soft Homemade Bread Rolls: I always hear folks say yeast baking is hard, but I’ve made this an incredibly straightforward process. It’s an Easy Yeast Rolls Recipe because we focus on temperature and timing, not complex folding. Once you see that glorious foam when you activate the yeast (Step 1!), you’ll know you’re on track for success.
Ingredients for Perfect Fluffy Dinner Rolls
Okay, let’s talk about what goes into these beauties. Getting the right ingredients, properly prepped, is half the battle when you are aiming for pillowy soft bread rolls. Don’t stress, though; most of this stuff is probably sitting in your pantry right now. The precision here is what separates a good roll from a truly spectacular one!
Here is exactly what you need for a dozen of the fluffiest rolls you’ve ever pulled from the oven. Remember, don’t skimp on the quality here—it matters!
- 1 cup whole milk, warmed to 105-115°F (This needs to be warm, but not hot, or you’ll kill the yeast—which is the number one way to ruin bread!)
- 2 1/4 teaspoons active dry yeast (That’s one standard little packet, easy peasy.)
- 1/4 cup granulated sugar
- 1/2 cup (1 stick) unsalted butter, softened (Make sure this is actually soft, not melted, okay?)
- 1 large egg, room temperature (Having it not cold helps everything mix beautifully!)
- 1 teaspoon salt
- 3 1/2 to 4 cups all-purpose flour, plus more for dusting (We start with less and add only if we absolutely must.)
If you’re looking for other ways to make amazing soft breads, you should definitely check out my recipe for easy homemade naan bread—it uses similar principles!
Key Components for Enriched Dough
The reason these turn out so much better than a plain water-and-flour loaf is that we are creating an enriched dough. Enrichment means adding fats and sugars, and they are the magic behind that Pillowy Soft Bread Recipe texture. The softened butter acts like a cushion for the gluten strands as they develop during kneading, keeping everything tender even when baked through. And the milk? It adds richness and helps keep the interior moist long after they’ve cooled down. It’s what makes these fluffy dinner rolls just melt in your mouth!
Step-by-Step Instructions for Fluffy Dinner Rolls
Alright, deep breath! This is where the magic truly happens. I know the recipe instructions look like a long list, but I promise you, each step builds on the last to guarantee you get those gorgeous, puffy rolls. Don’t rush the rises; that’s the secret weapon in our arsenal for getting light and airy bread buns. If you want a great guide on dough handling in general, check out my post on yeast bread loaf recipes!
Activating the Yeast and Mixing the Dough
First things first: waking up the yeast! This is non-negotiable. Pour your warm milk into a big bowl—it needs to be between 105-115°F. If it’s too cold, the yeast sleeps; if it’s too hot, it dies! Sprinkle in the yeast and maybe a tiny pinch of that sugar. Wait about 5 to 10 glorious minutes until you see a creamy foamy layer on top. That foam tells you: Life is good! Go ahead and stir in the rest of the sugar, the softened butter, the egg, and the salt.
Next, we add the flour gradually. Start with 3 1/2 cups. Mix it in until it looks shaggy and messy—don’t worry, that’s exactly how it’s supposed to look before kneading. That extra half-cup of flour is our safety net, so hold off on adding it unless the dough is sticking everywhere!
Kneading to Develop Structure for Fluffy Milk Bread Rolls
Now, we get our hands dirty! Turn that shaggy mess onto a surface lightly dusted with flour. You have to knead this for a solid 8 to 10 minutes. I’m serious about this kneading time. This develops the gluten structure that traps all the air we need for fluffy milk bread rolls. You’ll feel the change; it starts sticky and tuggy, but by the end, it should be smooth, soft, and super elastic. If you are still needing that last bit of flour because it’s practically liquid, add it sparingly, just enough so you can handle it without it gluing itself to your fingers.
The Two Rises: Developing Texture in Your Fluffy Dinner Rolls
Once you have that gorgeous elastic ball, lightly oil your rising bowl (I just swirl a little vegetable oil around mine), toss the dough in, and turn it once so it’s coated. Cover it tight. This first rise is crucial for flavor and structure. Put it somewhere warm, away from drafts—maybe near a warm oven rack or in an oven that has just been turned off—and let it sit for 1 to 1.5 hours. You are looking for it to double in size. Seriously, look for that doubling!
When it’s doubled, gently punch it down—sorry, dough, but we need to regroup! This is called bulk fermentation. Then we move to the second rise, the proofing. Divide the dough into 12 equal pieces. Roll each one tight into a smooth ball. These need about 30 to 45 minutes more, covered loosely. They should look puffy and soft when they are ready for the oven.
Shaping and Baking Your Light and Airy Bread Buns
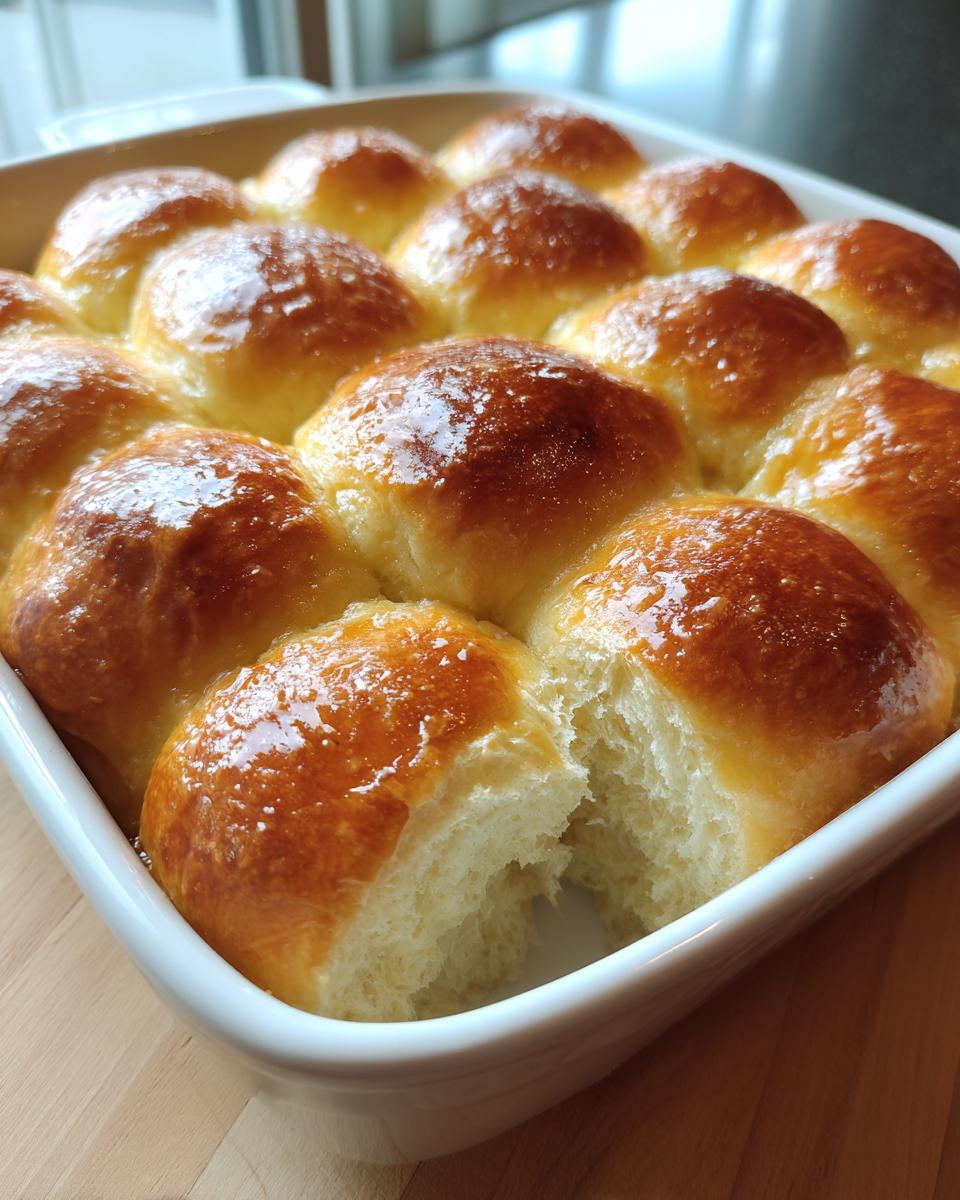
Get your oven preheated to 375°F (190°C) during the last few minutes of that second rise. You want a hot environment for a great spring! Grease that 9×13 inch pan well, and place your 12 dough balls inside, leaving about an inch between them. This spacing is what lets them grow together into little tear and share rolls!
Bake them for 15 to 18 minutes. They are done when they look gorgeously golden brown on top. The best part? Pull them out and immediately brush the tops with melted butter. That melts right in and adds a fantastic sheen and richness to your light and airy bread buns. Trust me, you won’t be able to wait to try one!
Aria’s Yeast Roll Baking Tips for Maximum Softness
Okay, now that you’ve seen the basic steps, let’s talk about the real insider secrets that take these rolls from just “good” to absolutely unforgettable. This is what separates the happy home bakers from the truly confident ones. I learned these little tricks from years of trial and error—mostly error back in the day—but now I’m passing them along so you skip that learning curve. These tips ensure you get those perfect, ultra-soft results every single time, no matter the weather outside!
If you want to see another recipe where temperature control truly shines, take a look at my guide for the easiest yeast bread recipe; the principles are identical!
The Importance of Ingredient Temperature
This is one of my absolute non-negotiables when making fluffy dinner rolls: your wet ingredients need to be temperate! I listed room temperature for the egg and 105-115°F for the milk for a reason. When cold ingredients—especially that egg—hit the creamy, softened butter and sugar mixture, they shock it. This causes the butter to seize up, and suddenly you lose all those tiny air bubbles you worked so hard to incorporate earlier. Those air bubbles? They are what give you that gorgeous lift!
When everything is room temperature, they emulsify smoothly, creating a uniform, beautiful base. It just makes the whole mixing process easier, leading directly to those superior Soft Homemade Bread Rolls.
Avoiding Tough Dough: The Kneading Limit
Listen carefully to this warning, because it’s crucial for that pillowy outcome: Do not over-knead! I know our initial recipe note says to knead for 8 to 10 minutes, and that’s necessary to get the gluten started. But if you keep going past that point, you are actually tightening the gluten framework too much. Think of it like this: strong gluten is great for a rustic loaf meant to stand up to soup, but for fluffy dinner rolls, we want slightly looser gluten so the gases can expand easily.
You’ve gone long enough when the dough looks smooth and passes the windowpane test (you can stretch a small piece thin enough to see light through it without tearing immediately). Once it’s elastic, stop! Putting it in the oiled bowl to rest is where the gluten relaxes naturally, ensuring your rolls are tender, not tough.
Making Best Dinner Rolls for Holidays and Gatherings
When the holidays roll around, or you’re hosting a big Sunday dinner, the last thing you need is to be stuck in the kitchen fighting with yeast bread while everyone else is enjoying appetizers. These fluffy dinner rolls are absolutely the best dinner rolls for holidays because they are so incredibly versatile and, yes, partially make-ahead friendly! This dough is robust enough to handle a little chill time, which is a lifesaver when you’re juggling turkey timing.
How you place them in the pan also changes the final look dramatically. If you want those gorgeous, rustic-looking, individual spheres you usually see in bakeries, just ensure you leave a little more space between them when you shape them into balls. However, if you let them snuggle up tight—about an inch apart as I noted in the instructions—they bake up into those perfect, cloud-like tear and share rolls that everyone fights over. It’s all about presentation!
Make-Ahead and Overnight Proofing Options
This is the biggest hack for stress-free entertaining, truly. Our recipe sets you up for making Overnight Proof Dinner Rolls with just one small adjustment. After you complete Step 6—oiling the bowl, coating the dough, and covering it—instead of leaving it on the counter for the first rise, stick the whole covered bowl right into the refrigerator.
Let it chill overnight, up to 18 hours! The cold temperature slows down the yeast way down, letting the flavor develop slowly and deeply, like a good aged cheese, but for bread. The next morning, you’ll pull that slightly puffed dough out. You’ll let it sit on the counter for about an hour just to warm up a tiny bit, then gently punch it down, divide it, shape it, and let it complete its second rise (Step 9) at room temperature before baking as directed. Voilà! You just did the majority of the hard work the day before!
If you need more exciting bread options that travel well, you absolutely have to check out my recipe for soft and chewy homemade breadsticks—they are amazing dipped in sauce!
Storage and Reheating Instructions for Classic Buttery Dinner Rolls
The worst tragedy that can happen to perfect fluffy dinner rolls is having them go stale before everyone has finished eating! Since these are made with an enriched dough, they hold their softness way better than basic bread, but we still need to treat them right. The goal is always to restore that just-out-of-the-oven puffiness, and that requires a little heat.
If you have any leftovers—and honestly, I doubt you will—storage is simple. Keep them in an airtight container or a large zip-top bag at room temperature. Do not, under any circumstances, store them in the refrigerator! The fridge temperature actually speeds up staling in bread, turning those heavenly rolls tough. They should stay wonderfully soft for a good two days this way. If you’re planning further ahead, they freeze beautifully!
Freezing Your Soft Homemade Bread Rolls
To freeze, let the rolls cool completely—and I mean completely—after brushing them with butter. Place them together in a heavy-duty freezer safe bag, squeezing out as much air as you can, or wrap them tightly in plastic wrap followed by foil. They are good frozen solid for up to three months. If you’re deep-freezing, make sure to pull them out the night before you plan to reheat them.
How to Reheat for That Freshly Baked Fluff
This is the key to bringing back the joy! When you’re ready to serve your classic buttery dinner rolls, you have two main options, and I have a favorite, of course.
The Oven is Best: Pop them onto a baking sheet—you can even sprinkle them with a tiny splash of water first (this creates a little steam). Heat them in a 350°F oven for about 5 to 8 minutes. This gently warms the butter back into the crumb and revives that beautiful soft texture we worked so hard to create. If you want to serve them with your homemade beef stew, this method is perfect!
The Microwave (For Quick Fixes): If you only have one or two rolls left and need them hot *right now*, the microwave works, but you have to be quick! Wrap the roll in a slightly damp paper towel. Microwave for just 10 to 15 seconds on 50% power. Any longer, and you’ll turn your beautiful roll into rubber. For more ideas on using baked goods in meals, take a look at my guide on making easy homemade bread bowls!
Serving Suggestions for Your Fluffy Dinner Rolls
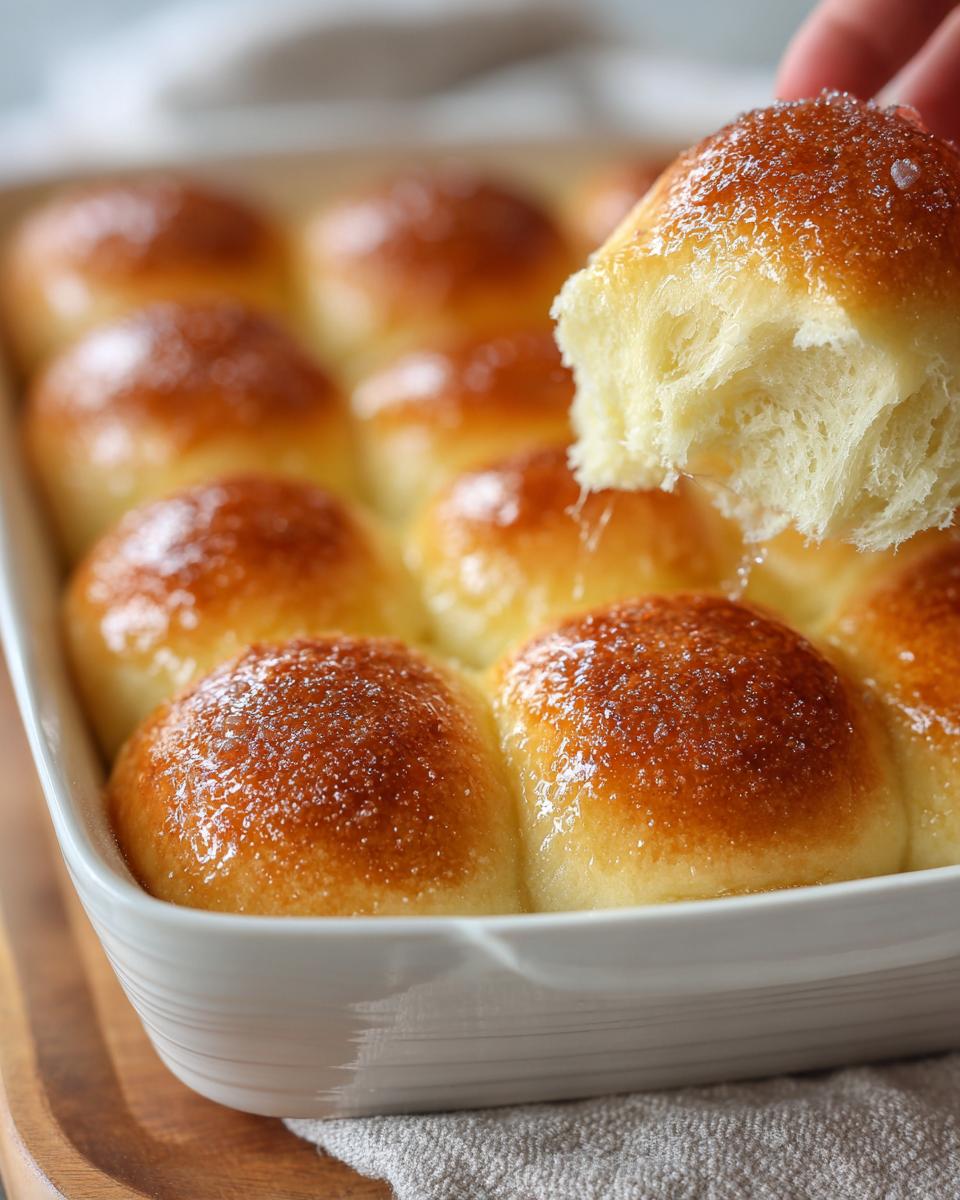
Once these golden, tender puffs are cooling slightly on the rack, your biggest challenge will be keeping your family members from devouring the entire batch before dinner even starts! Because these are such perfectly balanced, classic buttery dinner rolls—not too sweet, not too savory—they pair up beautifully with almost anything you put on the table. I mean it, almost anything!
When I’m planning a big meal, I always think about what those beautiful, soft centers can soak up. These rolls are practically begging for some serious accompanying goodness. If you’re making a roast, like a pot roast or even a prime rib, these are non-negotiable.
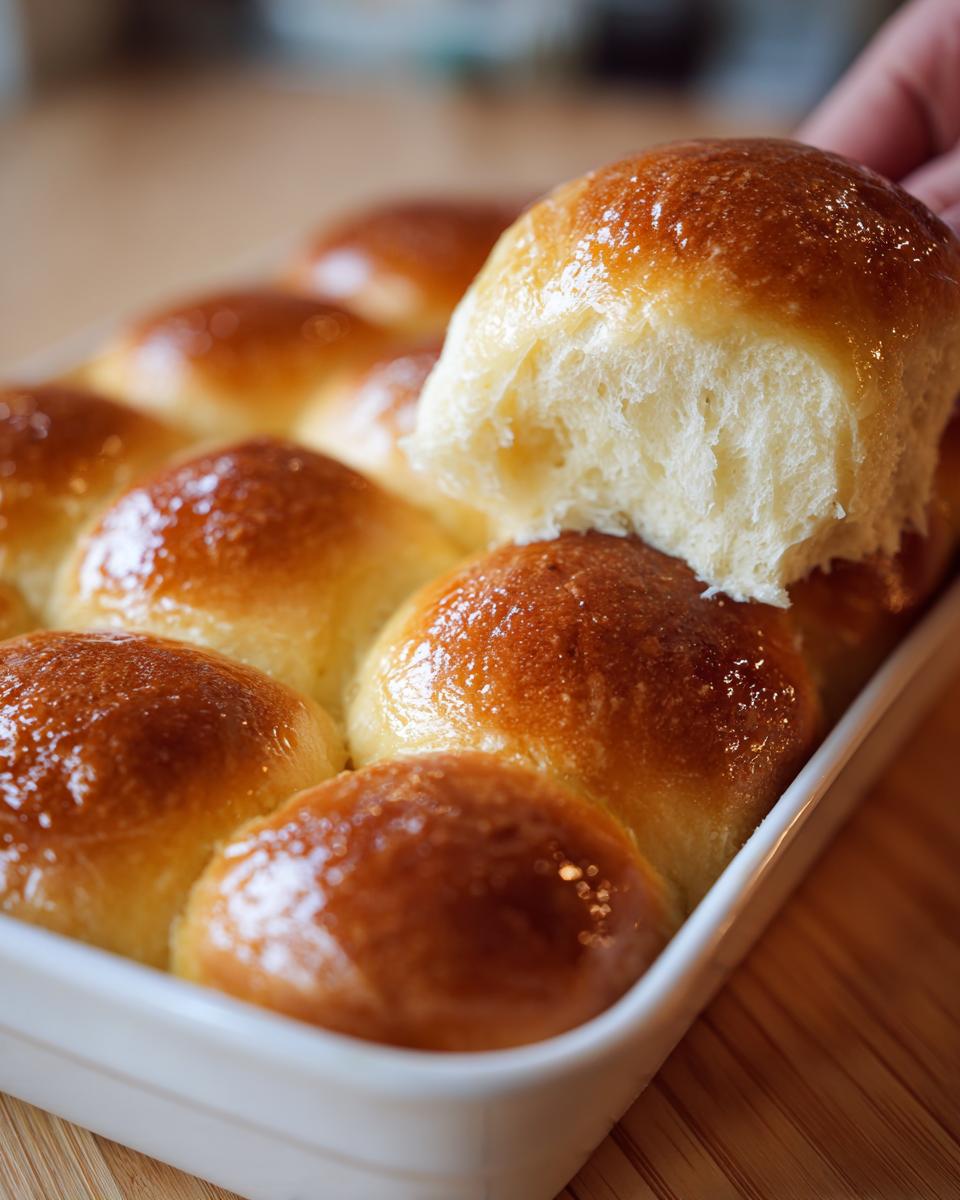
The Ultimate Gravy Moppers
Nothing beats tearing one of these pillowy soft bread rolls in half and dipping it straight into a rich, savory sauce. If you’re making country-fried steak, turkey, or even just mashed potatoes and gravy, these rolls are essential tools for cleaning your plate! I usually whip up my easy homemade brown gravy on the side, and I always make sure to double the gravy, knowing those fluffy rolls will soak up every last drop.
They balance the saltiness of any savory topping perfectly. Think about a big holiday spread—turkey, ham, stuffing—these rolls are the neutral, soft counterpart that ties the whole plate together. They just melt in your mouth!
Perfect Companions for Weeknight Dinners
Don’t save these just for special occasions, though! They make a Tuesday night spaghetti night feel instantly more gourmet. They are fantastic served alongside hearty comfort foods like chili, chicken and dumplings, or a big comforting helping of beef stew. They cut through the richness of those heavy, slow-cooked meals wonderfully.
Also, don’t forget soup night! Forget the croutons; these are the world’s best light and airy bread buns for dipping into tomato soup or French onion soup. They have enough body to hold up to the liquid without dissolving immediately, which is a major win in my book.
Sweet Spreads for a Casual Breakfast Treat
Because these are technically an enriched dough roll recipe, they have a lovely natural sweetness from the sugar and butter we added. Once they cool down, they are fantastic repurposed the next morning. Don’t just reheat them plain!
Serve them warm with quality jam, fruit preserves, or even just a drizzle of honey. They make an incredible quick breakfast or even a brunch sidekick if you’re going for a slightly sweet and savory vibe. Seriously, try slicing one, toasting it lightly, and topping it with cinnamon sugar butter—it’s like eating dessert for breakfast, but we won’t tell anyone!
Frequently Asked Questions About How to Make Soft Rolls
It’s totally normal to have questions when you’re working with yeast, especially when you are trying to achieve that truly perfect texture. I’ve answered some of the most common things I hear when people try to master how to make soft rolls so you can bake with full confidence! We want these to turn out exactly like the soft homemade bread rolls we aimed for.
If you’ve ever wondered about leveling up your yeast game in general, including using wild yeast, check out my post on sourdough yeast bread for more advanced tips.
Can I substitute the whole milk in this Enriched Dough Roll Recipe?
Yes, you absolutely can, but you need to understand what you’re changing! Whole milk provides the highest fat content, which is key to that rich mouthfeel we associate with an enriched dough roll recipe. If you substitute it with 2% milk, you’ll be fine; the rolls will still be wonderfully soft and fluffy. They just might feel *slightly* less rich.
I would generally advise against using skim milk here, as it lacks the fat necessary to counterbalance the flour and keep the crumb velvety. If you need a non-dairy option, unflavored, full-fat oat milk works miracles and keeps the texture beautifully close to the original!
Why did my fluffy dinner rolls not rise enough?
Oh, the dreaded flat roll scenario. It is heartbreaking! Nine times out of ten, this comes down to one of three things, all related to temperature or flour management. First, check your yeast expiration date! If the yeast wasn’t foamy in Step 1, it was dead, and nothing will rise. Second, was your kitchen cold? Yeast hates the cold; if your kitchen was chilly, it just didn’t have the warmth to thrive during the rises. Move the dough to a warmer spot next time.
The third, and most common mistake, is adding too much flour during kneading. If you add too much flour, the dough structure becomes too heavy and dense, and it simply can’t push itself up during the proofing stages. Remember, always err on the side of slightly sticky—that stickiness is moisture and softness waiting to happen!
What is the difference between these and Brioche Style Dinner Rolls?
That’s a great question when you are striving for the ultimate soft bread! Both are enriched doughs, which means they both contain extra fat and eggs compared to a lean dough (like a French baguette). The main difference is the richness level. These fluffy dinner rolls have a good amount of butter and milk, making them soft and buttery.
However, true Brioche Style Dinner Rolls take it a step further—they usually contain significantly more butter and eggs, and often use an even higher ratio of sugar. Brioche feels almost cake-like because of the sheer volume of fat. Our recipe hits that sweet spot: much softer than standard bread, but sturdy enough to serve perfectly with a main course, balancing savory and sweet beautifully!
Nutritional Estimate for These Light and Airy Bread Buns
I always get curious questions about the nutrition behind these beautiful, fluffy dinner rolls. While I’m definitely not a registered dietitian, I do like to keep a rough idea of what we are putting on the table. It’s just good home-cooking sense to know what you’re eating, right?
The ingredients we use—whole milk, butter, sugar—certainly make these an enriched dough, which means they have a little more substance than a simple lean loaf. But don’t worry, the portion size is small, and they bring so much joy to the meal, they are worth it!
Here is the general nutritional breakdown based on the recipe making 12 rolls. Keep in mind, these are estimated values based on standard ingredient measurements and preparation methods. They are a wonderful starting point for tracking, but for exact figures, you might need to weigh your portions!
- Serving Size: 1 roll
- Calories: 220
- Fat: 9g (with about 5g being saturated fat from that glorious butter!)
- Carbohydrates: 30g
- Sugar: 6g (Mostly from the added sugar and the natural sweetness derived from the milk)
- Protein: 5g
- Sodium: 250mg
- Fiber: 1g
They’re richer than your standard sliced bread, but that’s what makes them so satisfying and perfect for special meals. Enjoy them warm!
PrintGuaranteed Fluffy Dinner Rolls: Soft Homemade Bread Rolls
Follow this simple recipe to create pillowy soft bread rolls that are perfect for any dinner. This enriched dough yields light and airy buns every time.
- Prep Time: 25 min
- Cook Time: 18 min
- Total Time: 158 min
- Yield: 12 rolls 1x
- Category: Baking
- Method: Baking
- Cuisine: American
- Diet: Vegetarian
Ingredients
- 1 cup whole milk, warmed to 105-115°F
- 2 1/4 teaspoons active dry yeast (one standard packet)
- 1/4 cup granulated sugar
- 1/2 cup (1 stick) unsalted butter, softened
- 1 large egg, room temperature
- 1 teaspoon salt
- 3 1/2 to 4 cups all-purpose flour, plus more for dusting
Instructions
- Combine the warm milk and yeast in a large bowl. Let it stand for 5 to 10 minutes until foamy. This confirms your yeast is active.
- Stir the sugar into the yeast mixture.
- Add the softened butter, egg, and salt to the bowl. Mix until just combined.
- Gradually add the flour, one cup at a time, mixing well after each addition. Start with 3 1/2 cups. The dough will become shaggy.
- Turn the dough out onto a lightly floured surface. Knead for 8 to 10 minutes until the dough is smooth and elastic. If the dough is too sticky, add the remaining flour sparingly, only as needed to prevent sticking.
- Place the dough in a lightly oiled bowl, turning it once to coat. Cover the bowl with plastic wrap or a clean kitchen towel.
- Let the dough rise in a warm place for 1 to 1.5 hours, or until it has doubled in size. This first rise develops flavor and structure.
- Gently punch down the risen dough. Divide the dough into 12 equal pieces.
- Roll each piece into a smooth ball. Arrange the balls in a greased 9×13 inch baking pan, leaving about 1 inch between them for expansion.
- Cover the pan loosely and let the rolls proof (second rise) for 30 to 45 minutes, or until they look puffy.
- Preheat your oven to 375°F (190°C) during the last 15 minutes of the second rise.
- Bake for 15 to 18 minutes, or until the tops are golden brown.
- For extra buttery flavor, brush the tops immediately with melted butter as soon as they come out of the oven. Serve warm.
Notes
- For the softest rolls, use room temperature ingredients, especially the egg and milk.
- Do not over-knead the dough once it is mostly smooth; over-kneading can develop too much gluten, resulting in tough rolls.
- If you want tear and share rolls, place them closer together in the pan before the second rise.
Nutrition
- Serving Size: 1 roll
- Calories: 220
- Sugar: 6
- Sodium: 250
- Fat: 9
- Saturated Fat: 5
- Unsaturated Fat: 4
- Trans Fat: 0
- Carbohydrates: 30
- Fiber: 1
- Protein: 5
- Cholesterol: 30