
Oh, friends, there is nothing—absolutely nothing—that beats the sound of a truly crackling crust on a loaf baked right in your home oven. When you manage that thick, shatteringly crisp exterior alongside an open, airy interior, all powered by nothing but wild yeast and flour? That’s pure magic. That’s why I’m so thrilled to share my blueprint for the ultimate sourdough yeast bread. Forget those tiny packets of commercial yeast; this homemade sourdough recipe relies completely on the natural lift of your starter. It took me years of sticky messes and flat frisbees to finally nail the timing for this classic country loaf. But trust me, once you master this method, you’ll never go back. Get your scale ready—we’re baking real artisan bread making!
- Why This Is The Best Sourdough Yeast Bread Recipe (The Country Loaf Difference)
- Essential Ingredients for Your Sourdough Yeast Bread
- Mastering Starter Health for Perfect Sourdough Yeast Bread Rise
- Step-by-Step Instructions for Sourdough Yeast Bread
- Tips for Success: Baking Perfect Sourdough Starter Bread Instructions
- Troubleshooting Common Sourdough Yeast Bread Issues
- Storage and Keeping Your Artisan Bread Making Fresh
- Frequently Asked Questions About No Commercial Yeast Baking
- Estimated Nutritional Profile for a Slice of This Sourdough Yeast Bread
- Share Your Homemade Sourdough Recipe Creations
Why This Is The Best Sourdough Yeast Bread Recipe (The Country Loaf Difference)
So, why bother with the several-hour wait and the fussy starter maintenance when you can use instant yeast? Because the flavor payoff in this country loaf is just worlds away! This sourdough yeast bread is the gold standard because it prioritizes incredible texture and a deep, satisfying tang that commercial yeast simply can’t match. It’s a reliable hydration level that gives you that perfect oven spring.
- Superior, complex flavor developed over a long, cold proof.
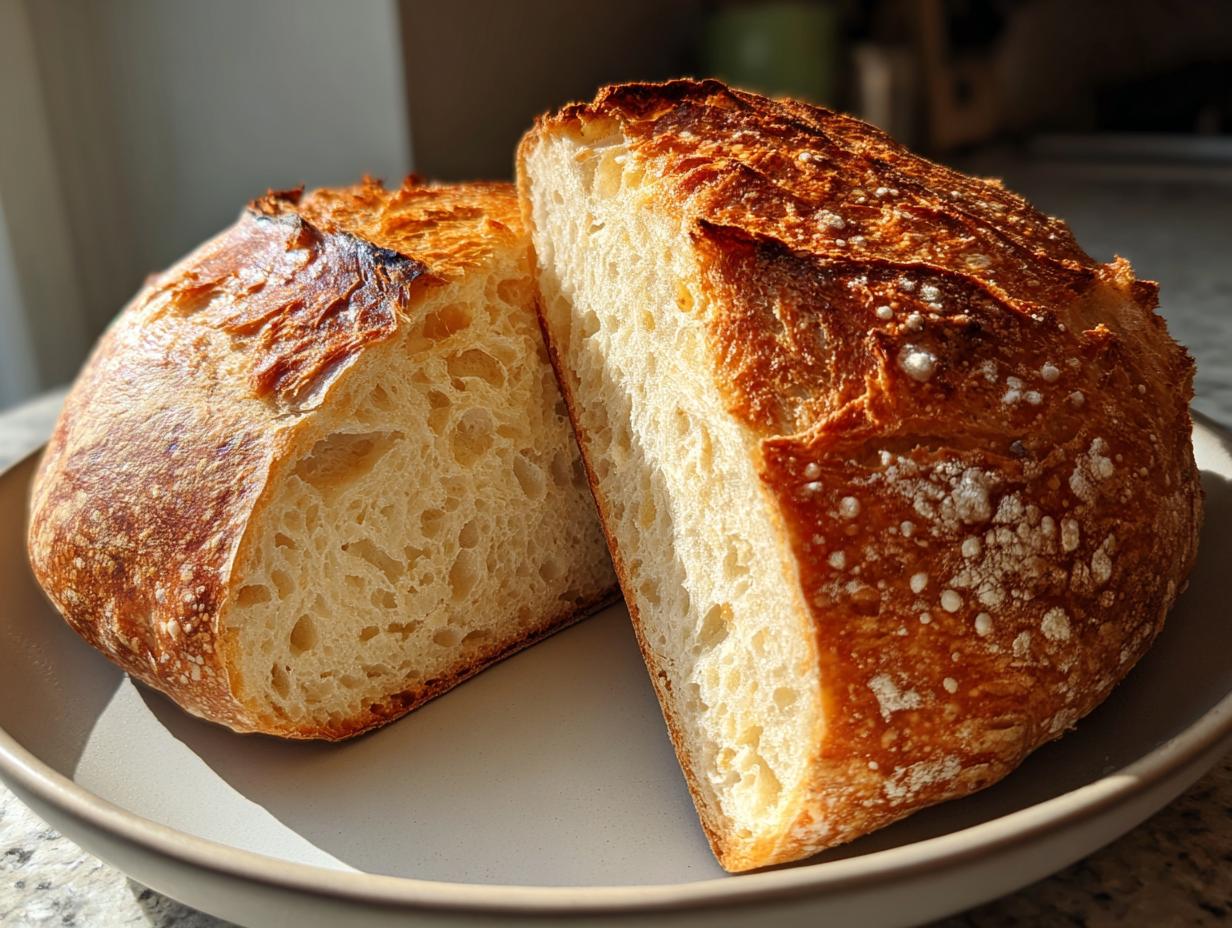
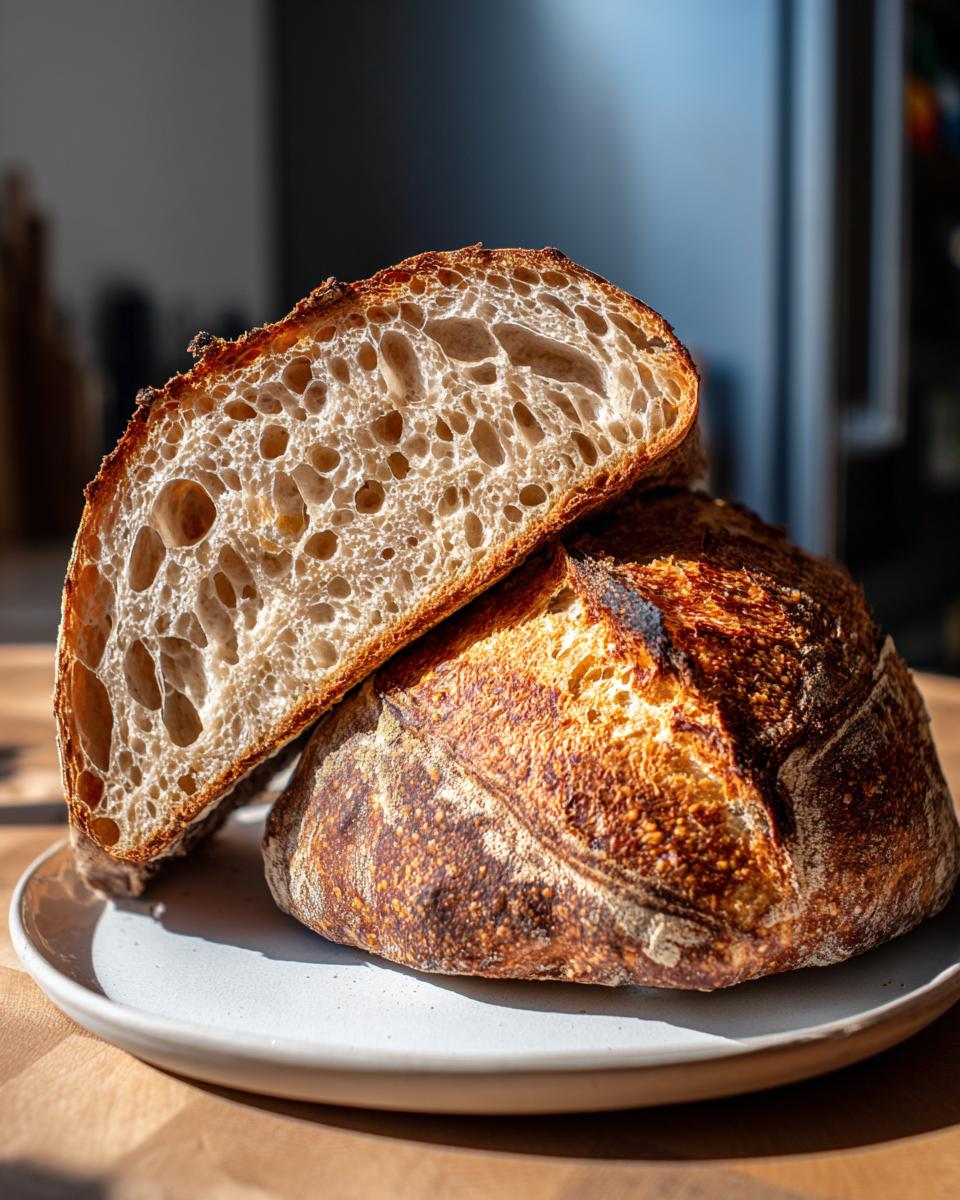
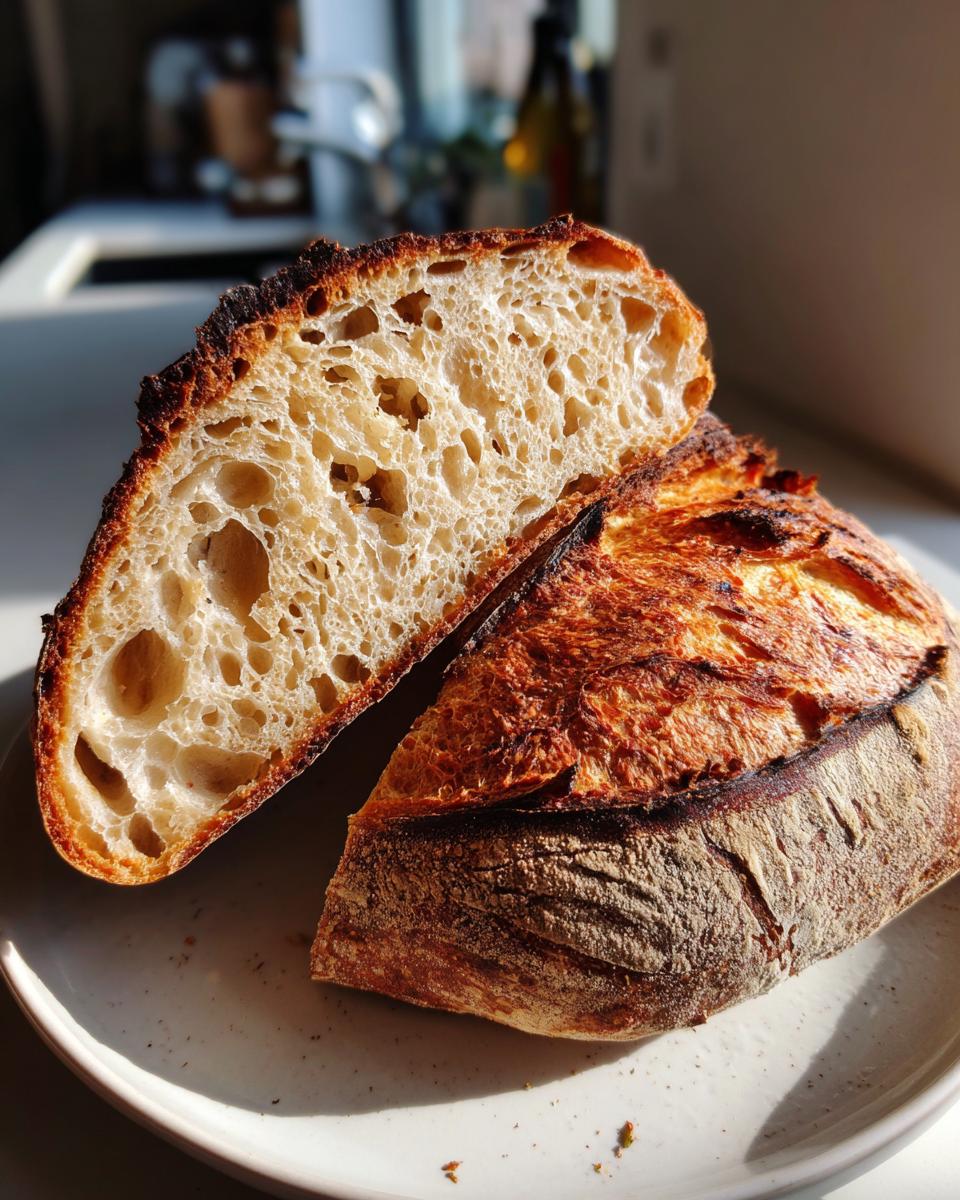
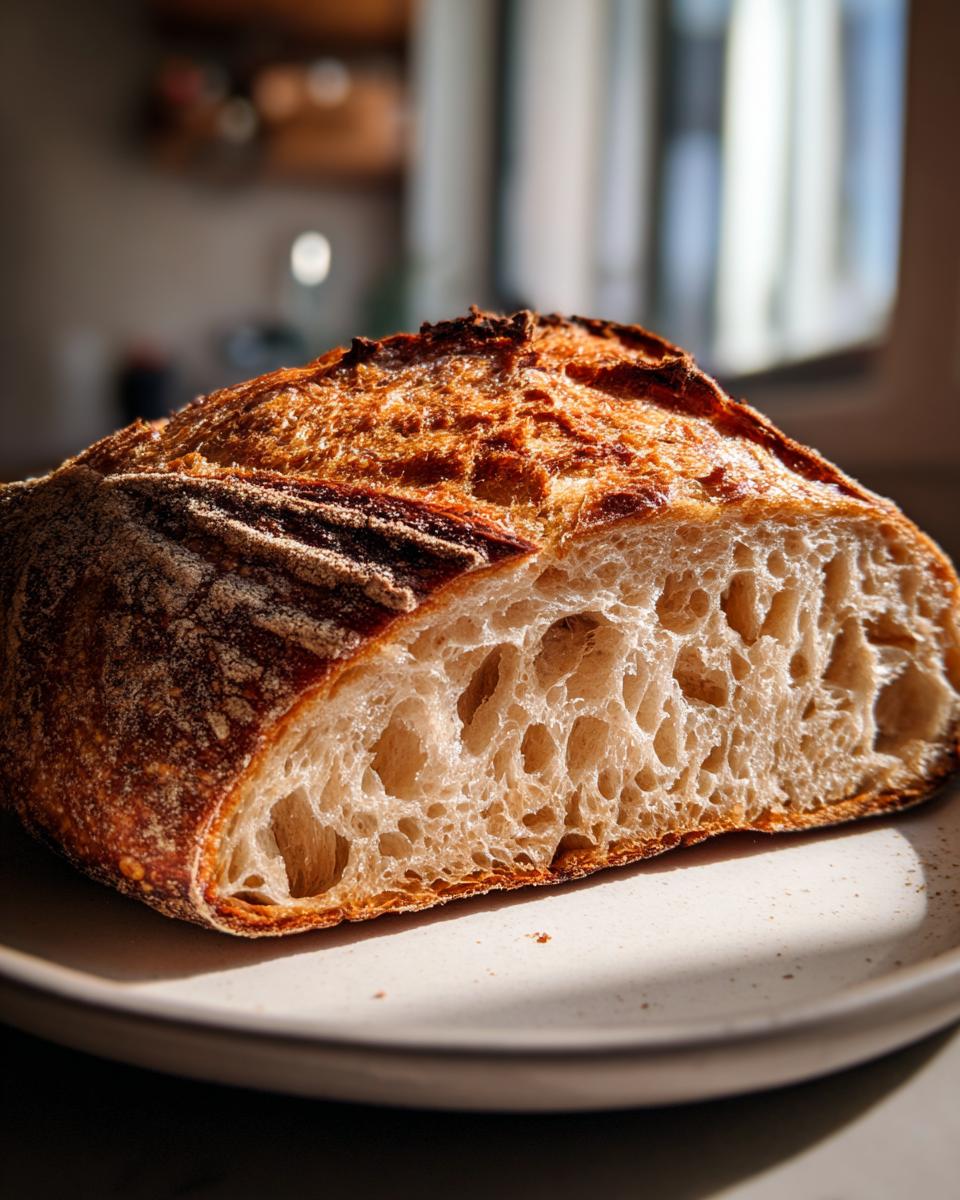
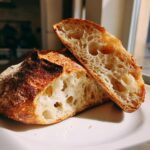
- A gorgeous, deeply blistered, shattering crust.
- An open, chewy crumb structure that’s perfect for dipping.
We aren’t just making bread here; we’re making artisan bread making accessible right in your kitchen. Ready to see how we get that lift without yeast? Check out how other crusty loaves come together, but stick around for the natural magic!
What Makes Sourdough Yeast Bread Unique
The difference is, well, life! Your sourdough starter is a living colony of wild yeasts and bacteria. This means we’re not just relying on quick gas production; we’re developing complex acids that break down the starches. This naturally leavening bread gets its rise—and its signature depth—from that micro-community. It’s slower, yes, but oh, the flavor profile it creates is spectacular.
Essential Ingredients for Your Sourdough Yeast Bread
Okay, real talk time: when you are diving into the world of sourdough yeast bread, precision isn’t just helpful—it’s mandatory. You absolutely cannot eyeball this! That’s why my number one rule for every single loaf is to use a kitchen scale. Trust me, 10 grams of salt versus 12 grams changes the whole game when we’re dealing with natural leavening bread. We need accuracy!
The starter itself has to be happy. I specify an active starter that has doubled nicely after feeding, usually about 4 to 8 hours old depending on how warm your kitchen is. You want that vigorous lift! If you are still nurturing your starter or need a refresh on how to get it booming, you absolutely must read my guide on starting your own starter from scratch.
Our ratio here is a bit higher hydration, aiming for that wonderful, chewy texture this classic style requires.
Ingredient Notes and Substitutions
For this sourdough yeast bread, I’ve chosen a blend of high-protein bread flour and whole wheat flour. The bread flour gives us incredible dough strength, which holds onto all that gas produced by the wild yeast. The whole wheat flour provides that beautiful, nutty flavor and adds structure. Don’t skip the whole wheat; it really gives the loaf character!
If you want to experiment but want to keep the structure solid, try swapping out 50 grams of the whole wheat for rye flour. Rye is an old friend to sourdough; it just loves to work with that natural acidity and really deepens the earthy flavor notes. Just make sure you weigh everything!
Mastering Starter Health for Perfect Sourdough Yeast Bread Rise
This is where beginners often get nervous, but trust me—your starter is just a pet that needs feeding! When I call for an ‘active starter’ for this sourdough yeast bread, I mean it needs to be at its absolute peak performance. That means you fed it recently, and it has at least doubled in volume since you last fed it. If you notice it’s just starting to deflate, it’s too late for the best rise.
For my feeding ratio (which is usually 1:2:2—one part starter, two parts flour, two parts water by weight), this usually happens about 4 to 8 hours after I feed it, but room temperature changes everything! If my kitchen is warm, like nearing 75°F, it might peak in just 6 hours. If it’s chilly, I might be waiting 10 hours.
Here’s my fail-safe check for sourdough yeast bread: the float test. Find a small cup of room-temperature water—don’t use cold water! Gently pluck a tiny piece of your bubbly starter on a spoon and drop it in. If it floats immediately to the surface, congratulations! It’s full of the gas it needs to lift your no commercial yeast baking masterpiece. If it sinks, give it a little more time; it’s not quite ready to power that loaf.
Step-by-Step Instructions for Sourdough Yeast Bread
Alright, deep breath! This is the part where it all comes together. Don’t let the number of steps scare you; it’s mostly waiting time. We are going slow and low here, which is the secret to transforming simple flour and water into amazing sourdough yeast bread. Remember, this process is all about patience and watching the dough, not watching the clock!
Mixing and Autolyse for Your Basic Sourdough Boule
First thing, get that starter nice and happy! Mix your active starter with the warm water until it looks milky. Then, toss in both the bread flour and the whole wheat flour. Mix this just until you see no dry clumps—it’s going to look messy and shaggy, and that’s perfect. Now, cover that bowl and let it sit exactly for 30 minutes. This is called the autolyse rest period. What’s that? It’s just letting the flour fully drink up the water before we add the salt. It makes the dough so much nicer to work with later for your sourdough yeast bread.
Incorporating Salt and Beginning Bulk Fermentation
Okay, after the rest, sprinkle that salt right over the top. Now, wet your hands—this keeps the dough from sticking to you! We are going to dimple the salt in by squeezing and pinching the dough gently until it feels incorporated. Then, we start the bulk fermentation. Over the next three hours, we do four rounds of stretch and folds, spaced 30 minutes apart. To do a fold, just gently grab one side of the dough, stretch it upward as high as it will go without tearing, and fold it over the center. Give the bowl a quarter turn and repeat three more times. That’s one set! After the fourth set, just let it sit undisturbed for the rest of the time—usually another hour or two—until it looks puffy and happy. This is where that vital basic bread dough fermentation happens!
Shaping and Cold Proofing the Natural Leavening Bread
Time to tame that sticky wild beast! Gently flip your dough out onto a lightly floured spot on your counter. We pre-shape first: just gently pull the edges into the middle to make a loose ball. Let it chill out, covered, for 20 minutes. That’s the bench rest. For the final shape, flip it skin-side down. Fold the bottom third up, then the top third down like an envelope. Bring the sides in neatly. Finally, flip it over seam-side down and use your hands to gently pull it toward your body until you feel firm surface tension—that’s the key to a high-rising basic sourdough boule! Tuck it seam-side up into your floured banneton, cover it, and stick it in the fridge for 12 to 18 hours. This long, cold proof builds that amazing flavor profile in your natural leavening bread.
Baking Your Homemade Sourdough Recipe in a Home Oven
This next part is non-negotiable: you need steam for a top-tier crust! Place your Dutch oven inside your regular oven and preheat *everything* to 500°F for a full 45 minutes. Once it’s screaming hot, carefully take out the Dutch oven. Quickly turn your cold dough out onto a sheet of parchment paper and grab your sharpest razor or blade. Get a good slash, or score, across the top—this controls where the bread expands, which is vital for your homemade sourdough recipe! Using the parchment as a sling, gently lower your loaf into the hot pot and put the lid on. Bake covered for 20 minutes. Then—and this is important—take the lid off and drop the heat down to 450°F for the final 25 to 30 minutes until it’s a deep, gorgeous brown. Don’t be shy about that color; it means flavor!
If you’re looking for an easier bake for a slightly different style of loaf, you might enjoy looking at this soft bread recipe, but remember, this country loaf needs that high heat!
Tips for Success: Baking Perfect Sourdough Starter Bread Instructions
I’ve learned so many little hacks over the years that elevate this from a good loaf to a truly spectacular one when following these sourdough starter bread instructions. First, remember my notes on easy release? If you find your dough sticks, use that homemade cake goop. Nobody wants to wrestle a beautiful loaf out of a pan!
For that crackly crust we all dream about when artisan bread making, you need maximum steam power. If your kitchen is struggling to keep the heat up, I always suggest adding a shallow pan underneath during preheating and pouring boiling water in right before the bread goes in. That initial steam explosion keeps the crust soft so the loaf can fully expand.
Here is my personal tip from Aria: Watch your ambient temperature! If your kitchen is significantly cooler than 70°F, your bulk fermentation is going to take miles longer than the 4-5 hours I mentioned. If I’m baking in the winter, I often pop the dough bowl into my turned-off oven with just the light on to give it a cozy, stable environment for that crucial basic bread dough fermentation. You want to look for volume, not clock time, when baking sourdough yeast bread!
And finally, don’t dive into that loaf right away! Cooling completely on a rack is tough, I know, but slicing it hot ruins that beautiful crumb structure you worked so hard to achieve. If you need a recipe break while you wait for cooling, you could always check out this no-bake treat!
Troubleshooting Common Sourdough Yeast Bread Issues
Don’t you dare throw away that flat loaf! It happens to all of us, even when we follow a perfect sourdough yeast bread guide. When your bread comes out dense or flat, 99% of the time it points back to one of two places: starter health or fermentation timing.
If your loaf is flat and has no oven spring, your starter probably wasn’t quite at its peek when you mixed it in. Use the float test next time! If the issue is a dense crumb—meaning it baked up but the inside structure is tight and not airy—you likely let your bulk fermentation go too long. That means the yeast ran out of steam before the oven heat could fully expand the dough. For your next batch of sourdough yeast bread, pull the dough when it’s puffy (maybe 30-40% bigger), not when it’s doubled, especially if you live in a warmer spot! You absolutely have the power to fix this; you just need to observe your dough.
Storage and Keeping Your Artisan Bread Making Fresh
Okay, my favorite part is over—the baking is done! But don’t ruin all that hard work by cutting into your beautiful loaf too soon. Seriously, if you slice that golden boule while it’s still steaming hot, you’ll end up with a gummy, sticky interior. That’s because the starches inside are still setting up as it cools. You absolutely must let your sourdough yeast bread cool completely—I mean, until it’s just barely warm to the touch—which takes at least two hours on a wire rack. This is non-negotiable for the best crumb structure in your artisan bread making project!

Now, how do you keep that wonderful, crunchy crust you fought so hard for? It’s tricky because the enemy of a great crust is moisture, and storing bread in a sealed plastic bag will steam that crust right into submission, turning it soft and sad almost immediately.
For the first 24 hours, I recommend keeping the loaf cut-side down on a clean wooden cutting board, uncovered. This allows air circulation while protecting the top crust. After that first day, if you have leftovers—which, let’s be honest, rarely happens in my house—you can transfer it to a paper bag or an airtight bread box. That will keep the interior soft for another day or two.
But honestly, the best way to keep this bread fresh is to eat it! If you know you won’t finish it in four days, slice whatever you won’t eat right away and freeze it airtight. When you’re hungry, just pop a slice straight into the toaster. It comes back to life perfectly! If you are looking for other tasty bread recipes to keep your freezer stocked, you might want to try my recipe for soft, chewy breadsticks later this week!
Frequently Asked Questions About No Commercial Yeast Baking
It’s natural to have questions when moving away from relying on instant yeast! That leap into true no commercial yeast baking opens up a whole new world, but it brings up some specific concerns. I tried to cover the biggest sticking points in the main instructions, but let’s dig a bit deeper into starter maintenance and dough timing, because those small details make all the difference in your sourdough yeast bread success.
Can I use all bread flour instead of whole wheat in this sourdough yeast bread?
Yes, you absolutely can swap out the whole wheat for more bread flour if you want a slightly lighter crumb, but I would caution you against doing it entirely! Remember, the whole wheat is there to add flavor, but it also absorbs water differently. If you use 100% bread flour, your dough will feel noticeably looser or ‘wetter’—it’ll be higher hydration than what you see outlined here. For this recipe, you might need to cut back on the water by about 10-15 grams if you go all-in on white flour, just to keep things manageable during the stretch and folds for your sourdough yeast bread.
How do I know if my dough is fully proofed during bulk fermentation?
This is the million-dollar question for basic bread dough fermentation! You cannot trust the clock here; you have to trust your eyes. If your kitchen is cold, the dough needs more time, period. Forget the 4 or 5-hour recommendation when it’s chilly. What you’re looking for visually is volume increase and activity. The dough should look noticeably puffy, almost pillow-like, and you should see small bubbles breaking the surface tension, especially around the edges of the bowl. It shouldn’t look tight and angry; it should look relaxed and slightly jiggly. If you gently jiggle the bowl, the dough should wobble, not just sit there heavily. Once you see those visual cues for your sourdough yeast bread, it’s time to move to shaping, regardless of what the timer says.
I always tell people that mastering the fermentation window is the biggest jump you make when learning natural leavening bread. If you want some other wonderful ways to bake without yeast packets, you might find my recipe for fluffy milk bread interesting, though it uses a different technique for tenderness!
Estimated Nutritional Profile for a Slice of This Sourdough Yeast Bread
When you bake glorious sourdough yeast bread at home, you’re using simple, whole ingredients—flour, water, salt, and starter! That means you know exactly what’s going into your body, which I just love. It gives me so much peace of mind compared to factory-made loaves.
Now, please remember these numbers are just my best guess based on the recipe amounts, using standard white bread flour and whole wheat. Every kitchen uses slightly different products, so consider this your baseline for this homemade sourdough recipe!
- Serving Size: 1 slice
- Calories: 250
- Sugar: 1g
- Sodium: 200mg
- Fat: 1g
- Protein: 10g
- Carbohydrates: 52g
The low sugar is a big win for no commercial yeast baking, as most of that sugar is consumed by the wild yeast during that long fermentation process. Enjoy every single slice!
Share Your Homemade Sourdough Recipe Creations
Whew! You made it through the entire process for making your sourdough yeast bread. Now for the fun part—sharing the success! I truly hope you are standing in your kitchen right now, inhaling the amazing aroma of that perfect crust, just like I am every time I bake this homemade sourdough recipe.
I built Cooking Zenith to be a real community where we all learn from each other, and your finished loaf is the best teacher! So please, take a picture when you slice into that beautiful basic sourdough boule. Drop a rating down below—five stars if the crust crackled just right! I read every single comment, and your feedback, whether it’s about adjusting your bulk time or how you handled the steam in your home oven, helps everyone else who tries this natural leavening bread.
Don’t forget, if you’ve got questions about the maintenance of your starter or want to read more about my story and philosophy behind simplifying the baking process, you can always check out my About Aria page. Happy baking, friends—I can’t wait to see your glorious loaves!
PrintBasic Sourdough Yeast Bread: A Country Loaf Recipe
Follow this detailed guide to bake a classic, naturally leavened sourdough country loaf using your active starter. This recipe focuses on clear steps for fermentation and home oven baking.
- Prep Time: 30 min
- Cook Time: 50 min
- Total Time: 14 hours 20 min
- Yield: 1 loaf 1x
- Category: Baking
- Method: Baking
- Cuisine: American
- Diet: Vegetarian
Ingredients
- 100 g active sourdough starter (fed 4–8 hours prior)
- 350 g warm water (about 90°F)
- 500 g bread flour
- 100 g whole wheat flour
- 10 g fine sea salt
Instructions
- Feed your sourdough starter until it is bubbly and has doubled in size. This is your active starter.
- In a large bowl, mix the active starter and warm water until mostly combined.
- Add the bread flour and whole wheat flour. Mix with your hands until no dry flour remains. This is the shaggy mass. Cover the bowl and let it rest for 30 minutes (autolyse).
- Sprinkle the salt over the dough. Wet your hands and dimple the salt into the dough. Squeeze and fold the dough for 3-5 minutes until the salt is incorporated and the dough begins to feel slightly smoother.
- Begin bulk fermentation. Over the next 3 hours, perform four sets of stretch and folds, spaced 30 minutes apart. To stretch and fold, gently stretch one side of the dough up and fold it over the center. Rotate the bowl 90 degrees and repeat until all four sides are folded.
- After the final set of folds, let the dough rest undisturbed for the remainder of the bulk fermentation (total bulk time is usually 4-5 hours, depending on room temperature). The dough should look puffy and show bubbles on the surface.
- Gently turn the dough out onto a lightly floured surface. Pre-shape the dough into a loose round by gently pulling the edges toward the center. Let it rest, covered, for 20 minutes (bench rest).
- Perform the final shaping. Flip the dough over. Gently stretch the dough into a rough square, then fold the bottom third up, the top third down, and finally fold the sides in like an envelope. Flip the dough seam-side down and use your hands to gently pull it toward you to create surface tension, forming a tight boule.
- Place the shaped dough, seam-side up, into a floured banneton or a bowl lined with a floured kitchen towel.
- Cover the banneton and place it in the refrigerator for a cold proof for 12 to 18 hours.
- Preheat your oven to 500°F (260°C) with a Dutch oven inside for at least 45 minutes.
- Carefully remove the hot Dutch oven. Gently turn the cold dough out of the banneton onto a piece of parchment paper. Score the top of the loaf with a sharp blade or razor to control expansion.
- Carefully lower the dough (using the parchment paper as a sling) into the hot Dutch oven. Cover the pot.
- Bake for 20 minutes with the lid on.
- Remove the lid, reduce the oven temperature to 450°F (232°C), and bake for an additional 25-30 minutes until the crust is deep brown.
- Remove the bread from the Dutch oven and cool completely on a wire rack before slicing.
Notes
- Use a kitchen scale for accurate measurements; this is key for successful artisan bread making.
- If your kitchen is cold, bulk fermentation may take longer. Look for dough volume increase, not just time.
- For a crispier crust, place a shallow pan on the bottom rack during preheating and pour 1 cup of boiling water into it immediately before placing the dough in the oven.
- If you prefer a softer crust, remove the bread from the Dutch oven for the last 10 minutes of baking.
Nutrition
- Serving Size: 1 slice
- Calories: 250
- Sugar: 1
- Sodium: 200
- Fat: 1
- Saturated Fat: 0
- Unsaturated Fat: 1
- Trans Fat: 0
- Carbohydrates: 52
- Fiber: 3
- Protein: 10
- Cholesterol: 0