
Oh my gosh, stop what you are doing right now and just imagine the sound: that crisp, sharp crackle of a perfectly baked crust giving way. That sound, followed by the sweet, yeasty aroma filling your entire house? That’s the magic we are chasing today! Forget those bland, soft grocery store loaves. My journey here at Cooking Zenith is all about taking everyday ingredients and making them extraordinary, and that’s exactly what we’re doing with this italian bread recipe. We nail that elusive bakery-quality contrast: an aggressively golden, crisp exterior hugging the softest, chewiest interior you’ve ever bitten into. Trust me; this method, developed through years of home testing, brings big bakery flavor without any of the fuss. If you love making bread for dipping in olive oil, you absolutely need to check out my quick dough recipe over here: quick dough recipe.
- Why This Homemade Italian Bread Recipe Works So Well
- Essential Ingredients for Your Italian Bread
- How To Make Italian Bread: Step-by-Step Tutorial
- Tips for Success When Baking This Italian Bread
- Variations: Italian Herb Bread and Cheese Bread Recipe
- Serving Suggestions for Your Freshly Baked Bread
- Storage and Reheating Instructions for Italian Bread
- Frequently Asked Questions About This Italian Bread
- Share Your Homemade Italian Bread Creations
Why This Homemade Italian Bread Recipe Works So Well
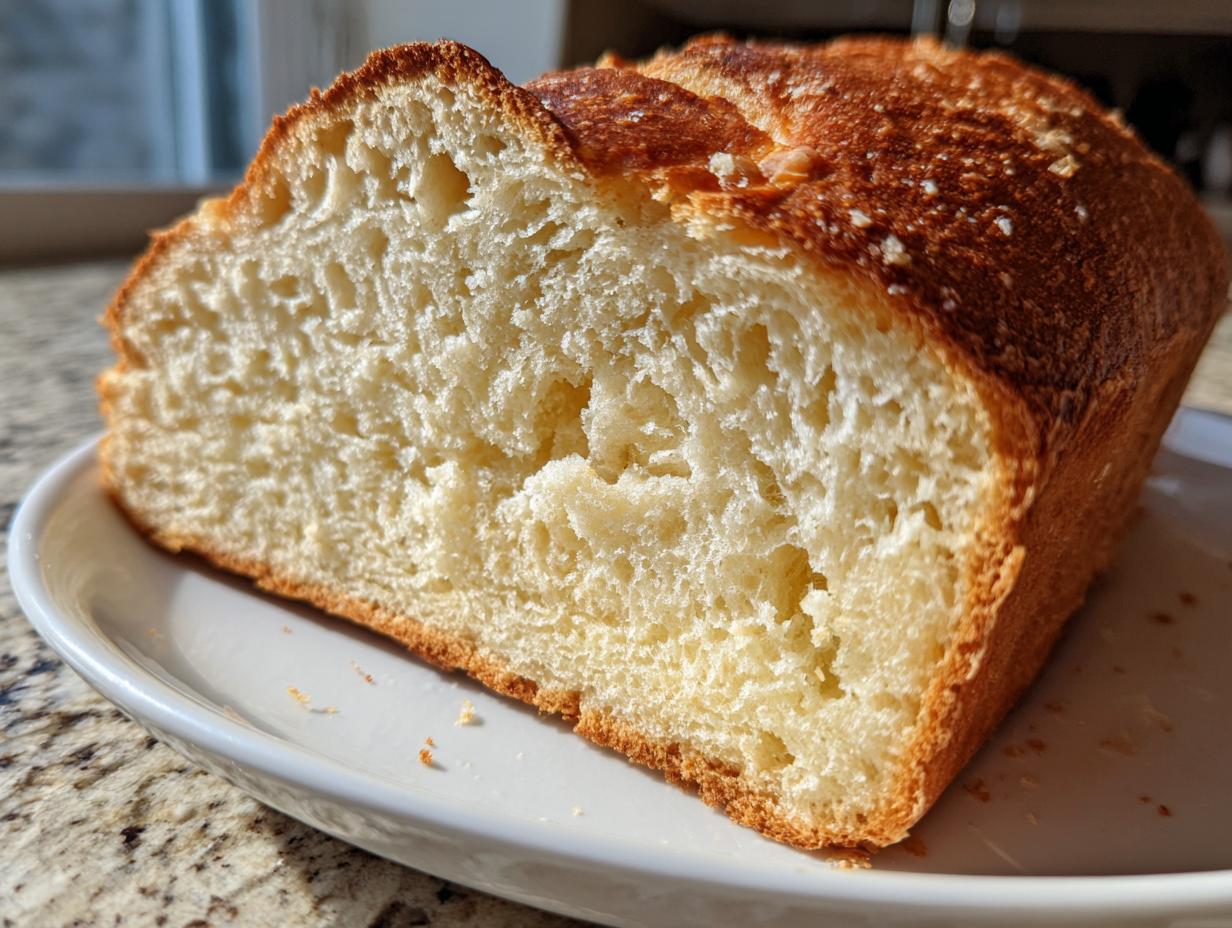
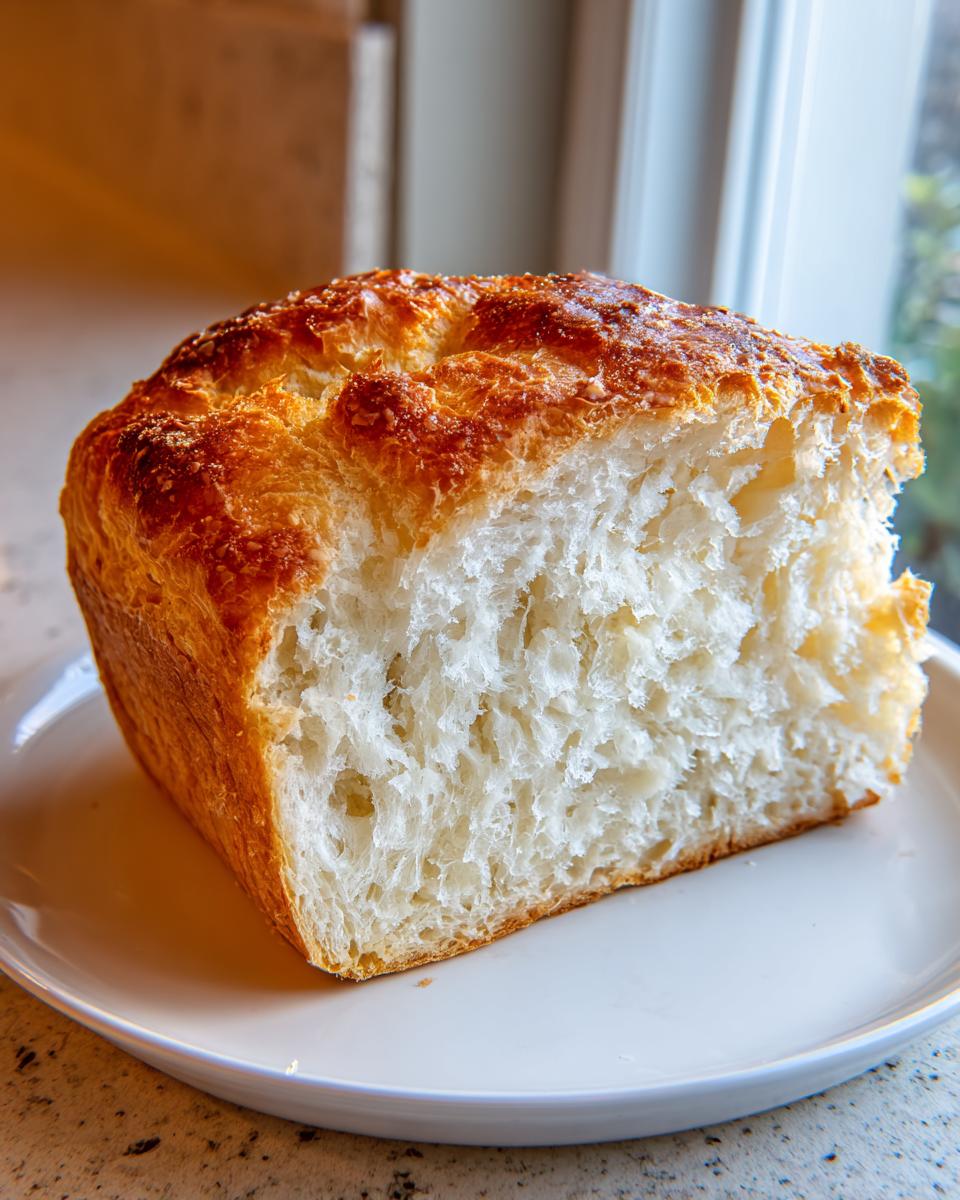
I want you to know right away that this isn’t just another bread recipe. We’re setting a high bar here: perfectly crisp crust and a tender, airy inside. I know so many recipes promise that, but this one actually delivers consistently. You get that satisfying crunch only found in a proper artisan loaf, but without needing fancy equipment or spending half the day kneading!
- This approach guarantees an **Easy Crusty Italian Bread** every single time you bake.
- The result is a beautiful, **Soft Italian Loaf** that’s miles better than store-bought.
It’s all about understanding the simple science behind why it works, which I’ll walk you through right now. If you’re looking for another fantastic dough adventure, check out my easy homemade pizza dough next!
Achieving the Perfect Crumb Texture Bread
The secret to that beautiful, open interior starts immediately when you mix the dough. We only mix until it’s just ‘shaggy’—that means we don’t develop too much gluten too early! That slight under-mixing, combined with the steam we force into the oven, keeps the dough soft and prevents it from turning dense. This results in the exact **Crumb Texture Bread** you see in professional bakeries.

Simple Steps for Bakery Style Bread At Home
You do not need hours of kneading or folding to get this texture. This recipe uses the power of yeast and time during the rises. It’s designed to feel intuitive rather than intimidating, meaning anyone can feel confident making **Bakery Style Bread At Home**. It’s truly the best way to start your **Baking Bread at Home** adventure!
Essential Ingredients for Your Italian Bread
Okay, baking high-quality Homemade Italian Bread relies on just a handful of items, but we need to treat them right! Don’t let the short list fool you; precision matters here, especially when it comes to moisture. You’ll need three cups of all-purpose flour, but make sure you have extra on hand for dusting later. Grab your instant dry yeast—it’s the easiest for beginners—one teaspoon of sugar to feed that yeast, and 1 and 1/2 teaspoons of salt. The most critical part is the water: use 1 and 1/4 cups of warm water, aiming for that perfect activation zone between 105 to 115°F. Finally, just a single tablespoon of olive oil goes right into the dough, plus a little extra to coat the bowl.
Ingredient Notes and Substitutions
Let’s talk yeast. I insist on instant dry yeast for this because it skips that fussy blooming step, making this recipe super straightforward. If you only have active dry, no sweat, just proof it in the warm water with the sugar for about ten minutes until it foams up nicely. Water temperature is everything; too cold and your dough won’t rise—too hot and you’ll kill the yeast right away. Don’t skip the tiny bit of sugar either; that’s the yeast’s favorite snack! Also, keep in mind that if you plan on making variations later, like that **Italian Herb Bread**, this is the point where you’d mix in your dried seasonings now.
How To Make Italian Bread: Step-by-Step Tutorial
Alright, this is where the magic really happens. Making excellent italian bread at home is less about strength and more about patience during the rest periods. We’re keeping the steps super clear so you feel like you’re following a simple map instead of a complicated blueprint. Forget the fancy stuff; if you want to dive deep into next-level bread techniques later, I have a great resource on making a starter right here: making a starter. Remember, baking is a waiting game, and that waiting is what develops all the amazing flavor and texture we’re aiming for today.
Mixing and First Rise for Your Italian Bread Dough
First things first: combine your dry stuff, then dump in the water and that bit of olive oil. Grab a wooden spoon—don’t even bother putting on an apron yet! Mix it until it looks messy and “shaggy,” meaning there’s just no dry flour floating around anymore. That’s it! Don’t overthink it, we’re not building muscle here! Lightly coat a clean bowl with oil, pop your shaggy dough in, roll it around so it gets coated too, and cover it tightly with plastic wrap. Now, find the warmest, draft-free spot in your kitchen. Let it chill out for about an hour to an hour and a half until it’s doubled up. Doing this right sets you up for success in this entire **Yeast Bread Tutorial**.
Shaping and Creating Steam for Crusty Italian Bread
Once it’s doubled, gently punch that air out—it feels so satisfying! Turn the dough onto a lightly floured surface. You’re going to shape it gently into a tight loaf, but please, don’t punch the air out again! We earned those bubbles. Let it rest for its second rise while you get serious about the oven. Preheat your oven to 425°F, and here’s the secret sauce: put a shallow pan or cast-iron skillet on the bottom rack while it heats up. When the oven is ready and the loaf has rested for its final 30 to 45 minutes, score the top with one quick, confident slash. Then, *carefully* open the door and pour about a cup of hot water into that hot bottom pan—that steam is what locks in the incredible crunch for your **Crusty Italian Bread**. Bake until it’s deeply golden brown and sounds hollow when you tap it, which usually takes about 25 to 35 minutes.
Tips for Success When Baking This Italian Bread
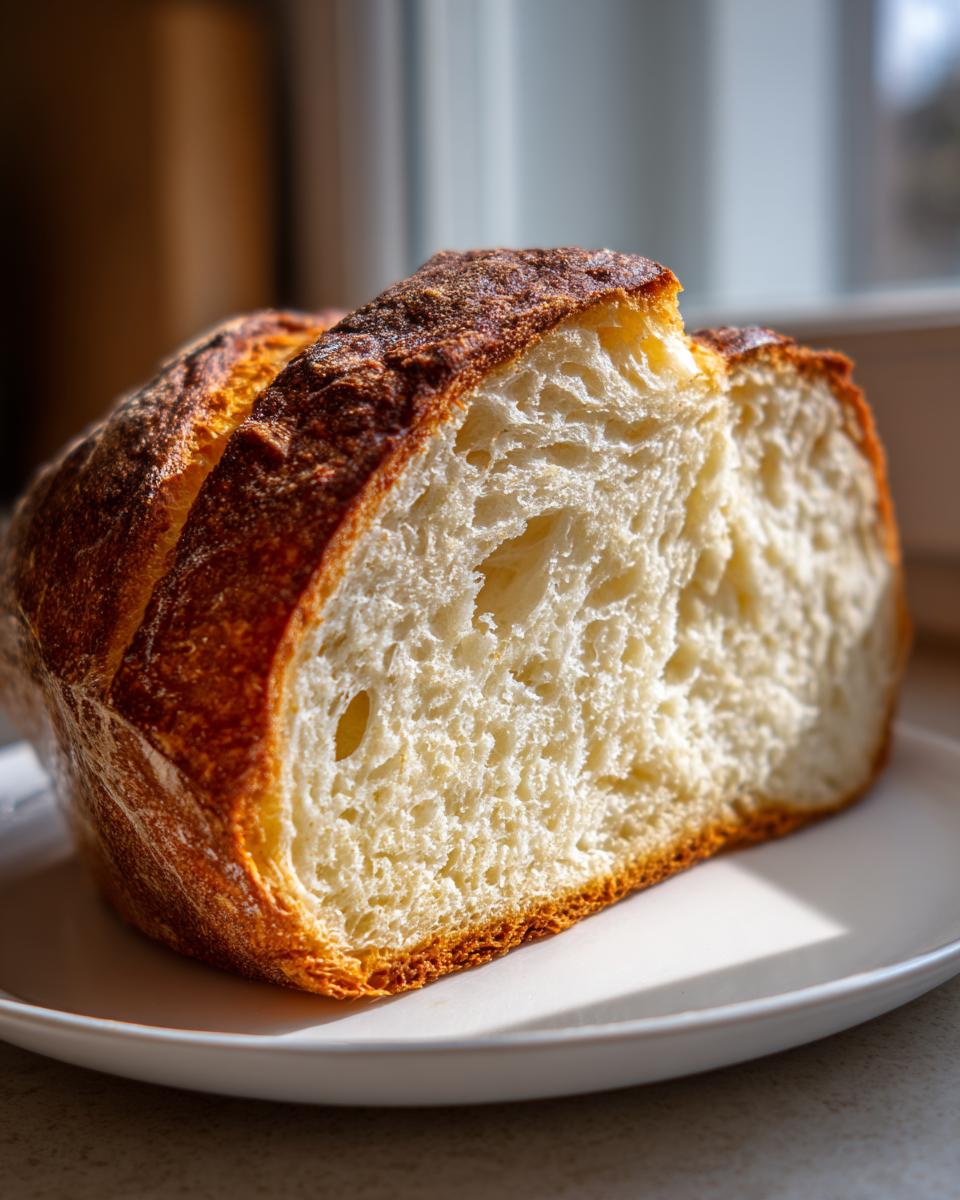
Look, baking bread at home can feel a little like sorcery until you learn the tricks. You want that beautiful, slightly uneven quality that screams **Artisan Bread Recipe**, right? I remember the first few times I tried this recipe, my loaves came out looking a little pale, and the bottoms were just… soft. Total sadness! I learned the hard way that the key to that perfect golden finish and that crackling crust isn’t in the dough itself—it’s all about what happens in the final 30 minutes inside the oven. These little secrets made the difference between an ‘okay’ loaf and one that actually makes your kitchen smell like a genuine Italian bakery. If you have a pizza stone gathering dust, this is the day to use it! For more quick culinary wins, check out my easy homemade pizza recipe guide.
Mastering the Oven Environment for Rustic Italian Bread
Steam, steam, steam! That’s rule number one. When you pour that hot water into the preheated pan on the bottom rack, the explosion of steam keeps the outer layer of your dough soft and pliable for the first crucial 10 minutes of baking. This allows the loaf to spring up fully before the crust hardens. If you skip the steam, the crust sets too fast, and you end up with a dense, almost heavy bread. For this reason, I always suggest using a heavy-duty pan down there, not just a thin jelly roll pan. If you’re feeling super fancy, preheat a pizza stone or baking steel on the top rack, then slide your loaf right onto that hot surface after scoring it. Baking dough directly onto intense heat provides the best possible bottom crust, turning your finished product into a truly stunning **Rustic Italian Bread**!

Variations: Italian Herb Bread and Cheese Bread Recipe
Okay, I love the pure, classic flavor of this basic dough, but sometimes you just want to ramp things up a notch, right? It’s so satisfying knowing you can take this simple base recipe and turn it into something totally different for your next gathering. If you’re throwing together a big pasta night or planning to just tear pieces off for dipping instead of making a full side dish, these variations are for you. They use the exact same rise times and temperatures, so there’s zero extra fuss involved—I promise!
For the fragrant version, let’s make an Italian Herb Bread. Instead of adding anything during the initial wet/dry mix, wait until the very end of the mixing process, right before the dough goes into the bowl for the first rise. Gently fold in about one full tablespoon of your favorite dried Italian seasoning blend—rosemary, oregano, basil, whatever makes your kitchen smell amazing. You want the herbs distributed, but you don’t want to work the dough once they are in.
Now for the ultimate savory indulgence: the Cheese Bread Recipe. This one is unbelievably good warm. Once your dough is mixed and you’ve punched it down after the first rise, treat it like you’re making that herb bread, but add about 1/2 cup of shredded, low-moisture Parmesan or mozzarella cheese along with the herbs. Fold it in *just* until it’s incorporated. The cheese melts beautifully into those airy pockets during the bake, creating little pockets of salty goodness. If you’re into savory twists, you have to try my garlic knots recipe—I think you’ll love them: garlic parmesan knots easy recipe. Both variations are fantastic, but remember, they might finish baking a minute or two faster than the plain loaf since the cheese melts!
Serving Suggestions for Your Freshly Baked Bread
The moment that Freshly Baked Bread comes out of the oven, your dinner plans instantly upgrade! Seriously, this loaf is the ultimate vehicle for soaking up every drop of sauce. Forget serving salad first; everyone will be reaching for this bread. It’s the perfect accompaniment for your **Italian Dinner Side Dishes**, whether you’re serving lasagna, spaghetti, or just a big bowl of quick sautéed greens.
If you’re keeping it simple, you absolutely have to cut thick slices and serve it warm alongside a shallow dish of good quality olive oil mixed with balsamic vinegar. I also have an incredible recipe for creamy caramelized onion dip that pairs surprisingly well with this savory loaf if you’re having guests over for apps. There’s nothing better than tearing off a hunk and dipping!
Storage and Reheating Instructions for Italian Bread
This is one of those inevitable questions, right? You bake this amazing, crusty loaf, and suddenly you’re eating half of it immediately. But what about the rest? The biggest challenge with homemade bread, especially when you strive for that perfect crust, is keeping it crusty after it cools down. If you wrap this beautiful loaf up tight in plastic wrap while it’s still warm, you are basically steaming the crust you worked so hard to create! Don’t do it!
For day one, just let the loaf cool completely—and I mean completely—on a wire rack. Once fully cool, I like to wrap it loosely in a clean cotton kitchen towel. This keeps the insides soft while allowing just enough air flow to maintain some crispness on the crust. Never store bread in the fridge; it turns stale lightning fast!
If you know you won’t finish it for a couple of days, you should definitely freeze it. Slice the bread first, then wrap the slices tightly in plastic wrap, and toss those into a freezer bag. It freezes beautifully! When you’re ready for it, just pop the frozen slices directly into the toaster or a 350°F oven for a few minutes.
But if you have leftovers that have gone a little soft overnight, don’t panic! This is how you bring it back to life and get that satisfying crackle again. Preheat your oven to 375°F. If it’s a whole loaf, you can lightly spritz the crust with water—just a super fine mist, not soaking it!—and place it directly on the rack for six to eight minutes. That burst of dry heat reactivates the crispness. If you prefer a little sweetness with your bread later, I whip up a batch of my easy honey butter recipe to serve alongside revitalized slices. It’s heavenly!
Frequently Asked Questions About This Italian Bread
I get so many messages when people try making their first loaf, and honestly, that’s the best part of sharing recipes! Baking bread has a few common sticking points, but once you know the fix, you’re golden. If you’re looking for more general baking tips after mastering this recipe, swing by my guide to the best homemade bread recipes!
Can I use this recipe for No Knead Italian Bread?
That’s a great question! This specific recipe is built around a very short, active knead to develop just enough structure to handle the high heat and steam needed for that ultra-crispy crust we are looking for. If you go completely no-knead, you often end up with a softer, chewier texture, which is fantastic for a rustic loaf but different from the classic Italian bread structure we are aiming for here. If you prefer a truly hands-off **No Knead Italian Bread**, you’ll need to adjust your expectations for the final crust texture and increase that initial rising time significantly. For this recipe, stick to that brief period of mixing/kneading; it’s quick, I promise!
What is the best way to get a truly crusty exterior?
If you take away only one thing from this whole guide, let it be this: steam is your absolute best friend for crust development! A crusty exterior is what lets this **Homemade Italian Bread** shine. You must use high heat—425°F is where we start—and you absolutely must introduce steam right away when the bread goes in. That initial blast of moisture prevents the crust from hardening immediately, allowing the dough to fully expand, creating those gorgeous bubbles in your crumb, and setting up the final crisp texture when the steam later dissipates. Don’t skip that shallow pan of hot water!
Share Your Homemade Italian Bread Creations
I just know you’re going to absolutely love pulling this golden loaf out of your oven. Seriously, the true joy of baking isn’t just in eating it (though that’s a huge perk!); it’s in the feeling of accomplishment and the ability to share something wonderful that you made with your own two hands. I want to hear all about it!
Did you achieve that crackling crust we talked about? Did it disappear lightning fast when you served it with dinner? Don’t be shy! Head down to the comments section and leave me a rating—even a simple star rating helps me know if this recipe is holding up its promise to you. I read every single comment because you all are the reason I love sharing these ideas.
If you snap a picture of your beautiful **Homemade Italian Bread**—maybe it’s sliced and ready for dipping, or perhaps it’s the star next to a big bowl of sauce—please tag me on social media! Seeing your creations and how this recipe fits into your real, everyday kitchen life is the absolute highlight of my week. It proves that extraordinary flavor really does come from elevating your everyday cooking. If you ever want to know more about my philosophy on cooking confidence, you can always check out my About Page. Happy baking, everyone!
PrintEasy Crusty Homemade Italian Bread Recipe
Make a bakery-quality Italian loaf at home. This straightforward yeast recipe delivers a golden, crisp crust and a soft, airy interior, perfect for dipping in olive oil or serving with dinner.
- Prep Time: 15 min
- Cook Time: 35 min
- Total Time: 2 hours 5 minutes
- Yield: 1 large loaf 1x
- Category: Side Dish
- Method: Baking
- Cuisine: Italian
- Diet: Vegetarian
Ingredients
- 3 cups all-purpose flour, plus more for dusting
- 1 teaspoon instant dry yeast
- 1 teaspoon sugar
- 1 1/2 teaspoons salt
- 1 1/4 cups warm water (about 105-115°F)
- 1 tablespoon olive oil, plus more for the bowl
Instructions
- In a large bowl, whisk together the flour, yeast, sugar, and salt.
- Add the warm water and 1 tablespoon of olive oil to the dry ingredients. Mix with a wooden spoon until a shaggy dough forms and no dry flour remains.
- Lightly grease a clean bowl with olive oil. Place the dough in the bowl, turning to coat. Cover the bowl tightly with plastic wrap.
- Let the dough rise in a warm spot for 1 to 1.5 hours, or until it has doubled in size. This is your first rise.
- Gently punch down the risen dough. Turn it out onto a lightly floured surface. Shape the dough into a tight loaf or two smaller oblong loaves.
- Place the shaped loaf(ves) on a baking sheet lined with parchment paper or in a prepared loaf pan. Cover loosely with plastic wrap or a clean kitchen towel.
- Let the dough rest for a second rise for 30 to 45 minutes. While it rests, place a shallow pan on the bottom rack of your oven and preheat the oven to 425°F (220°C).
- Just before baking, score the top of the loaf once or twice with a sharp knife. Carefully pour about 1 cup of hot water into the shallow pan on the bottom rack to create steam.
- Bake for 25 to 35 minutes, or until the crust is deep golden brown and the internal temperature reaches 200°F (93°C).
- Remove the bread from the oven and transfer it to a wire rack to cool completely before slicing.
Notes
- For an extra crisp crust, you can bake the bread directly on a preheated pizza stone or baking steel instead of a baking sheet.
- If you prefer an Italian Herb Bread variation, mix 1 tablespoon of dried Italian seasoning and 1/2 cup of shredded Parmesan cheese into the dough during the last minute of mixing.
- This bread pairs well with olive oil and balsamic vinegar for dipping.
Nutrition
- Serving Size: 1 slice
- Calories: 150
- Sugar: 1
- Sodium: 250
- Fat: 2
- Saturated Fat: 0.5
- Unsaturated Fat: 1.5
- Trans Fat: 0
- Carbohydrates: 30
- Fiber: 1
- Protein: 4
- Cholesterol: 0