Basic Sourdough Yeast Bread: A Country Loaf Recipe
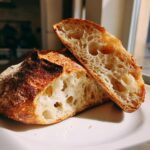
Follow this detailed guide to bake a classic, naturally leavened sourdough country loaf using your active starter. This recipe focuses on clear steps for fermentation and home oven baking.
- Prep Time: 30 min
- Cook Time: 50 min
- Total Time: 14 hours 20 min
- Yield: 1 loaf 1x
- Category: Baking
- Method: Baking
- Cuisine: American
- Diet: Vegetarian
Ingredients
Scale
- 100 g active sourdough starter (fed 4–8 hours prior)
- 350 g warm water (about 90°F)
- 500 g bread flour
- 100 g whole wheat flour
- 10 g fine sea salt
Instructions
- Feed your sourdough starter until it is bubbly and has doubled in size. This is your active starter.
- In a large bowl, mix the active starter and warm water until mostly combined.
- Add the bread flour and whole wheat flour. Mix with your hands until no dry flour remains. This is the shaggy mass. Cover the bowl and let it rest for 30 minutes (autolyse).
- Sprinkle the salt over the dough. Wet your hands and dimple the salt into the dough. Squeeze and fold the dough for 3-5 minutes until the salt is incorporated and the dough begins to feel slightly smoother.
- Begin bulk fermentation. Over the next 3 hours, perform four sets of stretch and folds, spaced 30 minutes apart. To stretch and fold, gently stretch one side of the dough up and fold it over the center. Rotate the bowl 90 degrees and repeat until all four sides are folded.
- After the final set of folds, let the dough rest undisturbed for the remainder of the bulk fermentation (total bulk time is usually 4-5 hours, depending on room temperature). The dough should look puffy and show bubbles on the surface.
- Gently turn the dough out onto a lightly floured surface. Pre-shape the dough into a loose round by gently pulling the edges toward the center. Let it rest, covered, for 20 minutes (bench rest).
- Perform the final shaping. Flip the dough over. Gently stretch the dough into a rough square, then fold the bottom third up, the top third down, and finally fold the sides in like an envelope. Flip the dough seam-side down and use your hands to gently pull it toward you to create surface tension, forming a tight boule.
- Place the shaped dough, seam-side up, into a floured banneton or a bowl lined with a floured kitchen towel.
- Cover the banneton and place it in the refrigerator for a cold proof for 12 to 18 hours.
- Preheat your oven to 500°F (260°C) with a Dutch oven inside for at least 45 minutes.
- Carefully remove the hot Dutch oven. Gently turn the cold dough out of the banneton onto a piece of parchment paper. Score the top of the loaf with a sharp blade or razor to control expansion.
- Carefully lower the dough (using the parchment paper as a sling) into the hot Dutch oven. Cover the pot.
- Bake for 20 minutes with the lid on.
- Remove the lid, reduce the oven temperature to 450°F (232°C), and bake for an additional 25-30 minutes until the crust is deep brown.
- Remove the bread from the Dutch oven and cool completely on a wire rack before slicing.
Notes
- Use a kitchen scale for accurate measurements; this is key for successful artisan bread making.
- If your kitchen is cold, bulk fermentation may take longer. Look for dough volume increase, not just time.
- For a crispier crust, place a shallow pan on the bottom rack during preheating and pour 1 cup of boiling water into it immediately before placing the dough in the oven.
- If you prefer a softer crust, remove the bread from the Dutch oven for the last 10 minutes of baking.
Nutrition
- Serving Size: 1 slice
- Calories: 250
- Sugar: 1
- Sodium: 200
- Fat: 1
- Saturated Fat: 0
- Unsaturated Fat: 1
- Trans Fat: 0
- Carbohydrates: 52
- Fiber: 3
- Protein: 10
- Cholesterol: 0
Find it online: https://cookingzenith.com/sourdough-yeast-bread-recipe/