
If you’ve ever sat in a restaurant, tearing off a piece of warm, pillowy naan bread and wondering how they get it so perfectly soft, well, I have wonderful news for you! You absolutely do not need a massive, fiery tandoor oven to achieve that incredible texture. I’m Aria, and I live to take those seemingly complicated dishes and make them work right on your own stovetop. I’m sharing the very best soft and fluffy homemade garlic naan bread recipe today, and trust me, the smell alone is worth the effort.
There is nothing quite like pulling freshly made, buttery bread off the skillet. It’s the ultimate comfort food for my family, and serving it fresh beside a rich curry just makes the whole dinner feel special. This method is quick, easy, and delivers unbelievable results. Click here if you want to jump straight to the printable recipe, but stick around to learn the secrets to that perfect chew!
- Why This Homemade Naan Bread Recipe Delivers Restaurant Style Results
- Gathering Ingredients for Buttery Naan Bread
- How to Make Naan Bread Step-by-Step Using This Easy Naan Recipe
- Tips for Perfect Soft & Fluffy Homemade Naan Bread
- Serving Suggestions for Your Buttery Naan Bread
- Storage and Reheating Instructions for Homemade Naan Bread
- Frequently Asked Questions About Naan Bread
- Estimated Nutritional Data for This Naan Bread Recipe
- Share Your Soft & Fluffy Naan Bread Creations
Why This Homemade Naan Bread Recipe Delivers Restaurant Style Results
So many store-bought breads are dense or stiff, but that’s not what we want here! We are aiming for that incredible, slightly chewy structure you only get when you make proper naan bread yourself. The reason this recipe hits every time, making it a truly Soft Flatbread, comes down to two small workhorses: high heat and cultured dairy.
It’s the perfect method for making a Fluffy Indian Bread that melts in your mouth. We’re going to use basic ingredients to unlock extraordinary performance, just like my early experiments in the kitchen always aimed to do!
Achieving Ultimate Softness in Your Naan Bread
The secret to that essential fluffiness in our naan bread lies partly in how we treat the dough. We use active dry yeast, which gives us that lovely airy lift. But the real game-changer is the yogurt! The natural acidity in the yogurt tenderizes the gluten just enough during the rise time. This keeps the final flatbread tender and prevents it from becoming tough or cracker-like—it keeps it pillowy, even after cooling.
The Skillet Naan Recipe Advantage (No Tandoor Needed)
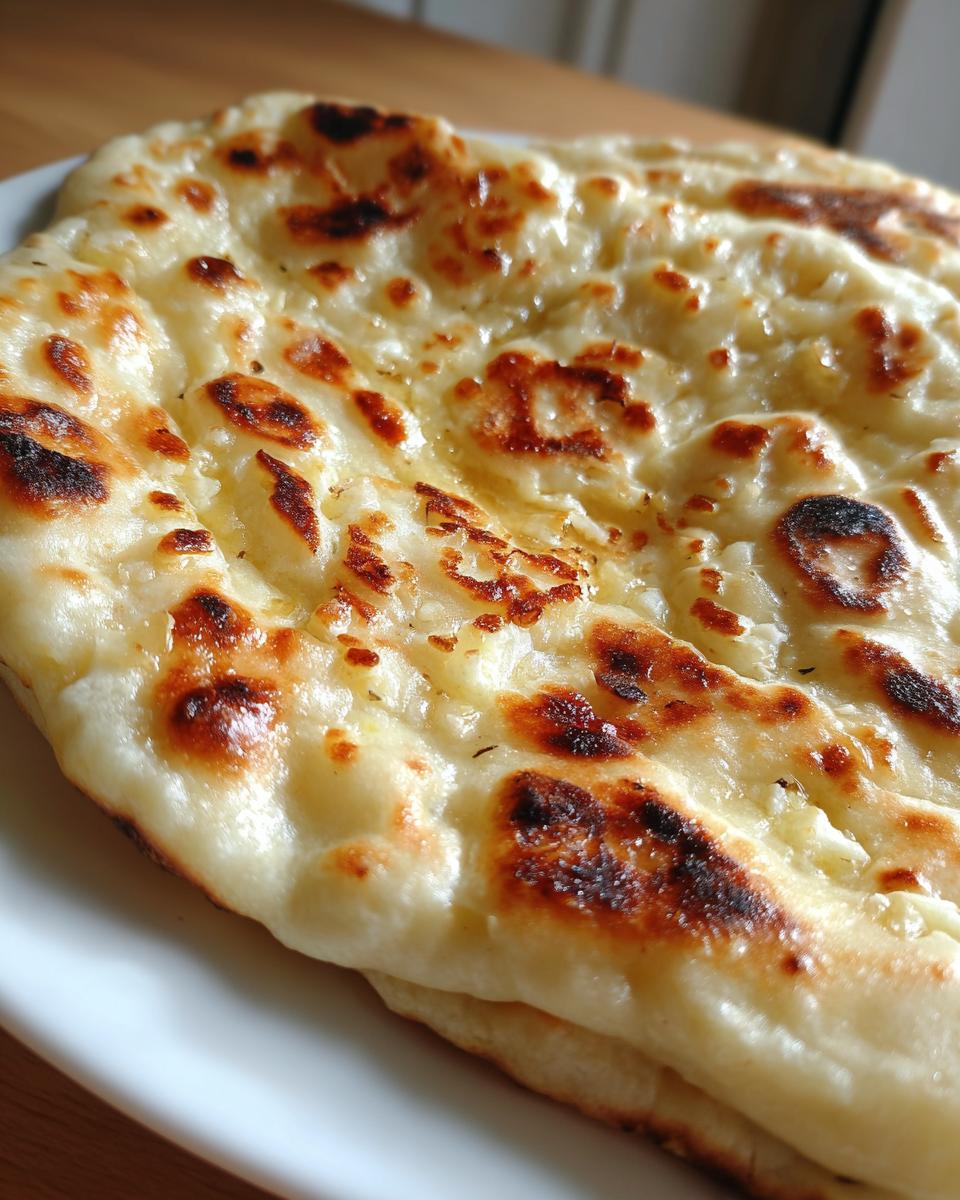
Forget hunting down specialized equipment! The magic moment happens when the dough hits a screaming hot pan. That intense, dry heat from the cast iron is what forces those immediate, beautiful large bubbles to form right on the surface. This is where the characteristic charring comes from. The high heat in our Skillet Naan Recipe mimics the intense environment of a tandoor, delivering those gorgeous dark spots and that unmistakable smoky flavor without any extra hassle.
Gathering Ingredients for Buttery Naan Bread
Okay, I know ingredient lists can sometimes look intimidating, but I promise, these are all things you likely have or can grab easily. This is not a recipe that demands specialty flour or obscure spices! We are building the foundation for truly memorable, Buttery Naan Bread right here. Taking this time now to measure correctly pays off massively in the end when those warm rounds come off the pan.
There’s just one thing I want you to note right away: the yogurt. Full-fat plain yogurt is my absolute favorite because it adds incredible richness. If you don’t have any, sour cream works in a pinch, but if you’re completely out, regular milk or even just water will work—you just lose a tiny bit of that signature tenderizing acid kick we talked about. Keep that in mind!
Dough Components for Soft Naan Bread
For the body of our naan bread, we need to get our yeast happy right away. The water needs to be warm to the touch, that sweet spot between bathwater and warm—aiming for between 105°F and 115°F is crucial for waking up that busy yeast. If it’s too hot, you kill it; too cold, and it sleeps in! Here’s what you’ll need for the dough itself:
- 1 teaspoon active dry yeast
- 1 teaspoon sugar (just to feed the yeast!)
- 1 cup warm water (that 105-115°F range is your best friend here)
- 3 cups all-purpose flour, plus some extra for dusting when we roll it out
- 1 teaspoon salt
- 1/2 cup plain yogurt (full fat is best, remember!)
- 2 tablespoons olive oil, plus a little extra for the bowl
If you’re interested in pairing these with some simple sweets later, you absolutely have to check out my recipe for melt-in-your-mouth butter cookies; they use similar rich fat components!
Creating the Signature Garlic Butter Topping
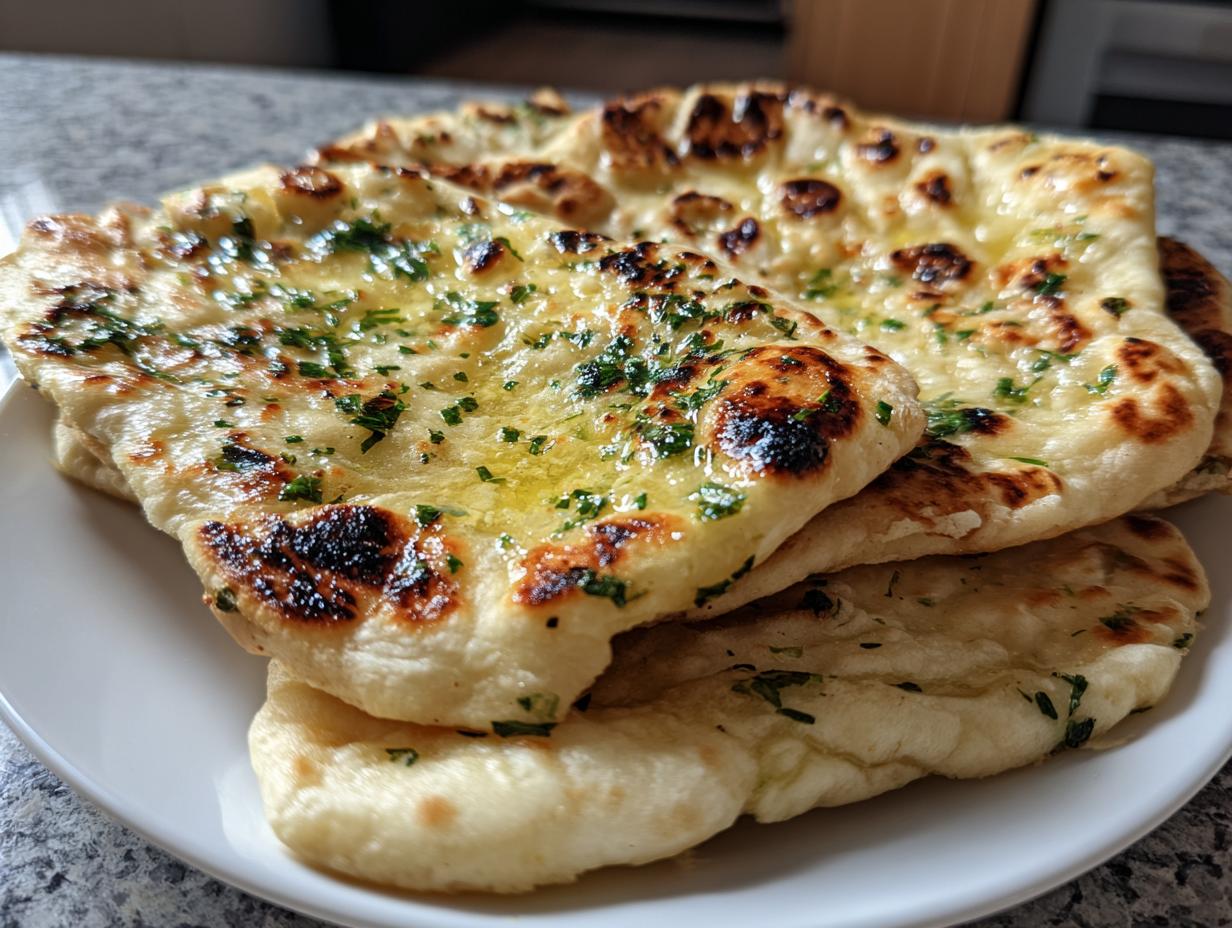
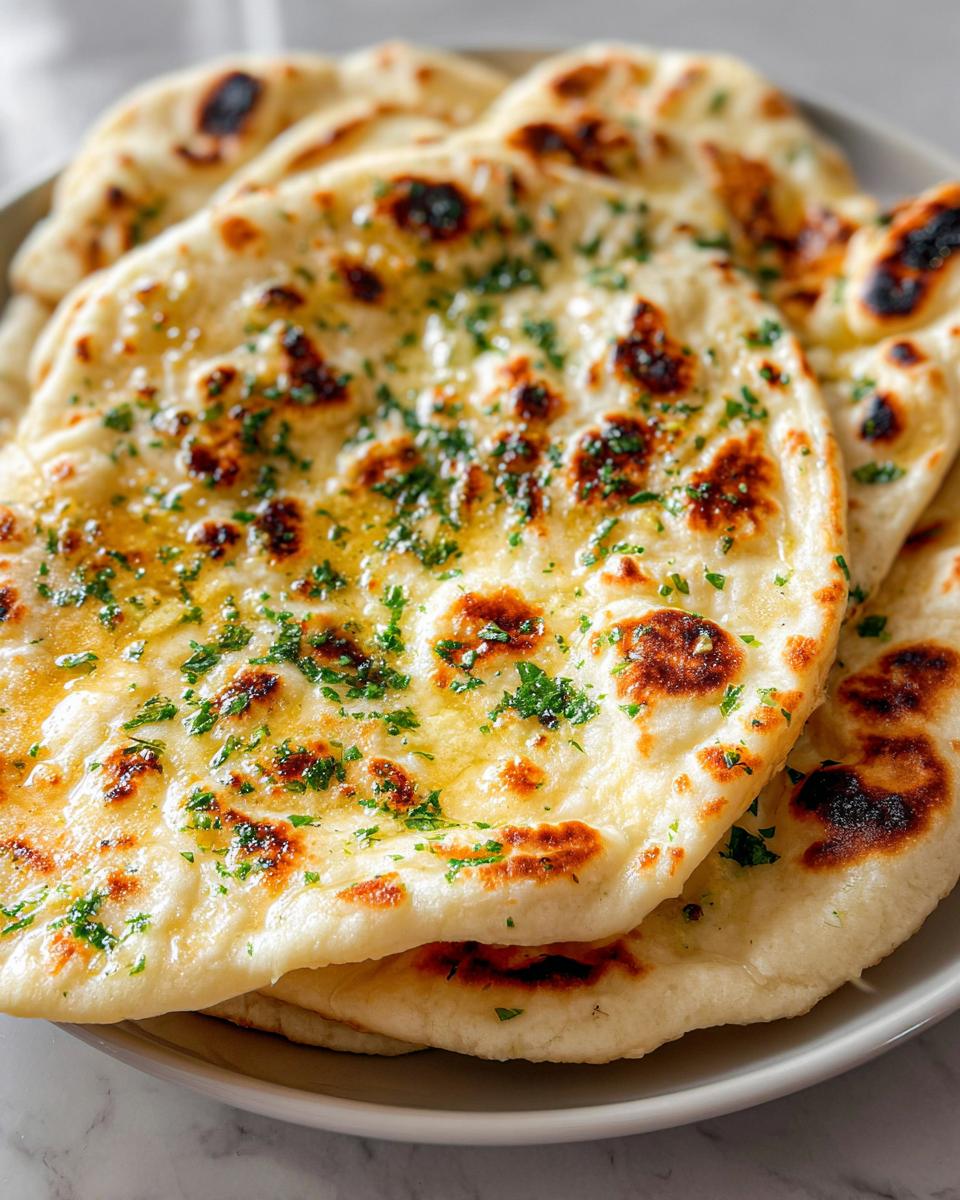
This isn’t just plain naan; we’re making it fantastic! The garlic butter is what takes this from a great side dish to an irresistible centerpiece. As soon as that hot flatbread comes off the skillet, it needs this bath of flavor immediately. This is what creates that amazing Garlic Naan experience.
- For the Garlic Butter: 4 tablespoons unsalted butter, melted until liquid
- For the Garlic Butter: 2 cloves garlic, minced super fine
- For the Garlic Butter: 1 tablespoon fresh cilantro, chopped up small

How to Make Naan Bread Step-by-Step Using This Easy Naan Recipe
Now for the fun part! If you follow these steps closely, you’ll see we aren’t complicating things at all. This truly is an Easy Naan Recipe meant for the everyday kitchen. Remember, bread baking is all about timing, so let’s respect the dough and give it the attention it needs, especially during the rising stages.
Activating Yeast and Mixing the Naan Dough
First thing’s first: we have to get that yeast working! Grab a small bowl, mix the warm water, sugar, and yeast together. You absolutely need to wait about 5 to 10 minutes for this mixture to get foamy. If it doesn’t foam, your water was probably too hot or too cold, and we need to start that step over—don’t skip this check!
Once it looks like the top of a good cappuccino, move on. In your big mixing bowl, whisk the flour and salt together. Now, pour in all the wet stuff: the bubbly yeast mixture, the yogurt, and the olive oil. Mix it all up with a spoon or spatula until you have what looks like a messy, rough ball. We call that a shaggy dough. Perfect!
Kneading and Allowing Your Naan Bread to Rise
Don’t be afraid of the kneading stage! Turn that shaggy mess out onto a lightly floured spot on your counter. You need to knead—pushing and folding—for a solid 5 to 7 minutes. You’ll know you’re done when the dough stops feeling sticky and starts feeling smooth and elastic, like a nice stress ball. Give it a little pat; it should spring back gently.
Pop the dough into a lightly oiled bowl, turn it over so it gets coated, cover it up tight, and then find a warm spot. This is when your naan bread builds flavor and loft. You must let it rise for 1 to 1.5 hours until it has truly doubled in size. Patience pays off here!
Cooking the Naan on a Hot Skillet
This is critical: get your cast-iron skillet—or any heavy pan you have—on the stove over medium-high heat. It needs to be very hot, and importantly, you cook these dry, no oil in the pan! Once it’s hot, gently flatten a piece of dough into an oval shape, about 1/8 inch thick.
Lay one piece down on the dry skillet. It should start bubbling almost immediately; cook that side for just 1 to 2 minutes until you see brown spots forming underneath. Flip it over and cook the other side for just about 1 minute. If you have a gas stove, you can briefly hold the cooked side right over a low flame with tongs for amazing charring. Immediately brush that hot flatbread with the garlic butter mixture we prepared!
Tips for Perfect Soft & Fluffy Homemade Naan Bread
Okay, we’ve made the dough, we’ve cooked it, and it is already fantastic! But if you want to troubleshoot or maximize that wonderful soft texture, there are just a few little secrets I pick up from years of baking this naan bread. Don’t let fluctuating kitchen temperatures or different ways you plan to eat it trip you up. Achieving that restaurant-style chewiness every time is all about respecting the dough’s environment.
These tips are vital for making sure every single piece of your Buttery Naan Bread comes out as good as the first. I promise, once you nail the resting, you’ll never look back!
Managing Dough Rise in Different Kitchen Temperatures
The biggest variable in any bread recipe is the ambient temperature of your room, especially in winter! If your kitchen is chilly, your dough is going to take forever to double—maybe even two or three hours—which messes up the flavor development too. My trick, which I learned from my dad when he baked sourdough, is to use the residual warmth of an appliance.
Find an oven-safe glass bowl, get your dough in there, cover it up, and then turn your oven light *on* but leave the oven *off*. That little bulb puts out just enough gentle heat to create a lovely, warm environment for the yeast to thrive. It really helps speed things along so you can get to that delicious crust faster!
Variations: Making Plain Naan Bread or Naan Pizza Base
While I absolutely adore this garlic version, sometimes you need something more neutral, especially if you’re serving it with a really assertive, spicy curry. It’s so easy to switch to a plain naan bread! Just skip the garlic and cilantro in the butter topping entirely; use plain melted butter brushed on immediately after cooking. Easy peasy, right?
On the flip side, these round beauties are amazing for a quick dinner base! If you plan on making a Naan Pizza Base, the best thing you can do is cook the bread slightly less on the skillet—only about 45 seconds per side, just until you see nice pockets but before it gets too browned. Then, you can top it with sauce and cheese and pop it under your oven’s broiler for just a minute or two to melt everything. Instant homemade pizza!
If gooey cookies are more your speed after dinner, don’t forget to check out my recipe for icing that hardens just right for decorating!
Serving Suggestions for Your Buttery Naan Bread
Now that you have this incredible, soft, buttery naan bread cooling on the rack, the only question left is: what are we eating it with? Honestly, I think I could eat a stack of this warm bread plain, but it really sings when paired with other dishes. It’s the ultimate Curry Side Dish, perfect for scooping up every last drop of savory sauce.
Try serving it alongside a hearty bowl of soup—my coconut curry soup needs this naan for dipping! Or, use it as a base for a quick appetizer spread with hummus and feta cheese. It’s so much better than any pre-packaged flatbread you buy at the store.

Storage and Reheating Instructions for Homemade Naan Bread
The only problem with making amazing homemade naan bread is that sometimes you end up with leftovers—if that’s even possible in my house! Since this bread is so full of moisture from the yogurt and the butter finish, it stays pretty soft for a while if stored correctly. But you definitely don’t want to just leave it sitting out on the counter, or it will get stiff fast.
The goal is to lock in the steam we created when we brushed on that lovely garlic butter. Here’s what I do:
- For Short-Term Softness (Same Day): As soon as I finish brushing the last piece with butter, I stack them all up in a clean kitchen towel or lay a layer of foil inside a sealed plastic bag. This traps the residual steam and keeps them soft and pliable for up to 12 hours.
- For Longer Storage (1-3 Days): You can keep them in an airtight container placed in the refrigerator for about three days. They will firm up a bit, but don’t worry!
Reheating is key to bringing that fresh-from-the-skillet flavor back. The microwave is fast, but it can sometimes make the bread rubbery if you overheat it. My preferred method is putting the stack of naan directly back into a dry, clean skillet turned to medium heat for maybe 30 seconds per side just to warm through. If you’re in a rush, a quick 10 seconds in the microwave, wrapped in a barely damp paper towel, does the trick for immediate serving.
Frequently Asked Questions About Naan Bread
I get so many questions after people try this recipe for the first time, and that’s great! It usually means they loved it and want to explore variations or ensure they’ve stored their leftovers (if they even made it to leftovers!). Dealing with bread questions always brings me back to the basics of dough, temperature, and timing. Here’s the scoop on the most common things people ask about this wonderful naan bread.
If you’re looking for ideas on what to eat with your fresh bread tonight, you should totally browse my list of quick and healthy lunch ideas for inspiration!
Can I make this naan bread without yeast?
That’s one of the first questions that comes up, especially if folks are looking for a *super* fast option. While you absolutely can make No Yeast Bread variations—often called a Quick Bread Recipe—by swapping in baking powder and yogurt, I have to be honest: this recipe uses yeast specifically because it delivers that superior, authentic, soft, and fluffy texture we are aiming for. If you use baking powder, you get more of a biscuit or scone texture, not the true pliable naan chew.
How long does homemade naan bread stay fresh?
Because we use yogurt and brush it with so much butter, this homemade naan bread actually holds its moisture better than dry, simple flatbreads, but the texture is best within the first 12 hours, served warm right alongside your curry. If you refrigerate it, it will firm up significantly. Honestly, my best advice is to freeze any leftovers you won’t eat in two days! Wrap them tightly in plastic wrap, and then foil, and they freeze beautifully for up to two months. Reheat directly from frozen in a hot, dry skillet for two minutes per side, and they come back to life!
Estimated Nutritional Data for This Naan Bread Recipe
I always get questions about what’s in our favorite recipes, and I totally understand why! When you’re making something this delicious and buttery, you want a general idea of the numbers. Keep in mind that since this is a homemade recipe, and depending exactly on how much butter you brush on (which, let’s be honest, is the best part!), these numbers are estimates based on one piece of bread.
This is intended as a general guide for what you’re consuming per serving (which yields 8 pieces total):
- Calories: 220
- Fat: 7g (This includes the good fats and the delicious butter!)
- Saturated Fat: 4g
- Trans Fat: 0g
- Cholesterol: 15mg
- Sodium: 350mg
- Carbohydrates: 35g
- Fiber: 1g
- Sugar: 2g
- Protein: 6g
It’s amazing how much flavor we pack into just 220 calories before we even consider scooping up a big bowl of curry!
Share Your Soft & Fluffy Naan Bread Creations
That’s truly everything you need to know to become a master of homemade naan bread! I hope you feel that same excitement I do when you pull those puffy, buttery rounds off the hot skillet. It’s such a rush when you realize restaurant-quality bread is actually achievable right in your own kitchen using this simple method.
Now that you’ve nailed the technique for that perfect soft and fluffy texture, I really, really want to hear from you! Did you brush yours with extra garlic butter? Did you decide to make a quick naan pizza base instead of serving it with curry? Don’t keep that delicious genius to yourself!
Please take a minute to leave a rating below—five stars if this recipe saved your dinner night—and tell me about your experience in the comments. If you snap a picture of your gorgeous creation, tag me on social media so I can cheer you on! I love seeing how you bring these recipes to life in your own homes. And if you ever have a question about dough temperature or rising times, just hop over to my contact page; I’m always here to help!
PrintThe Best Soft & Fluffy Homemade Garlic Naan Bread (Easy Skillet Recipe, No Tandoor Needed)

Make restaurant-style soft, fluffy, and buttery garlic naan bread at home using a simple skillet method. This easy naan recipe uses basic ingredients and delivers incredible texture perfect for pairing with curries or making naan pizza.
- Prep Time: 25 min
- Cook Time: 15 min
- Total Time: 1 hour 40 min
- Yield: 8 servings 1x
- Category: Side Dish
- Method: Skillet Cooking
- Cuisine: Indian
- Diet: Vegetarian
Ingredients
- 1 teaspoon active dry yeast
- 1 teaspoon sugar
- 1 cup warm water (about 105-115°F)
- 3 cups all-purpose flour, plus more for dusting
- 1 teaspoon salt
- 1/2 cup plain yogurt (full fat recommended)
- 2 tablespoons olive oil, plus more for brushing
- For Garlic Butter: 4 tablespoons unsalted butter, melted
- For Garlic Butter: 2 cloves garlic, minced
- For Garlic Butter: 1 tablespoon fresh cilantro, chopped
Instructions
- Activate the yeast: In a small bowl, combine the warm water, sugar, and yeast. Let it sit for 5 to 10 minutes until foamy.
- Mix dry ingredients: In a large bowl, whisk together the flour and salt.
- Combine wet and dry: Pour the yeast mixture, yogurt, and 2 tablespoons of olive oil into the flour mixture. Mix until a shaggy dough forms.
- Knead the dough: Turn the dough out onto a lightly floured surface. Knead for 5 to 7 minutes until the dough is smooth and elastic.
- First rise: Place the dough in a lightly oiled bowl, turning to coat. Cover the bowl with plastic wrap or a damp towel. Let it rise in a warm spot for 1 to 1.5 hours, or until doubled in size.
- Divide and rest: Gently punch down the risen dough. Divide it into 8 equal pieces. Roll each piece into a ball, cover them loosely, and let them rest for 15 minutes.
- Prepare the garlic butter: While the dough rests, melt the butter in a small saucepan. Stir in the minced garlic and chopped cilantro. Set aside.
- Cook the naan: Heat a cast-iron skillet or heavy-bottomed pan over medium-high heat until very hot. Do not add oil to the pan.
- Shape the naan: Take one dough ball and roll it out into an oval or teardrop shape, about 1/8 inch thick.
- Cook on the skillet: Place one rolled naan onto the hot, dry skillet. Cook for 1 to 2 minutes until bubbles form on the surface and the underside has brown spots.
- Flip and char: Flip the naan. Cook the second side for about 1 minute until browned. For extra charring, you can briefly place the cooked side directly over a low gas flame using tongs (if you have a gas stove).
- Brush with butter: Immediately transfer the cooked naan to a plate. Brush generously with the prepared garlic butter mixture.
- Serve: Repeat with the remaining dough balls, stacking the cooked naan and brushing each layer with butter. Serve warm with your favorite curry or dip.
Notes
- If your kitchen is cold, place the dough bowl inside your oven with just the light on to create a warm environment for rising.
- For a quick naan pizza base, cook the naan slightly less on the skillet, then top with sauce and cheese and finish under the broiler for 1-2 minutes.
- If you prefer a plain naan bread, skip the garlic and cilantro in the butter mixture and use plain melted butter instead.
Nutrition
- Serving Size: 1 piece
- Calories: 220
- Sugar: 2
- Sodium: 350
- Fat: 7
- Saturated Fat: 4
- Unsaturated Fat: 3
- Trans Fat: 0
- Carbohydrates: 35
- Fiber: 1
- Protein: 6
- Cholesterol: 15