
There is nothing—and I mean *nothing*—more comforting than a thick, creamy soup served inside a bowl made entirely of warm, crusty bread. If you’ve ever looked at gorgeous bakery-style bread bowls and thought, “I could never make that happen at home,” well, I’m here to tell you that you absolutely can! That’s the whole idea behind Cooking Zenith; we take the intimidating out of the spectacular. Like Aria Thompson always says, great food shouldn’t require an advanced degree, just good instructions. This recipe for classic bread bowls is my go-to for making Tuesday night feel like a special weekend feast!
- Why This Homemade Bread Bowl Recipe Works (Soft Interior, Sturdy Crust)
- Ingredients for Perfect Bread Bowls
- How to Prepare Easy Bread Bowls From Scratch
- What to Fill Your Bread Bowls With
- Tips for Success with Bread Bowls
- Bread Bowl Variations: Garlic Butter and More
- Storage and Reheating for Your Homemade Bread Bowls
- Frequently Asked Questions About Bread Bowls
- Estimated Nutritional Information for Bread Bowls
- Share Your Comfort Food Baking Creations
Why This Homemade Bread Bowl Recipe Works (Soft Interior, Sturdy Crust)
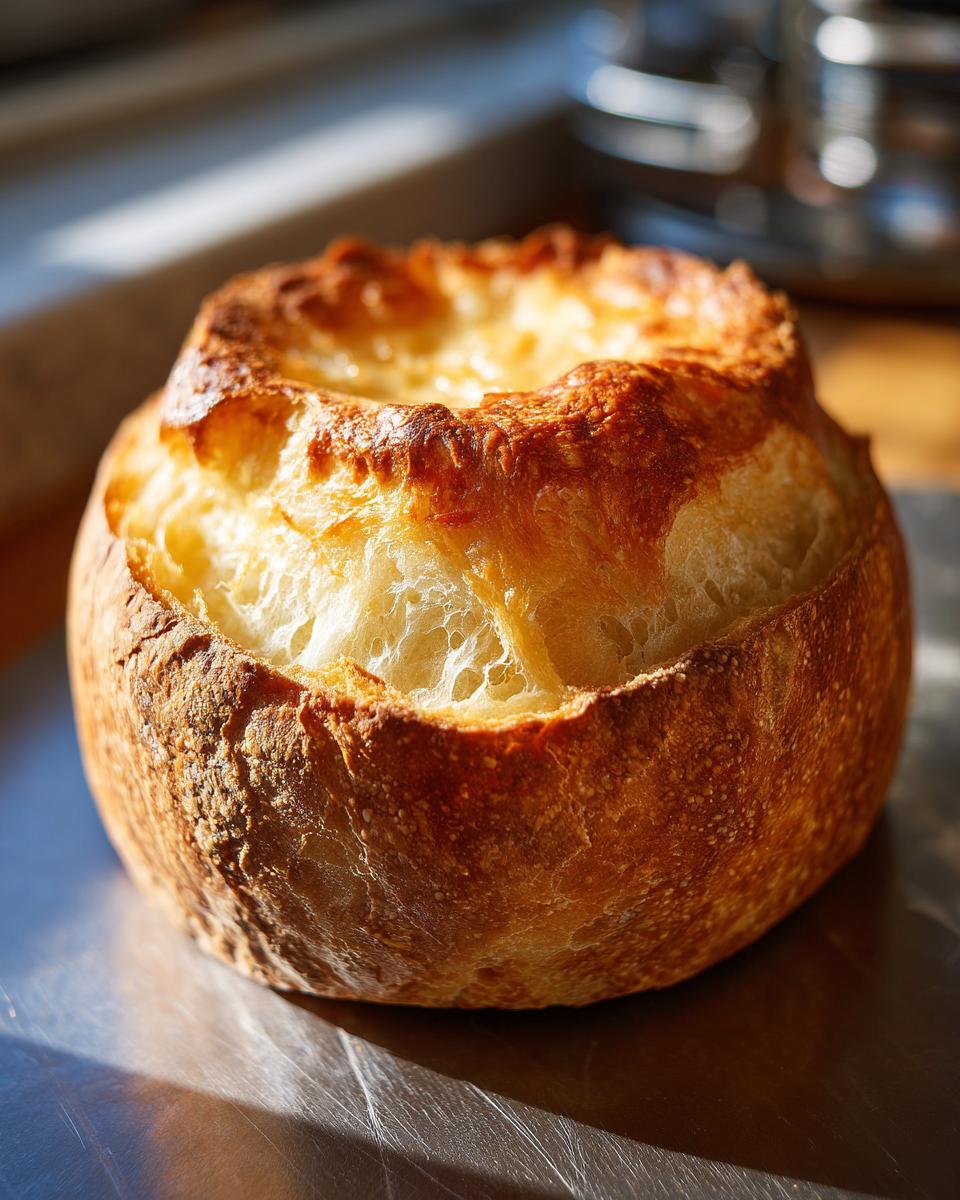
The primary goal when making your own Homemade Bread Bowl is balance, right? We want that incredible, crackly crust, but heaven forbid the inside is dry! This recipe nails the equilibrium because we focus on two major things: the right flour and the right heat. We’re not messing around with plain all-purpose flour here; we need the extra protein in bread flour to give the dough the structure it needs to hold your thickest chili or gooiest dip. Trust me, you need a sturdy edible bowl!

The second secret weapon is steam. It might sound fussy, but adding simple water to the oven creates a moist environment while the bread is first setting. This keeps the outer surface soft enough to expand beautifully, leading to that gorgeous, crackly, bakery-style finish.
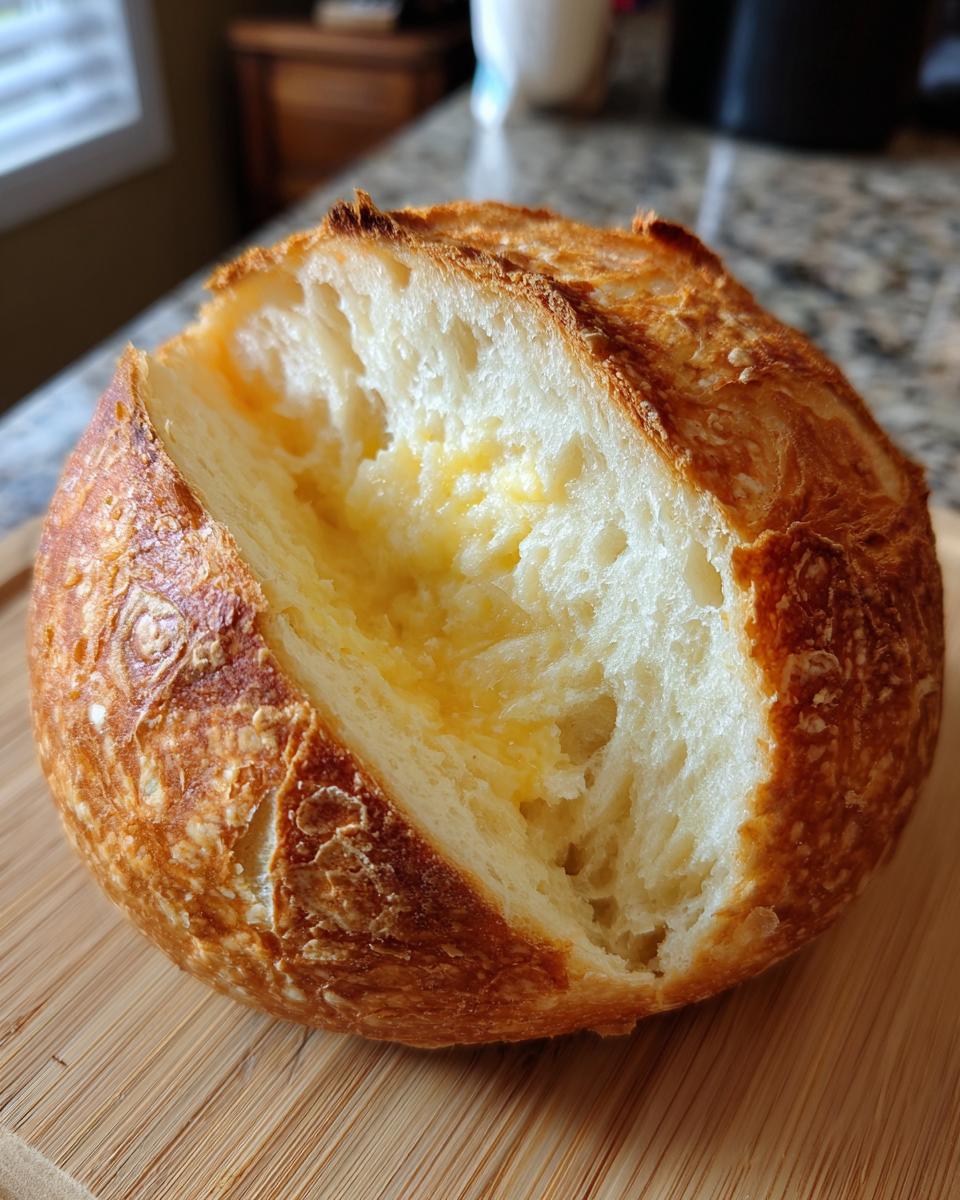
Achieving Bakery Style Bread Bowl Texture
The secret sauce for structure is that kneading time—we’re talking a solid 8 to 10 minutes! That’s where you develop those long, strong gluten strands. Gluten is basically the framework of the bread. More gluten means your dough can stretch without tearing, which is exactly what you need when you’re scooping out the soft bits to make room for dinner. If you skip kneading, your bread will collapse under soup moisture. We need strength for these edible bowls!
Ingredients for Perfect Bread Bowls
Okay, let’s look at what you need to rustle up these fantastic Bread Bowl Recipe Easy wonders. Unlike some complicated recipes out there, this lineup is super straightforward. The most important thing you need to watch is your water temperature; get that wrong and your yeast throws a tantrum! I always keep my instant-read thermometer nearby just to be safe.
You’ll notice we’re using bread flour, which I keep stocked specifically for sturdy baking like this, but don’t panic if you’re running low! Everything else is standard pantry fare for a truly satisfying bake.
- 2 1/4 cups warm water (aim for that sweet spot between 105-115°F!)
- 1 tablespoon of honey (our little flavor booster)
- 3 teaspoons active dry yeast
- 1 tablespoon of good olive oil
- 2 teaspoons of salt (don’t skip this, it adds flavor depth!)
- 4 1/2 cups bread flour, plus whatever extra you need for dusting later
- 1 egg, beaten well (this is just for the shiny top)
- A shallow pan filled with water, ready for the oven rack below!
Ingredient Notes and Substitutions for Your Bread Bowls
Let’s talk specifics, because the little details make all the difference in your final loaf. That warmed water *has* to be between 105°F and 115°F. Too cold, and the yeast wakes up grumpy; too hot, and you kill it instantly. That’s non-negotiable if you want a proper rise!
If you’re truly out of bread flour, all-purpose flour will work, but be warned: your Best Bread Bowl Dough won’t have quite the same chew, and the walls might be slightly less sturdy. Honey adds a lovely soft flavor, but you can absolutely swap it for the same amount of regular granulated white sugar if that’s what you have on hand. Easy solutions for real kitchens!
How to Prepare Easy Bread Bowls From Scratch
Alright, time to get our hands dusty! This dough comes together so quickly—we aren’t waiting around forever. First things first, you need to wake up your yeast. Mix that warm water and honey, sprinkle the yeast on top, and let it get foamy. That’s your signal that the yeast is happy and ready to work! Once it’s bubbly, stir in the olive oil and salt.
Now, incorporate that bread flour gradually until you have a shaggy mess. Turn it out onto the counter! Kneading is where the magic happens for these from scratch bread bowls—push, fold, turn, for a solid 8 to 10 minutes until it’s smooth. If your dough feels like it’s sticking to your fingers like glue, add just one tablespoon of flour at a time until it’s manageable. Pop it into an oiled bowl, turn to coat, cover it up, and let it do its thing for about 1 to 1.5 hours until it doubles in size.
After the first rise, punch it down gently! Divide that dough into four equal piles. Shape each piece into a tight, round ball. Place them on a baking sheet lined with parchment paper, leaving room between them. Cover them loosely and let them rest for a second rise for 30 minutes. This is where we prepare for baking success! Speaking of quick baking, if you ever need bread faster, check out my super-fast French bread recipe—but for these bowls, patience is key!
The Crucial Steam Step for Crusty Bread Bowls
We need that restaurant-quality crunch! To do this, you must place a shallow metal pan on the very bottom rack while your oven preheats to 425°F. Once you’re ready to bake, brush your risen balls with that beaten egg wash for color. Then, right as the baking sheet goes into the oven, quickly pour about 1 cup of *hot* water into that pan on the bottom rack. That blast of steam is exactly what keeps the crust supple while the inside cooks, guaranteeing those amazing crusty bread bowls!
Cooling and Hollowing Out Your Bread Bowls
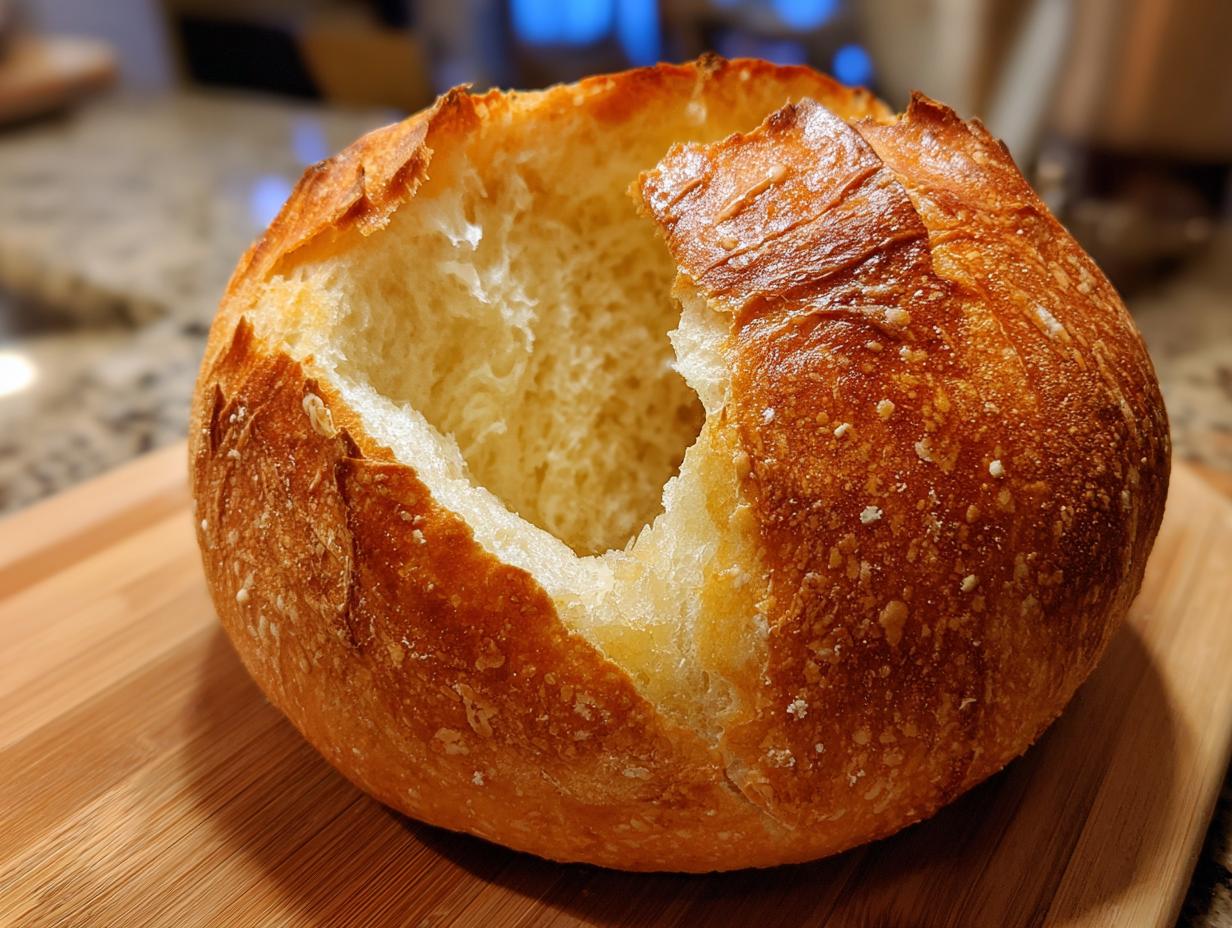
Bake them for 20 to 25 minutes until they are a beautiful deep golden brown. But hold your horses! You absolutely *must* let them cool on a wire rack for at least 30 minutes first. If you try to hollow them out when they are piping hot, they will just squish and tear because the structure hasn’t set. Don’t rush this part! Use a sharp knife to cut a circle around the top, making sure to leave about an inch of wall thickness so it doesn’t collapse. Gently scoop out that soft interior bread—you’ve now created perfect sturdy edible bowls!

What to Fill Your Bread Bowls With
Now that you have these incredible, edible containers, the real fun begins: filling them! Honestly, these aren’t just for serving; they’re part of the meal. You absolutely have to go classic with a thick soup. Think about loading one up with rich Split Pea Soup or that creamy, bright Broccoli Cheddar Soup I shared last week. They hold up beautifully!
If you’re having a cozy night, these are perfection for holding Clam Chowder in Bread Bowl—it just feels right, doesn’t it? And for a game day situation, skip the soup entirely and use them for substantial fillings. They are fantastic for holding thick Bread Bowls for Chili or even a heavy, cheesy baked pasta dish. The bread soaks up all those delicious juices!
Don’t forget about dipping! You can pull out the soft bread centers and stick a cheesy spinach artichoke dip right inside the hollowed-out shell. It’s guaranteed to disappear first at any party, I promise you that.
Tips for Success with Bread Bowls
Making beautiful, functional recipe for edible bowls isn’t always smooth sailing, but with a few tweaks learned from painful trial and error, you can bypass the issues! First up, let’s tackle density. If your dough seems heavy or doesn’t rise well, your yeast was probably unhappy—check that water temperature *every single time*. A sluggish rise means a dense loaf, and no one wants a brick soup holder.
Next, if your crust comes out pale and soft instead of deep gold, you missed the mark on the egg wash or the steam. Make sure you brush that beaten egg evenly right before baking. If you’re struggling with an uneven shape, try using a kitchen scale to weigh the dough before dividing it into four portions. Even weight equals even baking!
Also, if you want to elevate your technique slightly and get that amazing crust without the steaming pan hassle, you can look into how I handle the steam for my Yorkshire puddings—it’s the ultimate trick for a quick blast of moisture, which you can read about right here! Focus on temperature control, and your bread bowls will be the talk of the town.
Bread Bowl Variations: Garlic Butter and More
Now that we’ve mastered the classic plain loaf, let’s get creative because leftover bread is just a starting point for something even better! While this recipe uses commercial yeast for quick results, if you happen to keep a sourdough starter going, you can absolutely adapt this formula for a tangier, chewier loaf. It just takes patience—sourdough is a marathon, not a sprint! I have a wonderful recipe for sweet rolls that uses a similar base if you’re looking for baking inspiration!
But the easiest way to upgrade these sturdy edible bowls is with flavor. If you’re serving them on a chilly night and crave something extra luxurious, turning them into Garlic Butter Bread Bowls is a must-do. It’s fantastic for game days or when you just want a huge flavor punch alongside your soup.
Making Garlic Butter Bread Bowls
You have two options here! For maximum flavor penetration, brush the tops generously with garlic butter *before* they bake alongside the egg wash. If you prefer a soft interior soak, cut the cooled, hollowed-out bread tops into wedges and brush them *after* baking. We toss those scooped-out pieces in the extra garlic butter and toast them up for the most amazing dipping sticks for whatever soup you’re serving!
Storage and Reheating for Your Homemade Bread Bowls
These loaves are best eaten the day they are made. Seriously, that crisp crust just won’t last forever! Once they cool completely? Store them on the counter in an airtight container or heavily wrapped in plastic wrap. Resist the urge to put them in the fridge! Cold temperatures dry out bread super fast, and we want to keep that soft interior lovely.
If you have leftovers the next day, don’t toss them! You can bring them back to life with a quick blast in the oven at about 325°F for maybe 5 to 8 minutes. That dries them out a little but gets the crust crisp again. If they are truly stale, dice them up and toast them for croutons—zero waste in my kitchen!
Frequently Asked Questions About Bread Bowls
I get so many questions when people try this recipe for the first time! Baking bread can feel precise, but honestly, troubleshooting is half the fun. I want everyone to feel confident making these, whether it’s your first time tackling a recipe for edible bowls or your tenth time scaling up for a huge party.
Can I make the Bread Bowl Dough ahead of time?
You totally can! After the first rise, you can gently punch the dough down, wrap it tightly, and stick it in the fridge for up to 24 hours. This cold fermentation develops amazing flavor!
How long do the bread bowls stay fresh?
For the best crust, they are perfect the day they come out of the oven. They’ll still be good for about two days stored airtight on the counter, though the crust will soften up.
What is the secret to the sturdiest dough?
For the best bread bowl dough structure, you must use bread flour! It has higher protein than regular flour, which gives you that incredible gluten network needed to hold wet fillings. Kneading is just as important!
Is the egg wash the key to the color of the hollowed out bread recipe?
Yes, the egg wash (one egg mixed with a splash of water) is what gives you that beautiful, deep golden shine after baking. Without it, they tend to look a little dull, even if they are perfectly baked!
If you are looking for quicker weeknight recipes generally, I’ve pulled together some of my favorites over here!
Estimated Nutritional Information for Bread Bowls
Now, nobody is eating a bread bowl just for the health benefits, right? Let’s be real, this is comfort food! But just so you know what you’re dealing with before you load it up with creamy chowder, here are the estimated numbers for one unfilled bread bowl. Remember, this is just an estimate based on the recipe I laid out above—your exact values might shift slightly depending on the brands you buy!
- Serving Size: 1 bread bowl (unfilled)
- Calories: 320
- Fat: 3g
- Carbohydrates: 65g
- Protein: 10g
- Sugar: 3g
- Sodium: 350mg
Take these numbers with a grain of salt, though! As always, if you’re tracking macros closely, you’ll want to use a dedicated nutrition calculator for your exact ingredients. But for a basic, incredibly delicious crusty shell, that’s what we’re looking at!
Share Your Comfort Food Baking Creations
I’m genuinely so excited for you to get these in your oven! When you finally sit down with that steaming soup nestled in your very own edible bowl, snap a picture and tag me! I love seeing your finished baking projects. Please drop a comment down below telling me what filling you chose—was it chili, dip, or something totally wild? Don’t forget to rate the recipe so others know how fantastic these homemade bread bowls are! If you have any questions, feel free to reach out via my contact page!
PrintEasy Homemade Bread Bowls Recipe for Soups and Stews
Make sturdy, bakery-style bread bowls at home. This recipe yields crusty exteriors and soft interiors, perfect for holding hearty soups, chili, or dips.
- Prep Time: 20 min
- Cook Time: 25 min
- Total Time: 2 hours 15 min
- Yield: 4 servings 1x
- Category: Baking
- Method: Baking
- Cuisine: American
- Diet: Vegetarian
Ingredients
- 2 1/4 cups warm water (about 105-115°F)
- 1 tablespoon honey
- 3 teaspoons active dry yeast
- 1 tablespoon olive oil
- 2 teaspoons salt
- 4 1/2 cups bread flour, plus more for dusting
- 1 egg, beaten (for egg wash)
- Water in a shallow pan (for steam)
Instructions
- Combine the warm water and honey in a large bowl. Sprinkle the yeast over the top and let it sit for 5 to 10 minutes until foamy.
- Stir in the olive oil and salt. Gradually add the bread flour, mixing until a shaggy dough forms.
- Turn the dough out onto a lightly floured surface. Knead for 8 to 10 minutes until the dough is smooth and elastic. If the dough is too sticky, add flour one tablespoon at a time.
- Place the dough in a lightly oiled bowl, turning to coat. Cover the bowl with plastic wrap or a clean towel and let it rise in a warm place for 1 to 1.5 hours, or until doubled in size.
- Preheat your oven to 425°F (220°C). Place a shallow pan on the bottom rack of the oven to create steam for a crispier crust.
- Punch down the risen dough gently. Divide the dough into 4 equal pieces. Shape each piece into a tight, round ball.
- Place the dough balls on a baking sheet lined with parchment paper, leaving space between them.
- Cover the shaped dough loosely and let them rest for a second rise for 30 minutes.
- Brush the tops of the dough balls with the beaten egg wash.
- Place the baking sheet in the oven. Pour about 1 cup of hot water into the shallow pan on the bottom rack to create steam.
- Bake for 20 to 25 minutes, or until the bread bowls are deep golden brown.
- Remove the bread from the oven and let them cool on a wire rack for at least 30 minutes before hollowing them out.
- To serve, use a sharp knife to cut a circle around the top of each loaf, leaving a sturdy rim. Gently scoop out the soft interior bread, leaving a thick wall to hold your filling.
Notes
- For a crispier crust, add a pan of water to the bottom of the oven during baking to generate steam.
- Use bread flour for the best structure to hold heavy fillings like chili or stew.
- Hollowed-out bread pieces can be toasted and served alongside your soup for dipping.
Nutrition
- Serving Size: 1 bread bowl (unfilled)
- Calories: 320
- Sugar: 3
- Sodium: 350
- Fat: 3
- Saturated Fat: 0.5
- Unsaturated Fat: 2.5
- Trans Fat: 0
- Carbohydrates: 65
- Fiber: 3
- Protein: 10
- Cholesterol: 5