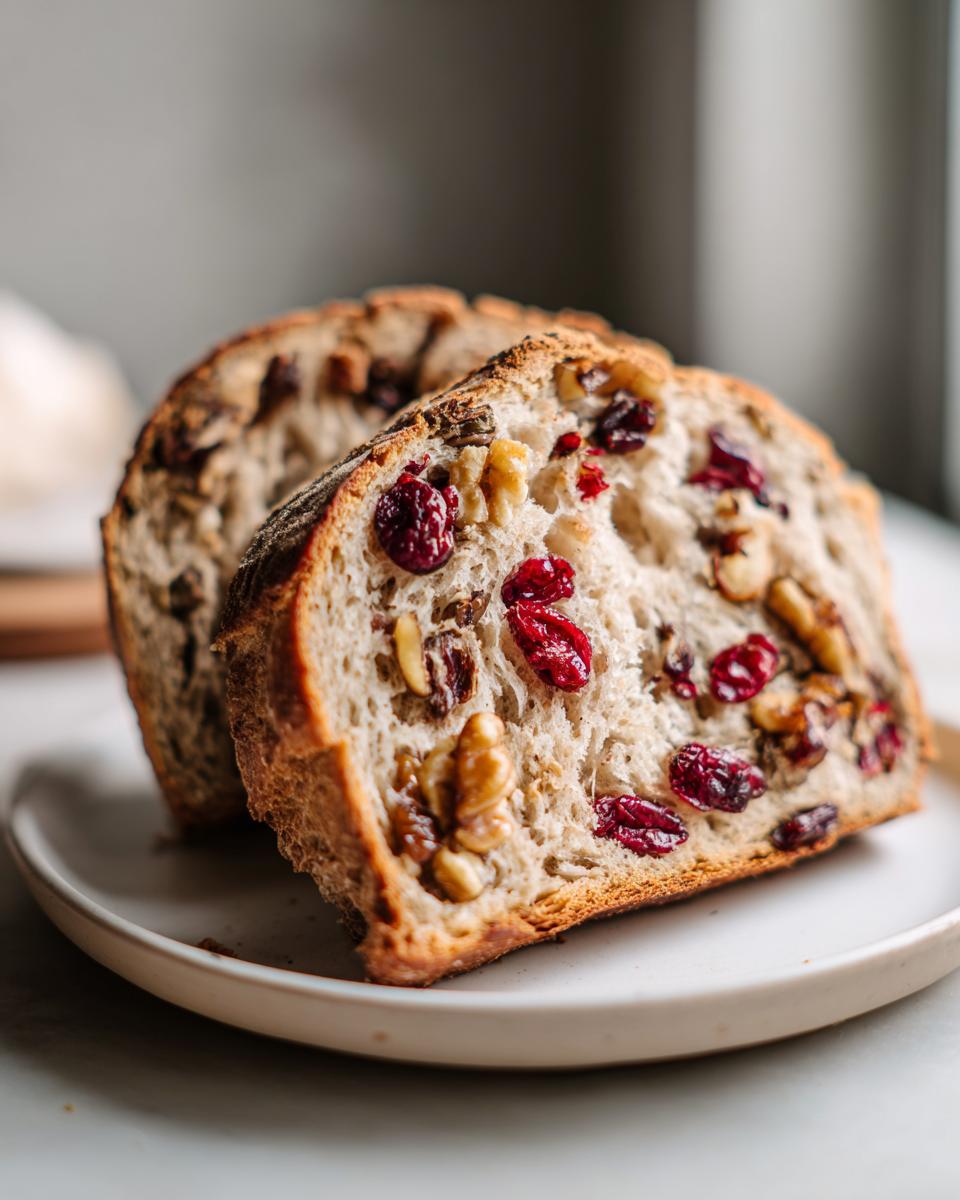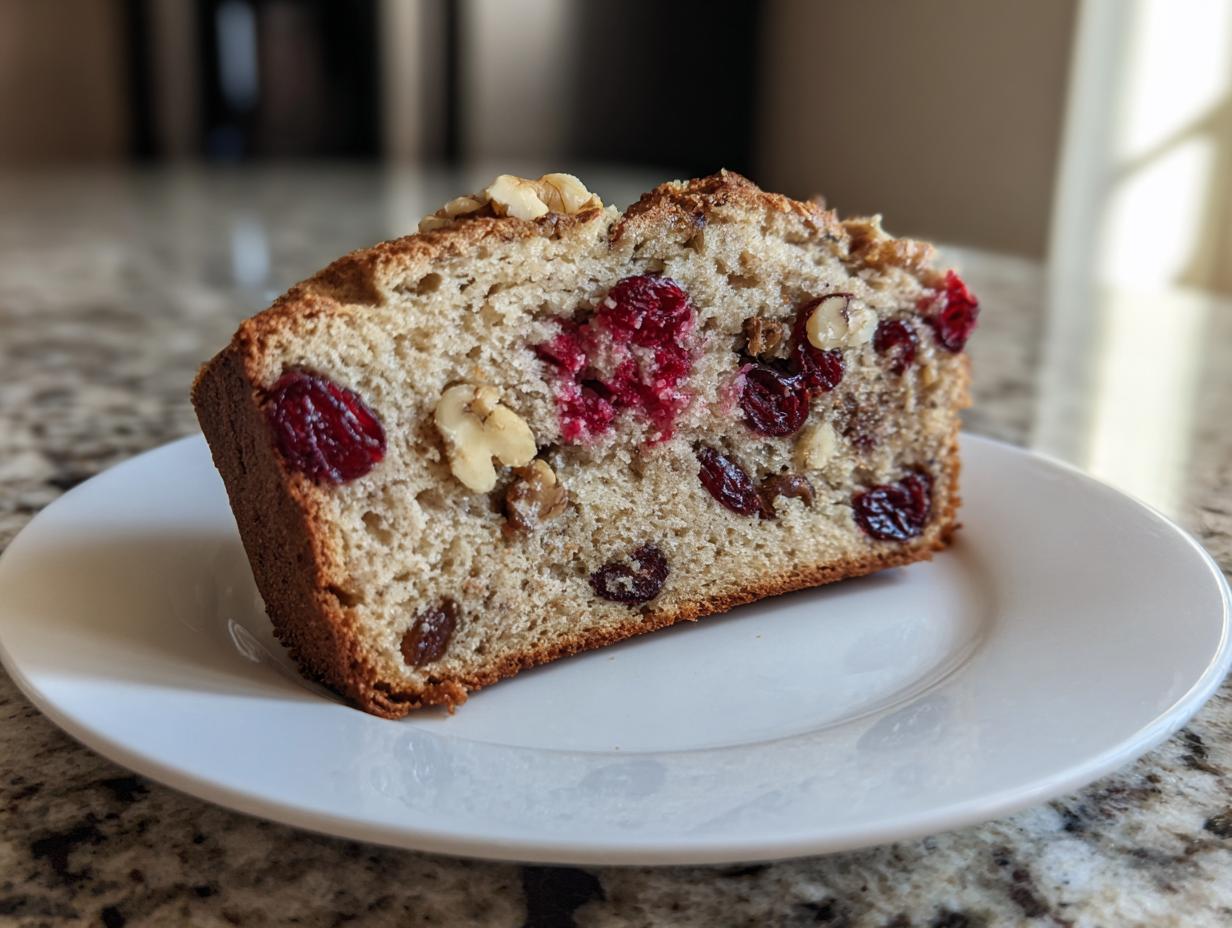
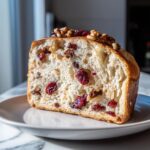
Oh, there is simply nothing in the world that beats that first slice of homemade bread, is there? I mean, that warm, yeasty smell filling your entire house? Pure heaven. That’s exactly what motivated me to perfect this Rustic Walnut and Cranberry yeast bread with inclusions. Forget those dry, crumbly loaves you sometimes get stuck with; this one is soft, rich, and packed with texture you’ll actually want to bite into.
Here at Cooking Zenith, my goal—and it’s Aria Thompson’s main focus—is making sure you don’t have to be a professional baker to achieve amazing results. We break down every single step so you can confidently try complex-sounding things, like incorporating nuts and dried fruit into a yeasted dough, and know you’re going to nail it. Trust me on this one; this method for baking yeast bread with inclusions is foolproof and will change your baking game!
- Why This Rustic Walnut and Cranberry yeast bread with inclusions Works So Well
- Gathering Ingredients for Your yeast bread with inclusions
- Step-by-Step Instructions for Baking Your yeast bread with inclusions
- Baker's Guide to Adding Solids to Dough: Tips for Perfect yeast bread with inclusions
- Variations: Sweet vs. Savory yeast bread with inclusions
- Storing and Reheating Your Homemade inclusion bread recipes
- Frequently Asked Questions About Baking with Chunky Mix Ins
- Estimated Nutritional Breakdown for this yeast bread with inclusions
- Share Your Texture Rich Homemade Loaves
- Estimated Nutritional Breakdown for this yeast bread with inclusions
- Share Your Texture Rich Homemade Loaves
Why This Rustic Walnut and Cranberry yeast bread with inclusions Works So Well
When it comes to homemade bread, I want substance! I don’t want a delicate loaf that collapses if you look at it wrong. This version, our signature yeast bread with inclusions recipe, gives you that wonderful balance. You get the rich, soft crumb from the milk and egg, but it’s robust enough to handle a huge payload of flavorings.
This recipe isn’t just about tossing things in; it’s about creating pockets of texture and flavor that make every slice interesting. If you’re ready to move past plain white bread, this is where you start. Seriously, you’ll want to keep this recipe close! Check out our similar Date Nut Bread for another great option.
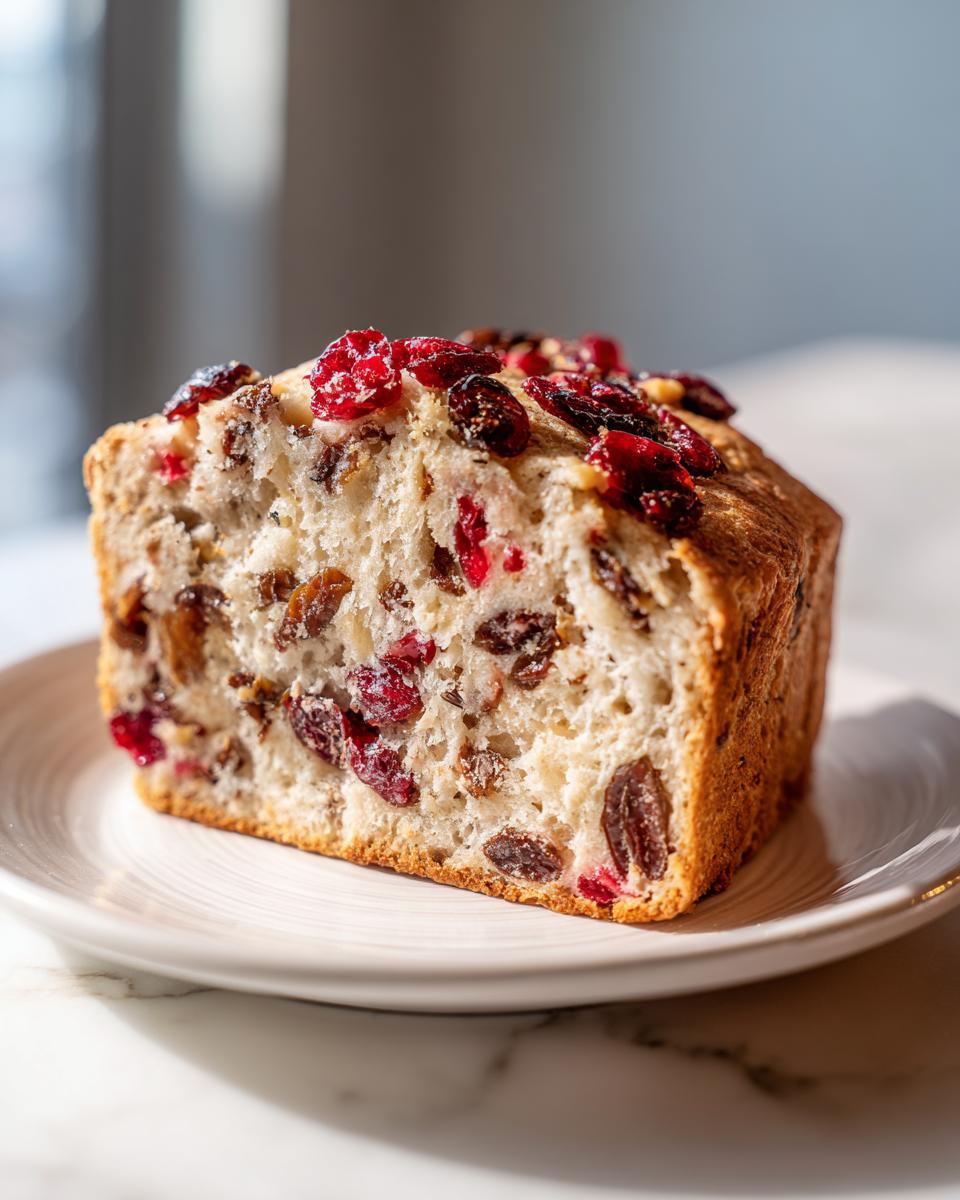
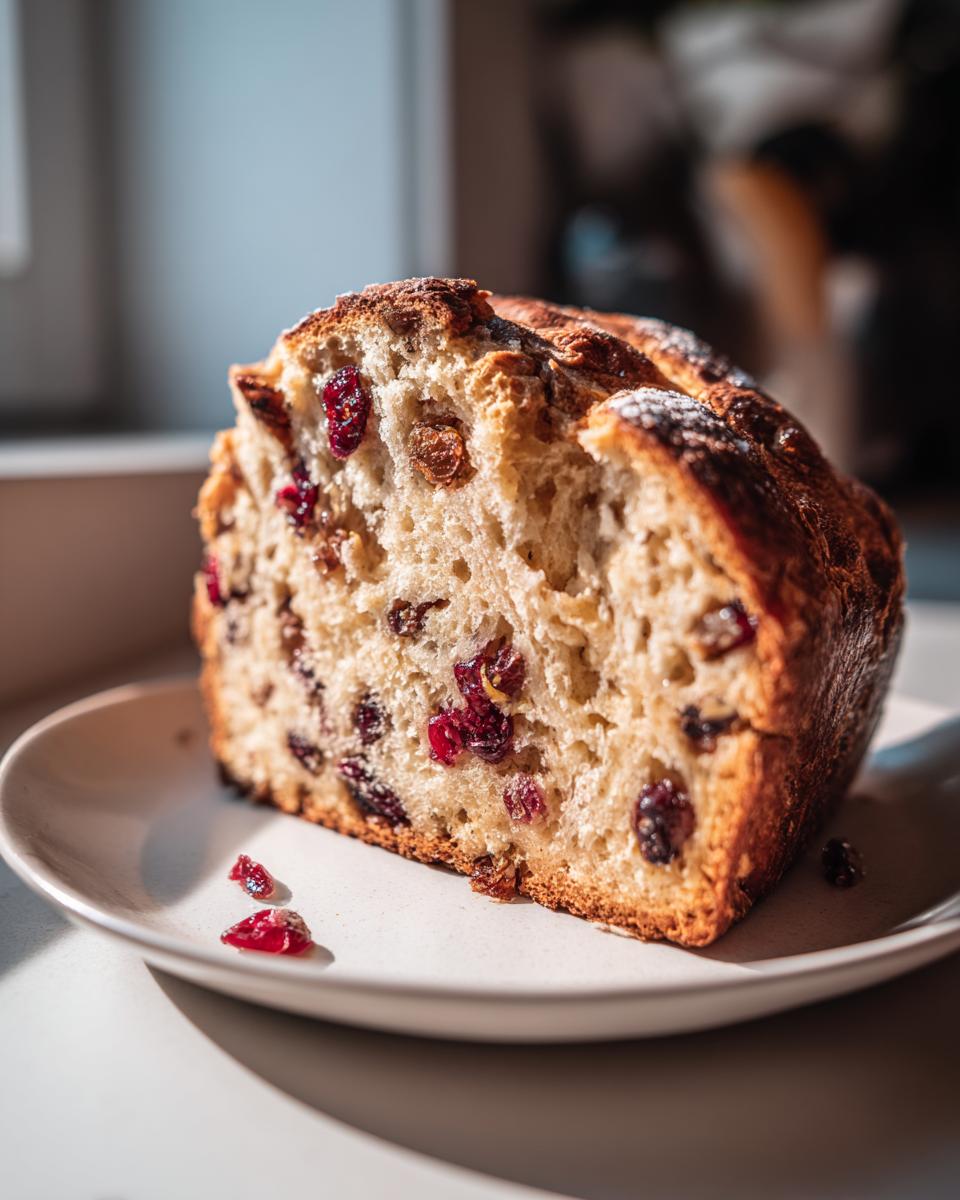
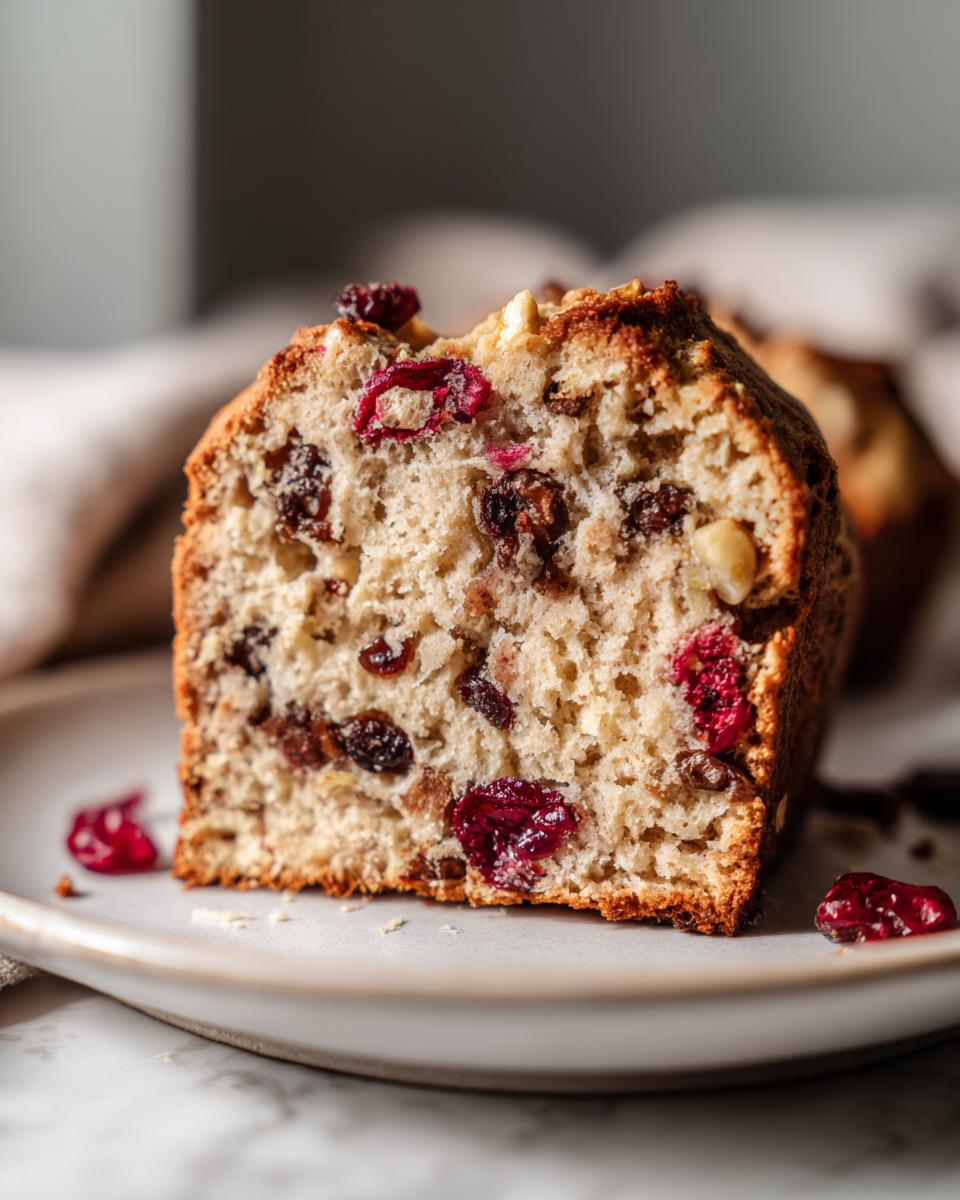
- The satisfying, sturdy crunch of the walnuts.
- The burst of chewy sweetness from the cranberries.
- A final loaf that slices beautifully without crumbling apart.
The Role of Inclusions in Enriched yeast bread mix ins guide
Most people worry that nuts and dried fruit will weigh the dough down, right? That’s why we treat them gently! Walnuts are relatively stable, but the cranberries can sometimes bleed color or moisture. We use a little flour dusting trick—I save that secret for the next step—to make sure these guys don’t just sink straight to the bottom. Mastering this part of the Enriched yeast bread mix ins guide guarantees you get an even distribution throughout the rising process.
Gathering Ingredients for Your yeast bread with inclusions
Okay, getting ready to bake is half the fun, and ensuring you have *exactly* what you need means we can move smoothly through the steps without panicking halfway through. For this yeast bread with inclusions, we are working with a slightly enriched dough because we are adding substantial mix-ins, so pay attention to the liquid temperatures!
I always gather everything onto the counter first—my little mise en place setup, if you will—so I can see everything at a glance. You’ll need these components for a perfect loaf:
- 1 cup warm water (It needs to be between 105°F and 115°F—too hot kills the yeast, too cold makes it lazy!)
- 2 1/4 teaspoons active dry yeast
- 1 tablespoon granulated sugar (This is just a little snack to wake up that yeast!)
- 3 cups all-purpose flour (We’ll talk about swapping some of this out later, but AP works beautifully here.)
- 1 teaspoon salt (Never skimp on salt; it controls the flavor and the rise!)
- 1/4 cup whole milk, warmed gently
- 2 tablespoons unsalted butter, softened to true room temperature
- 1 large egg, lightly beaten (This is what makes it enriched and tender.)
- 1 cup chopped walnuts (Make sure they are roughly chopped; we don’t want fine dust.)
- 3/4 cup dried cranberries (The tartness plays so nicely against the walnuts.)
If you feel like you need a quick refresher on making super soft dough, you might want to check out my Easy Condensed Milk Bread recipe. It uses a different base, but really teaches you how to handle soft, enriched doughs!
Step-by-Step Instructions for Baking Your yeast bread with inclusions
Alright, time to get our hands floury! Making a spectacular yeast bread with inclusions is all about timing, not brute force. We need to build up the gluten structure first, and *then* we gently fold in those chunky bits. Follow these steps closely, and you’ll have the best loaf imaginable.
- First thing’s first: we wake up the yeast! Combine the warm water (remember, 105°F to 115°F is key!) with the sugar and yeast in a small bowl. Don’t rush this part! Let it sit on the counter for 5 to 10 minutes until it looks foamy and active. If it doesn’t foam, your yeast might be sad, and we start over!
- While the yeast is getting happy, whisk your flour and salt together in a big mixing bowl.
- Now pour in that lovely yeast mixture, add your warm milk, softened butter, and the beaten egg to the dry stuff. Mix it with a spoon until everything just comes together into a shaggy ball.
- Time to knead! Turn that shaggy mess onto a lightly floured surface. You need to work this dough for about 8 to 10 minutes until it smooths out and feels elastic. If you’re using a mixer, use the dough hook and run it on low for 6 to 8 minutes. It needs to develop strength before we weigh it down with nuts!
Mastering the Kneading and Incorporating the yeast bread mix ins guide
This is that super important moment! Once your dough is smooth, gently flatten it out but don’t punch all the air out. Now, take your chopped walnuts and dried cranberries, and here’s my top tip from the Baker’s guide to adding solids to dough: lightly dust them with about 1 tablespoon of the flour you measured out earlier. This coating really helps keep them from sinking during the bake!
Spread those dusted inclusions evenly over the flattened dough. Fold one side over, then the other, like you’re folding a letter. Now, very gently, knead for only 1 to 2 minutes—just enough to distribute them without tearing the dough structure apart. We want that strength we just built!
Pop the dough into an oiled bowl, cover it, and let it have its first big rest (the first proof) in a warm spot for 1 to 1.5 hours, until it’s doubled. If your kitchen is chilly, tucking it into an oven that’s turned off but has the light on works like magic!
Proofing and Baking the yeast bread with inclusions
Once it’s doubled—you should be able to see the whole thing look puffy and airy—gently punch it down to deflate it. Shape it into a tight loaf and set it smoothly into your greased 9×5 inch loaf pan. Cover it lightly again; this is the second proof. We are patient here! Let it rise for 30 to 45 minutes. You’ll know it’s ready when it crests about 1 inch over the top edge of the pan.
Preheat your oven to 375°F (190°C) during the end of that second rise. Don’t skip this! When you slide it in, bake for about 30 to 35 minutes. You’re looking for a deep golden brown crust. I always confirm doneness by checking the internal temperature—you want it right between 200°F and 205°F. Take it out right away and let it cool totally on a rack. Slicing it hot is a guaranteed way to make it dense!
For more insight on getting perfect loaves, check out my method for making Easy Crusty Italian Bread, which has a totally different structure but still relies on great proofing technique. If you want soft, look at the Tangzhong Milk Bread guide; it shows off what liquids can do!
Baker’s Guide to Adding Solids to Dough: Tips for Perfect yeast bread with inclusions
If you’re nervous about making your first loaf of yeast bread with inclusions, I totally get it. It feels like you’re introducing a foreign object into a delicate structure. But once you understand what the walnuts and cranberries are actually doing to your dough, you’ll feel totally empowered!
We’ve touched on dusting them with flour to stop them from sinking, but the Baker’s guide to adding solids to dough relies on respecting two main things: how inclusions affect hydration and how they influence the yeast’s activity.
First, think about hydration. Walnuts are thirsty, and dried fruit holds onto moisture. If you add them dry, they suck water right out of your dough, potentially leading to a much stiffer, drier final bake, especially if you’re dealing with high-hydration doughs. Since our recipe is slightly enriched, the effect is minimized, but it’s something serious bakers always watch for!
Temperature control is also crucial when you load up on solids. Because the nuts and fruit are cooler than your dough, adding them too early can actually drop the overall temperature of your mix, slowing down your yeast. That’s why we wait until *after* the main kneading is done and the gluten is established before folding them in gently. You want that fermentation speed to stay consistent!
For those of you who love working with wild yeast, maybe you’re looking at making a sourdough version next! If you want to dive deeper into managing natural starters and hydration, my guide on making a Sourdough Starter From Scratch covers all those temperature and fermentation dynamics needed for wild yeast baking.
Variations: Sweet vs. Savory yeast bread with inclusions
One of the best things about having a solid base recipe like this Rustic Walnut and Cranberry loaf is how wonderfully adaptable it is. Once you nail the technique for handling your yeast bread with inclusions, you can basically pivot to anything you have in the pantry! Trust me, having versatility in your toolkit makes home baking so much more fun and less wasteful.
You don’t have to be a slave to the cranberry-walnut combo, even though it’s divine. We can easily shift this over to the sweet side or take a sharp turn toward super savory territory without fussing too much with the main dough structure.
Sweet Holiday Yeast Inclusions
If you want a bread that tastes like a cozy holiday morning, just swap out a few things. Forget the cranberries and toss in about 1 cup of chocolate chips—I prefer the semi-sweet kind. Maybe add 1/2 cup of cinnamon chips if you can find them! For an extra layer of bright flavor that complements the walnuts perfectly, you absolutely must add the zest from one large orange directly into the dough when you mix in the wet ingredients.
Another great sweet substitution is using dried chopped apricots instead of cranberries, perhaps with a teaspoon of ground cardamom mixed in with your flour. Doesn’t that sound incredible? It still falls nicely under the umbrella of yeast bread with inclusions, it just tells a different flavor story!
Artisan Bread with Savory Additions
Shifting to savory is just as easy, and this is where you can really get creative with herbs and cheeses. If you are making a savory loaf, scrap the tablespoon of sugar from the initial yeast activation—just use warm water and yeast, the savory notes won’t need that sweetness to bloom.
For savory mix-ins, I love using about 3/4 cup of sharply shredded cheddar cheese (use a drier block cheese, not the pre-shredded kind if you can help it!) and maybe a quarter cup of chopped fresh rosemary or even some sun-dried tomatoes packed in oil (make sure to pat them dry!). Alternatively, if you want something truly rustic, try adding 1/2 cup of flax seeds and sunflower seeds to the dough during the final mix. For a fantastic cheese and herb loaf idea, you have to see the depth of flavor you can get in my Savory Cheese and Herb Yeast Loaf recipe. It uses a similar technique for incorporating those wet, delicious ingredients!
Storing and Reheating Your Homemade inclusion bread recipes
Okay, the hard part is over! You’ve pulled that beautiful, textured loaf out of the oven. Now we need to talk about making sure those delicious Homemade inclusion bread recipes taste just as good tomorrow as they do today. Because this loaf has a little bit of enrichment from the milk and egg, it stays softer longer than a standard rustic loaf, which is great news!
When it comes to storage, my advice is always to let it cool completely first. And I mean *completely*. Slicing into warm bread traps steam inside, and trapped steam equals gummy bread the next day. Don’t do it to yourself!
Once it’s totally cool, you want to keep the air out. I swear by heavy-duty aluminum foil. Wrap the entire loaf tightly or, if you only sliced off half, wrap the cut end securely before placing the whole thing in an airtight container. Keep it right on the counter at room temperature for up to three days. Seriously, don’t put it in the fridge! The fridge actually makes bread go stale faster, and we definitely don’t want that happening to our hard work.
Slicing and Refreshing the Loaf
If you find the loaf has firmed up a little bit after a day or two (which happens especially with those thirsty walnuts!), reheating is your magic trick. Don’t try to microwave the whole thing; it just won’t end well.
For individual slices, just lay them on a baking sheet. Pop them into a moderate oven—say about 300°F—for about 5 to 7 minutes. This gently warms the nuts and cranberries, bringing back that soft, fresh-from-the-oven texture we love. If you want that crisp crust back, you can even turn the oven up to 350°F for the last minute. It re-crisps the exterior while keeping the inside tender. It’s the perfect fix for enjoying those Homemade inclusion bread recipes all week long!
Frequently Asked Questions About Baking with Chunky Mix Ins
When you’re stepping into the world of baking with lots of bits and pieces—nuts, seeds, cheese—you naturally have questions. It’s different than mixing a smooth, uniform batter! I’ve gathered the stuff most people ask me about when they try this recipe for the first time. Let’s demystify how to bake bread with chunky mix ins!
Can I use bread flour instead of all-purpose flour in this recipe?
Oh, absolutely! I mentioned in the notes that using a blend is fantastic for richness, but if you want a chewier, slightly more rustic crumb—which is great when you have heavy inclusions—you can substitute up to one cup of the all-purpose flour with bread flour. Bread flour has more protein, meaning it develops stronger gluten. This extra strength helps support those walnuts and cranberries so they stay exactly where you put them. It’s a simple swap that really boosts the texture!
Why did my fruit and nuts sink right to the bottom of the loaf?
This is the age-old nemesis of the baker working with mix-ins! If you dump in those heavy walnuts and dried cranberries right at the end, they just sink down through the soft, un-developed dough during the proofing stages. The solution, which I included in our instructions, is twofold: First, make sure your dough is sufficiently kneaded *before* you add them so the gluten network is strong enough to grab onto the inclusions. Second, and this is crucial, lightly toss those mix-ins in a tablespoon of your measured flour before folding them in. That little dry coating acts like glue, helping them stay suspended. If you still have issues, try baking in a tighter pan, like a standard loaf rather than a decorative Bundt, for extra support.
How long does this walnut and cranberry loaf last?
Because this is an enriched yeast bread—meaning we added milk, butter, and egg—it stays wonderfully soft. If you followed the storage advice and kept it wrapped tightly at room temperature, you should find it perfectly soft and delicious for about three full days. After that, it’s still perfectly fine to eat, but the texture might start to lean toward slightly dense. That’s when you break out the toaster or use slices for French toast! For longer storage, like holding onto your amazing Homemade inclusion bread recipes for later, I recommend slicing it and freezing it airtight; it freezes beautifully for up to three months.
Does adding cold nuts immediately affect the yeast?
That’s a very smart question! Yes, they absolutely can. If you are making a large batch or if your kitchen is cool, dropping in cold inclusions can drop the dough temperature below the optimal range for yeast activity, slowing down your rise significantly. That’s why my process involves kneading the dough *first* until it’s smooth and elastic right before folding in the nuts and fruit. This ensures the dough has already built up enough gaseous activity to keep its momentum going, even with the temperature dip. If you’re worried about time, wrapping the bowl in a warm towel while it proofs usually solves any sluggishness!
If you want to practice your basic kneading technique before tackling these chunky loaves, my guide on making the Best Homemade Breadsticks is a quick, low-commitment way to get more confident with handling dough!
Estimated Nutritional Breakdown for this yeast bread with inclusions
I know many of you like to keep track of what you’re eating, and since we want you to feel confident eating this rich and satisfying loaf, here is my best estimate for the nutritional information. Remember, this is based on using all-purpose flour and standard measures for the butter and sugar. If you load it up with extra honey or use all whole wheat flour, these numbers will shift a bit!
This breakdown is for a single slice, assuming the recipe yields 12 generous slices:
- Calories: 220
- Fat: 6g
- Saturated Fat: 2g
- Carbohydrates: 38g
- Fiber: 2g
- Sugar: 4g (Natural sugar from fruit/milk, plus the small amount added for the yeast)
- Protein: 6g
- Sodium: 250mg
- Cholesterol: 25mg
It’s a wonderfully balanced slice, offering a surprising amount of protein and fiber for a simple yeast bread. It really feels like eating dessert, but it definitely packs some good staying power!
Share Your Texture Rich Homemade Loaves
Now that you’ve conquered the art of folding in your favorite bits and pieces, I absolutely want to see what you came up with! Did you stick with the classic walnut and cranberry? Or did you go rogue with savory olives and herbs? Seriously, tell me everything in the comments below!
Baking is a shared journey, especially when we’re creating texture rich homemade loaves that look and smell amazing. Drop a rating or leave a comment sharing any modifications you made that worked well for you. Your experience helps the next person who sets out to bake their first perfect loaf.
If your baking adventure was a success, why not share the love by leaving a rating for the recipe? And if you’re already thinking about what to bake next, I have an amazing Chewy Sugar Cookie recipe that’s perfect for when you need a complete change of pace from yeasted dough!
Estimated Nutritional Breakdown for this yeast bread with inclusions
I know many of you like to keep track of what you’re eating, and since we want you to feel confident eating this rich and satisfying loaf, here is my best estimate for the nutritional information. Remember, this is based on using all-purpose flour and standard measures for the butter and sugar. If you load it up with extra honey or use all whole wheat flour, these numbers will shift a bit!
This breakdown is for a single slice, assuming the recipe yields 12 generous slices:
- Calories: 220
- Fat: 6g
- Saturated Fat: 2g
- Carbohydrates: 38g
- Fiber: 2g
- Sugar: 4g (Natural sugar from fruit/milk, plus the small amount added for the yeast)
- Protein: 6g
- Sodium: 250mg
- Cholesterol: 25mg
It’s a wonderfully balanced slice, offering a surprising amount of protein and fiber for a simple yeast bread. It really feels like eating dessert, but it definitely packs some good staying power!
Share Your Texture Rich Homemade Loaves
Now that you’ve conquered the great adventure of baking with chunky mix-ins, I absolutely want to see what you came up with! Did you stick to the classic walnut and cranberry combo we used for this yeast bread with inclusions? Or did you go rogue with something totally wild—maybe savory olives and sharp herbs coming through? Seriously, tell me everything in the comments below; I love hearing about your kitchen experiments.
Baking is such a shared journey, especially when we’re creating texture rich homemade loaves that look and smell amazing right out of the oven. Getting that perfect crumb with substantial mix-ins is a real win, and I want to celebrate with you!
Drop a rating for the recipe right underneath this section, or leave a comment sharing which inclusions you chose. Your feedback really helps the next person who clicks on this recipe feel confident trying it out. And hey, if you’ve got your bread fix covered for now and are looking for something completely different, I have an amazing Chewy Sugar Cookie recipe that’s perfect for when you need a totally different kind of baking project!
PrintRustic Walnut and Cranberry Yeast Bread
A straightforward recipe for homemade inclusion bread featuring walnuts and dried cranberries, resulting in a textured, flavorful loaf.
- Prep Time: 20 min
- Cook Time: 35 min
- Total Time: 2 hr 30 min
- Yield: 1 loaf 1x
- Category: Baking
- Method: Baking
- Cuisine: American
- Diet: Vegetarian
Ingredients
Scale- 1 cup warm water (105-115°F)
- 2 1/4 teaspoons active dry yeast
- 1 tablespoon granulated sugar
- 3 cups all-purpose flour
- 1 teaspoon salt
- 1/4 cup whole milk, warmed
- 2 tablespoons unsalted butter, softened
- 1 large egg, lightly beaten
- 1 cup chopped walnuts
- 3/4 cup dried cranberries
Instructions
- Combine the warm water, yeast, and sugar in a small bowl. Let this mixture sit for 5 to 10 minutes until foamy. This activates the yeast.
- In a large mixing bowl, whisk together the flour and salt.
- Add the yeast mixture, warm milk, softened butter, and beaten egg to the dry ingredients. Mix with a wooden spoon or a stand mixer on low speed until a shaggy dough forms.
- Knead the dough on a lightly floured surface for 8 to 10 minutes until it becomes smooth and elastic. If using a stand mixer, use the dough hook for 6 to 8 minutes.
- Flatten the dough slightly. Distribute the walnuts and dried cranberries evenly over the dough surface. Fold the dough over and gently knead for 1 to 2 minutes to incorporate the inclusions without tearing the dough structure.
- Place the dough in a lightly oiled bowl, turning to coat. Cover the bowl with plastic wrap or a clean towel. Let the dough rise in a warm place for 1 to 1.5 hours, or until doubled in size. This is the first proof.
- Gently punch down the risen dough to release the air. Shape the dough into a tight loaf and place it in a greased standard 9×5 inch loaf pan.
- Cover the loaf pan loosely and let it rise again in a warm spot for 30 to 45 minutes, or until the dough has crested about 1 inch over the rim of the pan. This is the second proof.
- Preheat your oven to 375°F (190°C) during the last 15 minutes of the second proof.
- Bake for 30 to 35 minutes, or until the crust is golden brown and the internal temperature reaches 200-205°F.
- Remove the bread from the pan immediately and cool completely on a wire rack before slicing.
Notes
- To prevent the fruit and nuts from sinking to the bottom, lightly dust the walnuts and cranberries with 1 tablespoon of the measured flour before adding them to the dough in Step 5.
- For a richer flavor, substitute the all-purpose flour with a mix of 2 cups all-purpose and 1 cup bread flour.
- If your kitchen is cool, place the covered dough bowl in a turned-off oven with the light on to create a warm proofing environment.
Nutrition
- Serving Size: 1 slice
- Calories: 220
- Sugar: 4
- Sodium: 250
- Fat: 6
- Saturated Fat: 2
- Unsaturated Fat: 4
- Trans Fat: 0
- Carbohydrates: 38
- Fiber: 2
- Protein: 6
- Cholesterol: 25