
Friends, let’s be honest: the little cylinders you find in the grocery bag? They are fine. But “fine” isn’t what we’re aiming for in our kitchens, is it? Homemade marshmallows are an entirely different experience—they’re cloud-like, intensely vanilla-flavored, and they actually *melt* the way they should inside a cup of cocoa. Trust me, once you try them, you won’t go back. You can see how seriously I take perfectly textured desserts when you look at my recipe for my chocolate meringue pie, and marshmallows are no different!
When I first set out to tackle fluffy homemade marshmallows from scratch, it felt like I needed a science degree just to get the sugar right. But that is exactly what I love doing here at Cooking Zenith—taking those recipes that look intimidating, like this Easy, Fluffy Homemade Vanilla Marshmallows From Scratch, and breaking them down until they fit perfectly into a busy weeknight schedule. I promise you, making this soft homemade candy is shockingly easy and requires only a few simple steps to achieve that pillowy texture we all dream about.
This recipe is my go-to foundational technique. If you can master this, you can make any flavor you want! We’re aiming for pure, melt-in-your-mouth magic.
- Why This Homemade Marshmallows Recipe Is Your New Favorite
- Gathering Ingredients for Homemade Marshmallows
- Step-by-Step Guide: How to Make Homemade Marshmallows From Scratch
- Tips for Perfect Homemade Marshmallows Success
- Ingredient Notes and Substitutions for Homemade Marshmallows
- Storage and Make-Ahead Tips for Your Homemade Confectionery
- Serving Suggestions for Homemade Marshmallows
- Frequently Asked Questions About Homemade Marshmallows
- Estimated Nutritional Data for Homemade Marshmallows
- Share Your Homemade Vanilla Treats
Why This Homemade Marshmallows Recipe Is Your New Favorite
I know you’re curious, so let me tell you exactly why this homemade marshmallows recipe wins every time. We aren’t just making something sweet; we are creating an experience! Forget that weird, waxy texture you get from the store; these are legitimately cloud-like.
Here’s what you gain when you use my technique:
- Pillowy Texture: They are genuinely melt in your mouth soft. Seriously, they practically disappear the second they hit your tongue.
- Beginner Friendly: Yep, this is designed to be the Best Marshmallow Recipe Ever for anyone new to candy making. Don’t let that shiny sugar scare you!
- Ultimate Use Case: Picture this: the perfect topping for your mug of hot cocoa, which reminds me of my chocolate cookies, or the absolute star of your next bonfire s’mores night.
If you love that rich flavor profile, you’ll adore how these taste nearly as amazing as my honey butter!
Gathering Ingredients for Homemade Marshmallows
The good news about making homemade marshmallows is that you likely have most of this stuff right now! We’re relying on just a handful of items to create that soft, pillowy magic. For the very best results, promise me you’ll use pure vanilla extract; don’t skimp there!
You’ll need:
- 3 tablespoons unflavored gelatin powder
- 1 cup cold water, divided (we split this up, pay attention!)
- 1 cup granulated sugar
- 1 cup light corn syrup
- 1/4 cup water (for the syrup)
- 1/4 teaspoon salt
- 1 teaspoon pure vanilla extract
- For Dusting: 1/2 cup powdered sugar mixed with 1/4 cup cornstarch
It’s simple stuff, but the combination delivers that melt-in-your-mouth texture that makes this the Best Marshmallow Recipe Ever. If you want to see what those simple ingredients can do in a baking context, check out my pumpkin crunch cake!
Step-by-Step Guide: How to Make Homemade Marshmallows From Scratch
Okay, here’s where the fun starts! This is the part that feels like real candy making, but I promise, it’s totally doable. We’re walking through the process to get those perfect, homemade marshmallows that are fluffy and airy. Pay close attention to the temperatures, because that’s how we guarantee this turns into an amazing batch of DIY marshmallow treats and not sticky soup. Mastering this technique means you’ll never look back, much like when you master my no-cook pizza sauce!
Preparing the Gelatin Base
First things first, we need to wake up that gelatin! Grab a small bowl and sprinkle your unflavored gelatin powder over about half a cup of the cold water we measured out. You absolutely have to use cold water here; hot water will make it seize up! Just let it sit undisturbed for a solid 10 minutes. This blooming time is non-negotiable—it lets the gelatin absorb the water so it can work its magic later when we whisk it into that hot syrup.
Cooking the Sugar Syrup for Fluffy Vanilla Marshmallows
Next up is the hard-ball stage! In a saucepan, whisk together your sugar, corn syrup, salt, and the remaining half-cup of water. Heat this over medium heat, stirring *just* until that sugar dissolves. Seriously, stop stirring once it starts boiling. Then, you attach your candy thermometer and let it climb until it hits exactly 240 degrees Fahrenheit. That temperature is the secret to that incredible, light texture we want in these fluffy vanilla marshmallows. If you absolutely cannot find a thermometer (though I suggest grabbing one for apple fritter bread too!), boil vigorously for about one minute after it reaches a fast, steady rolling boil. Remove it from the heat immediately once done.
Whipping the Homemade Marshmallow Mixture
This part is messy, so be careful! Slowly pour that hot syrup down the side of your stand mixer bowl—which already has the bloomed gelatin in it—while the whisk attachment is running on low. Once it’s all incorporated (don’t let the whisk splash it out!), crank that speed up high! You need to beat this mixture for a full 12 to 15 minutes. You’ll know it’s ready when the bowl has cooled down quite a bit, the mixture looks brilliantly glossy, and it holds stiff peaks. Right at the end, beat in your vanilla extract.
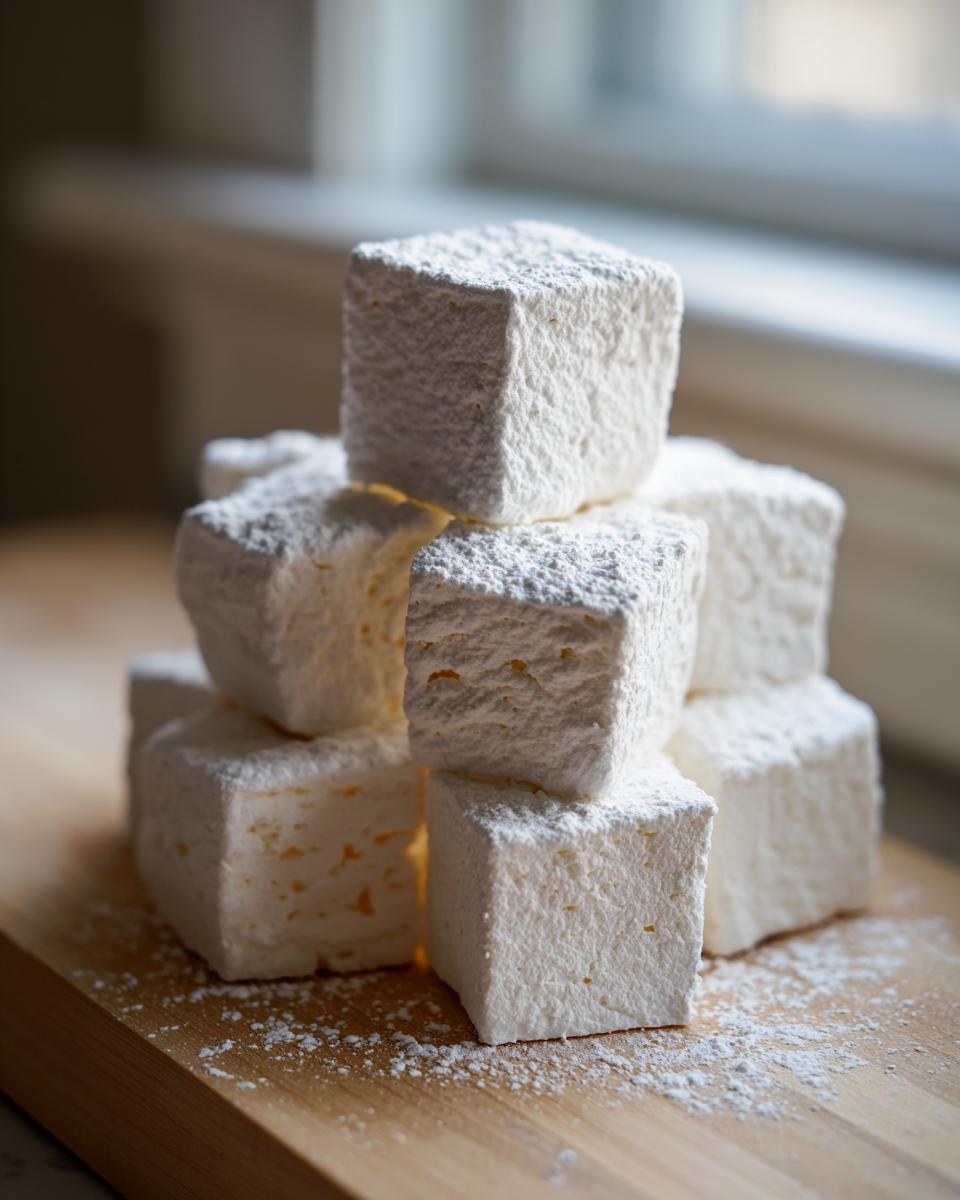
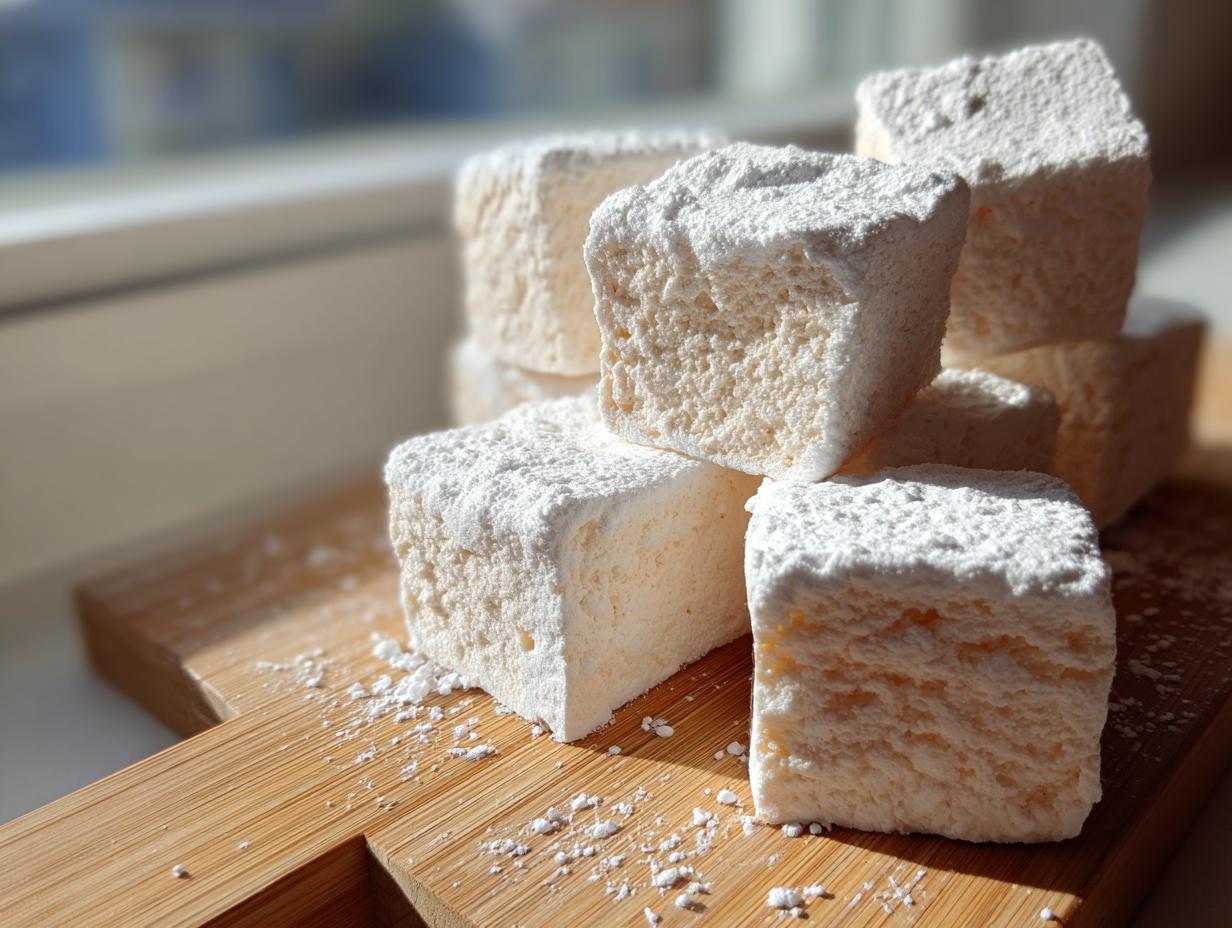
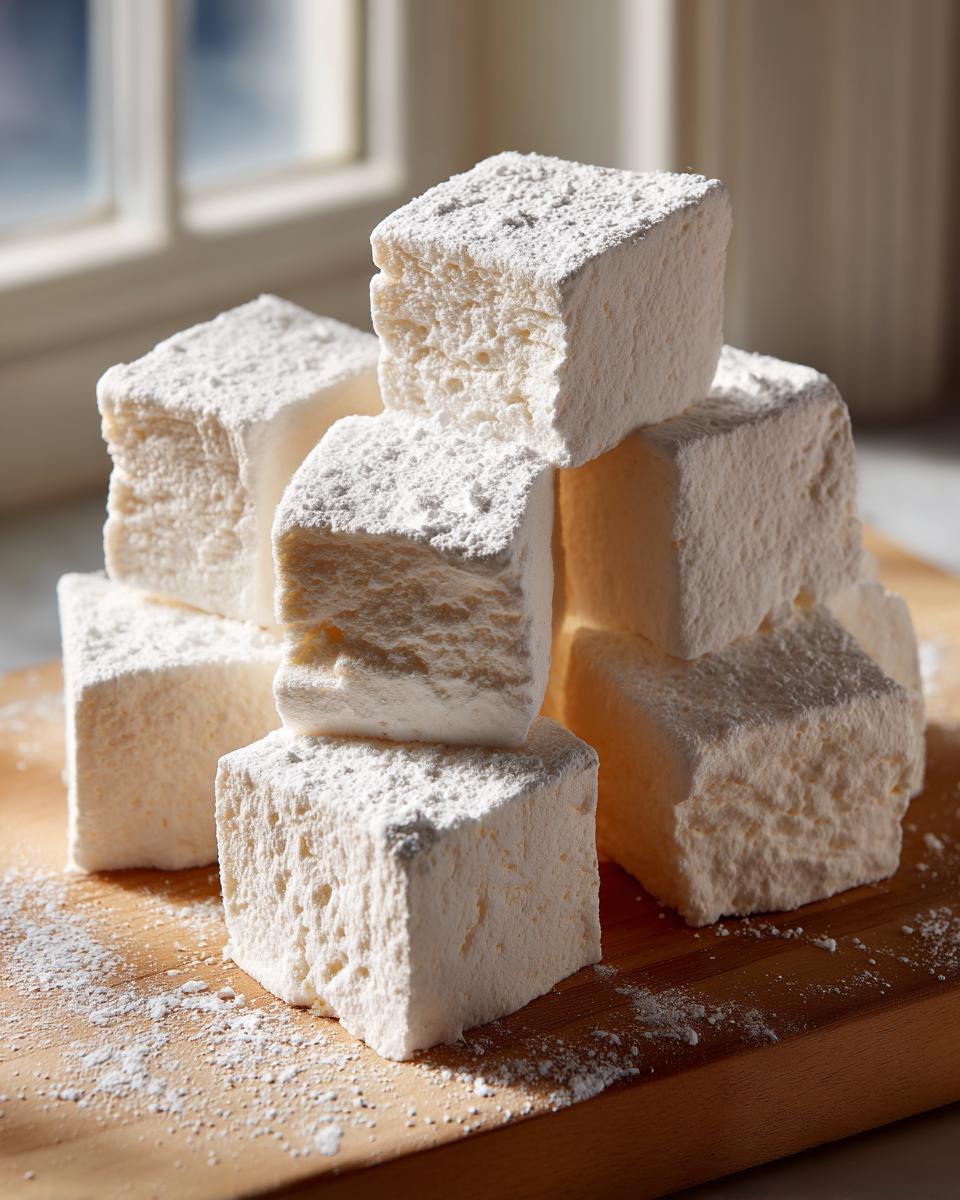
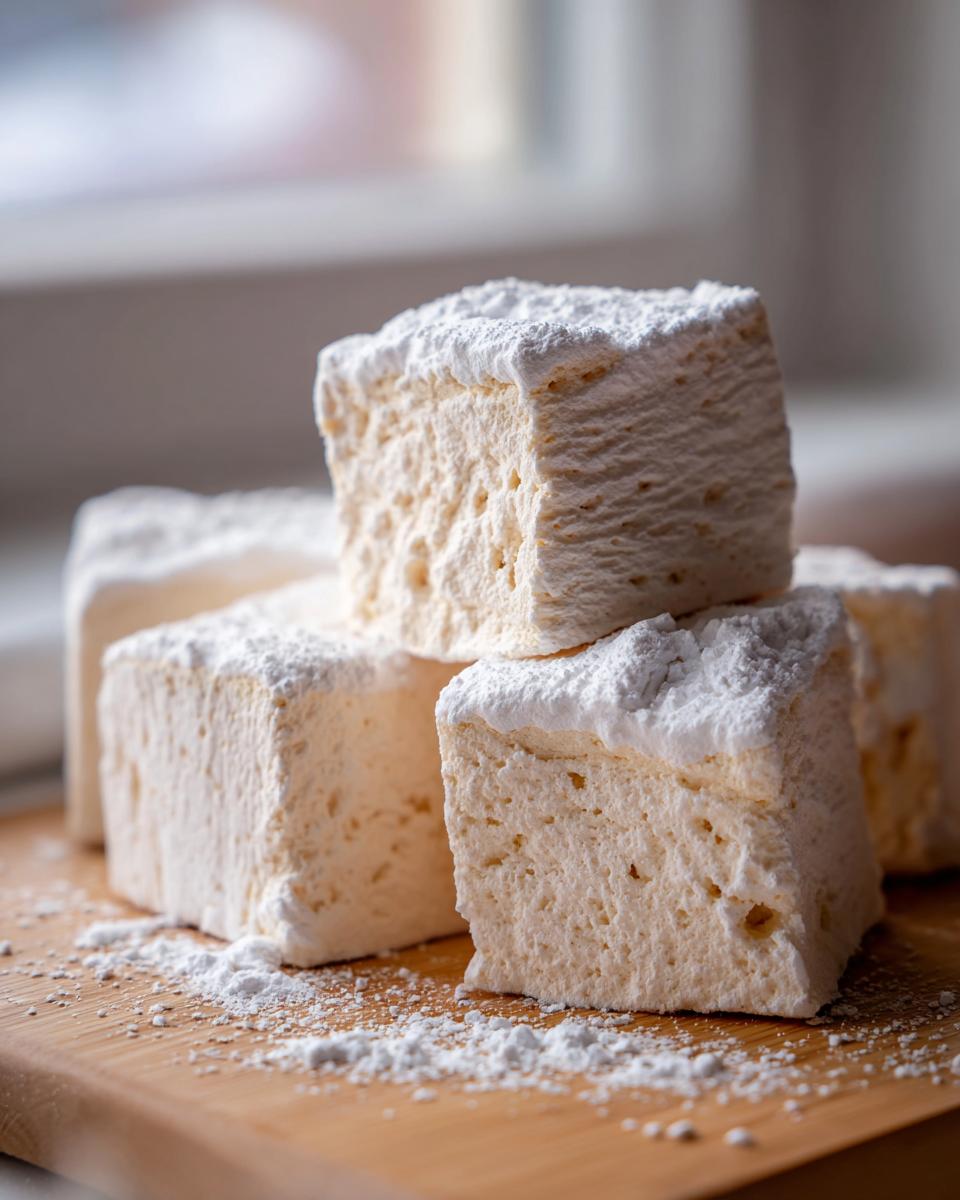
Setting and Cutting Your Soft Homemade Candy
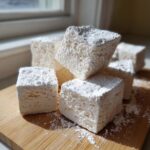
Prep your 9×13 pan by lightly greasing it. Pour that gorgeous, thick marshmallow fluff into the pan—it will be heavy! Dust the top lightly and then, THIS IS KEY: let it sit on the counter, uncovered, for at least four hours, but overnight is much better. Do not put this in the fridge, or you’ll ruin the texture! Once it’s fully set, dust a clean cutting board well with your powdered sugar and cornstarch mix. Flip the whole slab out. I use a large, sharp knife that I’ve oiled slightly—it makes cutting these squares so much cleaner for perfect soft homemade candy presentation.
Tips for Perfect Homemade Marshmallows Success
Getting that perfect, airy texture for your homemade marshmallows often comes down to fighting the elements, especially humidity! If it’s raining outside, your marshmallows might take a little longer to set up, so just be patient. Never, ever rush the 12-minute whipping time, or you’ll end up with sticky goo instead of cloud-like candy.
Another tip for success? The dusting mixture is your secret weapon. Don’t be shy with that cornstarch/powdered sugar blend when you cut them. If you skip it or use too little, they will bond together into one giant, sticky marshmallow brick. Once you’ve mastered this, you’ll be ready to move onto something challenging, like my famous baked mac and cheese recipe. Also, if you find yourself without a stand mixer for your cinnamon rolls, you’ll understand why it’s essential here!
Ingredient Notes and Substitutions for Homemade Marshmallows
We need to talk about corn syrup for just a second, because I know some of you are looking for No Corn Syrup Marshmallows. Look, for this *specific* Homemade Marshmallow Recipe, it’s crucial. Corn syrup is an invert sugar, and it stops the granulated sugar from crystalizing, which is how we get those wonderfully smooth, almost liquid-free interiors in our pillowy marshmallow recipe.
If you absolutely must skip it, you *can* sometimes substitute with extra liquid sugar like honey or maple syrup, but it changes the texture entirely—they won’t whip up quite as high or hold that light structure. Also, make sure you’re using standard unflavored gelatin; bloom strength really matters here for the final set!
For best results, stick to the recipe, but if you want to see what other classic techniques work perfectly, check out my sweet potato pie guide!
Storage and Make-Ahead Tips for Your Homemade Confectionery
The best part about these homemade marshmallows is that you can totally make them ahead! Since they are a fantastic option for homemade edible gifts, this is a huge bonus. Once you’ve cut them into squares and given them a good toss in that sweet dusting powder, store them in an airtight container at room temperature.
They keep beautifully for up to two weeks this way, tasting just as fresh as the day you made them. Seriously, how easy is that? You just need to make sure they are completely dry before sealing them up. If you wanted to try freezing them, you totally can, but they tend to absorb moisture when thawing, so I usually just stick to making a big batch and giving them away!
If you’re making these for a special occasion, try making your batch of chocolate covered strawberries a few days before, too!
Serving Suggestions for Homemade Marshmallows
Now that you’ve mastered these homemade marshmallows, the real fun begins—eating them! They are wonderful simply eaten plain, but they truly shine when warming up a drink. They make the absolute best toppers for your favorite hot cocoa; trust me, the store-bought kind just dissolve into a sad, sweet puddle.
If you’re heading outdoors, these are built perfectly for roasting because they hold their shape! These cut squares are the perfect size for next-level marshmallows for s’mores. Want to get fancy? Try adding almond extract instead of vanilla, or stir in some orange zest during that final minute of whipping to create some fun gourmet marshmallow recipes for your next batch!

For more amazing treats featuring chocolate, you have to try my chocolate brownie cookies, or perhaps you can whip up a pitcher of my homemade lemonade to wash them down!
Frequently Asked Questions About Homemade Marshmallows
I get so many questions about this recipe, which tells me a lot of you are excited to make these easy marshmallows from scratch! It’s all about texture, right? We want that cloud-like feel, not something tough or sticky. Here are the answers to the top things I hear from others trying this homemade confectionery! If you ever see me post a picture of my layered pumpkin crunch cake, you know I love simple, clear steps, and that’s what we’re doing here.
Can I make these Easy Marshmallows From Scratch without a Stand Mixer?
Look, I totally get that not everyone has a powerful stand mixer—but for this recipe, it’s kind of your secret weapon. You need serious, sustained high speed for 12 to 15 minutes to get the air incorporated just right for that truly fluffy vanilla marshmallows texture. If you only have a hand mixer, you can certainly try, but brace yourself for a serious arm workout! I highly recommend using the strongest hand mixer you own, or just bookmark this as the recipe where you finally decide to invest in the mixer. It really is the key to the best marshmallow recipe ever.
Why are my homemade marshmallows sticky?
Sticking is the number one complaint! Usually, this means one of two things happened. Either you cut them too soon before they fully set (they need that **4-hour minimum**!), or you didn’t use enough dusting powder. Remember, the mix of powdered sugar and cornstarch is what keeps these gorgeous bites from fusing into one block. If they are sticky, just dump more of that powder on them until they feel dry to the touch. That’s how you ensure they achieve that glorious melt in your mouth quality!
Can I use honey or maple syrup instead of corn syrup in this Homemade Marshmallow Recipe?
This is where people get caught up trying to make No Corn Syrup Marshmallows. While I totally support finding alternatives, corn syrup plays a structure role here by preventing the sugar from turning grainy. If you swap it out for pure honey or maple syrup, the final product will be softer and possibly won’t whip up as high. They’ll still taste good, but they won’t have the exact airy lift that this Homemade Marshmallow Recipe is known for. If you must avoid it, search for a specialized recipe, but for this one, stick to the syrup!
Estimated Nutritional Data for Homemade Marshmallows
Now, I always tell folks that baking is about joy, not strict calorie counting, especially when you are making something as purely fun as homemade marshmallows! But because I believe in being totally transparent about what goes into our treats here at Cooking Zenith, I’ve laid out the estimated nutritional breakdown for you below. Remember, these measurements are just an estimate based on the standard ingredients list for a single serving size, which is about four squares.
If you’re curious about how these compare to some things I make for a healthier weekday lunch, you should check out my ideas for quick healthy lunch ideas!
- Serving Size: 4 squares
- Calories: 150
- Sugar: 30g
- Sodium: 15mg
- Fat: 0g
- Saturated Fat: 0g
- Carbohydrates: 38g
- Protein: 2g
- Cholesterol: 0mg
Since this recipe is basically pure sugar and gelatin, you can see the numbers lean heavy on the carbs, naturally! But that’s okay—these are meant for special occasions, like when you need the perfect topping for a mug of cocoa. They are just too light and fluffy to worry about too much!
Share Your Homemade Vanilla Treats
Wow, I truly hope you loved making these homemade marshmallows! Now that you have achieved fluffy perfection, I want to see them! Your creation is part of our Cooking Zenith community now, and sharing your results helps other home cooks feel confident trying this recipe.
Don’t keep that joy all to yourself! Please leave a rating below the recipe so I know exactly how this turned out for you. Did they set up perfectly? Did the vanilla flavor pop?
If you snapped a picture while you were cutting your perfect squares, tag me on social media! Seeing real-life results—whether they’re destined for a fancy hot cocoa bar or just sitting on the counter waiting to be snacked on—makes my day. Use the hashtag so I can easily spot your beautiful homemade vanilla treats.
If you have any lingering questions about the syrup or the setting process, drop a detailed comment in the box below. I try to answer every single one personally. Or, if you want to send a more direct note, you can always reach out through my contact page. Happy cooking, friends!
PrintEasy, Fluffy Homemade Vanilla Marshmallows From Scratch
Make soft, pillowy homemade vanilla marshmallows that surpass store-bought quality. This recipe is simple for beginners and perfect for hot cocoa or s’mores.
- Prep Time: 20 min
- Cook Time: 15 min
- Total Time: 4 hr 35 min
- Yield: About 4 dozen 1x
- Category: Dessert
- Method: Candy Making
- Cuisine: American
- Diet: Vegetarian
Ingredients
- 3 tablespoons unflavored gelatin powder
- 1 cup cold water, divided
- 1 cup granulated sugar
- 1 cup light corn syrup
- 1/4 cup water
- 1/4 teaspoon salt
- 1 teaspoon pure vanilla extract
- 1/2 cup powdered sugar, for dusting
- 1/4 cup cornstarch, for dusting
Instructions
- Lightly grease a 9×13 inch baking pan. In a small bowl, sprinkle the gelatin over 1/2 cup of the cold water. Let it sit for 10 minutes to bloom.
- In a medium saucepan, combine the granulated sugar, corn syrup, salt, and the remaining 1/2 cup of cold water. Heat over medium heat, stirring until the sugar dissolves.
- Attach a candy thermometer to the side of the pan. Continue to cook the mixture without stirring until it reaches 240 degrees Fahrenheit (soft-ball stage). This is the best way to ensure fluffy marshmallows.
- Remove the sugar mixture from the heat. Carefully pour the bloomed gelatin into the bowl of a stand mixer fitted with the whisk attachment.
- With the mixer running on low speed, slowly pour the hot sugar syrup down the side of the bowl into the gelatin mixture.
- Increase the mixer speed to high and beat for 12 to 15 minutes until the mixture is very thick, glossy, and has cooled significantly. Beat in the vanilla extract during the last minute.
- In a small bowl, whisk together the powdered sugar and cornstarch for dusting.
- Pour the marshmallow mixture into the prepared baking pan. Lightly dust the top with some of the powdered sugar mixture.
- Let the marshmallows set at room temperature, uncovered, for at least 4 hours, or preferably overnight. Do not refrigerate.
- Once set, dust a clean cutting board generously with the remaining powdered sugar mixture. Invert the marshmallow slab onto the board.
- Use a sharp, oiled knife or pizza cutter to cut the slab into squares. Toss the cut pieces in the remaining dusting mixture to prevent sticking.
Notes
- To make marshmallows for s’mores, cut them into thick squares before they fully dry.
- If you do not have a candy thermometer, boil the sugar mixture until it reaches a slow, steady rolling boil for about 1 minute after it begins to bubble vigorously.
- Store your homemade confectionery in an airtight container at room temperature for up to two weeks.
Nutrition
- Serving Size: 4 squares
- Calories: 150
- Sugar: 30
- Sodium: 15
- Fat: 0
- Saturated Fat: 0
- Unsaturated Fat: 0
- Trans Fat: 0
- Carbohydrates: 38
- Fiber: 0
- Protein: 2
- Cholesterol: 0