
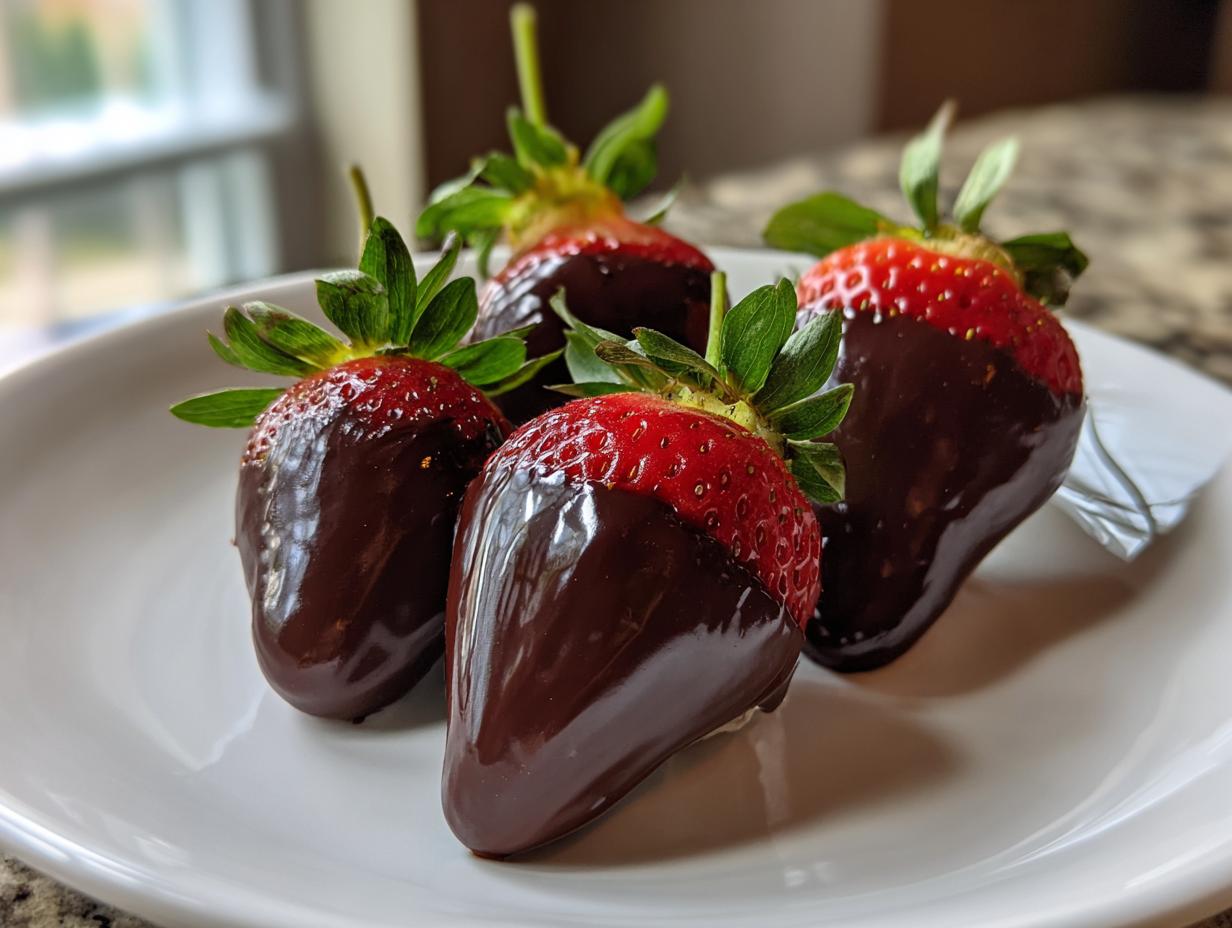
Honestly, sometimes the most stunning desserts are also the easiest ones to pull off, and I mean *truly* stunning. Forget complicated baking projects when you need something that screams ‘gourmet’ but takes maybe fifteen minutes of effort. That’s exactly what we’re doing with chocolate covered strawberries. You look at that perfect, glossy shell and think, ‘Wow, that must have taken forever!’ But trust me, it’s all about the technique, not the time commitment. I’ve spent years figuring out the kitchen hacks that turn standard treats into something that looks ready for a fancy bakery window. This recipe is my absolute winner for achieving that coveted smooth, crisp coating every single time without turning your living room into a meltdown disaster zone. We’re going to make these feel accessible, making them perfect for a spontaneous date night or even just treating yourself!
- Why You'll Love This Easy Chocolate Covered Strawberries Recipe
- Essential Ingredients for Perfect Chocolate Covered Strawberries
- Equipment Needed for Your Chocolate Covered Strawberries
- How to Dip Strawberries in Chocolate: The Ultimate Chocolate Covered Strawberries Instructions
- Making Chocolate Covered Strawberries Look Professional with Toppings
- Storage and Make-Ahead Tips for Your Chocolate Covered Strawberries
- Variations: White Chocolate Dipped Strawberries Tutorial and More
- Frequently Asked Questions About Making Chocolate Covered Strawberries
- Serving Suggestions for Your Homemade Chocolate Dipped Strawberries
Why You’ll Love This Easy Chocolate Covered Strawberries Recipe
This isn’t just another recipe; it’s your new go-to for effortless elegance. When you need something impressive fast, this is the answer. I love how flexible they are—they work just as well as a thoughtful gift as they do piled high on a quick decadent dessert platter for guests.
- Speedy Treat: Seriously, prep time is usually under 15 minutes. You can whip these up right before guests arrive!
- Professional Shine: We focus heavily on the technique that gives you that perfect, glossy coating that shatters beautifully when you bite into it.
- Dipping Confidence: My process makes it nearly foolproof, even if you’ve struggled with smooth chocolate dips before.
- Versatility for Any Event: They are the quintessential romantic dessert idea, but they also look fantastic on any simple party fruit platter.
Essential Ingredients for Perfect Chocolate Covered Strawberries
You really don’t need much for these, which is part of why I love them so much! We are focusing on quality here because that’s where the magic comes from. When you’re making something this simple, every single ingredient has to pull its weight. For the chocolate, please, don’t grab the cheapest chips you see. The best chocolate for dipping strawberries is really crucial for that smooth texture we talked about.
- 1 pound fresh strawberries, washed and completely dried (yes, dried!), stems on.
- 12 ounces high-quality melting chocolate: I recommend dark or milk chocolate wafers, or good quality chopped bars.
- 1 teaspoon coconut oil or vegetable shortening (this is optional, but trust me on this one!).
Ingredient Notes and Substitutions for Chocolate Covered Strawberries
The secret little addition here is the coconut oil or shortening. If you’re trying to achieve that glossy coating chocolate strawberries technique, this tiny bit of added fat helps lower the viscosity of the chocolate, making it flow beautifully and set thin and shiny—no dull chocolate shells here!
Now, about white chocolate. If you’re following a white chocolate dipped strawberries tutorial, be extra careful. White chocolate is temperamental; it loves to seize up. If you use white chocolate, make sure you use high-quality wafers—candy melts are probably safer if you are nervous, but real white chocolate tastes so much better if you manage it!
Equipment Needed for Your Chocolate Covered Strawberries
Don’t let the simplicity of the ingredients fool you; having the right tools makes the dipping process so much cleaner and less stressful. We aren’t using fancy gadgets here! Honestly, a good spatula and a bowl you don’t mind getting messy are the main players.
First up, you definitely need a few bowls, maybe one for melting and maybe a little one if you decide on drizzles later. The most essential item, though, is parchment paper. You have to line your baking sheet with it! If you try to set these directly on foil or a plate, they will glue themselves on, and you’ll end up serving broken treats. I always have a sheet ready to go before the chocolate even starts melting. It’s the easiest way to get these beautiful homemade chocolate dipped strawberries onto the tray without fuss.
How to Dip Strawberries in Chocolate: The Ultimate Chocolate Covered Strawberries Instructions
Alright, deep breath! This is the moment where we turn simple fruit and melted chocolate into something fantastic. The actual dipping process is fast, maybe thirty seconds per berry, so make sure you have everything lined up and ready to go. If you have someone helping you, assign one person to the dipping and one person to the topping application. That way, nothing sits around waiting for the chocolate to harden.
Let’s start with the fruit prep, because this is non-negotiable advice for anyone wondering how to dip strawberries in chocolate without them looking sad and lumpy. You must wash them gently and then let them air dry. I mean it—completely dry! If there is even a tiny bead of water clinging to that strawberry, the chocolate will seize up or refuse to stick. I sometimes use paper towels very gently, but I prefer letting them sit out for 20 minutes first. Make sure you leave those cute little green stems attached; they are your handles!
Next, melt the chocolate. I always microwave mine in short bursts—no more than 30 seconds at a time—and stir well between each burst. Why? Because if you overheat good chocolate, it gets grainy and awful. You want it smooth and luxurious, not chunky. Once it’s mostly melted, take it out and stir until the residual heat finishes the job. If you are making chocolate covered strawberries, you want that perfect texture right away!
Holding the strawberry by the leaves, dip it in! Tilt the bowl so you can submerge most of the berry but leave a little bit of the bright red showing at the top if you like that classic look. Now for the magic part, where we move from ‘homemade’ to ‘gourmet.’
Mastering the Glossy Coating Chocolate Strawberries Technique
This technique is what separates the amateurs from the pros, and it’s so simple! Remember that optional teaspoon of oil or shortening? Stir that in right before dipping. That tiny bit of added fat is what gives you that incredible, perfect chocolate shell strawberries look. It makes the melted chocolate flow like silk.
Once the berry is coated, don’t just pull it straight up! Lift it out and gently tap the back of your wrist against the side of the bowl. You don’t need to violently shake it—just a couple of gentle taps. This action encourages the excess, thick chocolate to drip back into the bowl. This step is vital if you want that thin, crisp shell rather than a thick, clunky layer of chocolate that cracks apart when you eat it.
Set the berry immediately onto your waiting parchment-lined tray. If you’re adding toppings, now is the time to sprinkle them on before the shell sets up!
Making Chocolate Covered Strawberries Look Professional with Toppings
Once those gorgeous, glossy berries are dipped, the fun part begins: decorating! This is how you take your simple chocolate covered strawberries from ‘nice snack’ to ‘showstopper centerpiece.’ Honestly, you don’t need much to make them look high-end; a little texture goes a long way.
For a really quick pop, grab some chopped pecans or finely crushed hazelnuts and sprinkle lightly as soon as they come out of the chocolate bath. Rainbow sprinkles look festive for parties, but for that elegant look, try crushed freeze-dried raspberries—the color contrast is stunning!
If you want to achieve that professional drizzle effect, the trick is contrast. Melt a small amount of white chocolate (if you used dark or milk chocolate for the base). Put that thin chocolate into a tiny piping bag, or just use a zip-top bag and snip the tiniest corner off. Holding the bag high above the tray, zig-zag quickly across the berries. This simple drizzle shows everyone how to make chocolate covered strawberries look professional without needing piping skills!
Storage and Make-Ahead Tips for Your Chocolate Covered Strawberries
Okay, here’s the reality check for these beautiful delights. Because they are covered in fresh fruit, they are best eaten the day you make them. Seriously, the texture is unmatched when they are fresh! They are the perfect chocolate covered strawberries no bake option because you don’t have to wait for anything to bake, but they don’t last forever.
If you absolutely must make them ahead, keep them in a single layer in an airtight container in the refrigerator. But aim for no more than 24 hours. Any longer and the moisture from the strawberry starts bleeding into the chocolate, which can make the shell go soft or even look a little dusty gray. Trust me, you want that crackle, so plan to dip them close to serving time!
Variations: White Chocolate Dipped Strawberries Tutorial and More
While the dark chocolate classic is unbeatable, sometimes you want a change! If you’ve been searching for a white chocolate dipped strawberries tutorial, remember what I said about temperature: white chocolate is fussy. It has milk solids, which makes it prone to seizing if you overheat it, even a little. Use high-quality white chocolate chips or candy melts for the smoothest results when trying this variation.
Another way I like to change things up, especially around the holidays, is to make chocolate-dipped *something else*. If you want something decadent but different, try dipping bakery-style brownie bites! You use the exact same melting and dipping technique for an amazing bite-sized treat. For more white chocolate inspiration, check out this great guide here.
Frequently Asked Questions About Making Chocolate Covered Strawberries
I know you might still have a few lingering questions about achieving that perfect look. It’s all about nailing down those little details that make the difference between good and great! These truly do make gourmet fresh fruit treats without the fuss.
Troubleshooting: Why Won’t My Chocolate Stick to the Strawberries?
This is the biggest frustration people have when trying to make chocolate covered strawberries look amazing! Nine times out of ten, this problem comes down to one culprit: water. If you washed your berries but let them sit out to dry for only five minutes, that residual surface moisture will fight the chocolate every step of the way. Think of it like water trying to mix with oil—it just won’t happen smoothly!
Also, check your chocolate temperature. If your chocolate seizes up and becomes thick and clumpy, it either got water splashed into it, or you heated it too high, causing the cocoa solids to separate. If it’s just sliding right off thinly, you didn’t leave enough time for the chocolate to set before moving them on the tray, or you skipped the coconut oil trick we talked about for that perfect shell!
What is the best way to store these if I need them for a party?
Keep them chilled in a single layer, but honestly, try to serve them within a few hours of dipping for the best texture. They are wonderful for setting out right before guests arrive! They’re a fantastic choice for elegant party platters.
Can I use milk chocolate instead of dark for a sweeter treat?
Absolutely! Milk chocolate is great, especially if you are making these for kids or if you prefer a sweeter profile over the richness of dark chocolate. Just watch the thickness, as milk chocolate tends to be a bit softer than dark ones once they have set up, so use that little bit of oil for extra support.
Are these suitable for a romantic dessert ideas night?
They are the ultimate choice! Paired with some nice sparkling wine or fresh coffee, they are unbeatable for an elegant and simple romantic dessert ideas night. They just feel special, don’t they?
Do I need to temper the chocolate for this recipe?
Nope! That’s the main reason this is an *easy* recipe. If you try to temper, you’ll get a beautiful shine, yes, but it’s fussy and time-consuming. We rely on adding a little extra fat (the oil/shortening) to stabilize the melted chocolate, which prevents it from needing the whole tempering process but still gives you a nice, snappy finish that sets up quickly. If you’re looking for other easy refreshment ideas to serve alongside, check out my guide for the best classic lemonade!
Serving Suggestions for Your Homemade Chocolate Dipped Strawberries
When it’s time to serve these beauties, presentation counts! Skip plating them individually. Instead, arrange your homemade chocolate dipped strawberries on a clean white platter or even nestle them into a bowl lined with fresh, crisp lettuce leaves—it makes them visually pop. They look especially stunning alongside other simple elegant homemade sweets like mini lemon tarts or even just fresh raspberries.
For serving, they are fantastic as a light finish to a heavy meal. I often pair them with homemade lemonade in the summer or serve them alongside a chilled glass of Prosecco for date night. If you want a fun cocktail pairing, these are lovely with a chilled Bellini. For more styling inspiration, this guide on elegant presentation might give you some extra ideas!
PrintUltimate Easy Chocolate Covered Strawberries with Professional Dipping Tips

Make professional-looking, glossy chocolate covered strawberries at home with this simple recipe. This guide provides clear steps for perfect dipping every time, ideal for any occasion.
- Prep Time: 15 min
- Cook Time: 5 min
- Total Time: 20 min
- Yield: About 18-20 servings 1x
- Category: Dessert
- Method: Dipping
- Cuisine: American
- Diet: Vegetarian
Ingredients
- 1 pound fresh strawberries, washed and completely dried
- 12 ounces high-quality melting chocolate (dark, milk, or white)
- 1 teaspoon coconut oil or vegetable shortening (optional, for gloss)
Instructions
- Prepare the strawberries: Gently wash the strawberries and dry them completely. Moisture prevents the chocolate from sticking. Leave the green stems on for easy handling.
- Melt the chocolate: Place the chocolate in a microwave-safe bowl. Microwave in 30-second intervals, stirring well after each interval, until the chocolate is mostly melted.
- Achieve a smooth coating: Stir in the coconut oil or shortening if using. Continue stirring until the chocolate is completely smooth and glossy. Do not overheat the chocolate.
- Dip the strawberries: Hold a strawberry by the stem. Dip it into the melted chocolate, tilting the bowl slightly. Rotate the berry to coat it evenly, leaving a small area of red visible near the top if desired.
- Remove excess chocolate: Lift the strawberry out of the chocolate and gently tap the side of the bowl with your wrist to allow excess chocolate to drip off. This helps create a thinner, professional shell.
- Set the coating: Place the dipped strawberries onto a baking sheet lined with parchment paper or wax paper.
- Add toppings (optional): Immediately sprinkle with crushed nuts, sprinkles, or drizzle with contrasting chocolate before the coating sets.
- Chill: Place the baking sheet in the refrigerator for 15 to 20 minutes, or until the chocolate is firm.
Notes
- The key to a glossy, shatter-crisp shell is ensuring your strawberries are completely dry before dipping.
- For white chocolate dipped strawberries, use high-quality white chocolate or candy melts, as standard white chocolate can seize easily.
- If you want a drizzle effect, melt a small amount of contrasting chocolate, place it in a small piping bag or a plastic bag with a tiny corner snipped off, and drizzle over the set coating.
Nutrition
- Serving Size: 1 strawberry
- Calories: 90
- Sugar: 10g
- Sodium: 5mg
- Fat: 5g
- Saturated Fat: 3g
- Unsaturated Fat: 2g
- Trans Fat: 0g
- Carbohydrates: 11g
- Fiber: 1g
- Protein: 1g
- Cholesterol: 0mg