
If you really want to win the appetizer game at any potluck or holiday gathering, you need a staple that never, ever fails. For me, that’s always been classic deviled eggs. Honestly, they disappear faster than anything else on the table! I spent years trying different proportions—too much mustard, too much mayo, yolks that ended up grainy—but I finally settled on what I call my foolproof guide for achieving that perfect, rich, creamy, and tangy filling. This recipe isn’t just great; it’s the version my father insists on every single Thanksgiving. It’s about elevating an old favorite using simple techniques so you always get spectacular results. If you love savory spreads, you should definitely check out my ham salad recipe too. Let me show you how to mix them perfectly, every single time.
- Why This Is Your Go-To Recipe for Classic Deviled Eggs
- Ingredients for the Ultimate Creamy Deviled Eggs Filling
- How to Make Perfect Hard Boiled Eggs for Classic Deviled Eggs
- Step-by-Step Instructions for Creamy Deviled Eggs Filling
- Tips for Achieving the Best Classic Deviled Eggs Texture
- Making Classic Deviled Eggs: Serving and Presentation Tips
- Storage and Make Ahead Party Snacks for Classic Deviled Eggs
- Frequently Asked Questions About Classic Deviled Eggs
- Nutritional Estimates for Classic Deviled Eggs
Why This Is Your Go-To Recipe for Classic Deviled Eggs
I understand that when you’re hosting a crowd, you can’t afford kitchen flops. That’s why I stand by this recipe time and time again—it’s truly my no fail deviled eggs method! You don’t need fancy tools, just good ingredients and the right timing.
- Incredibly Creamy Texture: We nail the yolk mash so you never get that crumbly look. It’s pure silk every time.
- That Perfect Tang: The balance of Dijon and vinegar gives you that classic, bright flavor without being overpowering.
- Crowd-Pleaser Guaranteed: These are the ultimate finger foods; they look beautiful and vanish instantly, whether it’s Easter brunch or a simple Sunday dinner.
- Simple Preparation: It’s quick enough to whip up when you realize you need an extra dish fast!
Ingredients for the Ultimate Creamy Deviled Eggs Filling
Okay, let’s gather our supplies for this amazing appetizer! Remember, the quality here really shines through, especially with just a few ingredients. Don’t try to sneak in anything weird; we are sticking to the classics for the best results. If you’re looking for another great creamy dip, you have to try my creamy horseradish sauce next!
- 12 large eggs
- 1/2 cup mayonnaise (Use the good stuff!)
- 2 teaspoons Dijon mustard
- 1 teaspoon white vinegar
- 1/2 teaspoon salt
- 1/4 teaspoon black pepper
- Paprika, for that beautiful garnish
- Optional: 1 tablespoon finely chopped fresh chives or dill
How to Make Perfect Hard Boiled Eggs for Classic Deviled Eggs
Listen, if you get the eggs wrong, the whole batch of classic deviled eggs is kind of doomed. That ugly grey-green ring around the yolk? We are fighting that with everything we’ve got! The secret to getting those **perfect hard boiled eggs for deviled eggs** is all about immediate temperature shock. Don’t try to boil them for a set time; that’s usually a disaster.
Here is my method: Put your eggs in a saucepan, cover them with cold water, and bring it to a full, rolling boil over high heat. The second it hits that strong boil, turn the heat off completely, slap a lid on it, and set your timer for exactly 12 minutes. No peeking! Those 12 minutes of standing time are what cook them perfectly through without making them tough.
Once the timer dings, you have to move fast. Scoop those hot eggs right into a bowl packed with ice water—that’s the bath that stops the cooking magic and prevents those rings from forming. I usually leave them chilling for about 10 minutes. Trust me, getting them super cold before peeling makes life so much easier. I always say if I can peel them without breaking the whites, I know they’ll be ready for a beautiful lemonade pairing later, too!
Step-by-Step Instructions for Creamy Deviled Eggs Filling
Now that you have your perfectly cooked and peeled eggs laying pretty on the platter, it’s finally time for the fun part—making that incredible creamy deviled eggs filling! This is where the magic happens, transforming dry yolks into something silky smooth.
- First, take all those beautiful golden yolks and place them into a clean, medium-sized bowl. You need to mash them really well. I mean, really, really well! Use a fork and press down until every single lump is gone. You want a very fine, crumbly powder before you add anything wet.
- Once that yolk is completely smooth, it’s time to introduce the binders. Add in your mayonnaise, that Dijon mustard for a little kick, the white vinegar to bring in the tang, and the salt and pepper. Don’t rush this part! Mix everything together until it looks perfectly homogenous. No one wants a spoonful of just mayo hiding in one corner, right?
- Taste it! This is key. Do you want a little more zip? Add a dash more vinegar. This is what separates good eggs from *great* ones.
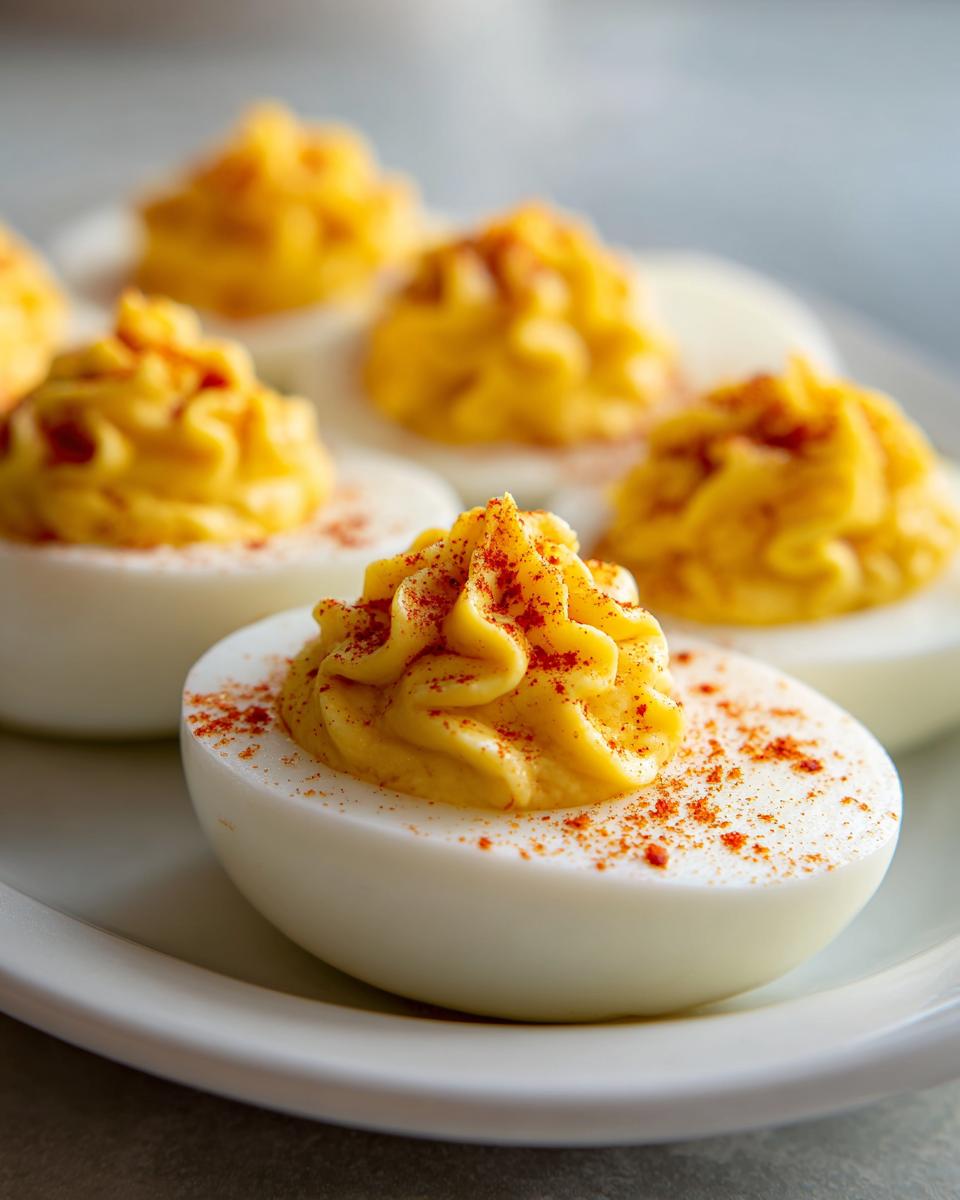
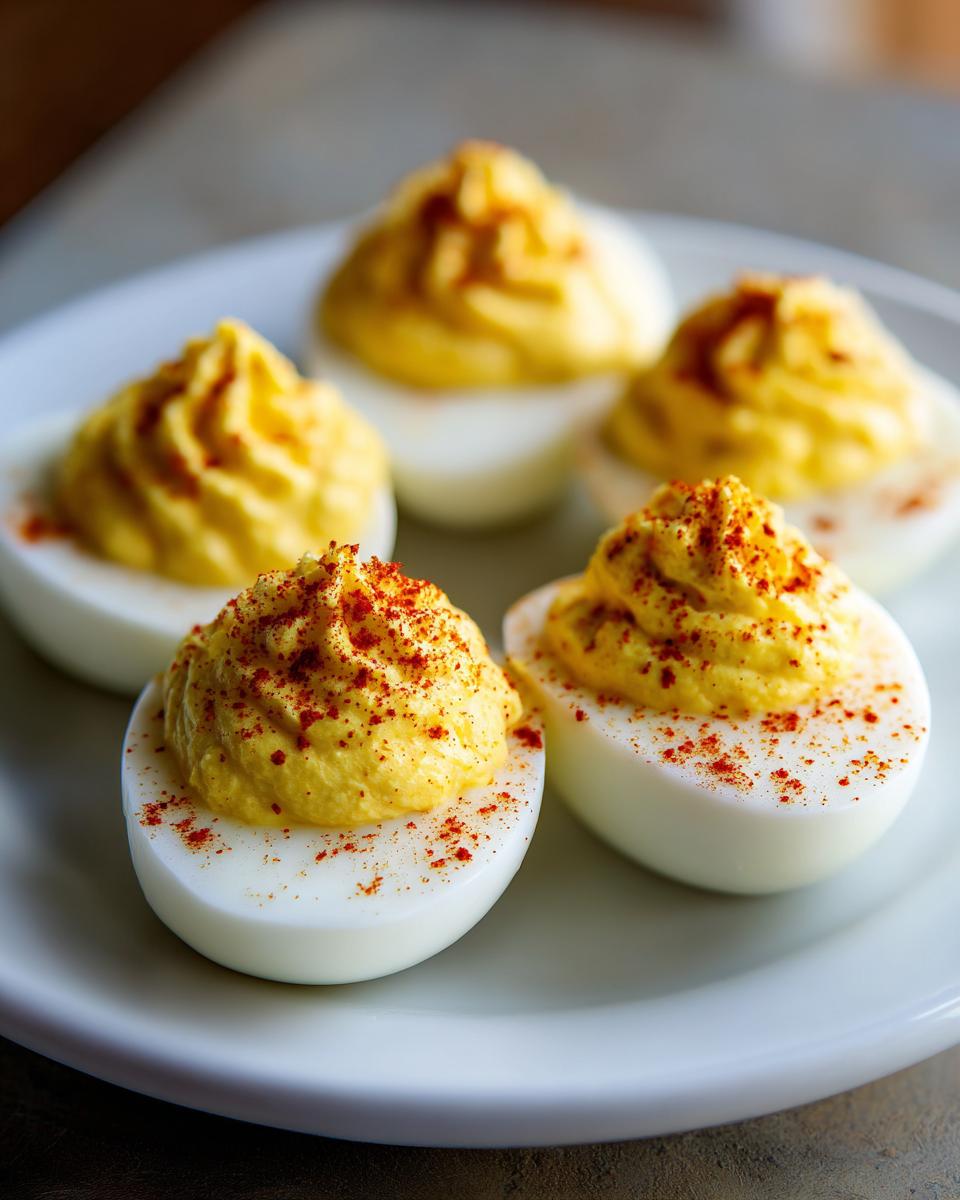
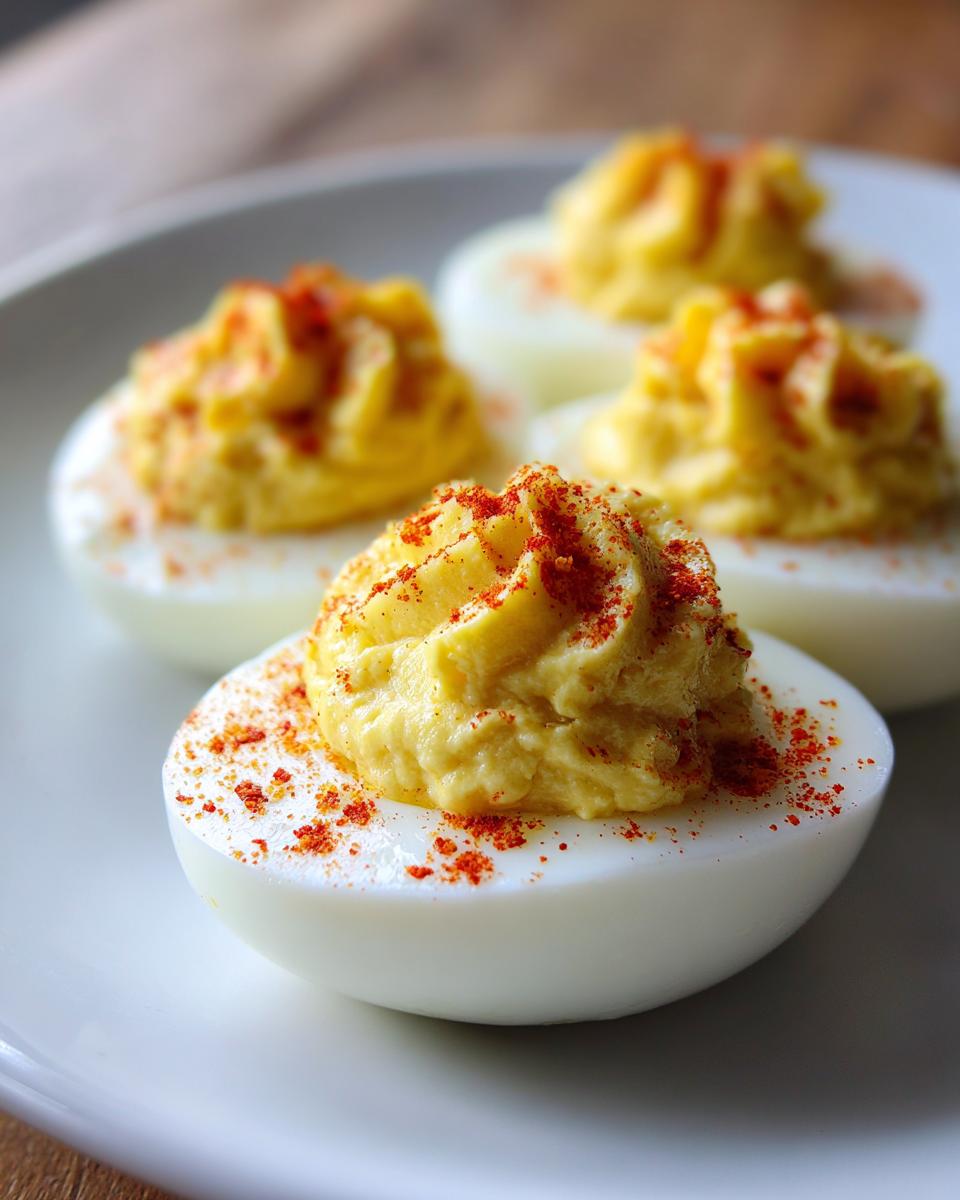
- Now, for presentation! You can totally just use a small spoon to dollop the filling back into the egg white halves, and that looks rustic and homemade. But if you want those fancy, bakery-style tops that look great on a platter, grab a piping bag fitted with a large star tip. Fill the bag and pipe that decadent filling back into the egg whites. This makes them look like you spent hours on them, even though we know they are super quick! If you want more presentation ideas, check out my whipped hot honey ricotta dip for other party flair.
Tips for Achieving the Best Classic Deviled Eggs Texture
The difference between good and memorable deviled eggs always comes down to the texture of the filling, right? That’s where those little secrets come into play. If your filling looks a bit dry or separates weirdly, it’s usually a temperature issue or you missed a crucial mashing step. We want that perfect mouthfeel that makes people go back for a third one!
If you really, truly want the absolute smoothest filling—the kind that looks like velvet—try pressing the mashed yolks through a fine-mesh sieve before you even think about adding the mayo. I know, it sounds fussy, but it’s one of my favorite ways to lock in that professional texture. After everything is mixed, stop! Resist the urge to overmix once the mayonnaise is in. Overmixing can sometimes make things break down and look weeping or oily later on.
And please, remember this: you absolutely have to chill them. Even if you’re in a rush, let these **tangy yolk filling secrets** sit in the fridge for at least 30 minutes. The chilling time lets all those flavors meld together beautifully and firms up the filling so it holds its shape perfectly on the platter. It makes them taste fresher, too! These tips make for amazing party appetizers that everyone raves about. If you love creamy textures, you have to try my creamy garlic parmesan mushroom pasta next time you need comfort food!

Making Classic Deviled Eggs: Serving and Presentation Tips
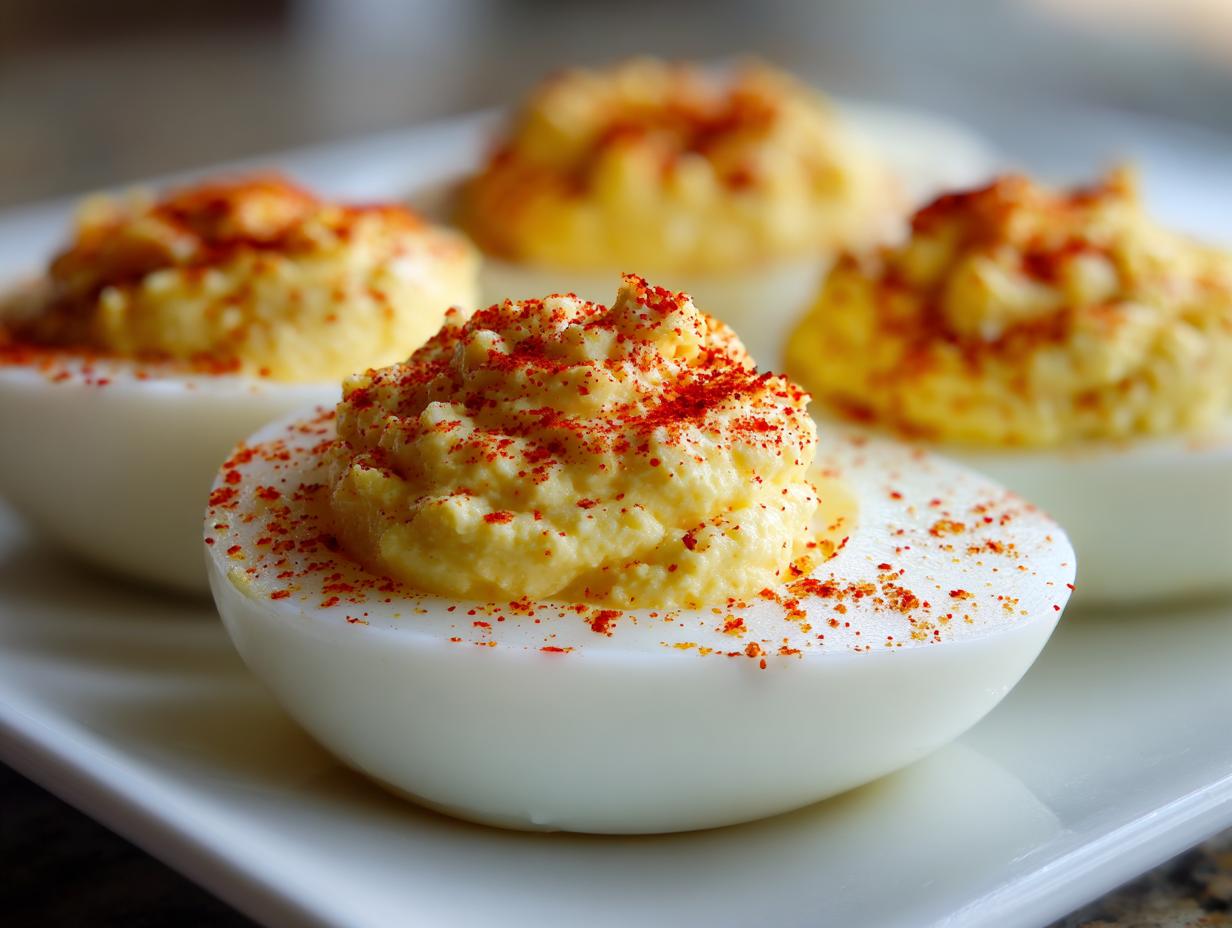
You’ve done the hard work—your filling is creamy, tangy, and perfectly seasoned. Now we make these **classic deviled eggs** look like the star of the show! Presentation is everything when you’re serving **crowd-pleasing finger foods**, especially for big events like an Easter buffet.
The garnish is simple but makes a huge visual impact. Don’t skip the paprika! A light, even dusting across the top adds color and a hint of smoky aroma. If you’re feeling fancy, a tiny snip of fresh chives or dill nestled right in the center looks so elegant. This is what elevates it to a true **traditional egg appetizer**.
But here’s my most important serving tip that people often forget: Chill them! Even if you’re starving, cover the platter loosely with plastic wrap and let them sit in the fridge for at least 30 minutes before guests arrive. They firm up beautifully, taste cooler and fresher, and are much easier to manage when guests start grabbing them. They are the absolute **best appetizer for parties** because they are simple, satisfying, and beautiful when plated right. If you are planning your buffet, you should absolutely save my recipe for the easy sweet potato casserole too!
Storage and Make Ahead Party Snacks for Classic Deviled Eggs
One of my favorite things about these **classic deviled eggs** is how perfect they are as **make ahead party snacks**. Seriously, planning ahead for a big gathering is half the battle, and these let you get a head start!
You have two ways to go about this, depending on how far out you’re prepping. If you’re just making them a day ahead, you can totally mix the filling and keep it stored in an airtight container in the fridge. The peeled egg whites can go right next to it. Assemble them right before serving, which keeps them looking pristine! If you store them fully assembled, they are still good for up to 24 hours, but the filling might start to weep a little bit due to the vinegar and mayo.
For the absolute freshest taste, especially if you are worried about humidity, peel the eggs the day before, mash the yolks, and put the mixed filling in a labeled container. Then, just plate and garnish everything right before everyone arrives. Keeping this in mind lets you focus on other dishes, like my tips for other easy make ahead party snacks!
Frequently Asked Questions About Classic Deviled Eggs
I know you might have a few specific questions once you get into the mixing—that’s totally normal when perfecting a timeless recipe like this! Don’t worry; we have all the answers here to make sure your **classic deviled eggs** are a total success for your next party. If you are planning a big holiday spread, I have a fantastic recipe for flaky Southern buttermilk biscuits I think you’ll love!
Can I make the filling for classic deviled eggs ahead of time?
Yes, you absolutely can, and this is great for those **make-ahead party snacks**! You can mash the yolks and mix the entire **creamy deviled eggs filling** up to a day in advance. Store the filling in a sealed container in the fridge. I suggest waiting until about an hour before serving to spoon it back into the peeled whites. This keeps the white looking super fresh and prevents moisture from wicking up into the filling.
What makes the yolk filling so creamy?
The core to that amazing, smooth texture is two things: proper mashing and quality mayonnaise! First, you must mash those yolks until they are dust before adding anything wet. If you skip that, you get bumps. Second, the quality of your mayo really matters here. Don’t skimp! The ratio of mayo to mustard helps create that perfect volume and the ultra-smooth consistency for your **creamy deviled eggs filling**. Don’t be afraid to add a tiny splash more mayo if it feels stiff coming out of the piping bag!
Nutritional Estimates for Classic Deviled Eggs
I know some of you are watching your macros or just curious what you’re sneaking in during the holiday snacking! Since these are such a beloved, **crowd-pleasing finger food**, it’s good to know the breakdown. Keep in mind that these numbers are just good estimates based on the recipe ingredients we used. If you use a low-fat mayo or add lots of extra pickle relish, things will shift a bit!
These figures are based on a standard serving size of two halves. If you’re making these **classic deviled eggs** for a potluck, just remember that people usually eat way more than two! If you’re looking for another light, flavorful make-ahead item, you should try my avocado chicken salad recipe next!
- Serving Size: 2 halves
- Calories: Roughly 90
- Total Fat: Around 8 grams
- Saturated Fat: About 2.5 grams
- Protein: 3 grams
- Carbohydrates: Very low, around 0.5 grams
- Cholesterol: About 105mg
See? Super simple, classic ingredients, and nothing too crazy here. They really are the perfect appetizer when you want something satisfying without derailing your whole day!
PrintThe Ultimate Creamy & Tangy Classic Deviled Eggs Recipe – The Foolproof Guide for Parties

Master the timeless appetizer with this foolproof guide to making the best classic deviled eggs. You get a rich, creamy, and tangy yolk filling that is perfect for any crowd, holiday, or potluck.
- Prep Time: 15 min
- Cook Time: 15 min
- Total Time: 40 min
- Yield: 24 halves (12 servings) 1x
- Category: Appetizer
- Method: Boiling and Mixing
- Cuisine: American
- Diet: Gluten Free
Ingredients
- 12 large eggs
- 1/2 cup mayonnaise
- 2 teaspoons Dijon mustard
- 1 teaspoon white vinegar
- 1/2 teaspoon salt
- 1/4 teaspoon black pepper
- Paprika, for garnish
- Optional: 1 tablespoon finely chopped fresh chives or dill for garnish
Instructions
- Place the eggs in a single layer in a saucepan. Cover the eggs with at least one inch of cold water.
- Place the saucepan over high heat and bring the water to a full, rolling boil. Once boiling, immediately turn off the heat, cover the pan, and let the eggs stand for exactly 12 minutes. This step helps prevent grey rings.
- Prepare an ice bath by filling a large bowl with ice and cold water.
- After 12 minutes, use a slotted spoon to transfer the eggs directly into the ice bath. Let them cool completely, about 10 minutes.
- Once cool, carefully peel the eggs. Slice each egg in half lengthwise. Gently scoop the yolks into a medium bowl. Place the egg white halves on a serving platter.
- Use a fork to mash the egg yolks until they are completely smooth and crumbly.
- Add the mayonnaise, Dijon mustard, white vinegar, salt, and pepper to the mashed yolks. Mix thoroughly until the filling is completely smooth and creamy. Taste and adjust seasoning if needed.
- Spoon or pipe the yolk mixture back into the hollows of the egg white halves. Piping creates a more professional look.
- Garnish each deviled egg with a light sprinkle of paprika and, if using, fresh chives or dill.
- Chill the deviled eggs for at least 30 minutes before serving for the best flavor and texture.
Notes
- For the smoothest filling, press the mashed yolks through a fine-mesh sieve before mixing in the wet ingredients.
- You can make the hard-boiled eggs and peel them up to two days ahead. Store the peeled whites and the yolk mixture separately in the refrigerator.
- For a tangier flavor, substitute 1 teaspoon of pickle relish (drained) for the white vinegar.
- To achieve a perfect, creamy texture, do not overmix the filling once the mayonnaise is added.
Nutrition
- Serving Size: 2 halves
- Calories: 90
- Sugar: 0.5
- Sodium: 110
- Fat: 8
- Saturated Fat: 2.5
- Unsaturated Fat: 5.5
- Trans Fat: 0
- Carbohydrates: 0.5
- Fiber: 0
- Protein: 3
- Cholesterol: 105