
If you’re hosting guests and need an appetizer that screams ‘gourmet’ but whispers ‘zero stress,’ STOP SCROLLING RIGHT NOW. I’ve tested hundreds of party spreads in my kitchen, and nothing gets eaten faster than this Whipped Ricotta Dip. Seriously, it’s my secret weapon! This is the kind of marinated cheese recipe upgrade you didn’t know you needed.
When I first played around with transforming ricotta, I wanted that ultra-smooth, cloud-like texture you usually only find at those fancy Italian restaurants. This isn’t just any scoopable cheese; this ricotta dip is light, airy, and requires absolutely zero time near a hot oven. It’s the easiest upgrade you can make to your next snack board, and I promise, once you whip it up, you’ll feel like a total culinary rockstar. Forget complicated recipes; this one is pure, confident home-cook magic, perfect for any gathering you’re planning. Check out my guide for mixing up this incredible dip—and yes, we’re finishing it with hot honey!
- Why This Whipped Ricotta Dip is Your New Favorite Easy Ricotta Appetizer
- Gathering Ingredients for Your Ricotta Dip
- How to Achieve the Perfect Whipped Ricotta Dip Texture
- Assembling Your Restaurant Style Ricotta Dip
- Tips for Success When Making This Ricotta Dip
- Serving Suggestions for Your Homemade Party Dip
- Variations on the Classic Ricotta Dip
- Storage and Reheating Instructions for Ricotta Dip
- Frequently Asked Questions About Making Ricotta Dip
Why This Whipped Ricotta Dip is Your New Favorite Easy Ricotta Appetizer
Look, I get it. Sometimes you need a showstopper appetizer, but you only have about ten minutes before the doorbell rings. That’s why this recipe has earned permanent residency in my entertaining rotation. It’s the best way to get that ricotta dip texture without dirtying half your kitchen. Think of it as the simpler, faster cousin to that whipped feta dip I love!
When I first played around with transforming ricotta, I wanted that ultra-smooth, cloud-like texture you usually only find at those fancy Italian restaurants. This isn’t just any scoopable cheese; this dip is light, airy, and requires absolutely zero time near a hot oven. It’s the easiest upgrade you can make to your next snack board, and I promise, once you whip it up, you’ll feel like a total culinary rockstar. Forget complicated recipes; this one is pure, confident home-cook magic, perfect for any gathering you’re planning.
Speed and Simplicity: A Quick Appetizer Recipe
Seriously, the entire process from pulling the ricotta out to putting the topping on takes less than 10 minutes, hands on. If you need a last-minute quick appetizer recipe, this is your hero. Since we aren’t baking anything, you can focus on the presentation while the food processor does all the heavy lifting for you. Instant elegance!
Gourmet Cheese Spread Texture
The magic word here is *whipped*. We’re not dealing with a heavy, dense block of cheese. By processing it with oil and lemon until it’s impossibly light, you transform it into something that feels like a decadent, gourmet cheese spread. It’s velvety smooth, and frankly, spreading it on a piece of crusty bread feels a little luxurious, even if you made it while answering dinner texts. This is what a truly creamy ricotta dip should feel like.
Flavor Balance: Hot Honey Ricotta
If you haven’t jumped on the sweet-and-spicy train yet, this is your ticket. The combination of rich, cool ricotta contrasted with the heat of the drizzle creates the perfect bite. This hot honey ricotta topping is what takes this from just a dip to the *must-make* appetizer of the season. Trust me, once you try it, you’ll never look at plain honey the same way again.
Gathering Ingredients for Your Ricotta Dip
Okay, this list looks short, which is a big plus when you need an easy ricotta appetizer, right? But don’t let the short ingredient list fool you; the quality matters here, especially since we aren’t hiding anything under a baked layer of cheese. Remember, we want this to look and taste like a gourmet cheese spread!
For the base, you absolutely need whole milk ricotta. Don’t cheap out on this; skim milk gives you grainy results, and we worked too hard whipping it to have it go wrong! You’ll also need some good olive oil—the kind you’d drizzle on a salad, not the one you use for greasing a pan. And of course, the star of the show on top: pistachios and hot honey.
Ingredient Notes and Substitutions for This Ricotta Dip
Before you even turn on the food processor, you need to pay attention to the cheese itself. This is where most people mess up their beautiful creamy ricotta dip.
First, the draining! Ricotta is packed in water, and if you don’t drain that excess moisture, your dip ends up looking soupy instead of light. Seriously, put it in a fine-mesh sieve over a bowl for at least 15 minutes while you chop your nuts or set out crackers. If it looks really wet, let it go longer. It’s worth every second!
Now, about the sweetener. If you can’t find good quality hot honey—which is fantastic, by the way—don’t sweat it. Just grab your favorite regular honey and stir in a pinch (start small!) of red pepper flakes. Taste it! You want that gentle warmth balanced against the lemon, not a fire alarm in your mouth. We’re building flavor complexity here, just like learning to build sauces, which you can check out if you ever need a great simple sauce!
How to Achieve the Perfect Whipped Ricotta Dip Texture
Okay, friends, listen up, because this is the part of making a whipped cheese dip that separates the good from the *incredible*. Getting that light, airy, almost mousse-like texture is the goal. If you just stir it with a wooden spoon, you get a heavy spread. We want airy magic!
My preference—and what gives the most reliably smooth result—is the food processor. Toss everything in—the ricotta, the olive oil, the lemon, the seasoning—and let it run. I usually process it for a full minute, stop, scrape down the sides (because that’s where the thick stuff hides!), and then pulse it for another minute. Don’t be shy! You need that hard processing time to break down the curds and actually whip some air into the cheese. If you try this the way you make simple sauces, you’ll end up disappointed.
If you’re using a stand mixer, that’s totally fine too! Just use that whisk attachment and let it run on high heat for about three to four minutes until it looks much paler. Either way, that smooth base is your canvas for the amazing toppings we’re about to add. You can check out other great inspiration for this style of dip, like the one over at The Comfort Pan, but honestly, the technique is what matters most!
Draining Ricotta: The Essential First Step for Creamy Ricotta Dip
I mentioned it before, but I’m going to yell it from the rooftops: You have to drain the cheese! Ricotta is naturally wet, because it’s stored in whey, and if you skip this, your ricotta dip will be soupy instead of firm and scoopable. You want that beautiful, thick, creamy ricotta dip appearance.
I try to give it a minimum of 15 minutes sitting in a fine-mesh sieve over a bowl. If you can leave it for 30 minutes, even better! This process pulls out the unnecessary water that prevents the cheese from whipping up properly. If you skip this, no amount of processing time is going to save you from a puddle in the bottom of your serving dish. Patience during this step equals gourmet results later!
Assembling Your Restaurant Style Ricotta Dip
Now that you have achieved that dreamy, airy base—thank you, food processor!—it’s time to make this look exactly like something you’d pay $18 for at a trendy bistro. This is where we transform our creamy ricotta dip into a genuine experience. Forget dumping toppings randomly; we’re layering for visual impact!
First, transfer your perfectly whipped cheese into a shallow serving bowl. I always take the back of a spoon (or an offset spatula, if I’m feeling fancy) and create a slight little well or swirl in the center. This depression is meant to cradle our beautiful toppings and show them off. This little flourish is what makes it a proper restaurant style ricotta dip.
Next comes the glorious sweet and spicy drizzle. Pour that hot honey ricotta slowly over the top, letting it pool a little in the center well, but also allowing some rivulets to run down the sides. Then, sprinkle those wonderfully crunchy, chopped pistachios everywhere. They add the necessary texture contrast!
Finally, for the ultimate polish—a very light drizzle of really good olive oil right over the top of the honey and nuts. Remember, this oil is for flavor and shine now, not just mixing! If you want to see how I use a similar method for another incredible spread, check out my whipped goat cheese dip instructions, but this one is definitely my personal favorite for parties.
Tips for Success When Making This Ricotta Dip
Even though this is an incredibly simple ricotta dip, getting the small details right is what keeps it looking and tasting like something from a high-end shop. I’ve learned these crucial lessons over making it for dozens of gatherings, so pin these notes down, okay?
First, let’s talk temperature. Because this is a no-bake recipe, you want the texture to be perfect right out of the processor. This dip truly shines when it’s cool and just set. If you live somewhere super hot, or if you whip it and then leave it sitting outside for an hour while you do other prep, the olive oil can start to separate slightly, and it won’t look as crisp. Try to assemble the final dip no more than 30 minutes before serving if you can manage it.
My next big tip involves the oil we use for the final drizzle. We used 2% olive oil for the whipping process, but for the final flourish on top—the one that catches the light and makes people grab a cracker—you need to spring for the good stuff. A high-quality finishing oil, maybe one that’s a little green or peppery, adds this wonderful dimension right before serving. It’s a small investment that elevates everything. If you’re looking for another impressive but simple starter, make sure you check out my tips for marinated cheese!
Finally, don’t try to overcomplicate the toppings by adding things that are too heavy or wet right before serving. If you want to add things like chopped sun-dried tomatoes, make sure they’ve been patted bone-dry first. We want crunchy, creamy, or sweet; we do not want soggy. Keep it focused, keep it fresh, and you’ll have the absolute best ricotta dip on the table every time.
Serving Suggestions for Your Homemade Party Dip
So, your gorgeous, cloud-like whipped cheese dip is ready, and everyone is staring at it waiting for the first scoop. What should they use to get that perfect bite of hot honey ricotta and pistachio?
Because this dip leans slightly sweet and spicy, you need dippers that can handle that bold flavor. Nothing beats thick slices of grilled or toasted crusty bread—the slight char on the bread is amazing against the cool ricotta. For crunch, skip flimsy chips and go for sturdy crackers, maybe something with rosemary or sea salt baked in. It also makes a fantastic vegetable accompaniment!
If you’re setting this out at a holiday or big event, this truly becomes the star of your homemade party dip spread. For a lighter touch, fresh cucumber slices or crisp apple wedges work beautifully. If you’re serving this alongside other appetizers, I highly recommend having my garlic parmesan knots on hand as another savory option!
Variations on the Classic Ricotta Dip
One of the reasons I adore this simple ricotta dip base so much is how wildly versatile it is! Once you nail that perfect, airy texture, you can swap out the hot honey and pistachios for practically anything. It’s like a blank canvas for entertaining, letting you match the dip to the season or the rest of your menu. Why stick to one flavor when you can have three?
If you realize you have way more basil than honey on hand, or maybe you’re serving it at a brunch where spicy isn’t the vibe, don’t panic! We can pivot immediately. This is where that foundational creamy texture really saves the day because the base allows any topping to shine through beautifully.
If you ever need a completely different kind of creamy, cheesy, tomato-based treat, you absolutely have to check out my recipe for easy pink sauce pasta, but for now, let’s focus on keeping this appetizer light and fresh!
Savory Starter Swaps (No Sweetness Allowed!)
For those times when you want a deeper, more herb-forward savory ricotta starter, hold the honey completely. Instead, take that beautifully whipped cheese, drizzle it generously with a peppery olive oil, and finish it with a shower of flaky sea salt. I’m talking Maldon salt here, the big, crunchy flakes—they give the best little salty bursts.
You can chop up fresh herbs and mix them right in, or just scatter them beautifully on top. My favorites for savory include fresh chopped rosemary (use sparingly, it’s strong!), finely minced chives, or even some sun-dried tomatoes that have been patted completely dry. A dash of garlic powder mixed into the base before whipping also makes this incredibly satisfying for garlic lovers!
Sweet & Fruity Twists for Entertaining
If you’re using this as part of a brunch spread or want a dessert-adjacent appetizer, the whipped cheese loves sweet things! You can skip the hot honey and instead use high-quality raspberry or fig preserves. Fig preserves are amazing; they give you that chewy texture and deep sweetness that works wonders on the cool ricotta.
For a vibrant summer look, skip the nuts and top the dip with finely diced, fresh peaches tossed lightly with a tiny sprinkle of cinnamon or nutmeg. Imagine that! It still functions as a fantastic appetizer dip for parties, but with a bright, summery feel. It’s honestly all about what you have on hand!
Storage and Reheating Instructions for Ricotta Dip
I know, I know. When you make something this ridiculously delicious, you immediately want to figure out how to make it five days ahead of time for Thursday’s game night while simultaneously eating it all right now. That’s the dilemma with our amazing whipped cheese dip!
Here is the honest truth from my kitchen: this specific ricotta dip is absolutely, 100% at its absolute peak texture within about three hours of whipping. That airy, cloud-like feel? It gently deflates as it chills because we didn’t use any stabilizers—we just used pure, wonderful technique. Reheating this particular *whipped* style isn’t really recommended; putting it back in the food processor after it’s been cold ruins that light structure we worked so hard for.
So, while I strongly suggest making this right before your guests arrive, if you absolutely must make it ahead, we need a strategy. The key is separating the base from the toppings!
Preparing the Base Ahead of Time
You can certainly process the ricotta base (just the cheese, oil, lemon, and seasoning) up to a day in advance. Store that smooth mixture in an airtight container in the fridge. It will firm up significantly as it cools down—think of it like chilled butter. If you know you’ll be serving it straight from the fridge the next day, you might want to take it out 30 minutes before you plan to assemble it, just to let it soften slightly.
When you are ready to serve, transfer the slightly softened base to your dish. You can try giving it a quick whisk by hand, but honestly, I find that just letting the toppings sit on it for a few minutes helps it relax back towards that creamy texture. For future make-ahead appetizers that need to be piping hot, you might want to look at my guide for an easy make-ahead cheesy egg bake instead, because that one thrives on being reheated!
Storing Toppings Separately
The toppings—the hot honey, the pistachios, and that final drizzle of oil—must be stored separately, always! Keep the honey and nuts in little airtight containers on the counter or in the fridge. Do not put them on top of the cheese mixture!
When you take the cheese base out of the fridge to let it set up, then you can drizzle the honey, sprinkle the nuts, and serve. If you put the honey on the night before, it might start sinking into the ricotta instead of sitting beautifully on top, and we lose that glorious visual contrast we worked for. Keep everything fresh, and your party dip will look stellar, even if you made the base yesterday afternoon!
Frequently Asked Questions About Making Ricotta Dip
I know that once you start making a ricotta dip, you start having a million little questions pop up! That’s totally normal when you are trying to achieve that perfect, restaurant-quality texture. I’ve gathered the top questions I always get asked about getting this easy appetizer just right so you can feel totally confident serving it at your next party.
Can I use part-skim ricotta cheese for this dip?
If you look at my recipe notes, you’ll see I insist on whole milk ricotta, and I really mean it! Whole milk has much higher fat content, which is what gives you that lush, creamy ricotta dip texture when you process it. Part-skim has more water. If that’s literally all you have, you *can* use it, but you must, absolutely must, drain it for at least an hour. If you don’t, your whipped cheese dip will end up looking more like a watery sauce, and that just won’t do for a fancy spread!
What is the best way to serve this whipped cheese dip?
Presentation makes all the difference, even for something so simple! We want this to look like a stunning gourmet cheese spread. Serve it in a shallow bowl so you can really show off those layers of honey and pistachios. For dippers, I always favor crunch—think toasted baguette slices or sturdy rosemary crackers. If you are aiming for a slightly more savory version, remember it works beautifully as a savory ricotta starter served alongside olives and good quality crusty bread. You just skip the honey entirely!
Can I make this ricotta dip ahead of time?
This is the trickiest question! Because the texture is so airy, this ricotta dip is best served within a few hours of whipping. If you chill it overnight, it firms up a lot, and you lose some that beautiful fluffiness—it won’t re-whip well, trust me on that one. My best advice for entertaining? Whip the cheese base (just the cheese, oil, and seasonings) the morning of your party and keep it covered in the fridge. Then, about 30 minutes before guests arrive, spread it out, add the hot honey and nuts, and serve it slightly cooler than room temperature. That keeps everything looking its best! If you’re looking for a make-ahead recipe that saves you time on the day of the event, maybe try my cassava cake instead for dessert!
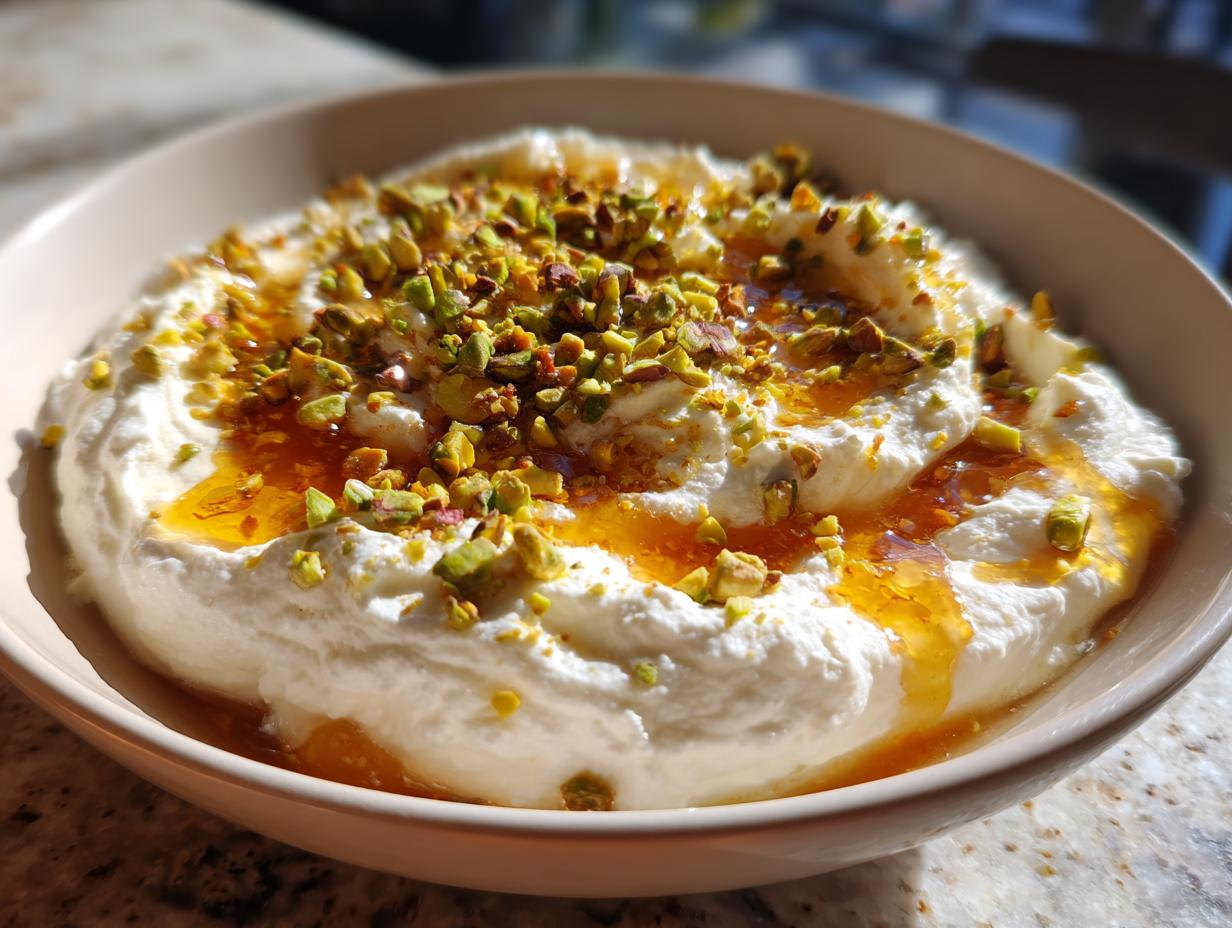
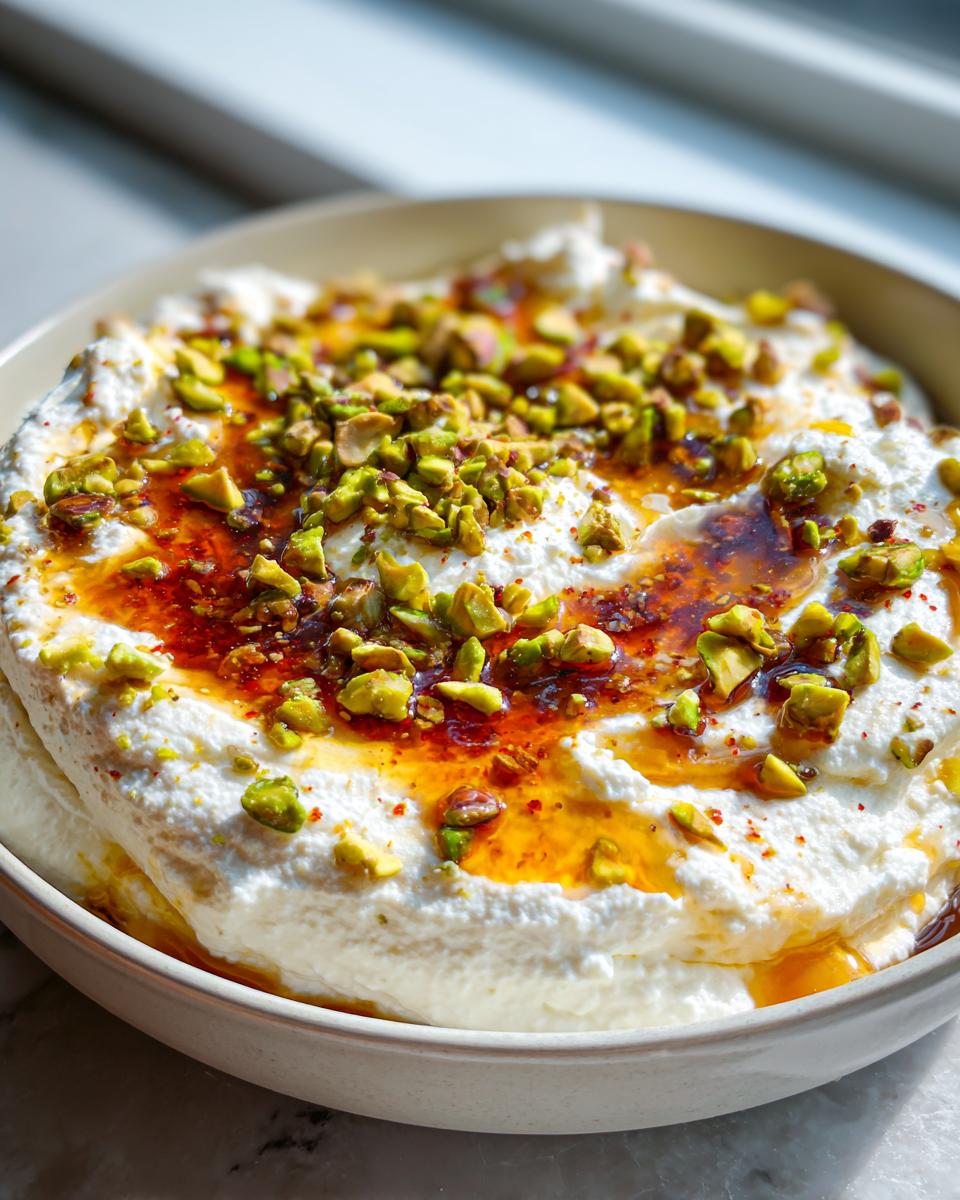
PrintWhipped Ricotta Dip with Hot Honey and Pistachios

Make this creamy, restaurant-style ricotta dip in minutes. Whipping the ricotta creates an airy texture, perfect for serving as a gourmet cheese spread topped with sweet and spicy hot honey and crunchy pistachios. This is an easy appetizer for parties.
- Prep Time: 10 min
- Cook Time: 0 min
- Total Time: 10 min
- Yield: 6 servings 1x
- Category: Appetizer
- Method: No-Bake
- Cuisine: American
- Diet: Vegetarian
Ingredients
- 15 ounces whole milk ricotta cheese, drained if very wet
- 2 tablespoons extra virgin olive oil, plus more for drizzling
- 1 tablespoon fresh lemon juice
- 1/2 teaspoon kosher salt
- 1/4 teaspoon black pepper
- 1/4 cup hot honey (or regular honey plus a pinch of red pepper flakes)
- 1/4 cup shelled pistachios, roughly chopped
Instructions
- Drain the ricotta cheese for at least 15 minutes if it seems very watery. Place the drained ricotta, 2 tablespoons of olive oil, lemon juice, salt, and pepper into the bowl of a food processor.
- Process the mixture for 1 to 2 minutes, stopping to scrape down the sides as needed, until the dip is completely smooth, light, and airy. This whipping action creates the creamy texture.
- Transfer the whipped ricotta dip to a shallow serving bowl. Use the back of a spoon to create a slight well in the center.
- Drizzle the hot honey evenly over the top of the dip.
- Sprinkle the chopped pistachios over the honey. Add a final light drizzle of olive oil over the entire surface.
- Serve immediately with crusty bread, crackers, or fresh vegetables for dipping.
Notes
- For a savory starter, skip the hot honey and top with fresh herbs like basil or rosemary, flaky sea salt, and a good quality olive oil.
- If you do not have a food processor, you can use a stand mixer with the whisk attachment, whipping on high speed for 3 to 4 minutes until lightened.
- This dip is best served the day it is made for the lightest texture.
Nutrition
- Serving Size: 1/6 of dip
- Calories: 210
- Sugar: 8
- Sodium: 250
- Fat: 16
- Saturated Fat: 7
- Unsaturated Fat: 9
- Trans Fat: 0
- Carbohydrates: 9
- Fiber: 1
- Protein: 9
- Cholesterol: 35