
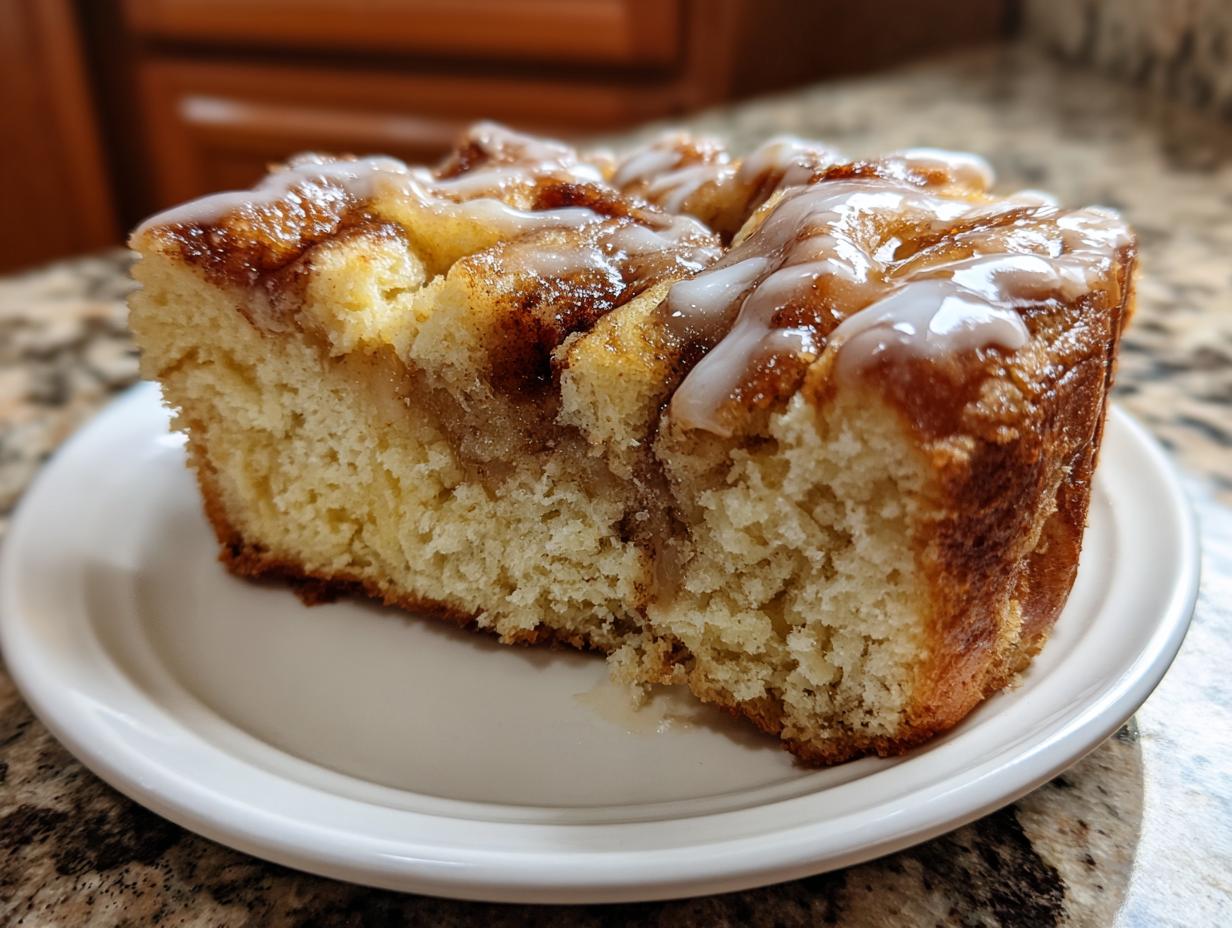
Oh, that craving! You know the one—that deep, undeniable yearning for the crispy edges and soft, gooey center of a classic apple fritter, but you don’t want the mess of deep-frying, right? Me neither! That’s why I perfected this apple fritter bread. Seriously, this Amish style brings all that wonderful bakery flavor right into one incredibly easy, sliceable loaf. It’s truly the ultimate Moist Apple Bread Loaf, perfect for anyone who wants an extraordinary baked treat without spending half the day in the kitchen. If you love sweet quick breads, make sure you check out my recipe for easy moist pumpkin bread too! Trust me, this buttery layered bread is about to become your go-to fall favorite!
- Why This Amish Apple Fritter Bread Recipe Works (Our Expert Tips)
- Gathering Ingredients for Your Apple Fritter Bread
- Step-by-Step Instructions for Easy Apple Fritter Bread
- Tips for Success When Making Country Apple Fritter Bread
- Ingredient Notes and Substitutions for Apple Fritter Bread
- Storing and Reheating Your Homemade Apple Dessert Bread
- Serving Suggestions for This Glazed Apple Bread
- Frequently Asked Questions About Apple Fritter Bread Recipe
- Share Your Best Apple Fritter Bread Creations
Why This Amish Apple Fritter Bread Recipe Works (Our Expert Tips)
Look, there are a million ways to bake with apples, but this recipe nails that perfect Apple Fritter Style Baking experience in a loaf, and it all comes down to a few key moves I learned testing this over and over. When you want that deep, satisfying flavor of a fried treat without the frying, you need technique. This isn’t just another quick bread; it’s structured to be a phenomenal Tender Apple Cake Loaf.
- Achieving the Perfect Moist Apple Bread Loaf Texture: This is 90% technique, folks. We are creaming that softened butter and sugar until it’s genuinely pale and fluffy—don’t rush that! Then, when you add the dry ingredients, you alternate them with the milk. This method keeps the fat emulsified and prevents gluten from developing too much. Seriously, stop mixing once the flour streaks just disappear. Overmixing is the enemy of tenderness!
- The Best Apples for Your Apple Fritter Bread Recipe: You absolutely *must* use at least two types of apples if you can swing it! I love combining the tartness of Granny Smith with the honey sweetness of Honeycrisp. Tossing them in their dedicated two tablespoons of sugar keeps them from bleeding too much moisture into the batter immediately, ensuring they don’t all sink to the bottom before baking. You want those bits of apple spread out beautifully! For more classic apple goodness, you should check out my best classic apple crisp recipe for comparison.
Gathering Ingredients for Your Apple Fritter Bread
Okay, let’s get organized! The beauty of this apple fritter bread is that it uses mostly pantry staples, but organization is key when you have three separate components: the tender batter, the spicy swirl, and the final glossy topping. Trust me, having everything measured out before you start creaming that butter makes the whole process fly by. You’ll want everything ready to go so you can layer it quickly before the baking powder loses its zip!
If you’re looking for other ways to use those warming spices, I have a fantastic easy cinnamon butter recipe you can whip up for serving alongside slices of this bread later!
Here is exactly what you need for one beautiful, glazed loaf:
For the Batter:
- ½ cup (1 stick) butter, softened
- ⅔ cup granulated sugar
- 2 large eggs
- 1½ teaspoons vanilla extract
- 1½ cups all-purpose flour
- 1¾ teaspoons baking powder
- Pinch of salt
- ½ cup milk
For the Apple and Cinnamon Swirl:
- 2 apples, peeled and chopped (remember, mix Granny Smith and Honeycrisp if you can!)
- 2 tablespoons granulated sugar (for tossing with apples)
- ⅓ cup light brown sugar (this is for the cinnamon mixture)
- 2 teaspoons ground cinnamon
For the Vanilla Glaze:
- ½ cup powdered sugar
- 1–3 tablespoons milk (keep 1 tablespoon ready and add slowly!)
Step-by-Step Instructions for Easy Apple Fritter Bread
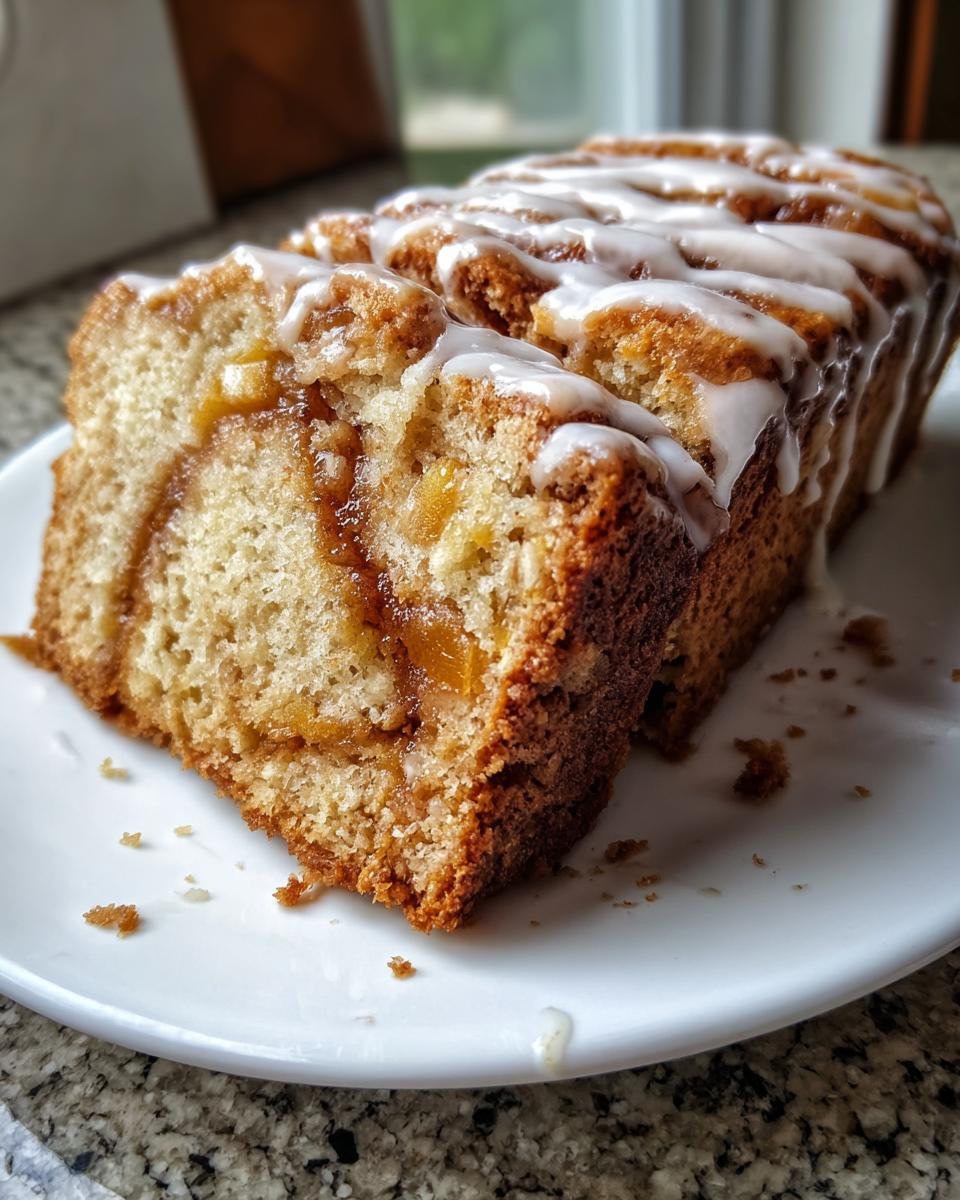
Putting this wonderful Easy Apple Fritter Bread together is surprisingly fast once you have your ingredients ready to go. We are layering texture and spice here to create that incredible Cinnamon Apple Bread Swirl that makes this loaf famous. Remember, precision in the wet/dry mixing is what keeps this loaf wonderfully tender, so don’t rush that part!
Preparing the Cinnamon Sugar Swirl and Apples
First things first, let’s get that oven ready—preheat it to 350°F and make sure you thoroughly grease that 9×5-inch loaf pan. You don’t want this beautiful loaf sticking! In a small bowl, quickly whisk together your light brown sugar and the cinnamon for the swirl layer and set it aside. Next, take your chopped apples and toss them gently with the 2 tablespoons of plain granulated sugar. That little bit of extra sugar helps draw out some of their pre-baking moisture. Easy peasy prep done!
Mixing the Batter for the Apple Fritter Bread Loaf
Now we start the batter. Cream that softened butter and the granulated sugar until it looks light and almost fluffy—it should be much paler than when you started. Beat in the eggs, one at a time, making sure each one is incorporated before adding the next, followed by the vanilla. In a separate bowl, just whisk your flour, baking powder, and salt together until they are combined. Then, you add the dry mixture and the milk alternately to the butter mixture. Start and end with the dry ingredients! Mix only until you can’t see big streaks of flour anymore. I mean it—stop mixing then, or you’ll deflate all that air we just whipped in!
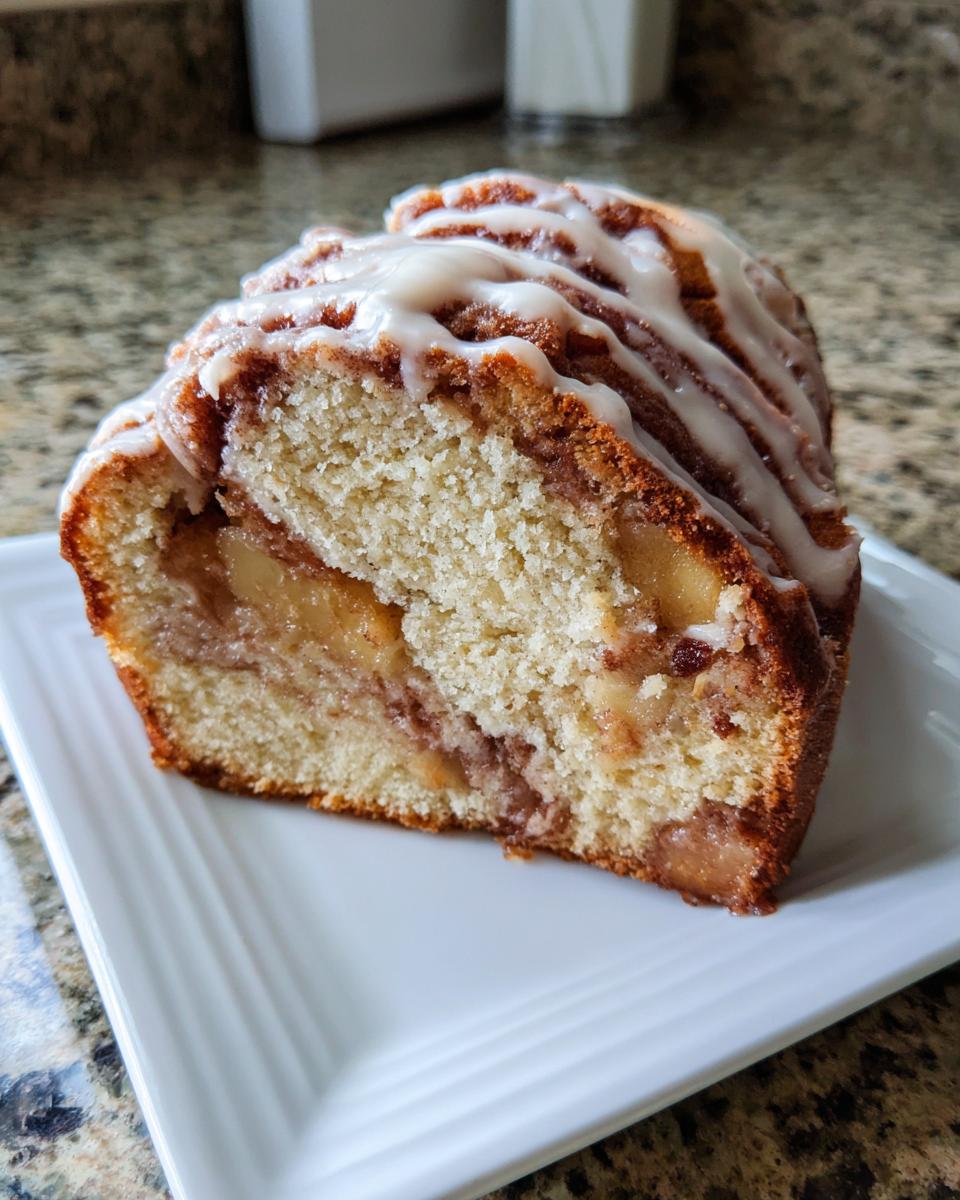
Layering and Baking Your Apple Fritter Bread
Time to build those glorious layers! Spread half of your batter into the prepared pan. Then, scatter half of your sugared apples and half of your cinnamon sugar mixture right over the top of that batter layer. You repeat this once more: remaining batter, then the rest of the apples and cinnamon sugar. Pop the whole thing into the 350°F oven and let it bake for about 50 to 60 minutes. I always check it with a toothpick around the 50-minute mark. If it comes out clean, you’re golden! If it has wet batter, give it five more minutes.
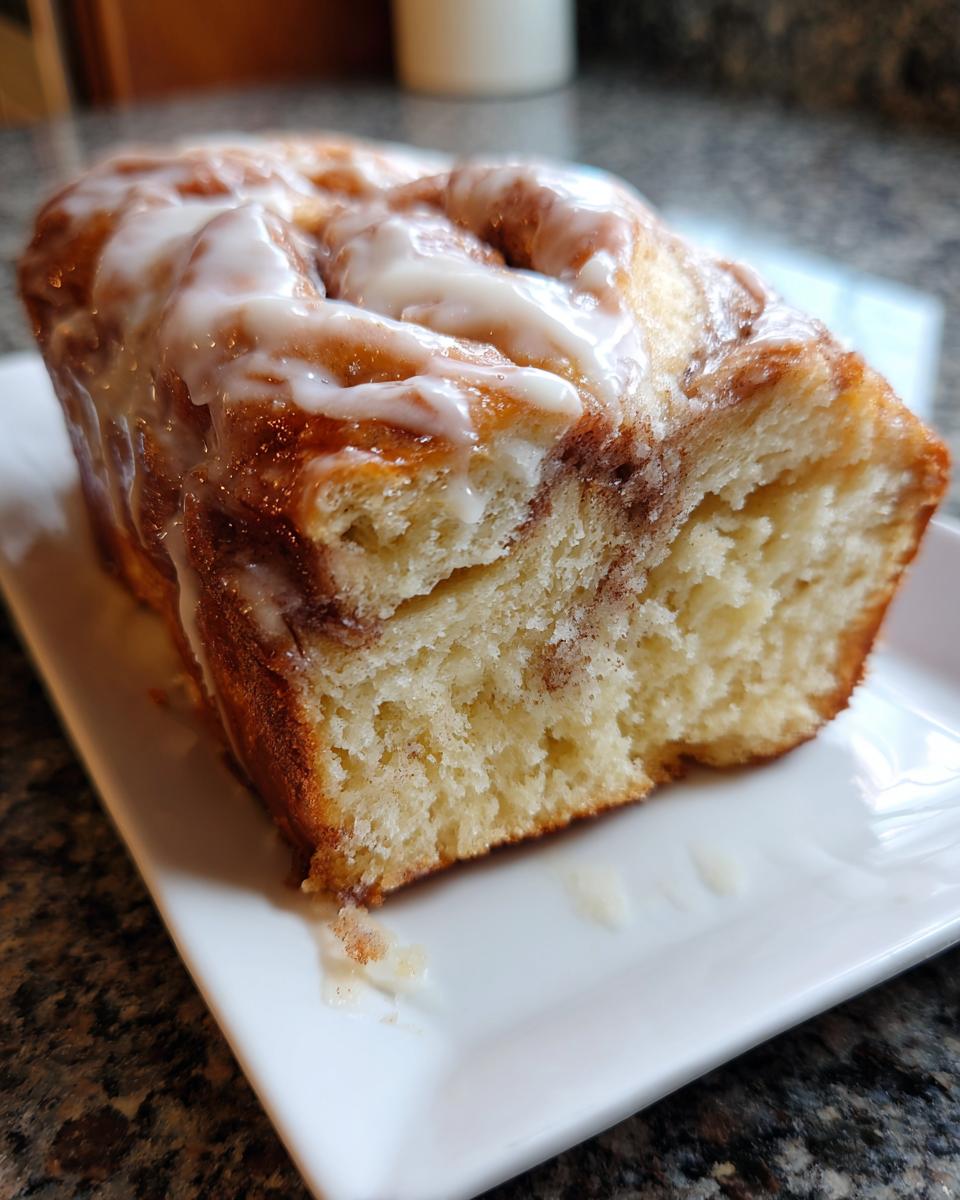
Finishing with the Sweet Glazed Apple Bread Topping
This part is simple magic! Once the bread has rested in the pan for about 10 minutes—just long enough to firm up—carefully turn it out onto a wire rack to cool more. While it’s cooling, whisk together your powdered sugar with just 1 tablespoon of milk. If it looks thick, add the milk one teaspoon at a time until it drizzles nicely off your spoon. Don’t apply this until the bread has cooled down a bit, or it will just melt right off. Drizzle that sweet vanilla icing over the top, grab a knife, and enjoy the best chocolate brownie cookies… just kidding, grab a slice of this incredible bread!

Tips for Success When Making Country Apple Fritter Bread
Getting that perfect bakery look when making this From Scratch Apple Bread is easier than you think if you remember just a couple of things. Since this is such a wonderful, heavy, Buttery Apple Loaf, make sure you don’t mess with the leavening agents. The baking powder ratio is exactly right for the amount of butter and apples you are using.
Also, if you want that amazing contrast between the soft bread and the sugary cinnamon layer, you must use room-temperature eggs and milk. Temperature management really helps everything emulsify properly when you are creaming the butter. And please, don’t skip the cooling time before glazing! If you’re looking for another great baking tip, check out how I keep my buttermilk biscuits ultra flaky. It’s all about temperature control!
Ingredient Notes and Substitutions for Apple Fritter Bread
I get so many questions about tweaking recipes once people start baking them, and that’s totally fine! That’s the fun of cooking! But since this apple fritter bread is built on achieving that perfect moist texture, there are a few swaps I recommend being cautious with. We want to keep that amazing bakery charm, right?
If you find yourself missing ingredients, here are my thoughts on keeping this easy recipe successful. If you love fruity bakes, you absolutely must try my cranberry orange cookies next season!
What if I only have one kind of apple?
Don’t stress if you’re stuck with just Granny Smith or just Honeycrisp! If you only have Granny Smith, you might want to sneak in an extra teaspoon of granulated sugar when you toss them, just to balance that tartness a bit, since you miss the sweetness from the other type. If you only have sweeter apples, like Gala or Fuji, you can reduce the sugar slightly in the batter itself—maybe by a tablespoon or two of the initial granulated sugar—to keep things from getting too sweet. The key is just adjusting for the flavor profile you have on hand!
Can I use self-rising flour instead of all-purpose?
This is a big one! Since this recipe relies on the precise rise we get from the baking powder and salt ratio in the batter, switching to self-rising flour can throw off the texture, especially since the flour brands vary so much in their salt and leavening content. If you absolutely must, substitute your 1½ cups of AP flour with self-rising, but then you need to *eliminate* the extra 1¾ teaspoons of baking powder AND the pinch of salt listed in the recipe. Honestly, I wouldn’t recommend it for your first go, because we are aiming for that signature dense crumb, not a light, airy cake!
Is the vanilla glaze really necessary?
Totally optional, but I highly recommend it! The glaze is what really pushes this from being ‘good apple bread’ to tasting exactly like an actual apple fritter without the deep-fry crust. It adds that final sugary punch we all crave. If you have to skip it, no worries! Just make sure to dust the loaf lightly with powdered sugar once it’s completely cooled for a little visual appeal. If you are short on time, you can skip the glaze entirely, but I think you’ll miss that final touch of sweet! You can always try my recipes for cinnamon butter to top the slices instead.
Storing and Reheating Your Homemade Apple Dessert Bread
The bad news? This apple fritter bread seems to disappear faster than any other loaf I bake. The good news? It stores surprisingly well, which means leftovers—if you manage to have any—stay delicious!
For room temperature storage, I find that tightly wrapping the cooled loaf (once the glaze is totally set, of course!) in plastic wrap, and then maybe slipping that into a large zip-top bag, works miracles. It keeps that buttery apple goodness from drying out. It should easily hang out on your counter for three full days. If you need it to last longer, move it to the fridge, but be warned: cold bread can sometimes feel a little drier, even if it lasts longer!
If you are making this for a special occasion, like a holiday brunch, you can definitely prep ahead! This bread freezes beautifully. Wrap the totally cooled, un-iced loaf tightly in plastic wrap, followed by a layer of aluminum foil. You can freeze it like this for up to three months. When you’re ready to eat it, just let it thaw slowly on the counter for a day. Try to save the icing for after thawing, though—it can get a little smudgy if frozen inside that heavy wrap.
When you reheat slices, remember the glaze will become very soft because of the sugar content. A quick blast in the microwave—maybe 15 to 20 seconds—is perfect for bringing back that fresh-baked warmth, especially if you plan on serving it with coffee. You can actually find some great tips for keeping bakes soft over on my chewy oatmeal bars recipe page, as those tips cross over well for quick breads!
Serving Suggestions for This Glazed Apple Bread
Now that you have this incredible, homemade Glazed Apple Bread loaf sitting on your counter—the tricky part begins: choosing how to serve it! Because this apple fritter bread combines the best parts of breakfast heaven and dessert indulgence, the options are wide open. Honestly, eating a thick slice plain while it’s still slightly warm is spectacular enough on its own, but why stop there?
For a cozy morning setup, these truly shine as part of your standard Breakfast Loaf Recipes lineup. They are magnificent alongside a hot mug of coffee, especially if you make my homemade homemade pumpkin spice latte recipe! If you’re feeling extra fancy, spread a little softened cream cheese on a warm slice. The slight tang cuts through the sweetness of the vanilla glaze perfectly.
When you want to turn this into an evening treat, it’s a simple transformation! Heat a slice up for about 15 seconds in the microwave until it’s wonderfully soft and fragrant. A scoop of high-quality vanilla bean ice cream melting right next to it turns this into a decadent dessert in seconds. It truly holds up as a perfect rich, buttery apple dessert bread. Enjoy every single bite!
Frequently Asked Questions About Apple Fritter Bread Recipe
I know you’re going to have questions once you get into the rhythm of baking this, because every great bake deserves a little troubleshooting! I’ve gathered the questions I usually get when friends try this recipe for the first time. Remember, baking is about learning, so don’t stress if your first loaf isn’t absolutely perfect. You can always find more general baking wisdom over on my whipped hot honey ricotta dip page—the science of dairy is surprisingly similar!
Can I make this apple fritter bread ahead of time?
Yes, you absolutely can! I actually prefer making this ahead. If you bake the loaf completely, let it cool, and leave off the glaze, you can wrap it tightly and keep it on the counter for up to three days, or freeze it for longer. If you are making it for a brunch event, you can even mix the batter up the night before and keep it covered in the fridge. Just know that batter might need an extra 5 minutes in the oven if it goes in straight from the cold fridge, since the cold slows down the leavening action a bit.
What makes this recipe taste like a true apple fritter?
That’s the million-dollar question! It’s all about the textural contrast, not just the flavor. A real fritter has that sugary, slightly crisp coating, right? We achieve that effect here with the distinct cinnamon sugar swirl layered throughout the middle. Plus, by using the creaming method and alternating wet/dry ingredients, we ensure the crumb is dense and soft rather than light and airy like a typical cake. That density mimics the texture you get when apples and dough are mixed in an actual fryer. It makes this apple fritter bread truly special.
How do I prevent my quick bread with apples from sinking?
The sinking issue usually comes down to two things in a Quick Bread with Apples like this: either you overmixed the batter, which weakens the structure, or the apple layer was too heavy and wet compared to the batter holding it up. To prevent sinking, make absolutely sure you are not overmixing after adding the flour. Also, make sure you toss those apples with their sugar coating! If you have especially juicy apples, maybe drain off a tiny bit of excess liquid before layering them. Distributing the cinnamon sugar evenly alongside the apples, rather than dumping it all in one spot, helps keep the layers balanced during that initial rise in the oven. Follow that layering guide, and you should have a beautifully level loaf!
Share Your Best Apple Fritter Bread Creations
Okay, now it’s your turn! I’ve given you my absolute best tips and the trusted family method for this apple fritter bread, but the real fun starts when you bring your unique kitchen magic to the table.
Please, if you make this lovely loaf, come back here and let me know how it went! Did you use pecans? Did you swap the glaze for maple? Drop a rating below so other bakers know what to expect. I absolutely love seeing what you all are doing in your own kitchens.
If you’ve snapped a picture while the glaze was still setting, tag me on social media! Knowing that this recipe is filling your homes with that sweet, buttery aroma is what makes all the testing worth it. I can’t wait to hear about your success—or maybe get a little feedback so we can troubleshoot together! If you’re looking for another simple, satisfying bake, you have to try my recipe for thick, chewy chocolate chip cookies next time you need a guaranteed hit!
PrintAmish Apple Fritter Bread with Cinnamon Swirl and Vanilla Glaze
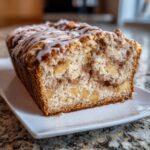
You get the taste of a classic apple fritter in a soft, sliceable loaf. This recipe creates a moist, buttery bread layered with cinnamon sugar and tender apples, finished with a sweet vanilla glaze. It is perfect for breakfast, a snack, or dessert.
- Prep Time: 20 min
- Cook Time: 60 min
- Total Time: 80 min
- Yield: 1 loaf (about 10 servings) 1x
- Category: Dessert
- Method: Baking
- Cuisine: American
- Diet: Vegetarian
Ingredients
- ½ cup (1 stick) butter, softened
- ⅔ cup granulated sugar
- 2 large eggs
- 1½ teaspoons vanilla extract
- 1½ cups all-purpose flour
- 1¾ teaspoons baking powder
- Pinch of salt
- ½ cup milk
- 2 apples, peeled and chopped (use a mix of Granny Smith and Honeycrisp)
- 2 tablespoons granulated sugar (for apples)
- ⅓ cup light brown sugar (for cinnamon sugar)
- 2 teaspoons ground cinnamon (for cinnamon sugar)
- ½ cup powdered sugar (for icing)
- 1–3 tablespoons milk (for icing)
Instructions
- Preheat your oven to 350°F. Grease a 9×5-inch loaf pan.
- In a small bowl, mix the light brown sugar and cinnamon for the cinnamon sugar. Set this aside.
- Toss the chopped apples with 2 tablespoons of granulated sugar. Set the apples aside.
- Make the batter: Cream the softened butter and granulated sugar until the mixture is light and fluffy. Beat in the eggs one at a time, then mix in the vanilla extract.
- In a separate bowl, whisk together the flour, baking powder, and salt.
- Add the dry ingredients to the wet ingredients alternately with the milk. Mix only until the ingredients are just combined. Do not overmix.
- Assemble the loaf: Spread half of the batter into your prepared loaf pan. Top this layer with half of the sugared apples and half of the cinnamon sugar mixture.
- Repeat the layering process with the remaining batter, apples, and cinnamon sugar.
- Bake for 50 to 60 minutes, or until a toothpick inserted into the center comes out clean.
- Let the bread cool in the pan for 10 minutes before carefully removing it to a wire rack to cool further.
- Make the icing: Mix the powdered sugar with 1 tablespoon of milk. Add more milk, one teaspoon at a time, until you reach a pourable consistency. Drizzle the icing over the cooled loaf. Slice and serve.
Notes
- Using a mix of tart and sweet apples, like Granny Smith and Honeycrisp, gives you the best flavor balance.
- Allow the bread to cool before slicing to help the layers set properly.
- This recipe makes a wonderful homemade apple dessert bread perfect for fall baking.
Nutrition
- Serving Size: 1 slice
- Calories: 350
- Sugar: 35g
- Sodium: 200mg
- Fat: 18g
- Saturated Fat: 10g
- Unsaturated Fat: 8g
- Trans Fat: 0g
- Carbohydrates: 45g
- Fiber: 2g
- Protein: 4g
- Cholesterol: 60mg