
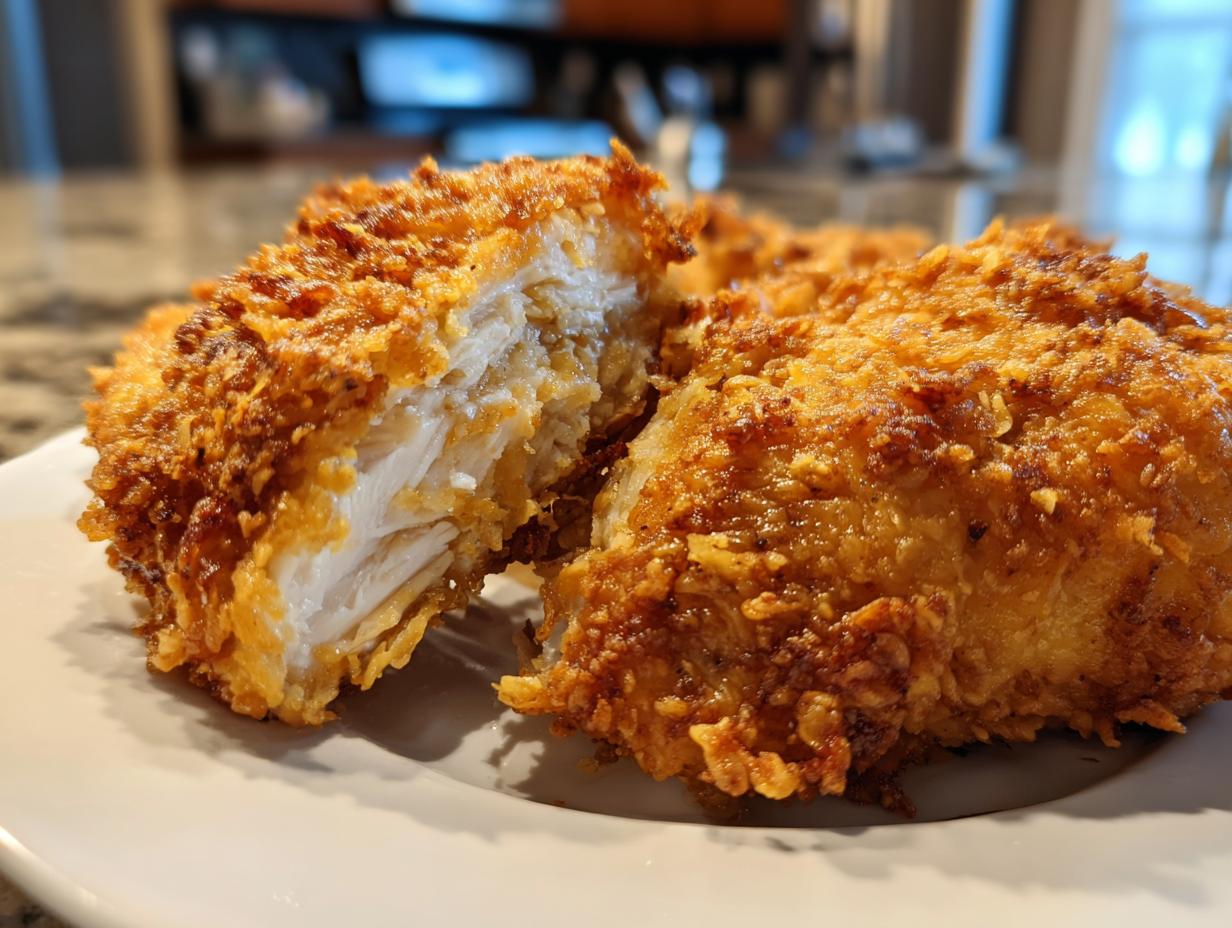
I know that craving. We all do! It’s that deep, satisfying yearning for perfectly crunchy, juicy Southern-style fried chicken, but you really don’t want to deal with the mess or the massive oil slick afterward. That’s exactly why I poured all my home cook energy into creating this air fryer fried chicken recipe. Trust me, you can absolutely get that shatteringly crisp coating we all love right in your basket! This isn’t some sad, pale air-fried substitute; this is The Ultimate Crispy Southern-Style Air Fryer Fried Chicken. We’re simplifying comfort food, cutting the guilt, and keeping the flavor intact. This is going to change your weeknight dinners, I promise.
- Why This air fryer fried chicken Recipe Works (The Secret to Crispiness)
- Ingredients for The Ultimate Crispy Southern-Style air fryer fried chicken
- Step-by-Step Instructions for Perfect air fryer fried chicken
- Tips for Making Crispy Air Fryer Chicken Every Time
- Serving Suggestions for Your air fryer fried chicken Dinner
- Storage and Reheating Instructions
- Frequently Asked Questions About Air Frying Chicken
- Estimated Nutritional Data
- Share Your Culinary Creations
- Estimated Nutritional Data
- Share Your Culinary Creations
Why This air fryer fried chicken Recipe Works (The Secret to Crispiness)
When people talk about air fryer chicken being soggy, they usually skipped the two most important steps I learned through trial and (a lot of) error. The air fryer is fantastic, but it needs help replicating that deep-fry crust. We hack the process by focusing on texture before the heat even turns on. It’s all about creating ridges and texture that the circulating hot air can blast crisp, ensuring you get that beautiful, crackly skin.
If you want true flavor and texture in your air fryer fried chicken, you can’t skimp here. It’s what separates a good attempt from a recipe you’ll save forever. If you skip these steps, you’re just making baked chicken, not crispy chicken!
The Buttermilk Soak for Juicy Air Fryer Chicken
First up is the soak. Buttermilk is magic because its acidity helps break down the proteins in the meat just a tiny bit, leading to incredibly Juicy Air Fryer Chicken. But even better? That thick liquid clings beautifully to the chicken. When you pull it out, the buttermilk residue acts like a glue for our flour dredge. It’s a non-negotiable step if you want that tender interior!
For more details on why buttermilk is the best marinade, you can check out my deep dive on traditional fried chicken methods here: why buttermilk makes all the difference.
Achieving Golden Brown Air Fryer Chicken Texture
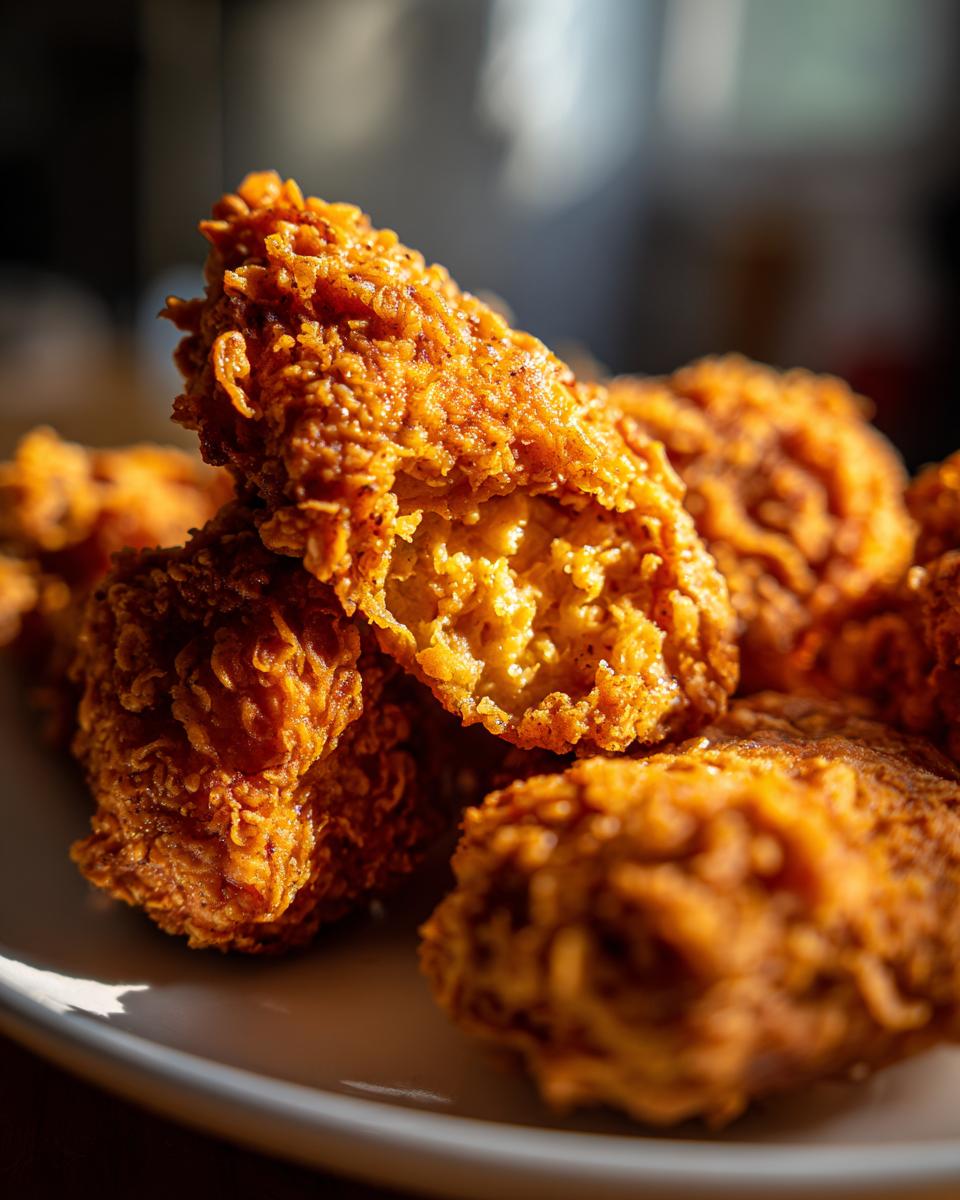
This is where the crunch comes from. Many recipes just dredge the chicken once, but that gives you a thin, one-layered crust. We need craggy, bumpy texture that maximizes surface area for crisping in the basket. That’s why we do a double-dredge!
After the first coat of flour, we dip it back into the wet buttermilk—just a quick dunk—and then back into the seasoned flour for a final, hard press. This technique creates those fantastic little flour flakes and peaks that turn into glorious, Golden Brown Air Fryer Chicken texture when cooked. Those little edges are what stay crispy!
Ingredients for The Ultimate Crispy Southern-Style air fryer fried chicken
I always keep my ingredient list straightforward because the magic really comes from the timing and the double-dredge, not from searching for obscure spices. We need bone-in pieces here—thighs and drumsticks work best for that Healthy Fried Chicken Alternative, but breasts are fine if you adjust the timing a bit. Make sure you measure your flour and cornstarch precisely; this blend is what sets up that amazing crust.
The hot sauce in the buttermilk is optional, but I highly recommend it; it adds no heat but brightens up the whole flavor profile. Remember, the full list is below, but treat the buttermilk soak time as seriously as you treat the final cooking time!
- 2 lbs bone-in, skin-on chicken pieces (thighs, drumsticks, breasts)
- 2 cups buttermilk
- 1 tablespoon hot sauce (optional)
- 2 cups all-purpose flour
- 1/2 cup cornstarch
- 2 teaspoons salt
- 1 teaspoon black pepper
- 1 teaspoon paprika
- 1 teaspoon garlic powder
- 1 teaspoon onion powder
- 1/2 teaspoon cayenne pepper
- Cooking spray or 1 tablespoon oil for brushing
Step-by-Step Instructions for Perfect air fryer fried chicken
Alright, now that you know the secrets to the crust, let’s actually cook this thing. Following these steps exactly is key to getting that result you see on amazing Pinterest photos. Don’t rush the marinating, and don’t overcrowd the basket—those are my two big rules for making this air fryer fried chicken work!
Marinating the Chicken for Tender air fryer fried chicken
First, you need to get that chicken happy. Grab your bowl with the buttermilk and hot sauce, and tuck those chicken pieces right in there. They need time to relax and absorb that tanginess! You must refrigerate them for a minimum of 4 hours. Seriously, the longer they marinate, the more incredibly Tender air fryer fried chicken you get. If you can plan ahead, letting them go overnight is absolutely the way to go. Just cover it up tightly so nothing drips!
Preparing the Breading and Dredging Technique
While the chicken is chilling, whisk up that beautifully seasoned flour mixture in your shallow dish. We talked about the double dredge, so let’s get specific. Take a piece out of the buttermilk, let the excess drip off—I mean *really* drip—and dredge it hard in the flour mix. Press that flour on, folks! Then, give it a very fast dip back into the buttermilk bath, and immediately put it back into the flour for the final coating.
When you press the second time, it should start forming those lovely, craggy little flakes on the surface. That’s the texture that crisps up like you wouldn’t believe!
Air Frying for Crispy Air Fryer Chicken
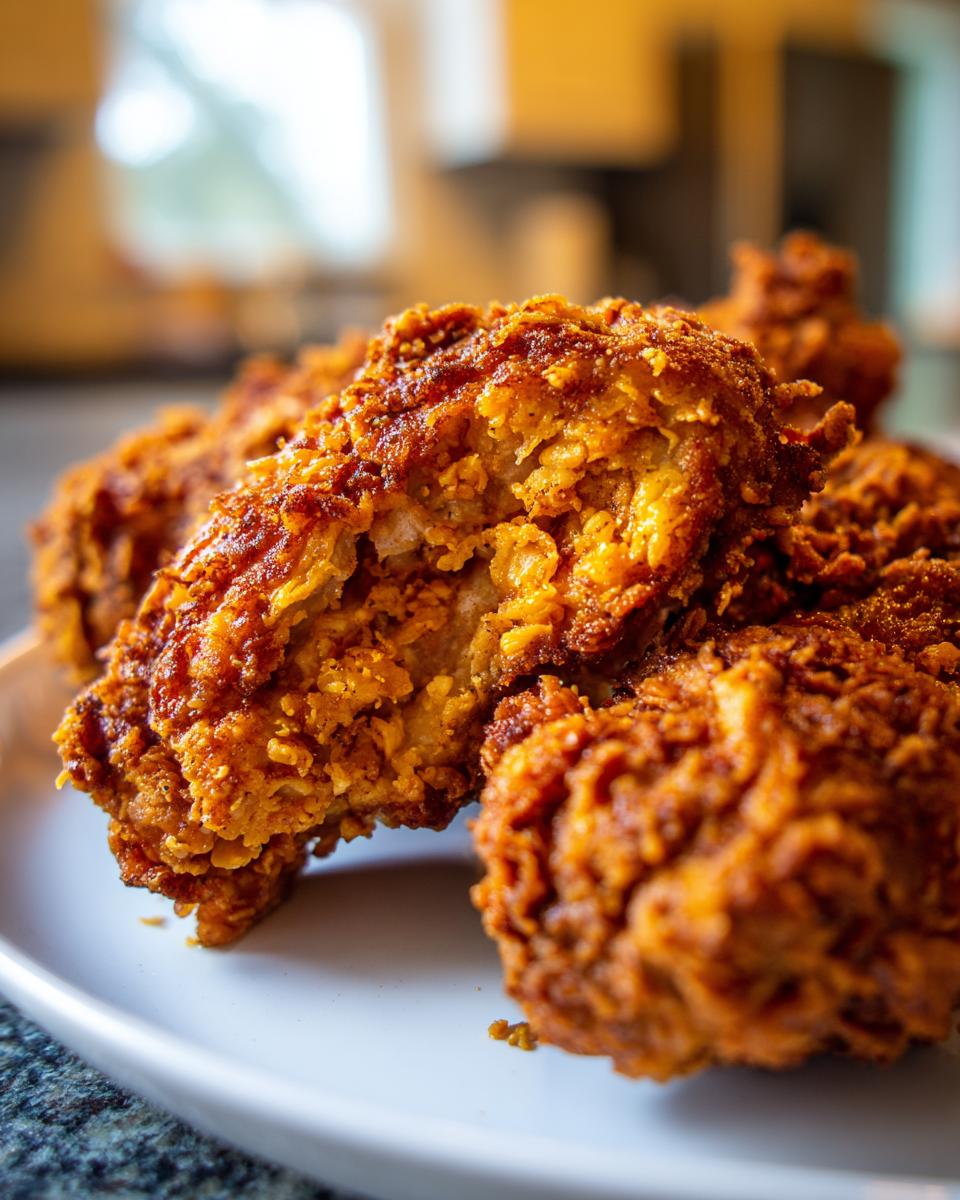
Time to cook! Make sure your air fryer is preheated to 380°F (195°C). This is crucial for that immediate crisping action. Lay your chicken pieces in the basket in a single layer. I can’t stress this enough: if they are touching, they will steam, and you will lose that hard-earned crunch. You might have to work in batches, but it’s worth the extra 10 minutes!
Cook for 20 minutes, then carefully flip every piece. Give the tops a quick spritz of cooking spray or a light brush of oil—this helps them turn brilliant gold. Pop them back in for another 10 to 15 minutes. Use a meat thermometer to check that the thickest part hits 165°F (74°C). That internal temp is your guarantee for Crispy Air Fryer Chicken success!
We have some great tips specifically for cooking different cuts in the air fryer over at our air fryer tender guide, which can help if you mix up your pieces. And for visual inspiration on the perfect end result, check out this technique over at their site: how they prep their batches.
Tips for Making Crispy Air Fryer Chicken Every Time
Okay, we’ve mastered the method, but let’s talk about the little stuff that separates good results from truly legendary Crispy Air Fryer Chicken. As a home cook, I know things aren’t always perfect when you start. Usually, the issue boils down to moisture control or air circulation. You absolutely want that golden, crunchy shell, and I’ve found a few tricks to guarantee it.
Remember, the air fryer works by blasting hot air around the food. If your chicken is too wet when it goes in, or if the pieces are crammed together, that air can’t do its job. It ends up steaming the coating instead of frying it! Don’t let that happen to your hard work. For more on how to manage air flow, check out my tips on air frying larger cuts of meat, as the principle is the same.
Ingredient Notes and Substitutions
When we talk about bone-in versus boneless, bone-in is my top pick for this recipe. The bone conducts heat, helping the meat cook evenly from the center out, which keeps the breast meat from drying out while you wait for the skin to crisp. If you use boneless breasts, you must pound them to an even thickness first; otherwise, the thinner edges will burn before the middle is done.
But what if you’re out of buttermilk? Don’t panic! You can make an emergency substitute that works almost as well. Just take regular milk and stir in one tablespoon of white vinegar or lemon juice. Let it sit on the counter for about five minutes until it starts to curdle slightly. That acidity mimics the buttermilk perfectly for tenderizing. If you’re looking for tried-and-true variations, always check out Hedy’s great tips, like the ones she shares about her own process.
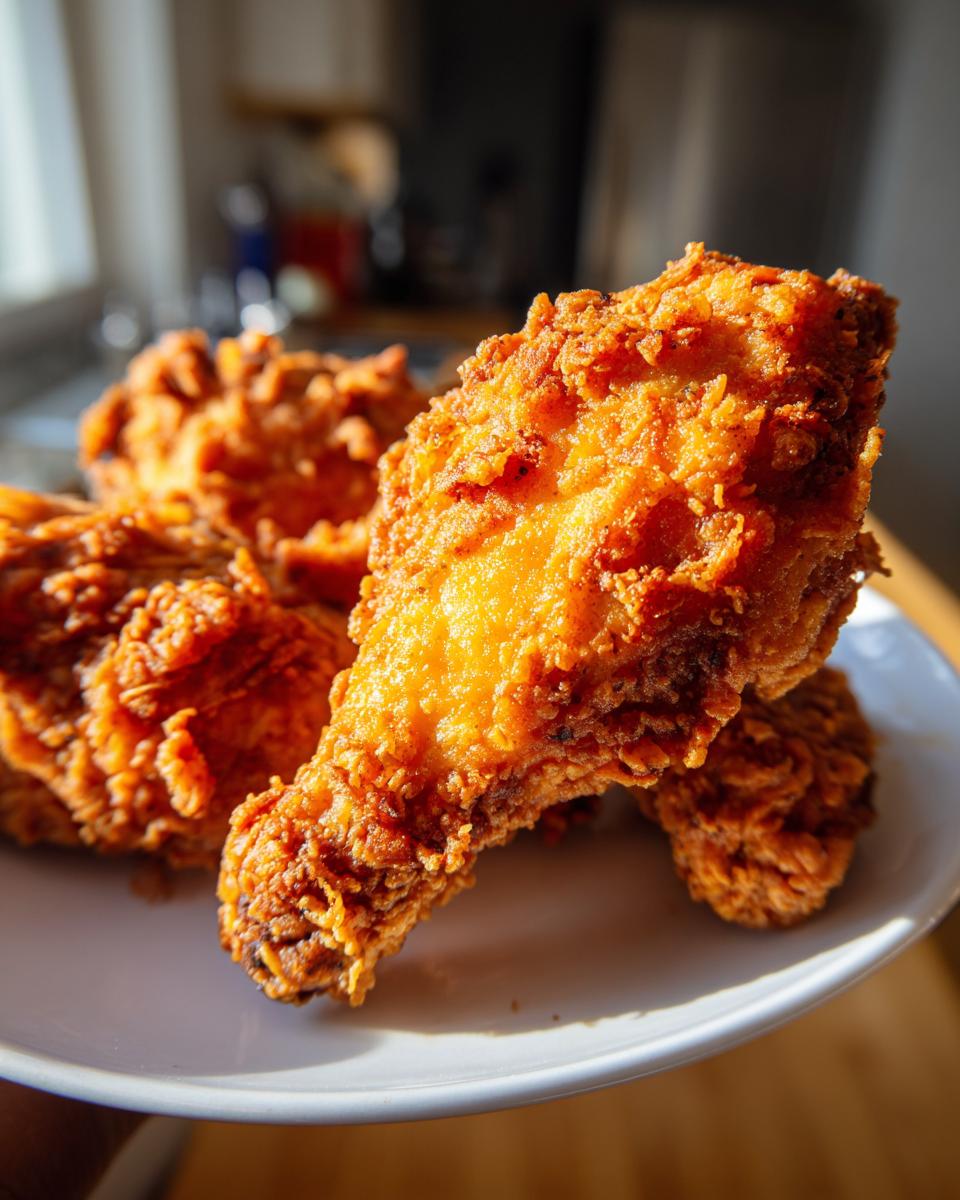
And just a reminder: that dry, craggy coating needs that little spritz of oil or brush right before cooking. It gives the breading the necessary fat to reach that high-heat crisping point! It’s the final, tiny step that makes the biggest visual difference.
Serving Suggestions for Your air fryer fried chicken Dinner
So you’ve mastered the crunch—congratulations! Now you need the supporting cast for this amazing air fryer fried chicken. Since this recipe is designed to be that perfect, guilt-free comfort food centerpiece, keeping the sides easy and delicious is key to making it an actual Easy Weeknight Chicken Dinner. We want satisfying sides that soak up those pan juices but don’t require you to turn on multiple ovens or dirty a million extra pots.
For that true Southern feel, you can’t go wrong with creamy, comforting classics. These sides pair perfectly with the slightly spicy, savory chicken coating, making the whole meal truly memorable.
My absolute must-haves are usually mash and greens. You can follow my recipe for incredibly creamy mashed potatoes—they are pure heaven next to that crisp skin. If you’re feeling ambitious but still want that traditional vibe, my slow-simmered collard greens are a fantastic (and make-ahead!) choice.
If you need something quicker, think simple. A vinegar-based coleslaw cuts through the richness beautifully. Sweet potato fries cooked right in the air fryer are another winner, or even just some steamed green beans tossed lightly with butter and salt. The goal here is to let that crispy chicken shine, so keep the sides flavorful but straightforward!
Storage and Reheating Instructions
This Southern-style chicken is so good, you might actually have leftovers—though I usually can’t resist eating it all! If you do manage to save some of that epic Crispy Air Fryer Chicken, how you store and reheat it is everything. We want to avoid that gummy texture that comes from reheating fried food incorrectly, which defeats the purpose of using the air fryer in the first place!
The best storing method is simple: completely cool every piece down first. Don’t put warm chicken into an airtight container; that’s a recipe for condensation, and condensation is the enemy of crispiness. Once cooled, place the chicken in a single layer in an airtight container, or use parchment paper between layers if you have to stack them.
For reheating, we go right back to the machine that made it great: your air fryer. You absolutely do not want to use a microwave if you care about that crunch. Set your air fryer to a medium-low temperature, around 350°F (175°C). Place the cold pieces back in the basket without overcrowding—again, airflow is vital!
Heat them for about 5 minutes, check them, and then go for another 3 to 5 minutes until they are fully heated through and the skin feels tight and crisp again. It works like a charm! This method restores that beautiful texture you worked so hard to achieve, making your leftovers nearly as good as they were fresh out of the basket.
Frequently Asked Questions About Air Frying Chicken
I know you might have a couple of lingering questions, especially if you’re nervous about achieving that true crunch. That’s okay! When I started experimenting with the air fryer, I had a million questions too. Dealing with bone-in chicken in this appliance can seem tricky, but once you get these basics down, you’ll be making your new favorite Air Fryer Dinner Ideas all the time.
Can I skip the buttermilk soak?
Oh, you *can*, but I honestly wouldn’t recommend it if you are aiming for genuinely Juicy Air Fryer Chicken and that deeply set flavor. The buttermilk works in two ways: it tenderizes the meat gently before cooking, and it acts like the best possible glue for the flour coating. If you skip it, you risk having a coating that flakes off easily or a piece of chicken that comes out drier. If you’re totally out, use the lemon juice/milk substitute I mentioned earlier, but try not to skip the wet step entirely!
Do I really need to spray the chicken with oil before cooking?
Yes, you absolutely do! While this is a Healthy Fried Chicken Alternative compared to deep frying, the air just doesn’t brown and crisp dry flour effectively on its own. That light layer of oil (or cooking spray) is what helps the coating transition from floury to golden and crunchy—it’s essential for that Southern-style visual appeal. Don’t skip the spritz before the flip, or you’ll end up with some pale spots.
Is the cooking temperature different for chicken breasts versus thighs?
That’s a smart question, and yes, it matters a lot! Chicken thighs (especially bone-in) have more fat and connective tissue, so they handle a higher temperature slightly better, usually hovering around 380°F (195°C). If you are making Boneless Chicken Breast Air Fryer cuts, I recommend starting a touch lower, say 370°F (188°C), and relying on the internal temperature check. Breasts cook faster and can dry out if you hit them too hard—we want tender, not tough! For more details on timing different pieces, check out my notes on air fryer chicken tenders, as that often involves thinner meat cuts.
How do I make sure my crust doesn’t fall off?
This is all about pressing and time! When you dredge, don’t just lightly dust the chicken; you need to firmly press the flour mixture onto every surface. Think of it like packing snow to make a snowball. Also, after dredging, let the coated chicken sit on a rack or plate for about 10 minutes *before* it goes into the air fryer. This resting period allows the flour to hydrate slightly with the buttermilk residue, essentially setting the crust so it stays put during cooking. This little break is a game-changer for the final look of your crispy texture!
Estimated Nutritional Data
When we talk about making this recipe for an Easy Weeknight Chicken Dinner, the nutrition profile really shines, especially when comparing it to the deep-fried version. We’ve massively cut down on the fat intake here because we aren’t submerging it in oil.
Keep in mind, these figures are estimates based on using standard bone-in, skin-on pieces and the ingredients listed. Your exact numbers will vary based on the size of your pieces and how much oil you use in the spray!
- Serving Size: 1 piece
- Calories: 350
- Sugar: 2g
- Sodium: 550mg
- Fat: 15g
- Saturated Fat: 4g
- Unsaturated Fat: 11g
- Trans Fat: 0g
- Carbohydrates: 18g
- Fiber: 1g
- Protein: 35g
- Cholesterol: 110mg
Share Your Culinary Creations
Now you have everything you need to create the ultimate Guilt Free Fried Chicken experience right in your kitchen! I hope you see how powerful just a few simple techniques—the soak and the double press—can be.
I absolutely live to see your results! Please try this out, and when you do, come back and leave a star rating and a comment telling me how crispy your coating got. Seriously, hearing from you keeps me energized to keep developing these recipes. If you snap a picture of your beautiful Air Fryer Fried Chicken, tag me on social media! It makes my day to see my recipes finding a home in your favorite cooking rotation. If you want to learn more about my mission to elevate everyday cooking, you can read about it here: my story!
Estimated Nutritional Data
When we talk about making this recipe for an Easy Weeknight Chicken Dinner, the nutrition profile really shines, especially when comparing it to the deep-fried version. We’ve massively cut down on the fat intake here because we aren’t submerging it in oil.
Keep in mind, these figures are estimates based on the ingredients listed and can vary based on specific product choices and portion size. Always remember, this is just a guide—the real proof is in how delicious it tastes!
- Serving Size: 1 piece
- Calories: 350
- Sugar: 2g
- Sodium: 550mg
- Fat: 15g
- Saturated Fat: 4g
- Unsaturated Fat: 11g
- Trans Fat: 0g
- Carbohydrates: 18g
- Fiber: 1g
- Protein: 35g
- Cholesterol: 110mg
Share Your Culinary Creations
Now you have everything you need to create the ultimate Guilt Free Fried Chicken experience right in your kitchen! I hope you see how powerful just a few simple techniques—the soak and the double press—can be.
I absolutely live to see your results! Please try this out, and when you do, come back and leave a star rating and a comment telling me how crispy your coating got. Seriously, hearing from you keeps me energized to keep developing these recipes. If you snap a picture of your beautiful Air Fryer Fried Chicken, tag me on social media! It makes my day to see my recipes finding a home in your favorite cooking rotation. If you want to learn more about my mission to elevate everyday cooking, you can read about it here: my story!
PrintThe Ultimate Crispy Southern-Style Air Fryer Fried Chicken

Make genuinely crispy, juicy Southern-style fried chicken using your air fryer. This recipe delivers the classic crunch with significantly less oil, making it a perfect healthy fried chicken alternative for a quick weeknight dinner.
- Prep Time: 20 min
- Cook Time: 35 min
- Total Time: 3 hours 55 min
- Yield: 4 servings 1x
- Category: Dinner
- Method: Air Frying
- Cuisine: American
- Diet: Low Fat
Ingredients
- 2 lbs bone-in, skin-on chicken pieces (thighs, drumsticks, breasts)
- 2 cups buttermilk
- 1 tablespoon hot sauce (optional)
- 2 cups all-purpose flour
- 1/2 cup cornstarch
- 2 teaspoons salt
- 1 teaspoon black pepper
- 1 teaspoon paprika
- 1 teaspoon garlic powder
- 1 teaspoon onion powder
- 1/2 teaspoon cayenne pepper
- Cooking spray or 1 tablespoon oil for brushing
Instructions
- In a large bowl, combine the buttermilk and hot sauce. Add the chicken pieces, ensuring they are fully submerged. Cover and refrigerate for at least 4 hours, or preferably overnight, to tenderize the meat.
- In a separate shallow dish, whisk together the flour, cornstarch, salt, pepper, paprika, garlic powder, onion powder, and cayenne pepper. This is your seasoned coating.
- Remove the chicken from the buttermilk, letting excess drip off, but do not rinse.
- Dredge each piece thoroughly in the flour mixture, pressing the coating firmly onto the chicken to create a thick layer. For extra crispiness, dip the floured chicken back into the remaining buttermilk for a second, quick dip, then return it to the flour mixture for a second coating.
- Preheat your air fryer to 380°F (195°C). Lightly spray the air fryer basket with cooking spray or brush the chicken pieces with a thin layer of oil.
- Place the chicken pieces in the air fryer basket in a single layer, ensuring there is space between pieces for air circulation. Do not overcrowd the basket; work in batches if necessary.
- Air fry for 20 minutes. Flip the chicken pieces, lightly spray or brush the tops with more oil, and continue to air fry for another 10 to 15 minutes, or until the internal temperature reaches 165°F (74°C) and the coating is golden brown and crisp.
- Remove the chicken and let it rest for 5 minutes before serving.
Notes
- For the crispiest skin, ensure your chicken pieces are very dry after removing them from the buttermilk soak before dredging.
- If using chicken breasts, you may want to pound them slightly to an even thickness for consistent cooking.
- To achieve a KFC copycat flavor, increase the amount of paprika and add a pinch of dried mustard powder to the flour mixture.
Nutrition
- Serving Size: 1 piece
- Calories: 350
- Sugar: 2
- Sodium: 550
- Fat: 15
- Saturated Fat: 4
- Unsaturated Fat: 11
- Trans Fat: 0
- Carbohydrates: 18
- Fiber: 1
- Protein: 35
- Cholesterol: 110