
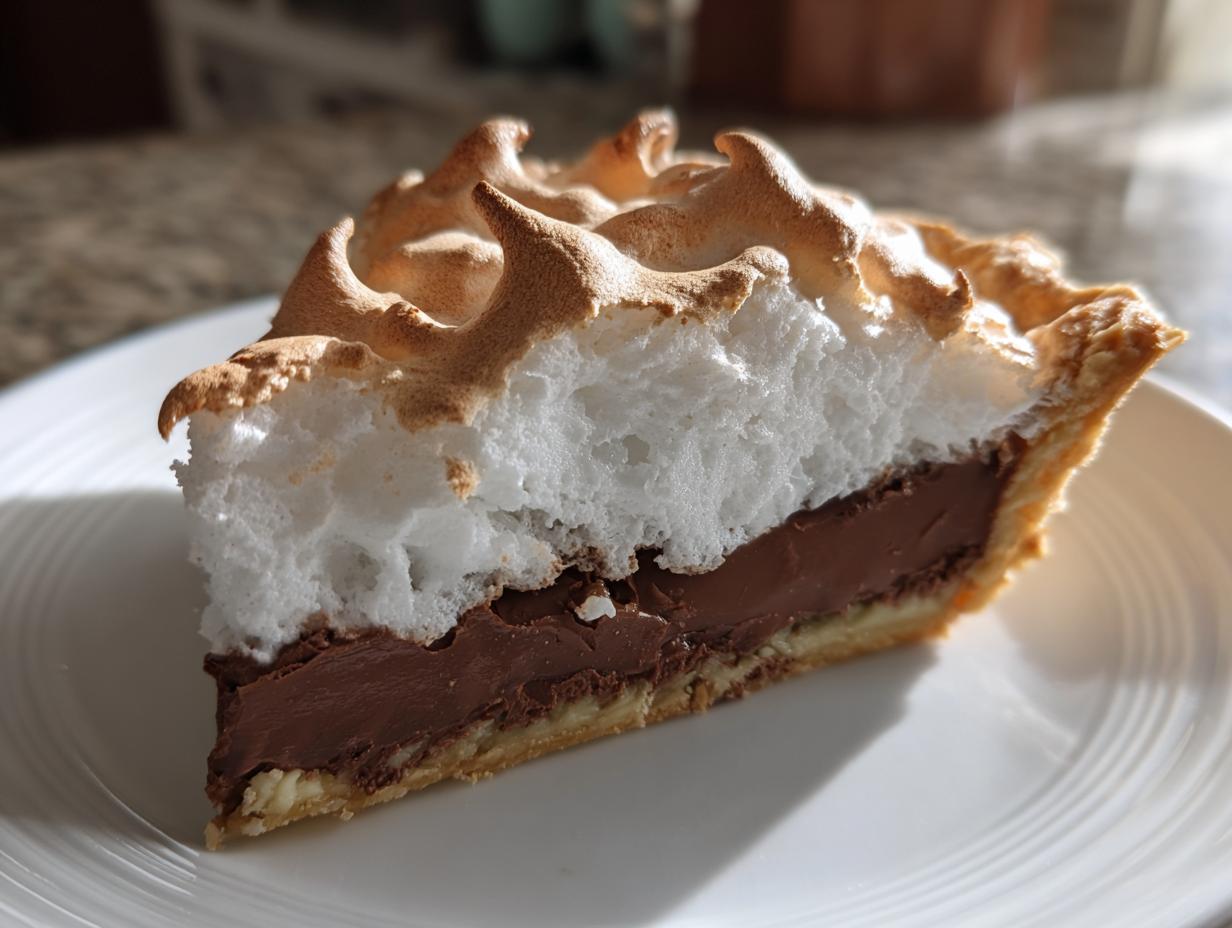
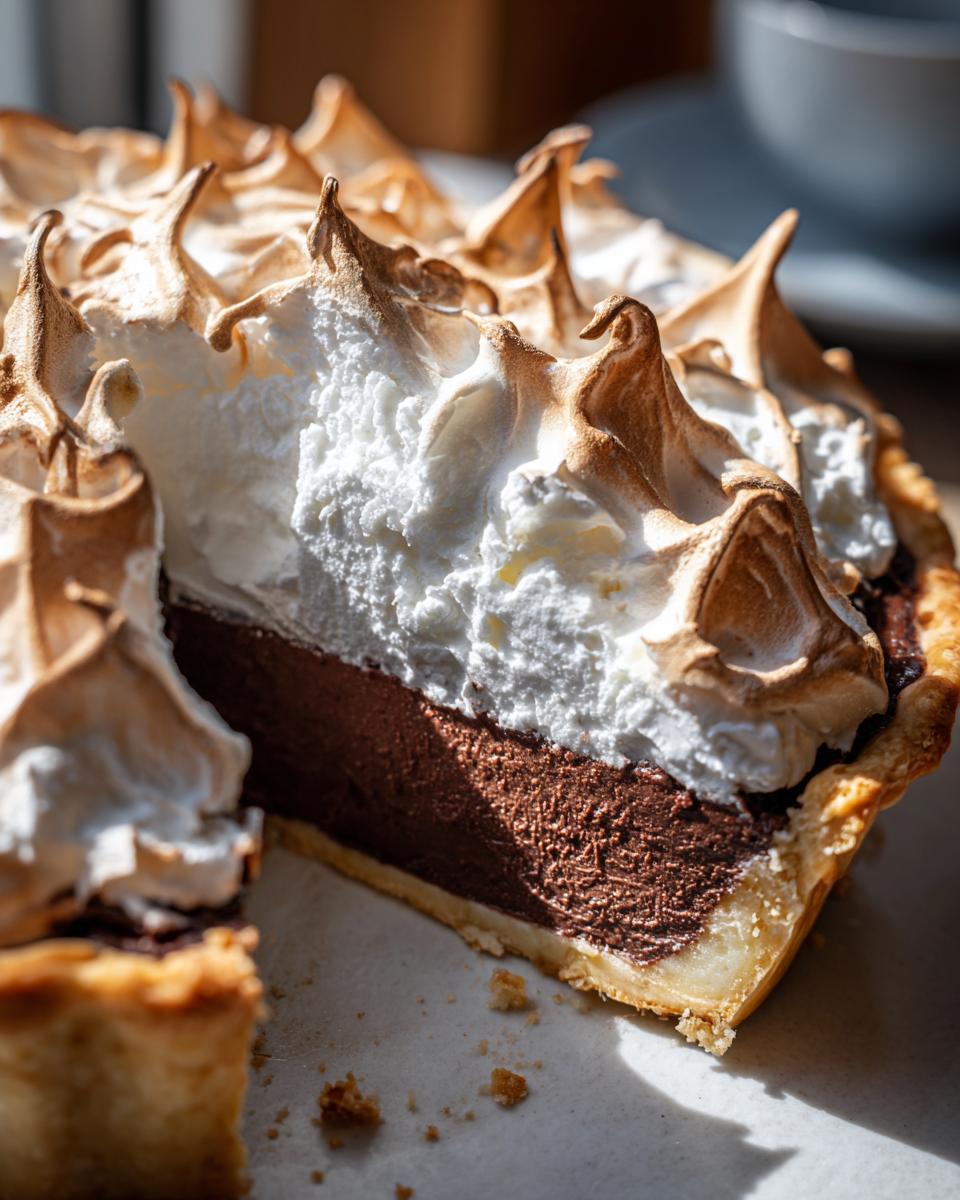
When you think about a true, show-stopping American classic dessert, honestly, what comes to mind? For me, it’s always a perfectly constructed pie. But let’s face it: the chocolate meringue pie can be terrifying! You want that gorgeous, towering, golden top, but all too often you end up with weeping, watery bases, or a meringue that collapses before you even get it to the table. Well, ditch the worry! I’m Aria Thompson, and I want you to be confident in the kitchen. I spent years developing this ultimate chocolate meringue pie recipe. It’s tested, obsessed over, and frankly, foolproof. We tackle the runny filling and the unstable topping head-on so you can achieve that decadent, creamy perfection every single time. If you love pies this much, you absolutely have to check out my thoughts on the best classic southern sweet potato pie, too!
- Why This is the Ultimate chocolate meringue pie Recipe
- Gathering Ingredients for Your chocolate meringue pie
- Step-by-Step Instructions to Make the Best chocolate meringue pie
- Essential Tips for a Perfect chocolate meringue pie
- Variations on the classic dessert recipes
- Serving Suggestions for Your Showstopping Chocolate Meringue Pie
- Storage and Reheating Instructions for Homemade Chocolate Pie
- Frequently Asked Questions About Making chocolate meringue pie
- Share Your Ultimate chocolate meringue pie Experience
Why This is the Ultimate chocolate meringue pie Recipe
What makes this my absolute favorite chocolate meringue pie? It’s all about the texture, friend. I didn’t just write down a recipe; I engineered it to defeat the two biggest pie villains: running filling and weeping meringue. After so many rounds of testing—trust me, I made a *lot* of failed pies—I finally nailed the perfect balance for a truly creamy chocolate filling.
This version delivers on every promise. It’s the kind of decadent chocolate dessert you serve when you really want to wow somebody. It’s the result of pure, home-cook persistence! If you’re looking for other creamy masterpieces, you have to try my creamy baked elote dip while you wait for this pie to chill.
Achieving a Velvety chocolate custard Base
The key here is not rushing the heat. We bring that chocolate mixture to a full boil and let it cook for a full minute after it thickens. Then, the tempering step! Slowly introducing the hot liquid to those yolks warms them up gently, so they don’t scramble. This careful process is what guarantees you get that lush, velvety chocolate custard that just melts in your mouth, filling up every space in that crust.
The Secret to a Fluffy Meringue Topping That Stays Put
For the topping, we use a little stabilizer—cream of tartar. I stress this step because it makes all the difference! Combined with adding the sugar slowly while beating, it builds those strong protein bonds needed for a beautiful, fluffy meringue topping. When you spread that meringue right to the crust edge, you seal in all that rich chocolate underneath, stopping any weeping before it even starts. You won’t regret trying this method!
Gathering Ingredients for Your chocolate meringue pie
Okay, now comes the “gathering” part, and for a recipe like this beautiful chocolate meringue pie, precision matters! We aren’t throwing things in randomly here; we’re setting up for success. You need to make sure everything is measured exactly, especially when dealing with custards and egg foams. Think of gathering your ingredients as assembling your high-end baking toolkit!
If you’re feeling extra ambitious and want to make your crust from scratch, make sure you check out my favorite easy honey butter recipe to go into that crust. But remember, the star here is the filling and the topping, so don’t stress if you need a shortcut!
For the No-Fail Pie Crust
First things first: you need a 9-inch pie crust, and here’s my big rule—it must be ready *before* we even think about the filling. This crust needs to be pre-baked until it’s just lightly golden, and then, this is extremely critical, it has to be totally, completely cool. A warm crust turns beautiful custard into soup! Grab whatever recipe you trust for your no-fail pie crust, bake it right, and let it chill out on a wire rack while we focus on the good stuff.
For the Creamy Chocolate Filling
This is where the magic happens, so measure these amounts carefully! We need 1 1/2 cups of granulated sugar, but notice how we split it up later for the meringue. For the base filling, whisk together 1 cup of that sugar, the unsweetened cocoa powder, cornstarch, and that tiny pinch of salt. Then, slowly add 1 1/2 cups of cold water. We also need 3 large egg yolks, lightly beaten—remember, save those whites for later! Finally, stir in 1 tablespoon of unsalted butter and 1 teaspoon of vanilla extract right at the end for richness.
For the Stabilized Meringue
This is the part people mess up constantly, but not you! We need 4 large egg whites, and I mean 4! They have to be at room temperature; cold whites just won’t whip up right. We also need 1/4 teaspoon of cream of tartar—I cannot stress this enough; this stuff is the insurance policy for your fluffy meringue topping. The remaining sugar for the meringue is 1/2 cup, which we will add slowly, a tablespoon at a time, into those whipping egg whites.
Step-by-Step Instructions to Make the Best chocolate meringue pie
Alright, let’s make some culinary magic! This is where all that preparation pays off. Follow these steps exactly, and you’ll see why this is my go-to recipe for the best chocolate meringue pie. I’ve broken it down into three main stages: getting the base ready, building the custard, and finally, crowning it with that perfect top layer.
Remember, for all the success stories and little nuggets of wisdom I’ve collected over the years, you can always check out my general guide on baking tips and tricks!
Preparing the Crust and Cooking the Velvety chocolate custard
Step one: Your pie crust needs to be cooled down completely. I mean totally room temperature, no residual heat! Then we dive into the saucepan. Whisk together 1 cup of that sugar, the cocoa, cornstarch, and salt. Slowly whisk in the cold water until everything is smooth as silk. Now, you need to turn the heat to medium and stir constantly until it gets thick and starts to boil. Seriously, don’t stop stirring! Once it boils, let it go for exactly one full minute, then pull it straight off the heat.
Tempering Egg Yolks and Finishing the chocolate meringue pie Filling
This next part is crucial for that creamy chocolate filling! In a separate little bowl, gently whisk your 3 egg yolks. Now, we temper them. This means you take about half a cup of that super hot chocolate mixture and *slowly* drizzle it into the yolks while whisking constantly. We’re raising their temperature gently so they don’t turn into scrambled bits in your pie! Once tempered, pour that yolk mixture carefully back into the rest of the chocolate in the saucepan. Cook it again on medium heat until it bubbles again, boil for one minute, then remove it immediately. Stir in your butter and vanilla until melty. Pour this hot filling *right now* into your cooled pie shell.
Whipping the Fluffy Meringue Topping and Baking
Time for the drama! Make sure your bowl is spotless! Beat the 4 room-temperature egg whites and that cream of tartar until they form soft peaks. Now, slowly, tablespoon by tablespoon, stream in the remaining 1/2 cup of sugar while the mixer is running. Turn the speed up high and beat until you get those stiff, glossy peaks. Spoon that glorious fluffy meringue topping onto the hot filling, and this is key: make sure you press the meringue right down against the edges of the crust all the way around. We are sealing it in! Bake at 350°F for about 10 to 15 minutes until it turns beautifully golden on top. Then, let it cool down its excitement on a rack before chilling it properly.

Essential Tips for a Perfect chocolate meringue pie
Listen, making a truly stunning chocolate meringue pie is never just about following steps; it’s about knowing the little secrets that keep everything from falling apart. Since I’ve spent so much time perfecting this, I want to share my best baking tips and tricks that ensure you get that perfect structure every time. These little details move your pie from good to truly showstopping!
If you’re looking for other great ways to use chocolate in your bakes, you have to check out my chocolate brownie cookies—they are chewy perfection!
Grease-Free Bowls for Meringue Stability
I can’t tell you how many times I’ve seen people ruined a fluffy meringue topping because of one tiny drop of grease! Egg whites are very fussy, you know? They need a clean surface to grip onto so they can build those strong air bubbles. Even a smudge of butter or a drop of yolk, and your whites will just stay sad and soupy. So, before you even think about whipping the egg whites, give your mixer bowl—and the whisk attachment—a good wipe down with a little vinegar or lemon juice, then dry it thoroughly. No grease allowed!
Slicing Your Decadent Chocolate Dessert
Your pie is beautifully set, the meringue is toasted, and everyone is just staring at it, waiting for the first slice. Don’t ruin the moment by wrecking the presentation! This trick works every time for a clean cut through that rich filling and fluffy top. Get a tall glass of hot water ready. Dip your sharpest knife into that hot water, wipe the blade completely dry, and then make your first slice. Repeat that simple dip-and-wipe process before every single cut. It melts right through the chocolate custard and keeps your slices looking absolutely perfect. It makes serving this decadent chocolate dessert so much easier!

Variations on the classic dessert recipes
I know you’re going to nail the ultimate chocolate meringue pie, but sometimes you need a little speed or a nod to tradition, right? Cooking Zenith is all about flexibility! We can easily shift gears to make this recipe fit whatever mood you’re in. Maybe you want something just for yourself tonight, or maybe you want to honor a recipe from even further back in time. It’s fun to see how these classic dessert recipes adapt!
If you’re done with pie for the moment, you might enjoy my small batch cinnamon rolls for a slightly different kind of comfort baking!
Making an Old Fashioned Pie Filling
If you are aiming for that true, dense, almost pudding-like texture found in true old fashioned pie recipes, here’s a secret: skip the egg whites that go into the meringue entirely! Use only the yolks in the custard base, maybe even adding one extra yolk. This cuts down on the final volume but makes the chocolate filling unbelievably rich and thick without relying on the whites for structure.
Quick Fixes for an Easy Chocolate Meringue Pie
Look, if it’s Tuesday and you need dessert now, we can make this an easy chocolate meringue pie. The biggest time-saver is using a high-quality, store-bought, pre-baked pie shell. Done! If you’re really short on time or nervous about the meringue step, ditch the homemade fluff entirely and top it with stabilized whipped cream instead. You get that creamy dessert experience instantly!
Serving Suggestions for Your Showstopping Chocolate Meringue Pie
Once this pie has finished its mandatory chill time, it’s ready to take the center stage! This showstopping dessert is incredibly rich on its own, so I usually try to balance the intensity with something lighter or a little tart on the side. It just feels right, you know?
I love taking a handful of fresh raspberries and scattering them right around the edge of the serving plate. The tartness cuts through that deep chocolate flavor perfectly. If you want something extra decadent, you can whip up some fresh, unsweetened heavy cream—just a little dab, not a mountain! And for a fun twist, try dipping some strawberries in chocolate using my easy chocolate covered strawberries recipe and serving one beside each slice!
Storage and Reheating Instructions for Homemade Chocolate Pie
Okay, you made it! You have this incredible, showstopping homemade chocolate pie, and the thought of leftovers is just… hopeful. Meringue pies are tricky when it comes to storage, though. If you treat this beauty wrong in the fridge, you risk that dreaded weeping or sweating, and we worked way too hard for that fluffy meringue topping to get soggy!
Here’s the lowdown on keeping your chocolate meringue pie perfect for later indulgence. For best results, you absolutely need to chill this pie completely, for at least four hours, before you even think about slicing it. That heat transfer from the filling to the meringue needs time to settle down.
When wrapping leftovers, never use plastic wrap pressed directly onto the meringue. Never! The condensation will stick and pull off chunks of your beautiful golden top. Instead, gently cover the entire pie dish loosely with parchment paper or wax paper tented high above the meringue layer. You can secure it loosely with a rubber band around the outside of the pie plate. This gives the meringue space to breathe while protecting it from fridge moisture.

This pie is best eaten within two to three days. Honestly, after day three, the filling starts to lose its perfect springiness. If you want to reheat anything, don’t! This chocolate dessert for company is meant to be served chilled or at cool room temperature. If you’re storing the pie uncovered (which I recommend for short periods), you can always give the meringue a quick little toasting with a kitchen torch right before serving to revive that gorgeous color. For more recipe adventures, check out my thoughts on using butter with a side of bread in baking!
If you want to see another amazing recipe, I always reference the classic chocolate meringue pie recipe from Cook Artisan when developing my own ratios!
Frequently Asked Questions About Making chocolate meringue pie
I know you’ve got questions, because trust me, I did too when I started battling this glorious chocolate meringue pie! Handling meringue and ensuring a perfectly set creamy chocolate filling takes practice, but once you know these tricks, you’ll never look back. This ultimate pie recipe is worth the effort, especially when you nail that towering, golden top!
If you’re ever looking for complex flavor in a simpler format, my notes on the ultimate moist red velvet cupcakes are always helpful!
How do I prevent the meringue on my chocolate meringue pie from weeping?
Weeping meringue—that sad little pool of sugary liquid between the topping and the filling—is the absolute worst! The most important preventative measure is heat sealing. You have to spread that fluffy meringue topping immediately over the hot chocolate filling. It needs to touch the crust edge all the way around—don’t leave any gaps! This seals the moisture in by creating a tight barrier so the sugar in the meringue doesn’t separate out as it bakes.
Can I use instant pudding instead of making the creamy chocolate filling from scratch?
If you want *my* ultimate, most decadent, velvety chocolate custard pie, then no, sweetie, you can’t. Using instant pudding skips the tempering and the boiling steps that give you that deep, rich flavor and necessary thickness. That being said, if you are desperate for an easy chocolate meringue pie tonight? Go for it! Instant mixes are designed to be fast, but they won’t give you the exact luxurious result we are aiming for here.
What is the best way to toast the fluffy meringue topping?
I honestly prefer the kitchen torch, hands down. It gives you complete control over the color, letting you get those beautiful, dark toasty peaks exactly where you want them without overcooking the meringue underneath. If you don’t have a torch, the oven works fine—just watch it like a hawk! Pop the pie in at 350°F until it browns, usually 10 to 15 minutes. If it starts browning too fast, pull it out immediately!
Share Your Ultimate chocolate meringue pie Experience
Now that you’ve mastered this ultimate chocolate meringue pie, I absolutely need to hear about it! Did that fluffy meringue topping stand tall and proud for you? Did the creamy chocolate filling set up just right? Please, please leave a rating below and tell me your success story! If you snap a picture, tag me on social media so I can see your beautiful work. Happy baking, friends!
And hey, if you found yourself craving more chocolate after conquering pie, you have to try my recipe for chocolate chip cookies that are thick and chewy—no chill required!
PrintThe Ultimate No-Fail Chocolate Meringue Pie
Make a showstopping dessert with this recipe for the best chocolate meringue pie, featuring a rich, velvety chocolate custard filling and a stable, fluffy, golden meringue topping.
- Prep Time: 25 min
- Cook Time: 20 min
- Total Time: 4 hr 45 min
- Yield: 8 servings 1x
- Category: Dessert
- Method: Baking and Stovetop
- Cuisine: American
- Diet: Vegetarian
Ingredients
- 1 (9-inch) unbaked pie crust (use your favorite no-fail pie crust recipe)
- 1 1/2 cups granulated sugar, divided
- 1/3 cup unsweetened cocoa powder
- 1/4 cup cornstarch
- 1/4 teaspoon salt
- 1 1/2 cups cold water
- 3 large egg yolks, lightly beaten
- 1 tablespoon unsalted butter
- 1 teaspoon vanilla extract
- 4 large egg whites, at room temperature
- 1/4 teaspoon cream of tartar
Instructions
- Prepare your pie crust according to your preferred method and bake until lightly golden. Let the crust cool completely on a wire rack.
- In a medium saucepan, whisk together 1 cup of the sugar, cocoa powder, cornstarch, and salt.
- Gradually whisk in the cold water until smooth. Cook over medium heat, stirring constantly, until the mixture thickens and boils. Boil for 1 minute, stirring constantly. Remove from heat.
- In a separate small bowl, whisk the egg yolks. Slowly temper the yolks by whisking about 1/2 cup of the hot chocolate mixture into the yolks.
- Pour the tempered yolk mixture back into the saucepan with the remaining chocolate mixture. Cook over medium heat, stirring constantly, until the filling returns to a gentle boil. Boil for 1 minute. Remove from heat.
- Stir in the butter and vanilla extract until the butter melts and is fully incorporated.
- Pour the hot chocolate filling immediately into the cooled, pre-baked pie shell.
- To make the fluffy meringue topping, place the egg whites and cream of tartar in a clean, grease-free bowl of a stand mixer fitted with the whisk attachment. Beat on medium speed until soft peaks form.
- Gradually add the remaining 1/2 cup of sugar, 1 tablespoon at a time, while beating. Increase the speed to high and beat until stiff, glossy peaks form. This creates a stable meringue.
- Spoon the meringue over the hot filling, making sure the meringue touches the crust edge all around to seal it. This helps prevent weeping.
- Bake the pie in a preheated 350°F oven for 10 to 15 minutes, or until the meringue is lightly golden brown.
- Cool the pie completely on a wire rack at room temperature for 1 hour, then refrigerate for at least 4 hours before slicing.
Notes
- For a perfectly stable meringue, ensure your mixing bowl and whisk attachment are completely free of any grease or water residue.
- Toasting the meringue with a kitchen torch after baking gives you a more even golden color than oven baking alone.
- When slicing this decadent chocolate dessert, dip your knife in hot water and wipe it clean between each cut for clean servings.
Nutrition
- Serving Size: 1 slice
- Calories: 380
- Sugar: 42g
- Sodium: 180mg
- Fat: 18g
- Saturated Fat: 10g
- Unsaturated Fat: 8g
- Trans Fat: 0.5g
- Carbohydrates: 52g
- Fiber: 2g
- Protein: 6g
- Cholesterol: 110mg