
Tell me this: Isn’t there just something truly magical about soft, warm bread right out of the oven? It smells like comfort, and it tastes divine. But when you’re planning dinner, who has time for a three-hour dough rise? You absolutely don’t need to, trust me! I developed this recipe because I needed that classic, pull-apart joy without waiting half a day. These are my ultimate quick and fluffy **dinner rolls**, ready from scratch in about an hour flat. I promise, even if you think yeast baking is tricky, these buttery yeast rolls are incredibly easy, proving that extraordinary flavor doesn’t need extravagant effort. Let’s get baking!
- Why These Are the Best Soft Dinner Rolls Recipe You Will Ever Make
- Gathering Ingredients for Your Buttery Yeast Rolls
- Step-by-Step Instructions to Make Easy Dinner Rolls
- Tips for Success Making Classic Butter Rolls
- Variations: From Garlic Butter Rolls Side Dish to Sweet Dinner Rolls
- Serving Suggestions: Pairing Dinner Rolls as the Best Side Dish for Dinner
- Storage and Reheating Instructions for Your Homemade Dinner Rolls
- Frequently Asked Questions About Making Yeast Rolls
- Nutritional Estimate for One Roll
Why These Are the Best Soft Dinner Rolls Recipe You Will Ever Make
Seriously, forget those store-bought frozen bricks! What everyone wants in a great side dish for dinner is that unmistakable soft, pillowy center and that rich, buttery topping. I get it—you want homemade bread from scratch, but you need it fast, right? These **dinner rolls** deliver that restaurant-quality texture, often faster than you can run to the store. We’ve managed to nail that incredible fluffiness in about an hour total, which is why people love this recipe so much. If you want that beautiful, warm bread experience tonight, this is the one. You can check out my guide on easiest yeast bread recipes if you want more quick-bake inspiration!
Ready in Under 65 Minutes: Quick Homemade Rolls
The time factor is huge here, and that’s by design! We call these our 1 hour dinner rolls because we skip the painfully slow overnight proofing most older recipes demand. How do we cheat the clock? We use slightly warmer water (but not hot—watch out!) and encourage the yeast with a little extra kiss of sugar and a cozy, warm spot in the kitchen. It’s the perfect setup for quick homemade rolls that don’t taste rushed at all.
The Secret to Pillowy Soft Dinner Rolls Recipe Texture
Texture is everything when we talk about melt in your mouth rolls. The secret isn’t complicated! It comes down to two main things: using enough melted butter in the dough itself—not just on top—and keeping your hands gentle during the kneading process. You want smooth dough, not overworked rubber. This balance means it’s an amazing beginner bread recipe. You get that light, pillowy soft rolls texture without needing specialist training. Seriously, check out how many people save this instantly at places like Flavor Nectar; they know a good thing when they see it! This recipe is a lifesaver.
Gathering Ingredients for Your Buttery Yeast Rolls
Okay, friend, let’s talk ingredients! The beauty of these buttery yeast rolls is that they use stuff you already have in your pantry—no special trips required. We need basic elements to whip up these amazing homemade rolls quickly. Making sure you have everything ready upfront makes this whole process feel smooth, almost therapeutic, honestly!
Here’s the shopping list we are working with for 12 gorgeous rolls:
- 1 cup warm water (and this is important—aim for 105°F to 115°F. Too cold and the yeast sleeps; too hot and you kill it!
- 2 1/4 teaspoons active dry yeast
- 1/4 cup granulated sugar
- 1/4 cup unsalted butter, melted, plus 4 tablespoons for brushing later (Don’t skimp on that second batch of butter, or we won’t have golden tops!)
- 1 large egg, lightly beaten
- 3 1/4 cups all-purpose flour, plus more for dusting
- 1 teaspoon salt
Ingredient Notes and Substitutions for Perfect Dinner Rolls
Since we’re moving fast, a couple of notes will guarantee you end up with those amazing, soft centers. First, that water temperature I mentioned? It’s non-negotiable for making sure our yeast gets active and happy!
You might be wondering about flour. I use all-purpose flour because it keeps these rolls incredibly soft, which is what we’re aiming for. However, if you prefer a slightly chewier, heartier bite—closer to a classic loaf—you can absolutely swap in some bread flour. Just use the same amount. Also, don’t panic if you only have instant yeast instead of active dry. If you use instant, just mix it right in with the flour and skip that initial 5-minute foaming step. It works just the same, but make sure it foams if you are using active dry yeast—that foam is your proof that the magic is ready to happen!
If you’re looking for other simple baking projects to use up your flour, you should absolutely check out my guide on easy homemade bread bowls where the rules are a little different but the satisfaction is the same!
Step-by-Step Instructions to Make Easy Dinner Rolls
Alright, this is where we turn ingredients into actual, tangible, soft bread goodness! Because we want these dinner rolls to be fast, we’re going to work with the dough quickly but gently. Don’t rush the waiting parts—that’s the yeast doing the heavy lifting for us!
Activating Yeast and Mixing the Dinner Rolls Dough
First things first: wake up that yeast! Grab your big bowl, dump in that warm water just shy of hot, the yeast, and the sugar. Give it a little swirl and then you just let it hang out for about 5 to 10 minutes. Seriously, watch it! When it starts looking foamy, like the top of a nice latte, that means your yeast is alive and ready to go. This is step one for any great homemade bread from scratch, and seeing that foam is so satisfying!
Once it’s foamy, whisk in your melted butter and that one lonely beaten egg. In another bowl, just give the flour and salt a quick whisk together. Now, slowly add the flour mix into your wet stuff. Mix it with a spoon or paddle attachment until it just comes together into a shaggy-looking lump. Don’t worry about perfection here; we’re grabbing the dough next!
Quick Proofing and Shaping Your Fluffy Homemade Bread
Time to get friendly with your dough! Turn it out onto a surface dusted lightly with flour. Now, knead it. You’re looking for about 5 to 7 minutes of work until it feels really smooth and elastic. It should feel soft, not tight. If you’re new to this, look up a quick video; it’s easier than you think! I find recipes like this one really show the proper texture.
Put the dough into an oiled bowl, give it a quick roll so it coats, cover it up securely, and tuck it somewhere warm—like near a sunny window or even in an oven that’s turned OFF. Let it rest for 30 minutes. It should get almost double in size. My philosophy is: if you rush the rise, you rush flavor, but for this quick homemade rolls recipe, 30 minutes is all we need!
When that time is up, gently punch the air out—don’t crush it, just deflate it a bit. Divide that lovely dough into 12 even bits, and roll each one into a tight little ball. Pinch the bottom seams closed so they are nice and smooth on top. Line them up in your greased 9×13 dish, leave an inch between them so they can cuddle, and cover them again for 15 to 20 more minutes. They’ll look puffy and ready to go!
Baking and the Final Buttery Finish for Your Dinner Rolls
Preheat that oven to 375°F (190°C). Pop the pan in and bake them for about 15 to 18 minutes. You are watching for that gorgeous, golden-brown top—that’s how you know they are cooked through. Seriously, don’t overbake them or you’ll lose that soft texture we worked so hard for! For more advanced techniques using yeast, you might want to look at my guide on sourdough yeast bread.
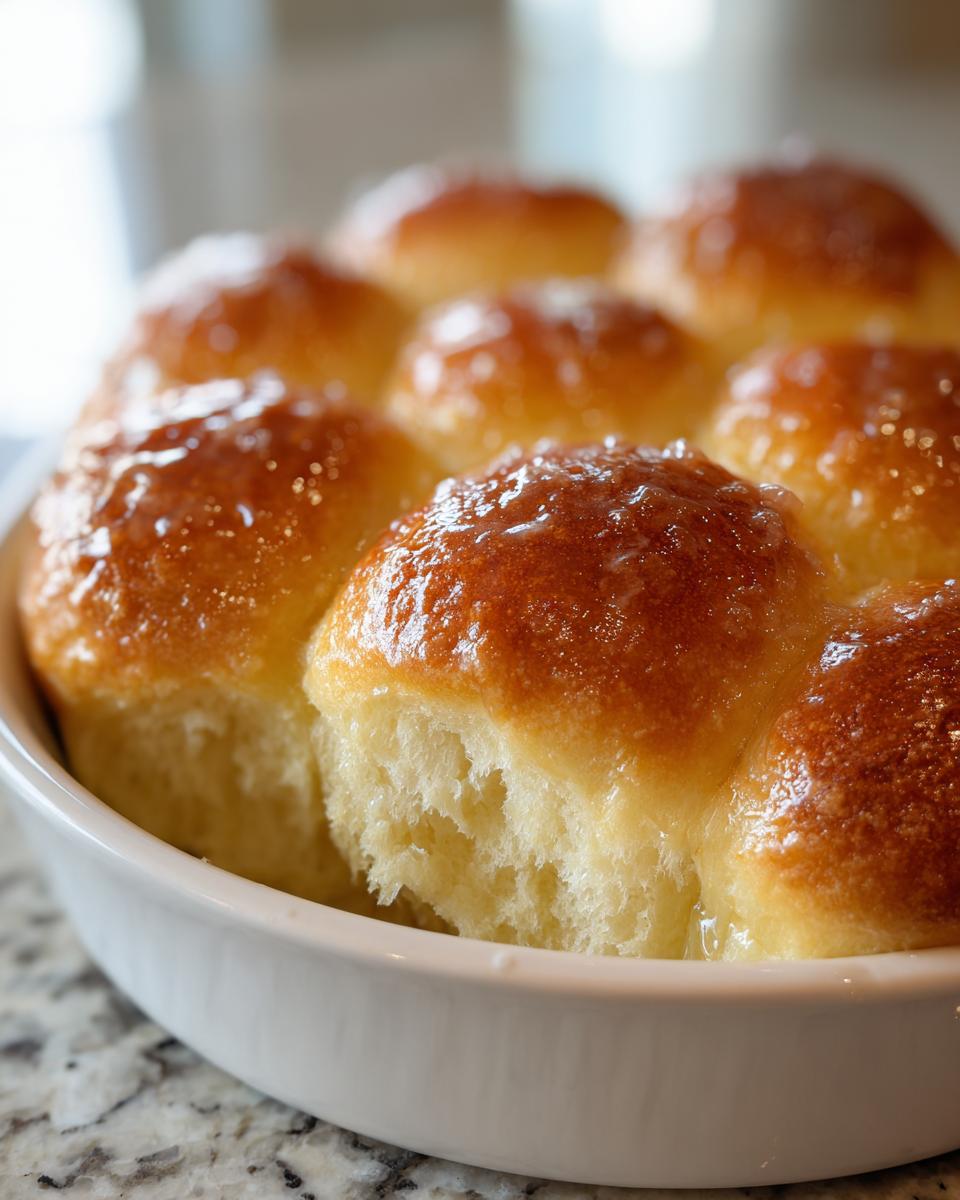
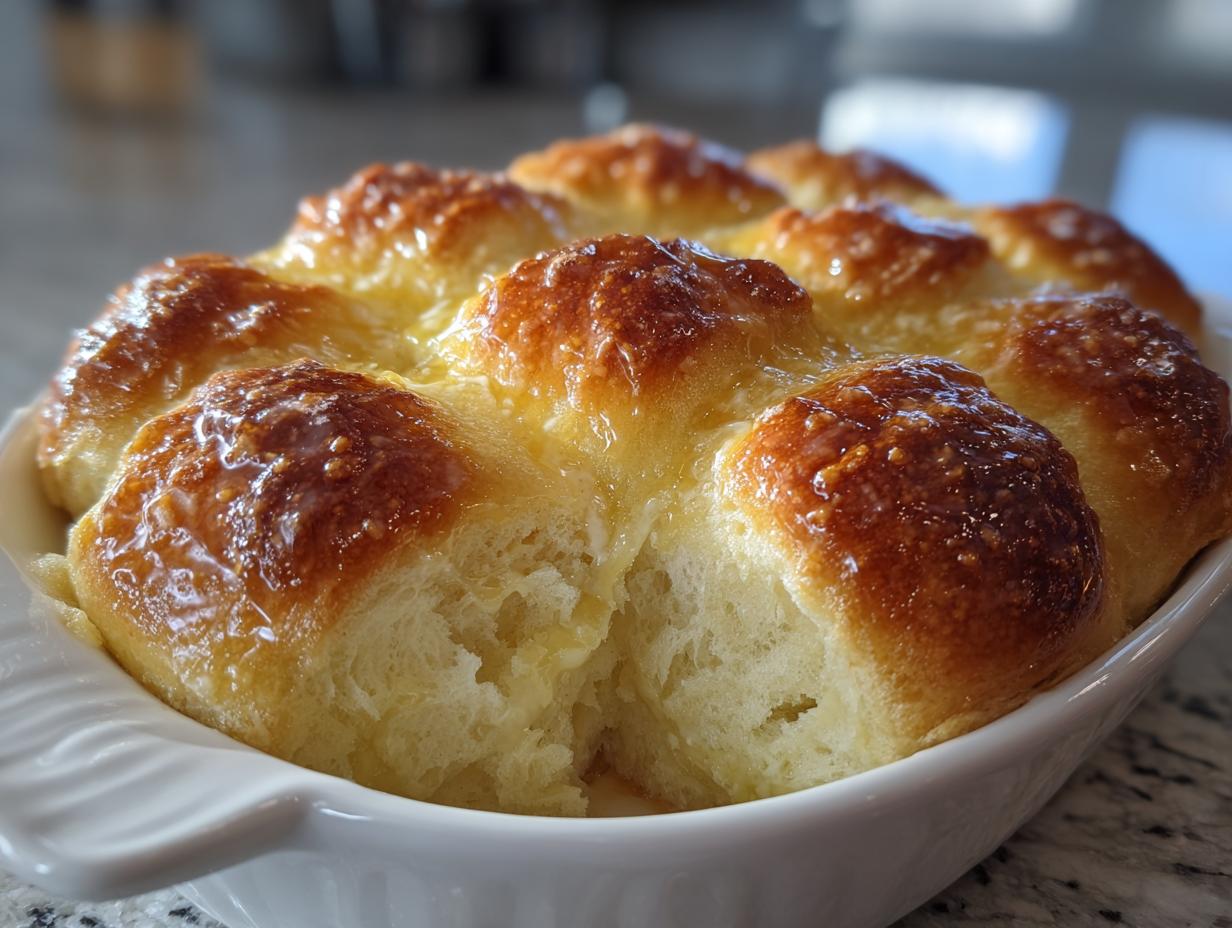
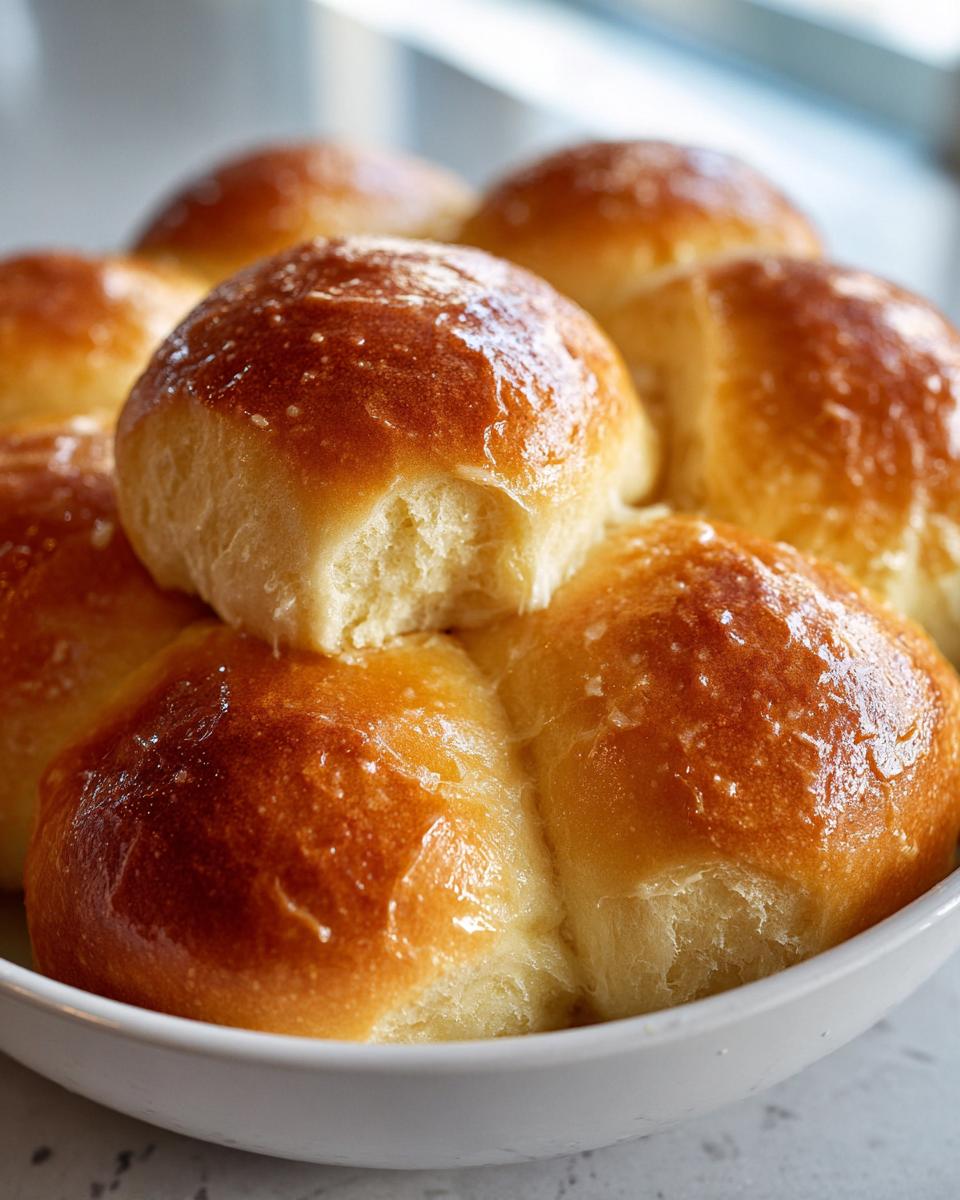
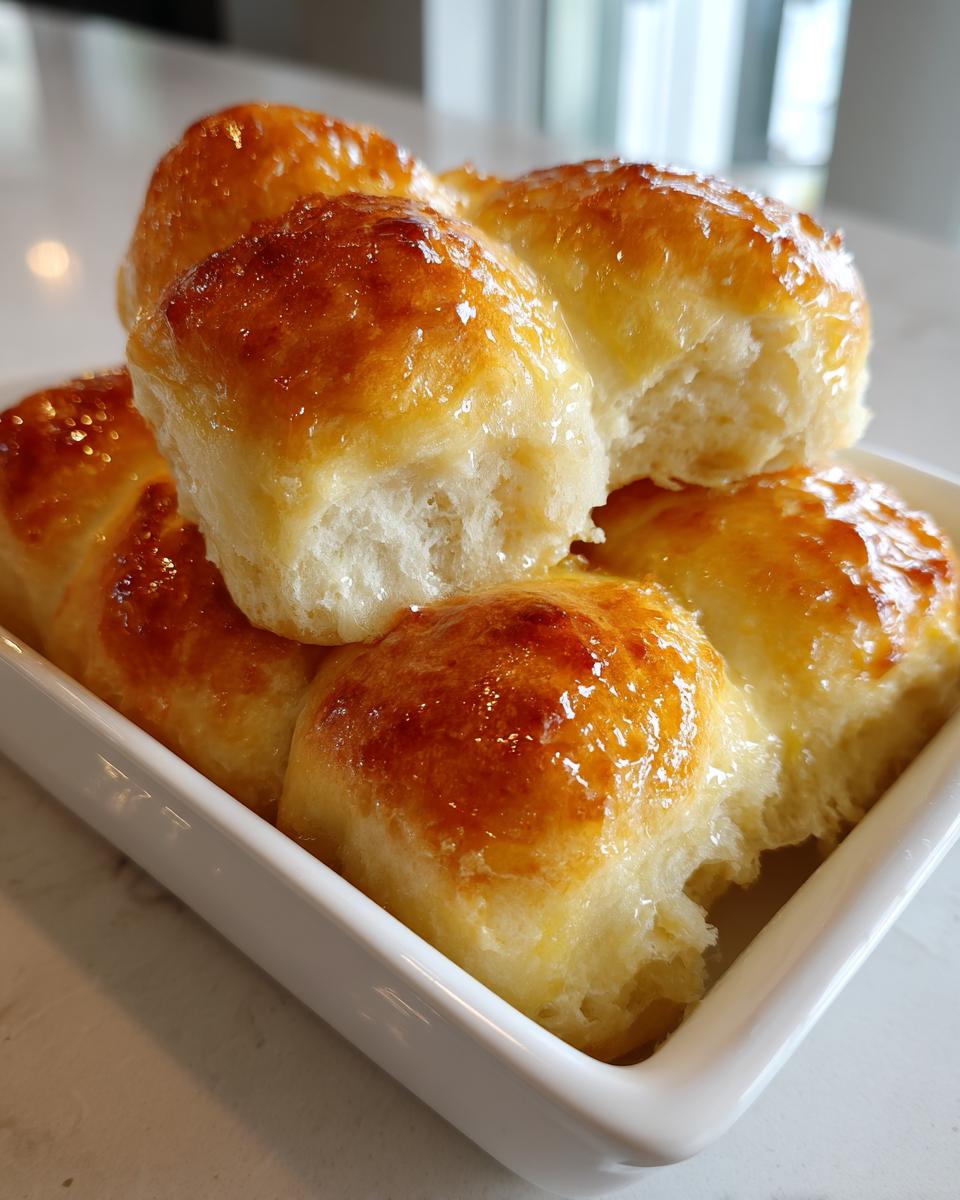
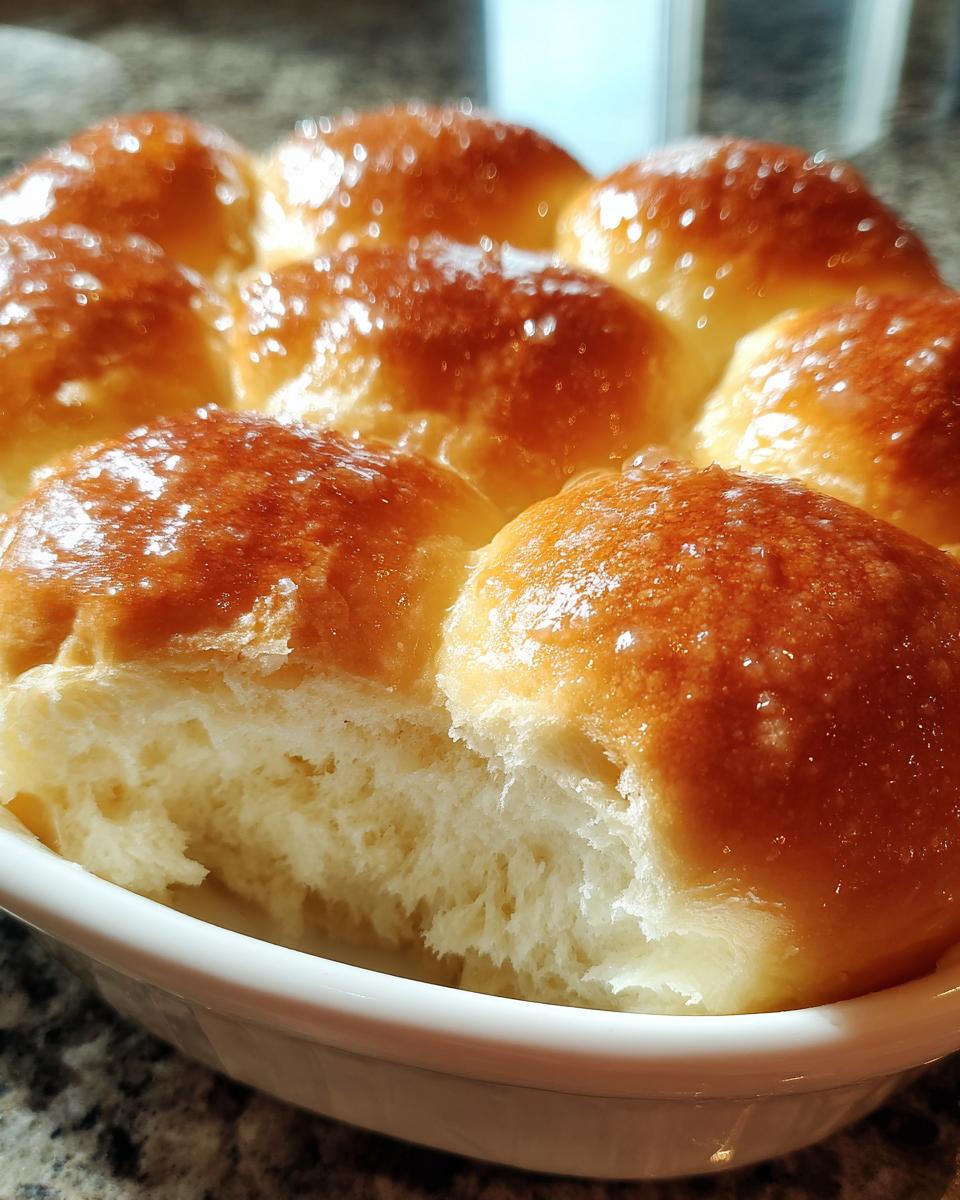
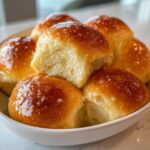
But wait, the best part is last! The second those rolls come out of the oven, melt those final 4 tablespoons of butter. Brush it everywhere! Generously coat the tops. That melted butter soaking in is what guarantees these turn into the best buttery yeast rolls you’ve ever tasted. They are best served right away, piping hot!
Tips for Success Making Classic Butter Rolls
Even though these classic butter rolls are designed to be foolproof, yeast has a mind of its own sometimes! When you’re hunting for that ultimate soft texture, it’s all about the environment and how you handle the dough when it’s sticky.
The number one thing that messes up quick bread recipes is the temperature. The yeast needs warmth—think cozy bathwater, not scorching hot tub! If your kitchen is chilly, don’t just leave the bowl anywhere. I always turn my oven light on (oven OFF, remember!) and put the covered bowl inside. That little bit of ambient heat is perfect for helping the dough double in that 30-minute first rise. If you’re having trouble getting a good rise, check out my guide on yeast bread loaf recipes for more environmental tips.
Secondly, when you knead, you might think stickiness means you need gallons of extra flour. Whoa there! Too much extra flour fights against the moisture we added, leading to drier rolls. If the dough is sticking stubbornly to your hands, just oil your hands very lightly instead of dumping flour everywhere. Lightly oiled hands allow you to shape those smooth balls without tearing the gluten structure you built up. Remember, we are aiming for soft, not tough!
Finally, don’t be tempted to bake immediately after the second rise, even if they look puffy. Give the oven a full 15 minutes to reach that 375°F. A hot oven causes the dough to rise rapidly (oven spring!), which helps create those light, airy pockets that result in such tender rolls.
Variations: From Garlic Butter Rolls Side Dish to Sweet Dinner Rolls
Part of the fun with making dinner rolls from scratch is that you can totally customize them! This base recipe is your perfect, slightly sweet canvas. Once you master the quick 1-hour rise, you can easily pivot to something entirely different, whether you need a savory kick or something a little sweeter.
If you’re looking for a savory showstopper, lean into the butter! As soon as those rolls come out of the oven, ignore the plain melted butter and go straight for the garlic treatment. Melt 4 tablespoons of butter, whip in about 1 teaspoon of garlic powder (use fresh minced garlic if you’re feeling extra!), a big pinch of dried parsley, and maybe a tiny dash of salt. Brush that glorious mixture all over the piping hot rolls. These instantly become incredible garlic butter rolls side dish material—they’re fantastic alongside soup or a big pasta dinner. If you want to make your own custom topping, check out my recipe for easy cinnamon butter, though we’re using that for the sweet version!
Now, if you want sweet dinner rolls (maybe for Christmas morning?), this is super simple. Before you even start mixing the dough, just increase the sugar in the recipe from 1/4 cup to a full 1/3 cup. That little extra hit of sweetness plays up beautifully against the yeast tang. Then, instead of brushing with plain butter at the end, brush with melted butter mixed with a teaspoon of honey or maple syrup. Oh my gosh, they become soft, fluffy clouds!
For the garlic lovers, I saw some amazing results when people turned these into savory rolls using recipes similar to the ones over at Cambrea Bakes; they really elevate that garlic flavor profile. Check out their savory take if you’re doing a big roast that needs something salty on the side!
Serving Suggestions: Pairing Dinner Rolls as the Best Side Dish for Dinner
Once you pull these gorgeous, buttery **dinner rolls** out, you’ll realize they deserve more than just showing up once a year for Thanksgiving! But let’s be honest, they absolutely deserve the spotlight as a premier Thanksgiving side dish rolls option. They soak up gravy better than anything else, and they’re light enough that they won’t weigh people down before dessert!
But please, don’t relegate these soft beauties just to the holidays. These are the best side dish for dinner any night of the week because they are so versatile. They are the perfect companions for anything liquidy that needs a cloud of bread to sop it all up. Think about it:
- Hearty Soups and Stews: A piping hot bowl of beef stew or my favorite creamy roasted tomato bisque just begs for one of these warm rolls to dip into it. The butter melts right into the warmth—it’s perfection!
- Sunday Roasts: Whether you’re doing chicken, ham, or pot roast, these rolls are the ideal vehicle for grabbing all those delicious pan drippings or that extra bit of gravy. They bring that comforting element to a heavier meal.
- Holiday Spreads: Beyond Thanksgiving, they are amazing for Christmas dinner, Easter, or any big family gathering where everyone expects warm, comforting bread on the table.
Honestly, the only downside is that since they are so good, people might fill up on rolls instead of the main course! Keep an extra batch ready, because these fluffy homemade bread items disappear fast.
Storage and Reheating Instructions for Your Homemade Dinner Rolls
Okay, the biggest challenge with rolls this soft and fluffy is keeping them that way! Trust me, I’ve learned a thing or two about leftovers, because sometimes we just can’t eat 12 rolls in one sitting (though I’ve been close!). The goal is always preventing them from getting stale or tough, which happens way too fast if you just leave them on the counter.
For short-term storage, say, 1 to 2 days, the best thing you can do is keep them tucked away in an airtight container at room temperature. Don’t refrigerate them! The fridge is the enemy of soft bread; it dries them out instantly. If you are lucky enough to have leftovers from your big meal and you want to make sure you have something incredible for dipping into leftover gravy—which you totally should, especially if you have some of my homemade brown gravy—you’ll need to reheat them correctly.
Reheating is key to bringing back that fresh-from-the-oven melt-in-your-mouth texture. You have two great paths to warmth:
The Microwave Method (Fastest): If you only need one or two, wrap the roll in a slightly damp (not soaking wet!) paper towel. Microwave it for about 10 to 15 seconds. That bit of steam trapped by the towel makes the roll unbelievably soft again. It’s heaven!
The Oven Method (Best Overall): If you’re aiming to revive the whole batch, wrap the rolls tightly in aluminum foil—this traps the steam—and pop them in a 350°F oven for about 8 to 10 minutes. They come out tasting almost freshly baked. That little bit of heat restores the tenderness we worked so hard to achieve in the quick rise!
Now you never have an excuse for not having amazing **dinner rolls** ready to go!
Frequently Asked Questions About Making Yeast Rolls
I know we covered a lot of ground to get these dinner rolls out so fast, but bread baking sometimes brings up little questions. It’s totally normal when you’re trying to get that perfect, soft texture! I want you to feel 100% confident making this recipe, which is why I put together a few things I always get asked.
Can I make these rolls ahead of time for a holiday bread recipe?
Oh, absolutely! This recipe is great for planning ahead, which is a lifesaver during busy holidays. You have two main options, and both work beautifully for keeping those rolls soft!
1. Cold Proofing: After you shape the little dough balls (Step 7), you can cover the pan tightly and pop the whole thing into the fridge overnight, maybe for up to 12 hours. The cold slows the yeast way down. When you want to bake them the next day, just take them out and let them sit on the counter for about 45 minutes to an hour—they need to warm up just enough to proof again. Then bake as directed! They come out tasting like they were made fresh that morning.
2. Baking and Freezing: You can also bake them fully, let them cool completely, and then freeze them! Pop them into a freezer bag, squeeze out most of the air, and they keep well for about two months. To reheat, just wrap them in foil and bake them at 300°F for about 10 minutes until they are warm through. That preserves the golden crust and buttery flavor for later!
What if I don’t have active dry yeast? Can I use instant yeast for these dinner rolls?
Yes, you definitely can use instant yeast! Instant yeast is usually milled finer and is designed to be mixed right into the dry ingredients, skipping that initial warm water bath. If you use instant yeast (also sometimes called rapid-rise), you can skip Step 1 entirely. Just whisk your instant yeast right in with the flour and salt in Step 3, and then add the wet ingredients. You don’t need to wait for it to foam because it will activate once it hits the warm water/sugar mixed with the flour later on.
Because instant yeast is more energetic, your proofing times might be even a little shorter, maybe 25 minutes for the first rise instead of 30. If you’re curious about other kinds of yeast for totally different projects, checking out my guide on sourdough starters might give you some fun background reading!
Nutritional Estimate for One Roll
I know some of you are tracking calories or macros, and I totally get that! When you’re making something this heavenly, it’s good to know what you’re working with. Keep in mind, these numbers are our best *estimate* based on the exact ingredients we used for these dinner rolls. Your exact figures might change a tiny bit depending on which brands of butter or flour you grab.
Per one standard roll, here is the breakdown:
- Serving Size: 1 roll
- Calories: 180
- Fat: 7g (with 4g being saturated fat—that’s all that lovely butter!)
- Carbohydrates: 26g
- Sugar: 4g
- Protein: 4g
- Sodium: 250mg
So, while they are rich and buttery (hello, 7g of delicious fat!), they are still a pretty light addition to your plate overall, clocking in under 200 calories. Isn’t that great? You get all that warmth and comfort without undoing all your meal prep!
PrintThe Ultimate Quick & Fluffy Buttery Dinner Rolls (Ready in 1 Hour)
You can make incredibly soft, fluffy, and buttery dinner rolls from scratch in about one hour. This easy yeast roll recipe uses basic ingredients to deliver warm, melt-in-your-mouth homemade bread perfect for any meal or holiday gathering.
- Prep Time: 15 min
- Cook Time: 18 min
- Total Time: 63 min
- Yield: 12 servings 1x
- Category: Side Dish
- Method: Baking
- Cuisine: American
- Diet: Vegetarian
Ingredients
- 1 cup warm water (105°F to 115°F)
- 2 1/4 teaspoons active dry yeast
- 1/4 cup granulated sugar
- 1/4 cup unsalted butter, melted, plus 4 tablespoons for brushing
- 1 large egg, lightly beaten
- 3 1/4 cups all-purpose flour, plus more for dusting
- 1 teaspoon salt
Instructions
- Activate the yeast: In a large bowl, combine the warm water, yeast, and sugar. Let this mixture sit for 5 to 10 minutes until it becomes foamy. This shows the yeast is active.
- Mix wet ingredients: Whisk the melted butter and the beaten egg into the yeast mixture.
- Combine dry ingredients: In a separate bowl, whisk together the flour and salt.
- Form the dough: Gradually add the dry ingredients to the wet ingredients, mixing until a shaggy dough forms.
- Knead the dough: Turn the dough out onto a lightly floured surface. Knead for about 5 to 7 minutes until the dough is smooth and elastic. It should be soft.
- First rise (Quick Proof): Place the dough in a lightly oiled bowl, turning once to coat. Cover the bowl with plastic wrap or a clean kitchen towel. Let the dough rise in a warm spot for 30 minutes, or until it has nearly doubled in size.
- Shape the rolls: Gently punch down the risen dough. Divide the dough into 12 equal pieces. Roll each piece into a smooth ball. Place the balls into a greased 9×13 inch baking dish, leaving about 1 inch of space between them.
- Second rise: Cover the pan loosely and let the rolls rise again in a warm place for 15 to 20 minutes. They should look puffy.
- Preheat and bake: Preheat your oven to 375°F (190°C).
- Bake: Bake the rolls for 15 to 18 minutes, or until the tops are golden brown.
- Brush with butter: While the rolls are hot, melt the remaining 4 tablespoons of butter. Brush the melted butter generously over the tops of the warm dinner rolls.
- Serve: Serve immediately for the best soft, buttery texture.
Notes
- For an extra soft texture, cover the rolls with a clean kitchen towel while they cool slightly after baking. The trapped steam keeps them tender.
- If you prefer a slightly sweet roll, you can increase the sugar in the dough to 1/3 cup.
- You can use bread flour instead of all-purpose flour for a slightly chewier texture.
Nutrition
- Serving Size: 1 roll
- Calories: 180
- Sugar: 4g
- Sodium: 250mg
- Fat: 7g
- Saturated Fat: 4g
- Unsaturated Fat: 3g
- Trans Fat: 0g
- Carbohydrates: 26g
- Fiber: 1g
- Protein: 4g
- Cholesterol: 25mg