
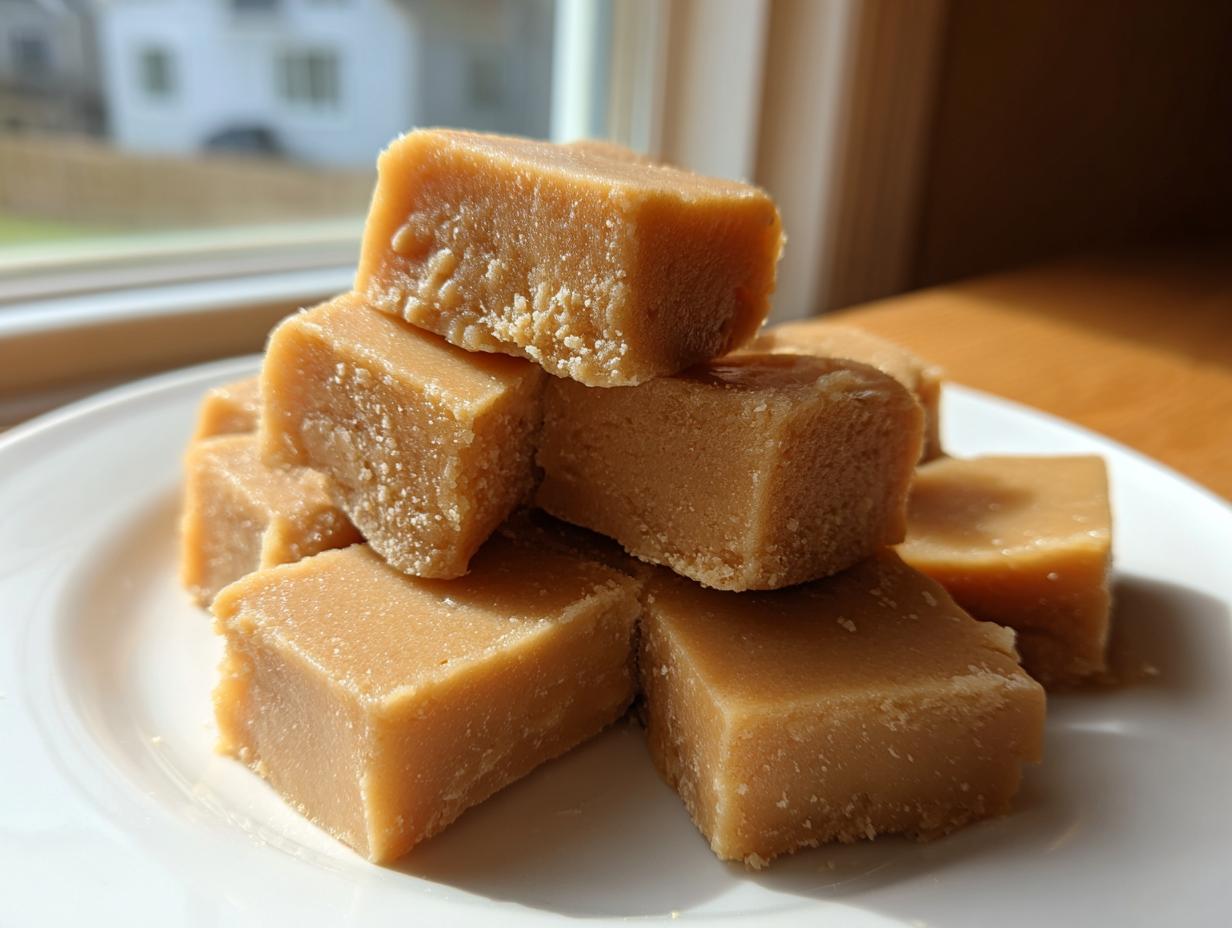
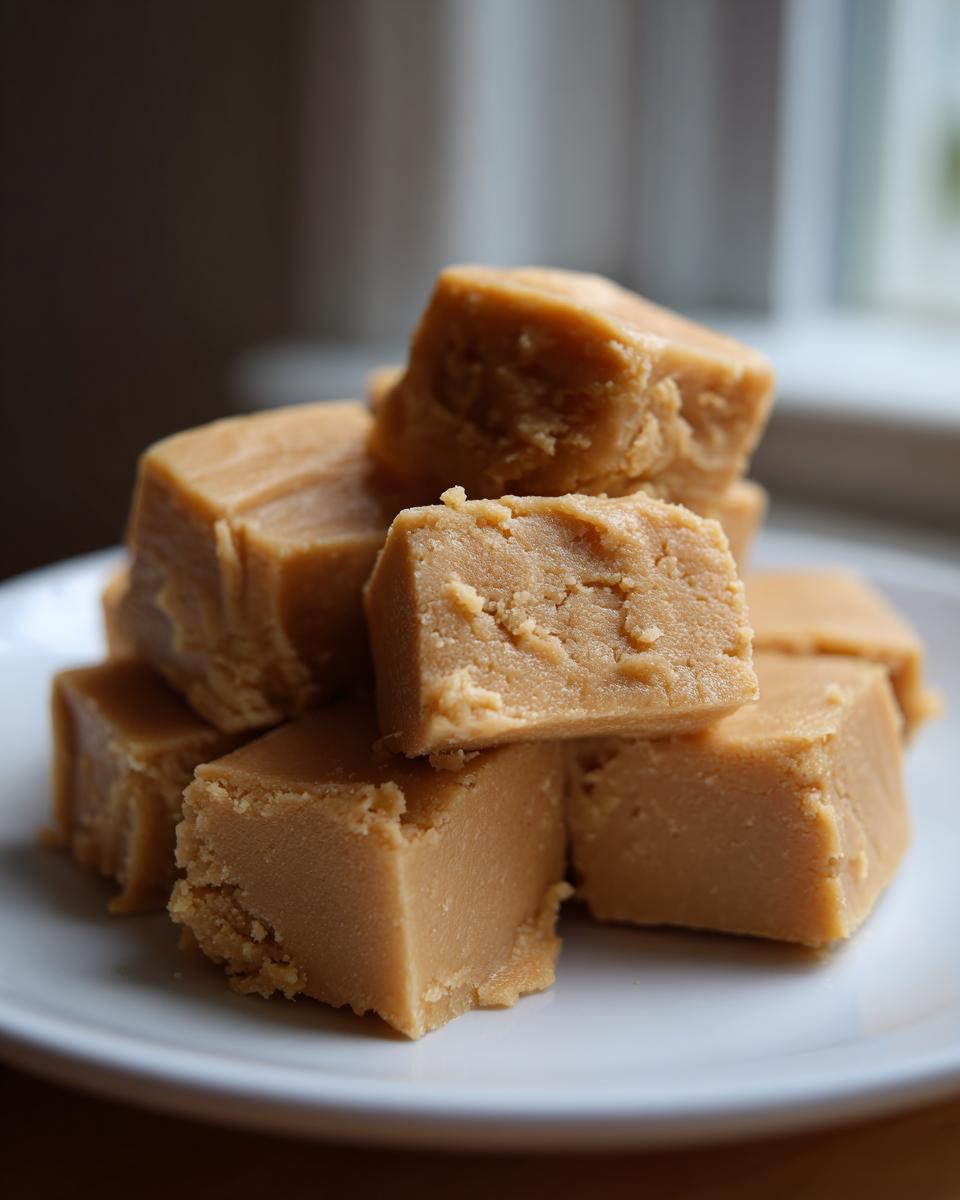
When we think of holiday treats, our minds often jump straight to chocolate, right? But honestly, some of the absolute best classic confection recipes are the ones that skip the cocoa entirely! I’m talking about that rich, buttery, almost impossibly smooth Penuche fudge. This isn’t just any candy; it’s a nostalgic hug made from the deep, melty flavor of brown sugar caramelizing perfectly. I spent ages perfecting this penuche fudge recipe because I wanted to capture that true, melt-in-your-mouth texture my grandmother used to talk about. This guide is everything you need to master this old-fashioned favorite and guarantee it comes out perfectly creamy every single time. It’s an essential part of the *Cooking Zenith* tradition of making everyday moments extraordinary.
- Why This Old Fashioned Penuche Fudge Recipe Works
- Gathering Ingredients for Your Penuche Fudge
- Tips for Achieving Smooth Texture Fudge
- Easy Fudge Instructions: How to Make Penuche
- Serving Suggestions for Your Penuche Fudge
- Storage and Reheating Instructions for Penuche Fudge
- Frequently Asked Questions About Penuche Fudge Recipe
- Estimated Nutritional Data for Penuche Fudge
- Share Your Penuche Fudge Success
Why This Old Fashioned Penuche Fudge Recipe Works
Seriously, if you’ve ever been burned by grainy fudge before, you need to trust in the science behind this recipe. We aren’t just throwing things together here; we are aiming for pure, buttery bliss! Making this brown sugar fudge is an experience because it relies on hitting a very specific sweet spot on the thermometer, which locks in that incredible texture. Forget everything you think you know about complicated candy making; this is accessible, yet deeply traditional. This method is why it stands head and shoulders above other simple homemade candy recipes.
So, why should you choose this specific method for your homemade candy recipes?
- It delivers that deep, rich caramel flavored fudge note—that’s the magic of using packed brown sugar as the base ingredient!
- We focus entirely on the cooling process, which is the secret handshake for achieving that elusive, perfect smooth texture fudge.
- The result is a true melt in your mouth dessert square that tastes incredibly nostalgic and satisfying.
- It’s just butter, cream, and sugar, making it a wonderful no chocolate fudge alternative when you need something simple but elegant.
This old fashioned fudge recipe proves that sometimes the simplest things, when done correctly, are the most spectacular. You’ll never want to try a different holiday candy after tasting this beauty!
Gathering Ingredients for Your Penuche Fudge
Okay, let’s talk supplies! Since we are aiming for that classic, unbelievably buttery fudge profile here, we need to make sure we have the right core ingredients ready to go before we start heating anything. Remember, this is your ultimate no chocolate fudge recipe; everything here is about highlighting that sweet, deep brown sugar flavor. Don’t skip prepping your pan first, though—a little parchment paper goes a long way in making cleanup a dream later on. I always lay mine out right before I measure anything because things move fast once that heat goes on!
Essential Components for Classic Penuche Fudge
Here’s what you need to have lined up on the counter. Precision counts when you’re making candy, so measure carefully!
- 2 cups granulated sugar
- 1 cup packed light brown sugar (Make sure it’s packed tightly so you get that true molasses depth!)
- 1 cup heavy cream (Don’t substitute this with milk, the fat content is vital for texture!)
- 2 tablespoons butter
- 1 teaspoon vanilla extract
- 1/4 teaspoon salt
Tips for Achieving Smooth Texture Fudge
Wow, this is where the “magic” truly happens, and why this recipe moves from just good to being absolute perfection. If you are interested in traditional candy making, you need to understand that **Penuche fudge** is super sensitive to temperature and stirring habits. The biggest fear in fudge making is getting that gritty, grainy texture, right? We are avoiding that, trust me!
The absolute number one non-negotiable rule is this: Once that mixture hits a rolling boil, you stop stirring immediately and let that candy thermometer do the work. If you mess with it, you risk causing sugar crystals to form, and that’s what ruins the entire batch. We need the mixture to reach a soft-ball stage—110 degrees Fahrenheit—before we do anything else. Resist the temptation! This dedication to temperature control is the backbone of getting that wonderfully smooth texture fudge we’re aiming for.
When it comes out of the heat, you let it rest undisturbed until it chills down to 110°F again. That cooling period is just as important as the cooking! It gives the components time to settle before we introduce the agitation needed for a creamy fudge finish.
Ingredient Notes and Substitutions for Penuche Fudge
Just a quick note because I know you might be wondering: Yes, Penuche is totally synonymous with brown sugar fudge! They are essentially the same thing—a rich, sweet, caramel-like candy that relies on molasses flavor. If you only have dark brown sugar on hand, you can totally substitute it for the light brown sugar provided here. Just know that dark brown sugar is going to give your final penuche fudge a slightly deeper, more robust molasses flavor, almost leaning toward a darker caramel. Both ways are delicious, but I stick to light brown sugar here to keep that classic, sweet profile that pairs so well with vanilla. For more ideas on great holiday sweets, check out my thoughts on making creamy desserts without the fuss!
Easy Fudge Instructions: How to Make Penuche
Okay, don’t let the candy thermometer scare you off! This part is exciting because it’s where simple ingredients turn into something magical. If you follow these easy fudge instructions exactly, I promise you’ll have that perfect, smooth finish, just like the vintage fudge recipe you remember. When learning homemade candy recipes like this, the timing is everything for that gorgeous creamy fudge result. We’re going from liquid to solid bliss, and the timing is everything for that gorgeous creamy fudge result.
Preparing the Pan and Cooking the Base
First things first, get that 8×8 inch pan lined with parchment paper, making sure you leave those extra flaps hanging over the sides. That’s your handle for lifting the whole block out later—smart, right? Now, grab your heavy-bottomed saucepan; we don’t want any hot spots here! Combine your sugars, the heavy cream, and that tablespoon of butter. Stir constantly over medium heat until everything dissolves and that butter melts away. The second it starts boiling, you need to stop stirring completely. Insert your candy thermometer right away. We are cooking this mess until it hits exactly 110 degrees Fahrenheit! When it hits temp, yank the pan off the burner. Seriously, don’t scrape the sides trying to get every last drop; those crystals are trouble!
The Critical Cooling and Beating Stage for Creamy Fudge
Once you’ve taken it off the heat, stir in your vanilla and salt—just a quick mix to incorporate them. Now you wait. You have to let that sugar mixture cool down undisturbed until it hits 110 degrees Fahrenheit again—this is critical for a non-grainy finish! Once it’s finally cooled down, start beating it like crazy. You can use a sturdy wooden spoon, but honestly, an electric mixer on medium speed works wonders. You’ll know you’re done when the mixture stops looking glossy and shiny and starts looking dull and thick. It’s thickening up right before your eyes!
When it’s properly beaten, it won’t flow smoothly anymore; that means your texture is locked in! Quickly pour that thick, glorious mixture into your prepared pan. Don’t even try to press it down or smooth the top—just let it settle into its final form. We want perfect, clean-cut simple dessert squares once it hardens up, so resist the urge to fuss with it now. Let it cool completely at room temperature, and enjoy the smell of caramelized goodness filling your kitchen!
Serving Suggestions for Your Penuche Fudge
Now that you’ve made this incredible, melt-in-your-mouth confection, the fun part is sharing it! Since this is such a pure, sweet vanilla candy, it pairs beautifully with slightly bolder flavors. I love setting out these little squares alongside a strong cup of coffee or a steaming mug of Earl Grey tea—the bitterness really cuts through the richness.
If you’re putting together a holiday platter, this penuche fudge looks amazing next to anything deep brown or red. It’s also such a thoughtful, old-fashioned treat for neighbors. Because it travels so well, this really becomes one of my go-to gifting fudge recipes during the colder months. Seriously, wrap a few squares up tied with simple twine, and you have the perfect little holiday fudge treats. Everyone appreciates something homemade, especially a classic like this!
You can always add a little flair by dusting the top with a tiny pinch of sea salt right before it sets, just to play up that beautiful caramel flavor. Check out my recipe for London Fog Shortbread if you want a cookie that perfectly complements this sweet square!
Storage and Reheating Instructions for Penuche Fudge
One of the best things about this classic confection is that it’s incredibly stable, which makes preparing for parties or holidays so much easier! You don’t need the fridge for day-to-day storage at all, which is fantastic because cold fudge can sometimes get a little crumbly when you cut it.
For short-term enjoying—say, the week leading up to Christmas—just keep your cut penuche fudge squares tightly wrapped in plastic wrap, or stored in an airtight container, right on your counter at room temperature. It’s best kept in a cool, dry spot, away from intense afternoon sunbeams. It will stay wonderfully soft and ready to go for about a week.
If you need to keep it longer, say for a couple of weeks, then pop that airtight container into the refrigerator. Remember though, when it comes out of the fridge, let it sit on the counter for about 20 or 30 minutes before serving. That slight warming brings back that amazing, melt in your mouth dessert quality. And please, save yourself the headache: fudge really does not reheat well! Warming it up tends to make it weep or go soft and gooey, messing up that perfect firm texture we worked so hard to achieve by beating it right. Skip the microwave entirely on this one!
Frequently Asked Questions About Penuche Fudge Recipe
I know candy making can sound a little scary sometimes, but once you get the hang of temperatures, this penuche fudge is a breeze! Here are some of the questions I hear most often when folks are diving into this delicious classic confection for the first time. It’s all about demystifying those little steps!
Is Penuche Fudge the same as Brown Sugar Fudge?
That’s a fantastic question, and honestly, the names are pretty much interchangeable these days! If you see a recipe labeled brown sugar fudge, you can bet it’s aiming for the exact same deeply caramelized, rich flavor profile as this penuche fudge recipe. This candy is historically famous precisely because it relies on that wonderful brown sugar base instead of relying on chocolate. It’s a beautiful, sweet vanilla candy all on its own!
Can I use dark brown sugar in this penuche fudge recipe?
You absolutely can, and I encourage you to experiment once you nail the base technique! If you use dark brown sugar instead of the light brown sugar specified, you’ll notice your resulting fudge is a little deeper in color and has a more intense, robust molasses background flavor. It’s delicious if you love caramel notes, but I recommend sticking to the light brown sugar for your very first try to ensure that classic, slightly milder caramel flavor that makes this a perfect divinity fudge alternative.
What temperature should the fudge reach before beating?
This is the single most important piece of information for making sure your fudge is wonderfully smooth and creamy and not gritty. After boiling the mixture, you must remove it from the heat and allow it to cool entirely down to 110 degrees Fahrenheit. Once it’s resting at that temperature, *then* you begin the vigorous beating process. This controlled cooling and subsequent agitation is the secret to that glorious, creamy fudge texture. Don’t rush the cooling part—it’s essential for learning how to make penuche the right way!
Estimated Nutritional Data for Penuche Fudge
I always like to be as transparent as possible about what we’re eating when we’re making these incredible simple dessert squares! Since candy-making relies heavily on sugar and butter, the breakdown for this rich penuche fudge is pretty straightforward, as you can see below. But remember, this is just an estimate. The exact amount of butter or heavy cream you use, or even if you swap out the sugar type slightly (like I mentioned with dark brown sugar), can change these numbers a bit!
I always encourage you to look at this information as a fun guideline rather than a strict diet tracker. This is a treat, after all! We make it because it tastes incredible and brings joy, not because it’s a nutritional powerhouse. But here are the ballpark figures for one perfect, melt-in-your-mouth square of this old fashioned fudge:
- Serving Size: 1 square
- Calories: 150
- Sugar: 25g (That’s the star of the show!)
- Fat: 5g
- Saturated Fat: 3g
- Sodium: 30mg
- Carbohydrates: 26g
- Protein: 1g
- Cholesterol: 15mg
My promise is that every single one of those 150 calories is packed with pure, buttery, caramel satisfaction. Don’t worry too much about the details; just worry about getting the temperature right so you nail that smooth texture fudge!
Share Your Penuche Fudge Success
Now that you have mastered this incredible, almost unbelievably creamy fudge, I truly want to hear all about it! Honestly, seeing your creations is the best part of running this little corner of the internet. Did you manage to keep your hands off the sugar while it was boiling? Did you get that perfect dull sheen when you were beating it? I’m dying to know!
Please, please take a moment to rate this penuche fudge recipe down below. Those stars help other cooks feel confident enough to try this classic confection, and I read every single piece of feedback you leave. If you took a picture of those perfect little simple dessert squares, tag me on social media! I love seeing how you present your holiday candy.
If you loved how easy this was—and really, who doesn’t love a piece of buttery fudge that requires so little fuss once you nail the temperature—you should totally check out my recipe for the moistest banana bread ever. It’s another one of those comforting classics that everyone adores.
And hey, if you’re curious to see how other folks are handling this sweet treat, I always love browsing through community results. You can find great inspiration for adapting this old fashioned fudge over at Tikkido’s post on making penuche. Happy cooking, friends, and thanks so much for joining me on this journey to elevate your everyday treats!
PrintOld-Fashioned Penuche Fudge: Creamy Brown Sugar Candy
Make classic penuche fudge, a rich, buttery confection made with brown sugar for a deep caramel flavor. This recipe focuses on achieving a smooth, melt-in-your-mouth texture, perfect for gifting or holiday treats.
- Prep Time: 15 min
- Cook Time: 15 min
- Total Time: 40 min
- Yield: 36 squares 1x
- Category: Dessert
- Method: Stovetop Cooking
- Cuisine: American
- Diet: Vegetarian
Ingredients
- 2 cups granulated sugar
- 1 cup packed light brown sugar
- 1 cup heavy cream
- 2 tablespoons butter
- 1 teaspoon vanilla extract
- 1/4 teaspoon salt
Instructions
- Line an 8×8 inch pan with parchment paper, leaving an overhang for easy removal. Lightly grease the paper.
- Combine the granulated sugar, brown sugar, heavy cream, and butter in a heavy-bottomed saucepan.
- Stir the mixture constantly over medium heat until the sugar dissolves and the butter melts completely.
- Stop stirring once the mixture boils. Insert a candy thermometer.
- Cook the mixture without stirring until it reaches exactly 110 degrees Fahrenheit (soft-ball stage). This step is crucial for a smooth texture.
- Remove the pan from the heat immediately. Do not scrape the sides of the pan.
- Stir in the vanilla extract and salt.
- Let the mixture cool undisturbed until it reaches 110 degrees Fahrenheit. Do not rush this cooling process.
- Once cooled to 110 degrees Fahrenheit, begin beating the mixture vigorously with a wooden spoon or an electric mixer on medium speed.
- Continue beating until the fudge loses its glossy shine, thickens, and becomes dull. This takes several minutes and creates the creamy texture.
- Quickly pour the thickened fudge into the prepared pan. Do not spread or press it down.
- Let the penuche fudge cool completely at room temperature until firm before cutting into squares.
Notes
- For the smoothest texture, ensure you cool the sugar mixture to 110 degrees Fahrenheit before you begin beating it. This prevents graininess.
- Penuche is often called brown sugar fudge; it is a classic confection that skips the chocolate.
- This sweet vanilla candy makes excellent holiday fudge treats for sharing.
Nutrition
- Serving Size: 1 square
- Calories: 150
- Sugar: 25g
- Sodium: 30mg
- Fat: 5g
- Saturated Fat: 3g
- Unsaturated Fat: 2g
- Trans Fat: 0g
- Carbohydrates: 26g
- Fiber: 0g
- Protein: 1g
- Cholesterol: 15mg