
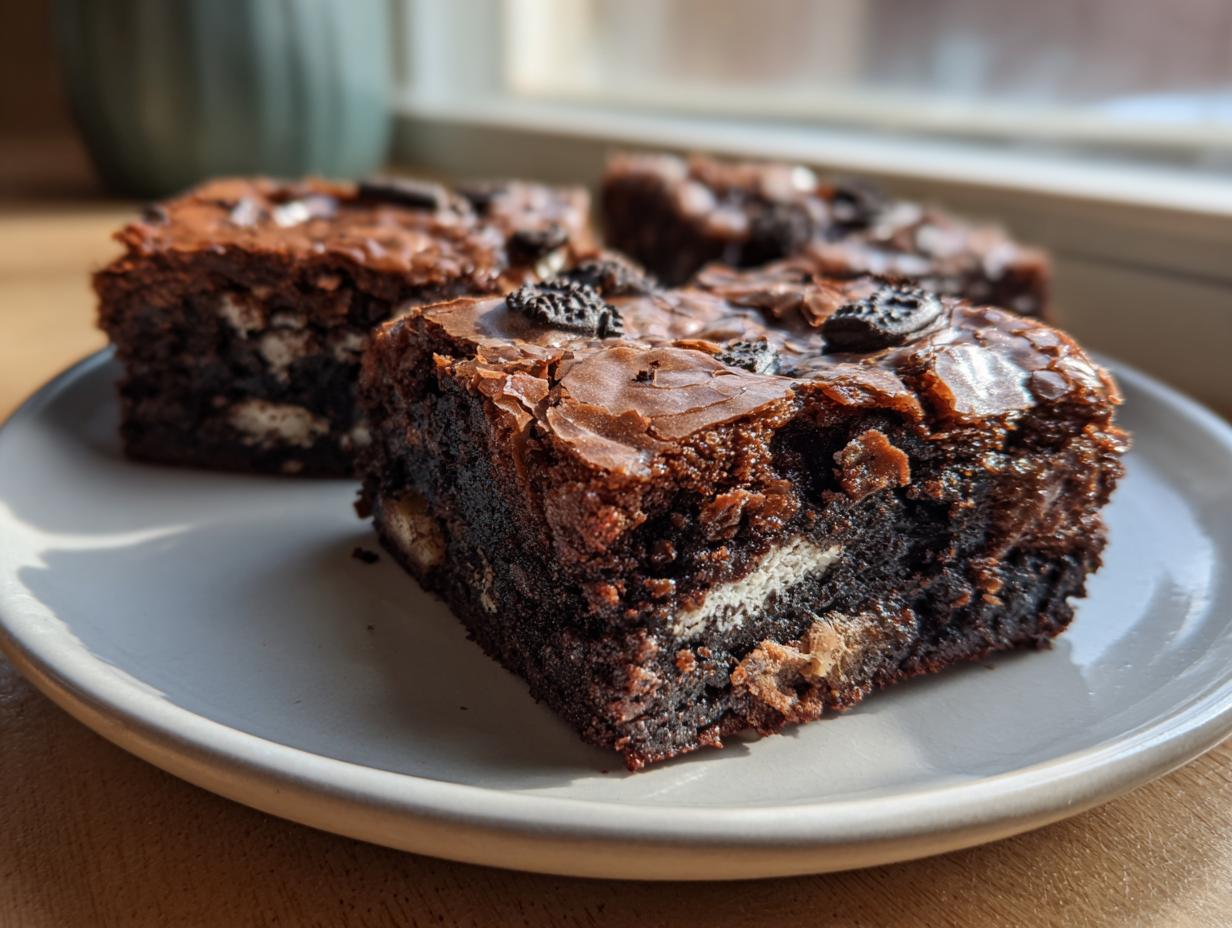
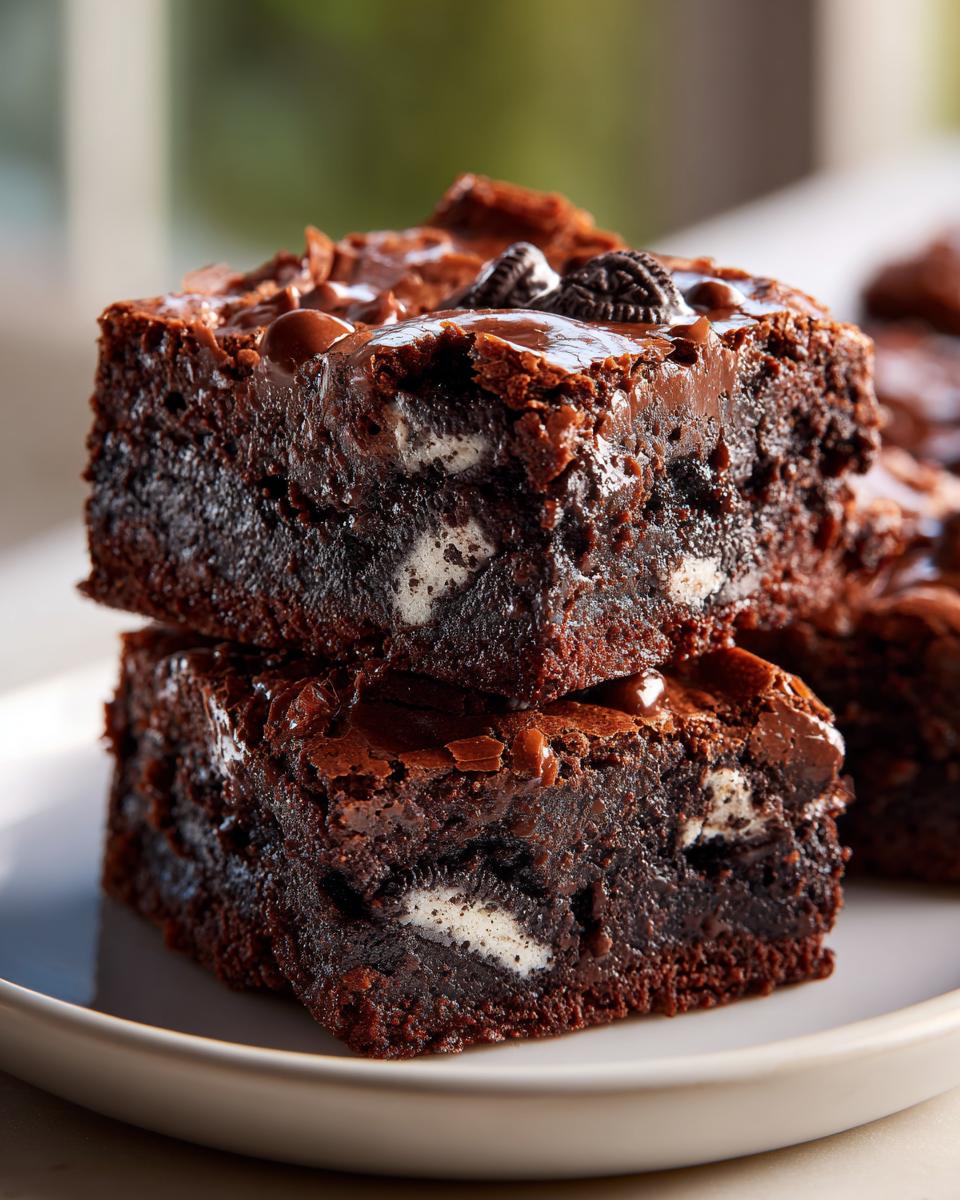
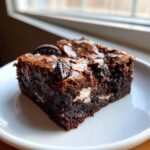
Let’s be honest: few things hit the spot quite like a deep, dark, decadent chocolate dessert. But why settle for just good when you can have amazing? Today, we’re talking about transforming that classic treat into something spectacular. I’m not just sharing a recipe; I’m sharing my blueprint for crafting the Ultimate Fudgy Oreo Brownies with a Shiny Crackly Top. It took me months to nail the perfect ratio, but trust me, these oreo brownies are the definition of chocolate indulgence. This is the recipe I use when I need a guaranteed crowd-pleaser. Getting that perfect combination of rich chewiness and the beautiful, fragile crust on top? That’s the magic touch, and I’m going to show you exactly how we get there every single time.
- Why This Recipe Delivers the Best Oreo Brownies
- Gathering Ingredients for Your Ultimate Oreo Brownies
- Step-by-Step Instructions for Easy Oreo Brownie Recipe
- Tips for Success Making Your Oreo Brownies
- Storage and Reheating Instructions for Homemade Oreo Dessert Bars
- Variations on Classic Oreo Brownies
- Serving Suggestions for Decadent Chocolate Desserts
- Frequently Asked Questions About Oreo Brownies
- Share Your Best Fudgy Oreo Brownies Experience
Why This Recipe Delivers the Best Oreo Brownies
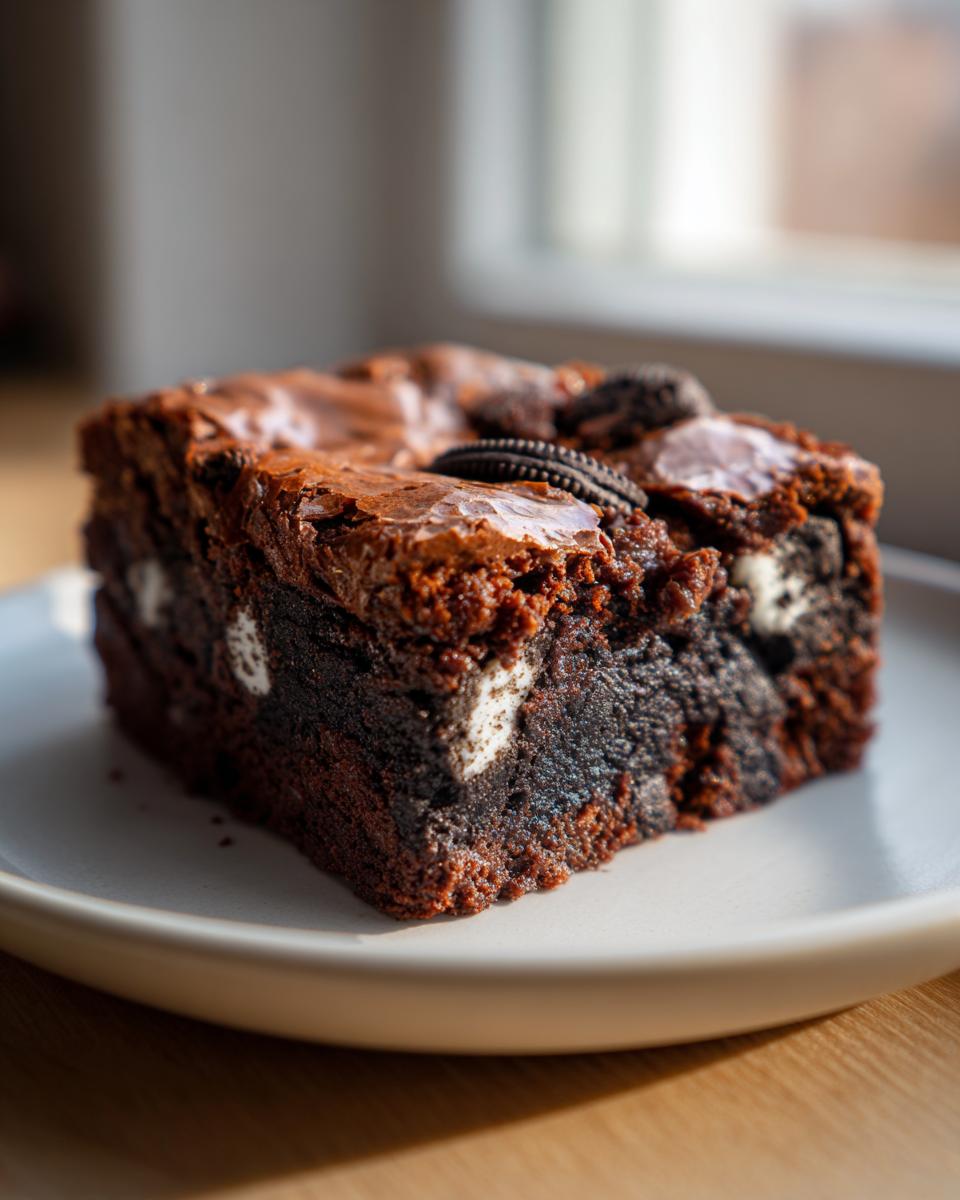
So, what makes these cookies and cream brownies stand out from the pile? Honestly, it’s all about texture. We aren’t going for cakey bars here; we are aiming straight for decadent, rich, and chewy. I’ve linked to my chocolate crinkle cookie recipe, which has a similar fudgy quality, because the principles are the same! Take a peek at Broma Bakery’s work too; they know how to keep things fudgy!
- The perfect balance of chocolate chips and chopped Oreos means you get chocolate *and* crunch in every single bite.
- The texture is absolutely spot on—truly the Best Chewy Brownies you’ll ever make.
- And yes, we achieve that unbelievable, glass-like, shiny top without any fancy tricks!
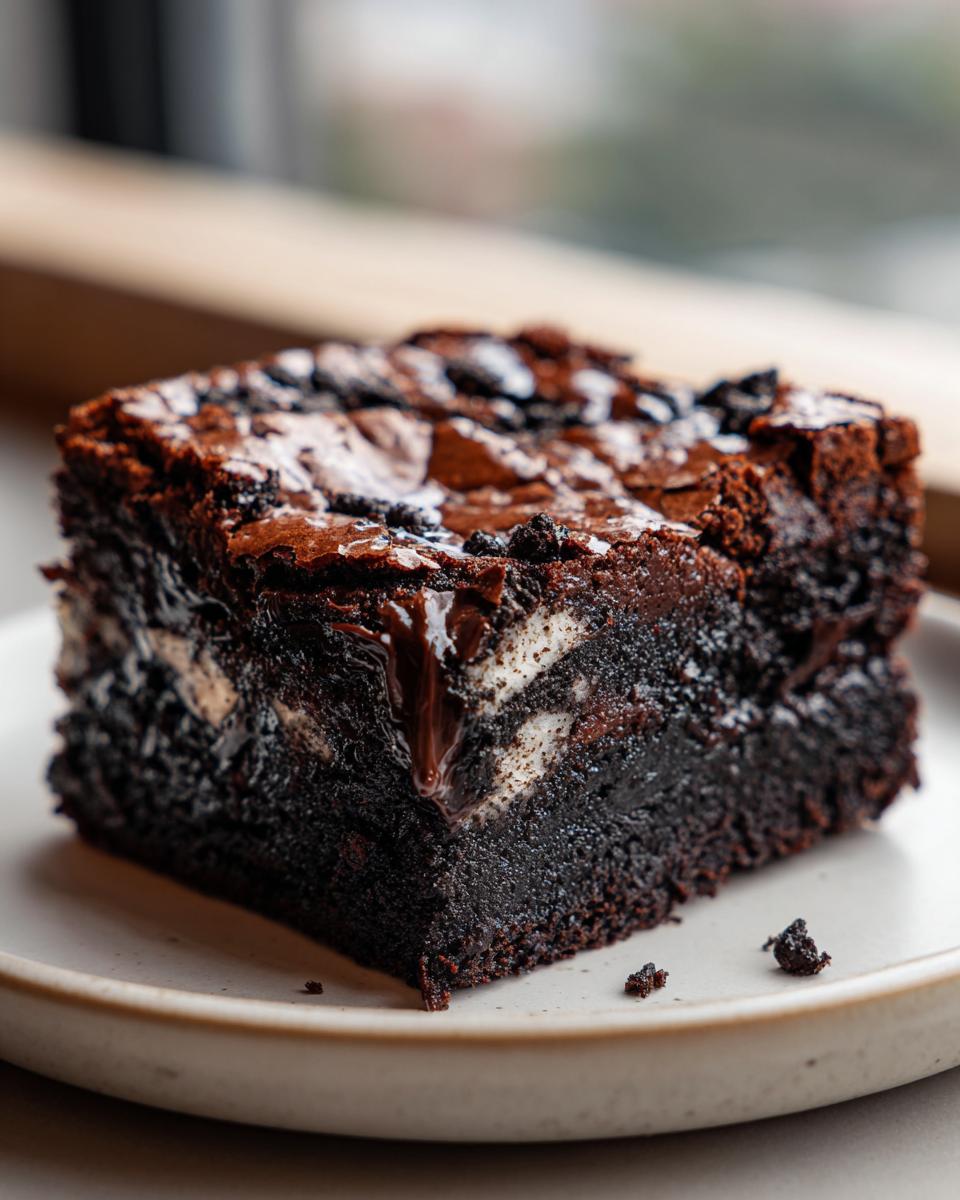
Achieving Fudgy Oreo Brownies Perfection
The secret to that gorgeous fudgy texture comes down to math, weirdly enough! We load up on fat—that’s the melted butter and the sugar—and keep the flour content low. This ratio tells the batter to stay dense instead of puffing up like a cake. If you want that ultra-rich, melt-in-your-mouth experience, you need to trust the high sugar and fat amounts.
The Secret to a Shiny Crackly Top on Your Oreo Brownies
This is the visual cue that tells everyone these were made by someone who knows what they are doing! It’s created by thoroughly whisking the melted butter, sugars, and eggs for a solid few minutes *before* the dry ingredients even enter the bowl. That process dissolves the sugar slightly and creates a thin meringue layer on top. When it bakes, that layer shatters beautifully. If you want the ultimate crackle, remember that vigorous initial whisking is key!
Gathering Ingredients for Your Ultimate Oreo Brownies
Okay, friends, let’s talk supplies. Making decadent chocolate desserts starts long before you turn on the oven, it starts with the ingredients you choose. I always say, if you use quality stuff, you get quality results! You’ll need a few staples you probably have, plus the important stars of the show—the chocolate and the cookies. I’ve linked over to my guide on using box mixes, but for these scratch-made chocolate Oreo treats, you need the real deal.
Here is exactly what you’ll need for the batter. Make sure you trust your measurements for these rich fudgy bars!
- 1 cup (2 sticks) unsalted butter, melted
- 2 cups granulated sugar
- 1 cup packed light brown sugar
- 4 large eggs, room temperature
- 1 tablespoon vanilla extract
- 1 cup all-purpose flour
- ¾ cup unsweetened cocoa powder
- 1 teaspoon salt
- ½ teaspoon baking powder
- 1 cup chocolate chips (semi-sweet or dark)
- 1 package (about 14.3 oz) Oreo cookies, roughly chopped (about 24 cookies)
Ingredient Notes and Substitutions for Cookies and Cream Brownies
I know baking can feel stiff, but understanding *why* we need certain things really helps. For instance, the butter has to be melted, not just softened, because that helps create a denser, fudgier base right off the bat. Don’t even think about skipping room temperature eggs, either!
Those eggs are critical for getting that gorgeous crackly top we talked about. Cold eggs seize up the melted butter and sugar, which ruins the meringue layer. So, please, plan ahead and let them sit out for 30 minutes.
When it comes to the cocoa powder, this is where you really step up your game for decadent chocolate desserts. Use the best quality unsweetened cocoa powder you can find. It makes a world of difference in that deep chocolate flavor. And for the Oreos? Yep, the standard store-bought ones work perfectly here! Just toss the whole package in a zip-top bag and give them a few good whacks with a rolling pin until they are roughly chopped. We want chunks, not dust!
Step-by-Step Instructions for Easy Oreo Brownie Recipe
Whew! Now that we have our ingredients ready, let’s get baking! Remember, slow and steady wins the race when we’re aiming for those perfect rich fudgy bars. For the best results, preheat your oven to 350°F (175°C) right now. We’re using a 9×13 inch pan, and I highly suggest lining it with parchment paper that overhangs—that makes lifting these beauties out so much easier later on. Don’t forget to grease that parchment lightly! If you love chocolate bars, be sure to check out my super moist hot fudge brownie bread recipe, it shares a similar decadence!
Preparing the Pan and Mixing Wet Ingredients for Fudgy Oreo Brownies
Grab your large mixing bowl! First up, whisk together that melted butter with both the granulated and the light brown sugar. We aren’t just stirring; we need to whisk this until it feels smooth and happy together. This is step one for that shiny top! Once that’s looking good, whisk in your room temperature eggs one by one until everything is beautifully combined. Finish this wet stage by stirring in that tablespoon of vanilla extract.
Combining Dry Ingredients and Folding in Mix-ins for Chocolate Oreo Treats
In a separate bowl, quickly whisk your flour, cocoa powder, salt, and baking powder. Now, here’s the critical part for these chocolate Oreo treats: add the dry mixture to the wet ingredients gradually. Mix only until you see no more dry streaks. Seriously, stop mixing! Overdoing it makes them cakey. Next, gently fold in your chocolate chips and about two-thirds of those chopped Oreos.
For the next bit, we’re layering! Spread half of that wonderfully thick batter into your pan. Sprinkle half of the remaining Oreos over that layer. Then, dollop the rest of the batter on top and spread gently. Finish by scattering the final bits of cookie crunch over the very top. Keep checking out recipes like the fantastic one over at Salt & Baker for visual inspiration!
Baking and Cooling Time for Brownie Recipe with Shiny Top
Into the oven they go for 30 to 35 minutes. For that fudgy texture we love, you want them to look slightly underdone in the very center when you pull them out. The toothpick test is essential: insert it near the edge, and it should come out with moist crumbs attached—wet batter means add five more minutes.
Listen to me: you absolutely must let these cool completely in the pan. I know impatience strikes, but if you try to cut them warm, they will turn into chocolate lava! Let them chill out on a wire rack until they are fully set. Once cool, use that parchment overhang to lift them, and then slice them up for serving.
Tips for Success Making Your Oreo Brownies
Okay, if you want these oreo brownies to be exactly what you dreamed of—ultra-fudgy with that glass-like sheen—you need to follow these quick pointers. My biggest tip centers on avoiding gluten development; this is what makes them cakey instead of chewy. Once that flour hits the wet mixture, you switch from mixing to folding. Just combine it gently until you can’t see white streaks anymore, and that’s it. Stop! You’ll ruin the texture if you keep going.
Also, don’t forget to check your pan size! If you decide to use a smaller 8×8 pan for super thick bars, you’ll absolutely need to add at least 10 to 15 extra minutes to the baking time. I talked about making chocolate milk from scratch over at this guide, which is a fun pairing, but for the brownies themselves, remember: resist the urge to cut them early!
Storage and Reheating Instructions for Homemade Oreo Dessert Bars
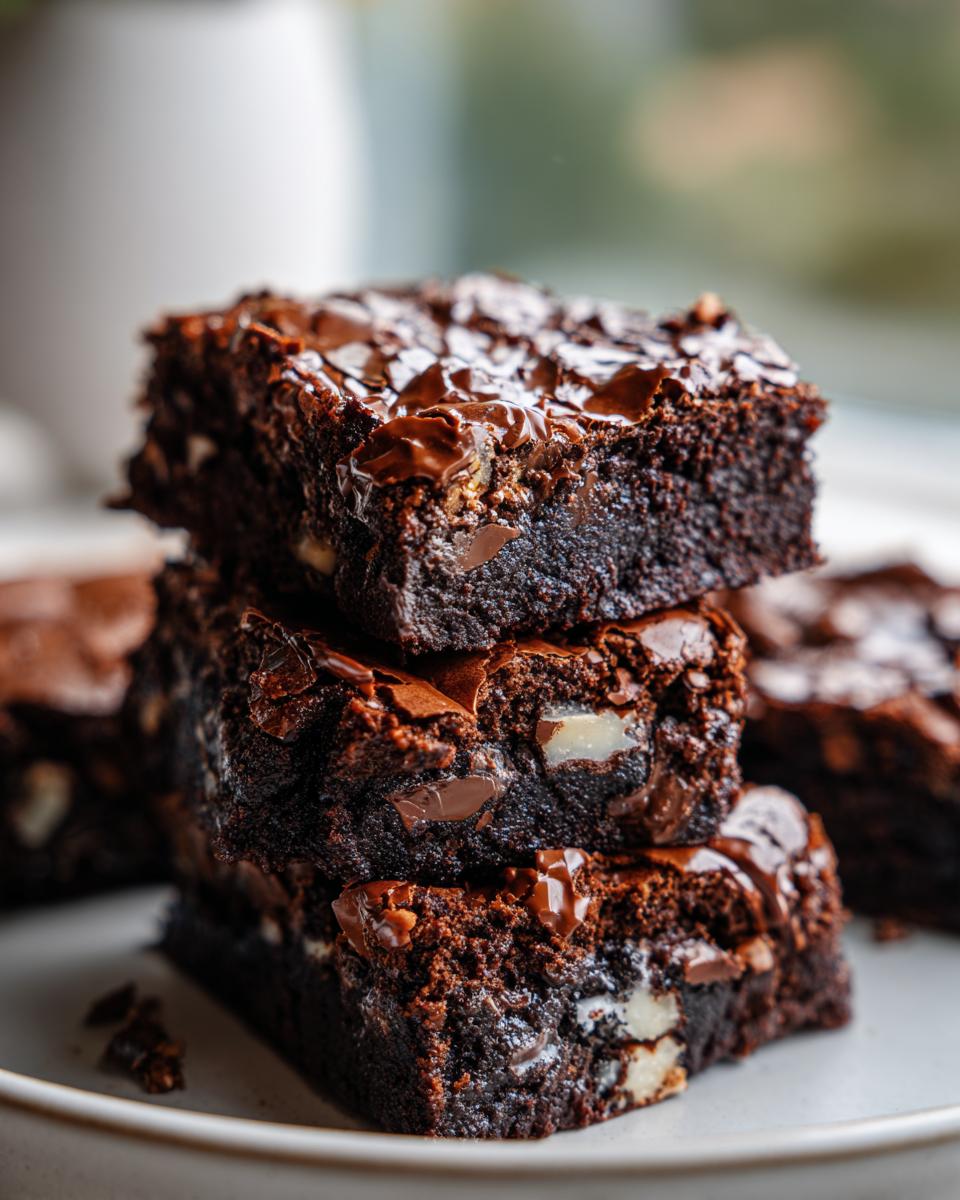
These homemade Oreo dessert bars are so rich, they actually keep incredibly well! To maintain that glorious fudgy texture, you need to store them in an airtight container at room temperature. I find they are actually even better on day two, as the chocolate sets up a bit more. They should stay fresh and delicious at room temperature for about three or four days.
If you have an absolute mountain of these chocolate Oreo treats (which, let’s be real, happens), you can definitely freeze them! Just slice them first, wrap the individual squares tightly in plastic wrap, and then pop them into a freezer-safe bag. They freeze beautifully for up to three months. When you want one, just let it thaw on the counter for an hour or two. Honestly, they are great straight from the fridge, too!
If you want a quick reheat, pop a square in the microwave for just 10 seconds—it softens everything up perfectly. Speaking of great pairings, you should check out my recipe for easy homemade raspberry jam; a tiny smear on the side of a warm brownie is surprisingly good!
Variations on Classic Oreo Brownies
While this recipe is absolutely my gold standard for oreo brownies, I love playing around once I’ve mastered the base. If you want to get really creative—and why wouldn’t you?—there are a few easy swaps you can make in the batter.
For a completely different vibe, you could try adding a swirl! Melt down some peanut butter and dollop it right on top of the first layer of batter before you add the second layer of chocolate and cookies. It turns into this incredible flavor bomb!
If you’re interested in diving into the world of hybrid baking, you absolutely have to check out the Brookies Recipe inspiration floating around out there; sometimes I swap out half the Oreos for chocolate chip cookie dough pieces folded in. It’s intense!
If you prefer cheesecake, my recipe for red velvet cheesecake brownies uses a similar layering technique that you could totally adapt for these Oreo bars if you’re feeling ambitious!
Serving Suggestions for Decadent Chocolate Desserts
You’ve baked the ultimate, fudgy chocolate experience, so how do you serve it up? You need pairings that can stand up to that incredible richness! Forget boring plain milk; these decadent chocolate desserts demand something special.
My go-to, hands-down favorite pairing is a scoop of vanilla bean ice cream. The contrast between the warm, intense chocolate and the cold, creamy vanilla is just *everything*. If you make my no-churn strawberry ice cream, the berry tartness cuts through the sweetness perfectly, too!
Otherwise, just grab a tall glass of ice-cold milk or brew a strong cup of black coffee to sip alongside. That bitterness balances the sugar explosion beautifully!
Frequently Asked Questions About Oreo Brownies
It sounds like you’ve got a few lingering questions about whipping up these amazing oreo brownies, and that’s totally fair! Baking is all about precision, so let’s clear up some common snags before you start mixing up your batch of homemade dessert bars.
Can I make these Oreo Brownies without a shiny top?
You absolutely can! While that shiny, crackly top is what everyone dreams of when they make these chocolate Oreo treats, if you skip the vigorous whisking of the butter, sugars, and eggs at the beginning, you won’t develop that meringue layer. Without it, you’ll just get a matte finish. It’s still going to taste amazing—just less visually striking on the surface. You’ll end up with a texture closer to my cream cheese fruit dip pairing—soft and yielding, rather than crisp on top!
What is the difference between these and Brookies Recipe?
That’s a fantastic question, especially since those hybrid desserts are so popular! Our current recipe is focused on creating the ultimate Fudgy Oreo Brownie texture by layering chocolate batter with whole, crunchy Oreo cookies inside. A true Brookies Recipe, however, is a mashup where you actually layer a full sheet of cookie dough (like chocolate chip cookie dough) right underneath or on top of the brownie batter. So, here we have cookies *in* the brownie; a Brookie has cookie dough *as* a separate layer.
Why don’t my brownies set up nicely when I cut them?
Oh, I’ve been there! If your rich fudgy bars are falling apart after baking, it almost always comes down to one thing: impatience! The biggest mistake people make with fudgy bars is trying to cut them when they are even slightly warm. You have to let them cool completely—I mean down to room temperature or even chilling them for an hour—before slicing. When they’re cool, the fats solidify and lock everything into place, letting you get those perfect bakery-style squares.
Can I use different kinds of cookies instead of Oreos?
Well, if you are making Cookies and Cream Brownies, you kind of need the Oreo flavor, right? But if you are just looking for crunchy texture, sure! You can substitute them with shortbread cookies or even Ritz crackers if you want something salty and buttery in your mix. Just make sure whatever you use is roughly chopped so you get good distribution throughout the batter before baking.
Share Your Best Fudgy Oreo Brownies Experience
Alright, fellow chocolate lover! Now that you have the secrets to the Ultimate Fudgy Oreo Brownies sitting on your counter (or maybe you’re just about to start mixing!), I absolutely need to hear about it.
Did you get that crackly top? Were they fudgy enough? I’m always tweaking things in my kitchen, and your feedback is honestly the best part of sharing these recipes. Don’t be shy!
Take a moment after you’ve let them cool—and I mean *completely* cool!—and pop down into the comments below. Give the recipe a star rating so others know what you thought. If you snapped a photo of your incredible homemade Oreo dessert bars, please share it with me on social media and tag me! I love seeing your creations.
If you’re looking for another easy, savory bake after all that chocolate, check out my honey garlic chicken thighs recipe—it’s a weeknight lifesaver! And if you want more inspiration on achieving perfection, feel free to check out what’s trending with Naomy’s Kitchen on their Oreo brownie posts. Happy baking, and I can’t wait to read your comments!
PrintThe Ultimate Fudgy Oreo Brownies with a Shiny Crackly Top
Make rich, decadent Oreo brownies that are perfectly fudgy and feature that sought-after shiny, crackly top. This easy recipe uses simple ingredients to create a bakery-style dessert bar packed with chocolate and cookie crunch.
- Prep Time: 15 min
- Cook Time: 35 min
- Total Time: 50 min
- Yield: 16 servings 1x
- Category: Dessert
- Method: Baking
- Cuisine: American
- Diet: Vegetarian
Ingredients
- 1 cup (2 sticks) unsalted butter, melted
- 2 cups granulated sugar
- 1 cup packed light brown sugar
- 4 large eggs, room temperature
- 1 tablespoon vanilla extract
- 1 cup all-purpose flour
- ¾ cup unsweetened cocoa powder
- 1 teaspoon salt
- ½ teaspoon baking powder
- 1 cup chocolate chips (semi-sweet or dark)
- 1 package (about 14.3 oz) Oreo cookies, roughly chopped (about 24 cookies)
Instructions
- Preheat your oven to 350°F (175°C). Line a 9×13 inch baking pan with parchment paper, leaving an overhang on the sides for easy removal. Lightly grease the paper.
- In a large bowl, whisk together the melted butter, granulated sugar, and brown sugar until fully combined.
- Whisk in the eggs one at a time until the mixture is smooth. Stir in the vanilla extract.
- In a separate medium bowl, whisk together the flour, cocoa powder, salt, and baking powder.
- Gradually add the dry ingredients to the wet ingredients, mixing on low speed or by hand until just combined. Do not overmix.
- Gently fold in the chocolate chips and about two-thirds of the chopped Oreo cookies.
- Spread half of the brownie batter evenly into the prepared pan. Sprinkle half of the remaining chopped Oreos over the batter.
- Dollop the remaining brownie batter over the first layer and gently spread it out. Top with the remaining chopped Oreos.
- Bake for 30 to 35 minutes. For fudgy brownies, the center should still look slightly underdone when you remove them. A toothpick inserted near the edge should come out with moist crumbs attached, not wet batter.
- Let the brownies cool completely in the pan on a wire rack before lifting them out using the parchment overhang.
- Once cool, cut into squares. These are best served at room temperature or slightly chilled.
Notes
- For the best shiny top, do not overmix the batter once the flour is added. Overmixing develops gluten, which prevents the signature crackle.
- If you want a thicker, more decadent bar, use an 8×8 inch pan instead, but increase the baking time by 10 to 15 minutes.
- Use high-quality cocoa powder for the richest chocolate flavor in these chocolate Oreo treats.
Nutrition
- Serving Size: 1 square
- Calories: 320
- Sugar: 35
- Sodium: 180
- Fat: 18
- Saturated Fat: 10
- Unsaturated Fat: 8
- Trans Fat: 0.5
- Carbohydrates: 38
- Fiber: 2
- Protein: 4
- Cholesterol: 65