
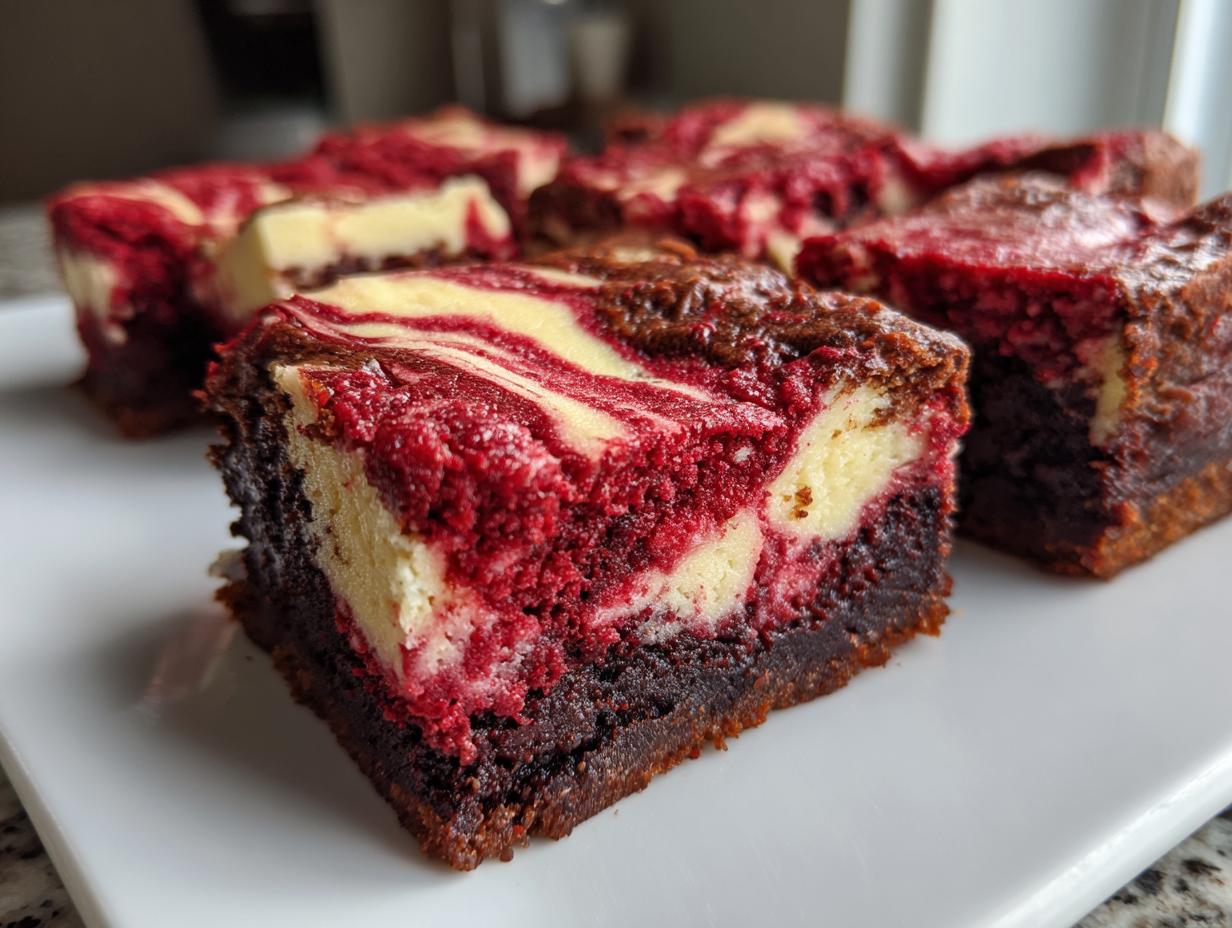
Sometimes, you just need a dessert that screams “special occasion,” right? When I think about creating something truly memorable for celebrating, or maybe just for surviving a really tough Tuesday, I always land on something layered. There’s something so satisfying about cutting into something where the top layer is totally different from the bottom, giving you two incredible textures in every single bite. That, my friends, led me to develop what I sincerely believe is the ultimate showstopper baked goods: the red velvet cheesecake brownies. Forget dry, crumbly everything; this recipe guarantees fudgy, rich red velvet meeting a tangy, creamy cheesecake swirl. I promise, getting that perfect swirl is easier than you think, and the result is pure culinary confidence.
- Why This Recipe Creates the Best red velvet cheesecake brownies
- Gathering Ingredients for Your red velvet cheesecake brownies
- Step-by-Step Instructions for Layered red velvet cheesecake brownies
- Tips for Success Making red velvet cheesecake brownies
- Storage and Serving Suggestions for Your Impressive Dessert for Guests
- Frequently Asked Questions About Cream Cheese Swirl Dessert
- Nutritional Estimates for One Serving
- Share Your Baking Journey
Why This Recipe Creates the Best red velvet cheesecake brownies
Honestly, these aren’t just pretty; they taste like they came from a fancy bakery! My huge goal when creating this recipe was to nail the texture, and I think I nailed it. We are aiming for a truly rich and tangy dessert combination here. These babies are definite showstopper baked goods that look fantastic on any platter, whether it’s for Christmas or just a gorgeous Valentine’s Day treat for your sweetheart.
Achieving the Perfect Fudgy Red Velvet Brownies Texture
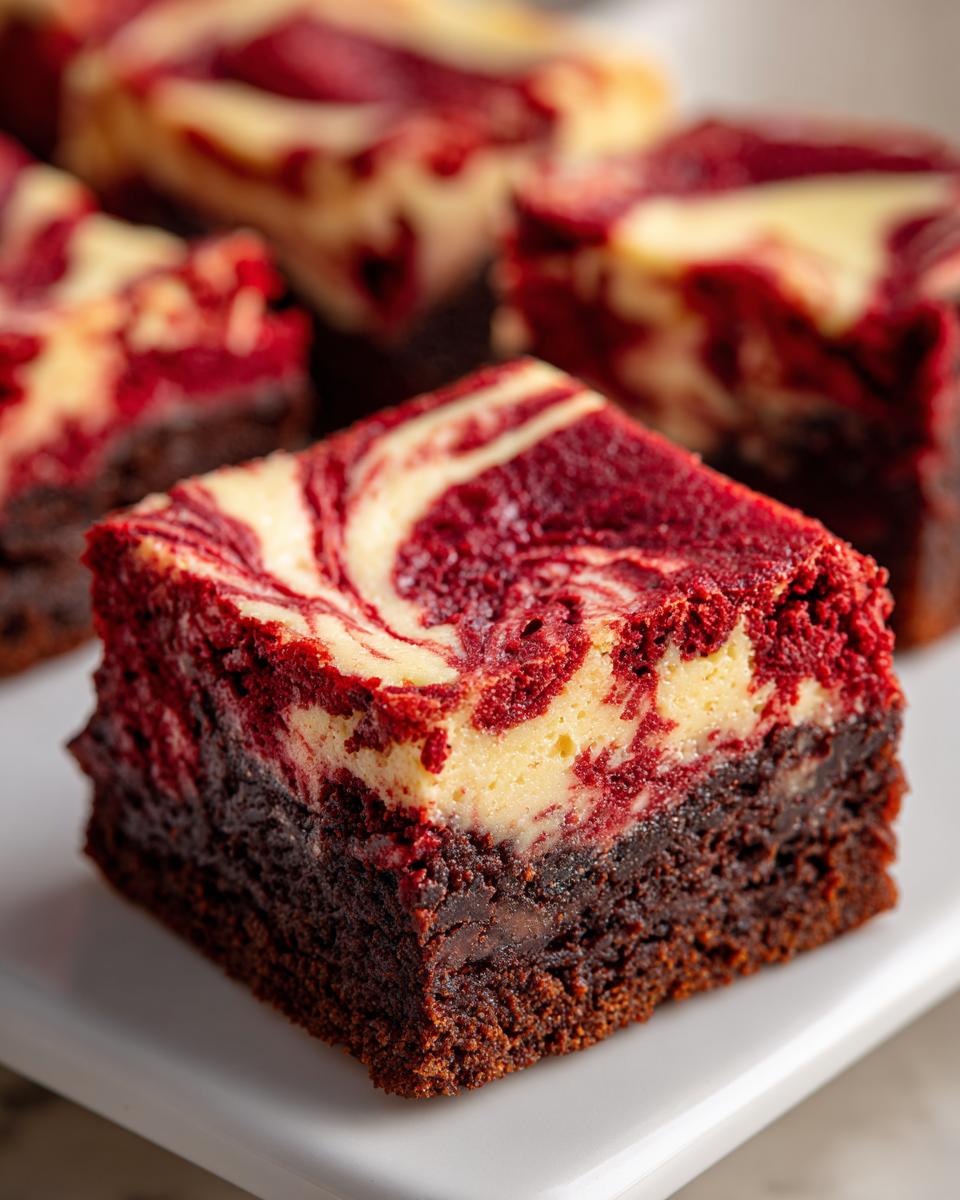
The secret to that dense, fudgy texture in the red velvet base isn’t just the cocoa powder; it’s the fat ratio! By using melted butter instead of softened butter for the brownie part, we skip incorporating too much air, which leads to a more gooey outcome. This method keeps things moist and ridiculously decadent. If you love that perfect chew, check out my fudgy lemon brownie recipe too—it uses a similar principle!
The Tangy Cream Cheese Swirl: Key to Great red velvet cheesecake brownies
You need that sour punch to cut through all that richness, and that’s where the cheesecake layer swoops in! This simple layer of cream cheese filling balances the deep chocolate and vanilla notes beautifully. Without it, these would just be heavy chocolate brownies. This swirl prevents flavor fatigue and adds that essential, creamy mouthfeel that really elevates these homemade red velvet bars.
Gathering Ingredients for Your red velvet cheesecake brownies
Okay, we’ve talked about how amazing these are going to be, but now comes the fun part: gathering supplies! I always say that even the easiest recipes hinge on the quality of what you bring into the kitchen. For these rich and decadent desserts, we need two distinct lists completed. Don’t substitute the main players, especially the buttermilk and the cream cheese, if you can help it. That slight tang is what makes these red velvet cheesecake brownies sing!
Ingredients for the Fudgy Red Velvet Batter
This part is basically a fudge brownie recipe with a little extra zing. Make sure you have these ready to go:
- 1 cup (2 sticks) unsalted butter, melted (Trust me, melted works best here!)
- 2 cups granulated sugar
- 4 large eggs
- 1 teaspoon vanilla extract
- 1 teaspoon white vinegar (This reacts with the baking soda for a little lift)
- 1 teaspoon red food coloring (or more for that deep, dramatic color you see in photos!)
- 1 1/2 cups all-purpose flour
- 1/2 cup unsweetened cocoa powder
- 1 teaspoon baking soda
- 1/2 teaspoon salt
- 1 tablespoon white vinegar (Yes, there’s a second vinegar! This helps activate the baking soda in the red velvet base.)
- 1 cup buttermilk
Ingredients for the Cream Cheese Swirl Dessert
This is the part that brings the creamy tang! Make sure your cream cheese is sitting out long enough to get truly soft, otherwise, you’ll get tiny lumps in your beautiful swirl.
- 8 ounces cream cheese, softened
- 1/2 cup granulated sugar
- 1 large egg
- 1/2 teaspoon vanilla extract
Step-by-Step Instructions for Layered red velvet cheesecake brownies
Alright, let’s get baking! This is where we turn those ingredients into that gorgeous, decadent dessert we’ve been dreaming about. Seriously, don’t let the two layers scare you off; we’re treating the two components separately until the very end. If you’re looking for a super quick recipe, you might want to see this version, but I find from-scratch gives that fudgy depth that just can’t be beaten.
Preparing the Pan and Brownie Batter Base
First things first: preheat your oven to 350°F (175°C). Grab that 9×13 inch pan and line it with parchment paper, but make sure you leave an overhang hanging over the sides! That overhang is your handle later when you need to lift these beauties out—trust me on this one. Now, mix your wet stuff (butter, sugar, eggs, coloring) until it’s perfectly uniform. In a separate bowl, whisk your dry stuff (flour, cocoa, salt). I mix the buttermilk and vinegar together quickly to make my own buttermilk substitute on the spot. Then, add the dry ingredients and wet ingredients alternately to the main bowl, mixing only until the flour streaks just disappear. Do not overmix, or you’ll lose that fudgy goodness!
Creating the Cream Cheese Swirl Component
For this layer, the key word is smooth. Take your softened cream cheese and beat it hard with the sugar until there are absolutely no discernible lumps hanging around. Then gently beat in your egg and vanilla. If you see any little cream cheese chunks at this stage, just keep beating until it looks like thick, pale frosting. This mixture needs to be ready to gently drop onto the brownie layer later.
Assembling and Marbling Your Swirled Brownies Recipe
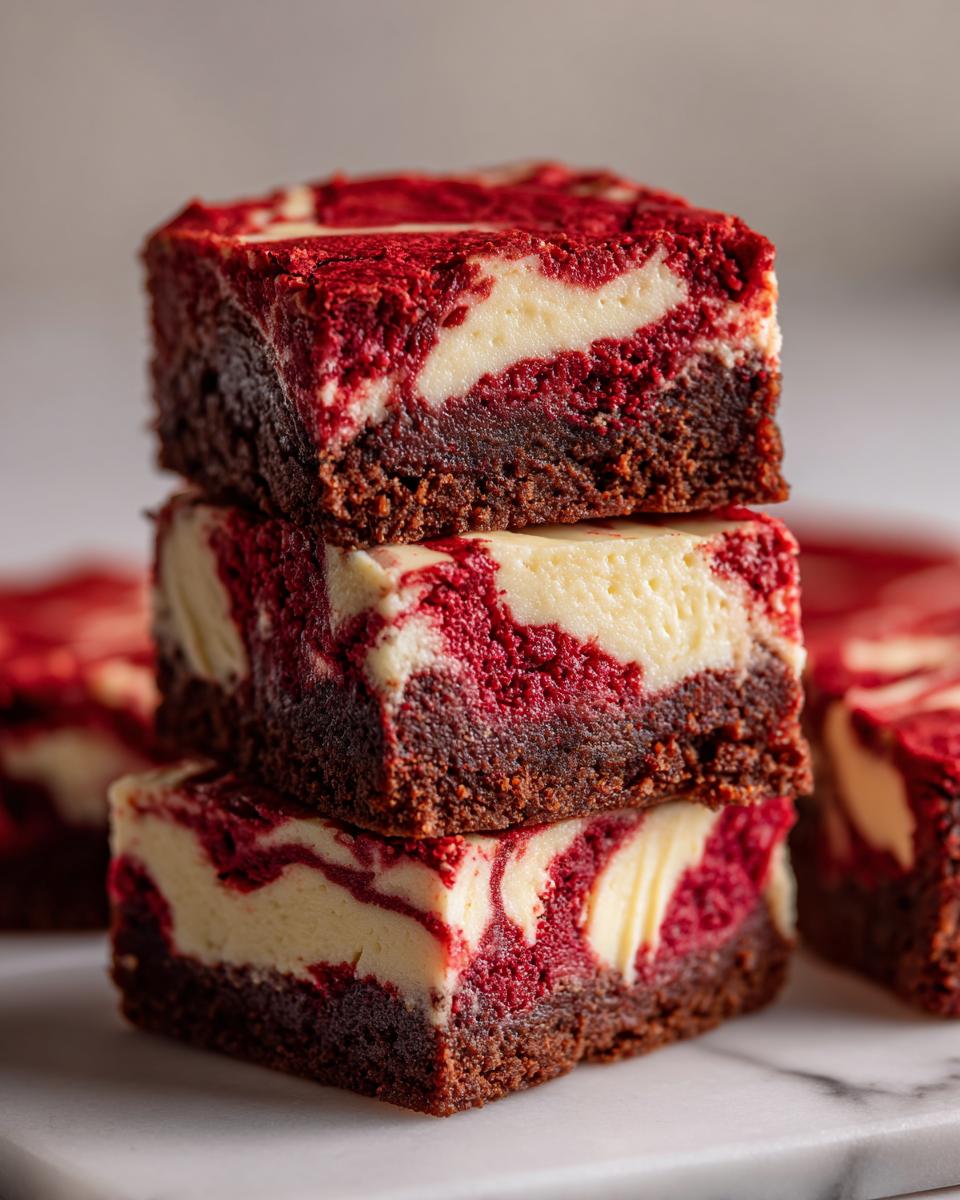
This is the artistic part! Pour about two-thirds of that gorgeous red velvet batter into your prepared pan and spread it out nicely. Next, drop spoonfuls of the cheesecake mixture randomly over the top. Don’t worry about spacing; just scatter them around. Now, pour the remaining red velvet batter over all those white dollops. Grab a butter knife—a skewer works too!—and gently pull it through the batter in broad S shapes to create that beautiful marbled effect. Don’t go crazy trying to blend everything; we want ribbons, not a uniform pink color! This technique is key for a perfect layered brownie dessert.

Tips for Success Making red velvet cheesecake brownies
I know baking anything with two separate batters feels intense, but trust me, a few little secrets pulled straight from my test kitchen notes will guarantee these turn out stunning. If you’re looking for more inspiration on perfecting indulgent dessert ideas, you might find some fun ideas on this site!
Baking Time and Testing for Doneness
It’s easy to overbake brownies, and that’s the kiss of death for fudgy ones! You are aiming for 30 to 35 minutes at 350°F, but always rely on the toothpick test. When you pull that toothpick out of the center brownies, you want to see moist, sticky crumbs clinging to it—not wet batter, but definitely not perfectly clean either. Clean means dry, and dry means cakey, not fudgy! Another huge tip for gorgeous, clean slices leading to perfect marbled brownie squares is that you absolutely *must* let them cool completely. I prefer chilling them in the fridge for at least two hours before attempting to use the parchment overhang to lift them out.
The Box Mix Hack for Easy Cheesecake Brownie Bars
Listen, I am all about making things from scratch because it tastes amazing, but I also know life gets busy! If you need to whip up these cheesecake brownie bars in a pinch, you can totally use a box mix hack. Take one standard box of red velvet cake mix. Follow the package directions for preparing the brownie batter, but omit any liquid ingredients listed for frosting. Instead, use the specified amounts of oil, eggs, and water listed for the cake preparation, and maybe add a little extra cocoa powder (like two tablespoons) to give it that deep chocolatey brownie base flavor instead of a standard cake flavor. Then, proceed with layering that over your homemade cream cheese mixture. It cuts your prep time in half!
Storage and Serving Suggestions for Your Impressive Dessert for Guests
So you managed to bake these masterpieces! Congratulations! Now, the biggest hurdle is getting them to the party looking perfect, or just saving the rest for yourself—which, let’s be honest, is half the fun. Since we’re dealing with a cheesecake layer in these red velvet cheesecake brownies, storage is key, especially if you’re making them ahead of time for guests.
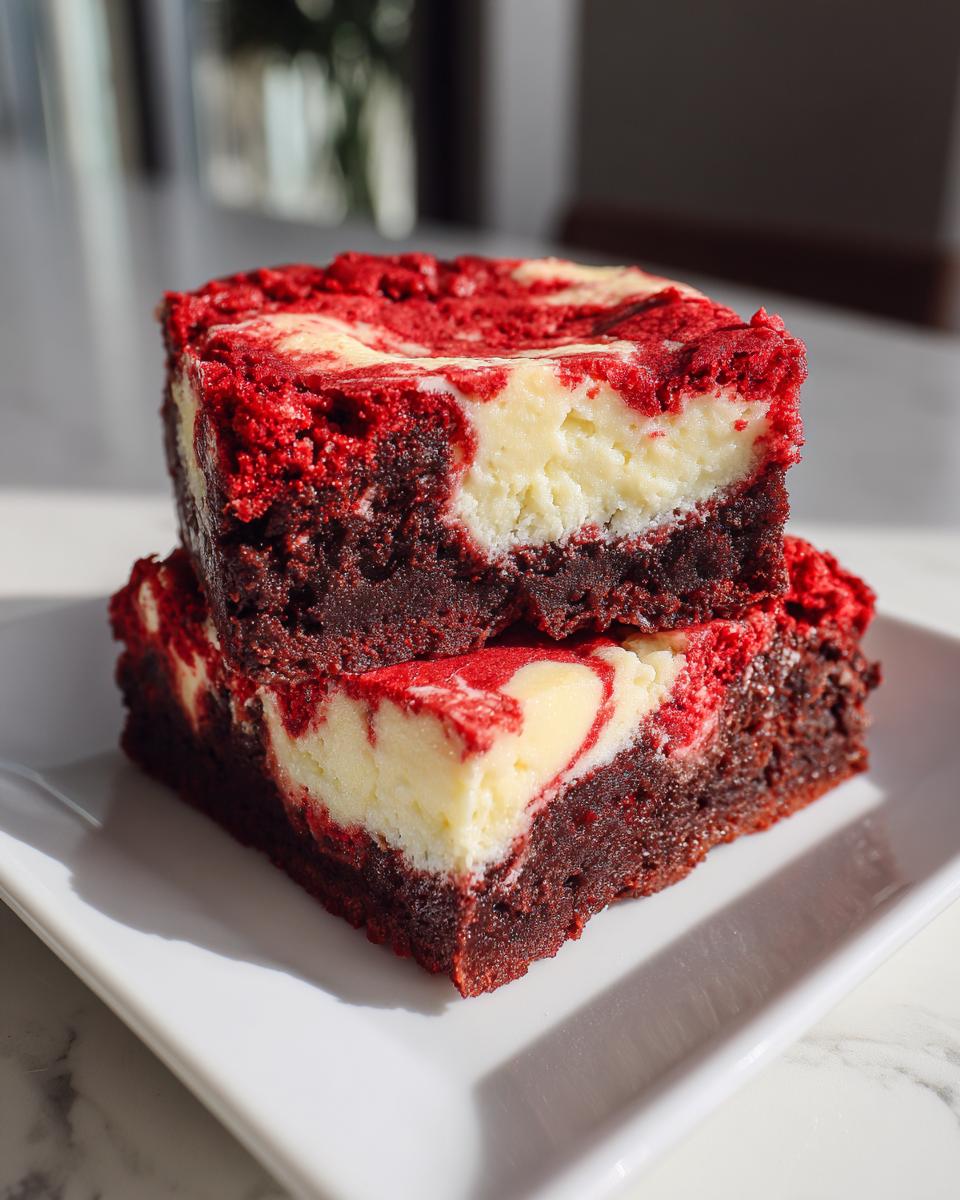
My number one rule for serving these up beautifully is chilling them. You really do need to let these bars set up completely. If you try to slice them when they’re even slightly warm, that beautiful cheesecake layer is going to ooze all over the knife, and you won’t get those sharp, clean edges you worked so hard for. After they cool on the counter completely, pop the whole pan (still wrapped in that parchment overhang!) into the fridge for at least two hours.
Once they are chilled, you can lift them out easily and cut them into those perfect squares. If you’re serving them immediately, let them sit on the counter for about 15 minutes before cutting just so they aren’t ice-cold, but don’t let them sit too long, or the cheesecake softens too much. They store wonderfully in an airtight container in the refrigerator for up to five days. That gorgeous vibrant color stays true, and the texture stays wonderfully fudgy.
If you want to get extra fancy for your guests, a little something extra on the side can be amazing! Since these are so rich, you actually don’t need a heavy topping, but sometimes a light drizzle is fun. I sometimes serve leftovers with a bit of warm, homemade chocolate sauce on the side for dipping, just to make it a next-level sundae experience. If you ever stop by my kitchen while these are chilling, you’ll find me peeking in the fridge every five minutes, just admiring the swirls before diving in!
For more holiday inspiration or general baking tips, you can always look at fantastic ideas over at Averie Cooks; she always has stunning bakes.
Frequently Asked Questions About Cream Cheese Swirl Dessert
FAQs are the best way to clear up any last-minute worries before you dive into making these gorgeous red velvet cheesecake brownies! It’s totally normal to have questions when dealing with two separate layers. Don’t stress—we’re going to conquer them using what I’ve learned through trial and error in my kitchen. Addressing these little concerns is part of building that culinary confidence that Cooking Zenith is all about!
Can I make these red velvet brownies without red food coloring?
You absolutely can, and I won’t tell anyone! If you skip the coloring, your bake will technically become a rich, dark chocolate brownie marbled with cheesecake—delicious, no doubt. However, you’ll certainly lose that signature, vibrant look that makes these such a great cream cheese swirl dessert for holidays or Valentine’s Day gatherings. Flavor-wise, the color doesn’t change much other than maybe tasting slightly more like classic cocoa without the slight added flavor some dyes carry, but trust me, seeing that red pop against the white is half the fun!
How do I prevent my cheesecake layer from sinking?
This is such an important question when making any swirled brownies recipe! The cheesecake batter is wetter, and gravity wants it to sink right down into the brownie base, which we definitely don’t want for our beautifully layered brownie dessert. The best trick I found (and that they mention in some of the best recipes out there) is to chill that already-mixed cheesecake layer in the freezer for about 10 to 15 minutes before you start assembling. Just until the edges start to firm up slightly. You don’t want it frozen solid, just stiff enough that when you dollop it onto the base batter, it holds its shape better while you spread the top layer over it.
What is the best way to store these Layered Brownie Dessert bars?
Because we have that decadent cream cheese component, refrigeration is the way to go for storage. Once they are completely cooled and you’ve cut your perfect squares, place them in an airtight container. If you can, put a layer of parchment paper between the layers of bars so they don’t stick together while chilling. They are fantastic pulled straight from the fridge after a day or two, or you can let them sit on the counter for 20 minutes before serving for a slightly softer bite. They easily last five to seven days stored correctly this way!
Nutritional Estimates for One Serving
Now, I have to preface this by saying that if you look at the ingredients list—butter, sugar, cream cheese—you know these aren’t exactly diet food, right? They are meant to be rich, indulgent dessert ideas, and that’s what they are! These decadent chocolate desserts are special occasion treats, plain and simple. The numbers below are just my best guess, based on the measurements in the recipe card, giving you a very rough idea.
Because I’m a home cook, not a certified nutritionist, my figures are based on standard ingredient calculations, and your final nutrition breakdown for these gorgeous red velvet cheesecake brownies will definitely change depending on the brand of cream cheese or butter you use. But hey, we bake these for love, not for calorie counting, right?
Here is what an average square might look like:
- Serving Size: 1 square
- Calories: 350
- Sugar: 35g (Yes, it’s a splurge!)
- Fat: 20g
- Saturated Fat: 12g
- Carbohydrates: 40g
- Protein: 5g
If you compare these to a store-bought version of cheesecake brownie bars, you’ll often find ours are better quality because we controlled all those ingredients ourselves. Feel good about what you made; you created a showstopper!
Share Your Baking Journey
Well, that’s it! You’ve made it through the process, from melting the butter to that final, beautiful swirl. See? That wasn’t scary at all! You just conquered a truly impressive bake. You’ve elevated your everyday cooking, just like we talk about here at Cooking Zenith!
Now, I genuinely want to see what you created! Seriously, tag me on social media if you snap a picture of those gorgeous red velvet cheesecake brownies. Seeing your fudgy bases and creamy swirls is the best part of my whole week because it proves that you, too, can master these kinds of stunning desserts for guests.
And if you loved this recipe, please, please leave it a rating down below. Five stars helps other home cooks find this recipe when they are searching for the best fudgy red velvet bake or a show-stopping holiday treat. Every time you leave a comment, it feels like we’re chatting over coffee, and I can offer support if anything wasn’t quite right, or just cheer you on for your success!
If you have any lingering questions about the layering, the chilling process, or how to make these even more decadent, pop them in the comments section! If you need to chat directly, you can reach out via the contact page anytime. Happy baking, my friend—you earned that rich, tangy treat!
PrintUltimate Decadent Red Velvet Cheesecake Brownies: Fudgy, Creamy, and Swirled Perfection
Make showstopping Red Velvet Cheesecake Brownies that combine rich, fudgy red velvet batter with a tangy, creamy cheesecake swirl. This recipe delivers a visually impressive, layered dessert perfect for any gathering.
- Prep Time: 20 min
- Cook Time: 35 min
- Total Time: 55 min
- Yield: 16 squares 1x
- Category: Dessert
- Method: Baking
- Cuisine: American
- Diet: Vegetarian
Ingredients
- 1 cup (2 sticks) unsalted butter, melted
- 2 cups granulated sugar
- 4 large eggs
- 1 teaspoon vanilla extract
- 1 teaspoon white vinegar
- 1 teaspoon red food coloring (or more for deeper color)
- 1 1/2 cups all-purpose flour
- 1/2 cup unsweetened cocoa powder
- 1 teaspoon baking soda
- 1/2 teaspoon salt
- 1 tablespoon white vinegar (for the batter)
- 1 cup buttermilk
- 8 ounces cream cheese, softened
- 1/2 cup granulated sugar (for the cheesecake layer)
- 1 large egg (for the cheesecake layer)
- 1/2 teaspoon vanilla extract (for the cheesecake layer)
Instructions
- Preheat your oven to 350°F (175°C). Line a 9×13 inch baking pan with parchment paper, leaving an overhang on the sides for easy removal. Lightly grease the paper.
- Prepare the Red Velvet Brownie Batter: In a large bowl, whisk together the melted butter and 2 cups of sugar until combined.
- Whisk in the 4 eggs one at a time until incorporated. Stir in 1 teaspoon vanilla extract, 1 teaspoon white vinegar, and the red food coloring until the mixture is uniformly red.
- In a separate medium bowl, whisk together the flour, cocoa powder, and salt.
- In a small bowl, whisk together the buttermilk and 1 tablespoon of white vinegar to create a makeshift buttermilk substitute.
- Alternately add the dry ingredients and the buttermilk mixture to the wet ingredients, mixing only until just combined. Do not overmix the batter.
- Prepare the Cheesecake Layer: In a medium bowl, beat the softened cream cheese with 1/2 cup sugar until smooth. Beat in 1 egg and 1/2 teaspoon vanilla extract until the mixture is creamy.
- Assemble the Brownies: Pour about two-thirds of the red velvet batter into the prepared pan and spread evenly.
- Dollop spoonfuls of the cheesecake mixture over the batter. Pour the remaining red velvet batter over the cheesecake dollops.
- Take a butter knife or skewer and gently swirl the two layers together to create a marbled effect. Do not over-swirl; you want distinct layers and ribbons.
- Bake for 30 to 35 minutes, or until a toothpick inserted near the center comes out with moist crumbs attached, not wet batter. The cheesecake layer should be mostly set.
- Let the brownies cool completely in the pan on a wire rack before lifting them out using the parchment overhang.
- Cut into squares and serve your impressive dessert.
Notes
- For a richer, fudgier texture, slightly reduce the baking time until the center is just set.
- If you prefer a quicker method, you can substitute the red velvet batter ingredients with one box of red velvet cake mix prepared according to package directions (omitting any ingredients listed for frosting).
- Chill the cheesecake layer mixture slightly before swirling; this helps prevent it from sinking too deeply into the brownie batter.
Nutrition
- Serving Size: 1 square
- Calories: 350
- Sugar: 35
- Sodium: 250
- Fat: 20
- Saturated Fat: 12
- Unsaturated Fat: 8
- Trans Fat: 0
- Carbohydrates: 40
- Fiber: 2
- Protein: 5
- Cholesterol: 90