
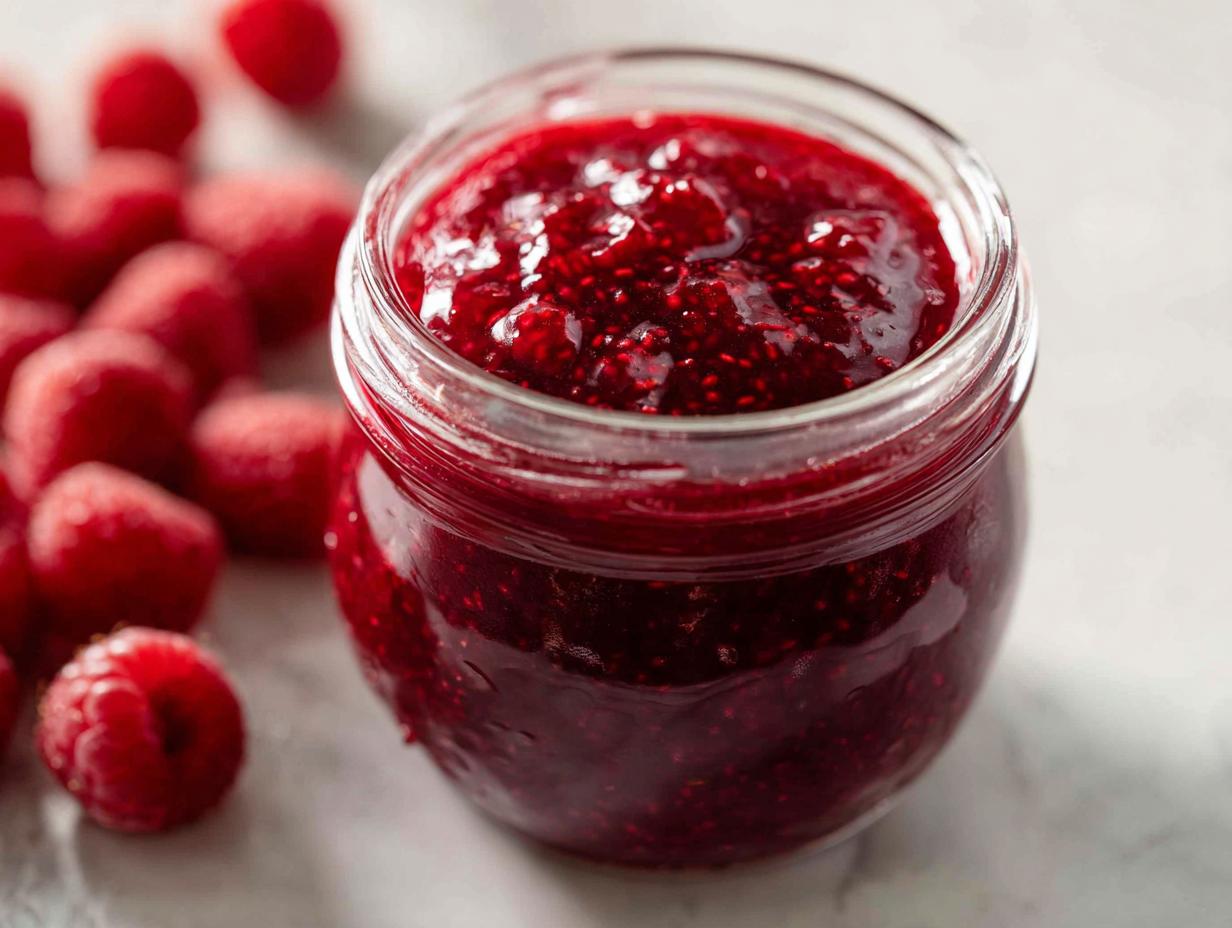
Oh, that vibrant, electric taste of summer berries screaming from a jar? That’s what we’re chasing today! Forget the complicated canning manuals and those pricey jars of store-bought stuff; we are making incredible, pure raspberry jam right here on the stovetop. My whole philosophy centers on making your everyday cooking better, and what’s more everyday wonderful than the perfect toast topping?
I’m Aria, and honestly, if I can tackle this batch jam project after a long day, you absolutely can. This is my go-to easy homemade raspberry jam recipe without pectin. You heard that right—we rely on the natural magic of the berries and sugar, not weird powders! It thickens beautifully all on its own, and trust me, the flavor of preserves made from scratch just cannot be beaten. If you’ve been looking for the best way to capture those summer moments, this is it. You might even have the ingredients needed right now, like in my guide to homemade essentials.
- Why This Easy Raspberry Jam Recipe Works So Well (No Pectin Needed)
- Gather Your 3 Ingredient Raspberry Jam Staples
- Step-by-Step Instructions for Perfect Homemade Raspberry Jam
- Expert Tips for the Best Homemade Jam Results
- Storing Your Homemade Raspberry Jam
- Using Your Raspberry Jam Beyond Toast
- Frequently Asked Questions About Making Raspberry Jam
- Estimated Nutritional Breakdown for Raspberry Jam
- Share Your Homemade Raspberry Jam Creations
Why This Easy Raspberry Jam Recipe Works So Well (No Pectin Needed)
The biggest question I get about my preserves is, “Aria, how does this set without that weird pectin powder?” It’s simple science, really! When you work with fruit like raspberries, which naturally have acid and pectin locked inside, what you mostly need is patience and sugar. The long, steady boil concentrates those natural setting agents. That little bit of lemon juice is crucial—it provides the acid element needed to activate the berry’s natural pectin. That’s the entire secret to this wonderfully thick, easy raspberry jam recipe.
Quick Berry Jam: Fresh vs. Frozen Raspberries
Don’t stress about running to the market for perfect berries! This is where we make life easy. You can absolutely use them straight from the freezer. Honestly, for this quick berry jam, I often use frozen ones because they break down beautifully when they hit the heat. Since we are cooking it down anyway, there’s no need to even thaw them first. This guarantees we can make a lovely small batch jam recipe whenever inspiration strikes!
Gather Your 3 Ingredient Raspberry Jam Staples
Alright, let’s talk ingredients! My goal here is maximum flavor with minimum fuss. This recipe truly shines because it relies almost entirely on kitchen pantry staples. You won’t be hunting down specialty items, trust me. When you look at this short list, you’ll realize why I call this the magic 3 ingredient raspberry jam recipe. It’s unbelievably simple, but the quality of these three items makes all the difference in achieving that perfect spreadable texture.
You will need:
- 4 cups fresh or frozen raspberries (no need to thaw them if they are frozen!)
- 3 cups granulated sugar (yes, that much—it helps it set!)
- 1 tablespoon fresh lemon juice (don’t skip this acid, it’s key)
That’s it! No commercial pectin hiding in the back of the cupboard needed whatsoever. If you need a quick reference for dough making later, check out my guide for homemade pizza dough, but for now, just focus on these beautiful berries and sugar!

Step-by-Step Instructions for Perfect Homemade Raspberry Jam
Okay, now for the fun part! Transforming those kitchen pantry staples into luscious homemade raspberry jam is surprisingly fast. We are keeping this straightforward so you can get back to enjoying your summer!
- First things first, get your storage ready! If you plan on long-term storage, make sure your jars and lids are cleaned and waiting. If you are just making this for the fridge or freezer—my favorite way for quick weekend treats—just grab your freezer-safe containers.
- In a heavy-bottomed saucepan (this is vital to stop scorching!), toss in the raspberries and the sugar. Give them a gentle stir and just let them sit there for about 15 minutes. This resting time is wonderful because the sugar sucks all that gorgeous juice right out of the berries.
- Pop the pan over medium-high heat. You must stir constantly here until you see that sugar completely dissolve. Once it hits a rolling boil—a boil that doesn’t stop when you stir it—toss in that lemon juice.
- Now we cook! Keep stirring frequently to prevent anything from sticking or burning on the bottom. This usually takes about 15 to 25 minutes for the jam to reach the perfect set. The test? Dollop a tiny bit onto a plate you chilled in the freezer earlier. If the jam wrinkles when you push it with your finger, it’s done! If it’s runny, give it five more minutes and test again.
- Pull the pot off the heat. If you see any pink foam floating on top, just skim it off with a clean spoon—it makes the final jam look so much prettier!
Preparing Jars for Canning Raspberry Jam or Freezer Jam
As the jam cooks, make sure your canning setup is ready if you want that shelf stability. If canning, get your water bath boiling now. For this gorgeous recipe—a quick berry jam that’s perfect for almost any use—you can also just let it cool down completely before sealing it tight and popping it into the freezer for up to a year. It’s great that this recipe supports both easy breakfast recipes and serious preserving!
Achieving Seedless Raspberry Jam Instructions
If you absolutely dislike those tiny seeds in your preserves, this is your moment! Right after you take the jam off the stove—while it’s still piping hot but before it cools down—press the entire batch through a fine-mesh sieve over a bowl. Use a spatula to push all that lovely pulp through. If you want the seeds, just skip this part! Return the smooth pulp back to the clean pot and proceed to ladle it into your jars.
Expert Tips for the Best Homemade Jam Results
Making homemade raspberry jam is all about paying attention to those little details that take it from *good* to absolutely *the best homemade jam* quality. Since we aren’t using pectin, we have to coax the pectin that’s already there out of hiding, and that requires a little respect for the cooking process. I learned early on that treating fresh berries right means you get that vibrant, tart flavor without any off-tastes.
My number one piece of advice, seriously, is your pot selection. You absolutely must use a heavy-bottomed saucepan. If you use a thin metal pot, the sugar will scorch on those little hot spots, and you’ll end up scraping toasted bits—and a burnt flavor—off the bottom of your pot during our crucial 25-minute cook time. Trust me, that’s no fun.
When the jam starts boiling, you’ll see foamy bubbles forming on the surface. That foam isn’t bad, but it can make your final jars look cloudy if you leave it in. So, once you hit that setting point and remove the jam from the heat, take a clean spoon and gently skim off that foam. It’s a small step, but that’s how you get professional-looking fresh raspberry preserves that are perfect for gifting.
Also, keep stirring! Even when you think you’re safe because it’s boiling, the sugars can cling to the bottom and burn fast. Constant, gentle stirring keeps the heat distributed evenly across that wonderful berry mixture. When the jam is done, it should look glossy and perfectly vibrant, just like the high-quality jam you’d find at a fancy market! If you’re getting ready for a scone break later, remember my tips on getting the perfect glaze to go with your new jam.
If you want to check out other methods—especially ones that use less sugar—check out this fantastic guide on no-pectin jam techniques. It’s always good to see how others handle these summer berries!
Storing Your Homemade Raspberry Jam
So, you’ve got your glorious, glossy, perfectly set raspberry jam. Now what? Don’t let all that hard work go to waste! We have three fantastic ways to store this batch, depending on how fast you think your family will devour it. Remember, since we skipped the pectin, how you store it matters hugely for shelf life.
For the quickest approach, especially if you just made a small batch jam recipe, the refrigerator is your friend. You can let the jam cool down completely on the counter, then seal those jars tightly and pop them in the fridge. They will stay wonderfully fresh for about three weeks. That’s perfect for keeping on hand for your sourdough toast every morning!
If you want to preserve that summer sunshine for months—which you definitely should, because this is the best homemade jam—you’ll want to process it using a water bath. This is how you safely handle canning raspberry jam. Once those jars are filled with the hot jam, you process them submerged in boiling water for exactly 10 minutes. After that, cool them down, listen for that satisfying *ping*, and tuck them away in your pantry. They’ll last ages!
Finally, if you love the idea of a freezer jam recipe but don’t want to deal with the boiling water bath, freezing is such a fast solution. Just make sure to cool the jam separate from its lid first. Once it’s totally cool, seal your freezer-safe containers securely. This method keeps that super fresh flavor locked in for up to a full year! Honestly, I usually divide mine into three jars: one for now, one for canning, and one designated for the freezer drawer for emergencies.
If you want some other clever ways to keep things fresh around the kitchen, you should definitely check out my recipe for refrigerator pickles—they use super simple, quick preservation methods too!
Using Your Raspberry Jam Beyond Toast
Now that you’ve made the best homemade jam, you might think it’s only for sourdough or bagels, but trust me, this stuff is dynamite everywhere! Think about it—this bright, tart flavor takes things up a notch instantly. I love just swirling a big spoonful into my morning Greek yogurt; it’s way better than plain fruit chunks.
And okay, for baking? You have to try these with my raspberry thumbprint cookies recipe. That jam bakes up gorgeously sticky. If you’re making cocktails, a little splash of this simple syrup replacement adds such a beautiful, fresh berry punch. See? This easy raspberry jam recipe is truly a flavor powerhouse for your entire kitchen!
Frequently Asked Questions About Making Raspberry Jam
I always get questions when people try making preserves for the first time, especially when we’re skipping the commercial stuff! Don’t hesitate; these are the same things I panicked about the first time I tried making from scratch jam.
Can I use less sugar in this raspberry jam no pectin recipe?
This is a tricky one, and you have to be careful! When we don’t use added pectin, the sugar plays a huge role in the actual thickening process; it binds with the acid and the fruit’s natural pectin. If you cut back too much on that 3 cups of sugar for a four-cup berry batch, your beautiful raspberry jam no pectin might end up being a runny sauce instead of a spread. I strongly advise sticking to the recipe here if you want that perfect set. It’s the trade-off for making such a wonderfully simple preserve!
What is the setting point test for this quick berry jam?
Forget trying to guess by boiling time—the eye test is always the best way to nail the set on this quick berry jam. Remember that trick with the chilled plate? That remains your gold standard. Pull your pan off the heat when the jam wrinkles slightly after you push the dollop with your finger. If you push it, and the spot where you pushed stays ruffled and doesn’t immediately flow back to smooth, you’ve hit the setting point! If it flows back, it needs a couple more minutes of boiling.
How long does this small batch jam recipe last in the fridge?
Since this is designed as a small batch jam recipe and you likely won’t be canning *all* of it, storage is key! If you just put a jar in the fridge (cooled well, of course), it keeps that fresh, bright flavor beautifully for about three weeks. That’s usually long enough for me to eat one jar before the next batch is even ready! If you want it to last beyond that, you absolutely have to process it using the water bath method we discussed.
If you’re looking for other simple ways to use up fresh ingredients quickly, check out my full list of easy breakfast recipes for inspiration!
Estimated Nutritional Breakdown for Raspberry Jam
Now, I know some of you might be wondering about the numbers, especially since we use a good amount of sugar to help this 3 ingredient raspberry jam set all on its own! Just remember, these figures are estimates based on serving size, and the best part is you control the portion size, right?
When looking at the nutrition details for this homemade raspberry jam recipe, keep in mind that a serving size is about two tablespoons. If you’re spreading it thick on your morning slice, you might be enjoying more than one serving, so balance is key!
Here’s a snapshot of what this simple preserve generally packs:
- Calories: Around 105 per serving.
- Sugar: About 27g—this is where the setting power comes from, so it’s necessary!
- Carbohydrates: Roughly 27g total.
- Protein: Almost zero—it’s pure fruit and sugar goodness!
The wonderful news is that there’s virtually no fat or cholesterol here, which is standard for a fruit preserve. It’s a little sweet treat, but knowing that it’s made from scratch jam with real fruit instead of artificial fillers makes me feel a hundred times better about spreading it on my favorite slice of toasted sourdough!
Share Your Homemade Raspberry Jam Creations
Well, that’s it! You’ve done the work, and now you have jars full of sunshine. Honestly, seeing your triumphs in the kitchen is the absolute best part of my job here at Cooking Zenith. I truly want to know how this batch of raspberry jam turned out for you.
Did you go for the easy refrigerator jam, or did you go all-in with water bath canning? Maybe you decided to make a special freezer jam recipe and already have some tucked away for a dreary winter morning? Tell me everything in the comments below!
Please, take a second to drop a rating for this easy raspberry jam recipe—five stars if it spread perfectly on your morning toast! Honestly, those ratings help other home cooks feel confident enough to try making their own homemade raspberry jam from scratch. If you snapped a photo of your shiny jars or your beautiful breakfast creation featuring the jam, tag me on social media so I can share the love. Nothing brings me more joy than seeing you elevate your everyday cooking!
If you have any leftover questions, or if you just want to connect about other summer berry recipes, don’t hesitate to reach out through my contact page. Happy jamming, friends!
PrintEasy Homemade Raspberry Jam Recipe Without Pectin
Make this simple, three-ingredient raspberry jam at home. This recipe works well for small batches and thickens naturally without added pectin, perfect for toast, yogurt, or baking.
- Prep Time: 15 min
- Cook Time: 25 min
- Total Time: 40 min
- Yield: About 1.5 pints 1x
- Category: Preserves
- Method: Stovetop Cooking
- Cuisine: American
- Diet: Vegetarian
Ingredients
- 4 cups fresh or frozen raspberries
- 3 cups granulated sugar
- 1 tablespoon fresh lemon juice
Instructions
- Prepare your jars and lids if you plan to can the jam. If freezing, ensure you have freezer-safe containers ready.
- Combine the raspberries and sugar in a heavy-bottomed saucepan. Let the mixture sit for 15 minutes to allow the sugar to draw out the juices from the berries.
- Place the saucepan over medium-high heat. Stir constantly until the sugar dissolves completely and the mixture begins to boil.
- Once boiling, add the lemon juice. Continue to boil, stirring frequently to prevent scorching, until the jam reaches the setting point. This usually takes 15 to 25 minutes. You can test the set by placing a small spoonful on a chilled plate; if it wrinkles when pushed, it is ready.
- Remove the jam from the heat. Skim off any foam that has formed on the surface using a spoon.
- For seedless jam, press the mixture through a fine-mesh sieve now, returning the pulp to the pot. If you prefer seeds, skip this step.
- Ladle the hot jam into your prepared jars, leaving 1/4 inch headspace. Wipe the rims clean.
- For refrigerator storage, let the jam cool, then seal and store in the refrigerator for up to three weeks. For longer storage, process the jars in a boiling water bath for 10 minutes, then cool and store. For freezer jam, cool completely before sealing and freezing for up to one year.
Notes
- This recipe yields about 3 half-pint jars of jam. Adjust quantities for larger batches.
- Using frozen raspberries is fine; do not thaw them before cooking.
- The lemon juice helps the jam set and brightens the berry flavor.
- For the best results when canning raspberry jam, use proper canning jars and follow safe canning procedures.
Nutrition
- Serving Size: 2 tablespoons
- Calories: 105
- Sugar: 27g
- Sodium: 1mg
- Fat: 0g
- Saturated Fat: 0g
- Unsaturated Fat: 0g
- Trans Fat: 0g
- Carbohydrates: 27g
- Fiber: 1g
- Protein: 0g
- Cholesterol: 0mg