
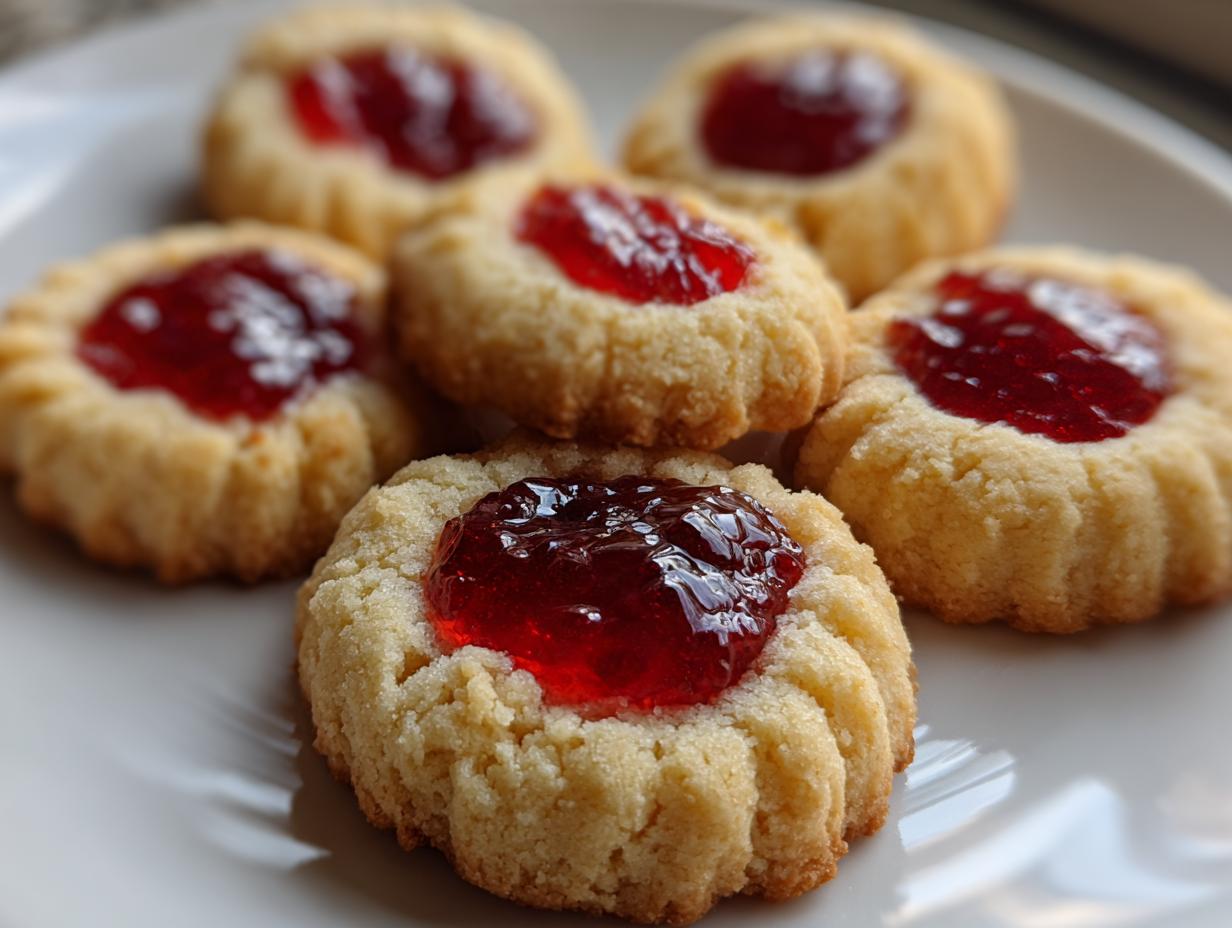
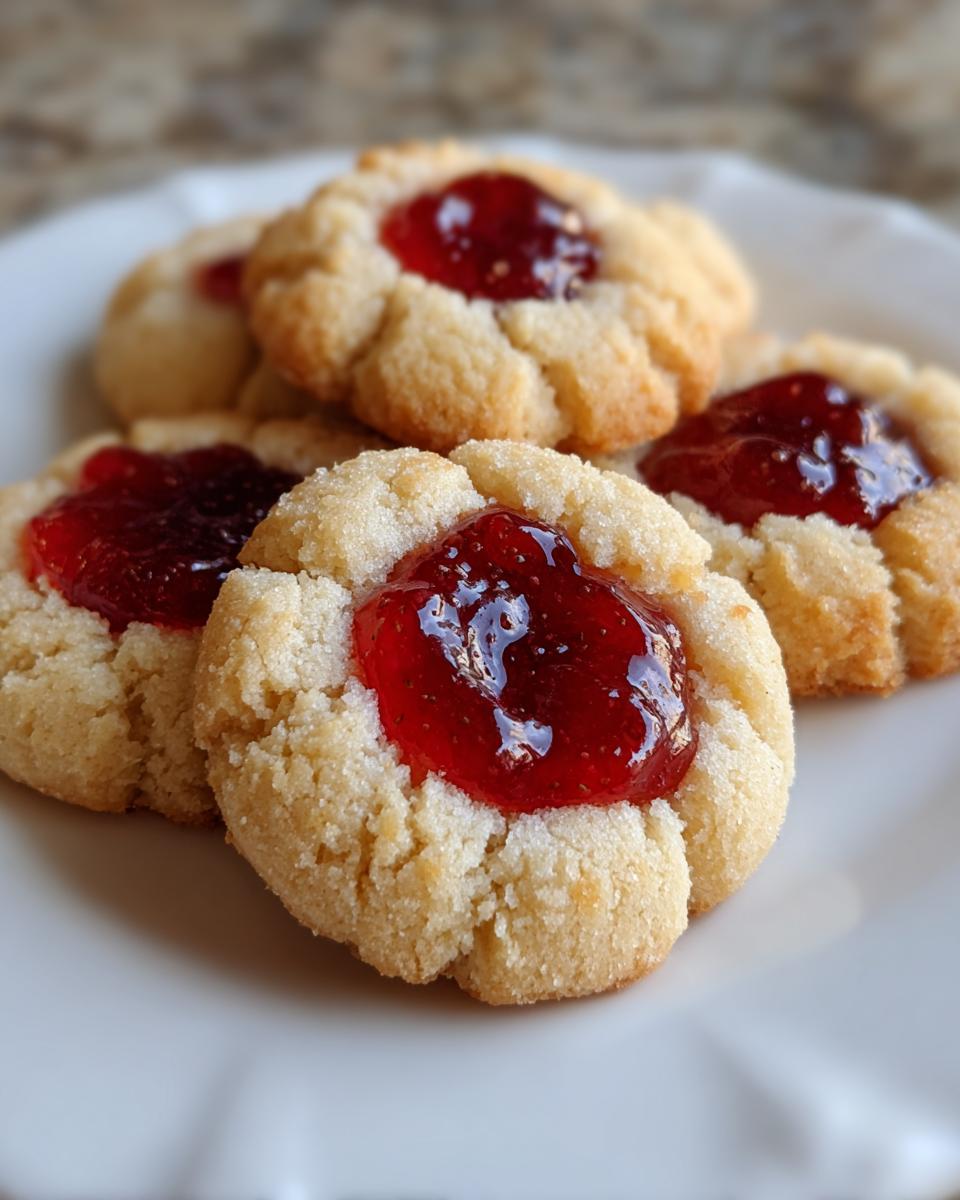
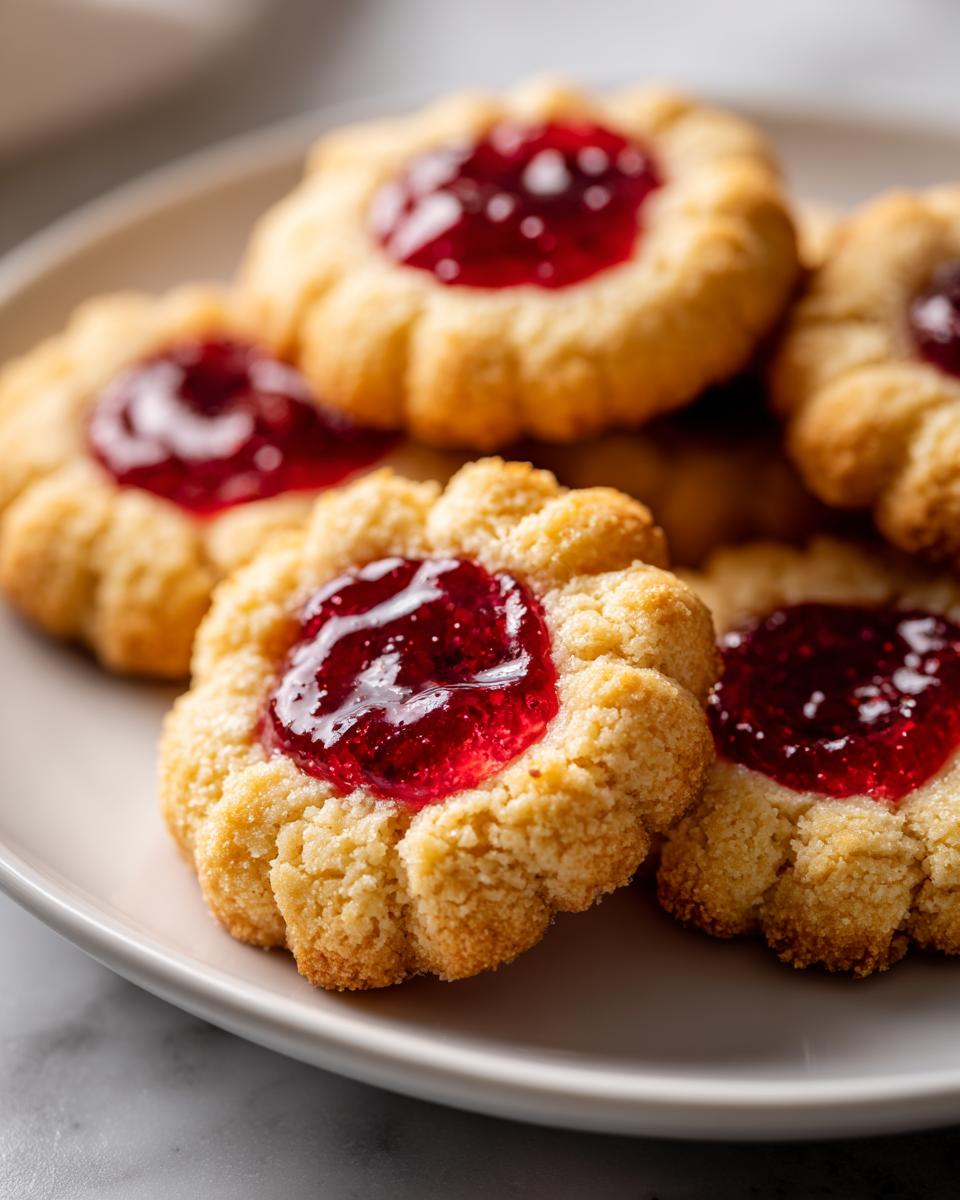
There is something so wonderfully nostalgic about a cookie that melts the second it hits your tongue, right? Especially when that buttery shortbread cradles a little dollop of bright, sweet jam. That’s why I absolutely adore classic raspberry thumbprint cookies. If you’ve ever struggled to keep that little jam well from collapsing during baking, trust me, you’ve come to the right spot. I’m Aria Thompson, and through countless batches developed right here in my home kitchen, I’ve perfected this recipe to guarantee you get that beautiful, neat indentation every single time. This isn’t just a recipe; it’s the reliable method for achieving those perfect melt in your mouth cookies that everyone asks for.
- Why This Classic Raspberry Thumbprint Cookies Recipe Works (E-E-A-T)
- Gathering Ingredients for Perfect Raspberry Thumbprint Cookies
- Step-by-Step Instructions for Classic Raspberry Cookies
- Baking Tips for Flawless Raspberry Thumbprint Cookies
- Variations: Beyond Classic Raspberry Cookies
- Storage and Making Ahead for Holiday Cookie Recipes
- Frequently Asked Questions About Raspberry Thumbprint Cookies
- Estimated Nutrition for Homemade Raspberry Dessert
- Share Your Baking Success with These Raspberry Thumbprint Cookies
Why This Classic Raspberry Thumbprint Cookies Recipe Works (E-E-A-T)
The reason these raspberry thumbprint cookies are my go-to recipe every year comes down to stability, which is everything when you’re dealing with jam! Too much liquid, and you get a puddle. Too little fat, and they spread into sad little pancakes. I tested this exact ratio of butter to flour for months until I nailed the perfect buttery shortbread cookies base that truly melts in your mouth—you won’t believe how tender they are.
The most crucial part, which you can read about more in this classic recipe post, is the chilling. Honestly, that 30 minutes in the fridge is non-negotiable. It stops the dough from losing its footing in the oven, which is what keeps those cute little dips perfectly intact until they come out golden. This recipe is designed to be foolproof, trust me. For more simple, high-quality baked goods, check out my tips for three-ingredient butter cookies!
Key Attributes of Our Best Thumbprint Cookies
- The dough produces authentically rich, melt in your mouth cookies every single time.
- Chilled dough ensures your jam center stays beautifully nestled and doesn’t bubble over excessively.
- It uses a very simple ingredient list—nothing fancy, just quality staples for a true from scratch cookie experience.
- The edges turn just barely golden while the center remains perfectly pale, showing they are baked but still soft.
Gathering Ingredients for Perfect Raspberry Thumbprint Cookies
Okay, let’s get real about ingredients because they make or break these delicate little treats. Since the dough is basically a glorified shortbread, the quality of your butter matters huge! You absolutely must use unsalted butter, and it needs to be properly softened—not melted, just soft enough that your finger leaves an easy indent. Don’t try rushing this by microwaving it; that dough will never come together right!
When it comes to the jam, I insist on using seedless raspberry jam. Nobody wants to chew around those little raspberry seeds when they are looking for a truly homemade raspberry dessert experience. You need that smooth, pure flavor contrast.
Ingredient Notes and Simple Cookie Recipes Substitutions
This is genuinely one of the most simple cookie recipes you’ll ever make, which means every ingredient gets to shine! If raspberry isn’t your favorite, feel free to swap it out. Apricot jam is gorgeous here, or even strawberry if you prefer a bit more sweetness. If you want to lean into those nutty notes reminiscent of almond raspberry cookies, skip the vanilla extract and use 1/2 teaspoon of almond extract instead. It adds a wonderful depth to that buttery base without adding any extra steps.
Step-by-Step Instructions for Classic Raspberry Cookies
Now that we have perfect ingredients, let’s get baking! Remember what I said about intuition over rigidity? Well, this part needs a little bit of focused attention, but it’s where those gorgeous classic raspberry cookies start to take shape. The secret to texture and the secret to the pretty dip are intertwined, so pay attention to those first chilling steps!
Mixing the Buttery Shortbread Dough
First things first: turn on your mixer and get that softened butter and sugar whipped up until it’s fluffy—we are talking pale and airy. That’s where you start building the structure for these buttery shortbread cookies. Once that looks perfect, mix in your egg yolk and vanilla. Don’t mix it for too long here, just enough to combine. Next, slowly, and I mean *slowly*, add your flour and salt mixture. As soon as you see that dough start to come together into a cohesive mass, STOP the mixer! Overmixing at this stage activates the gluten too much, and we want tender, not tough!
Wrap that soft dough up tightly in plastic wrap. Now comes the hardest part: patience! It needs to chill in the fridge for at least 30 minutes. Seriously, don’t skip this, or everything falls apart later. While that’s chilling, go ahead and get your oven preheated to 350°F (175°C) and line those baking sheets with parchment paper. You’ll be so glad you did when it’s cleanup time! If you want to try glazing these later, you can review my favorite basic sugar cookie icing that hardens.
Forming and Filling Your Raspberry Thumbprint Cookies
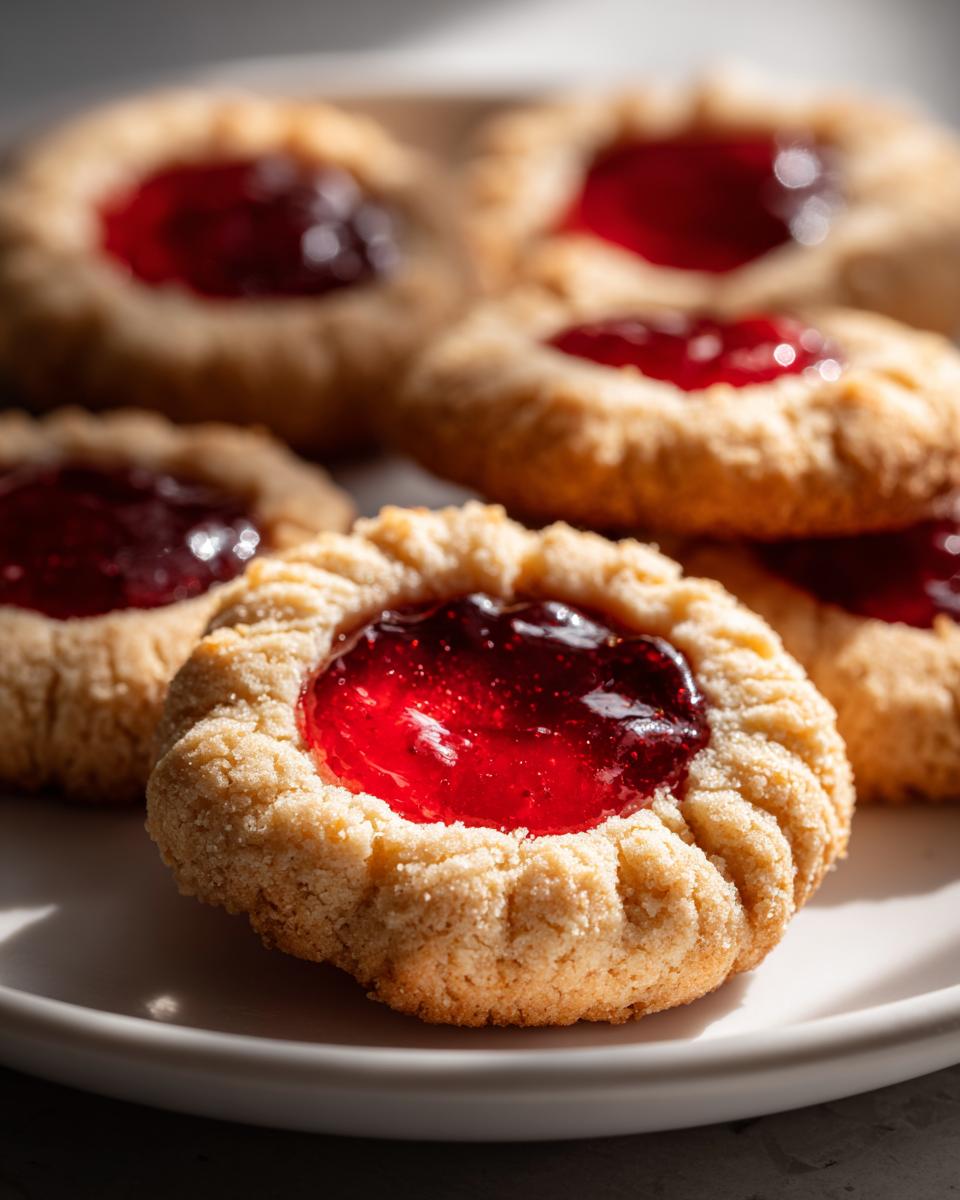
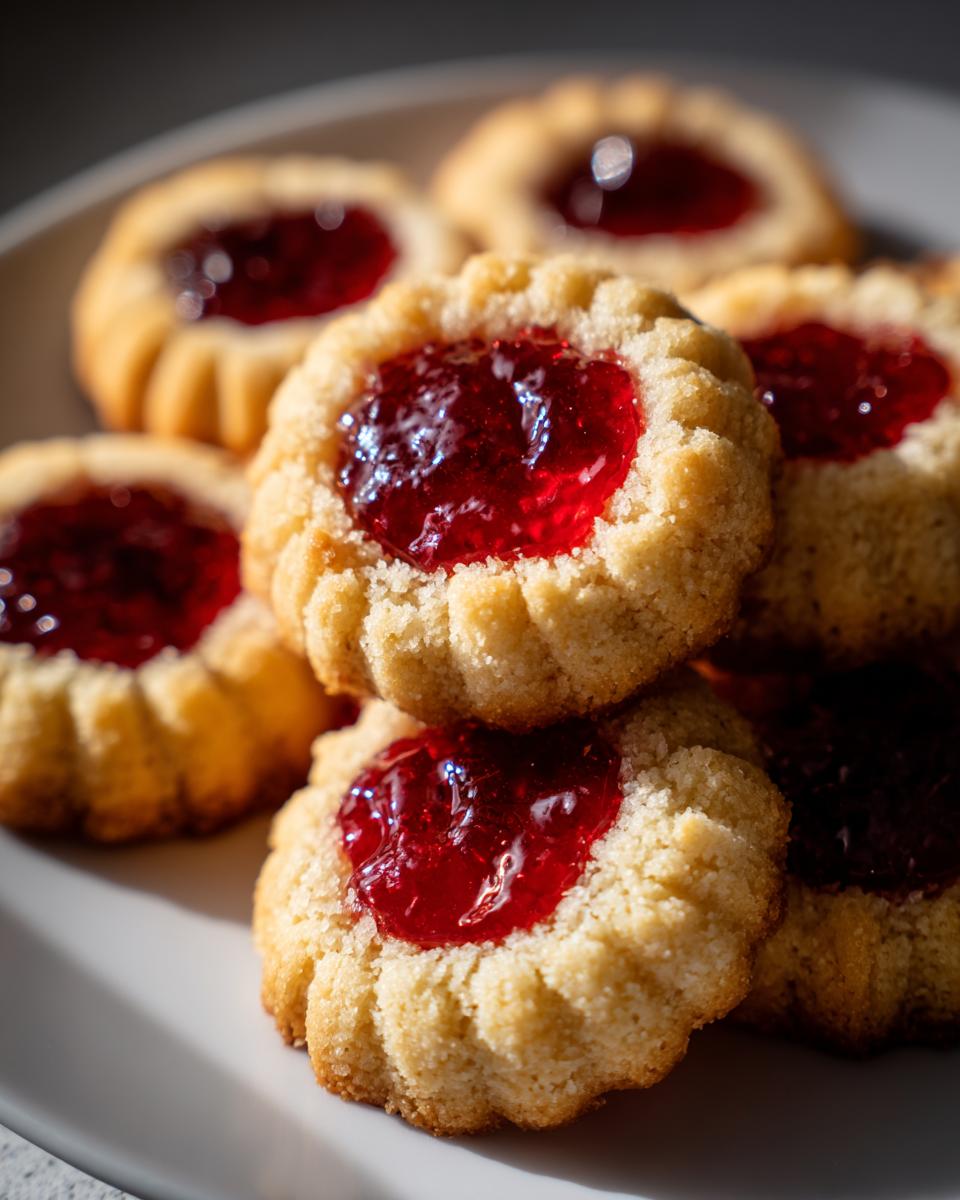
Once the dough is cold enough to handle, scoop it into little balls—about one tablespoon each. Roll them around quickly between your palms for the smoothest shape. Now for the fun part: the thumbprint! You want a deep well, but not so deep you tear the dough apart. While my mom always used her actual thumb, I found the cleanest, most uniform results by using the back of a half-teaspoon measuring spoon. Press down firmly right in the middle. This technique is what ensures you get perfect little pockets for your jam, turning them into beautiful bite sized cookies.
Spoon your seedless raspberry jam in—about half a teaspoon per cookie. Be careful not to let it ooze over the sides; we want the cookie dough to be the star! Once they are filled, place them on the sheet with about an inch of space between them, just like you read in this helpful cookie guide I found.
Baking Tips for Flawless Raspberry Thumbprint Cookies
Getting those easy thumbprint cookies into the oven is only half the battle! You need to watch them closely because they go from perfect to overdone really fast. Bake them at 350°F (175°C) for just 12 to 15 minutes. I learned this the hard way years ago when I was distracted chatting with a friend and baked them for 20 minutes. Wow, were they crunchy! The key is to look for the edges to just *barely* turn that light golden shade, but the middle should still look remarkably pale. That paleness is your sign that the shortbread is cooked but still wonderfully soft.
Remember these are meant to be tender, melt-in-your-mouth treats, not crisp wafers! Once they come out, give them five minutes resting time right on that warm baking sheet before you dare try moving them. If you try to lift them too soon, they’ll just crumble. But for more fail-proof baking, check out my thoughts on easy breakfast cookies—sometimes you just need a simple win!
Variations: Beyond Classic Raspberry Cookies
Look, I love tradition, but sometimes your sweet tooth needs a little shake-up! While these classic raspberry cookies are perfect as they are, sometimes I like to pretend I’m getting fancy. For a burst of sunshine that totally wakes up that buttery dough, try adding the zest of one lemon or even an orange right in with your creamed butter and sugar at the beginning. It pairs brilliantly with the tartness of the jam.
If someone isn’t a fan of raspberries, you can easily swap jams. Apricot is divine here, giving it that lovely golden hue. And yes, if you saw a picture out there of iced thumbprint cookies, you can absolutely do that! Once they are totally cool—and I mean totally—you can drizzle them lightly with a thin powdered sugar glaze. If you want a really simple glaze recipe, I’ve detailed how I make zesty icing over on my lemon crinkle post, and that works perfectly here too. Alternatively, you know some people love the combo, so check out this guide if you want to see how to add that sweet icing touch to your batch!
Storage and Making Ahead for Holiday Cookie Recipes
One of the best things about this raspberry thumbprint cookies recipe is how fantastic they are for planning ahead, especially if you are tackling a huge tray of holiday cookie recipes or need great cookie swap treats! Good news: these hold up beautifully, but you have to treat them right. Store the completely cooled cookies in a sturdy, airtight container. Don’t pile them too high, maybe just two layers with a sheet of parchment paper between them so they don’t stick, and they’ll stay fresh and tender for a good week.
If you’re making these way ahead of time, skip the powdered sugar dusting until right before you serve them. If you dust too early, the moisture from the jam slowly seeps into the sugar, and you end up with a gummy, melted layer rather than that lovely snowy finish we want. I always bake them a few days before the big holiday party, let them cool completely—seriously cooled, not even a little warm—and then store them plain. Then, about an hour before I bring them out, I dust everything lightly. It makes them look instantly fresh! If you want more tips on baking ahead, check out how I manage my stash of spiced persimmon cookies; the storage concepts are basically the same!
Frequently Asked Questions About Raspberry Thumbprint Cookies
When you’re deep into baking from scratch cookies, questions are bound to pop up! Since I’ve made these little beauties hundreds of times, I figured I’d tackle the common issues I hear about most often. If you’re aiming for that picture-perfect, stable cookie, these little troubleshooting tips should help you out!
Why do my raspberry thumbprint cookies spread too much?
Ah, the dreaded spread! This always comes down to two main culprits, and it usually means we got a little impatient. First, check your butter temperature. If your butter was too soft or starting to look oily when you creamed it, it simply doesn’t have the structural integrity needed to stop the cookie from relaxing in the oven. Second, and most commonly, you rushed the chill time! That 30 minutes (or even 45 minutes if your kitchen is warm) lets that shortbread dough firm up properly. Patience really is key when making these amazing jam filled cookies!
Can I use store-bought jam in these jam filled cookies?
Absolutely, you can use store-bought jam! There’s no need to feel like you have to make everything completely from scratch if you don’t have the time. However, I strongly recommend using a high-quality, seedless raspberry jam. If you use jam with whole seeds, those seeds create high spots in your indentation, which makes it harder to get that smooth, deep well you need for the perfect look. Plus, the seedless texture blends so much better with the melt in your mouth cookies base. If you’re looking for other quick recipes, my guide to homemade cheese crackers has a few shortcuts too!
Are these cookies suitable for mailing or gifting?
Yes, these are fantastic for gifting! Because the shortbread base is sturdy and the jam is baked right in, they travel much better than, say, a soft, chewy chocolate chip cookie. They keep well for about a week in an airtight container at room temperature. Just make sure they are completely cool before packing them up, and avoid putting too much weight on top!
Can I use a different nut in the dough like pecans?
You certainly can customize these! While I love the idea of almond raspberry cookies using almond extract, if you want to add actual nuts, you’ll need to treat them like you would in a standard shortbread. Finely chop your pecans or walnuts and mix them in along with the flour. Don’t substitute too much of the flour volume, though; maybe add 1/4 cup of nuts maximum so you don’t throw off that perfect cookie-to-jam ratio we worked so hard to achieve!
Estimated Nutrition for Homemade Raspberry Dessert
Now, I know we aren’t here for the numbers, right? We are here for the delicious, buttery goodness! But, just so you have an idea, I’ve pulled the general estimates for a single one of these raspberry thumbprint cookies based on the recipe measurements. Please remember these are just guidelines, since the precise brand of butter or amount of jam you use will change things slightly. If you’re counting macros, always check your ingredient labels! For more ideas on light fare, take a peek at my tips for quick, healthy lunch ideas.
Share Your Baking Success with These Raspberry Thumbprint Cookies
Honestly, baking should be a conversation, not a lecture! I put my heart and soul into making sure these raspberry thumbprint cookies come out perfectly buttery and tender for you. Now that you’ve got the recipe, I want to hear all about your experience. Did you try the back-of-the-spoon trick for the indentation? Did they hold their shape beautifully? I get such a kick out of seeing your results!
Please, jump down to the comments below and leave a star rating—it helps other home bakers know this recipe is reliable. And if you made any variations, like swapping jam or adding that little dash of almond extract, tell me how it turned out! If you snapped a picture of your perfect little jam valleys, I would absolutely love to see them! You can tag me on social media or feel free to reach out via my contact page. Knowing I helped you create a little moment of joy in your kitchen is truly the best part of what I do here at Cooking Zenith.
PrintClassic Buttery Raspberry Thumbprint Cookies with Perfect Indentation Guide

Bake these classic raspberry thumbprint cookies featuring a buttery shortbread base filled with sweet raspberry jam. This simple recipe yields melt-in-your-mouth cookies perfect for holiday cookie swaps or everyday treats.
- Prep Time: 20 min
- Cook Time: 15 min
- Total Time: 65 min
- Yield: 24 cookies 1x
- Category: Dessert
- Method: Baking
- Cuisine: American
- Diet: Vegetarian
Ingredients
- 1 cup unsalted butter, softened
- 1/2 cup granulated sugar
- 1 large egg yolk
- 1 teaspoon vanilla extract
- 2 cups all-purpose flour
- 1/4 teaspoon salt
- 3/4 cup seedless raspberry jam
- 1/4 cup powdered sugar, for dusting (optional)
Instructions
- In a large bowl, beat the softened butter and granulated sugar together with an electric mixer until the mixture is light and fluffy.
- Beat in the egg yolk and vanilla extract until just combined.
- In a separate bowl, whisk together the all-purpose flour and salt. Gradually add the dry ingredients to the wet ingredients, mixing on low speed until a soft dough forms. Do not overmix.
- Wrap the dough in plastic wrap and chill in the refrigerator for at least 30 minutes. This step helps the cookies hold their shape.
- Preheat your oven to 350°F (175°C). Line baking sheets with parchment paper.
- Scoop the chilled dough into balls, about 1 tablespoon each. Roll the dough balls lightly between your palms.
- Create the thumbprint indentation: Use your thumb or the back of a small measuring spoon (like a 1/2 teaspoon) to press a deep well into the center of each dough ball.
- Fill each indentation with about 1/2 teaspoon of raspberry jam. Do not overfill, as the jam may bubble over.
- Place the cookies on the prepared baking sheets, leaving about 1 inch between them.
- Bake for 12 to 15 minutes, or until the edges are lightly golden brown. The centers should remain pale.
- Let the cookies cool on the baking sheets for 5 minutes before carefully transferring them to a wire rack to cool completely.
- Once cool, dust the cookies with powdered sugar, if desired.
Notes
- For the best indentation, chill the dough thoroughly. If the dough softens while you are rolling, return it to the refrigerator for 10 minutes.
- If you want a slightly different flavor, substitute almond extract for vanilla extract in the dough.
- For a beautiful presentation, you can drizzle the cooled cookies with a simple glaze made from powdered sugar and a few drops of milk or lemon juice.
Nutrition
- Serving Size: 1 cookie
- Calories: 120
- Sugar: 10
- Sodium: 45
- Fat: 7
- Saturated Fat: 4
- Unsaturated Fat: 3
- Trans Fat: 0
- Carbohydrates: 14
- Fiber: 0
- Protein: 1
- Cholesterol: 25