
There is just something magical about a sweet treat that feels incredibly decadent but takes almost zero effort, right? That’s exactly what we’re diving into today with what I firmly believe is the absolute best, easiest, no-bake peanut butter fudge recipe on the internet. Forget the stovetop worries and the scary candy thermometers! When I first started Cooking Zenith, I knew I needed at least one foolproof candy recipe to build confidence. This specific peanut butter fudge recipe delivers that perfect, creamy texture every single time. Trust me, once you see how simple this is, you’ll be making batches for holidays and Tuesday nights alike!
- Why This Creamy Peanut Butter Fudge Recipe Works Every Time
- Ingredients for Perfect Peanut Butter Fudge
- Step-by-Step Guide to Making Your Peanut Butter Fudge
- Tips for the Best Peanut Butter Candy: Avoiding Graininess
- Variations on Classic Peanut Butter Fudge
- Serving Suggestions for Your Peanut Butter Confection
- Storage and Keeping Your Peanut Butter Fudge Fresh
- Frequently Asked Questions About Peanut Butter Fudge
- Share Your Decadent Peanut Butter Dessert Creations
Why This Creamy Peanut Butter Fudge Recipe Works Every Time
You read the ingredient list, and maybe you thought, “That’s it? No cooking?” Yes! That’s the beauty of this no bake fudge recipe. When I develop sweets for Cooking Zenith, I always look for ways to minimize fuss while maximizing flavor and texture. This specific combination of ingredients achieves that rich, creamy peanut butter fudge consistency we all crave without any risk of burning sugar or dealing with crystallization.
This method is honestly foolproof. You are essentially creating a stabilized, slightly sweetened fat base that holds the sugar perfectly in suspension—no heat required!
- It’s incredibly fast; you mostly just mix things together.
- You get guaranteed smooth results every time because we skip the tricky heating phase.
- It sets up beautifully firm, so slicing is clean and simple.
Achieving Melt in Your Mouth Fudge Texture
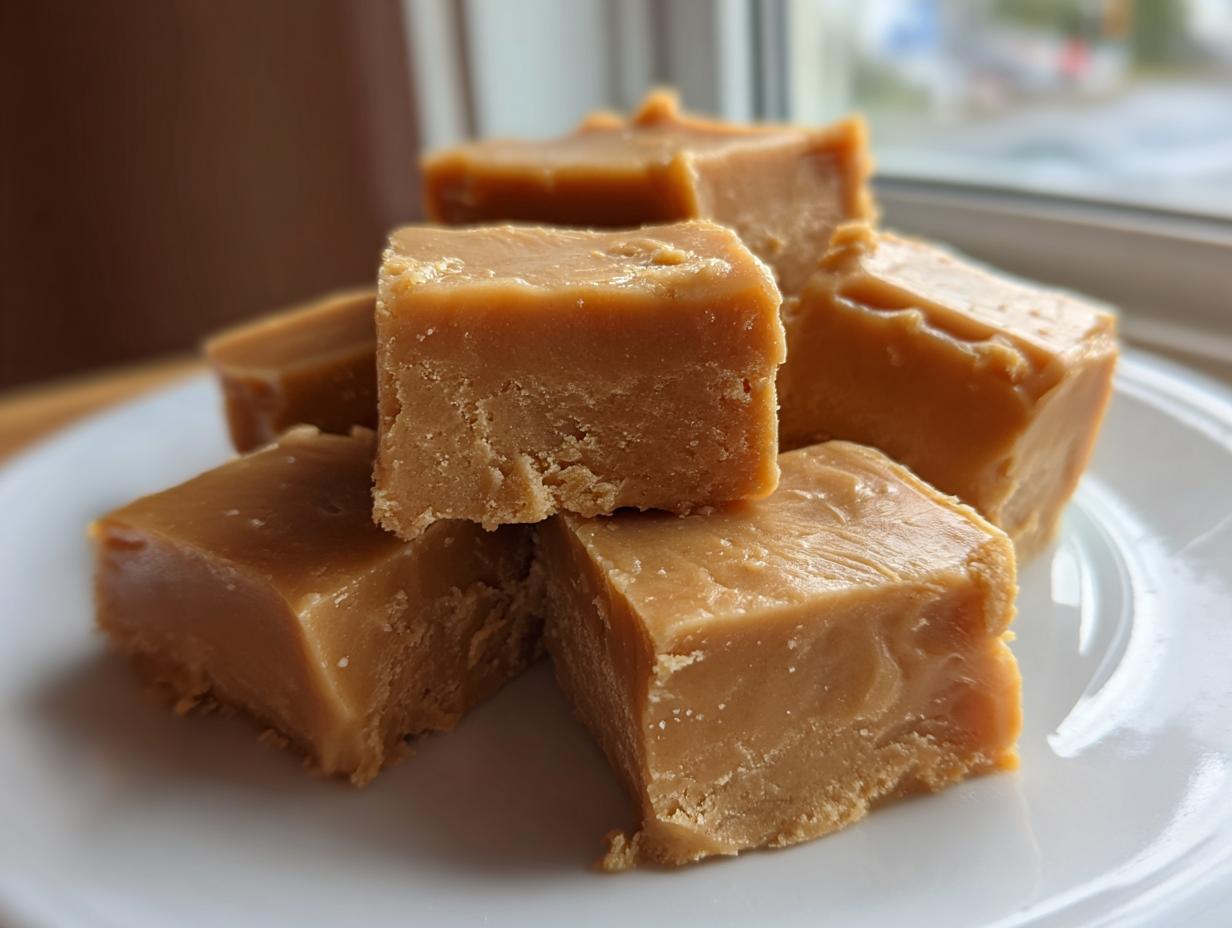
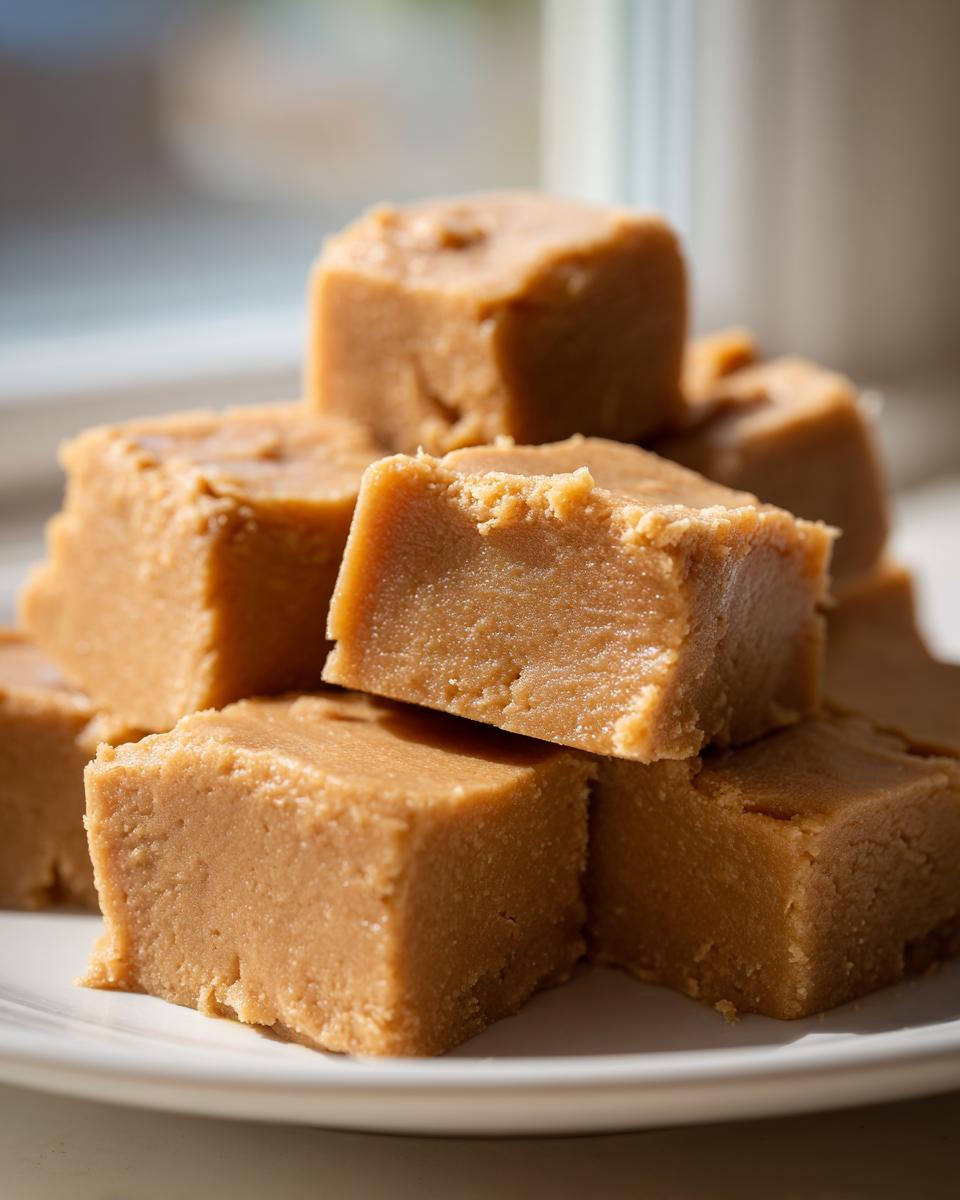
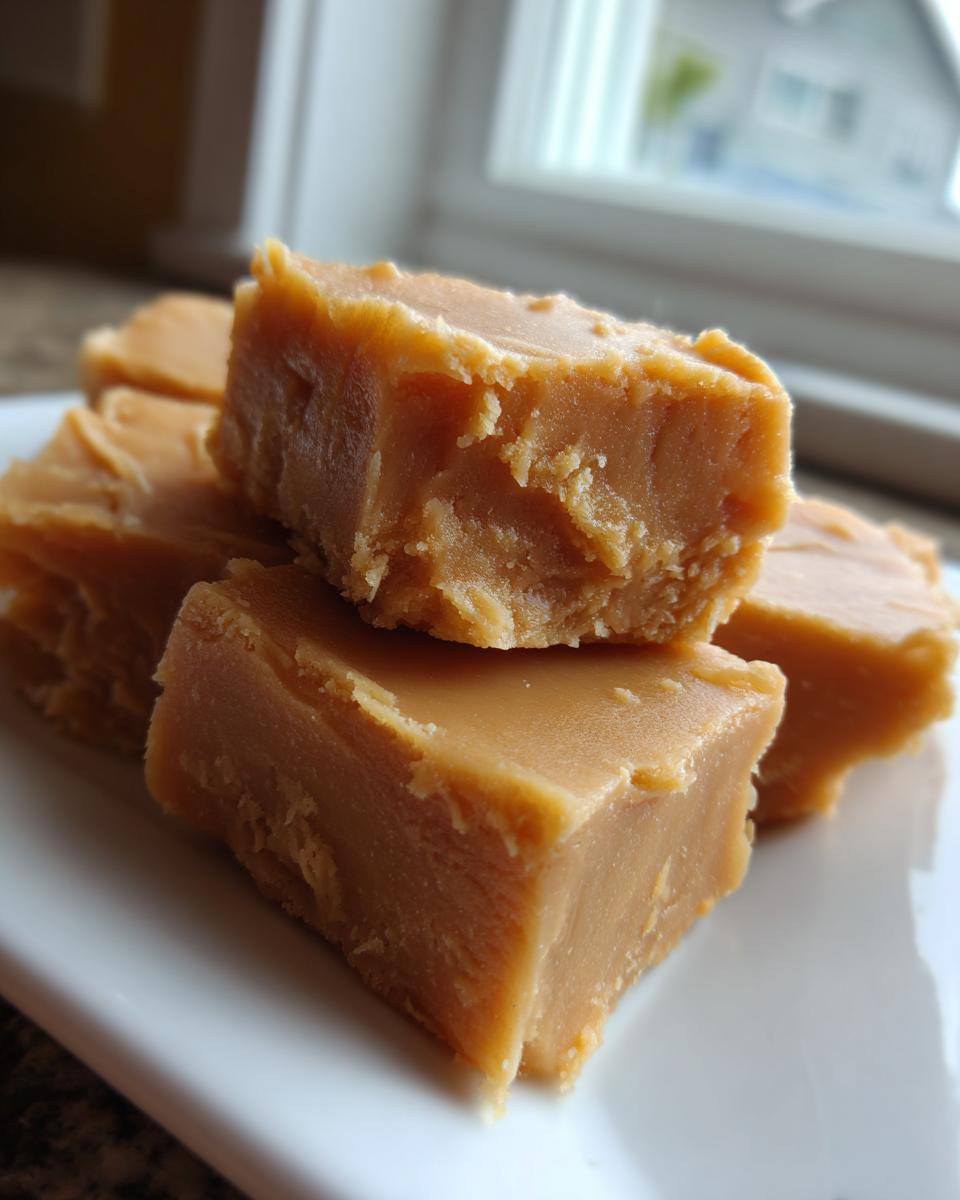
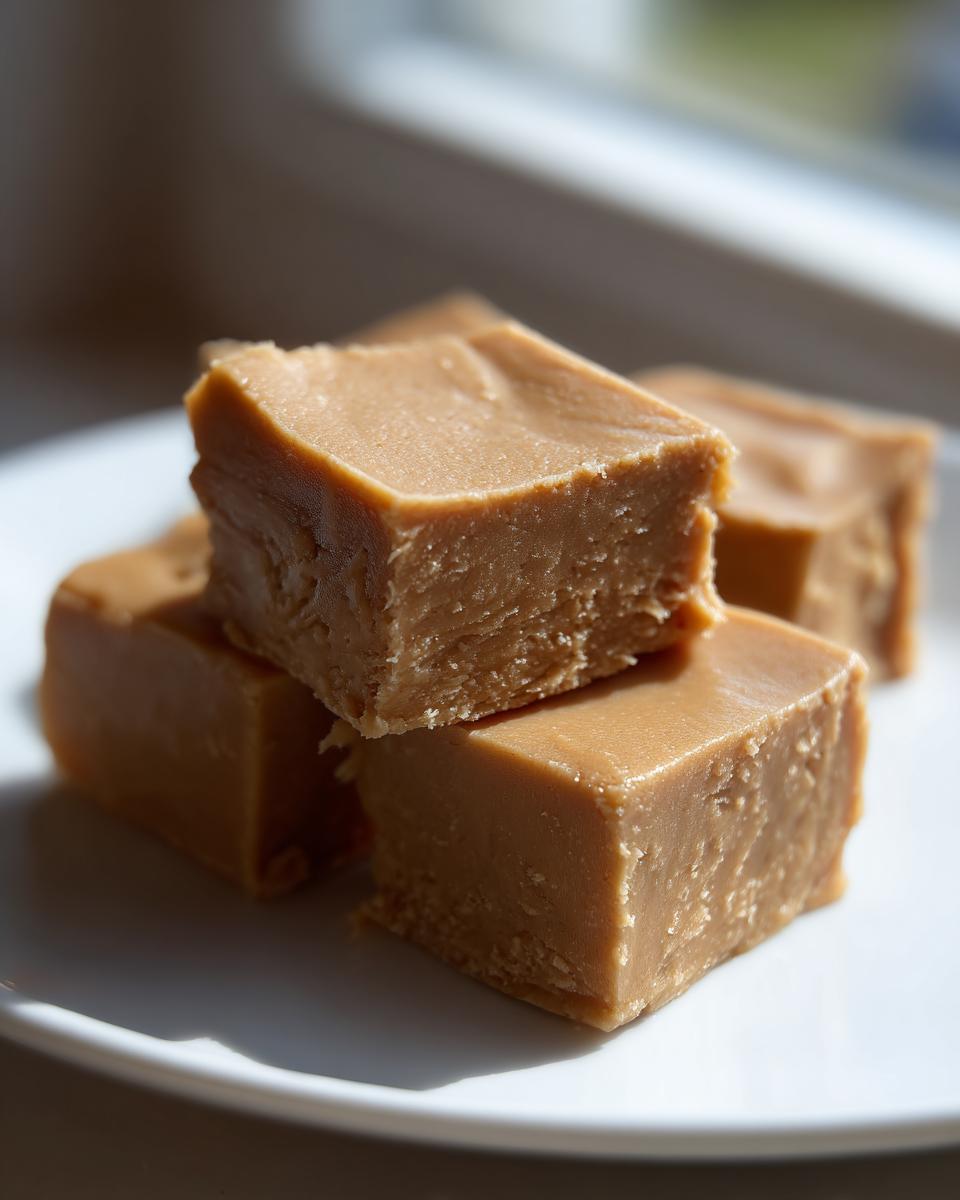
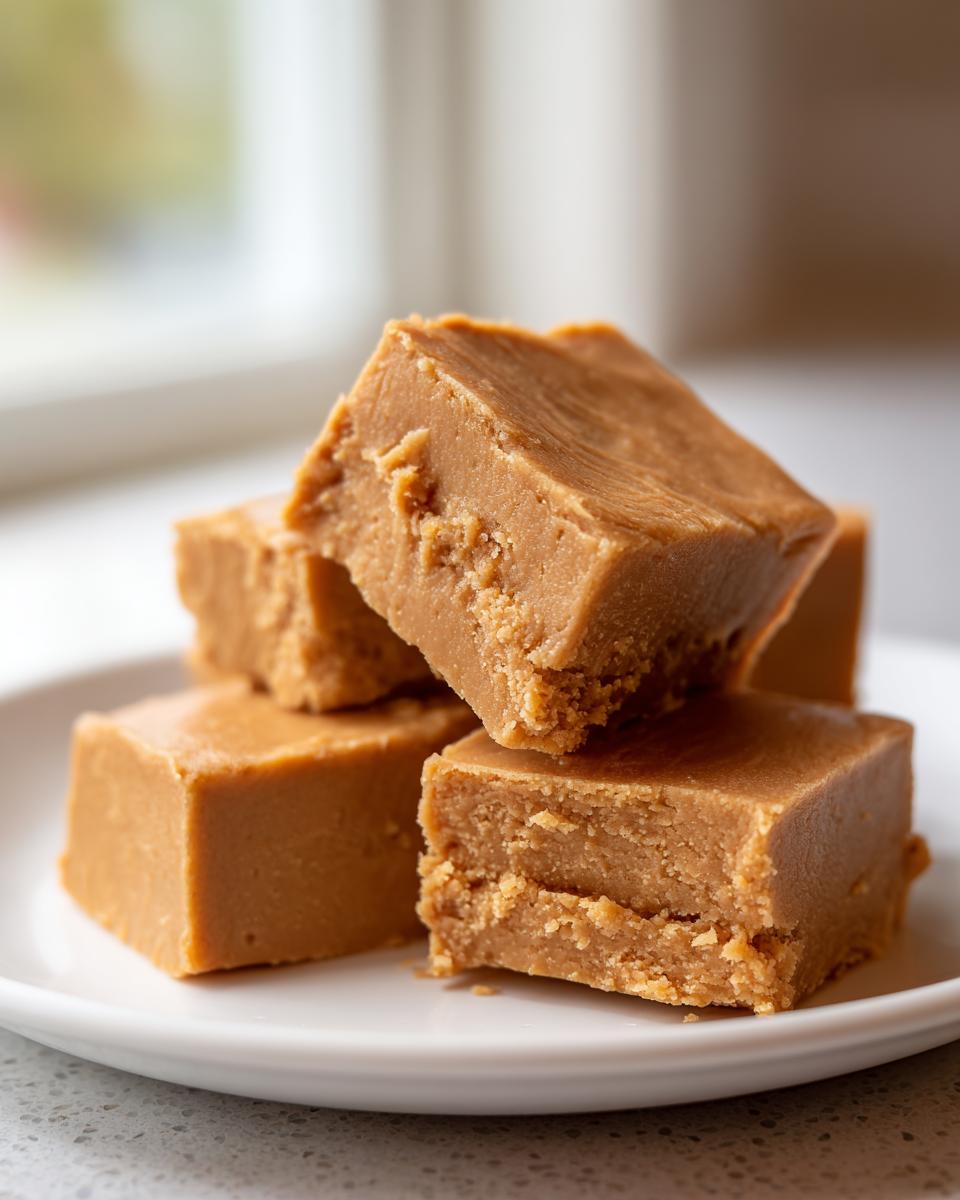
The secret to that perfect, light, melt in your mouth fudge texture lies entirely in the ratio between the fat (butter and peanut butter) and the finely ground sugar. The butter and peanut butter need to be fully incorporated first. When you slowly beat in that sifted powdered sugar, the sugar dissolves partially into the fat, creating that dense softness. If you dump the sugar in all at once or don’t beat it enough, it clumps, and hello, graininess! We want luxurious smoothness here.
Here is a look at the finished product—look how smooth those edges are!
The Secret to This Easy Homemade Fudge
I know so many people look for easy homemade fudge recipes, but they usually involve watching a thermometer swing up to exactly 234°F. Ugh! With this version, we completely bypass that entire stress point. It’s one of those perfect easy dessert ideas because the base ingredients perform the magic. You just mix, press, and chill. That’s it. No oven, no boiling water bath, just pure, simple candy making happiness.
Ingredients for Perfect Peanut Butter Fudge
When you’re making something simple like this, the quality of your ingredients really shines through. Fortunately, we aren’t wrestling with complicated things here; we are using just four heavy hitters to create this amazing **peanut butter confection**. But I need you to listen closely to this one specific thing, because it saves the whole batch!
Here is exactly what you need for your fudge:
- 1 cup (2 sticks) unsalted butter, softened (and I mean truly soft, spreadable, but not oily!)
- 2 cups creamy peanut butter
- 1 teaspoon vanilla extract
- 4 cups powdered sugar, sifted
Now, about that powdered sugar. Seriously, don’t skip the sifting step! Grandma always said that white sugar acts like tiny, hard rocks in a delicate mixture. If you don’t sift those 4 cups of confectioners’ sugar, you are risking graininess, and we want that luscious, smooth texture we talked about earlier. Sifting breaks up any lumps before they get mixed in, ensuring your final **peanut butter treat** is genuinely melt-in-your-mouth perfection. You’ll thank me later when you’re cutting those beautiful squares!
Step-by-Step Guide to Making Your Peanut Butter Fudge
Walking through the steps is where the magic happens, and honestly, this is so simple you might feel like you’re cheating! We aren’t using the oven, so there’s no preheating needed, which makes this one of my absolute go-to sweet spreads and fillings substitutes when I need dessert in a hurry. Just grab a large bowl and your electric mixer. We’re moving fast, but remember, in candy making, speed only applies to the mixing—patience comes later when we chill!
Preparation and Creaming the Base for Peanut Butter Fudge
First things first, get your 8×8 inch pan ready. I always lay down parchment paper so it hangs over two sides—this is your built-in handle later! Then, toss in your softened butter and the creamy peanut butter. Using your electric mixer, beat these two together until they are completely smooth and homogenous. You want no streaks of plain butter left behind. Once that’s looking perfect, pour in the vanilla extract and give it one last quick mix. This creamy base is what gives our **peanut butter fudge** that incredible body.
Incorporating Powdered Sugar for Quick Dessert Recipes
Okay, this is the fun (and slightly messy) part. Take your sifted powdered sugar—remember, sifted!—and add it in *one cup* at a time. Seriously, do not dump it all in! Set your mixer to low speed before you turn it on, or you’ll send a beautiful white cloud throughout your whole kitchen. Mix on low until that cup is just incorporated, then add the next. Keep going until all 4 cups are mixed in. The mixture will get very thick, almost like a dough. That’s exactly when you know you’ve nailed this part of the quick dessert recipes process!
Setting and Cutting Your Peanut Butter Treat
Once everything is mixed, scrape that thick batter into your lined pan. Use a spatula or the back of a sturdy spoon to press it down evenly. You want a nice flat surface, otherwise, your squares will look wonky later. Give it a light smooth top, and then the hard part begins: waiting! You need to chill this in the refrigerator for at least two hours. If you rush this, you’ll end up with sticky goo, not a clean **peanut butter treat**. Once it’s totally firm, use those parchment paper handles to lift the whole sheet out. Slice it into small, manageable squares. They look impressive!
Tips for the Best Peanut Butter Candy: Avoiding Graininess
Now that you know the basic method for this easy homemade fudge, let’s talk about elevating it from “good” to “Oh my goodness, where did you buy this?” We’re talking next-level texture here. If you want the absolute best peanut butter candy that truly rivals what you get in the fancy candy shops, you need to pay attention to three things: temperature, ingredient sourcing, and technique refinement. This is where the intuition of a home cook really shines through in simple candy making!
Ingredient Quality for Rich Peanut Butter Fudge
Did you notice I insisted on softened butter? That’s key. If your butter is too cold, you’ll get lumps, and those lumps will never fully blend with the sugar, making your fudge slightly grainy even if you did sift! My personal rule for really rich peanut butter fudge? I like my butter to be able to leave a clean indent when I press it—it should yield easily, but there shouldn’t be any visible oil slick on the plate. It needs to be the perfect middle ground.
Regarding the peanut butter itself: creamy is the goal here because the smoother the base, the smoother the finish. If you use natural peanut butter—the kind where the oil separates—you absolutely must thoroughly stir that jar until the oil is fully re-incorporated before you measure it out. Any extra oil that separates during chilling can also ruin that perfect, dense structure we are aiming for, making the fudge weep a bit.
Microwave Fudge Recipe Adjustments (If Needed)
While this recipe is based on a traditional, no-heat creaming method, I know some of you might be staring at your microwave thinking, “Could I just zap this?” You can, but it changes things! If you absolutely need a tiny batch in a pinch for a microwave fudge recipe trial, you can gently melt the butter and peanut butter together in a microwave-safe bowl in 30-second bursts until just melted—don’t let it get hot or split! Then, immediately transfer it to your mixing bowl and beat in the sugar as directed. The key difference is that the microwave melts the fat completely, whereas our method of beating the soft butter incorporates air. So if you use the microwave, you have to beat that fat/PB mixture longer to try and mimic that air incorporation. I still prefer the creamed method for that signature light texture, but for a tiny taste test, a quick zap works to get the ball rolling!
Variations on Classic Peanut Butter Fudge
Part of the fun of mastering a base recipe like this is knowing you can pivot and create something new without starting over! This foolproof method really lends itself well to experimentation, especially when you’re looking to make a batch for holiday platters or just want a slightly different kick. I’ve got a few favorite twists on our classic peanut butter fudge that you absolutely have to try next time you make a square batch. These are easy swaps and additions that bring new textures and flavors to the table.
For instance, if you want something a bit lighter and fluffier—almost like a peanut butter cloud—skip a quarter of the powdered sugar and fold in five ounces of marshmallow fluff! It makes an incredibly airy confection. You can find my tips for making great peanut butter cup cookies which also benefits from a slightly fluffier texture base, but this fudge modification is truly amazing.
Here are the three variations I rotate through most often:
- Chocolate Ripple Delight: Right after you press the fudge into the prepared pan, melt 4 ounces of semi-sweet chocolate chips with a teaspoon of coconut oil until smooth. Drizzle it artfully over the top of the fudge base. Take a butter knife and gently swirl the chocolate into the top layer of the fudge. Then chill! This layering makes for a gorgeous presentation and takes this decadent peanut butter dessert over the top.
- Crunchy Nut Power-Up: If you love texture in your sweets, this one’s for you. Before pressing the fudge into the pan, stir in one cup of roughly chopped, dry-roasted peanuts. This boosts the nutty flavor and adds a satisfying crunch that contrasts beautifully with the creamy interior. It turns it into a powerhouse of a peanut butter treat!
- The Salted Caramel Swirl: This sounds fancy, but it’s so simple. Make your fudge base as normal. Now, take a few tablespoons of good quality, thick caramel sauce—the kind you’d pour over ice cream. Drizzle generously over the top before chilling. Once it sets, you get that amazing salty-sweet combination throughout your easy homemade fudge. Just be sure to serve these slightly colder if you use a runnier caramel!
Serving Suggestions for Your Peanut Butter Confection
Once your beautiful **peanut butter confection** has chilled and you’ve lifted it out of the pan, presentation is everything! While I absolutely love this fudge eaten straight out of the fridge with a cup of hot coffee, serving it differently makes it feel more special. Remember I mentioned cutting them into small squares? That’s the standard because these are rich! A little bit goes a long way.
For holidays, try dusting the tops lightly with cocoa powder or even a tiny sprinkle of flaky sea salt if you didn’t swirl caramel in. They pair brilliantly next to something tart. If you ever make my famous classic lemonade recipe, a small piece of this fudge beside a frosty glass is pure heaven. It’s such a satisfying, simple pairing!
Storage and Keeping Your Peanut Butter Fudge Fresh
This is one of the joys of making **easy homemade fudge**: it actually stores incredibly well! Unlike baked goods that start drying out the second they sit, this creamy confection actually benefits from a little time in the fridge. Since this recipe is essentially a stabilized fat and sugar combination, it holds up beautifully, which is why it’s a favorite for making ahead for big events or those last-minute Holiday Fudge Recipes.
You basically have three options for storage, depending on how quickly you plan to devour this amazing **Peanut Butter Treat**.
- Room Temperature (The Quick Treat Drawer): If you plan to eat the batch within about a week, you can absolutely keep it on the counter. Just make sure you store it in an airtight container. I like to put a layer of wax paper between the layers of fudge squares so they don’t suction together. Keep it in a slightly cooler spot away from direct sunlight or heat, as the butter can soften too much and make the squares slouch.
- Refrigeration (Best for Texture): Honestly, this is my favorite way to store it. Chilling just keeps the fudge firm and ensures that perfect, dense texture holds up, especially if your kitchen tends to run warm. Store it in an airtight container, and it will stay perfect for up to three weeks. Bring it out about 10 minutes before serving so it softens just slightly—this helps activate that amazing melt-in-your-mouth quality.
- Freezing for Later: Yes, you can freeze it! If you’re making a massive batch for Christmas gifts or just want to stash some away for a future craving emergency, wrap the fudge tightly first in plastic wrap, then foil. This double layer protects it from any freezer smells. It lasts wonderfully for up to three months in the freezer. When you want some, just transfer the wrapped batch to the fridge overnight to thaw slowly, then let it sit on the counter for 15 minutes before slicing!
Because we didn’t use any dairy products that are prone to spoilage (like milk or cream), this candy is truly freezer-friendly and shelf-stable for longer than most baked goods!
Frequently Asked Questions About Peanut Butter Fudge
It’s totally normal for questions to pop up when you’re making something new, even if it seems super simple. I hear all the time about the specific texture people are chasing when they search for the **best peanut butter fudge**. I want to make sure every single batch you pull out of the fridge is perfect, so let’s tackle the most common worries right here. Having strong answers builds confidence, which is what Cooking Zenith is all about!
Can I use natural peanut butter in this peanut butter fudge recipe?
This is a great question, and the answer is mostly yes, but you have to be careful! Remember how I stressed using creamy peanut butter for the smoothest result? Natural peanut butter—the kind you have to stir because all the oil floats to the top—can be tricky. If you decide to use it, you MUST stir that jar until the oil and the solids are totally combined before you measure out your 2 cups. The worst thing that can happen is that excess oil seeps out when the fudge chills, leaving you with a little oily puddle instead of a perfect square. I usually have to add a tiny bit more powdered sugar if I use natural PB just to stabilize that extra oil, but try to stick to regular creamy if you can for true creamy peanut butter fudge.
What is the best way to get creamy peanut butter fudge without baking?
The best way to guarantee that gorgeous, sliceable, yet soft texture for this **no bake fudge recipe** without any heat at all comes down to two things: technique and temperature. First, you must beat the softened butter and peanut butter until they are fully aerated and light *before* you add the sugar. Think of it like creaming butter for a cake—you’re whipping air in there!
Second, the sugar addition must be slow and steady. If it’s too fast, the sugar crystals don’t dissolve properly into the fat mixture, and that’s the genesis of graininess. When you mix those 4 cups of sifted powdered sugar in slowly, you are physically forcing the sugar particles into a smooth suspension with the fat. Keep your mixer on low speed during this stage. That mindful mixing keeps the fudge light instead of dense, giving you that famous melt in your mouth fudge finish without ever needing to turn on the stove!
If you start getting worried about the texture, check out some of my tips for making creamy sauces; the principle of slowly incorporating dry ingredients into a fat base is very similar for achieving that velvety feel!
Share Your Decadent Peanut Butter Dessert Creations
Whew! That’s it—you’ve just made what might be the easiest, most ridiculously satisfying **Decadent Peanut Butter Dessert** known to humankind. Now, I absolutely need to hear about it! Don’t just disappear back into your kitchen with your squares; come share your success with me and the rest of the Cooking Zenith family. Did it set up perfectly? Did you sneak a bite before the two hours were up?
Please take a moment to leave a rating right down below in the comments section. Knowing how this recipe worked in *your* kitchen is what helps me keep developing the very best, most reliable guides for all of you home cooks out there.
And if you took a gorgeous picture of your perfectly smooth, creamy fudge—maybe you even tried one of my swirl variations!—please tag me on social media! Sharing your kitchen wins makes me happier than a perfectly baked cookie. If you’re looking for another quick win after this candy, check out my guide to making the best easy homemade teriyaki sauce recipe; sometimes savory is the perfect palate cleanser after a dose of incredible fudge!
PrintBest Creamy Peanut Butter Fudge Recipe (No Bake)
Make the best peanut butter fudge that is rich, creamy, and melts in your mouth. This easy, no-bake recipe uses simple ingredients and sets into perfect squares, making it a foolproof holiday treat or quick dessert.
- Prep Time: 10 min
- Cook Time: 0 min
- Total Time: 2 hr 10 min
- Yield: 36 small squares 1x
- Category: Dessert
- Method: No Bake
- Cuisine: American
- Diet: Vegetarian
Ingredients
- 1 cup (2 sticks) unsalted butter, softened
- 2 cups creamy peanut butter
- 1 teaspoon vanilla extract
- 4 cups powdered sugar, sifted
Instructions
- Line an 8×8 inch baking pan with parchment paper, leaving an overhang on the sides for easy removal.
- In a large bowl, beat the softened butter and peanut butter together until smooth using an electric mixer.
- Add the vanilla extract and mix until combined.
- Gradually add the sifted powdered sugar, one cup at a time, mixing on low speed until fully incorporated and the mixture is thick.
- Press the fudge mixture evenly into the prepared baking pan. Use a spatula or the back of a spoon to smooth the top.
- Refrigerate for at least 2 hours, or until firm enough to cut.
- Use the parchment paper overhang to lift the fudge from the pan. Cut into 1-inch squares.
Notes
- To prevent grainy fudge, ensure your powdered sugar is sifted before adding it to the mixture.
- For a richer flavor, use natural peanut butter, but stir it well before measuring.
- If you prefer a firmer fudge, chill it for 3 hours before slicing.
- You can substitute half of the peanut butter with marshmallow fluff for a fluffier texture.
Nutrition
- Serving Size: 1 square
- Calories: 185
- Sugar: 22
- Sodium: 75
- Fat: 10
- Saturated Fat: 4
- Unsaturated Fat: 6
- Trans Fat: 0
- Carbohydrates: 22
- Fiber: 1
- Protein: 4
- Cholesterol: 15