
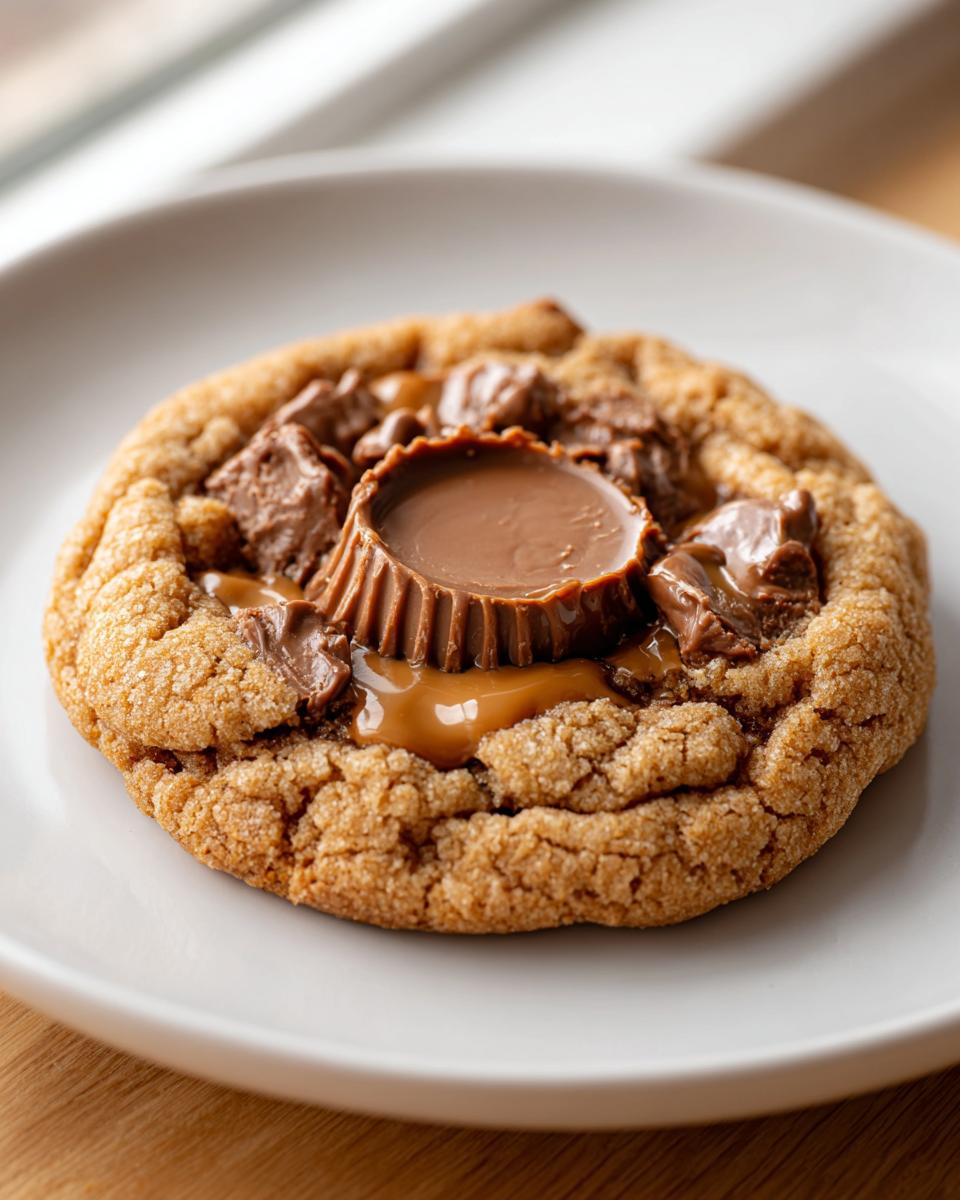
Oh my goodness, let’s just talk about the ultimate craving crusher for a second. You know that moment when you desperately need something rich, something chocolatey, and something with that unmistakable salty-sweet peanut butter punch? That’s where these cookies come in, friends. I’m introducing you to what I genuinely believe are the BEST Soft & Chewy peanut butter cup cookies you will ever meet. Growing up, my family always had a tray of stacked, classic American sweets ready, and these are the modern powerhouse version of that tradition. Seriously, stuffing a whole chocolate peanut butter cup right into the center of peanut butter dough? It’s genius. If you loved my recipe for soft, chewy snickerdoodles, wait until you try wrapping candy inside this phenomenal dough!
- Why You Will Make These peanut butter cup cookies Again and Again
- Essential Ingredients for Perfect peanut butter cup cookies
- Equipment Needed for Your peanut butter cup cookies
- Step-by-Step Guide to Making the Best peanut butter cup cookies
- Expert Tips for Mastering peanut butter cup cookies
- Variations on Your Classic peanut butter cup cookies
- Storage and Reheating Instructions for Your peanut butter cup cookies
- Frequently Asked Questions About peanut butter cup cookies
- Share Your Ultimate Chocolate Peanut Butter Dessert
Why You Will Make These peanut butter cup cookies Again and Again
Listen, I know you have a few other cookie recipes in your arsenal, but these ones? They hit all the right notes, every single time. They are my go-to when I need a quick wow-factor dessert!
- They are genuinely soft and chewy—no hard edges here!
- They come together fast, perfect for those sudden dessert emergencies.
- You get that amazing textural surprise when you bite into the sweet, melty candy center.
Essential Ingredients for Perfect peanut butter cup cookies
Okay, the secret to getting that perfectly soft and chewy result, and making sure the peanut butter flavor truly shines, starts right here with the ingredients. I’m not messing around when it comes to the base for these peanut butter cup cookies. You need the right ratio of sugars, and trust me, don’t skimp on the butter quality—it makes such a difference in the final texture!
Before you start mixing, make sure your butter is truly softened but not greasy or melted. That little bit of effort pays off big time later. Also, notice the brown sugar? It needs to be packed down firmly in the measuring cup. That molasses content is what keeps these cookies tender longer, even if they aren’t wrapped up with candy!
We are adding optional peanut butter chips, which is totally up to you, but I usually toss them in because, honestly, why *wouldn’t* you want more peanut butter flavor? If you want to see my favorite way to make a similar super-soft classic, check out my guide on soft, chewy snickerdoodles.
Here is what you’ll need to gather:
- 1 cup (2 sticks) unsalted butter, softened
- 3/4 cup creamy peanut butter (I use Jif or Skippy, nothing too natural!)
- 3/4 cup packed light brown sugar
- 1/2 cup granulated sugar
- 2 large eggs
- 1 teaspoon vanilla extract
- 2 1/4 cups all-purpose flour
- 1 teaspoon baking soda
- 1/2 teaspoon salt
- 1 cup peanut butter chips (This is optional, but please do it!)
- 18 full-size peanut butter cups, unwrapped and halved, OR 36 mini peanut butter cups, unwrapped (You need enough for 18 cookies!)
Equipment Needed for Your peanut butter cup cookies
You don’t need a million fancy gadgets for these, which is part of why I love them so much! Getting the dough right is key, and that means having a decent mixer on hand. If you’re looking for tips on getting the perfect spread on your cookies, check out my guide on sourdough chocolate chip cookies, as that technique transfers over beautifully.
Here’s the short list of what you’ll want ready before you even think about preheating the oven:
- Large mixing bowl and a separate medium bowl
- Electric mixer (handheld or stand mixer—whatever makes creaming butter easy!)
- Whisk (for the dry ingredients)
- Rubber spatula or wooden spoon (for careful folding)
- Baking sheets—you’ll need at least two so you don’t overcrowd them
- Parchment paper—this is non-negotiable for easy cleanup and release!
- Cookie scoop (about 2 tablespoons size is perfect for even wrapping)
Step-by-Step Guide to Making the Best peanut butter cup cookies
This is where the fun starts! Everything is pretty straightforward, but you have to trust the process, especially when creaming the fats and sugars together. This step is the real secret to those fantastic, thick, bakery style peanut butter cookies we are aiming for. We only have a quick baking time, so make sure your oven is ready to go. If you’ve been wondering how to get more moisture into your oatmeal cookies, the same principle of aeration applies here!
Mixing the Wet and Dry Ingredients for Chewy Peanut Butter Cup Cookies
First thing: get that oven preheated to 350 degrees F and line your sheets with parchment paper. Now, in your big bowl, you’re going to beat that softened butter, both kinds of peanut butter, and both sugars. You must mix this until it looks genuinely light and fluffy—I mean, it should almost look paler than when you started. That takes about three minutes with an electric mixer, and it’s creating all those air pockets we need for softness. Then, beat in the eggs one at a time before stirring in your vanilla.
In a separate bowl, whisk together the flour, baking soda, and salt really well. Then, add this dry mix slowly to the wet ingredients, mixing on low speed until it just disappears. Don’t overmix! If you use the chips, stir those in now with a spatula.
Stuffing and Shaping the peanut butter cup cookies
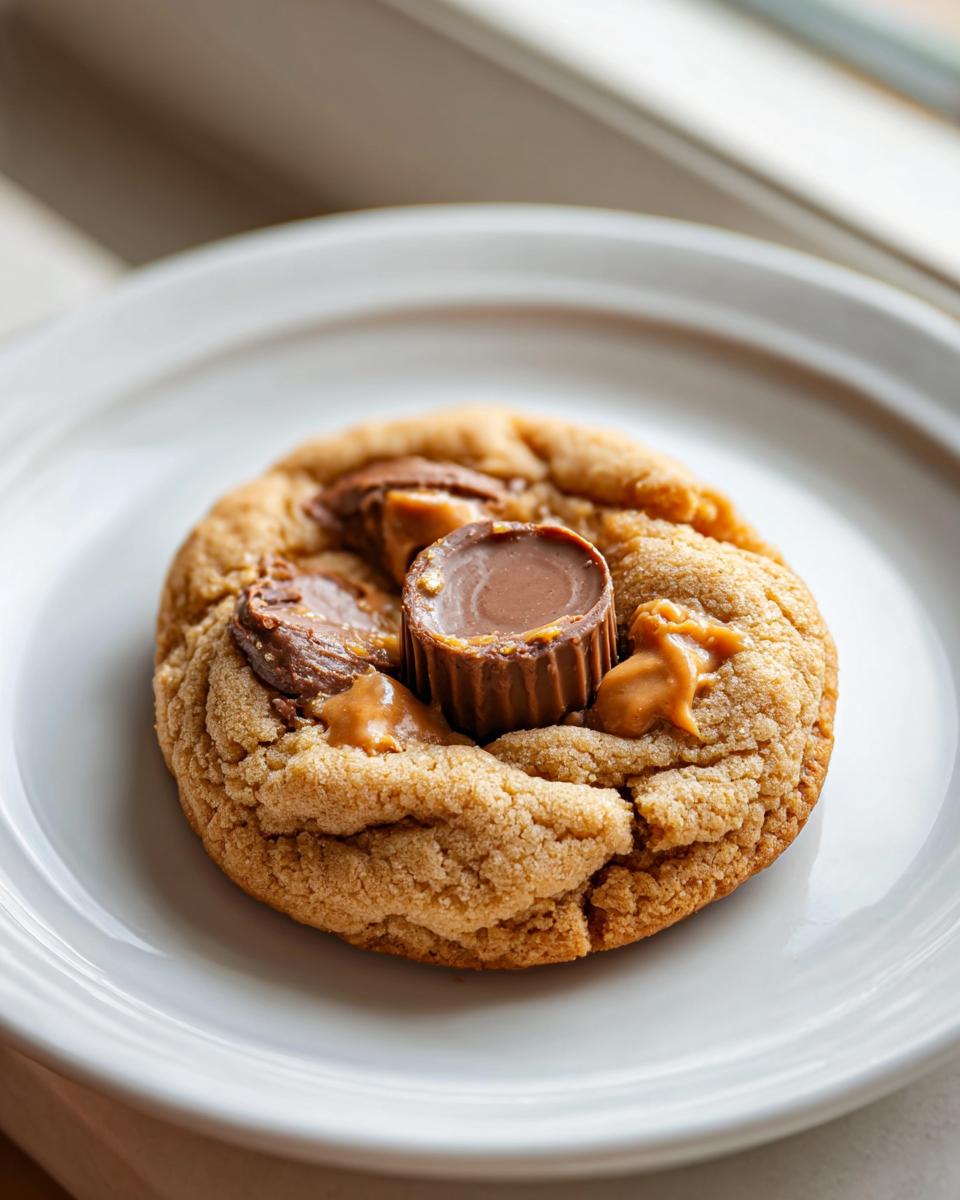
This part needs a little focus, so listen up! You need to wrap the dough completely around the chocolate peanut butter cup. If you’re using full-size cups, cut them in half first. My biggest tip? Make absolutely sure the dough seals completely around the candy. If there’s a gap, that melted chocolate is going to escape in the oven, and you’ll end up with a sticky mess instead of a perfect Reese’s stuffed cookie. If you find your dough is feeling a little too soft before you wrap them, pop the whole bowl in the fridge for just 30 minutes—this makes sealing them much easier!
Baking and The Final Touch for Gooey peanut butter cup cookies
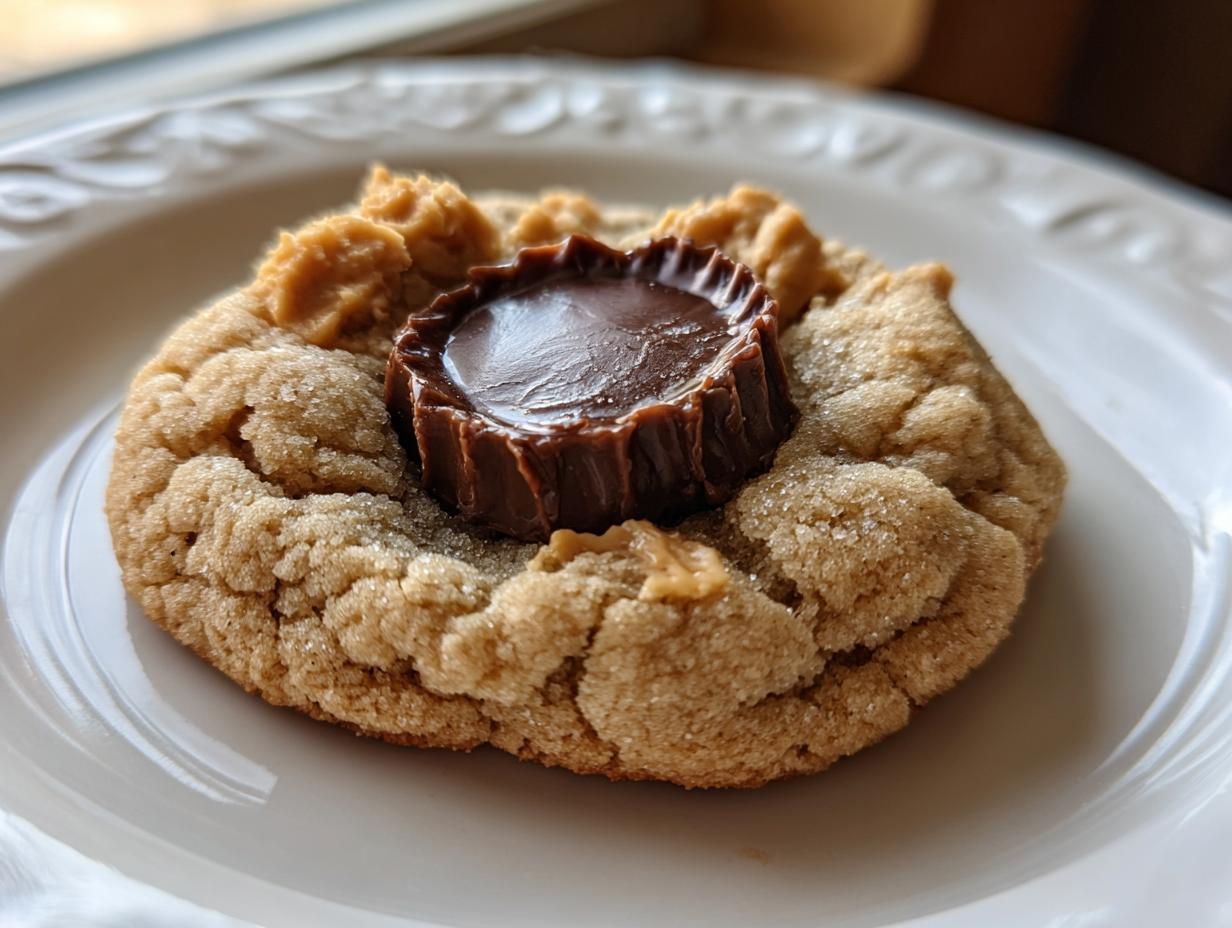
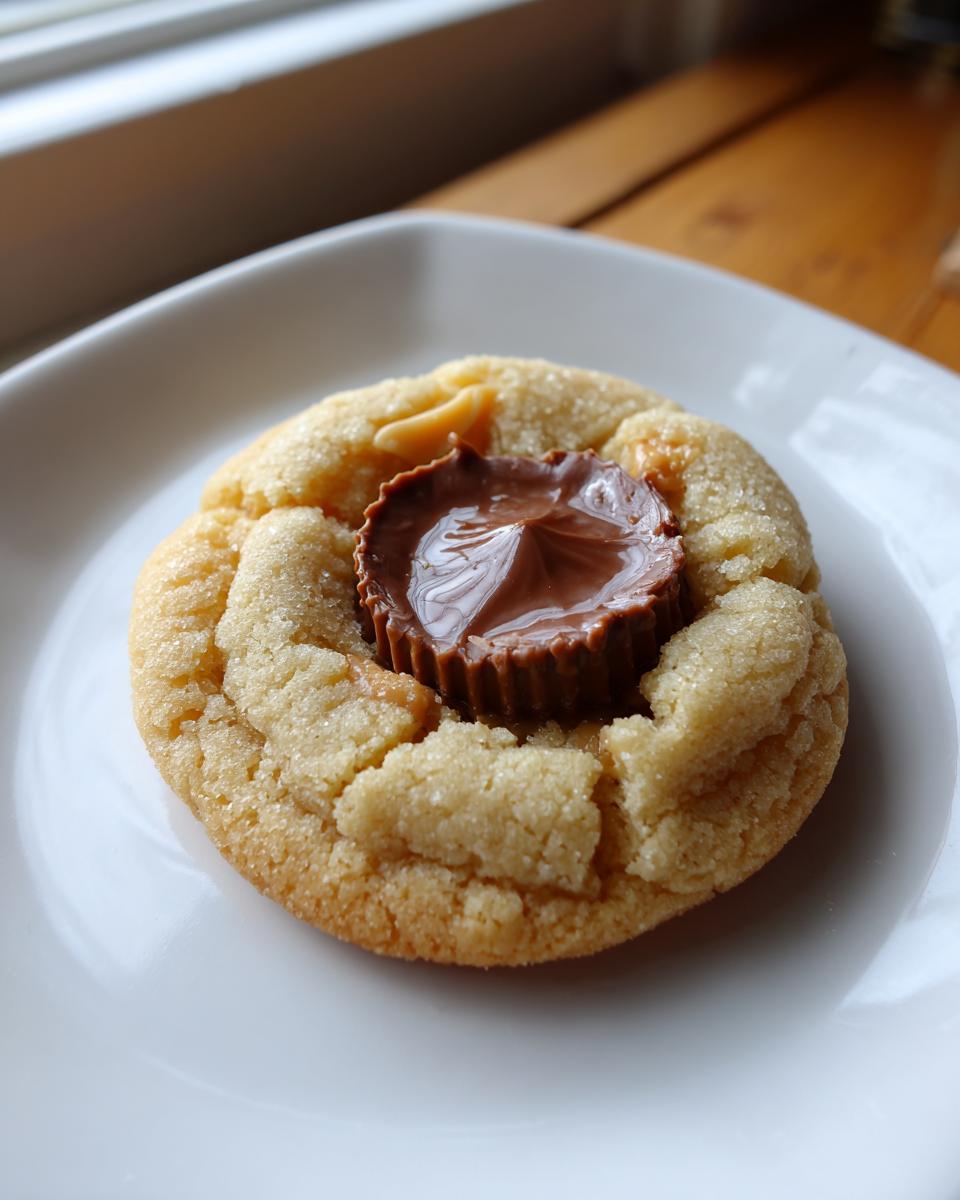
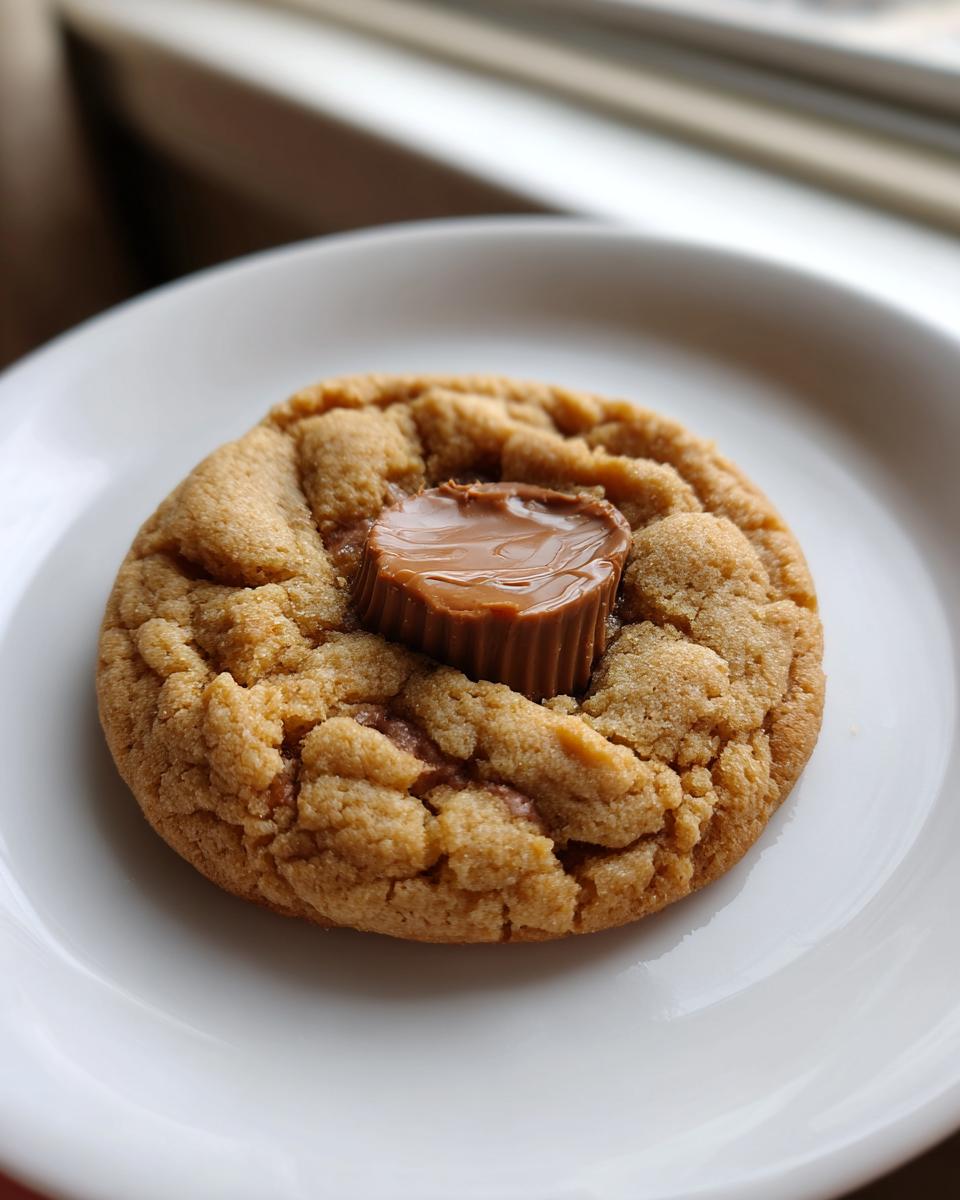
Scoop your sealed dough balls onto the prepared sheets, letting them breathe (about two inches apart). Bake them for just 10 to 12 minutes. The edges should look set, but please, for the love of gooey centers, leave the middle looking slightly soft. Pull them out right away and immediately press an extra little piece of peanut butter cup right into the center of each warm cookie.
The residual heat melts it just enough to create that amazing, gooey filling everyone screams for. Let them rest on that hot pan for a full five minutes—this helps them set up just enough so they don’t fall apart when you move them to the cooling rack. Trust me, that five minutes is crucial!
Expert Tips for Mastering peanut butter cup cookies
Now that you know the basic steps for these decadent cookie recipes, let’s talk about leveling up. Even when making something as simple as these peanut butter cup cookies, a few small adjustments can go a long way toward bakery-style perfection. Do you want them thicker and less prone to spreading, especially if your kitchen runs warm? Don’t skip the chilling step! Seriously, giving that dough 30 minutes in the fridge firms up the fats, and it keeps the candy perfectly tucked inside while baking.
Also, I want to mention texture again. If you’re feeling adventurous, you can swap out the creamy peanut butter for crunchy peanut butter in the dough itself. It adds this wonderful little textural dimension that plays so well against the smooth melted candy center. If you’re worried about things getting messy, remember my advice on sealing—make sure that dough seam is tight! For more guidance on achieving perfect structure in butter-based sweets, take a peek at my thoughts on melt-in-your-mouth butter cookies.
Variations on Your Classic peanut butter cup cookies
Everyone loves a classic, but sometimes we need to shake things up, right? These Reese’s stuffed cookies are so versatile, and honestly, once you master the dough, the sky’s the limit for what you can tuck inside. Since this is the ultimate chocolate peanut butter cookie experience, we can certainly play around with the fillings!
If you’re not totally dedicated to the peanut butter cup world—though I don’t know why you wouldn’t be—you can try tossing in different candies. Think about using chopped-up chocolate bars or even some of those festive holiday peanut butter cups when they pop up in stores. For a richer texture, try adding a small amount of good quality melted chocolate along with your chips. It really deepens that overall flavor profile.
I also love adding a little something extra to the dough itself to create next-level chocolate peanut butter cookies. A tiny splash of almond extract mixed in with the vanilla completely transforms the flavor—it brings out the roasted notes of the peanut butter beautifully! If you’ve ever made my Andes Mint Cookies, you know how that subtle extract magic works. You can even experiment with using a portion of crunchy peanut butter instead of creamy in the dough for a totally different texture experience underneath that soft exterior.
Storage and Reheating Instructions for Your peanut butter cup cookies
You’ve made a perfect batch of these gooey peanut butter cookies, but life happens, right? Maybe you hid half the batch before anyone noticed! The absolute key to keeping these amazing cookies the way they are—soft, chewy, and perfectly chocolatey—is managing the moisture right from the start. I always tell people that if you didn’t bake a cake, you need to make sure you store your cookies properly after they cool, or they turn hard way too fast!
If you want to keep them at room temperature, make sure they are completely cooled—and I mean *completely* cooled—before putting them anywhere near a container. If you trap any steam inside, you get soggy spots, and nobody wants that. Pop them into a sturdy, airtight container.
If you’re not eating them right away, they are fantastic for freezing! I actually prefer freezing them because it locks in that fresh-from-the-oven taste. You can freeze the baked cookies—just stack them with a small piece of wax paper between each one so they don’t stick together. They last beautifully frozen for up to three months. Did you know you can revive leftover moist chocolate cake with warming tricks too? Cookies are even simpler!
When you’re ready for a warm treat, just pull out the frozen cookies you want. Don’t thaw them on the counter! You want to reheat them in the microwave for about 10 to 15 seconds while they’re still partially frozen. That little burst of warmth softens the dough and re-melts the peanut butter cup center just enough to make it feel like you baked them five minutes ago. Enjoy them while they’re melty!
Frequently Asked Questions About peanut butter cup cookies
I totally get it—when you’re baking something this decadent, you want to make sure you get it absolutely perfect. Questions are my favorite part of baking because it means you’re thinking critically about the science *and* the delicious outcome! Let’s dive into a few things folks often ask me about making these peanut butter cup cookies.
Can I make these peanut butter cup cookies ahead of time?
Yes, absolutely! You have two great options here. For the absolute freshest cookie experience, I recommend making the dough, wrapping up all those peanut butter cups inside, rolling them into balls, and then chilling them in an airtight container for up to 24 hours. When you bake them straight from the fridge, they’ll naturally spread less, giving you a thicker cookie. If you’ve already baked them, make sure they are completely cool before storing them in an airtight container for up to four days. If you chill the baked ones, let them sit on the counter for about 15 minutes before eating!
What is the secret to making these Easy Peanut Butter Cup Cookies chewy?
This comes down to two things that I hammered home earlier! The first secret is the sugar ratio—we use more light brown sugar than white granulated sugar. That molasses content in the brown sugar keeps the texture soft and moist for days, making them truly Easy Peanut Butter Cup Cookies. The second part is not getting greedy in the oven! If you bake them until they look fully set in the middle, they will dry out. Pull them when the edges are set but the center still looks just a tiny bit undone. That residual heat finishes the baking process after they come out onto the pan!
If you need any help mastering other quick bake essentials, you can always check out my guide on homemade teriyaki sauce, though that’s definitely for dinner—not cookies!
Share Your Ultimate Chocolate Peanut Butter Dessert
And there you have it! You have successfully mastered the art of making the most decadent, softest, and chewiest batch of peanut butter cup cookies known to mankind. I really hope you feel that surge of culinary confidence now that you know how to perfectly seal that gooey candy center without making a mess!
Now, it’s your turn to share the joy! Did you try them with mini cups, or did you stick with the full-size ones buried deep inside? Did you sneak a cookie while they were still warm, or did you manage to wait until they cooled down? I absolutely live for hearing about your baking adventures!
Please take a moment to leave a rating for this recipe right down in the comments section below. And if you snap a picture of these beautiful chocolate peanut butter creations, tag me on social media! I promise I’ll be cheering you on. If you’re looking for another easy, show-stopping dessert that requires almost no effort, you have to try my easy three-ingredient chocolate mousse next!
Happy baking, friends. Keep elevating that everyday!
PrintThe BEST Soft & Chewy Peanut Butter Cup Cookies
Make these soft and chewy peanut butter cup cookies. You fold peanut butter cookie dough around whole or mini peanut butter cups for a decadent, chocolatey, and peanut butter-filled treat.
- Prep Time: 15 min
- Cook Time: 12 min
- Total Time: 27 min
- Yield: 18 cookies 1x
- Category: Dessert
- Method: Baking
- Cuisine: American
- Diet: Vegetarian
Ingredients
- 1 cup (2 sticks) unsalted butter, softened
- 3/4 cup creamy peanut butter
- 3/4 cup packed light brown sugar
- 1/2 cup granulated sugar
- 2 large eggs
- 1 teaspoon vanilla extract
- 2 1/4 cups all-purpose flour
- 1 teaspoon baking soda
- 1/2 teaspoon salt
- 1 cup peanut butter chips (optional)
- 12 full-size peanut butter cups, unwrapped and halved, OR 24 mini peanut butter cups, unwrapped
Instructions
- Preheat your oven to 350 degrees F. Line baking sheets with parchment paper.
- In a large bowl, beat the softened butter, peanut butter, brown sugar, and granulated sugar with an electric mixer until light and fluffy, about 3 minutes.
- Beat in the eggs one at a time, mixing well after each addition. Stir in the vanilla extract.
- In a separate medium bowl, whisk together the flour, baking soda, and salt. Gradually add the dry ingredients to the wet ingredients, mixing on low speed until just combined. If using, stir in the peanut butter chips.
- Scoop about 2 tablespoons of dough. Flatten the dough slightly in your palm. Place one half of a full-size peanut butter cup, or one whole mini peanut butter cup, in the center of the dough.
- Wrap the dough completely around the peanut butter cup, sealing the edges well to fully enclose the candy. Roll the dough into a ball.
- Place the dough balls onto the prepared baking sheets, leaving about 2 inches between them.
- Bake for 10 to 12 minutes, or until the edges are set and lightly golden. The centers should still look slightly soft.
- Remove the cookies from the oven. Immediately press a reserved peanut butter cup half (or a mini cup) gently into the center of each warm cookie. The residual heat will soften it slightly.
- Let the cookies cool on the baking sheet for 5 minutes before transferring them to a wire rack to cool completely.
Notes
- For extra gooey centers, you can press a small piece of peanut butter cup into the top of the cookie immediately after they come out of the oven.
- If you prefer a thicker cookie, chill the dough for 30 minutes before scooping and wrapping the candy.
- You can substitute creamy peanut butter with crunchy peanut butter for added texture.
Nutrition
- Serving Size: 1 cookie
- Calories: 280
- Sugar: 22
- Sodium: 180
- Fat: 17
- Saturated Fat: 7
- Unsaturated Fat: 10
- Trans Fat: 0
- Carbohydrates: 29
- Fiber: 1
- Protein: 5
- Cholesterol: 45