
Sometimes, you just crave that vibrant, warm flavor profile you get from the best churro cheesecake hybrids, something truly Tex-Mex inspired that feels special but doesn’t take all day. I get it! That’s why I perfected these Easy Sopapilla Cheesecake Bars. Trust me when I say this recipe is pure genius for the modern kitchen. We aren’t messing around with deep frying or complicated doughs here; we are using simple pantry staples to get that incredible texture contrast.
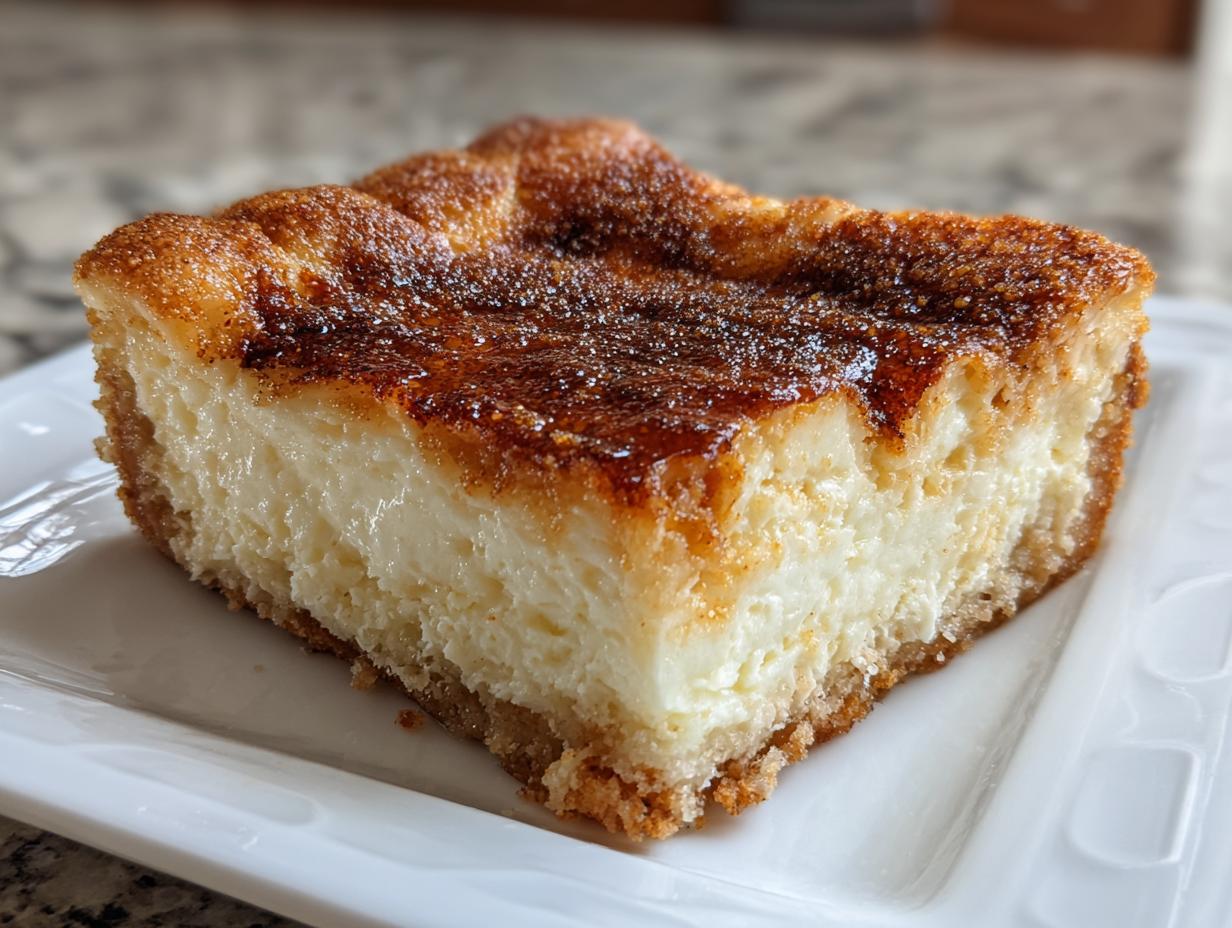
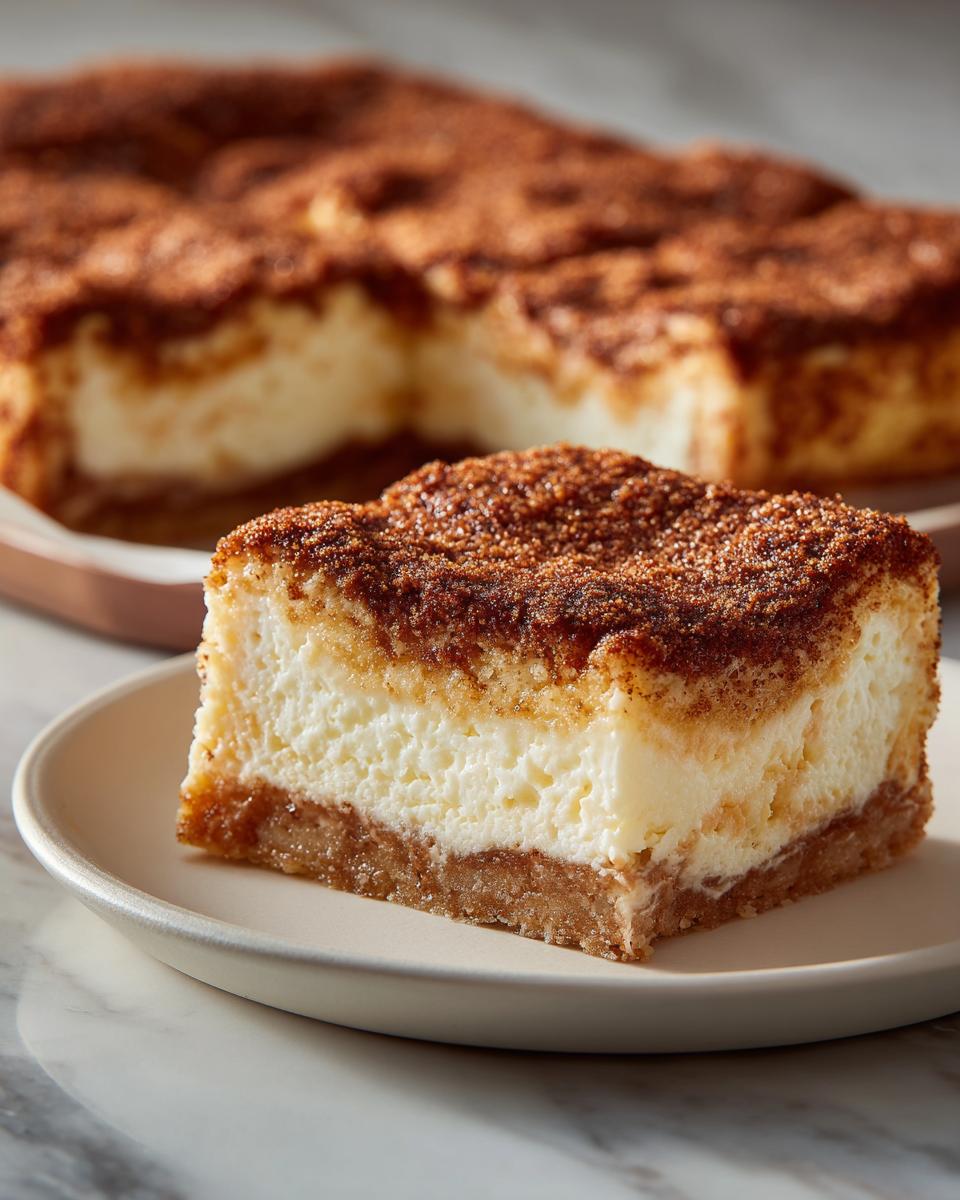
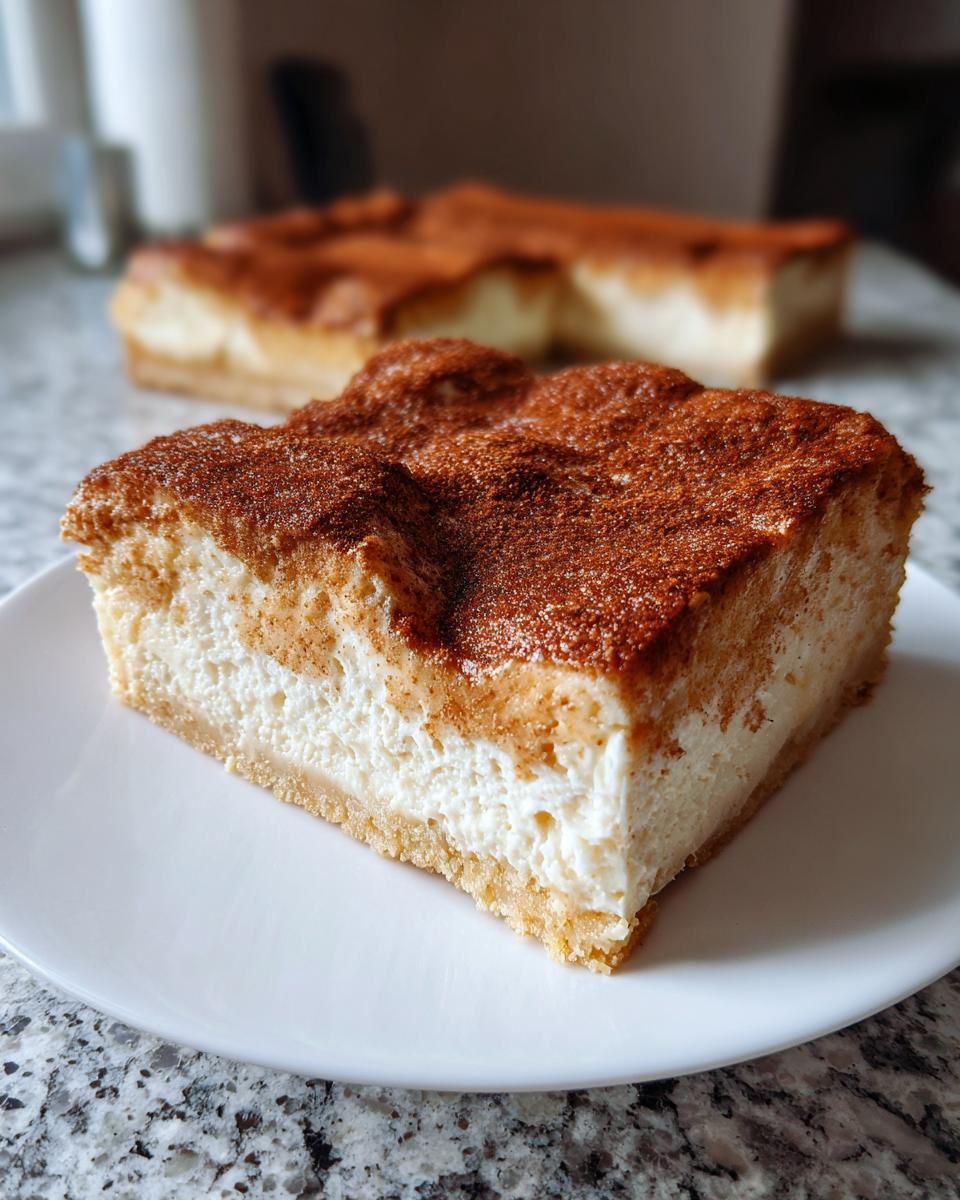
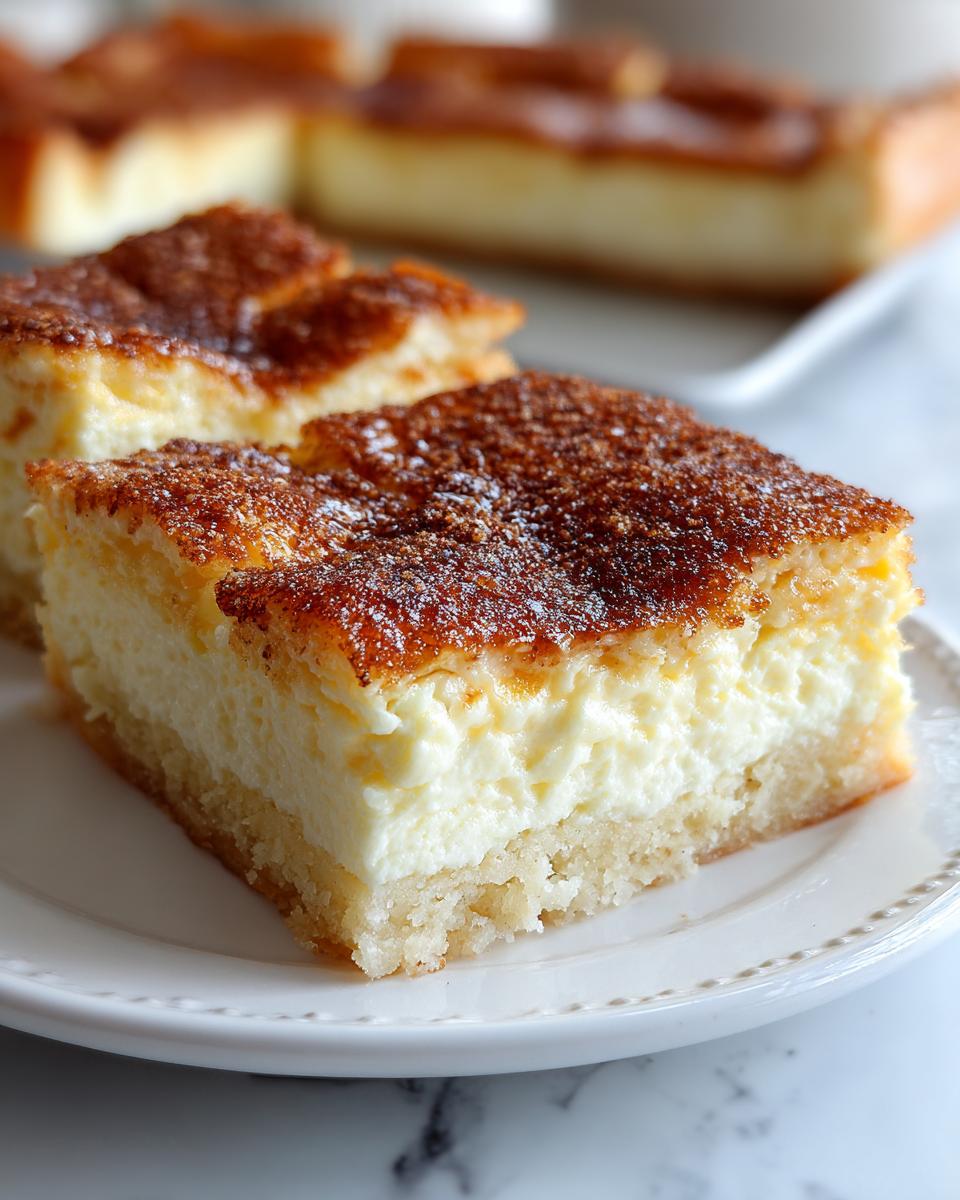
The magic is in the layers: a bottom layer of flaky pastry, a thick, luscious cream cheese filling that sets up beautifully, and that golden, buttery cinnamon sugar topping that just sings. It tastes exactly like your favorite decadent dessert mashup, yet it comes together faster than most weeknight meals! As a home cook, I love recipes that allow me to serve something extraordinary without feeling totally stressed, and this sopapilla cheesecake delivers every single time.
- Why This Easy Sopapilla Cheesecake Recipe Works for Everyone
- Gathering Ingredients for Your Sopapilla Cheesecake
- How to Make Sopapilla Cheesecake Bars Step-by-Step
- Tips for Perfect Golden Brown Baked Sopapilla Cheesecake
- Variations on Your Favorite Sopapilla Cheesecake
- Serving Suggestions for This Sweet Pastry Dessert
- Storage and Make Ahead Desserts Information
- Frequently Asked Questions About Sopapilla Cheesecake
- Nutritional Estimate for Sopapilla Cheesecake Bars
Why This Easy Sopapilla Cheesecake Recipe Works for Everyone
If you are looking for truly simple easy dessert recipes that disappear instantly at parties, this is the one. I stand by this recipe because it takes the stress out of making a layered dessert. It’s designed for maximum flavor payoff with minimum fuss! These are absolute must-haves for your collection of potluck dessert favorites.
- They utilize crescent roll desserts staples, meaning you don’t need a specialty store trip.
- Cleanup is a breeze! It’s all done in one 9×13 pan.
- It travels beautifully, making it ideal for taking to gatherings.
Quick Assembly Using Store-Bought Dough
Seriously, the best part? We are cheating—and there is zero shame in it! I grab two tubes of refrigerated crescent roll dough. You just unroll, press, and you have a base and a top crust ready to go in under five minutes. No messy rolling pins, no worrying about yeast. It’s all about speed here.
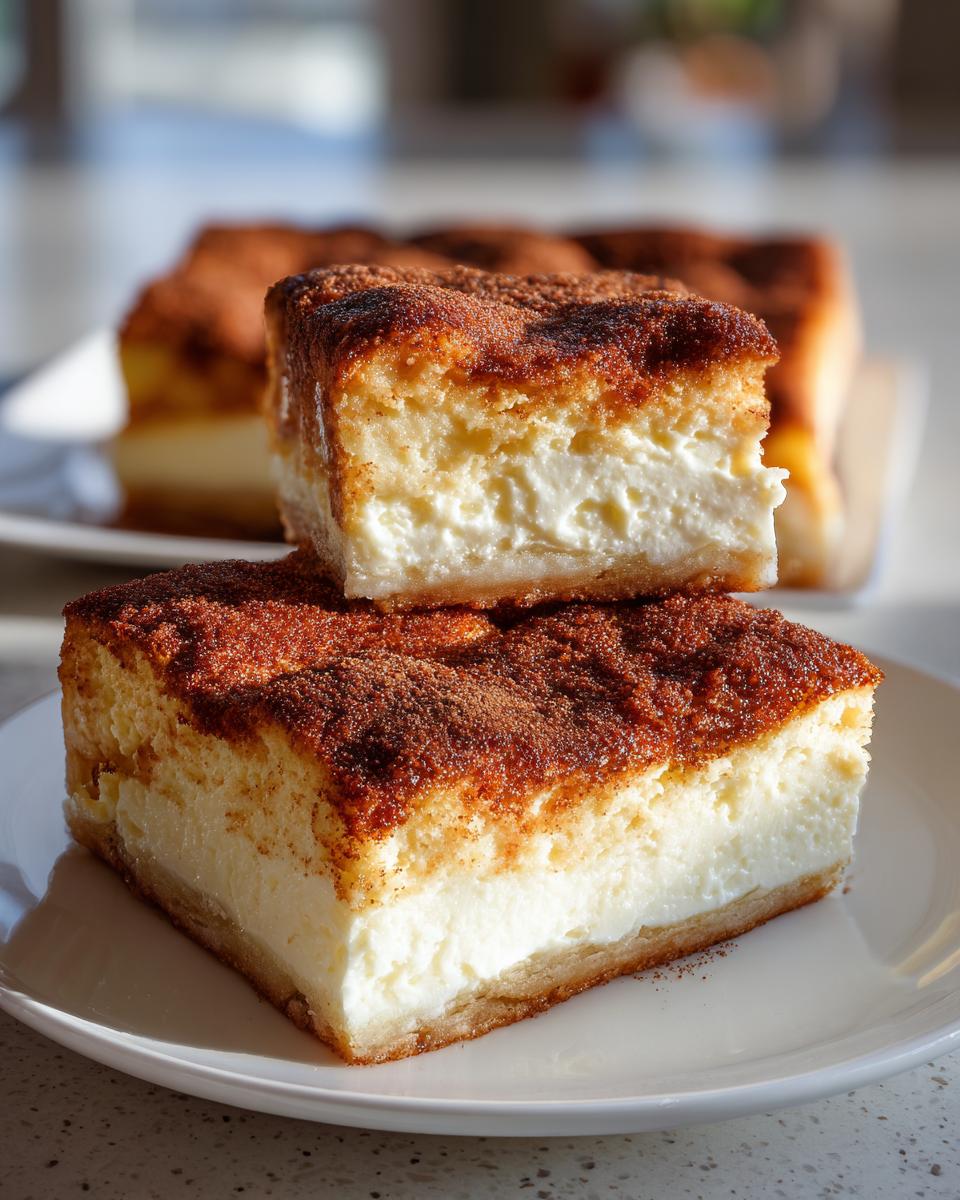
Perfect Texture: Flaky Pastry Meets Creamy Cheesecake Bars
What makes these so addictive? That incredible contrast! You get the buttery, flaky edges from the pastry dough mingling with that cool, dreamy cream cheese center. When these bake up golden, the texture of these creamy cheesecake bars is just unbeatable. The topping crisps up just enough to give you that perfect crunch, just like a freshly fried sopapilla!
Gathering Ingredients for Your Sopapilla Cheesecake
Alright, let’s talk about what you need to grab from the pantry and fridge! Because we are keeping this recipe so straightforward, listing the parts helps you stay organized. When the cream cheese is perfectly softened and your butter is melted, the assembly part flies by. I always make sure my cream cheese is definitely room temperature because a runny filling is the first step toward a soggy bottom, and we definitely don’t want that!
You’ll have dough, filling components, and the topping mix. For those who love exploring spice blends, check out my recipe for cinnamon sugar pecans; it gives you a little more depth you could play with later, but for this classic version, stick to the straightforward ingredients below.
For the Cream Cheese Dessert Bars Filling
This is the heart of our recipe, that cool, creamy center that makes these bars so irresistible! Remember that cream cheese needs to be ready to go:
- Two tubes (8 ounce each) of refrigerated crescent roll dough (this is our flaky workhorse!)
- One 8 ounce package cream cheese, softened completely
- 1 cup of granulated sugar
- 1 large egg
- 1 teaspoon of pure vanilla extract
For the Cinnamon Sugar Topping
This sugary layer gets golden and crisp in the oven, providing that essential crunch. Make sure that butter is melted down so you can brush it evenly:
- 1/2 cup (which is one standard stick) of unsalted butter, melted
- 3/4 cup of granulated sugar
- 2 teaspoons of ground cinnamon
How to Make Sopapilla Cheesecake Bars Step-by-Step
You’ve got your ingredients ready, and now we get to turn them into magic! Making these is like building a delicious, layered sandwich, only you bake it instead of eating it right away—and trust me, waiting is worth it. I always turn the oven on first. You want it nice and warm when the whole thing is ready to go in, aiming for that perfect 350 degrees F. If you’re looking for something cool and refreshing to sip while you bake, you should check out my recipe for classic lemonade!
Preparing the Layers and Cream Cheese Filling
First, grease that 9×13 pan—we don’t want any sticking drama later! Unroll one can of crescent dough, and gently press it right into the bottom of the pan. Try to get it even, sealing up any gaps so the filling doesn’t escape. Now for the good stuff: whip up that filling! With a hand mixer or a sturdy spoon, beat the softened cream cheese with 1 cup of sugar, the egg, and the vanilla until it looks perfectly smooth. Don’t leave any lumps lurking around! Once it’s silky, spread that gorgeous cream cheese layer evenly right over your bottom dough crust.
Assembling and Topping the Sopapilla Cheesecake
Time to seal the deal! Take that second tube of crescent dough and carefully lay it over the filling. If the edges don’t line up perfectly, just pinch the seams together *gently*. We are aiming for a nice seal here. Next, melt that stick of butter. Brush every single bit of that melted gold over the top crust. This is crucial for texture development! Then, mix your remaining 3/4 cup of sugar with the cinnamon on a plate, and sprinkle that mixture liberally over the buttered top layer. Don’t be shy!
Baking and Cooling for the Best Texture
Into the 350-degree oven it goes! Bake it for about 30 to 35 minutes. You’re looking for that beautiful, golden brown look on top, and you want the filling to feel set when you gently nudge the pan. Now, here is the absolute hardest (but most important) step: you MUST let these cool completely! If you try to cut these creamy cheesecake bars when they are hot, the filling will just melt right out. Patience ensures you get perfect squares that hold their shape beautifully when you slice them up.
Tips for Perfect Golden Brown Baked Sopapilla Cheesecake
Look, getting that perfect golden brown baked finish is what separates an *okay* dessert from an ‘Oh my gosh, who made this?!’ dessert, right? Since we rely on that butter helping everything crisp up, make sure you brush that melted butter right to the edges of the top crescent layer—don’t leave any dry spots, or they’ll look pale! That butter mixed with the sugar is what gives us that irresistible crunch.
And when it comes out of the oven looking beautiful and golden, here’s a little secret: if you want that true, authentic flavor, drizzle just a tiny bit of honey right over the top while the bars are still piping hot! It sinks in and adds a beautiful sheen. You can find more tips on making the best cheesecake recipes over on my guides page!
Achieving That Warm Gooey Dessert Finish
The combination of high heat on the butter and the sugar creates a caramelized crust. Keep an eye on it around the 30-minute mark. If you notice the edges browning too fast, you can always loosely tent a piece of foil over the pan. That way, the middle finishes setting without scorching the buttery edges—we want gooey, not burnt!
Expert Tip for Cream Cheese Dessert Bars Stability
I know it’s tough, but I have to shout this again: you must let these cream cheese dessert bars cool completely! If you cut them warm, the filling is still molten and you end up with a soupy mess. Cooling allows that cream cheese structure to firm up properly, giving you those clean, perfect squares we are aiming for. Give them at least two hours on the counter, or even better, chill them for an hour after cooling on the counter!
Variations on Your Favorite Sopapilla Cheesecake
Even though this classic version of sopapilla cheesecake is perfect, sometimes I like to shake things up a little bit—especially when I’m making it for myself again later in the week! These Tex-Mex inspired sweets are so versatile. If you are tired of the standard mix, I have a couple of sneaky ways to add extra flair without complicating the process.
Adding a Hint of Spice to the Filling
My favorite trick to deepen the flavor is adding spices right into the cream cheese mixture. Don’t just stick to the topping! Try adding just a tiny pinch of nutmeg or a quarter teaspoon of extra cinnamon right into that creamy center when you mix it up. It gives the whole bar a warmer, more complex flavor that borders on true churro cheesecake territory. It’s subtle, but it totally elevates the experience!
Alternative Toppings for Sopapilla Cheesecake
If you aren’t feeling the cinnamon sugar sprinkle mix this time around, you have options! Remember, my instructions just mention dusting with powdered sugar if you want something simple, but an even better idea is a quick glaze. Just beat together a little powdered sugar with some milk and a splash of vanilla until it pours nicely. If you want a little zesty kick, check out how I incorporate citrus in my Mexican cornbread recipe—a little orange zest in the glaze works wonders here too!
Serving Suggestions for This Sweet Pastry Dessert
Figuring out how to present this amazing dessert when you’re making it for a crowd is the best part! As one of the best sweet pastry recipes you’ll ever use, presentation matters. I typically serve these bars at room temperature because the cheesecake filling is fully set by then, which makes slicing and serving way easier for large groups.
However, if you are serving this as a super cozy weeknight treat, warming the bars up for just about twenty seconds in the microwave brings back that lovely gooey texture underneath the cinnamon sugar. If you pair these with something bright, like my recipe for Christmas Sangria, it’s the perfect balance for a holiday baking spread!
Storage and Make Ahead Desserts Information
I know life gets hectic, so one of the biggest perks of these bars is how fantastic they are as make ahead desserts! You can totally assemble the entire thing, cover it tightly with plastic wrap, and keep it in the fridge for up to two days before you plan on baking it. That’s a win for holiday baking, isn’t it?
Once they are baked and completely cooled (remember that rule!), you store them covered in the refrigerator. They keep beautifully for about four days because the cream cheese acts like a natural shield against drying out. If you want to reheat one slightly before serving, zap it for about 15-20 seconds in the microwave. That brings the butter back to life, making the crust soft again!
Frequently Asked Questions About Sopapilla Cheesecake
I know when you see a recipe that looks this good, you naturally have questions! It’s all about setting yourself up for success, especially when you’re making something that relies on layers setting correctly. I’ve pulled together the most common things people ask me about these wonderful cream cheese dessert bars. Answering these just ensures your results are absolutely perfect every time you pull them out of the oven!
Can I substitute the dough for this sopapilla cheesecake recipe?
This is a super common question, and here’s my honest take: you really should stick to the refrigerated crescent roll dough for this specific bar recipe. Puff pastry is delicious, of course, but it expands a lot more aggressively and it’s usually much flakier. Since we are aiming for that classic, sturdy base and top crust that holds in our rich filling, the structure of the crescent dough is exactly what we need for these bars to slice cleanly. It gives you that lovely flaky bottom without turning into a huge puff!
How long do these creamy cheesecake bars need to cool?
Oh, this is where you need the most patience! While the baking time is short and sweet, the cooling time is non-negotiable if you want those beautiful squares. I mentioned this in the steps, but just to reiterate: let them cool on the counter at room temperature for at least two full hours before you even think about slicing. If you cut them warm, that gorgeous cream cheese filling is too soft, and everything kind of slides around. If you chill them for an hour after they hit room temp, even better! That second chill really firms up those creamy cheesecake bars so they hold their shape!
Is this recipe better than a traditional Sopapilla Cheesecake?
That depends on what you’re aiming for! A traditional, round sopapilla cheesecake is usually taller and richer because you use more filling relative to the crust area. These bars are fantastic because they maximize that crispy, cinnamon-sugared edge in every single bite. They are also much easier to portion out for a crowd! Honestly, for a potluck or holiday gathering, the bars are simply more practical and just as delicious.
Nutritional Estimate for Sopapilla Cheesecake Bars
I always want to be super upfront with you; whenever I share a recipe this delicious, people naturally want to know the numbers! Keep in mind that these figures are just estimates based on the ingredients I listed—the exact brands of crescent dough or how much butter seeps in can shift things slightly. When I calculated this out for 16 generous servings, here’s what we’re looking at per bar.
This recipe uses a standard set of ingredients, so these are pretty close to what you’ll find if you track them yourself. It’s a definite indulgence, but totally worth the occasional treat! Since this recipe is a true make ahead dessert, you can certainly plan accordingly!
- Serving Size: 1 bar
- Calories: 285
- Sugar: 22g
- Total Fat: 16g
- Protein: 4g
- Carbohydrates: 32g
Since we are relying on cream cheese and butter, you’ll see the fat content is moderately high, but hey, that’s where all the flavor comes from in these cheesecake dessert bars! Enjoy every layer!
PrintEasy Sopapilla Cheesecake Bars with Creamy Filling and Cinnamon Sugar Topping

Make these easy Sopapilla Cheesecake Bars for a dessert that combines flaky pastry, a rich cream cheese filling, and a buttery cinnamon sugar topping. This recipe tastes like a mix of churros and cheesecake and is perfect for potlucks or holiday baking.
- Prep Time: 15 min
- Cook Time: 35 min
- Total Time: 50 min
- Yield: 16 bars 1x
- Category: Dessert
- Method: Baking
- Cuisine: Tex-Mex Inspired
- Diet: Vegetarian
Ingredients
- 2 (8 ounce) tubes refrigerated crescent roll dough
- 1 (8 ounce) package cream cheese, softened
- 1 cup granulated sugar
- 1 large egg
- 1 teaspoon vanilla extract
- 1/2 cup (1 stick) unsalted butter, melted
- 3/4 cup granulated sugar
- 2 teaspoons ground cinnamon
Instructions
- Preheat your oven to 350 degrees F. Lightly grease a 9×13 inch baking dish.
- Unroll one tube of crescent roll dough and press it into the bottom of the prepared baking dish, covering the base completely.
- In a medium bowl, beat the softened cream cheese, 1 cup of sugar, the egg, and vanilla extract until the mixture is smooth and creamy.
- Spread the cream cheese mixture evenly over the bottom layer of crescent roll dough.
- Unroll the second tube of crescent roll dough and place it over the cream cheese layer. Pinch the seams together to seal the edges.
- In a small bowl, mix the remaining 3/4 cup of sugar and 2 teaspoons of cinnamon together.
- Brush the melted butter evenly over the top layer of dough. Sprinkle the cinnamon sugar mixture over the buttered top.
- Bake for 30 to 35 minutes, or until the top is golden brown and the filling is set.
- Let the bars cool completely in the pan before slicing. This helps the creamy filling firm up.
- Cut into squares to serve. You can dust with powdered sugar if desired.
Notes
- For a richer flavor, you can drizzle a little honey over the bars after they come out of the oven, similar to traditional sopapillas.
- You can prepare the cream cheese filling ahead of time and store it in the refrigerator for up to one day before assembling the bars.
- If you prefer a churro cheesecake flavor, use slightly less cinnamon in the topping, or add a pinch of nutmeg to the cream cheese mixture.
Nutrition
- Serving Size: 1 bar
- Calories: 285
- Sugar: 22
- Sodium: 210
- Fat: 16
- Saturated Fat: 9
- Unsaturated Fat: 7
- Trans Fat: 0.5
- Carbohydrates: 32
- Fiber: 1
- Protein: 4
- Cholesterol: 45