
We all have those kitchen goals, right? Those desserts that look absolutely *unreal* on a fancy platter, but you just assume they belong in a five-star restaurant. Well, stop right there! I am here today to prove that you don’t need to be a professional pastry chef to conquer the king of **indulgent treats**: the **creme brulee cheesecake**. This isn’t just one dessert; it’s the ultimate **dessert mashup** where the velvety, rich texture of a classic baked cheesecake meets that famous, shatteringly crisp, crackly sugar topping of crème brûlée. It’s decadent, it’s elegant, and trust me, it is completely achievable right in your own oven. Aria Thompson built Cooking Zenith on the belief that gourmet flavors should be accessible, and this recipe is the perfect example of turning that complex dream into a delicious reality for every home cook. If you love the concept of a rich filling paired with a snap, you might also adore my recipe for strawberry cheesecake sweet rolls, but today, we focus on this glorious mashup!
- Why This Creme Brulee Cheesecake Recipe Works for You
- Ingredients for the Ultimate Creme Brulee Cheesecake
- Step-by-Step Guide to Making Creme Brulee Cheesecake
- Expert Tips for a Flawless Creme Brulee Cheesecake
- Ingredient Substitutions for Your Creme Brulee Cheesecake
- Serving Suggestions for This Elegant Dessert Mashup
- Storing and Reheating Your Creme Brulee Cheesecake
- Common Questions About Making Creme Brulee Cheesecake
- Share Your Perfect Creme Brulee Cheesecake Experience
Why This Creme Brulee Cheesecake Recipe Works for You
I know what you’re thinking—this sounds too complicated for a weeknight bake, right? Nope! This recipe is designed to be the showstopper you need for any celebration, delivering maximum wow-factor with minimal daily fuss.
- It delivers unbelievable buttery, crackly crunch thanks to that perfectly torched sugar layer.
- The filling is pure **creamy dessert** magic—silky smooth every single time.
- It’s the ultimate **indulgent treat** that makes any dinner party feel instantly gourmet.
It’s a proper decadent baked goods experience that you’ll be proud to serve!
Ingredients for the Ultimate Creme Brulee Cheesecake
Okay, for this **creme brulee cheesecake** to reach peak **creamy dessert** potential, you MUST respect the temperature warnings. That’s my golden rule for any good **cheesecake recipe**!
Grab your ingredients now. We’re splitting them into three simple groups: the crust, the filling, and that glorious topping.
For the Crust, you need:
- 1 1/2 cups graham cracker crumbs
- 1/4 cup granulated sugar (yes, put some sugar in the base!)
- 6 tablespoons unsalted butter, melted
Now, for the filling—this is where true smoothness happens. Seriously, make sure your dairy isn’t chilly!
- 16 ounces cream cheese, softened to room temperature
- 3/4 cup granulated sugar (the main sweetener)
- 3 large eggs, room temperature (Crucial for no lumps!)
- 1 teaspoon pure vanilla extract
- 1/2 cup heavy cream, cold (This goes in last for texture)
- 1/4 cup sour cream or plain Greek yogurt, room temperature
And finally, the signature crunch for the **caramelized sugar topping**:
- 1/2 cup granulated sugar (separate portion, just for the top!)
If you bring those main dairy components to room temperature, you’ve already won half the battle toward a flawless, velvety texture. Want to see how I use cream cheese in other fun ways? Check out this recipe for my easy fruit dip!
Step-by-Step Guide to Making Creme Brulee Cheesecake
Alright, deep breath! This is where we bring that gorgeous **creme brulee cheesecake** to life. Don’t let the water bath intimidate you; it’s the secret weapon for a perfectly smooth and crack-free **gourmet cheesecake**. We’re moving through this methodically, just like I learned every technique in my baking tutorials at home. Remember, patience during baking and cooling is what separates a good cake from the best, just like in my classic New York cheesecake recipe!
Preparing and Baking the Cheesecake Recipe
First things first: get that oven warmed up to 325°F (160°C). While it heats, line a 9-inch springform pan bottom with parchment paper—this saves so much stress later! Mix your crust ingredients (crumbs, sugar, melted butter) and press it firmly into the pan. Bake that base for just ten minutes, then let it chill a bit while we tackle the filling. For the filling, beat that room-temperature cream cheese until it’s unbelievably smooth. Add your sugar, then the eggs one by one—and I mean *one by one*! We do not want air bubbles turning into cracks later, so only mix until just incorporated. Then swirl in the vanilla and sour cream/yogurt. Finally, pour in the cold heavy cream slowly while mixing on low. Pour this gorgeous batter over your cooled crust, set the pan into a larger roasting pan, and add that hot water for the bath. Bake for 55 to 65 minutes until the center has a gentle wiggle.
Achieving the Perfect Caramelized Sugar Topping
This step must, I repeat, MUST wait until the cheesecake is completely finished baking, cooled slowly inside the oven, and then chilled. I seriously recommend covering it and letting it hang out in the fridge overnight. That chilling time is essential for a solid base before we hit it with the heat! Once it’s rock hard and cold, sprinkle that final 1/2 cup of sugar evenly across the top—don’t skimp, this is your crunch!
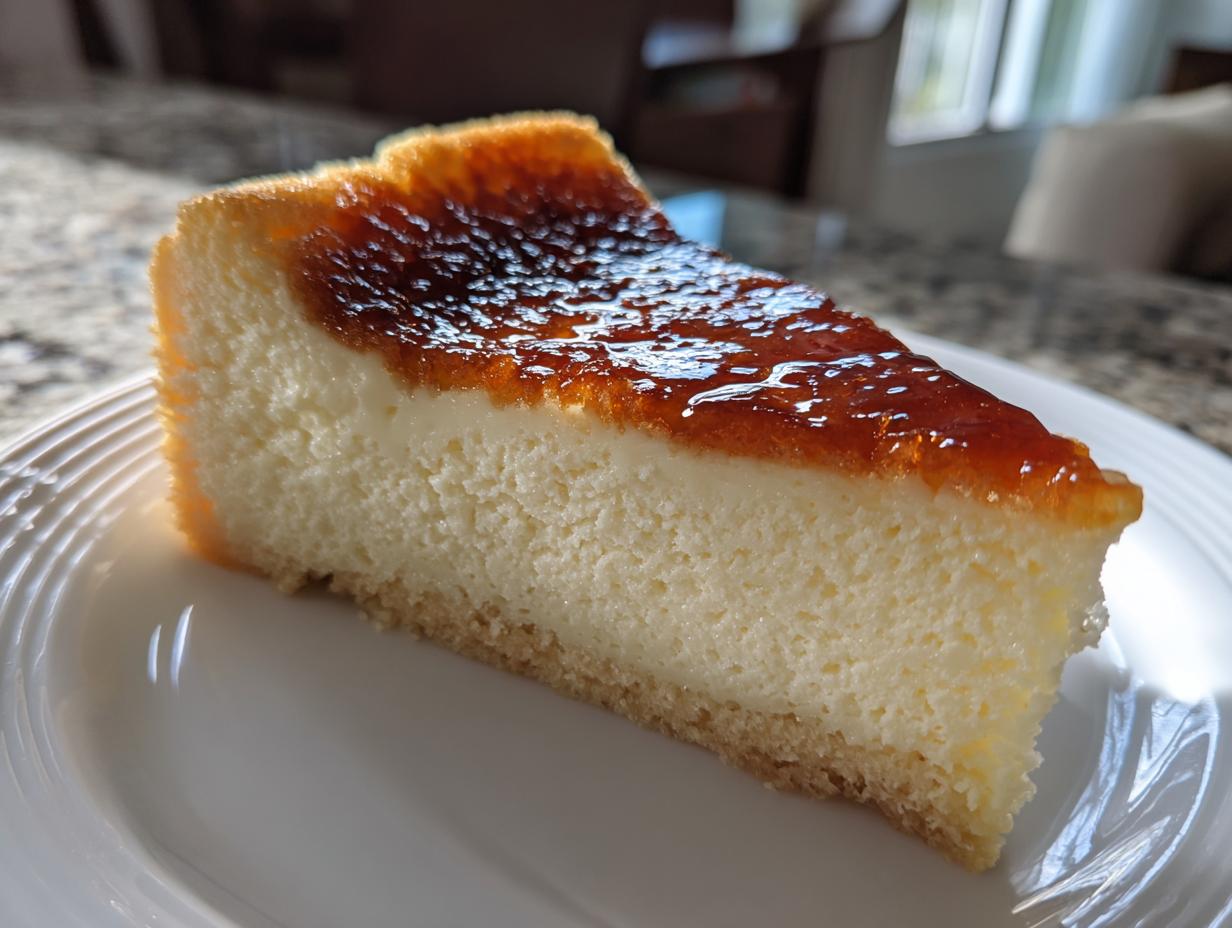
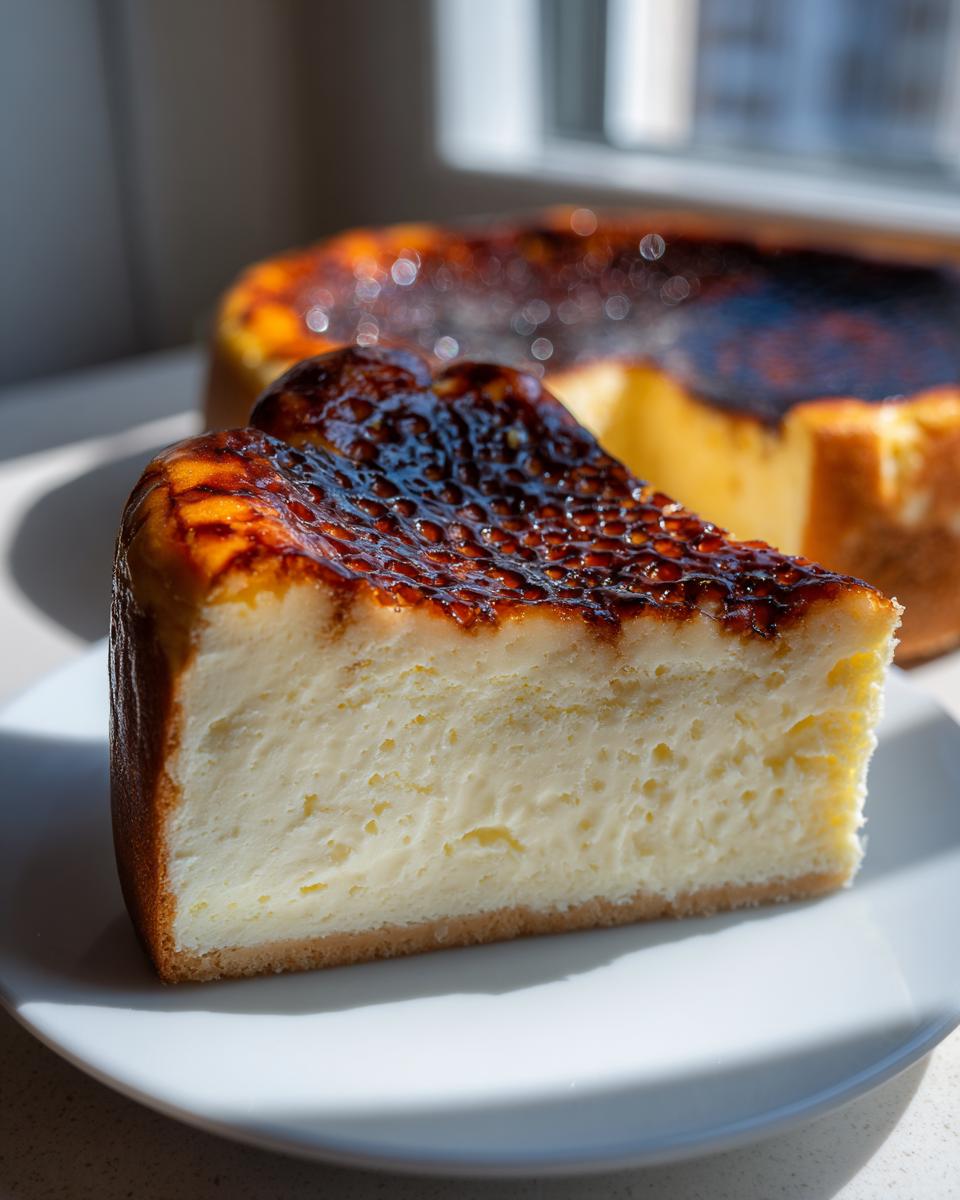
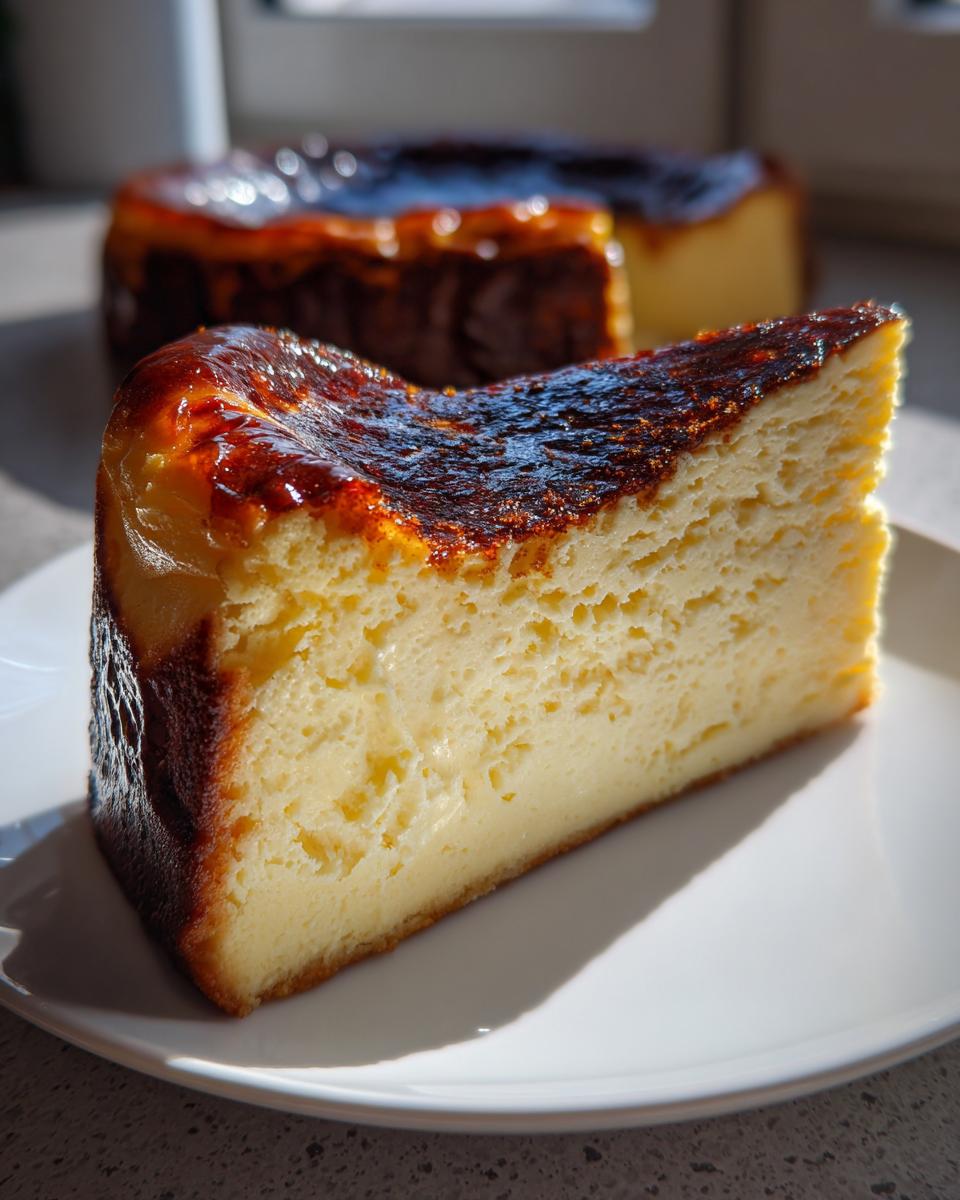
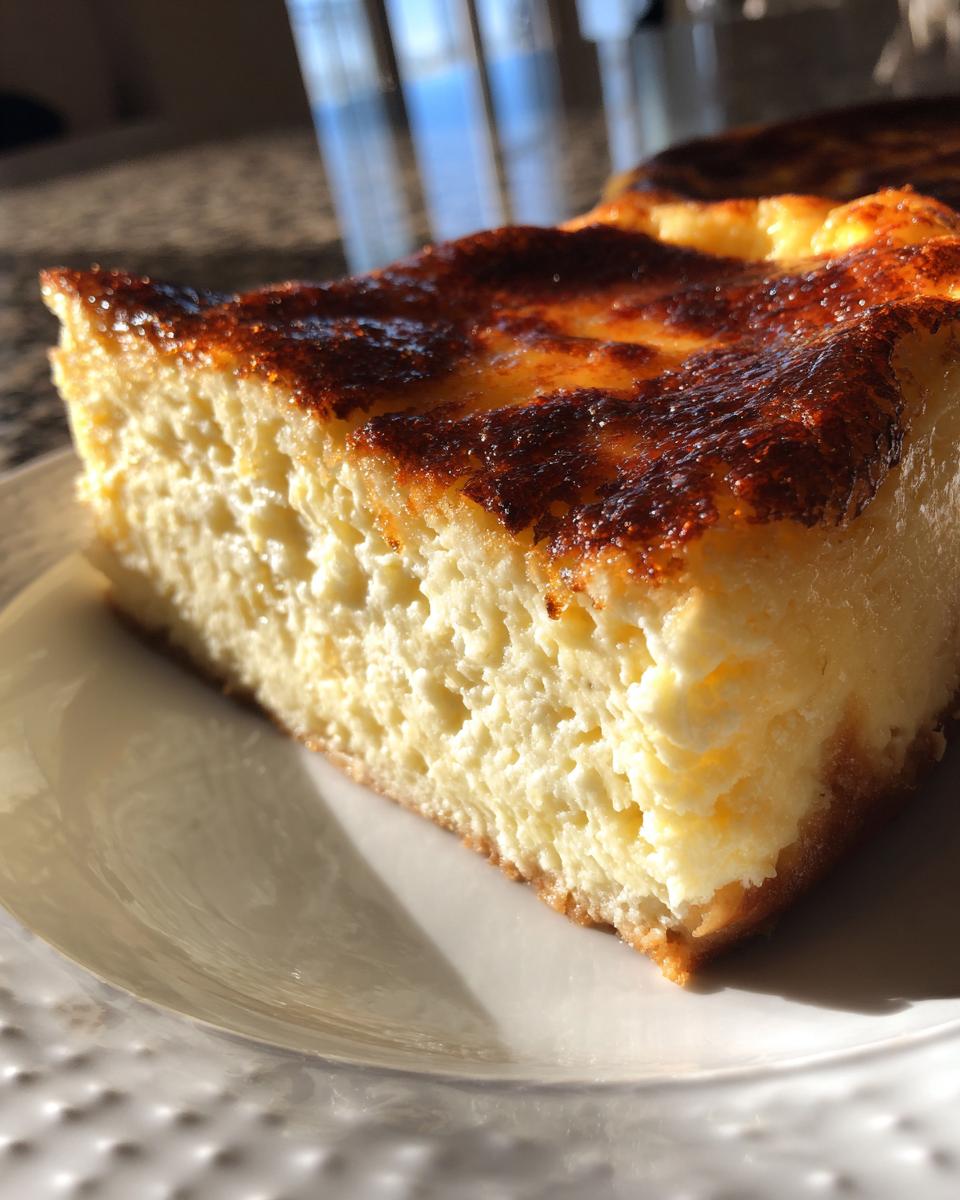
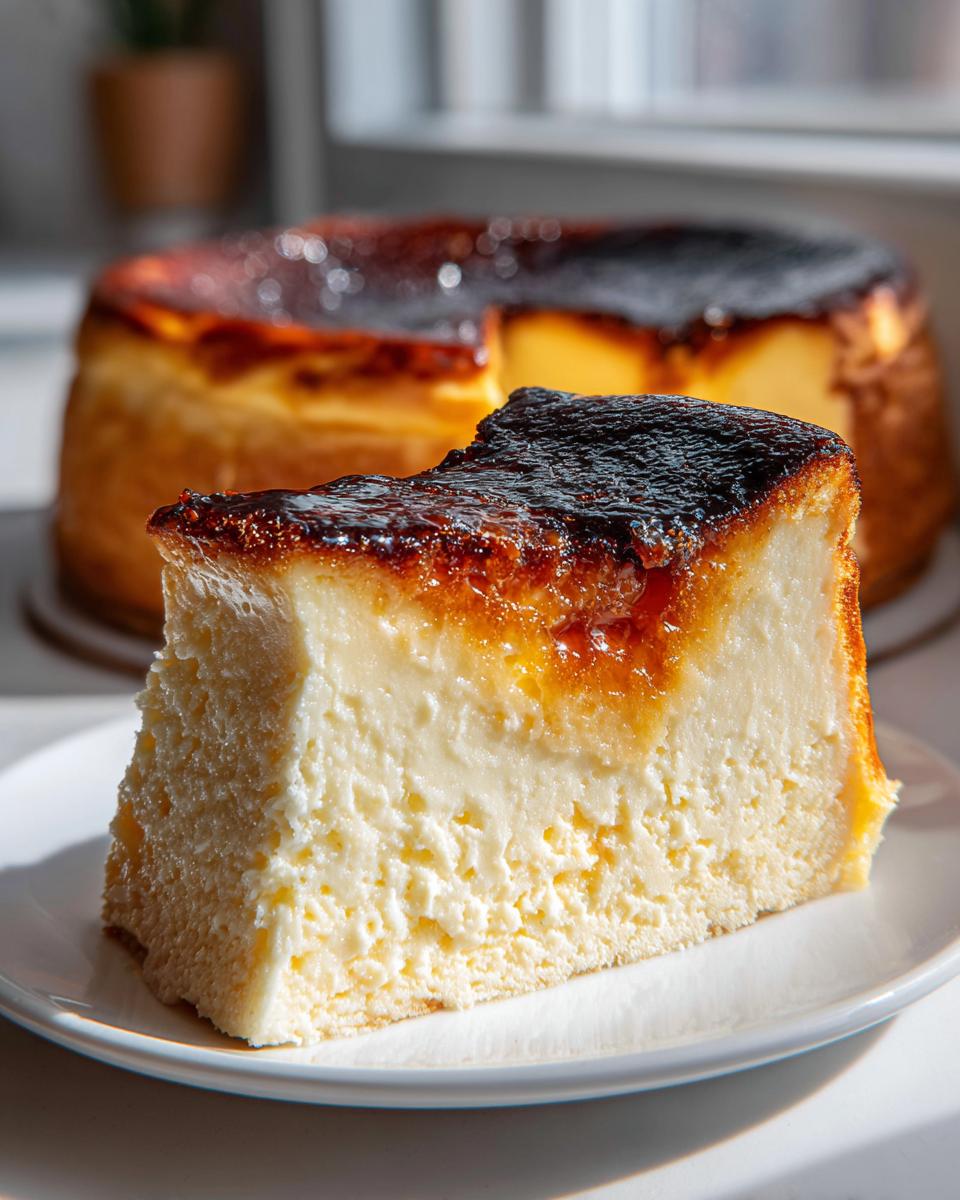
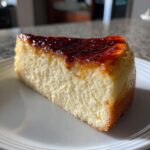
Time for the fun part—the torch! If you have a kitchen torch, use it now. Keep the flame moving constantly over the sugar until it melts into a gorgeous, deep amber color, creating that signature **caramelized sugar topping**. If you don’t have a torch, you can carefully use your broiler for 1 to 2 minutes, but you have to stand right there staring at it—it burns FAST! Serve these beauties immediately so you get that amazing contrast of warm, crisp sugar over cold, creamy cheesecake.
Expert Tips for a Flawless Creme Brulee Cheesecake
I want every single one of you to succeed with this **gourmet cheesecake**. Seriously, there are three things I stress about every time I bake this magnificent **dessert mashup**. If you follow these little pointers, you’ll skip the usual heartache that comes with fancy **baked cheesecake** recipes.
- Temperature Matters Most: I can’t say this enough—your cream cheese, eggs, and sour cream *must* be at true room temperature. If they’re even slightly chilly, you’ll end up with lumps, and suddenly it stops being a **creamy dessert** and starts being a sad, grainy situation. Been there, done that.
- Under-Beat the Eggs: When you add those eggs, you aren’t making scrambled eggs; you’re just incorporating them. Stop the mixer the second you can’t see streaks of yolk anymore. Overmixing is the number one culprit for tiny air bubbles that expand and create cracks during baking.
- The Slow Cool is Non-Negotiable: When the timer goes off, turn the oven off, crack the door, and let it sit for a whole hour. This gradual temperature drop is the secret weapon Aria Thompson learned to prevent that dreaded sinkhole or crack right in the center. It takes so much patience, but it’s the key to that picture-perfect surface before we add the toppings!
If you nail those three things, you’re golden. Need a savory break from all this sugar? Why not check out my recipe for easy chicken thighs with honey garlic?
Ingredient Substitutions for Your Creme Brulee Cheesecake
One thing I love about baking at home is adapting recipes! We’re talking about a **dessert mashup**, so getting creative with the base is totally encouraged. If you run out of graham crackers for the crust—don’t panic! I find that digestive biscuits make a fantastic, slightly richer swap. They hold up beautifully against that creamy filling.
What about the tang factor? We use sour cream here, but if you only have plain Greek yogurt on hand, go ahead and use that instead. They provide a similar acidic lift that cuts through the richness. Just make sure that yogurt is full-fat and room temperature, okay? If you’re looking for another fun shortcut recipe, check out my cake mix cookie bars later!
Serving Suggestions for This Elegant Dessert Mashup
Now that you’ve conquered this beautiful **creme brulee cheesecake**, you need to decide how best to serve this **elegant dessert**! Because the topping is naturally warm and crisp right after torching, I actually love serving it completely plain so the texture contrast sings the loudest. But if you need to dress the plate up a bit, keep it light!
A tiny drizzle of a raspberry coulis or a tart cherry sauce works wonders to cut through the richness. If you’re a coffee lover like me, serving a slice alongside a strong espresso is heavenly; it’s like you’ve got the full dessert experience going on! Speaking of coffee, if you want another great coffee-infused treat, you have to try my coffee cake cookies next time!
Storing and Reheating Your Creme Brulee Cheesecake
This is where we need to be smart about timings! Since this is a hybrid dessert, we treat the cheesecake base and the glorious **caramelized sugar topping** very differently. The cheesecake itself, once fully chilled—and I mean *truly* chilled, ideally overnight—stores wonderfully in the fridge, tightly covered, for up to four days. It’s still a fantastic, **creamy dessert** even on day three.
But here is the deal breaker: do *not* torch that sugar until you are ready to eat it! The beauty of the **caramelized sugar topping** is that shatteringly crisp texture against the cold filling. If you torch it ahead of time, that sugar will melt right back into the cake, leaving you with a soupy, sticky mess rather than that satisfying crack. Just keep the cheesecake chilled and bare, and torch it right before you serve it. Planning on whipping up some pumpkin cookies soon? My recipe for pumpkin cookie soft cream cheese frosting is perfect for a fall follow-up!
Common Questions About Making Creme Brulee Cheesecake
When you’re dealing with a spectacular creme brulee element combined with a classic cheesecake recipe, people always have questions! I’ve gathered the ones I hear most often when talking about this rich **dessert mashup**.
Can I skip the water bath and make this a no water bath cheesecake?
I really, truly advise against it if you want that perfectly smooth, crack-free surface. A water bath is essential for creating a gentle, humid heat that cooks the dairy slowly. Without it, the edges will cook too fast, resulting in a dry layer or, worse, giant cracks in your beautiful top. Stick with the bath for the best results!
What if I don’t have a kitchen torch for the topping?
Don’t let a missing torch stop you from enjoying this! If you don’t own one of the essential kitchen torch recipes gadgets, you can use your broiler. Place the chilled, sugared cheesecake under a preheated broiler for just a minute or two. You must watch it constantly, though! The sugar goes from perfect amber to burnt charcoal in about three seconds flat. Keep the oven rack high up!
Can I modify this to make mini cheesecakes or cheesecake bars?
Absolutely! You can definitely turn this into **mini cheesecakes**! You’ll just need to line a muffin tin with liners or grease it well, pour in the filling, and reduce your baking time significantly—probably down to 20–25 minutes. For **cheesecake bars**, use a 9×13 pan instead of the springform. Again, watch the baking time carefully!
Share Your Perfect Creme Brulee Cheesecake Experience
So, there you have it! You’ve made the most stunning **creme brulee cheesecake** imaginable. Now, I absolutely need to know how it turned out! Did you get that satisfying *crack* when you tapped your spoon against the **caramelized sugar topping**?
Please, please leave a rating and tell me your results in the comments below. I’m dying to hear all about your success. And if you snapped a picture of that gorgeous contrast between the cold filling and the warm crust, you can share it with me over on the contact page! Happy baking, friends!
PrintThe Ultimate Creamy Creme Brulee Cheesecake with a Perfect Crackly Brûlée Top
Combine the rich texture of a baked cheesecake with the signature caramelized crunch of crème brûlée in this decadent dessert mashup. This recipe guides you to a smooth, crack-free filling and the perfect torched sugar topping for an elegant, gourmet cheesecake.
- Prep Time: 30 min
- Cook Time: 65 min
- Total Time: 7 hours 35 min
- Yield: 10 servings 1x
- Category: Dessert
- Method: Baking
- Cuisine: American
- Diet: Vegetarian
Ingredients
- 1 1/2 cups graham cracker crumbs
- 1/4 cup granulated sugar (for crust)
- 6 tablespoons unsalted butter, melted
- 16 ounces cream cheese, softened to room temperature
- 3/4 cup granulated sugar (for filling)
- 3 large eggs, room temperature
- 1 teaspoon pure vanilla extract
- 1/2 cup heavy cream, cold
- 1/4 cup sour cream or plain Greek yogurt, room temperature
- 1/2 cup granulated sugar (for topping)
Instructions
- Prepare the crust: Preheat your oven to 325°F (160°C). Line the bottom of a 9-inch springform pan with parchment paper.
- In a bowl, combine the graham cracker crumbs, 1/4 cup sugar, and melted butter. Press this mixture firmly into the bottom of the prepared pan. Bake the crust for 10 minutes. Remove and let it cool slightly.
- Prepare the cheesecake filling: In a large bowl, beat the softened cream cheese until completely smooth. Add the 3/4 cup sugar and beat until combined.
- Beat in the eggs one at a time, mixing only until each egg is incorporated. Do not overmix.
- Mix in the vanilla extract and sour cream or yogurt until just combined.
- Slowly pour in the cold heavy cream while mixing on low speed until the batter is smooth.
- Pour the filling over the cooled crust. For a smooth finish without cracks, place the springform pan inside a larger roasting pan. Carefully pour hot water into the roasting pan until it reaches halfway up the sides of the springform pan (this is a water bath).
- Bake for 55 to 65 minutes, or until the edges are set but the center still has a slight jiggle.
- Turn off the oven, crack the door open slightly, and let the cheesecake cool inside the oven for 1 hour. This slow cooling prevents cracking.
- Remove the cheesecake from the water bath and let it cool completely on a wire rack. Once cool, cover and refrigerate for at least 6 hours, or preferably overnight.
- Prepare the brûlée topping: Just before serving, sprinkle the remaining 1/2 cup of sugar evenly over the top of the chilled cheesecake.
- Use a kitchen torch to melt and caramelize the sugar until it forms a dark amber, crackly crust. Work quickly to avoid heating the cheesecake filling too much.
- Serve immediately to enjoy the contrast between the warm, crisp topping and the cold, creamy cheesecake.
Notes
- If you do not have a kitchen torch, you can place the sugared cheesecake under a preheated broiler for 1-2 minutes, watching constantly to prevent burning.
- For the creamiest texture, bring all dairy ingredients (cream cheese, eggs, sour cream) to true room temperature before mixing.
- Digestive biscuits make an excellent substitute for graham crackers in the crust.
Nutrition
- Serving Size: 1 slice
- Calories: 450
- Sugar: 35g
- Sodium: 250mg
- Fat: 30g
- Saturated Fat: 18g
- Unsaturated Fat: 12g
- Trans Fat: 0.5g
- Carbohydrates: 40g
- Fiber: 1g
- Protein: 8g
- Cholesterol: 110mg