
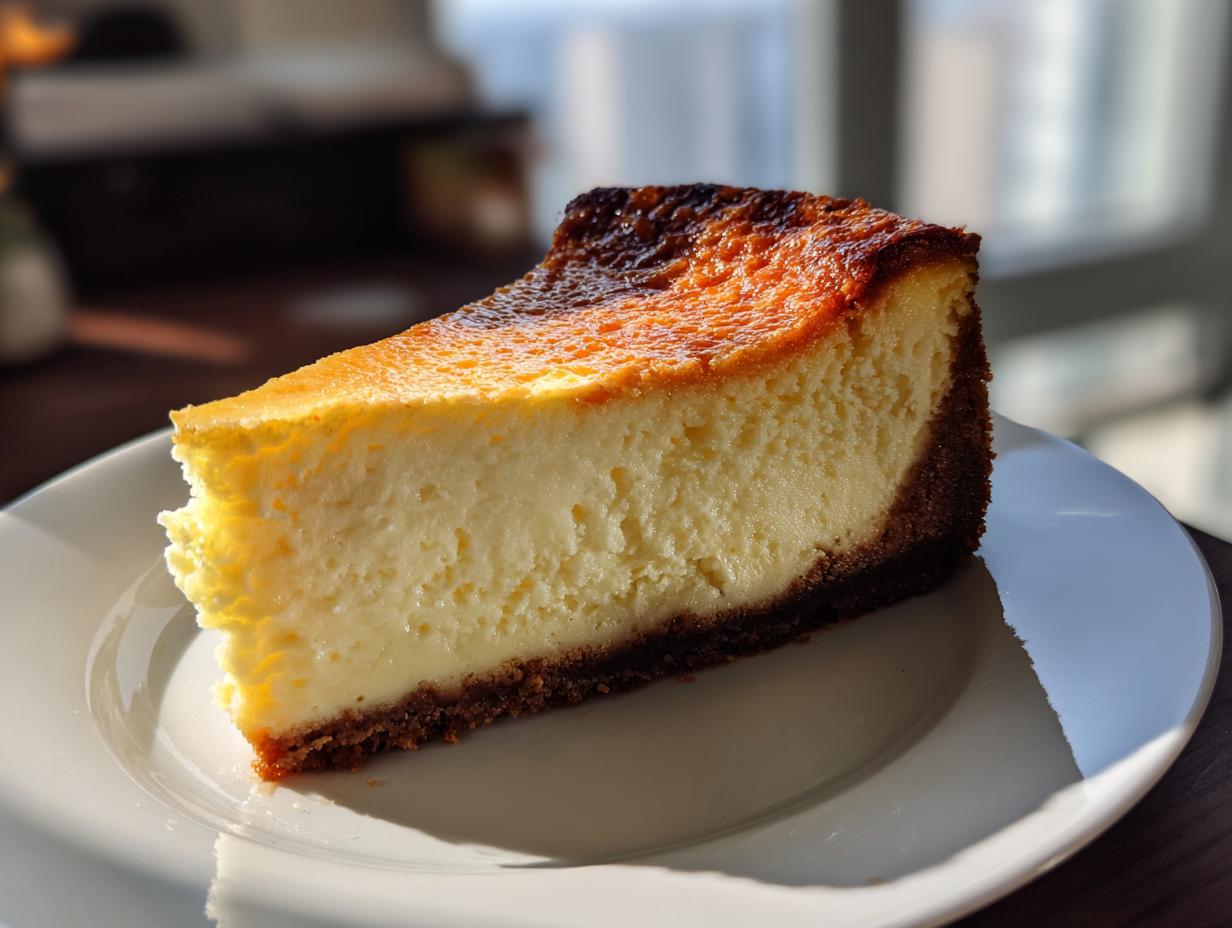
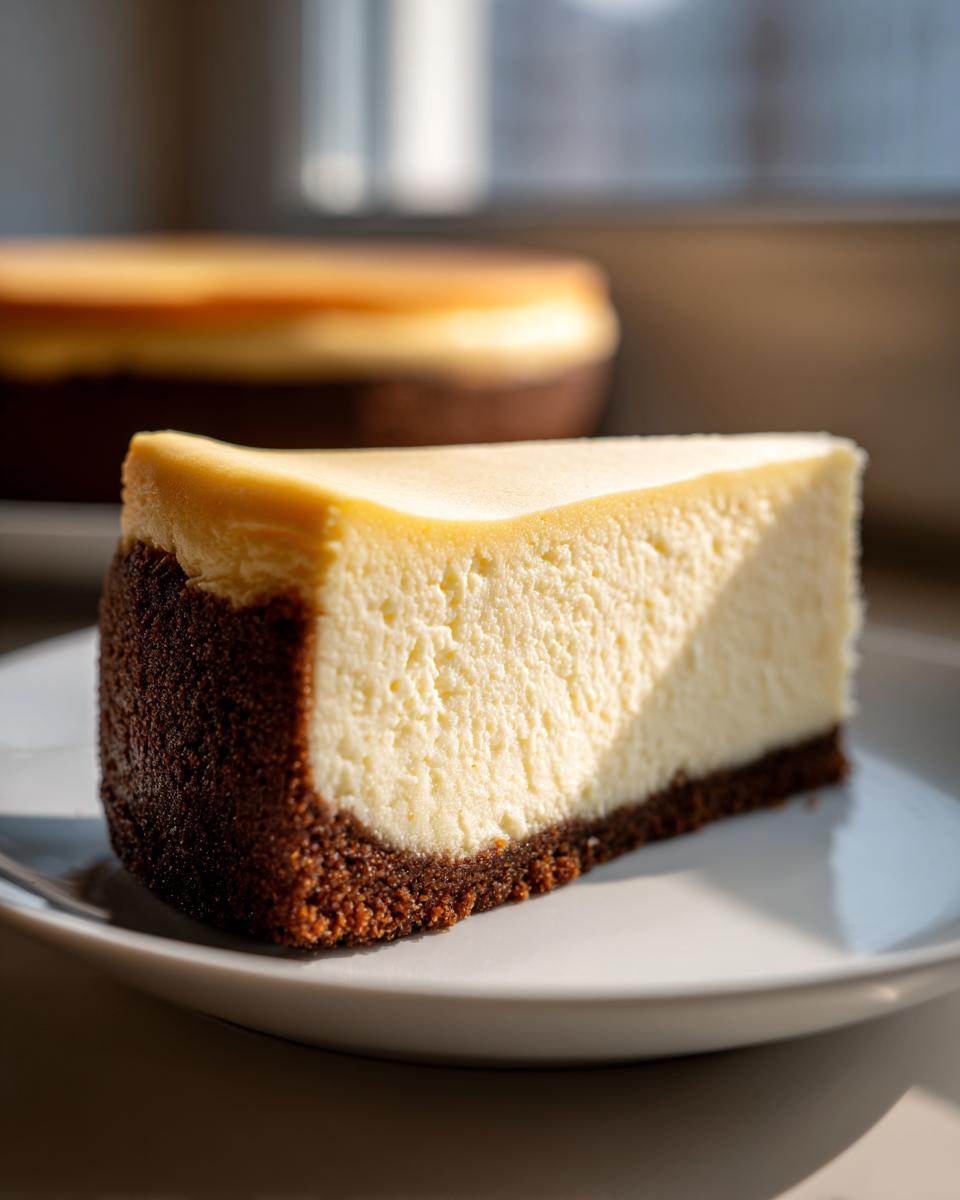
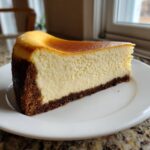
Oh, that perfect slice. You know the one—it’s tall, it’s impossibly dense, and it melts on your tongue like velvet? We are talking about the absolute king of desserts: the true **New York Cheesecake**. For years, I thought that level of smooth, rich perfection was only available in those famous Manhattan bakeries, and honestly, the fear of cracks kept me away from trying. But I cracked the code! I spent so many hours in my kitchen perfecting this recipe until it was truly foolproof. This isn’t just another dessert; it’s the showstopper that proves you can achieve that signature creamy texture without any drama. If you have ever wanted to master this classic, you’ve come to the right place. I promise, this New York Cheesecake Recipe will be your new go-to for every single special occasion. I really pour everything I know about technique into these steps, so trust the process!
- Why This is the Best New York Cheesecake Recipe You Will Ever Make
- Gathering Ingredients for Your Classic New York Cheesecake Dessert
- Step-by-Step Instructions for Homemade New York Style Cheesecake
- The Slow Cooling Process: Key to a Restaurant Style Cheesecake Finish
- Ingredient Notes and Substitutions for Your New York Cheesecake
- Tips for Serving and Storing Your Decadent Cream Cheese Cake
- Frequently Asked Questions About Making New York Cheesecake
- Understanding the Estimated Nutrition for This Rich Baked Cheesecake
- Share Your Simple Cheesecake from Scratch Experience
Why This is the Best New York Cheesecake Recipe You Will Ever Make
So, what makes this my legendary recipe for a classic **New York Cheesecake**? It’s not just what goes in; it’s how I make sure you get that textbook result every single time. Forget those sad, crumbly, cracked failures you might have made before! This method is built on precision, and I’ll tell you exactly why it works.
- It delivers unparalleled richness—this cake is *heavy* in the best way possible.
- The texture is truly velvety; it sets up perfectly dense.
- We are locking in moisture to ensure a flawless, crack-free surface!
Achieving That Signature Dense and Creamy Texture
The secret to that velvety feel starts before you even turn the mixer on! You absolutely must use those four blocks of full-fat cream cheese, and they need to be completely softened—I mean butter-soft at the room temperature. If they aren’t soft, you’ll end up with lumps, and lumps are the enemy of the **Best Creamy Cheesecake**. Then, when we add those room-temperature eggs and sour cream, everything incorporates beautifully, creating that famous heavy but smooth mouthfeel.
The Foolproof No Crack Cheesecake Guide
Here’s where people usually mess up, but not you! Cracks happen when the exterior cooks too fast or the batter gets too much air whipped in. My **No Crack Cheesecake Guide** relies on two things. First, you mix on medium speed, minimum fuss; we aren’t making meringue! Second, and this is my biggest non-negotiable: the water bath. It steams the sides gently, ensuring the bake is even from edge to center. Follow those two steps, and you’ve got a stunning presentation!
Gathering Ingredients for Your Classic New York Cheesecake Dessert
Okay, let’s talk supplies! For a **New York Cheesecake** this good, we can’t skimp on what we put into it. The success of this **Classic Cheesecake Dessert** hinges on using the right ingredients, especially making sure everything is at true room temperature. Remember, we want everything to fold together gently, not fight each other in the mixer! That full-fat cream cheese truly is the boss here—it creates that required density and flavor without fail.
For the Perfect Cheesecake Crust
The base needs to be sturdy enough to hold up that tall tower of creamy goodness, and it only takes three things. Don’t try to cut corners here; the buttery flavor is just beautiful!
- 1 1/2 cups graham cracker crumbs (make sure they are fine!)
- 1/4 cup granulated sugar
- 6 tablespoons unsalted butter, melted
The Rich Baked Cheesecake Filling Components
This is where the magic happens, but pay close attention to that temperature note! I listed it twice for a reason. This combination makes for the **Rich Baked Cheesecake** of your dreams.
- 4 (8 ounce) packages full-fat cream cheese, softened to room temperature
- 1 1/2 cups granulated sugar
- 1/4 cup all-purpose flour (this helps stabilize everything!)
- 1 teaspoon vanilla extract
- 1/4 teaspoon salt
- 4 large eggs, room temperature
- 1/2 cup sour cream, room temperature
Step-by-Step Instructions for Homemade New York Style Cheesecake
Alright, now for the main event! I know reading instructions can sometimes feel like reading a novel, but stick with me here. If you follow this order exactly, your **New York Cheesecake** is going to come out looking like it was stolen from a fancy restaurant display case. It’s all about gentle handling and knowing when to stop mixing. We want smooth, not fluffy, remember?
Preparing the Pan and Pre-Baking the Perfect Cheesecake Crust
First thing first, we need to protect this beauty from that water bath! Grab heavy-duty foil—I usually use two large sheets wrapped around the base and sides of your 9-inch springform pan. Make sure it’s tight! Then, get your oven preheated to 350°F (175°C). While that warms up, mix your crust ingredients and firmly press that buttery graham cracker mix into the bottom of the pan. Pop that into the oven for 10 minutes. This sets the **Perfect Cheesecake Crust** so it doesn’t get soggy later. Once done, take it out, let it cool a touch, and then drop your oven temp down to 325°F (160°C).
Mixing the Velvety Cheesecake Batter Without Over-Aeration
This section is crucial for that soft, **Velvety Cheesecake Baking** result. Beat your softened cream cheese by itself until it is absolutely silky smooth; use a paddle attachment if you have one, and scrape those sides constantly! Next, gently beat in all the sugar, flour, salt, and vanilla until it’s just combined. Now, the eggs! Add them one at a time, waiting until the previous one is *just* mixed in before adding the next. Seriously, don’t let the mixer run long here. Finish by folding in the sour cream quickly. The goal is smooth, not airy!
Baking the Tall Cheesecake Recipe with a Water Bath
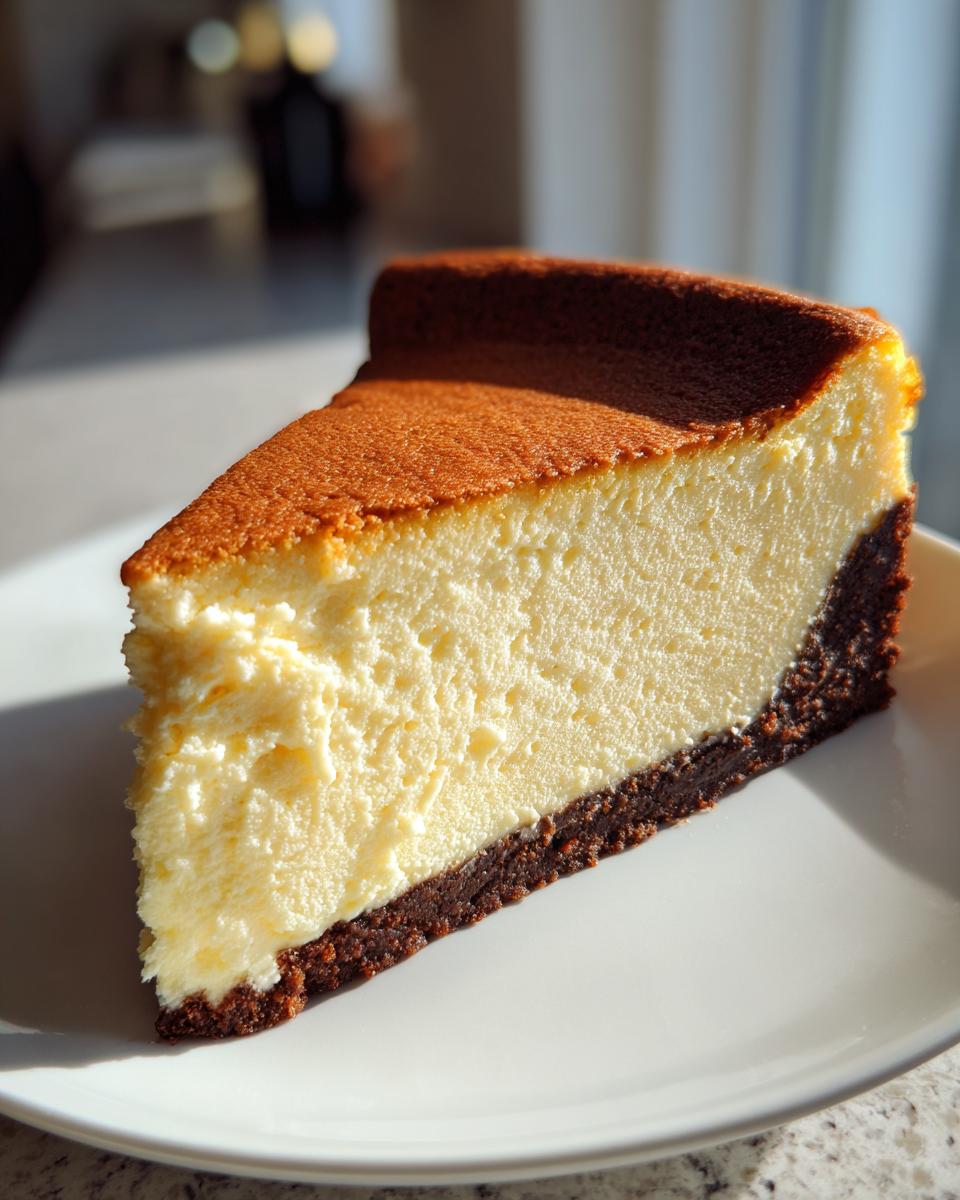
We’re using the water bath to create steam, which is the secret to a **Tall Cheesecake Recipe** that stays moist! Take your foil-wrapped pan, put it inside a large roasting pan. Pour the batter carefully into the crust. Now, carefully—and I mean *carefully*—pour boiling water into the outer roasting pan until the water comes halfway up the side of the springform. Slide this whole setup into the 325°F oven and bake for about 60 to 75 minutes. You’re looking for the edges to be set, but if you give the pan a *gentle* nudge, the very center should still have a tiny, two-inch wiggle. That means it’s done!
The Slow Cooling Process: Key to a Restaurant Style Cheesecake Finish
Okay, you see how tall and gorgeous your cheesecake is right now? Don’t touch it! This next step is honestly the most boring part, but I swear on my grandmother’s rolling pin, this slow cooling method is the absolute single most important piece of my **No Crack Cheesecake Guide**. If you pull this beautiful **New York Cheesecake** straight out of the oven and set it on the counter, the sudden drop in temperature will cause it to contract too quickly, and boom—we get the dreaded crack.
We want that gorgeous, smooth top that signals a true **Restaurant Style Cheesecake**. Here is the absolute foolproof method for achieving that:
Once the baking time is up (remember that slight jiggle in the center!), turn that oven off immediately. Do not open the door yet! Prop the door open about two inches—I usually use a sturdy wooden spoon handle jammed in the side to keep it stable. Now, just leave it in there for one full hour.
That hour allows the cheesecake to gradually settle down and acclimate to the cooler room air, preserving that incredible, dense texture we worked so hard for. After that hour, you can gently take the roasting pan out, remove the foil wrapping, and let it sit on a wire rack to come completely to room temperature. Trust me on this one, patience right now saves you a huge headache later when it comes time to slice!
Ingredient Notes and Substitutions for Your New York Cheesecake
You might look at the ingredient list and think, ‘Can I swap this out for what I have on hand?’ For this spectacular **New York Cheesecake**, I have to be honest: most substitutions will compromise that signature texture. You absolutely need full-fat cream cheese; low-fat versions just turn watery when baked. If you happen to be out of sour cream, heavy cream can work in an absolute pinch, but it won’t give you that slight tang we love in the **Best Creamy Cheesecake**.
Also, please stick to graham crackers for the crust. The crisp structure of that buttery base can’t be easily replicated since we pre-bake it. If you check out this great recipe idea here, they also stress the importance of full-fat dairy. It really is worth buying exactly what the recipe calls for!
Tips for Serving and Storing Your Decadent Cream Cheese Cake
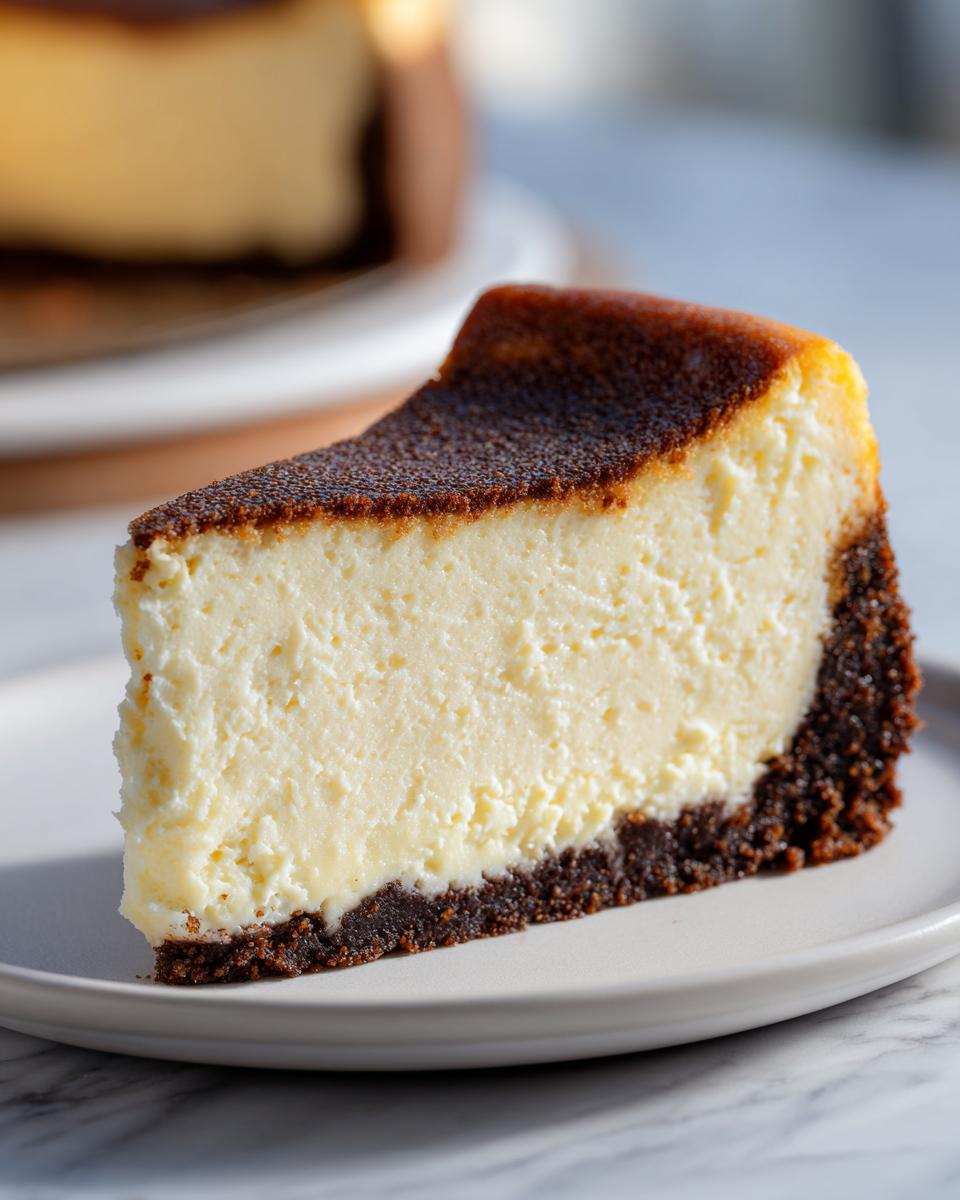
You’ve done the hard part! Your **Decadent Cream Cheese Cake** has survived the slow cool in the oven, and now it needs its beauty rest. This cheesecake is actually never better the day it’s baked. It really needs time for that incredibly rich filling to truly set up and firm into that dense consistency we crave in a great **New York Cheesecake**.
Minimum chilling time is six hours. I know, I know, waiting is torture, but seriously—aim for overnight if you can manage it. Six hours lets the structure solidify. Overnight lets the flavors really deepen and marry together perfectly.
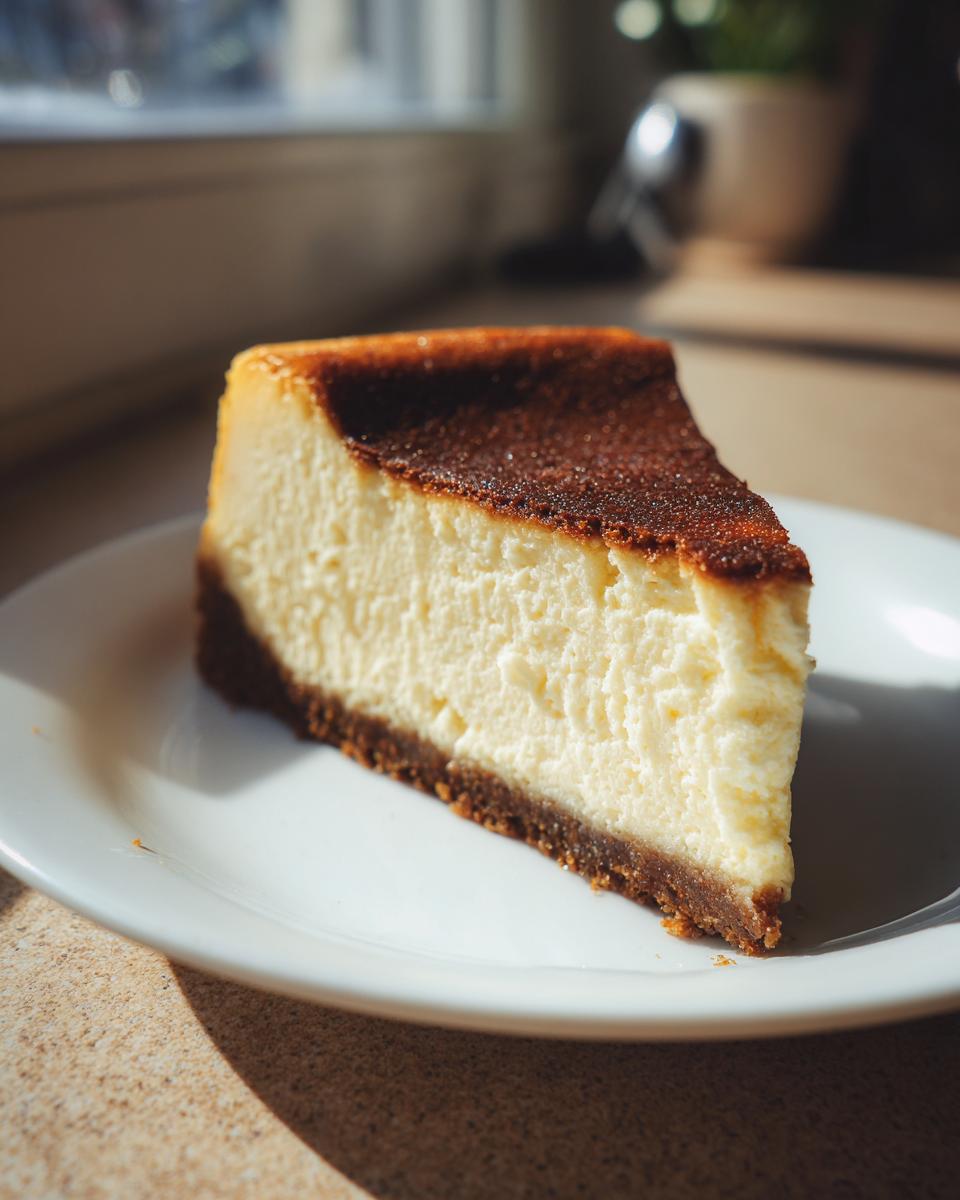
A Clean Slice is an Impressive Slice
When it is finally time to serve this masterpiece, presentation matters! If you try to cut this rich cake cold right out of the fridge, you’ll get smearing and crumbs everywhere, which is a shame after all that work. Here’s my technique for a picture-perfect slice:
- Get a tall, thin knife—like a carving knife.
- Dip the knife into a tall glass of very hot water until the blade is steaming hot.
- Wipe the knife completely dry with a clean towel.
- Make one clean, decisive downward cut into the cheesecake.
- Wipe the knife clean again, reheat it in the hot water, dry it, and repeat for the next slice.
This hot knife trick melts the tiny bit of fat on the surface just enough to give you that smooth, clean edge every single time. It’s the little trick that makes the difference between a good slice and an impressive slice!
Keeping Your Cheesecake Fresh
Once sliced, cover the remaining cheesecake tightly with plastic wrap. Because this recipe is so rich and has a higher fat content, it actually keeps really well in the refrigerator for about four or five days. If you happen to have leftovers (which I doubt!), you can freeze slices wrapped tightly in plastic wrap and then in foil for up to a month. Thaw them overnight in the fridge, and they taste almost exactly like they were freshly made!
Frequently Asked Questions About Making New York Cheesecake
I know you might still have a few lingering worries, especially if this is your first time tackling a towering, creamy bake like this **New York Cheesecake**. It’s totally normal! I’ve gathered the questions I get asked most often when people tackle this recipe for the first time. Don’t stress; we’re covering all the bases so you feel completely confident before sliding this into the oven.
Can I make this Easy New York Dessert without a Springform Pan?
Technically, yes, but I really advise against it for this specific recipe. Because this **Easy New York Dessert** is so rich and relies on that tight seal to keep the water out during the water bath, a regular cake pan is going to be a nightmare. If you absolutely can’t find one, you have two options that carry a risk: try a deep-dish pie plate, but skip the water bath entirely and just bake it low and slow, accepting you might have a slightly less creamy bottom, or you can try lining a regular cake pan with massive amounts of heavy foil, crimping it super high, but I truly can’t guarantee it won’t leak into your oven. The springform pan is your best friend here!
What is the best way to serve a Classic Cheesecake Dessert?
Honestly, this **Classic Cheesecake Dessert** is so perfectly balanced—rich, tangy, and sweet all on its own—that it doesn’t *need* much help. If you are feeling fancy, I love a super thin layer of tart, seedless raspberry jam drizzled across the top *after* chilling. A tiny bit of lemon zest sprinkled over the top of the jam also brings out the brightness in the filling. Avoid heavy chocolate sauces or super sugary fruit toppings, because they just fight with how perfectly balanced this cake already is. If you need to reach out for help with your bake, feel free to contact me across at Cooking Zenith!
Understanding the Estimated Nutrition for This Rich Baked Cheesecake
Okay, let’s talk fueling up! I know when you make something as unbelievably decadent as this **Rich Baked Cheesecake**, you might wonder what exactly you’re sinking into. Since we focused on using full-fat cream cheese and plenty of butter for that amazing texture, it’s definitely a treat deserving of being called a showstopper, not an everyday snack.
Here is a general rundown of the estimated nutritional breakdown per slice, based on the recipe yielding 12 servings. Remember, this is just a snapshot, and ingredients like the exact brand of graham crackers can make a tiny difference. But this gives you a good idea of what you’re enjoying!
As always, please remember this is a rough estimate, not a guarantee from a certified nutritionist! Baking is an art, but nutrition tracking is science, and these numbers should be treated as guidelines only. If you ever want to check my official policies on data, you can always look over my Privacy Policy.
- Serving Size: 1 slice
- Calories: 450
- Sugar: 35g
- Sodium: 300mg
- Fat: 30g
- Saturated Fat: 18g
- Unsaturated Fat: 12g
- Trans Fat: 0.5g
- Carbohydrates: 38g
- Fiber: 1g
- Protein: 9g
- Cholesterol: 110mg
See? Pure indulgence! It’s absolutely what you want when you decide tonight is the night for a truly authentic, magnificent **New York Cheesecake** experience.
Share Your Simple Cheesecake from Scratch Experience
Wow, we made it! You now have the secret to turning out what I confidently call the ultimate **New York Cheesecake**. I hope you look at that beautiful, tall, crack-free creation in your kitchen and feel that huge wave of accomplishment. Seriously, mastering this **Simple Cheesecake from Scratch** is a huge win. It’s a classic that people are often intimidated by, but you followed the steps for the slow cooling and the gentle mixing, and I know it paid off beautifully.
Now, I desperately want to hear about it! Did you serve it plain? Did you risk adding a simple cherry topping? Head down to the comments below and let me know how your first **Homemade New York Style Cheesecake** went. Leaving a rating and telling me what worked for you helps other cooks feel confident enough to try their hand at this dessert too. Don’t forget to check out my Terms of Use before you post, because I love connecting with all of you!
Go show off that kitchen confidence, my friend. You just conquered one of the best baked desserts out there!
PrintThe Ultimate Tall & Creamy New York Cheesecake: A Foolproof Classic Recipe
Make a classic New York Cheesecake with a rich, dense, and creamy texture. This recipe provides step-by-step guidance for a perfect, crack-free result and a traditional graham cracker crust.
- Prep Time: 25 min
- Cook Time: 75 min
- Total Time: 8 hours 40 min
- Yield: 12 servings 1x
- Category: Dessert
- Method: Baking
- Cuisine: American
- Diet: Vegetarian
Ingredients
- 1 1/2 cups graham cracker crumbs
- 1/4 cup granulated sugar (for crust)
- 6 tablespoons unsalted butter, melted
- 4 (8 ounce) packages full-fat cream cheese, softened to room temperature
- 1 1/2 cups granulated sugar (for filling)
- 1/4 cup all-purpose flour
- 1 teaspoon vanilla extract
- 1/4 teaspoon salt
- 4 large eggs, room temperature
- 1/2 cup sour cream, room temperature
Instructions
- Prepare the oven and pan: Preheat your oven to 350°F (175°C). Wrap the outside of a 9-inch springform pan tightly with heavy-duty aluminum foil to prevent water entry.
- Make the crust: Combine graham cracker crumbs, 1/4 cup sugar, and melted butter. Press the mixture firmly and evenly into the bottom of the prepared springform pan. Bake for 10 minutes. Remove and let cool slightly. Reduce oven temperature to 325°F (160°C).
- Prepare the water bath: Place the foil-wrapped springform pan inside a larger roasting pan.
- Mix the filling: In a large bowl, beat the softened cream cheese with an electric mixer on medium speed until completely smooth. Scrape down the sides.
- Add dry ingredients: Gradually beat in the 1 1/2 cups sugar, flour, vanilla extract, and salt until just combined. Do not overmix.
- Incorporate eggs and sour cream: Beat in the eggs one at a time, mixing only until each egg is incorporated. Mix in the sour cream last until the batter is smooth. Overmixing adds air, which causes cracks.
- Pour and bake: Pour the filling over the cooled crust. Place the roasting pan in the oven and carefully pour boiling water into the roasting pan until it reaches halfway up the sides of the springform pan.
- Bake for 60 to 75 minutes. The edges should look set, but the center 2 inches should still jiggle slightly when gently nudged.
- Cool slowly: Turn off the oven. Prop the oven door open slightly (about 2 inches) and let the cheesecake cool inside the oven for 1 hour. This slow cooling prevents cracking.
- Chill: Remove the cheesecake from the water bath and remove the foil. Let it cool completely on a wire rack at room temperature. Once cool, cover loosely and refrigerate for at least 6 hours, preferably overnight, before serving.
Notes
- Use room temperature ingredients for the filling to prevent lumps and ensure a smooth texture.
- Do not skip the water bath; it creates steam for even, gentle baking, which is key to a creamy, crack-free result.
- For the tallest cheesecake, use a 9-inch pan and ensure your cream cheese is fully softened.
Nutrition
- Serving Size: 1 slice
- Calories: 450
- Sugar: 35g
- Sodium: 300mg
- Fat: 30g
- Saturated Fat: 18g
- Unsaturated Fat: 12g
- Trans Fat: 0.5g
- Carbohydrates: 38g
- Fiber: 1g
- Protein: 9g
- Cholesterol: 110mg