
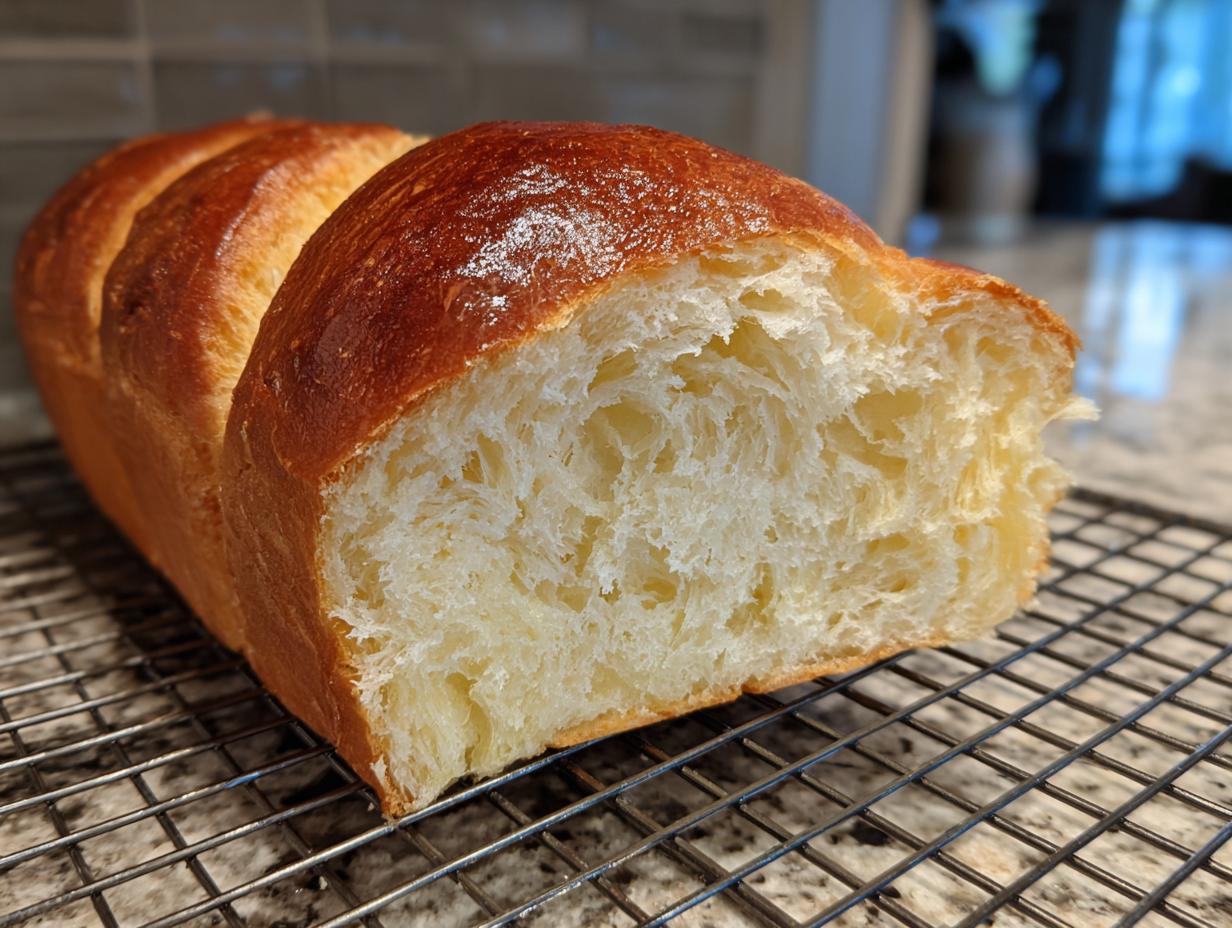
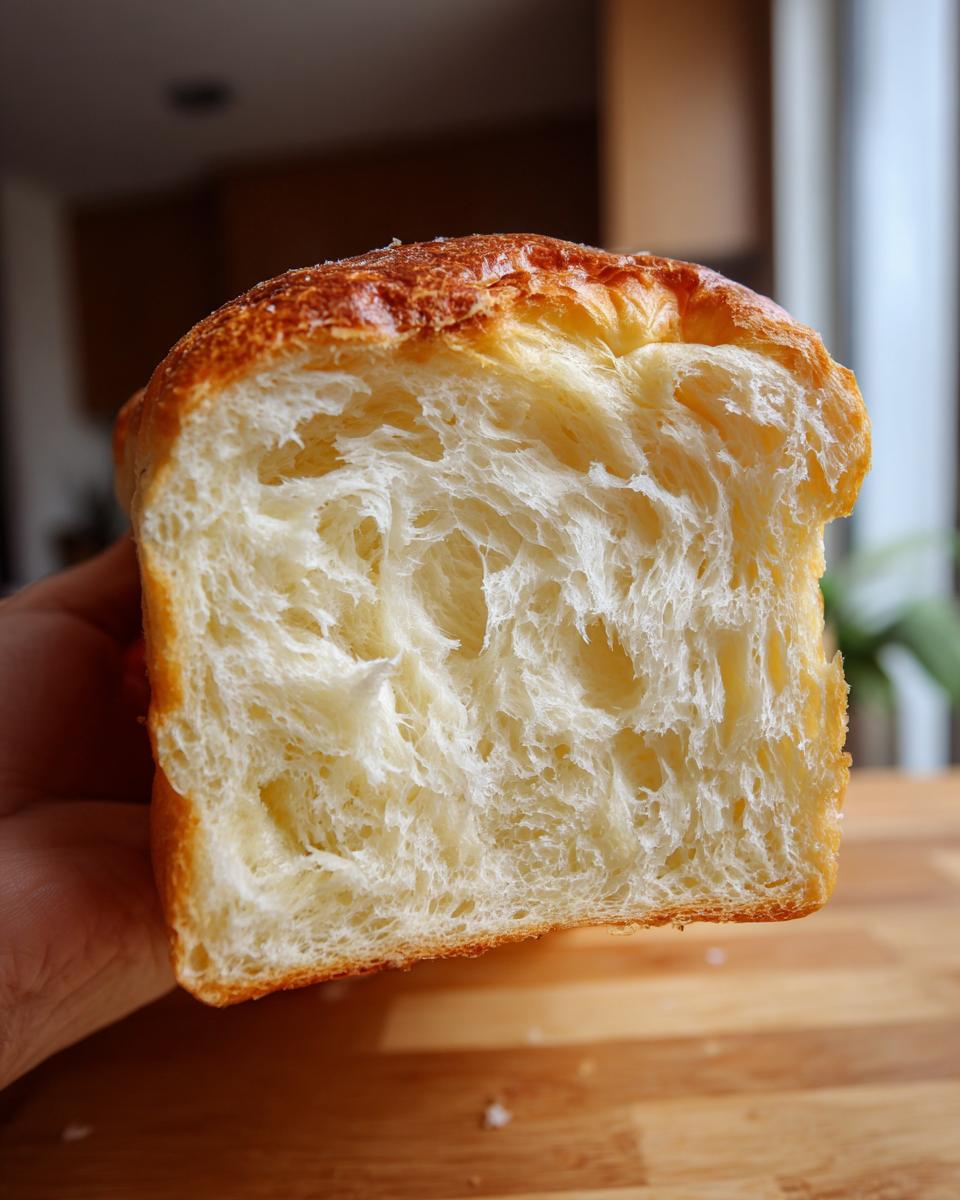
I bet you’ve walked into an Asian bakery, taken one look at that incredible, tall loaf, and thought, “There is no way I can make bread that soft at home.” Well, I’m here to tell you that you absolutely can! Forget those mediocre, slightly tough loaves you’ve made before. Today, we are tackling the Foolproof Japanese Milk Bread (Shokupan) Using the Tangzhong Method, and trust me, this is the game-changer.
The magic, the reason this bread is famous for its cloud-like texture that actually feels like it melts in your mouth, lies entirely in the little starter we call Tangzhong. It sounds fancy, but mixing a tiny bit of flour and liquid together is the simple secret guarantee for ultra-soft results. I spent ages tweaking this, just like Aria Thompson does in her kitchen, determined to take any complexity out of this process. If you’ve been intimidated by making authentic Japanese Milk Bread, stop worrying. This recipe gets it right on the very first try, giving you that perfect, pillowy crumb every single time.
- Why This Japanese Milk Bread Recipe Guarantees Cloud-Like Softness
- Essential Ingredients for Authentic Japanese Milk Bread
- Step-by-Step Tangzhong Bread Tutorial
- Tips for Success When Making Japanese Milk Bread
- Storage & Reheating Instructions for Pillowy Soft Bread
- Serving Suggestions for Your Homemade Loaf Guide
- Frequently Asked Questions About Japanese Milk Bread
- Estimated Nutritional Data for Japanese Milk Bread
- Share Your Cloud Like Bread Creations
Why This Japanese Milk Bread Recipe Guarantees Cloud-Like Softness
I know what you want: bread that feels wrong to squeeze because it’s so light, bread that stays soft long after you’ve pulled it from the oven. That’s absolutely what this recipe delivers, and it’s all thanks to that specialized starter technique we talked about. When you’re deep into baking, like Aria is, you realize that little starting steps make all the difference in the final texture. This method is honestly foolproof, which is exactly what I look for when I’m trying a new bake. You can read more about her dedication to clear, powerful guidance over on the About page!
The Science Behind the Tangzhong Bread Tutorial
So, what sets this loaf apart? It’s the Tangzhong Bread Tutorial part of the process. We’re basically cooking a small amount of the flour and liquid first until it turns into this thick, starchy paste. Don’t let the word ‘science’ scare you! When we add this cooked paste into the main dough, it helps the starch absorb way more water than it normally could. Think of it like a moisture sponge locked inside the dough structure. That extra moisture is why your Japanese Milk Bread stays ultra-soft for days!
Why We Love This Japanese Milk Bread Recipe
Honestly, why wouldn’t we love it? Look at what this technique nets us:
- It gives you that unbelievably ultra-soft texture that rivals any bakery case.
- The bread stays fresh and tender for days, far longer than your average loaf.
- It’s sturdy enough to make the absolute best, non-flimsy sandwiches you’ve ever had.
- It’s reliable! If you follow the steps, you get that signature pillowy soft bread result every time.
Essential Ingredients for Authentic Japanese Milk Bread
Okay, let’s talk about what goes into making this absolutely perfect Japanese Milk Bread Recipe. While the ingredient list looks standard, the *type* of ingredients and how we handle them is where the difference between good bread and *this* bread happens. First and foremost, if you want that tall, structured loaf, you absolutely must use high-protein Bread Flour. It gives the dough the strength it needs to hold all that moisture we’re locking in. Make sure your butter is nicely softened before you start mixing, and that the milk you use for the dough is nice and cold—these temperature details really matter when you’re working with rich dough like this.
Ingredient Notes and Substitutions for Soft Homemade Bread Loaf
When you’re grabbing ingredients, make sure that yeast is Instant Dry Yeast. It’s the most forgiving, especially when you’re learning how to handle this enriched dough. Don’t bother testing it! The butter and milk give us richness, but if you want to go completely over the top with flavor and texture, try swapping out half of that cold milk in the main dough with heavy cream. That fat content makes the resulting Soft Homemade Bread Loaf even more luxurious and tender. Trust me, it only elevates the final product!
Step-by-Step Tangzhong Bread Tutorial
Okay, deep breath! This is where the real magic happens, and I promise you, the work we put in now is what separates your loaf from every other bread you’ve ever baked. Since this Japanese Milk Bread requires serious gluten development—we’re talking 15 minutes or more of kneading once the butter is in—I highly recommend using a stand mixer. It takes the guesswork out of timing and strain! This whole detailed process has been tested time and again in my home kitchen, which is why I know it works for you too; it’s all about translating home cooking intuition, just like Aria talks about on the About page.
Preparing the Tangzhong Starter
First things first: the starter. I whisk together the milk, *small* amounts of flour and sugar for the Tangzhong in a tiny saucepan. You have to cook this gently over low heat, stirring constantly, until it looks like a thick, beautiful paste. It should hit about 160°F or 71°C. Immediately pull it off the heat, slap some plastic wrap directly onto the surface—this keeps a skin from forming, which would ruin the texture—and let it get totally cold. Do not rush this cooling part!
Mixing and Kneading for Fluffy Bread Baking
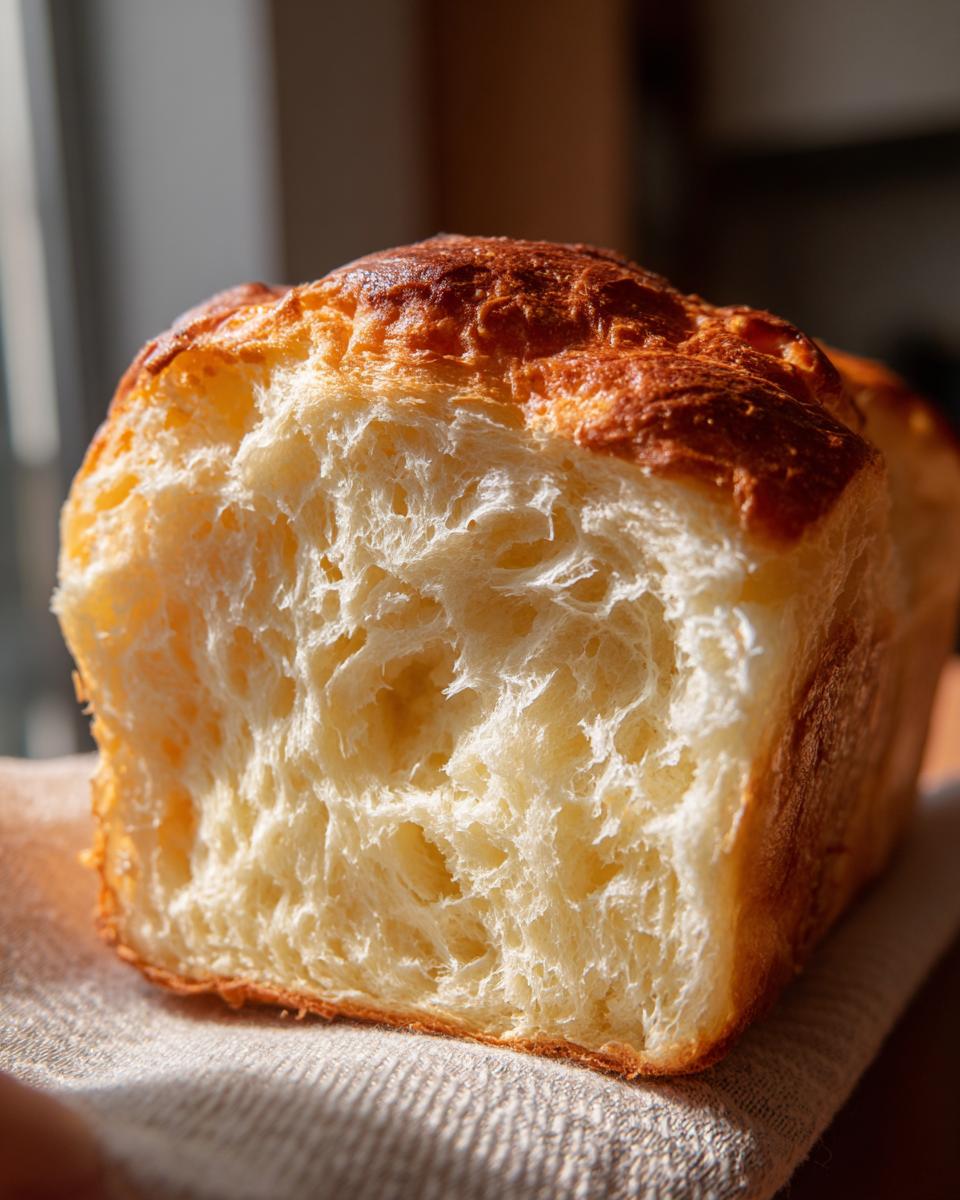
Next, in your mixer bowl, combine all the dry dough ingredients first—flour, sugar, yeast, salt. Then, dump in the cold milk, the egg, and all that glorious, cooled Tangzhong paste. Mix it low until it comes together into a rough blob. Now, increase the speed slightly and let it go for about five minutes. This is where you add the softened butter, a little bit at a time, waiting until it’s incorporated before dropping in the next piece. After the butter is in, knead it hard for another 10 to 15 minutes. You need that dough to be perfectly smooth and elastic. Keep going until it passes what bakers call the windowpane test—when you stretch a tiny piece, it should stretch thin enough to see light through it without tearing. That’s your sign for Fluffy Bread Baking success!
Proofing and Shaping Your Japanese Milk Bread Loaf
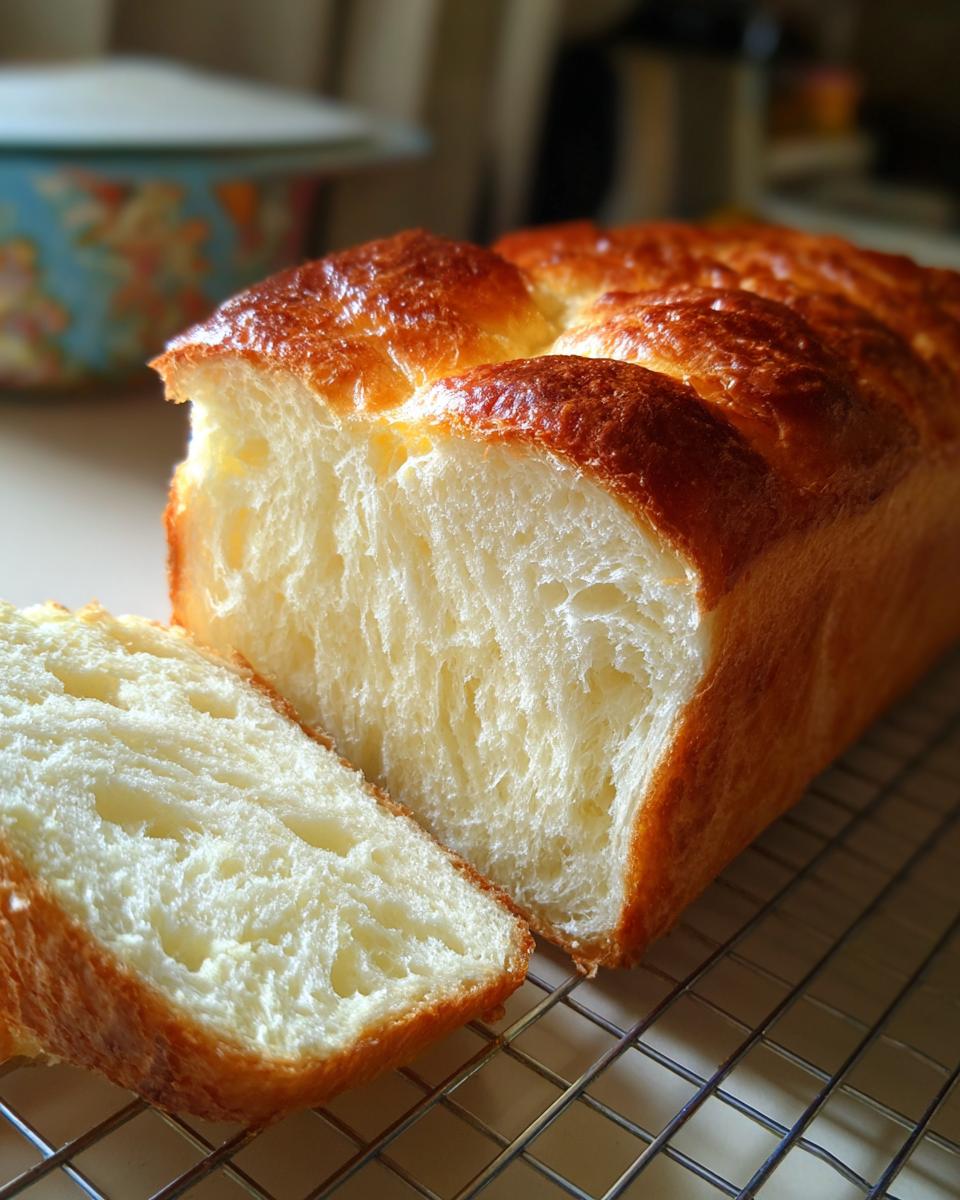
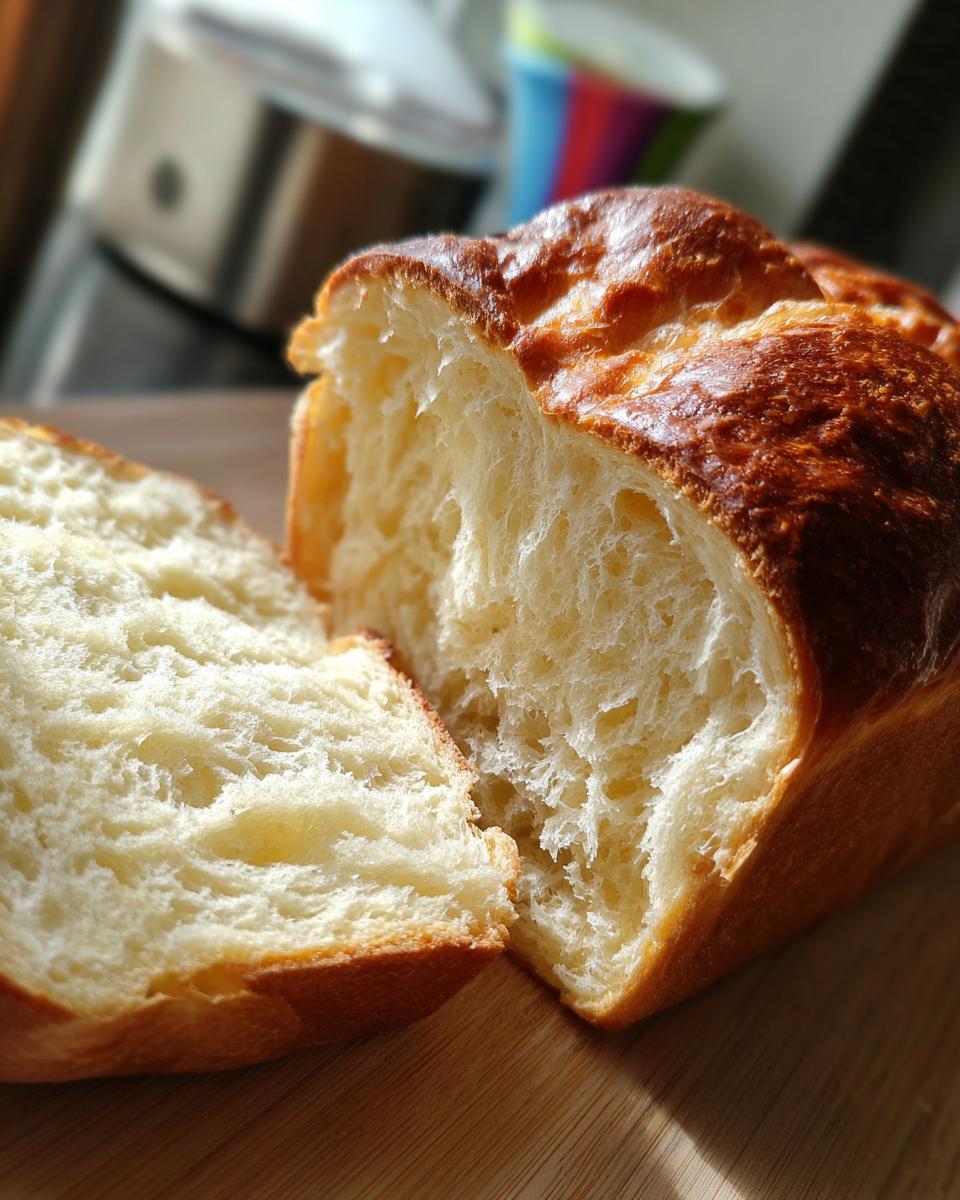
Once the kneading is done, we give it the first rest, or bulk fermentation. Put the dough in an oiled bowl, cover it, and let it double—usually about an hour. When it’s puffy, gently punch it down and divide it into three equal pieces. Roll each piece into a tight little ball and let them chill out for ten minutes. Then, gently roll each ball into a rectangle and roll those rectangles up super tightly into logs. Place the three logs side-by-side in your greased 9×5 pan. The second rise is key: cover it loosely and let it proof until the dough crests about one full inch over the top of the pan rim. Don’t let it go much further, or it might collapse when baking!
Baking and Cooling the Best Milk Bread Recipe
Preheat your oven to 350°F (175°C). Brush the top of the loaf lightly with milk for a nice sheen. You bake it until it’s golden brown, aiming for an internal temperature of 200°F (93°C). Checking the temperature is how you guarantee the Best Milk Bread Recipe bakes all the way through without drying out! As soon I pull it out, I get it out of the hot pan right away and let it cool completely on a rack. If you leave it in the pan too long, the trapped steam will actually make the sides soggy, and we definitely don’t want that!
Tips for Success When Making Japanese Milk Bread
Even though this recipe is designed to be foolproof, enriched doughs like this Japanese Milk Bread can still feel a little wild the first time you handle them. They are sticky, soft, and frankly, a bit intimidating! Don’t let that stop you. Most home baking fails happen because we add too much flour during shaping, which introduces dryness where we want ultimate moisture.
Handling the Very Soft Dough for Shokupan Recipe
When you go to punch down and shape your dough, resist the urge to pile on the flour. Seriously, don’t do it! Because we’ve already locked in so much moisture with the Tangzhong, using flour on your hands or your work surface will immediately make the dough grabby and dry out the surface. Instead, lightly oil your hands or use a tiny bit of neutral oil directly on your work surface. You want the dough to feel unmanageable at first, but trust the process! Everything comes together perfectly when you roll those three pieces into tight logs for your Shokupan Recipe.
Storage & Reheating Instructions for Pillowy Soft Bread
The best part about using that Tangzhong starter is that this Pillowy Soft Bread lasts much, much longer than regular white bread. When it’s completely cool, you need to wrap it up tight! I use plastic wrap first, then slide the whole thing into a zip-top bag and squeeze out all the air. That keeps the moisture right where it belongs. If you manage to have leftovers after three or four days (which is tough, I know!), don’t just toss it. To bring back that fresh-from-the-oven cloud-like texture, give a slice a 15-second blast in the microwave, or better yet, toast it lightly!
Serving Suggestions for Your Homemade Loaf Guide
Now that you have this incredible, tall loaf of Japanese Milk Bread, what do you do with it? Honestly, it’s amazing eaten plain—the texture alone is a treat! But it’s definitely versatile. Slice it thick for the fluffiest toast you can imagine; the slight sweetness really comes alive with a bit of melted butter. Seriously, this makes the ultimate soft bread for sandwiches; those fillings don’t tear through this sturdy, yet tender loaf!
It’s also just the perfect snack bread, amazing with a light drizzle of honey or maybe some fruit jam while it’s still slightly warm. Enjoy figuring out all the ways to use up your Homemade Loaf Guide!
Frequently Asked Questions About Japanese Milk Bread
Can I use the Yudane Method instead of Tangzhong for this Japanese Milk Bread Recipe?
Oh, absolutely! The Yudane Method is just as fantastic for making super soft loaves. It’s very similar to Tangzhong, but instead of gently heating the flour/liquid paste, you pour boiling water over the flour mixture. It gelatinizes the starches a bit differently, and the resulting crumb is usually just as wonderfully soft and moist in your Japanese Milk Bread Recipe!
How long does this Fluffy Bread Baking recipe stay fresh?
Because this recipe uses the Tangzhong trick, it stays beautifully soft—truly fluffy bread baking at its best—for about three to four days if you keep it wrapped up properly on the counter. Honestly, that extra moisture retention is the best part of this whole process. It dries out way slower than standard homemade bread!
What kind of flour is required for Authentic Shokupan?
For Authentic Shokupan, you really need Bread Flour, which has a high protein content. If you use All-Purpose flour, your loaf just won’t have the structure to rise tall and hold onto all that moisture we worked so hard to add in. Bread Flour gives you that necessary elasticity and strength—don’t skip it!
Estimated Nutritional Data for Japanese Milk Bread
Now, I’m not a nutritionist—I’m just a cook who loves feeding people! But when you make this ultimate Japanese Milk Bread, you might be curious about what’s inside. Based on my ingredient list, here are some rough estimates per slice. Remember, these numbers are based on using standard measurements, so your specific milk or butter brand might shift things around a little bit. It’s just a delicious guide!
- Calories: Around 180
- Fat: About 5g
- Carbohydrates: Roughly 28g
- Protein: Approximately 5g
- Sugar: Around 8g
It’s definitely a richer loaf because of the milk and butter we use, but hey, that’s why it’s so wonderfully soft!
Share Your Cloud Like Bread Creations
Well, that’s it! You’ve done it! By following these very specific steps, you’ve moved beyond just baking bread and you’ve actually mastered the Best Milk Bread Recipe out there. I hope you are staring at your perfectly golden, towering loaf right now and feeling incredibly proud of yourself!
I truly want to know how your Cloud Like Bread journey went! Did the Tangzhong work its magic? Did you get that amazing windowpane texture I was talking about? Don’t be shy! Please come back here and leave a rating, preferably five stars if you loved it, and tell me about your experience in the comments below. If you snap a picture of your beautifully soft Japanese Milk Bread, tag me on social media—I absolutely live to see your successful bakes!
If you have any final questions or need a bit of troubleshooting help after you’ve baked it, you can always reach out via the contact page. Happy baking, friends!
PrintFoolproof Japanese Milk Bread (Shokupan) Using the Tangzhong Method
Make ultra-soft, fluffy Japanese Milk Bread (Shokupan) at home using the Tangzhong method for a cloud-like texture that stays fresh longer.
- Prep Time: 45 min
- Cook Time: 35 min
- Total Time: 3 hr 0 min
- Yield: 1 loaf 1x
- Category: Baking
- Method: Baking
- Cuisine: Japanese
- Diet: Vegetarian
Ingredients
- 75g Milk
- 25g Bread Flour (for Tangzhong)
- 10g Granulated Sugar (for Tangzhong)
- 250g Bread Flour (for Dough)
- 30g Granulated Sugar (for Dough)
- 4g Instant Dry Yeast
- 5g Salt
- 120ml Whole Milk (cold)
- 40g Unsalted Butter (softened)
- 1 large Egg (for dough)
Instructions
- Prepare the Tangzhong: Whisk together 75g milk, 25g bread flour, and 10g sugar in a small saucepan. Cook over low heat, stirring constantly, until the mixture thickens to a paste (about 160°F or 71°C). Remove from heat, cover the surface with plastic wrap, and cool completely.
- Mix Dry Ingredients: In the bowl of a stand mixer fitted with the dough hook, combine the remaining 250g bread flour, 30g sugar, yeast, and salt. Mix briefly on low speed.
- Combine Dough: Add the cooled Tangzhong, 120ml cold milk, and the egg to the dry ingredients. Mix on low speed until a shaggy dough forms.
- Knead: Increase the speed to medium-low and knead for 5 minutes. Add the softened butter, piece by piece, ensuring each piece is incorporated before adding the next.
- Continue Kneading: Knead for another 10 to 15 minutes until the dough is smooth, elastic, and passes the windowpane test. The dough will be very soft.
- First Rise (Bulk Fermentation): Place the dough in a lightly oiled bowl, cover, and let it rise in a warm place until doubled in size, about 60 to 90 minutes.
- Shape the Loaf: Gently punch down the dough. Divide it into three equal pieces. Roll each piece into a tight ball. Rest the balls for 10 minutes, covered.
- Final Shaping: Flatten each ball into a rough rectangle. Roll each rectangle tightly into a log shape. Place the three logs side-by-side, seam-side down, into a greased 9×5 inch loaf pan.
- Second Rise (Proofing): Cover the pan loosely and let it proof in a warm place until the dough has nearly doubled and crests about 1 inch above the rim of the pan, about 45 to 75 minutes.
- Bake: Preheat your oven to 350°F (175°C). Brush the top of the dough lightly with milk or an egg wash for color. Bake for 30 to 35 minutes, or until the top is golden brown and the internal temperature reaches 200°F (93°C).
- Cool: Immediately remove the bread from the pan and cool completely on a wire rack before slicing.
Notes
- Using a stand mixer is recommended for the extended kneading time required to develop the gluten structure for this soft loaf.
- For an even richer flavor, substitute half of the cold milk in the dough with heavy cream.
- This bread stays soft for several days when stored tightly wrapped at room temperature.
Nutrition
- Serving Size: 1 slice
- Calories: 180
- Sugar: 8
- Sodium: 150
- Fat: 5
- Saturated Fat: 3
- Unsaturated Fat: 2
- Trans Fat: 0
- Carbohydrates: 28
- Fiber: 1
- Protein: 5
- Cholesterol: 25