
Okay, raise your hand if you’ve ever needed a truly decadent, chocolatey dessert but absolutely refused to turn on the oven. Me too! That’s where the magic of assembly comes in, and honestly, Aria Thompson built Cooking Zenith on this very idea—that amazing flavors don’t need complicated steps. If you’re looking for something simple that tastes amazing, like how we keep things easy with her easy homemade rice pilaf recipe, this chilled cake follows that same philosophy.
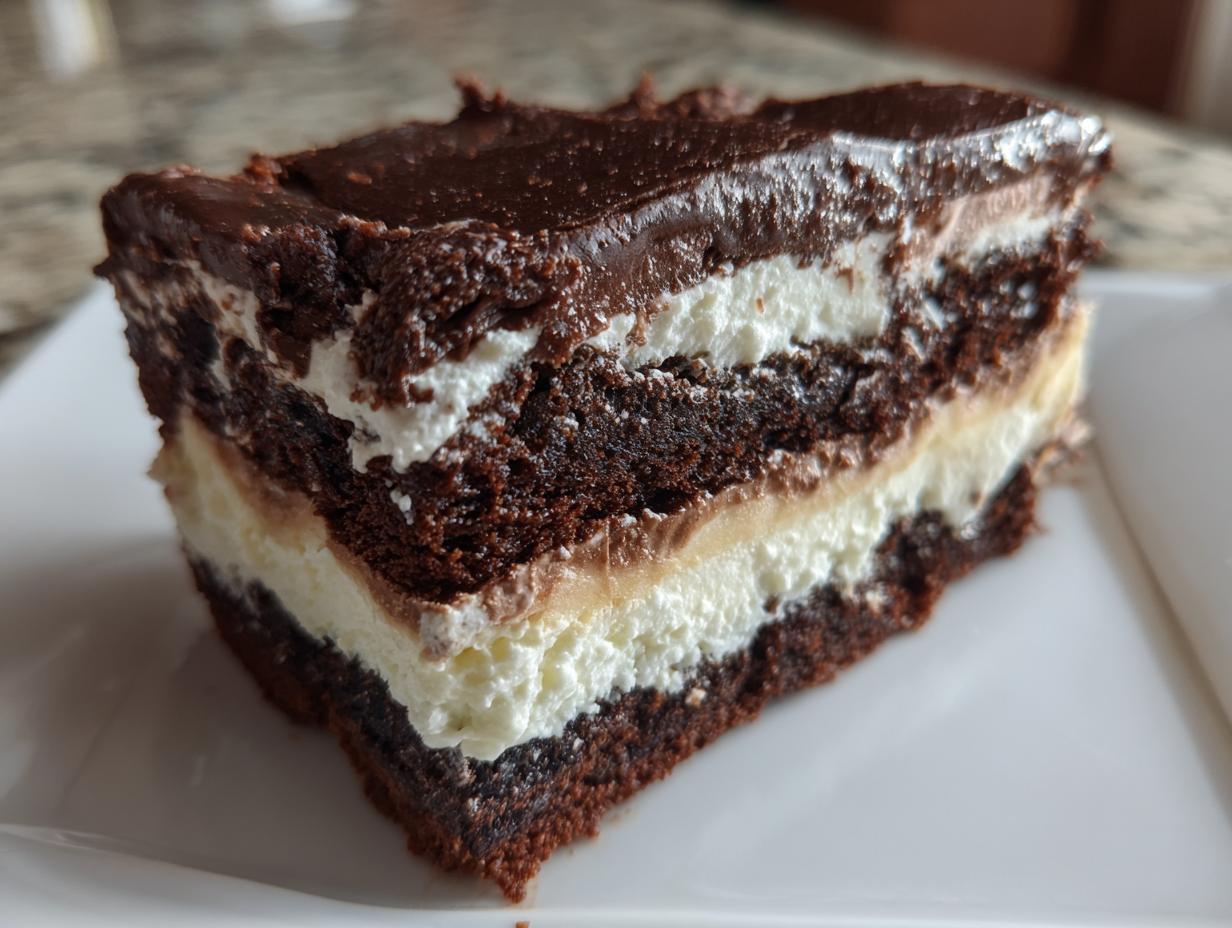
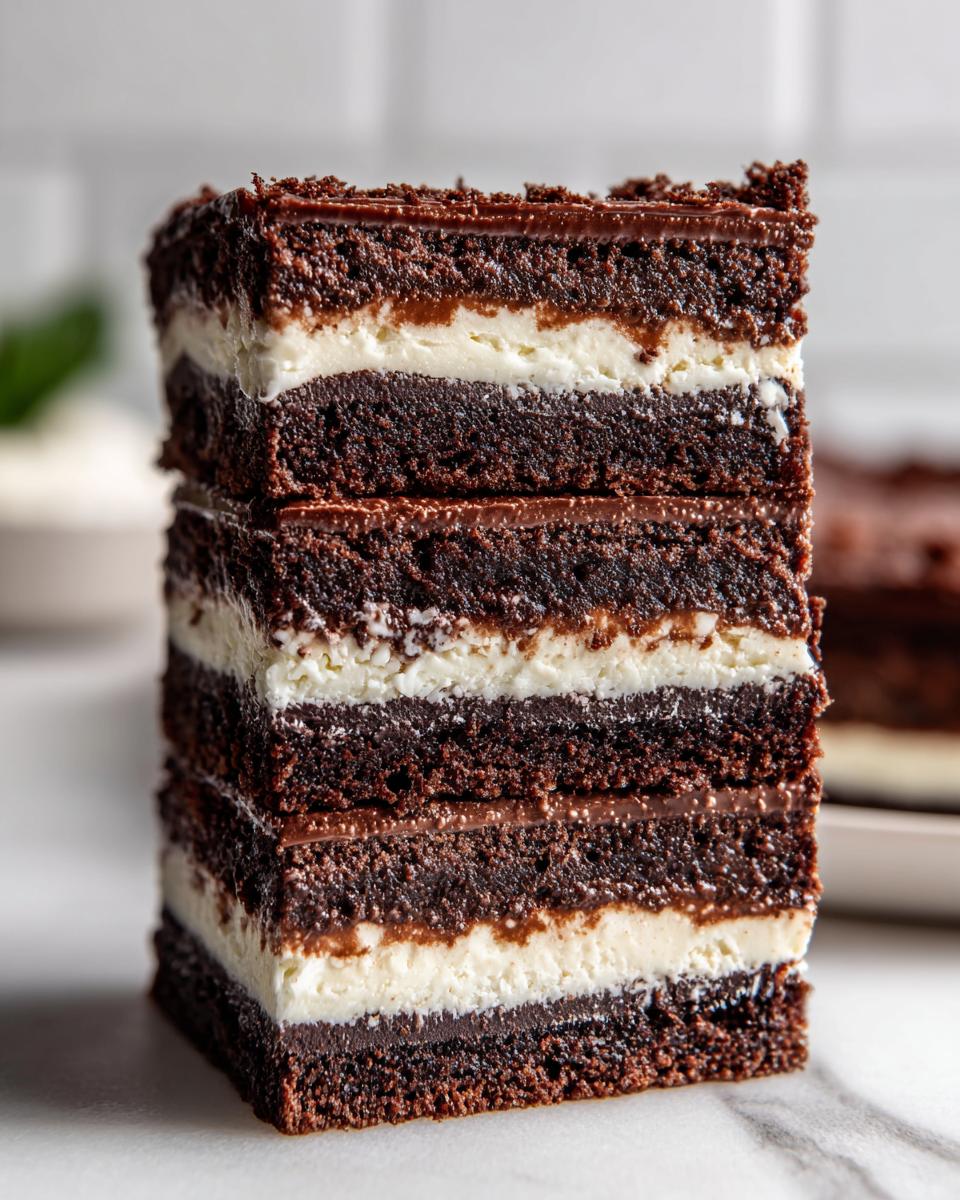
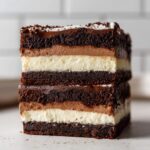
I’m here to share my absolute favorite solution for those moments: the ultimate brownie refrigerator cake. Forget delicate sponges; this is a powerhouse layered dessert. We take fudgy texture, mix it with creamy components, and let the cold do all the heavy lifting. Trust me, using store-bought brownies in this **brownie refrigerator cake** is completely intentional. It keeps the assembly lightning-fast while guaranteeing that rich, satisfying flavor we all crave after a long day. This recipe proves extraordinary indulgence can be wonderfully simple.
- Why This Brownie Refrigerator Cake is Your New Favorite Easy Make Ahead Chocolate Dessert
- Gathering Ingredients for Your Brownie Refrigerator Cake
- Step-by-Step Instructions for the Best Refrigerator Desserts Assembly
- Tips for Success Making Your Fudgy Brownie Dessert
- Variations for This Rich Chocolate Layers Dessert
- Serving Suggestions for Your Crowd Pleasing Chilled Cake
- Storage and Reheating Instructions for the Brownie Refrigerator Cake
- Frequently Asked Questions About Making a Brownie Refrigerator Cake
- Share Your Experience with This Decadent Chilled Chocolate Treat
Why This Brownie Refrigerator Cake is Your New Favorite Easy Make Ahead Chocolate Dessert
When I say easy make ahead chocolate dessert, I mean it! This isn’t just another chocolate recipe; it’s the ultimate secret weapon for when you need something truly impressive but don’t have the time or energy for baking. It’s a perfect no bake brownie cake that pleases absolutely everyone. Seriously, it’s the secret handshake for potlucks because it always goes first. You just layer, chill, and boom—you have a stunning, rich chocolate treat.
I love that this becomes one of those brilliant best refrigerator desserts because the chilling time is crucial. It gives the textures time to meld into something spectacular instead of just being stacked ingredients. If you’ve ever made my easy creamy shrimp enchiladas recipe, you know I prioritize simple assembly, and this cake is no different! It’s just as satisfying as a big scoop of pumpkin fluff easy no-bake dip recipe, but in cake form.
Key Features of Our Layered Brownie Icebox Cake
- It relies on pre-made brownies or simple baked ones—zero fuss in the oven for the main components!
- This is a true dessert that sets in the fridge; the chilling does all the hard work for structure.
- Those creamy layers? They turn into this incredible, unified brownie cream cheese dessert texture once set.
- It’s unbelievably potluck friendly chocolate cake material—it travels wonderfully as long as it stays cool.
Gathering Ingredients for Your Brownie Refrigerator Cake
Alright, let’s talk what you need! The beauty of this chocolate refrigerator dessert is that the cast of characters is short and sweet, relying on pantry staples and (my secret weapon) good quality store-bought brownies. You don’t need to bake a single thing to get started here, except maybe the base brownies if you opt to make them fresh.
When assembling this creamy brownie dessert recipe, everything needs to be ready to go, especially those layers that stack up so beautifully. We are building this structure layer by layer, so make sure your cream cheese is room temperature soft. If you’re looking for other simple assembly treats, you should check out my homemade Twix bites copycat recipe—it’s addictive!
Ingredient Notes and Substitutions for the Creamy Brownie Dessert Recipe
Listen up, this is where we nail the texture. For the base of this brownie refrigerator cake, you absolutely want fudgy brownies. Cakey brownies just don’t hold up when they chill; they get too crumbly when you slice them. Fudgy ones compress perfectly and create that ideal base layer.
When picking up your pudding mix, please grab the instant kind! If you use the cook-and-serve variety, you’ll end up with soup and struggle to get that thick, sliceable structure we need for a proper layered brownie icebox cake. The whipped topping definitely needs to be thawed, but keep it cool while you work so it folds in nicely without deflating.
Here is exactly what you need to have on hand before you start layering:
- One box of that fudgy brownie mix—or a whole box of store-bought fudgy ones if you’re skipping the bake step!
- Eight ounces of cream cheese—remember, softened! This is mandatory for a smooth layer.
- One cup of powdered sugar. Don’t substitute this with granulated—we need that fine texture.
- One teaspoon of vanilla extract for that classic background warmth.
- One cup of cold milk. Seriously, cold milk for the pudding, or it won’t set!
- One small (3.4 ounce) box of instant chocolate pudding mix.
- One eight-ounce tub of frozen whipped topping, thawed out ready to go.
- A little handful of chocolate chips if you want to make it extra pretty on top!
Step-by-Step Instructions for the Best Refrigerator Desserts Assembly
We’re moving into the assembly phase now, and this is the fun part! Since this is a dessert that sets in the fridge and we aren’t turning on the oven for this structure, prep time is all about getting your components ready to layer. First thing’s first: make sure those brownies are completely cool, whether they came from the box or your oven. If you baked them, let them cool on a rack until they are just room temperature or fully chilled. Cooling prevents the layers from melting into each other when we start building our incredible brownie refrigerator cake.
We’ll assemble this in an 8×8 or 9×9 square dish. I always line mine with plastic wrap first, leaving plenty of overhang on the sides. This little trick is game-changing because pulling the entire brownie refrigerator cake out in one piece later is amazing! Don’t skip it!
Preparing the Cream Cheese Base and Pudding Filling
First, tackle that cream cheese layer. Beat your softened cream cheese with the powdered sugar and vanilla until it is ridiculously smooth. I mean, no lumps allowed! Set that gorgeous, sweet mixture aside while you tackle the pudding. In a fresh bowl, whisk your cold milk and that instant chocolate pudding mix together vigorously for about two minutes until it starts thickening up nicely. Let it sit for just five minutes so it firms up even more.
Now for the gentle part! Take half of your thawed whipped topping and fold it *gently* into that thickened pudding. We don’t want to crush all the air out, so use a rubber spatula and fold until roughly combined. This becomes our light and airy chocolate layer!
Assembling Your Brownie Refrigerator Cake Layers
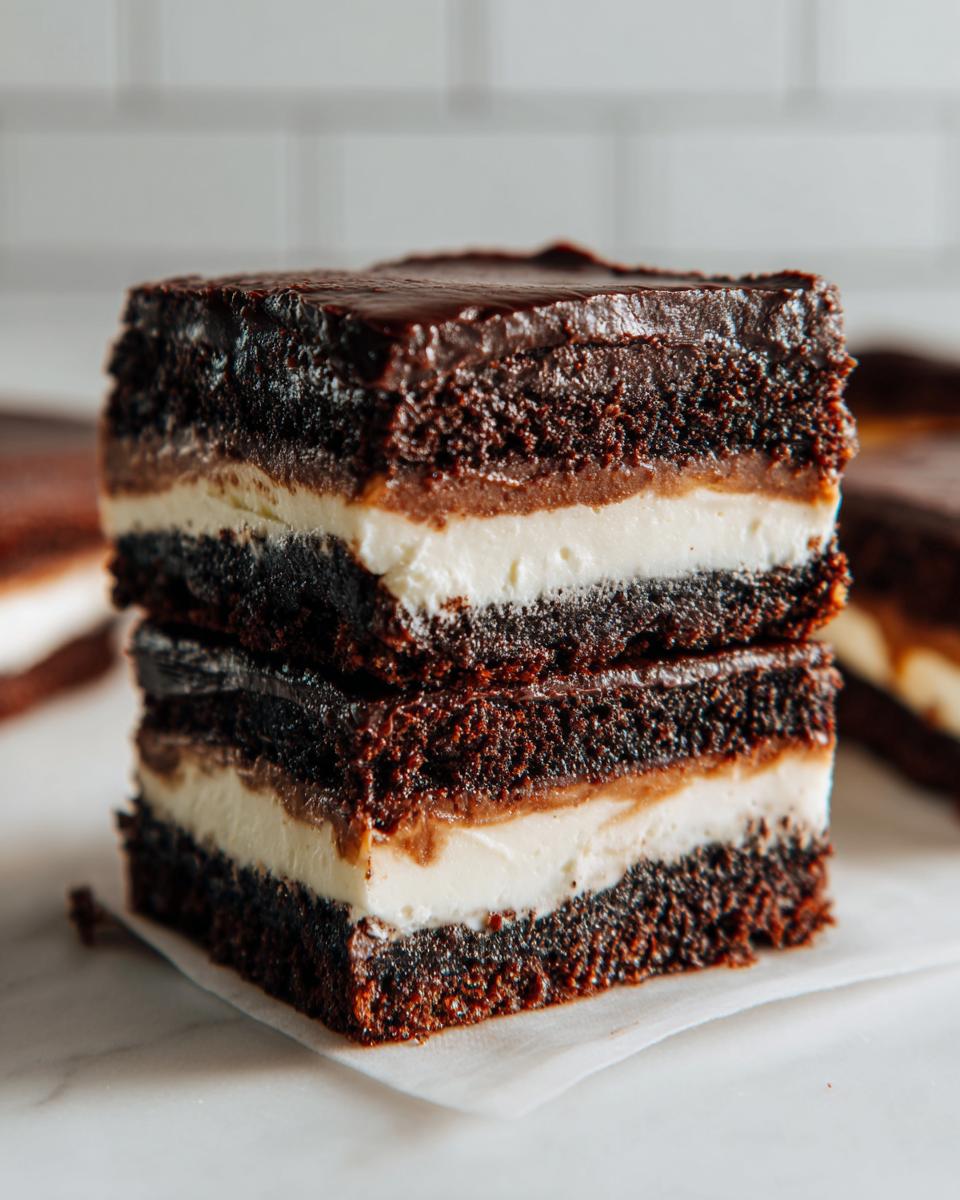
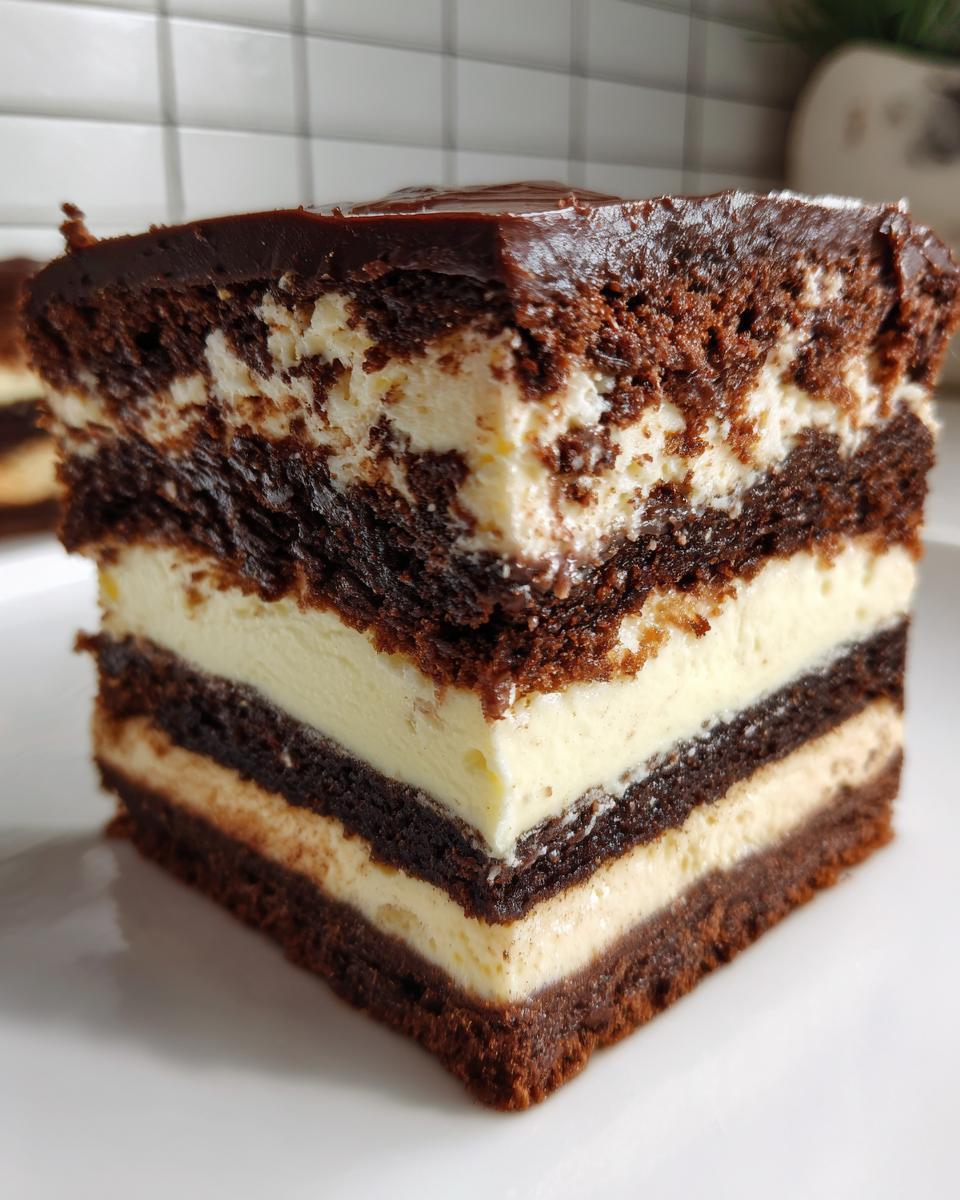
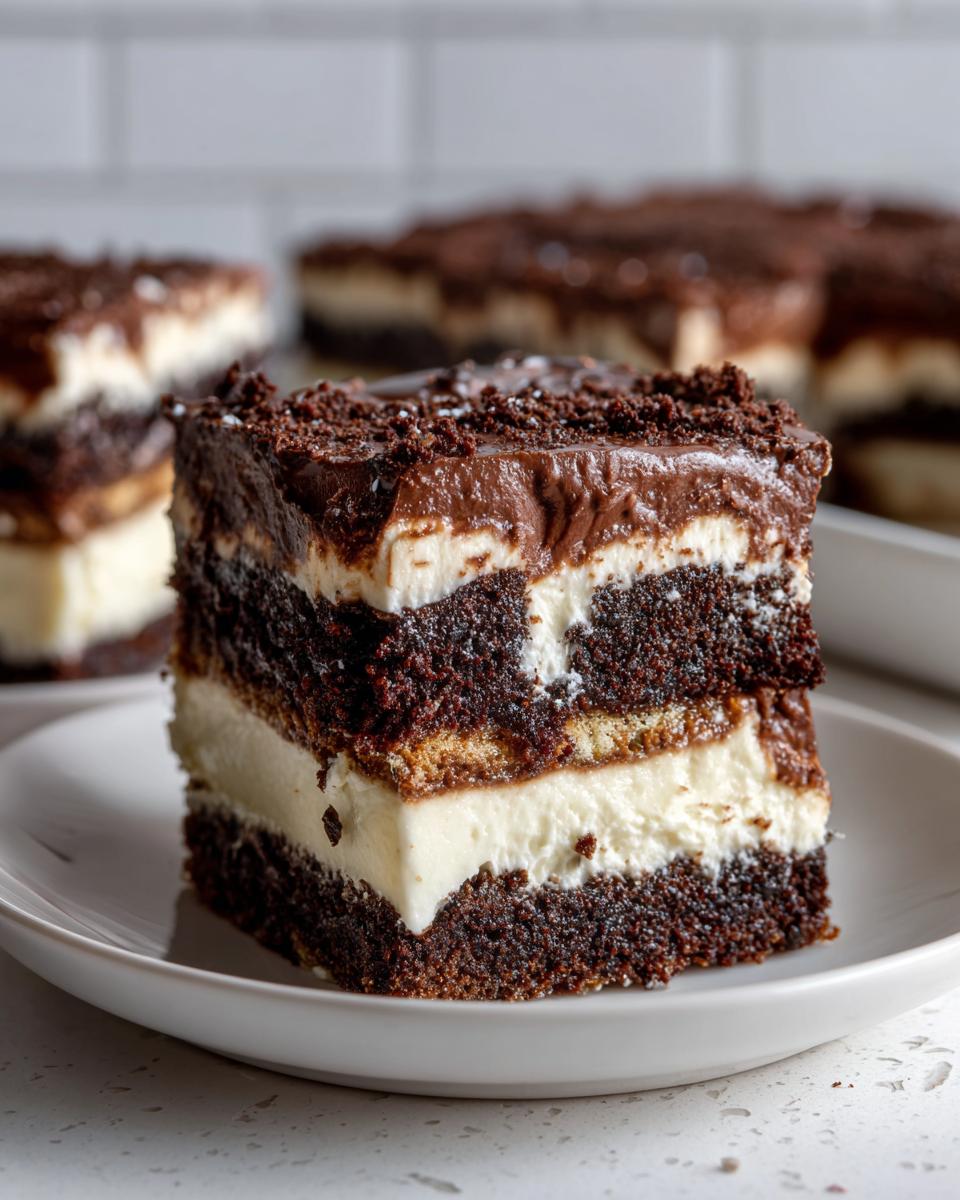
Time to layer! Put half of your cooled brownie pieces down evenly across the plastic-lined dish bottom. Next, smoothly spread out all of that cream cheese mixture right over the brownies. Try to keep it even so your slices look great later. Then, dollop half of your beautiful chocolate pudding mixture on top of the cheese layer.
Repeat the process: add the remaining brownie pieces, then top those with the rest of the chocolate pudding mixture. Finally, spread the *rest* of the thawed whipped topping right over the top as the finishing coat. You’ve built your masterpiece!
The Crucial Chilling Time for This Dessert That Sets in the Fridge
This is the test of patience, but you have to let this pecan pie cheesecake recipe’s cousin chill out! Cover the dish loosely with plastic wrap and pop it into the refrigerator. You need a minimum of six hours, but honestly, for the absolute best structure—where this becomes a true, sliceable brownie refrigerator cake—you must let it chill overnight. Chilling solidifies the cream cheese and pudding, making every layer perfectly distinct and firm. It transforms from a dessert mush into something you can actually cut into neat squares!
Tips for Success Making Your Fudgy Brownie Dessert
You’ve got the layers built, but trust me, the magic of a great brownie refrigerator cake happens *after* it chills. I’ve made enough of these to learn a few little tricks that keep them from collapsing when you make that first cut. It all comes down to temperature management and timing!
First off, if you’re worried about presentation—like, who wants a messy slice for their guests?—you need a hot knife. Before you slice into your perfectly set fudgy brownie dessert, run your sharpest knife under very hot water for about 30 seconds, then dry it completely. Slice once, don’t drag, and then wipe the knife clean before the next cut. Repeat that process for every single piece. It gives you the cleanest edges possible!
Another little tip I learned after ruining an entire early attempt is about the whipped topping. When you fold that last bit of topping onto the very top layer, smooth it out nicely, but resist the urge to press down hard. If you compact that top layer too much, it can squeeze the softer pudding layer beneath it when it chills.
Also, don’t stress if your brownies are slightly sticking to the pan when you lift them out using the plastic wrap overhang. If that happens, just gently press down on the plastic wrap on top of the layer you’re gripping. The pressure helps release the cake from the sides of the dish just enough so you can pull it free cleanly. I learned this method through necessity after trying to wrestle one out clumsily the first time. You can find more foolproof baking wisdom when exploring my best fudgy Oreo brownies recipe, too—same logic applies to structure!
Variations for This Rich Chocolate Layers Dessert
So, you’ve mastered the classic brownie refrigerator cake, and now you’re feeling inventive? I love that energy! While I preach sticking close to tradition, this layered structure is incredibly versatile. You can totally switch things up while keeping that essential creamy, chilled factor that makes this such a great rich chocolate layers dessert.
My absolute favorite tweak is playing with the pudding layer. If you aren’t a huge dark chocolate fan, swap out the instant chocolate pudding mix for the vanilla flavor instead. You still need that creamy set, but the vanilla offers a lighter bridge between the fudgy brownie and the tangy cream cheese. It really makes it feel less heavy, though still totally decadent!
Another fantastic way to elevate this into a more grown-up chocolate refrigerator dessert is by adding coffee. Before you mix the cream cheese layer, dissolve about a teaspoon of instant espresso powder right into the vanilla extract. It doesn’t make it taste like coffee, per se, but it deepens the chocolate flavor dramatically—it just makes the chocolate taste *more* chocolatey, if that makes sense. It’s a tiny addition that turns this into a spectacular simple chocolate indulgence.
If you’re feeling adventurous and want something totally different, you could try making a peanut butter layer instead of the plain cream cheese. Just beat the cream cheese, powdered sugar, and vanilla, and fold in about a half cup of smooth peanut butter. It turns into a peanut butter cup experience tucked inside your cake! While you’re playing with different flavors, don’t forget to check out my German chocolate poke cake recipe if you’re looking for another easy flavor bomb idea!
Remember, the key to keeping this a successful no bake brownie cake is maintaining the contrast between the soft layers and the sturdy, chilled brownies. Don’t overcomplicate the structure, just tweak the flavor profiles!
Serving Suggestions for Your Crowd Pleasing Chilled Cake
Now that you’ve wrestled your beautiful, perfectly set brownie refrigerator cake out of the pan, it’s time for the presentation flourish! Since this is such a rich and decadent chilled treat, you don’t need much to dress it up, but a little something extra can make it feel super special, especially if you’re serving it at a gathering. Think about balancing that intense chocolate flavor with something bright or textural.
My absolute favorite way to serve this is with a sprinkle of fresh color. A scattering of fresh raspberries or sliced strawberries across the top layer of whipped topping looks absolutely stunning against the dark chocolate. The tartness of the berries cuts right through the sweetness of the pudding and cream cheese layers, balancing the whole bite perfectly. It really takes this simple dessert and makes it look like something from a fancy bakery case!
If you prefer to keep the chocolate theme strong, a simple dusting of high-quality unsweetened cocoa powder is fantastic. Use a small sieve to tap it lightly over the top—it gives a dusty, matte contrast to the smooth white topping. Don’t underestimate the power of simplicity here; sometimes, less is more, especially when the layers beneath are already so intense.
Finally, consider what you serve *alongside* it. This is definitely my go-to crowd pleasing chilled cake when I know my guests appreciate deep flavor. It pairs unbelievably well with a cup of strong black coffee or an espresso. If you want a drink pairing that isn’t coffee, try a homemade chocolate milk recipe from scratch, but skip the added sugar—the cake is sweet enough!
Just remember, the presentation is the final step after all that chilling magic. Keep it cold right up until you slice, and I promise everyone will be asking for the recipe for this amazing brownie refrigerator cake!
Storage and Reheating Instructions for the Brownie Refrigerator Cake
This is one of the fantastic things about making a brownie refrigerator cake: it’s built to last! Since this entire wonderful creation—layers of pudding, cream cheese, and creamy topping—needs to stay chilled to maintain its structure, storage is actually super easy. You definitely don’t want to reheat this, trust me! Even if you *could* manage to warm up a slice of this beautiful chocolate refrigerator dessert, the structure would totally melt into goo. We built this to be wonderfully cold and firm, so keep that fridge door closed until serving time!
When it comes to keeping leftovers of your Layered Brownie Icebox Cake fresh, airtight is your best friend. Once you’ve sliced it, cover the remaining portion tightly with plastic wrap. If you used the overhang from the plastic wrap we put in the pan for assembly, just use that to cover the top. Just make sure that covering physically touches the top layer of whipped topping so you don’t get any weird spots developing.
How long does it stay good? I find that for the absolute best texture—where the brownies are still slightly yielding but not mushy—three days is the sweet spot. After day three, the moisture from those pudding layers starts to really penetrate the brownies, and while it’s still safe to eat, you lose some of that delightful textural contrast we worked so hard to build. I’ve stored leftovers for up to five days, but honestly, the texture changes quite a bit.
If you happen to be making this as an easy make ahead chocolate dessert for a party next weekend, you can definitely assemble the whole thing on, say, Thursday night, and it will be perfectly set and ready for Saturday serving. It’s wonderful for meal prepping desserts! Just keep it on the deepest, coldest shelf of your fridge. If you’re interested in other great make-ahead chilling recipes, you might love checking out my thoughts on refrigerator pickles—different food entirely, but same principle: the fridge does the work!
Frequently Asked Questions About Making a Brownie Refrigerator Cake
I know when I first started mastering the brownie refrigerator cake, I had a million little questions buzzing in my head. It’s always the assembly recipes that trip people up because they don’t have the ‘oven tells you when it’s done’ feature! I think I’ve covered all the main things people worry about when building this delicious chocolate refrigerator dessert.
Can I use homemade brownies instead of store-bought for this brownie refrigerator cake?
Oh, absolutely you can! If you prefer making them yourself, go for it. The main thing—and this is key for a sturdy No Bake Brownie Cake—is that homemade brownies absolutely must be completely, totally cooled. Like, maybe even chilled in the fridge for 30 minutes once cooled. You want dense, fudgy texture, not a crumbly mess that dissolves into the cream cheese when you press it down. They work perfectly!
What happens if I do not chill the layered brownie icebox cake long enough?
That’s the million-dollar question! If you try to slice it too soon, it’s going to be a sloppy situation. The pudding and cream cheese layers won’t have fully set, so when you pull the knife through, those beautiful layers you built will slide around instead of holding their shape. The structure of the brownie refrigerator cake depends entirely on that chilling time. If you rush it, you’ll end up with a delicious, messy, spoonable dessert!
Do I have to use both cream cheese and pudding layers?
You don’t *have* to, but honestly, I wouldn’t skip it if you want the best experience of this chilled brownie pudding dessert. The cream cheese adds that signature tang and firmness, while the pudding layers—especially once folded with whipped topping—provide the airy, melt-in-your-mouth component. Combining them gives you that perfect textural balance so it isn’t just one heavy note.
If you had more questions, jump down in the comments and ask away! I use tricks like swapping out the milk for heavy cream sometimes, and you can find out more about my other favorite flavor enhancers when you check out my easy homemade teriyaki sauce guide—similar energy, just savory!
Share Your Experience with This Decadent Chilled Chocolate Treat
Whew! Now you’ve got the blueprint for the ultimate brownie refrigerator cake, and I truly cannot wait for you to try assembling this magnificent dessert that sets in the fridge. This is where the joy of Cooking Zenith really comes alive—when you take the steps and make the creation your own!
I want to hear all about your results! Did you make any little tweaks? Did you try adding coffee to the cream cheese, or did you stick with the classic fudgy structure? Please, please, please leave me a comment right below this section. Tell me how long you chilled yours and if it made those beautiful, clean slices we talked about.
If you whip up this amazing crowd pleasing chilled cake, snap a quick picture and tag us on social media! Seeing your beautifully layered results is honestly the best part of my day. It proves, just like with my super simple easy cheesy pasta bake rigatoni recipe, that incredible food doesn’t have to be difficult.
Don’t stop here with your newfound chilling confidence! If you loved how easy this decadent chilled chocolate treat was, stick around and explore some of our other fantastic easy make ahead chocolate dessert options. We have so many more ways to elevate your everyday cooking!
PrintNo-Bake Fudgy Brownie Refrigerator Cake
You create this rich, layered brownie refrigerator cake using store-bought brownies, cream cheese, and chocolate pudding. This easy make-ahead chocolate dessert sets perfectly in the fridge.
- Prep Time: 25 min
- Cook Time: 0 min
- Total Time: 6 hr 25 min
- Yield: 9 servings 1x
- Category: Dessert
- Method: Chilling/Assembly
- Cuisine: American
- Diet: Vegetarian
Ingredients
- 1 (18.25 ounce) box fudgy brownie mix, prepared and cooled (or 1 box store-bought brownies)
- 8 ounces cream cheese, softened
- 1 cup powdered sugar
- 1 teaspoon vanilla extract
- 1 cup cold milk
- 1 (3.4 ounce) package instant chocolate pudding mix
- 1 (8 ounce) container frozen whipped topping, thawed
- 1/4 cup chocolate chips (optional, for topping)
Instructions
- Prepare the brownies according to the package directions or use your store-bought brownies. Cool them completely, then cut them into uniform squares or break them into rough pieces suitable for layering.
- In a medium bowl, beat the softened cream cheese, powdered sugar, and vanilla extract until the mixture is smooth and creamy. Set this aside.
- In a separate bowl, whisk together the cold milk and the instant chocolate pudding mix for about two minutes until it thickens. Let this mixture stand for five minutes.
- Gently fold half of the thawed whipped topping into the thickened chocolate pudding mixture until just combined.
- To assemble your brownie refrigerator cake, line an 8×8 inch or 9×9 inch square dish with plastic wrap, leaving an overhang for easy removal later.
- Create the first layer by arranging half of the brownie pieces evenly across the bottom of the prepared dish.
- Spread the entire cream cheese mixture evenly over the brownie layer.
- Top the cream cheese layer with half of the chocolate pudding mixture.
- Add the remaining brownie pieces as the next layer.
- Spread the remaining chocolate pudding mixture over the brownies.
- Top the entire cake with the remaining whipped topping.
- Cover the dish and chill the brownie refrigerator cake in the refrigerator for at least 6 hours, or preferably overnight, to allow it to set completely.
- Before serving this decadent chilled chocolate treat, sprinkle the top with chocolate chips if you are using them. Lift the cake out of the dish using the plastic wrap overhang before slicing.
Notes
- If you use store-bought brownies, ensure they are dense and fudgy for the best texture in this layered brownie icebox cake.
- For a richer flavor, you can substitute the milk in the pudding layer with heavy cream or use a chocolate cream cheese layer instead of plain cream cheese.
- This dessert that sets in the fridge travels well; keep it chilled until serving time.
Nutrition
- Serving Size: 1 square
- Calories: 380
- Sugar: 35
- Sodium: 250
- Fat: 20
- Saturated Fat: 11
- Unsaturated Fat: 9
- Trans Fat: 0.5
- Carbohydrates: 48
- Fiber: 2
- Protein: 5
- Cholesterol: 45