
I am so over mushy, sticky rice. Seriously, if I wanted rice that clumped together like paste, I’d just boil it—but who wants that?
And don’t even get me started on those little colored boxes of flavor-packet rice. We can do so much better at home, trust me! That’s why I’m thrilled to share my absolute favorite secret weapon for dinner: a classic, fluffy homemade rice pilaf. This isn’t complicated restaurant stuff, though it tastes like it! As a home cook, my goal is always to give you techniques that are totally foolproof.
This particular method focuses on unlocking the perfect texture through simple steps—we’re toasting the grains first, which is the magic key. Keep reading, because this recipe will completely change how you look at your side dishes. It pairs beautifully with anything, like my honey garlic chicken thighs!
- Why This Homemade Rice Pilaf Recipe is Your New Weeknight Staple
- Gathering Ingredients for Flavorful Rice Pilaf
- The Rice Pilaf Cooking Technique: Achieving Perfect Texture From Scratch
- Tips for Success: Mastering Your Flavorful Rice Pilaf Recipe
- Serving Suggestions for Your Best Rice Pilaf Side Dish
- Storage and Make Ahead Rice Side Instructions
- Frequently Asked Questions About Making Rice Pilaf
- Estimated Nutrition for This Quick Rice Pilaf Recipe
- Share Your Perfect Texture Rice Pilaf Experience
Why This Homemade Rice Pilaf Recipe is Your New Weeknight Staple
We’re taking back our dinner plates from the flavor packet aisle! This recipe is all about delivering maximum payoff with minimum fuss for you busy folks. You get that incredible, savory depth without spending an hour over the stove. It truly transforms what a simple grain side dish can be.

- It’s genuinely fast! You’re looking at a total time of just 35 minutes.
- Say goodbye to sogginess; this is the definition of a Fluffy Rice Pilaf Recipe.
- It’s a much healthier option since we control every speck of salt and fat.
This pilaf is so good, it might steal the show from the main event. If you need more quick ideas for those busy evenings, check out my guide to simple weeknight dinners!
Gathering Ingredients for Flavorful Rice Pilaf
Alright, let’s talk about what you need to grab from the pantry. Making this rice pilaf from scratch is so much better than opening up any boxed mix because you control the quality! Precision matters here, so having everything measured out before you even turn on the heat will make your life so much easier. We aren’t just throwing rice in a pot; we are building layers of flavor starting with the fat.
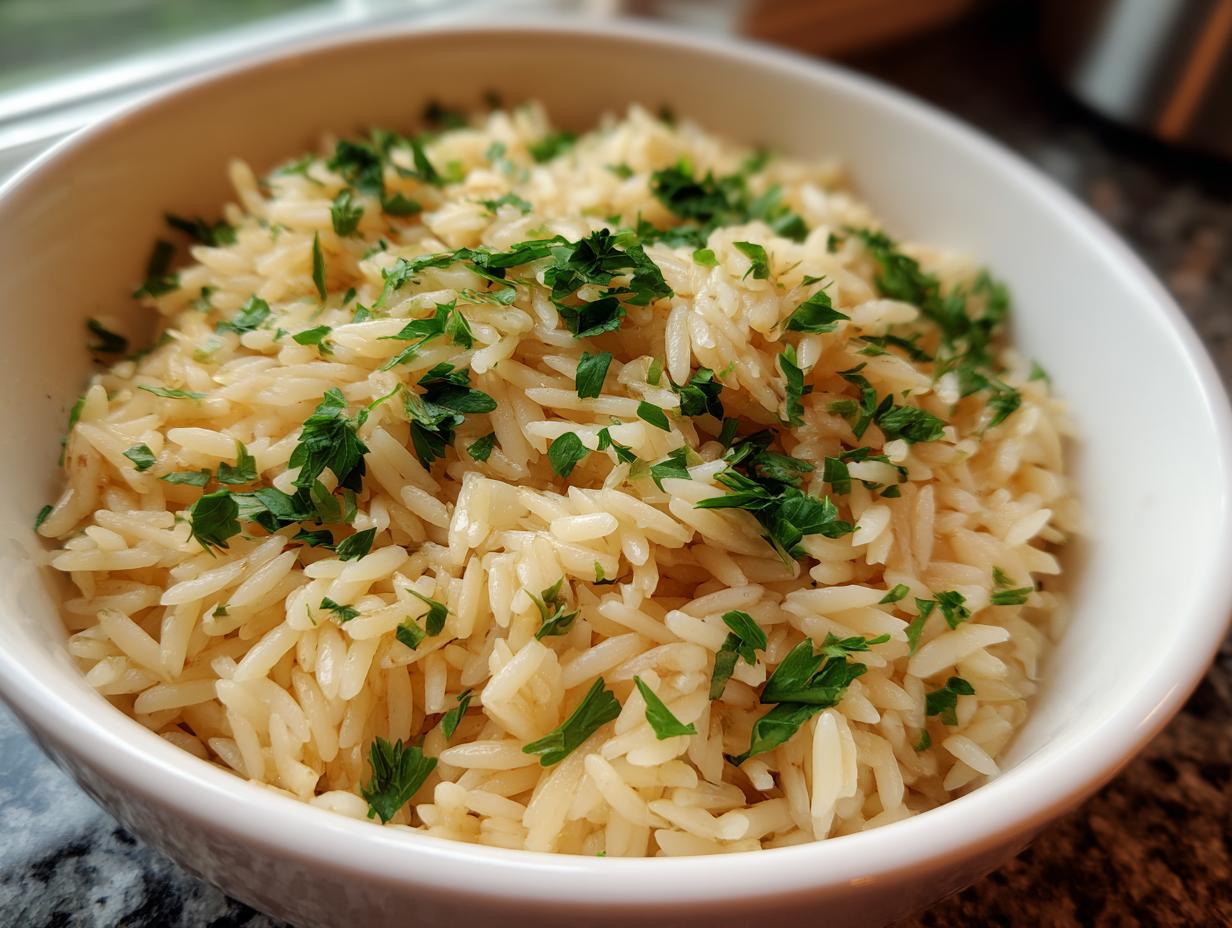
You’ll notice I call for both olive oil and butter. That combination gives us that wonderful, rich, almost Buttery Rice Pilaf taste without burning the butter right away. And see that little bit of orzo pasta? Don’t skip it! Toasting that orzo is one of the real secrets. It adds a wonderful chewiness and incredible structure to the final dish. If you love it in savory dishes, you should absolutely check out my recipe for Creamy Lemon Parmesan Orzo, too!
Ingredient Notes and Substitutions for Perfect Rice Pilaf
I know we all sometimes have to swap things around based on what we have, and that’s fine, but I want to point out a couple of spots where sticking close to the recipe really pays off. For the rice itself, I strongly recommend long-grain Basmati rice. It holds its shape beautifully and gets way fluffier than regular white rice when prepared this way. You want every grain separate, right?
If you’re cooking this for friends who don’t eat meat, no problem! Just swap that chicken broth out for a low-sodium vegetable broth. That keeps it totally suitable for a Vegetarian Pilaf Recipe without sacrificing any of the savory depth we build later on. Remember, the broth choice is your main seasoning source here!
The Rice Pilaf Cooking Technique: Achieving Perfect Texture From Scratch
Okay, this is where the magic happens. Seriously, if you want to move beyond that sad, boxed stuff, you have to understand the Rice Pilaf Cooking Technique, and it all comes down to fat and heat. Forget simmering your rice from the start! We build flavor and structure by toasting everything first. That’s how we nail that restaurant-style, perfectly separate grain texture—the hallmark of a great rice pilaf.
First, we’re going to toast our orzo until it’s beautifully golden brown right in the fat before we even invite the onions and garlic to the party. Then, we add the actual rice grains and sauté them for a couple of minutes until they look translucent around the edges. This coating step seals the outside of the grain so it absorbs only the broth slowly, preventing that mushy interior we dread! If you’re curious about other fluffy grain techniques, check out my guide on Cauliflower Rice!
Step-by-Step Instructions for Easy Homemade Rice Pilaf
Follow these steps exactly, and I promise you’ll have the best Easy Homemade Rice Pilaf you’ve ever made. The timing on the heat is non-negotiable for success!
- Get your oil and butter hot in the saucepan over medium heat.
- Toss in that orzo and keep stirring—you need it golden brown, which usually takes about 3 to 5 minutes. Don’t wander off!
- Add the onion until it softens up, then drop in the garlic for just one quick minute until you can really smell it.
- Now, add the measured rice. Stir it all around so every little grain gets coated in that buttery goodness for about 2 minutes.
- Pour in your broth, salt, and pepper, and bring it up to a good boil.
- The absolute most important part: as soon as it boils, drop the heat to the lowest setting possible, cover it *tightly*, and walk away for exactly 15 minutes. Do not lift the lid!
- When the 15 minutes are up, take the whole pan OFF the heat source, and let it sit there, still covered, for an extra 10 minutes. This resting period is what sets the fluffiness!
- Finally, uncover, fluff gently with a fork, and garnish! See? Total perfection!
Tips for Success: Mastering Your Flavorful Rice Pilaf Recipe
Even with a great roadmap, there are a few little home-cook nods I want to give you so your Flavorful Rice Pilaf Recipe turns out perfectly every single time. It’s all about respecting the heat and the steam, honestly.
First, remember that resting step? That mandatory 10 minutes off the heat is non-negotiable. If you skip it, the steam hasn’t redistributed properly, and you’ll end up with rice that’s a bit denser than you want. Patience truly pays off here!
Second tip: When you add the broth and bring it up to a boil, make sure your cover is absolutely tight-fitting. You want to trap every speck of steam inside to cook those grains evenly. If steam escapes during that 15-minute simmer, the cooking time becomes totally guesswork. It’s why I love using my heavy Dutch oven lid here!
Also, only fluff gently with a fork at the very end. If you use a spoon and stir too aggressively, you’ll break those beautiful, separate grains we worked so hard to toast, and suddenly you’re back to sticky rice territory. We want fluffy, not fussed-over!
This savory base goes wonderfully with almost anything, from simple roasted veggies to something richer like my Easy Chicken Alfredo Pasta. Give these little pointers a try, and make sure you tell me how it goes!
Serving Suggestions for Your Best Rice Pilaf Side Dish
Now that you have the fluffiest, most flavorful rice pilaf imaginable, the next logical step is deciding what delicious main course you’re going to serve it with! This side dish is so versatile, it feels like cheating. It really elevates any weeknight meal without needing any special ingredients from you.
Seriously, this savory grain dish is designed to play supporting roles perfectly. It holds up beautifully next to saucier main dishes because the grains stay separate. This means your sauce or glaze won’t just turn your rice into a soupy mess. It soaks up flavor without losing its own wonderful texture!
If you’re making one of my favorite, effortless dinners, like roasted chicken or pork tenderloin, this is the essential accompaniment. It’s honestly the Best Rice Pilaf Side Dish for dishes that have a little bit of jus or pan sauce. The rice soaks it right up!
I developed this recipe thinking specifically about pairing it with poultry. If you’re looking for a great way to prepare the bird itself, you have to check out my steps for the Spatchcock Chicken Recipe Tutorial—the crust on that bird alongside this buttery rice? Forget about it!
It’s hearty enough for a big, comforting meal of slow-cooked pork chops, yet delicate enough that it doesn’t overshadow lighter fare like grilled fish or shrimp scampi. For those times you need a main dish that’s ready fast, remember that this Rice Pilaf for Chicken pairs just as well with a quick pan-sear as it does with a slow oven roast. You really can’t go wrong whatever you choose!
Storage and Make Ahead Rice Side Instructions
So, you made too much, which is the best kind of problem to have, right? Since this recipe is so good, you’ll absolutely want some leftovers! If you are planning way ahead, this makes a fantastic Make Ahead Rice Side.
When you have leftovers, the most important thing is cooling them down fast. Don’t just leave the dish on the counter. Once it’s completely cool, keep that rice pilaf stored in an airtight container in the fridge. It’s great for about three to four days.
When it’s time to reheat, don’t blast it in the microwave dry! Add just a little tablespoon of water or broth per cup of rice before warming it up gently. That steam gets the texture back to being light and fluffy. Trust me, it tastes just as good the next day!
Frequently Asked Questions About Making Rice Pilaf
I always get questions about this pilaf because once you master the technique, you want to know all the little nuances! Home cooking is all about troubleshooting, so here are the things you guys ask me most often about getting that perfect batch of rice pilaf.
Why is my rice pilaf mushy, even though I followed the steps?
Ugh, that’s the worst! Ninety-nine percent of the time, mushy rice comes down to one thing: steam escaping during the cooking phase. If you lift the lid during those critical 15 minutes, the temperature drops, and the rice starts steaming instead of properly absorbing. Also, make sure your heat is on the absolute lowest setting before covering it. If it’s simmering too hard under the lid, you’re essentially boiling it, and that leads straight to sogginess. You want that firm, separate grain texture, which requires low, slow, trapped heat!
Can I skip toasting the orzo pasta? Is it essential for the Perfect Texture Rice Pilaf?
You technically *can* skip it, but why would you want to? If you’re aiming for that truly superior, savory side dish that tastes like it came from a great Mediterranean spot, don’t skip this step! Toasting the orzo along with the rice grains coats them in fat. This seals the exterior, which is a huge part of the Rice Pilaf Cooking Technique. It stops the outside from breaking down too fast in the liquid, which is exactly what causes that sticky, mushy texture we talked about above. That little bit of golden orzo adds chewiness and depth; it’s worth those extra three minutes, I promise!
What is the best type of rice for a Fluffy Rice Pilaf Recipe?
I’m really particular about this one! For the best results, use long-grain white rice, and I specifically recommend Basmati rice. Basmati is naturally long and slender, and its starch content releases differently than, say, Arborio rice (which you use for risotto, of course!). Basmati resists clumping beautifully, which is key for achieving that gorgeous, airy fluff we are aiming for in this versatile grain side dish. If you use instant rice, you’ll just end up with a mess, so stick to Basmati or a high-quality converted long-grain rice.
How can I turn this into a Vegetarian Pilaf Recipe if I’m out of chicken broth?
This is super easy and something I do all the time! The broth is where most of the savory flavor comes from, so if you swap to vegetable broth, you need to make sure that vegetable broth is really flavorful itself. If yours tastes weak, try simmering it for 10 minutes beforehand with a bay leaf and an extra shallot to deepen the flavor before you use it in the pilaf steps. If you’re looking for more quick, meat-free meals, take a peek at my quick healthy lunch ideas!
Can I make this ahead of time for meal prep?
Absolutely! This is an excellent Make Ahead Rice Side option. Just follow all the steps right up until you fluff it with the fork. Once it’s cooked and then rested off the heat, spread the rice out thinly on a baking sheet to cool quickly. Once it’s totally cool, you can put it into an airtight container. When reheating, just add a splash of water or broth and cover it tightly to steam it back to tenderness. It’s perfect for grabbing for lunch all week!
Estimated Nutrition for This Quick Rice Pilaf Recipe
I always like to give you a general idea of what you’re digging into when you make one of my recipes! Transparency is huge for me—you need to know what you’re putting on the table, especially when you’re choosing healthier alternatives like this homemade version over the boxed mixes.
Keep in mind these are estimates for this Quick Rice Pilaf Recipe. I’m calculating based on the ingredients listed, using standard low-sodium chicken broth and one tablespoon of butter. If you swap to all olive oil, or use richer stock, those numbers will shift slightly, so take this as a fantastic guideline!
- Serving Size: About 3/4 cup cooked
- Calories: Roughly 320 per serving
- Fat: Around 6g total fat
- Protein: About 7g
- Carbohydrates: 58g
- Sodium: Aiming for 350mg (this depends heavily on your broth choice!)
It’s really satisfying to see how balanced this side dish is. Low in sugar, decent protein, and all that complex carb energy from the rice and orzo. It’s proof that comfort food can absolutely be wholesome food!
Share Your Perfect Texture Rice Pilaf Experience
I’ve given you all my secrets—the toasting of the orzo, the precise simmering time, and the mandatory resting period that guarantees you finally achieve that magnificent, fluffy finish. Now that you’ve whipped up a batch of this stellar rice pilaf, I really want to hear how it went in your kitchen!
Did you notice the huge difference the toasting made? Tell me about the smell while the onion and garlic were softening—that’s the best part for me. Did you pair it with chicken, or maybe try it alongside some baked fish? Let me know what protein you chose to complement your perfect grain side dish!
If this recipe finally solved the mushy rice problem for you, please, tell me about it in the comments below! Leaving a rating helps other home cooks build their confidence, and honestly, hearing your success stories fuels everything I do here at Cooking Zenith.
If you had any little tweaks that worked brilliantly for your stove, or if you want to tell me how you customized the aromatics, please share it all! Use the contact form if you have a specific question about the technique, but for general praise (or results!), the comment section is where we connect. Happy cooking!
PrintThe Secret to Fluffy Homemade Rice Pilaf (Healthy Alternative)

Make restaurant-style, fluffy rice pilaf from scratch. This easy homemade recipe uses a simple toasting technique to achieve perfect texture, making it a healthier, flavorful side dish for chicken, pork, or seafood.
- Prep Time: 10 min
- Cook Time: 25 min
- Total Time: 35 min
- Yield: 4 servings 1x
- Category: Side Dish
- Method: Stovetop
- Cuisine: American
- Diet: Vegetarian
Ingredients
- 1 tablespoon olive oil
- 1 tablespoon butter
- 1/2 cup orzo pasta
- 1 small yellow onion, finely chopped
- 2 cloves garlic, minced
- 1 1/2 cups long-grain white rice (Basmati recommended)
- 2 1/4 cups low-sodium chicken broth (or vegetable broth for vegetarian)
- 1/2 teaspoon salt
- 1/4 teaspoon black pepper
- 2 tablespoons fresh parsley, chopped (for garnish)
Instructions
- Heat the olive oil and butter in a medium saucepan over medium heat.
- Add the orzo to the pan and cook, stirring constantly, until it turns golden brown, about 3 to 5 minutes. This toasting step is key for flavor.
- Add the chopped onion to the pan and cook until softened, about 4 minutes.
- Add the minced garlic and cook for 1 minute until fragrant. Do not let the garlic burn.
- Add the long-grain rice to the pan. Stir well to coat the grains with the fat and toast them for 2 minutes.
- Pour in the chicken broth, salt, and pepper. Bring the mixture to a boil.
- Once boiling, immediately reduce the heat to the lowest setting, cover the saucepan tightly with a lid, and simmer for 15 minutes without lifting the lid.
- Remove the pan from the heat and let it stand, covered, for an additional 10 minutes. This resting period creates the fluffy texture.
- Remove the lid, fluff the rice gently with a fork, and stir in the fresh parsley before serving.
Notes
- For a vegetarian pilaf, substitute the chicken broth with vegetable broth.
- To make this a vegetarian pilaf, use only vegetable broth and butter or oil.
- If you prefer a richer flavor, use homemade chicken stock instead of store-bought broth.
- This recipe works well as a make ahead rice side dish; cool completely before storing.
Nutrition
- Serving Size: 3/4 cup cooked
- Calories: 320
- Sugar: 0.5g
- Sodium: 350mg
- Fat: 6g
- Saturated Fat: 2g
- Unsaturated Fat: 4g
- Trans Fat: 0g
- Carbohydrates: 58g
- Fiber: 1.5g
- Protein: 7g
- Cholesterol: 5mg