
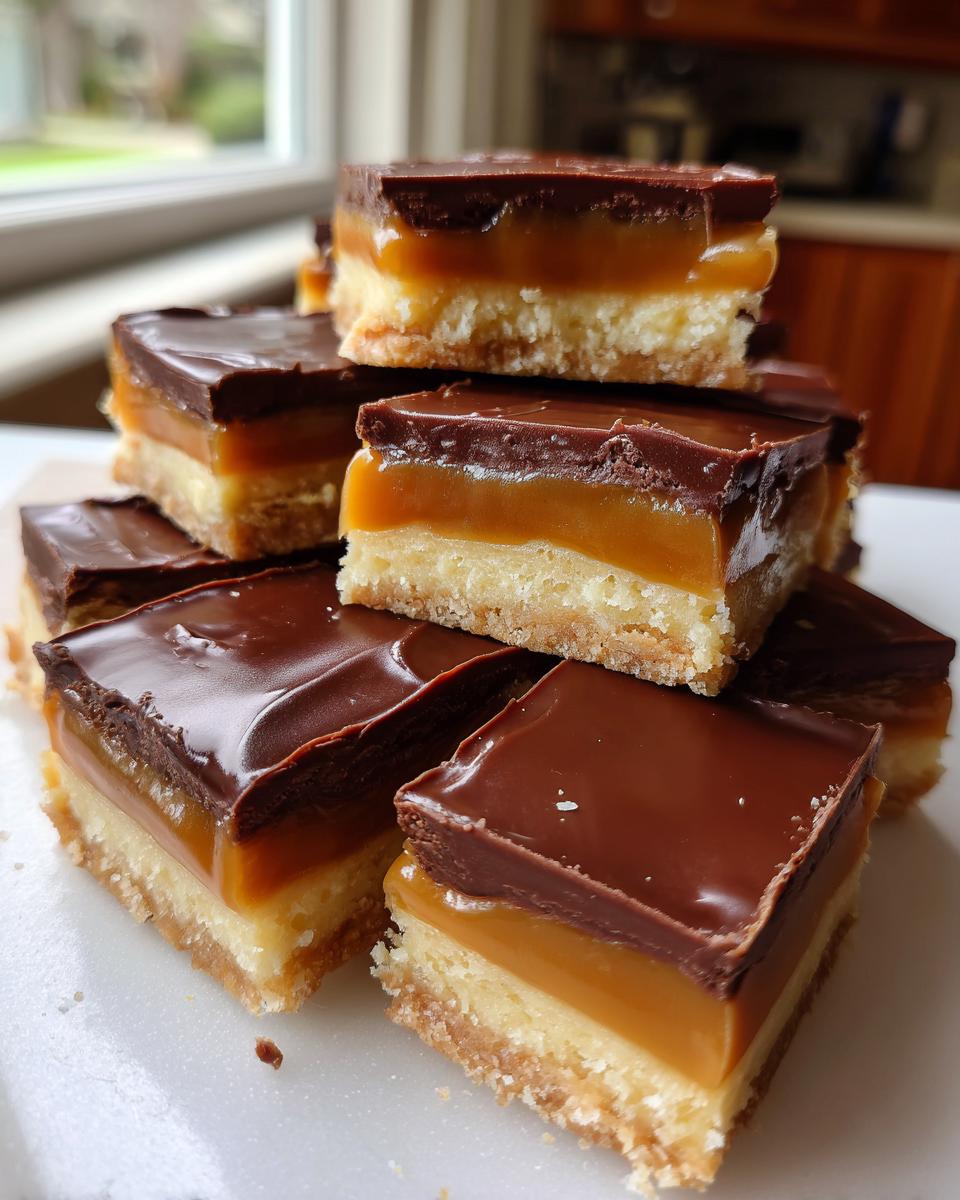
Oh, I know that feeling! That late-night craving hits, and what you really want is that perfect snap of chocolate followed by that soft, gooey caramel sandwiching a crisp shortbread base. You know the one—the classic Twix bar. Store-bought is fine in a pinch, but honestly, nothing beats recreating that magic right in your own kitchen. I’m Aria, and I’ve spent ages perfecting this layered creation. Forget those intimidating store-bought versions; my goal here is to show you how to make incredible, bite-sized homemade Twix treats that nail that texture and flavor. You don’t need to be a professional pastry chef, trust me. If you can press dough into a pan, you can master this!
- Why You Will Love These Homemade Twix Bites
- Gathering Ingredients for Your Twix Recipe
- Mastering the Layers: How to Make Twix
- Tips for the Best Copycat Dessert Recipes
- Storage & Reheating Instructions for Homemade Twix
- Making Twix Bites for Holiday Candy Baking Ideas
- Ingredient Notes and Substitutions for Your Twix Recipe
- Frequently Asked Questions About Copycat Candy Bar Recipes
- Share Your Homemade Twix Creations
Why You Will Love These Homemade Twix Bites
If you’re looking for the best homemade candy bar recipes, stop right here. These bites are truly special. I promise you’ll be hooked after the first taste!
- They taste unbelievably close to the original candy bar—a perfect copycat dessert recipe!
- We are working with that amazing Easy Caramel Chocolate Shortbread combo every single time.
- Baking the shortbread base means you get that perfect, light snap of crumb that store-bought can’t match.
- We turn them into bite-sized candy desserts, which means they are perfect for sharing (or hiding away for yourself!).
If you want to explore making caramel from scratch, check out my recipe for easy homemade salted caramel, but these recipes use simple soft candies for ease!
Gathering Ingredients for Your Twix Recipe
Okay, deep breath! Gathering what you need is half the battle won. This isn’t some massive shopping trip, but precision matters here, especially with baking. We want that perfect texture, remember? I’m breaking down everything into three simple groups so you can see exactly what goes into those beautiful layers. Make sure your butter for the base is truly softened—we don’t want any lumps in our shortbread!
For the Buttery Shortbread Base Treats
This is the foundation of our Buttery Shortbread Base Treats. It needs to be perfectly mixed to get that crumbly dough consistency.
- 1 cup all-purpose flour
- 1/2 cup (1 stick) unsalted butter, softened
- 1/4 cup granulated sugar
- 1/2 teaspoon vanilla extract
For the Gooey Caramel Layer
The caramel layer is where we get super gooey! Expert Tip: Make sure you are using soft caramel candies, the kind you unwrap, not the hard squares. They melt down so much better for an easy layer.
- 1 cup soft caramel candies, unwrapped
- 2 tablespoons heavy cream
For the Rich Chocolate Covered Snacks Coating
This topping finishes off those perfect Rich Chocolate Covered Snacks. I always add coconut oil because it helps thin the chocolate just enough so that when it sets, it results in a super shiny, crisp snap that isn’t too thick on the bite.
- 1 1/2 cups semi-sweet chocolate chips
- 1 tablespoon coconut oil
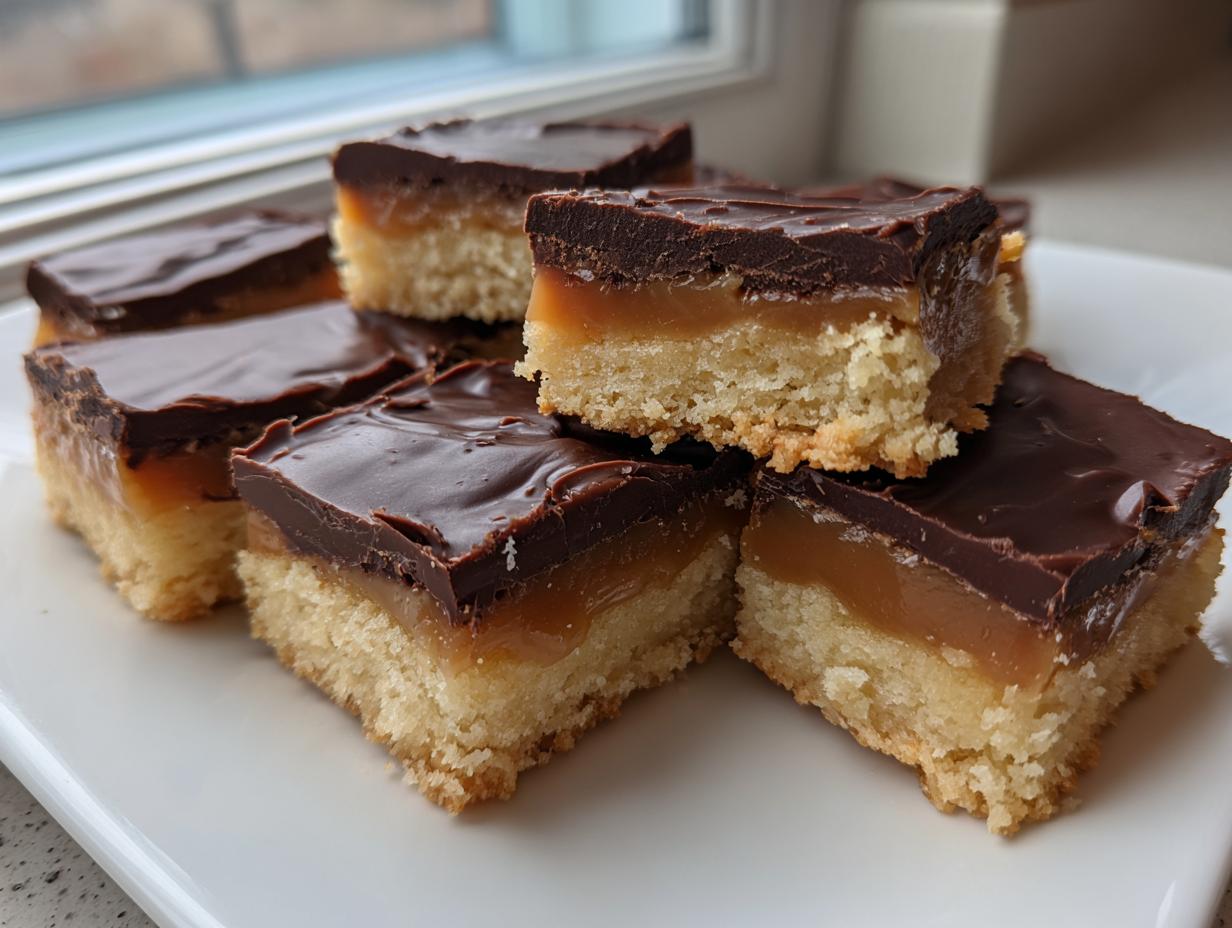
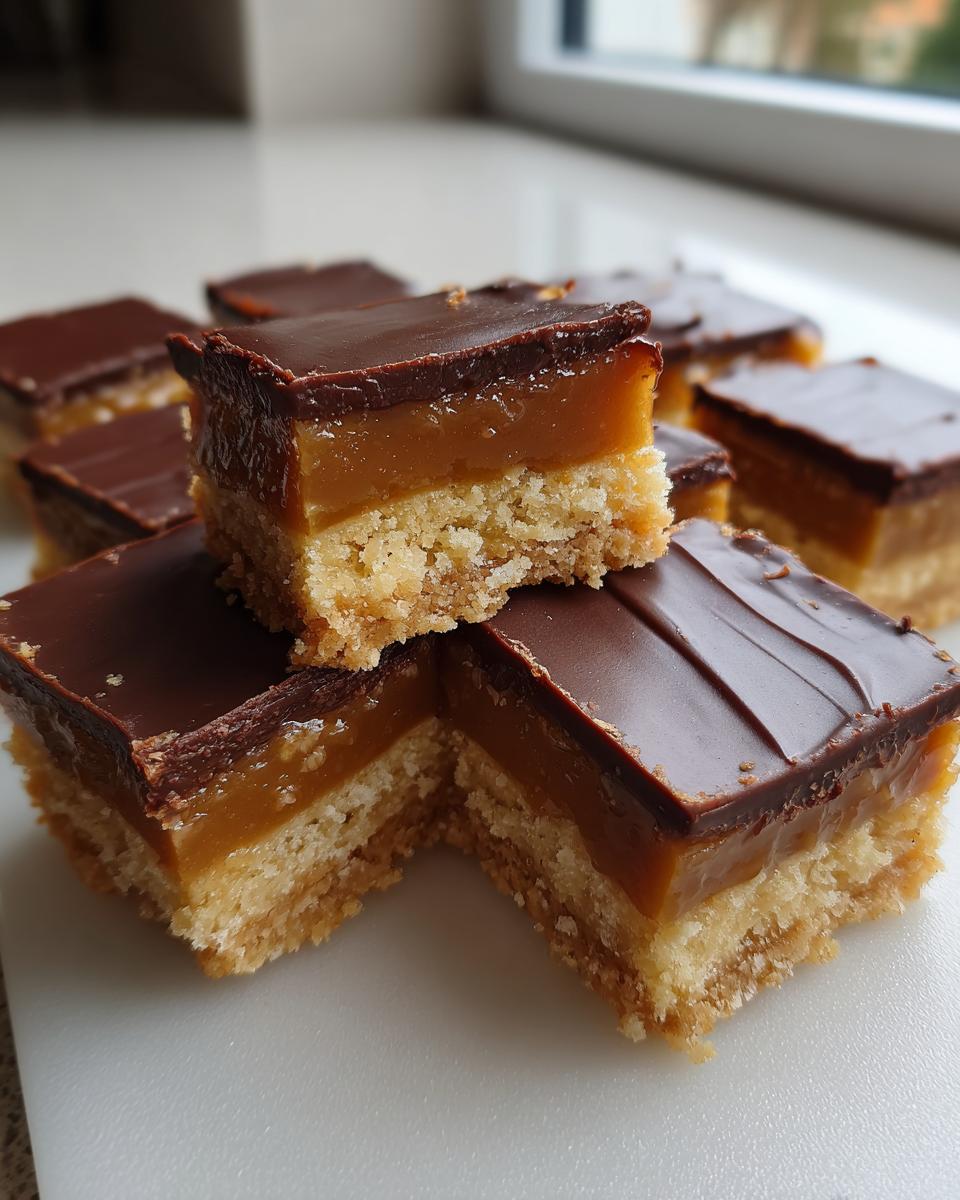
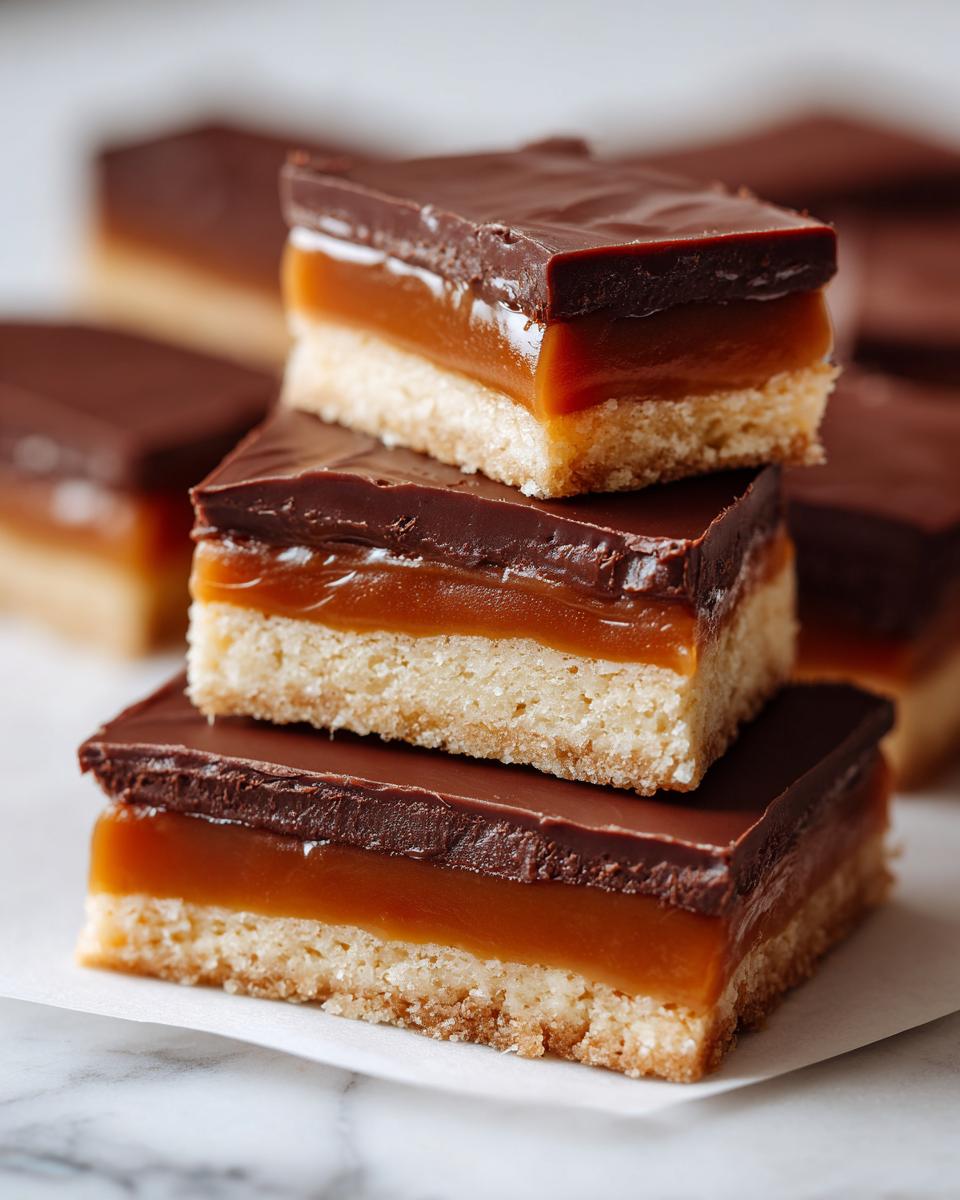
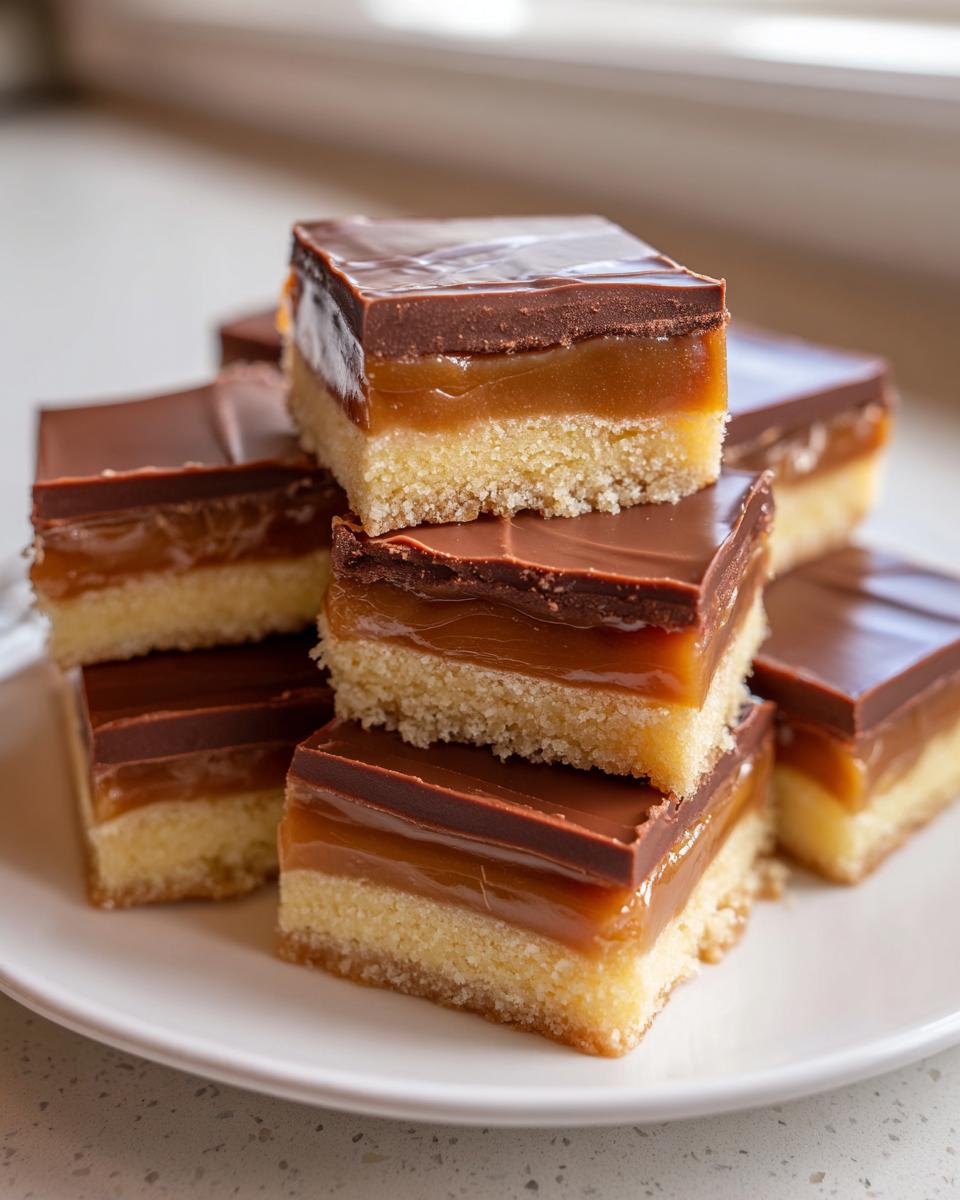
Mastering the Layers: How to Make Twix
Alright, this is where the magic happens. We are building the ultimate homemade candy bar, layer by glorious layer. Don’t rush this part; patience is key to getting that lovely texture contrast we crave! We need to work through the shortbread, the caramel, and finally, the chocolate shell. If you’ve already mastered some of my easier bar recipes like cake mix cookie bars, you’ll find this is just as straightforward!
Preparing and Baking the Buttery Shortbread Base Treats
First things first, get your oven preheated to 350°F (175°C). For the base, grab that crumbly dough you mixed up. You need to press it super evenly into your 8×8 inch pan, which should already be lined with parchment paper leaving lots of overhang—that overhang is your best friend later, so use it!
Spread it firmly so there are no thin spots that might burn or thick spots that stay doughy. Pop that pan in the oven for just 15 minutes. You’re looking for the edges to be barely golden. Once they look done, pull them out and you must, *must* let it cool completely before moving on. Seriously, do not rush the cool-down!
Creating the Gooey Caramel Layer for Your Twix
Now for the gooey part! Take those unwrapped caramel candies and the heavy cream and put them in a microwave-safe bowl. Be careful microwaving because caramel gets incredibly hot. Heat them in 30-second bursts, stirring really well between each one until the mixture is completely smooth. It shouldn’t have any stubborn lumps.
Pour that gorgeous, warm caramel directly over your cooled shortbread. Spread it gently—you don’t want to tear up the crust underneath! Once it’s covered edge-to-edge, it needs a serious chill. Stick it in the refrigerator for a full hour, or until the caramel feels firm if you press it. You can check out more tips on creating perfect coatings and dips like this one over at this cookie bites recipe for extra inspiration.
Cutting and Coating the Chocolate Covered Layer Bars
Once that caramel is set, gently lift the whole slab out of the pan using those parchment paper handles. Now, cut them into small bars or bites—whatever size feels right for you! Here’s a pro trick: if the caramel is still a little sticky after chilling, pop the whole rectangle into the freezer for about 15 minutes; that makes clean cutting so much easier.
Next, melt your chocolate chips and coconut oil together until they are perfectly smooth. Dip each cut piece into your melted chocolate. Make sure you get full coverage! A fork works best for dipping and lifting. Let the excess drip off, and place these newly coated pieces onto a fresh sheet of parchment paper. Pop them back into the fridge for just 20 minutes until that chocolate coating sets nice and firm.
Tips for the Best Copycat Dessert Recipes
If you want these Twix bites to truly mimic that amazing store-bought texture, you have to focus on contrast! The key isn’t just making the layers, but making sure the shortbread is crisp and the caramel is perfectly soft. That contrast is what makes these Copycat Dessert Recipes so addicting. Remember that note about chilling? Don’t skip that hour in the fridge, or your caramel will just melt into your shortbread when you pour it!
Look, sometimes life is busy, and I get wanting a break. If you are absolutely desperate for that chocolate and caramel fix fast, you can try the 3-ingredient shortcut I mentioned in the notes! You can skip baking altogether by using store-bought vanilla wafer cookies as your base. It’s much quicker, but you lose a little of that buttery flavor only homemade shortbread gives you. If you want deep dives into recreating other favorites, check out my guide on the best copycat candy bars!
For extra inspiration on bite-sized perfection, I really love what others are doing, like these fantastic bites mentioned by And Tasty. They really nail the nostalgia factor.
Storage & Reheating Instructions for Homemade Twix
Because we made these magnificent chocolate covered layer bars with real, gooey caramel, we absolutely need to treat them right when it comes to storage. I know, I know, part of me hopes they disappear the day I make them, but real life demands leftovers!
The short answer is: keep them cold. These homemade Twix bites must be stored in an airtight container in the refrigerator. If you leave them out on the counter—even for a few hours, depending on how warm your house is—that luscious caramel layer might start getting a little too soft, and your beautiful chocolate coating could start sweating or separating. Yuck!
In the fridge, they keep wonderfully for at least a week. I’ve even managed to push it to ten days, and they were still fantastic. We are talking about quick caramel treats that last!
When it comes to serving, this is personal preference, but I have a strong opinion! If you serve them straight from the fridge, the chocolate will be super snappy, and the caramel will be pleasantly chewy, almost like taffy. That’s great if you love a firm bite!
However, if you want that absolute soft, melt-in-your-mouth feeling that mimics the original candy bar perfectly, pull your container out of the fridge about 20 to 30 minutes before you plan to eat them. This gives the caramel just enough time to soften up slightly while the shortbread stays nice and buttery. Trust me on this slight warming trick; it elevates the whole experience!
Making Twix Bites for Holiday Candy Baking Ideas
You know, these chocolate covered layer bars are just screaming festive season! They are absolutely perfect for cookie exchanges or assembling gift tins because they look so professional stacked up. Since they are sturdy once chilled, they travel beautifully too. Just line a nice tin with some colorful tissue paper or maybe some wax paper, skip the space between each little homemade Twix, and you have a truly impressive gift.
For sharing these amazing Christmas cookie bars with neighbors, I often use small cellophane bags tied with a bright ribbon. People absolutely go wild for seeing a favorite candy bar recreated! Check out how others present their holiday flavors over at Inspirations Valley for some extra presentation flair!
Ingredient Notes and Substitutions for Your Twix Recipe
I always get questions about ingredients when I share a copycat recipe, which is totally fair! When you’re trying to replicate something specific, you want to know what you can tweak to make it your own, or what you can swap out if the store is missing something. I’ve tried just about every combination out there, so let me clear up a few things about what makes these layers work so well.
Let’s talk chocolate first. I listed semi-sweet chips because I think they balance the sweetness of the caramel layer perfectly, giving you that classic candy bar finish. But if you adore milk chocolate, please just substitute the same amount of milk chocolate chips! Use what makes you happy. And if you’re worried about crunch versus chew, remember that the coconut oil in the coating is critical for that smooth, quick-setting shell we want for our Rich Chocolate Covered Snacks.
Now, the caramel layer! That heavy cream isn’t optional, folks; it’s the secret ingredient to avoiding rock-hard caramel. When you melt those soft candies down, the cream adds the necessary liquid fat to keep the mixture pliable and chewy after it chills. If you skip it, you end up with something much closer to a hard toffee than a soft caramel filling, which messes up the whole texture profile!
Don’t forget, you can always look into making amazing additions like homemade salted caramel if you want to take things up a magnificent notch! But for this recipe, stick to the cream to ensure those bites stay soft.
Frequently Asked Questions About Copycat Candy Bar Recipes
I always get asked the same things when people start diving into the world of Copycat Dessert Recipes! It’s exciting to make something so nostalgic at home, but sometimes the layers can feel a little intimidating. Here are the most common questions I hear about nailing that perfect texture contrast that makes these little homemade Twix treats so irresistible.
Can I make these Twix cookies without baking the shortbread?
Yes, you absolutely can if you are short on time! Remember how I mentioned the 3-ingredient shortcut? If you need a super fast version, you can skip baking that buttery base entirely. Just grab some sturdy store-bought vanilla wafer cookies, press the warm caramel right on top of those, chill, and then dip them in chocolate. That’s how you make instant Bite Sized Candy Desserts! Just manage your expectations: the texture won’t have that wholesome, buttery crumb that the baked shortbread gives you, but the flavor profile is right there!
What is the best way to get a smooth chocolate coating on my Twix bites?
Oh, the coating! That smooth, flawless finish of the Rich Chocolate Covered Snacks is all about what you mix in with your chips. We use just a touch of coconut oil in the recipe for a reason. When you microwave the chips, you need to stir until they are completely homogeneous—no lumps! The oil ensures the melted chocolate stays fluid and flows smoothly around the cold caramel layer without clumping. Dip quickly, let the excess drip off back into the bowl, and place them on parchment paper. They set up beautifully firm! You can see a great example of a quick coating technique over at Kitchen Divas.
How do I prevent the caramel from becoming too hard when making these Twix desserts?
This is the make-or-break moment for any soft caramel recipe, right? If your caramel turns into a jaw-breaker, it ruins that wonderful experience of biting through all three layers! The secret here is the heavy cream. Cream adds the necessary fat and moisture to keep that caramel soft even after chilling. Make sure you stir that caramel really well after every microwave burst to distribute that heat and incorporate the cream fully. If you do that, you’ll have wonderfully Gooey Caramel Desserts every time. If you want to dive deeper into chocolate and caramel wonders, check out my tips on other fantastic bar recipes—though these simple Twix ones remain a favorite!
Share Your Homemade Twix Creations
Okay, my wonderful cooks, that’s it! You have successfully brought back that classic candy bar flavor right into your cozy kitchen. Now, I need to know how they turned out!
When you make this incredible layered Twix recipe, please take a picture. Whether you went for the full bar or stuck to those cute little bites, I want to see your handiwork! Snap a photo and tag us on social media so I can share your success stories.
And if you found this recipe truly hit the sweet spot—if it deserves a permanent place in your baking rotation—please give it a generous five stars right down below the instructions. Your feedback really helps other home cooks gain the confidence to try these wonderful chocolate treats too. Happy baking, everyone!
PrintHomemade Twix Bites Copycat Recipe
Create perfect bite-sized versions of the classic candy bar with this recipe featuring a buttery shortbread base, gooey caramel layer, and rich chocolate coating.
- Prep Time: 25 min
- Cook Time: 15 min
- Total Time: 1 hour 40 min
- Yield: 24 servings 1x
- Category: Dessert
- Method: Baking and Chilling
- Cuisine: American
- Diet: Vegetarian
Ingredients
- 1 cup all-purpose flour
- 1/2 cup (1 stick) unsalted butter, softened
- 1/4 cup granulated sugar
- 1/2 teaspoon vanilla extract
- 1 cup soft caramel candies, unwrapped
- 2 tablespoons heavy cream
- 1 1/2 cups semi-sweet chocolate chips
- 1 tablespoon coconut oil
Instructions
- Prepare the shortbread base: In a medium bowl, mix the flour, softened butter, granulated sugar, and vanilla extract until a crumbly dough forms.
- Press the dough evenly into the bottom of an 8×8 inch baking pan lined with parchment paper, leaving an overhang for easy removal.
- Bake the shortbread at 350°F (175°C) for 15 minutes, or until the edges are lightly golden. Let it cool completely.
- Make the caramel layer: Place the caramel candies and heavy cream in a microwave-safe bowl. Microwave in 30-second intervals, stirring well after each, until the caramel is smooth and fully melted.
- Pour the warm caramel evenly over the cooled shortbread base. Spread it gently to cover the entire layer.
- Chill the caramel layer in the refrigerator for at least 1 hour, or until the caramel is firm to the touch.
- Prepare the chocolate coating: Combine the chocolate chips and coconut oil in a microwave-safe bowl. Microwave in 30-second intervals, stirring until completely smooth.
- Remove the shortbread and caramel slab from the pan using the parchment paper overhang. Cut the slab into small, rectangular bar shapes or bite-sized squares.
- Dip each piece into the melted chocolate, ensuring it is fully coated. Place the coated pieces onto a baking sheet lined with fresh parchment paper.
- Refrigerate the homemade Twix bites for about 20 minutes, or until the chocolate coating is set.
Notes
- For an easier cut, place the chilled caramel layer in the freezer for 15 minutes before slicing the bars.
- If you prefer a milk chocolate coating, substitute milk chocolate chips for the semi-sweet chips.
- You can use store-bought shortbread cookies as a base for a quick 3-ingredient Twix bites version.
Nutrition
- Serving Size: 1 bar
- Calories: 210
- Sugar: 22g
- Sodium: 75mg
- Fat: 12g
- Saturated Fat: 7g
- Unsaturated Fat: 5g
- Trans Fat: 0.1g
- Carbohydrates: 25g
- Fiber: 1g
- Protein: 2g
- Cholesterol: 25mg