
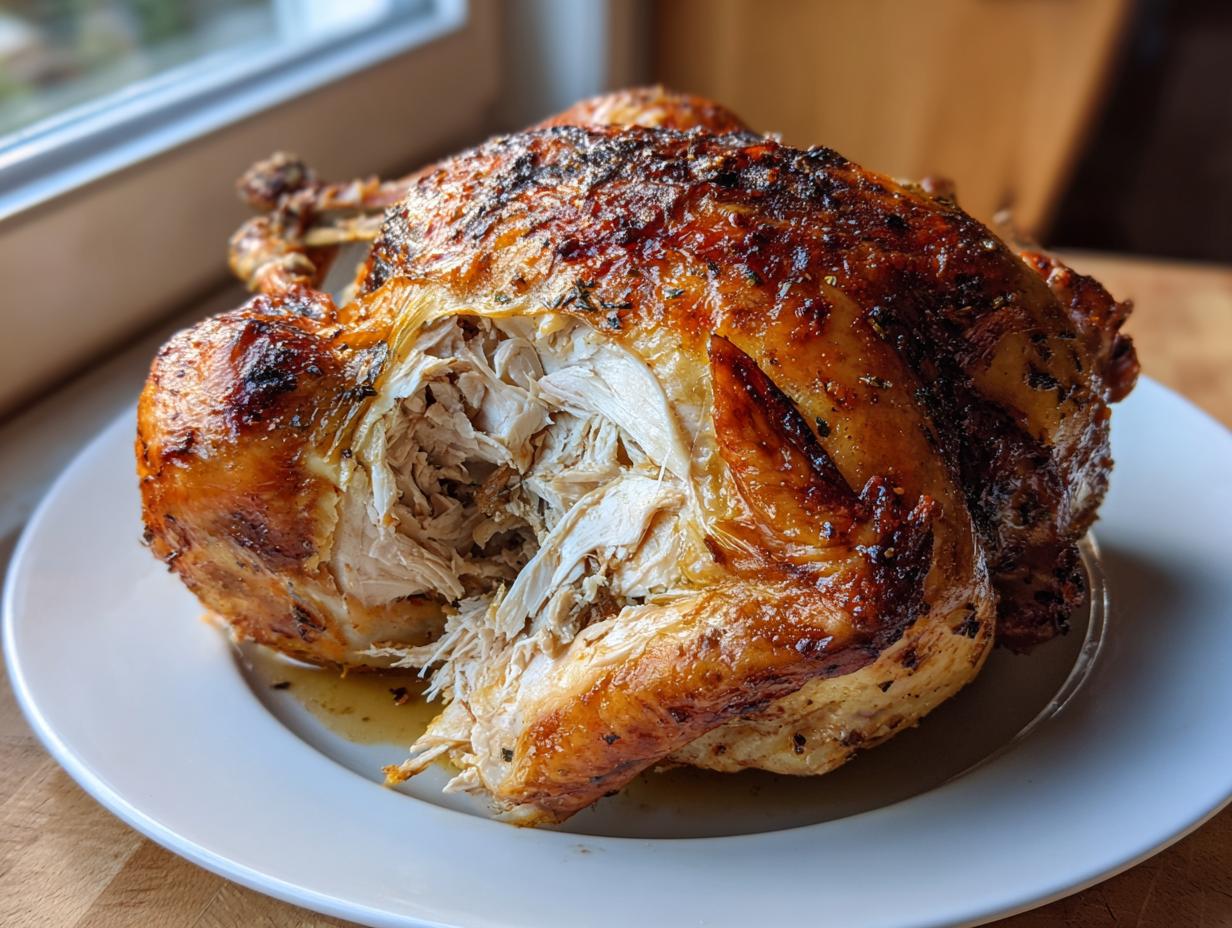
Oh, friends, let’s talk about the absolute king of comfort food: the roast chicken. If you’ve ever looked at a beautiful, golden-brown whole bird and thought, “I could never get the skin that crispy and keep the inside that tender,” I’m here to shake your hand and tell you that you are wrong! Mastering the whole chicken isn’t some secret chef technique; it’s just knowing a couple of simple tricks. My goal for you today is total confidence. We are going to unlock the secrets to the crispiest skin and the juiciest meat you’ve ever pulled from your own oven. Trust me, once you nail this easy whole chicken method, you’ll be roasting one every week!
- Why This Is the Best whole chicken recipe for Crispy Skin and Juicy Meat
- Ingredients for Your Simple Roast Chicken
- How to Prepare the Perfect oven roasted chicken
- Expert Tips for Your whole chicken Seasoning Ideas
- Serving Suggestions for Your Family Meal Chicken
- Storage and Reheating Instructions
- Troubleshooting Common Roasting Issues
- Frequently Asked Questions About Roasting Poultry
- Nutritional Estimates for This Recipe
- Nutritional Estimates for This Recipe
Why This Is the Best whole chicken recipe for Crispy Skin and Juicy Meat
I want you to stop scrolling through every Pinterest board looking for the next best thing. This particular whole chicken recipe is the keeper! It’s built on a couple of non-negotiable steps that guarantee success, turning an intimidating bird into a simple, spectacular family meal chicken. We focus on science, not just guesswork, so you get restaurant results.
- It turns out much better than other roasting guide for whole chicken methods I’ve tried.
- It’s the definition of easy whole chicken—truly minimal fuss for maximum impact.
- It creates the perfect base for a classic Sunday roast chicken.
Foolproof Texture: Crispy Skin Chicken Guaranteed
If you skip one micro-step, this is where you’ll lose the battle. We have to get that skin bone-dry, like, paper towel dry! Moisture is the enemy of crispiness. Then, we hit it hard with high heat initially—425°F—just long enough to aggressively start rendering the fat and puffing up the skin. That initial blast is what sets you on the path to perfect crispy skin chicken.
Achieving a Juicy Roast Chicken Every Time
Juicy meat comes down to two things: containment and patience. Stuffing the cavity with lemon and herbs basically steams the inside gently while the outside crisps up, which is essential for a juicy roast chicken. And don’t you dare skip the rest! Letting that bird relax after it comes out ensures all the muscle fibers relax and reabsorb those glorious juices. It truly makes this an easy whole chicken task.
Ingredients for Your Simple Roast Chicken
Okay, don’t let the ingredient list intimidate you! This looks like a lot of stuff, but most of it is just seasonings. The beauty of using a simple roast chicken is that the robust flavor comes from good technique and simple herbs, not a million complicated steps. Remember, we’re keeping this straightforward for that perfect whole chicken dinner.
Here’s exactly what you need for your bird, which should be around 4 to 5 pounds—that size is perfect for our high-heat method.
- 1 whole chicken (about 4-5 lbs—don’t go too small or too big for this one!)
- 2 tablespoons kosher salt (Yes, kosher! It has better texture for this rub.)
- 1 tablespoon black pepper
- 1 tablespoon dried thyme
- 1 tablespoon dried rosemary
- 1 tablespoon garlic powder
- 1 lemon, halved
- 4 sprigs fresh rosemary
- 4 sprigs fresh thyme
- 3 tablespoons olive oil
That’s it! See? Mostly pantry staples! The fresh lemon and herbs are just for filling the cavity to make the inside smell amazing while it cooks. Now that we have everything measured out, let’s get back to the real magic: the prep work!
How to Prepare the Perfect oven roasted chicken
Alright, let’s get down to business! Getting that oven roasted chicken ready is faster than you think—we’re looking at about 15 minutes of hands-on prep time, and then the oven does the heavy lifting. Remember, the process takes about 90 minutes total, but that time is mostly hands-off waiting for magic to happen. Pay close attention to the setup, because that’s where the perfectly cooked chicken is born.
Prep Work: Drying and Seasoning the whole chicken
This is the step I cannot stress enough: you absolutely must dry your bird! When you pull your whole chicken out of the packaging, use paper towels—lots of them—to pat down every single inch of the skin. Inside the cavity, underneath the wings—everywhere! If you feel like the skin is dry, pat it one more time. This is your best tool for achieving that amazing texture.
While you’re doing that, whisk together your dried herbs and spices: salt, pepper, thyme, rosemary, and garlic powder. Once the bird is dry as a bone, rub it all over with olive oil. Don’t be shy; make sure it’s coated. Then, take that seasoning blend and sprinkle it evenly everywhere, rubbing it gently into the skin. Next, stuff the cavity with the halved lemon and the fresh herbs we set aside. You don’t need to tie the legs—I never bother, honestly—just toss it right onto your roasting pan.
The Two-Stage Roasting Guide for whole chicken Dinner
This is the game-changer for any whole chicken dinner! First, you preheat your oven to a blazing hot 425°F (220°C). We crank the heat to start crisping that skin aggressively. Pop the chicken into the oven.
Pop the chicken in and roast it for exactly 15 minutes. After those initial 15 minutes, you’ll immediately drop the temperature down to 375°F (190°C) to finish cooking evenly.
Continue roasting for another 60 to 75 minutes. How do you know when it’s done? Forget the color! You have to use a meat thermometer inserted deep into the thickest thigh part—make sure you aren’t poking the bone! You are aiming for 165°F (74°C). That temperature guarantees you a safe and perfectly cooked chicken that avoids rubbery breast meat.
Resting: The Secret to a Juicy Roast Chicken
Seriously, walk away now. Maybe go set the table or pour yourself a glass of wine, but do not touch that bird for 15 full minutes after it comes out of the oven. This resting period is critical for a juicy roast chicken. If you cut into it right away, all those beautiful internal juices—which got pushed to the center during the heat—will immediately run out onto your cutting board, leaving you with dry meat. Resting lets those juices redistribute throughout the muscle fibers. Trust me on this one; it’s the final act of true culinary patience!
Expert Tips for Your whole chicken Seasoning Ideas
Now that you’ve roasted the perfect bird, I want to share a couple of my favorite tricks—the things I do when I want this whole chicken to taste extra special, maybe even worthy of a holiday table instead of just a weeknight. These aren’t massive steps, but they add layers of flavor! Remember, this is how we elevate the everyday roast.
If you want to push your whole chicken seasoning ideas up a notch, you have to play underneath the skin. Take some softened, room-temperature butter—and yes, it has to be real butter, not that stuff in a tub—and mix in a bit more of your herb blend, maybe some fresh minced garlic if you’re feeling fancy. Gently slide your fingers between the skin and the breast meat, creating space, and spread that herb butter mixture right onto the meat itself. This keeps the breast incredibly moist while the skin on top crisps up perfectly.
What if you notice your beautiful bird is getting a little too dark on top halfway through the cooking time? Don’t panic and don’t pull it out! We don’t want burnt skin while the inside is still raw. This is where aluminum foil saves the day. Just take a small sheet of foil—and I mean small, don’t cover the whole thing—and loosely tent it right over the breast area. This shields the skin from direct heat while allowing the lower temperature to finish cooking the rest of the chicken through. You can remove the foil for the last 10 minutes if you feel like it needs a final crisp, but usually, the shield works wonders for preventing premature browning!
Serving Suggestions for Your Family Meal Chicken
You’ve done it! The bird is rested, glistening, and ready to carve. Now we have to talk about what goes alongside this masterpiece, because a whole chicken dinner deserves sides that really sing. I try to keep the sides simple because the roasted chicken is really the star of the show, but they need to be satisfying enough for a proper family meal chicken experience.
My absolute go-to, no-brainer pairing is mashed potatoes. You just can’t beat the classic combination of creamy, fluffy potatoes soaking up the natural pan juices. If you want to try something a little heartier without adding too much work, I highly recommend my recipe for creamy scalloped potatoes—they bake right alongside the chicken if you time it right, and the richness is just heavenly.
But you really need some green on the plate to cut through that richness! Roasted vegetables are perfect because they share the baking pan and absorb all that great, seasoned chicken fat while they cook down. Think carrots, Brussels sprouts, or even wedges of sweet potatoes tossed with a tiny bit of the same herbs we used on the bird. They take on that herby flavor, and cleanup is a breeze!
And okay, I almost forgot the gravy. Please don’t let those beautiful drippings go to waste! They are liquid gold. You can make the simplest, richest gravy right in the roasting pan after you pull the bird out. Just scrape up all those brown, flavorful bits stuck to the bottom, whisk in a bit of flour or cornstarch slurry, and let it bubble up with a splash of broth. It turns a terrific whole chicken dinner into something truly spectacular and comforting!
Storage and Reheating Instructions
What are you going to do with the inevitable leftovers from this amazing bird? Because honestly, roast chicken tastes almost as good the next day—if you treat it right! Storing and reheating leftovers from a whole bird recipes adventure requires a little care so you don’t dry out the meat we worked so hard to keep juicy.
First things first: safety! Get that cooked chicken into the fridge within two hours of coming out of the oven. I usually carve the meat off the bone entirely before storing it. Cut the white and dark meat into serving-sized chunks and place them into an airtight container. This will keep your meat fresh and tender in the refrigerator for about three to four days, max. Labeling it with the date is always a good idea, though mine rarely lasts that long!
Now for reheating—this is key. Microwaving slices of plain chicken will turn them into shoe leather, so we need moisture! If you are only reheating a small portion, take the slices you need and place them in an oven-safe dish. Add a thin splash of chicken broth or a little pat of butter right over the top of the meat. Cover the dish tightly with foil. Pop it into a 350°F (175°C) oven for about 10 to 15 minutes, or until it’s heated through. The foil traps the steam from the broth/butter, essentially giving the meat a tiny second steam bath, bringing back that wonderful juiciness.
If you’re feeling ambitious and want to use up a big batch of leftovers, I highly recommend turning them into something utterly comforting like a chicken pot pie casserole. That way, the chicken is submerged in creamy sauce, making dryness impossible—it’s the ultimate way to utilize those lovely scraps!
Troubleshooting Common Roasting Issues
Even with the best recipe in the world, sometimes things just don’t cooperate in the oven. It happens to me all the time! Cooking is part science, part art, and sometimes things get slightly off balance. But when you’re cooking a beautiful, expensive whole bird recipes center piece, we don’t want failure. Don’t stress if your roast chicken didn’t look textbook perfect; usually, these little hiccups are easy to fix or prevent next time around!
Why Did My Skin Not Crisp Up?
If you pulled your dinner out and the skin was merely chewy or damp instead of shatteringly crisp, I can almost guarantee you one of two things happened. Nine times out of ten, the issue comes down to moisture. Did you really pat it dry? Spend an extra minute drying it; residual water creates steam, and steam equals soggy skin. Seriously, make sure it feels almost tacky dry before you oil it!
The other culprit is oven temperature stability. If your oven runs cool, it won’t hit that aggressive searing temperature needed at the start. Make sure you use an oven thermometer if you suspect your appliance is lying to you! That initial blast at 425°F is essential for flashing off surface moisture; if the oven isn’t hot enough, you end up steaming instead of crisping.
Dealing with Uneven Cooking
This is super common when roasting poultry—the breasts (white meat) always seem to cook faster than the thighs (dark meat). If you check your temperature and the thickest part of the breast hits 160°F but the thigh is still lagging at 150°F, you can’t just keep cooking or the breast will be ruined!
Here’s the play: Grab a small piece of aluminum foil and loosely drape it over the breast area only. This shields the fast-cooking white meat while allowing the lower heat to catch up in the thighs. You can also gently rotate the whole pan about halfway through to ensure even heat exposure from your oven walls. A slight adjustment here or there is all it takes to ensure every slice is tender, not just one part of the bird.
Frequently Asked Questions About Roasting Poultry
I get so many questions about roasting poultry, and honestly, it makes me excited because it means more people are ditching the mediocre meals and going for the glory of a perfectly cooked bird! Even though this recipe focuses on my favorite oven roasted chicken method, I totally understand you might be wondering about other ways to tackle that beautiful bird.
Can I use this seasoning blend if I decide to make an air fryer whole chicken instead?
Absolutely! The spice blend is fantastic, regardless of the cooking method, because the flavor relies on the ratio of salt, herbs, and garlic powder, not the heat source. If you decide to pivot to your air fryer whole chicken, just remember that air fryers cook fast! You’ll want to use slightly less time than the oven method, and you might need to check the internal temperature sooner to ensure you don’t overcook those lovely breast muscles.
How much earlier do I need to season the chicken for the best flavor?
This is a great question for anyone making a classic Sunday roast chicken, where you might want to start the day before. While my recipe calls for seasoning just before the heat goes on (which works great for crispy skin!), if you have time, seasoning up to 24 hours ahead of time is phenomenal. The salt draws out moisture, dissolves the herbs, and then the meat reabsorbs all that flavor overnight. Just leave it uncovered in the fridge on a rack—that cold air helps keep the skin dry while it marinates!
What’s the deal with trussing or tying the legs? Do I really need to truss for a simple roast chicken?
I’m old school on some things, but when it comes to a simple roast chicken where the goal is maximum skin exposure, I skip tying the legs! Trussing (tying the legs together) makes the bird cook more evenly because it creates a tighter package. However, if you are using the two-stage high/low temperature method I taught you, the breast will actually cook perfectly fine before the legs overcook. If you use twine, just make sure it’s kitchen twine and it doesn’t have plastic threads! For speed and excellent skin texture, I leave the legs splayed slightly.
How can I make sure I use up all the meat in this whole bird recipes batch?
That’s the true test of a good whole bird recipes creator! After carving, save those carcass bones and any leftover scraps. Don’t toss them! You can immediately use them to make a quick, flavorful broth. That broth is fantastic for thinning out pan drippings into gravy or it becomes the liquid base if you decide to turn those leftovers into, say, amazing chicken enchiladas the next day. Never waste the bones!
Nutritional Estimates for This Recipe
Since we are using a relatively lean method here—just a little olive oil and natural chicken fat—this is a hearty, high-protein meal that fits beautifully into many healthy eating plans. Remember, these numbers are an estimate based on a 4-5 lb bird cooked as directed, and they don’t account for any extra gravy or side dishes you pile on your plate!
- Serving Size: 6 oz cooked meat (this recipe yields 4 servings comfortably)
- Calories: Approximately 350 per serving
- Protein: A solid 45 grams! Great fuel.
- Fat: Around 18 grams (much of this is the delicious skin we worked so hard to crisp!)
- Carbohydrates & Sugar: Zero, woohoo!
You can adjust the final fat content easily if you’re counting calories—just scrape off a little more of the skin before eating, though I personally can’t bear to part with it after all that work!
PrintThe Best Oven Roasted Whole Chicken for Crispy Skin and Juicy Meat

Follow this simple guide to roast a whole chicken in the oven. You will achieve perfectly crispy skin and tender, juicy meat every time, making this the ideal recipe for your next family dinner or Sunday roast.
- Prep Time: 15 min
- Cook Time: 75 min
- Total Time: 90 min
- Yield: 4 servings 1x
- Category: Dinner
- Method: Oven Roasting
- Cuisine: American
- Diet: Low Fat
Ingredients
- 1 whole chicken (about 4–5 lbs)
- 2 tablespoons kosher salt
- 1 tablespoon black pepper
- 1 tablespoon dried thyme
- 1 tablespoon dried rosemary
- 1 tablespoon garlic powder
- 1 lemon, halved
- 4 sprigs fresh rosemary
- 4 sprigs fresh thyme
- 3 tablespoons olive oil
Instructions
- Preheat your oven to 425 degrees Fahrenheit (220 degrees Celsius). Place an oven rack in the lower-middle position.
- Remove the whole chicken from its packaging. Remove any giblets or neck from the cavity. Pat the entire chicken, inside and out, completely dry using paper towels. This step is key for crispy skin.
- In a small bowl, combine the kosher salt, black pepper, dried thyme, dried rosemary, and garlic powder to create your seasoning blend.
- Rub the olive oil all over the exterior of the chicken. Sprinkle the seasoning blend evenly over the skin, rubbing it in gently.
- Stuff the chicken cavity with the halved lemon, fresh rosemary sprigs, and fresh thyme sprigs. You can tie the legs together with kitchen twine if desired, but it is not required for this method.
- Place the seasoned whole chicken directly onto a roasting pan or a sturdy, rimmed baking sheet.
- Roast the chicken for 15 minutes at 425 degrees Fahrenheit (220 degrees Celsius) to start crisping the skin.
- Reduce the oven temperature to 375 degrees Fahrenheit (190 degrees Celsius). Continue roasting for approximately 60 to 75 minutes more.
- Check the internal temperature using a meat thermometer inserted into the thickest part of the thigh without touching the bone. The chicken is done when the temperature reaches 165 degrees Fahrenheit (74 degrees Celsius).
- Remove the perfectly cooked chicken from the oven. Tent it loosely with foil and let it rest on a cutting board for 15 minutes before carving. This resting period keeps the meat juicy.
Notes
- For extra crispy skin, you can rub softened butter mixed with herbs under the skin over the breast meat before seasoning the outside.
- If your chicken browns too quickly, loosely tent the breast area with aluminum foil during the last 20 minutes of cooking.
- Use the pan drippings to make a simple gravy for serving alongside your roast chicken dinner.
Nutrition
- Serving Size: 6 oz cooked meat
- Calories: 350
- Sugar: 0
- Sodium: 650
- Fat: 18
- Saturated Fat: 5
- Unsaturated Fat: 13
- Trans Fat: 0
- Carbohydrates: 0
- Fiber: 0
- Protein: 45
- Cholesterol: 150