
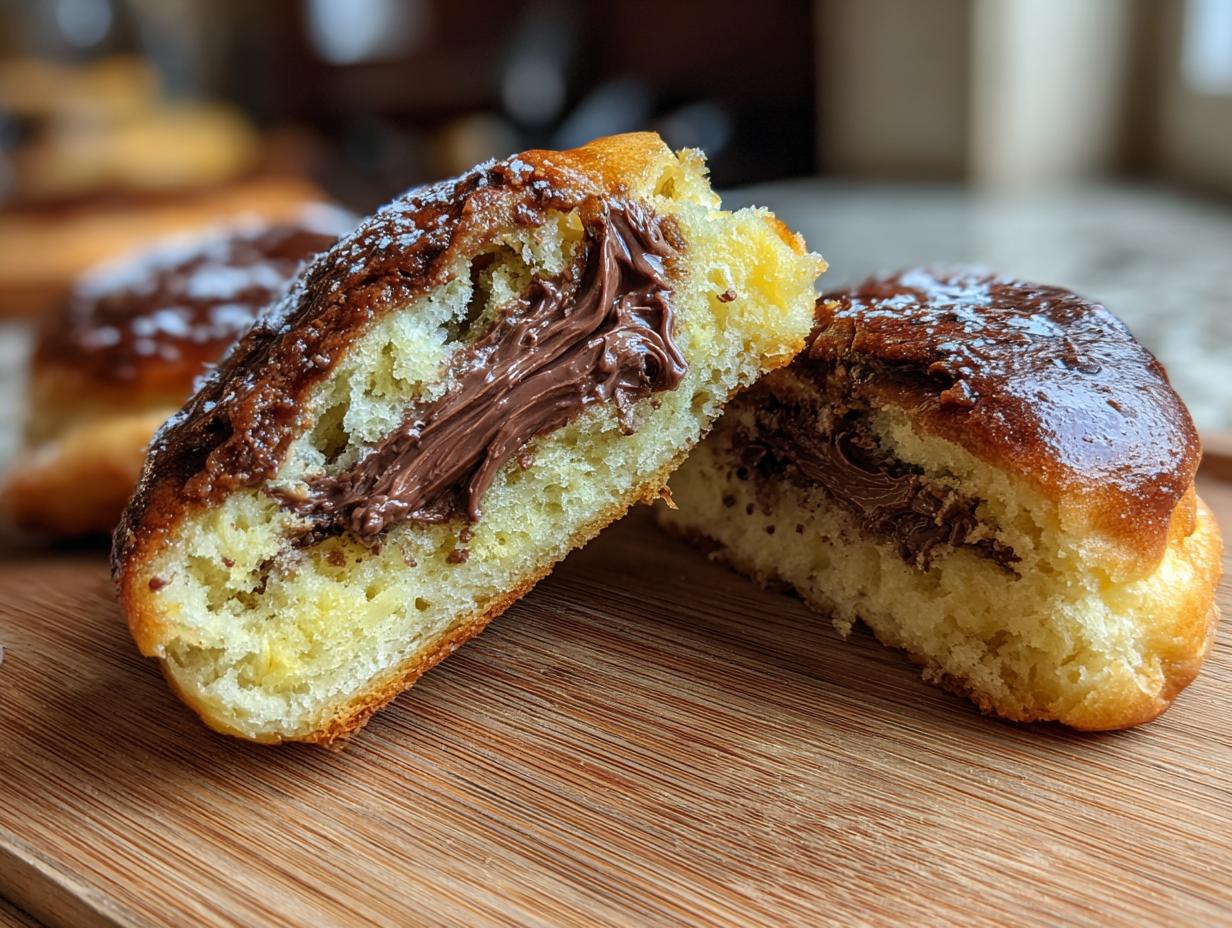
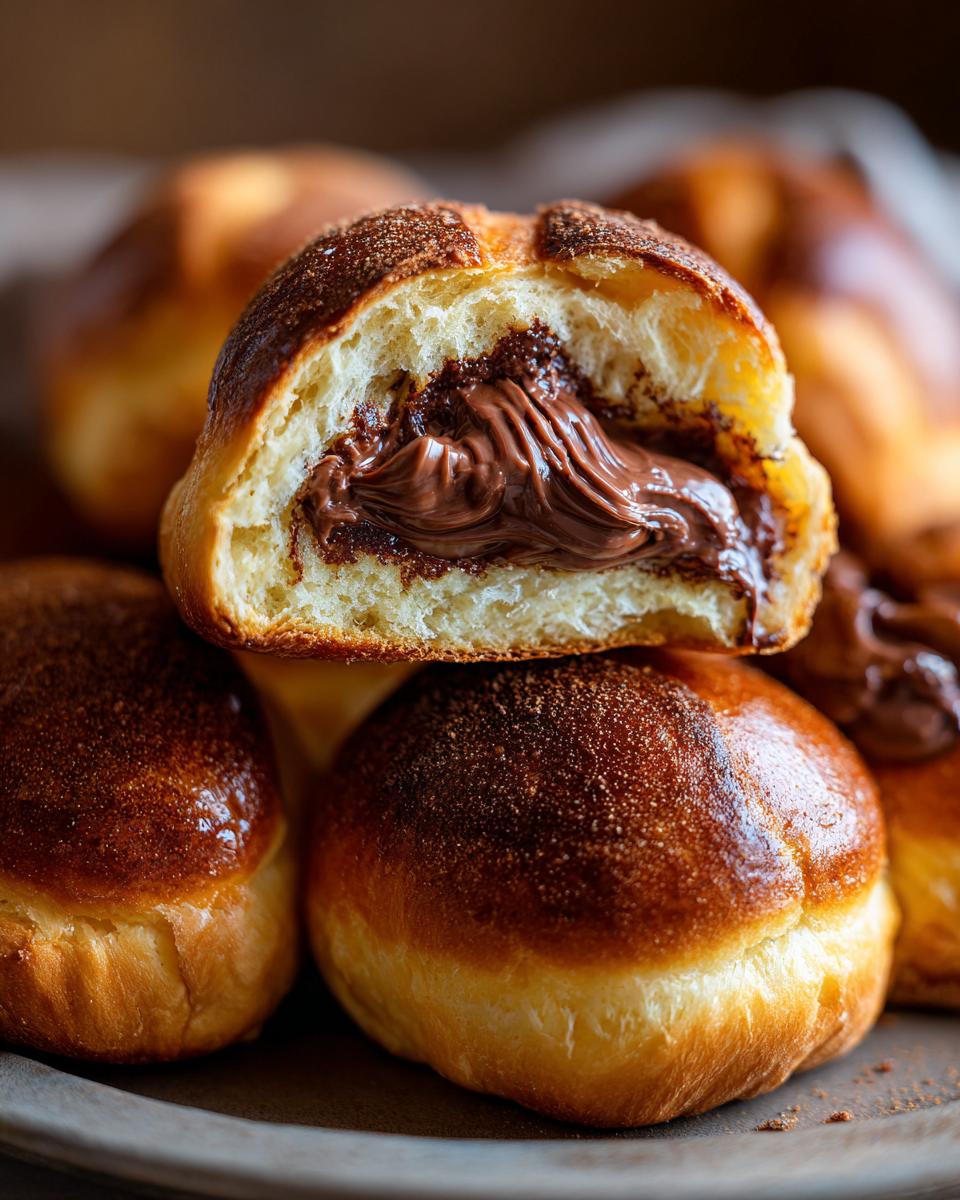
There’s just something magical about Roman street food, isn’t there? Those light, cloud-like sweet buns—the classic maritozzi—are totally iconic. But let’s be real, sometimes tradition needs a little boost, especially when dark chocolate is involved. So trust me when I say that this recipe for italian chocolate maritozzi bread is the one you need. It takes that wonderfully soft brioche base, usually reserved for simple morning treats, and pairs it with a decadent, rich chocolate cream filling. I won’t lie, working with a sweet yeast dough like this moves us into intermediate territory, but the payoff? Oh, the payoff is absolutely worth every minute of patient kneading. When you bite into that airy bread hugging that beautiful chocolate filling, you’ll know exactly why I stake my culinary reputation on this recipe! If you love Italian baking, you simply have to try these; they are just as rewarding as my soft ricotta cookies.
- Why This Italian Chocolate Maritozzi Bread Recipe Works (E-E-A-T)
- Essential Ingredients for Homemade Maritozzi Dough
- Step-by-Step **Sweet Yeast Dough Tutorial** for **Italian Sweet Bread Recipes**
- Shaping and Baking Your Classic Roman Maritozzi
- Preparing the **Whipped Cream Filled Pastry** for Assembly
- How to Make Maritozzi at Home: Filling and Finishing
- Tips for Success with Italian Weekend Baking
- Storage and Reheating **Chocolate Filled Buns**
- Frequently Asked Questions About Italian Chocolate Maritozzi Bread
Why This Italian Chocolate Maritozzi Bread Recipe Works (E-E-A-T)
I know the intermediate label might scare some of you off, but stick with me! This particular approach delivers those perfect Roman sweet buns every single time. It’s all about unlocking that amazing texture and making sure your filling holds up. We’re aiming for a bread that feels lighter than air but still has that satisfying chew you expect from top-tier Italian sweet bread recipes.
- These maritozzi have the softness of a perfect soft brioche recipe because we let that yeast do its slow, happy work.
- The balance of fat (butter!) and liquid in the dough is precisely measured so it doesn’t collapse during the second proof.
- We use a rich, stable chocolate base for the filling so it doesn’t just weep out when you slice the bun open.
Achieving the Signature Soft Brioche Texture
The secret to that signature lofty crumb—the reason it feels great, similar to advanced milk bread techniques—is purely the kneading. You absolutely must knead for those full 8 to 10 minutes. That time develops the gluten structure strong enough to trap all those beautiful gas bubbles from the yeast and butter.
The Perfect **Chocolate Filled Buns** Cream
Skip the runny, plain whipped cream if you want that deep flavor! We’re using a stabilized chocolate pastry cream or a deep chocolate ganache folded into the cream base. This gives you the best chocolate cream filling that tastes incredibly decadent against the tender, slightly sweet bread. It won’t deflate on you during assembly, which is a huge win!
Essential Ingredients for Homemade Maritozzi Dough
Gathering your ingredients is half the battle when tackling traditional Italian pastries like these. Because this is a brioche-style dough, precision with the fats and liquids really matters. I’ve laid everything out below, but trust me on one non-negotiable step: temperature! If you’ve ever made an enriched loaf, you know the importance of properly hydrated flour, much like we discuss when perfecting easy sweet bread recipes.
- For the Dough: 1 cup whole milk (warm!), 2 1/4 teaspoons active dry yeast, 1 teaspoon sugar (for yeast), 1/4 cup plus 1 teaspoon granulated sugar, 3 1/2 cups all-purpose flour, 1/2 teaspoon salt, 2 large eggs, and 4 tablespoons unsalted butter.
- For the Finish: 1 large egg yolk mixed with 1 tablespoon heavy cream for that gorgeous golden crust.
- For the Filling: 1/2 cup cold heavy whipping cream, 1/4 cup powdered sugar, and 1/2 cup of your favorite dark chocolate ganache or pastry cream.
Ingredient Clarity: Milk, Butter, and Eggs
Don’t grab that milk straight from the fridge! The milk absolutely must be warmed to between 105°F and 115°F so your yeast wakes up happy. Also, your butter needs to be genuinely softened—think squishy but not oily or greasy. And those two eggs? Take them out an hour before you start! Room temperature eggs emulsify much better into the dough, which is the secret handshake for achieving that incredibly fine crumb in our sweet yeast dough tutorial.
Step-by-Step **Sweet Yeast Dough Tutorial** for **Italian Sweet Bread Recipes**
Okay, this is where we turn simple ingredients into tender magic, just like we do in all our favorite yeast bread recipes. First, we activate the yeast! Mix that warm milk—and I mean warm, not hot—with the teaspoon of sugar and the yeast. If you don’t see foam in 10 minutes, your yeast is sad and you need to start over. Next, in your big bowl, whisk the flour, the rest of the sugar, and the salt. Now, make a little well in the center for the yeast mixture, the room temperature eggs, and that softened butter. Mix it gently on low speed just until it looks like shaggy stuff clinging together.
Then comes the serious part: kneading. You need to commit to the mixer running on medium-low for 8 full minutes, minimum. You want that dough to completely clean the sides of the bowl and look smooth. It will feel slightly tacky—almost like damp suede—but resist the urge to dump in half a bag of flour! That slight stickiness is what keeps these Roman sweet buns recipe so moist.
Once it’s smooth, we let it rest. Lightly oil a clean bowl, pop the dough mass in there, turn it over once so it’s coated, and cover it tight. Now, go put your feet up! It needs a good 1 to 1.5 hours in a warm spot to double in size. Patience here is everything for these authentic Italian dessert recipes.
Kneading to Achieve Elasticity
I can’t stress this enough: that 8 to 10 minutes of kneading is non-negotiable if you want the authentic texture. After that time, the dough should look shiny, elastic, and spring back slowly when you poke it. If it rips immediately, it needs a couple more minutes to build that gluten network. Remember, this slight tackiness means you’ve perfectly incorporated the fat, which leads directly to that wonderfully airy crumb we crave.
Shaping and Baking Your Classic Roman Maritozzi
Once your dough is puffed up like a happy cloud, gently punch it down—no anger in this kitchen, please! You want to divide that beautiful mass into exactly 8 even pieces. Roll each piece firmly between your palms until you have a perfectly smooth ball. This shaping step is key to getting that round, professional look common in traditional Italian pastries. Space them out generously, about two inches apart, on your parchment-lined sheet. Now, cover them loosely again and let them rest for the final proof, about 30 to 45 minutes, until they look visibly puffy. Don’t rush this second rise; it’s what makes them airy!
Preheat that oven up to 375°F (190°C) while they rest. Before they go in, whisk together that egg yolk and cream—this is your golden ticket to shiny tops! Brush the tops of the buns lightly with this egg wash. Bake them for 15 to 18 minutes. Seriously, watch them closely after the 15-minute mark! They should be deeply golden brown, not just pale yellow. If you’re making a big spread for friends, these would be gorgeous next to a big Italian pasta salad!
When they come out, transfer those beauties immediately to a wire rack. They have to be completely, totally cool before we even think about slicing them open. If you try to fill them warm, the cream will melt into a sad puddle, and we absolutely can’t have that!
Preparing the **Whipped Cream Filled Pastry** for Assembly
Now that our lovely dough is cool—and I mean ice-cold cool, okay?—we pivot to the filling. If you are using the pre-made chocolate pastry cream, make sure it has been chilling for hours; it needs to be firm. If you’re making my favorite whipped version, grab that cold heavy cream and powdered sugar and get your mixer going!
You want stiff peaks here! I mean it, stiff. If you lift the whisk and the peak flops over, keep beating. This stability is exactly what makes the final presentation of your italian chocolate maritozzi bread so magnificent. We need that cream to hold its shape against the soft dough structure. If you want an even richer flavor base, you can always fold in some cooled, melted chocolate once you hit soft peaks, much like we do for whipped chocolate ganache frosting!
How to Make Maritozzi at Home: Filling and Finishing
This is the grand finale, the moment we’ve been waiting for! First, remember that cooled bread rule? Don’t cheat it! Seriously, grab a serrated knife—think of slicing bread, not cake—and slice each maritozzo horizontally almost all the way through. You want to make a hinge so the top stays attached to the bottom; don’t cut it completely in half.

Next, it’s time for the good stuff! Load up your chocolate cream into a piping bag fitted with a large round tip. Now, gently open that hinge, and pipe that lush filling right into the center. Be generous! You want the cream to peek out enticingly. Gently press the top half down just a touch so the cream settles nicely inside, much like how we fill our favorite sweet rolls with cream filling. That’s it! Your perfect batch of chocolate filled buns is ready to enjoy immediately!
Tips for Success with Italian Weekend Baking
Okay, now that you have the whole process down, I want to share a few secrets I learned over years of wrestling with enriched dough for my homemade maritozzi dough. These little nudges elevate your bake from good to *wow*, which is what all great Italian weekend baking should be about.
First, if you live somewhere humid, like I did during the summers down by the coast, watch your proofing times like a hawk. High humidity means the air is already doing some of the work for your yeast, so that 1 to 1.5-hour first rise might be closer to 45 minutes. You want the dough doubled, not tripled—over-proofed dough struggles when it hits the oven heat.
Second, when you’re testing if the bun is done baking, don’t just rely on the toothpick. Use the gentle poke test! Press one knuckle lightly into the center of a bun. If the indentation springs back quickly but leaves just the tiniest, softest impression, they’re perfect. If it springs back immediately, they need a minute more. If it stays completely dented, well, oops! They might be slightly overdone, but they’ll still be delicious dunked in coffee.
My third insider secret involves the shaping—when you roll those 8 pieces into balls, you need to create surface tension. Roll them tight against the counter for a moment to seal the bottom seam. Think of it like tucking in a baby! This tension is what helps them hold that beautiful, round shape as they puff up for the second rise and bake. If you’re looking for other fun ways to use that yeast knowledge, check out my tips for making easy homemade pretzel dogs!
Storage and Reheating **Chocolate Filled Buns**
Since we’re dealing with that glorious, rich chocolate cream filling, these can’t just sit out on the counter all day like plain bread. Once filled, your beautiful chocolate filled buns really need to go straight into the fridge. They’ll last nicely for about two days, but honestly, they are miles better the day you make them!
And please, don’t even think about reheating them! The heat will turn that beautiful piped cream into soup. If you absolutely must, you can gently warm the plain, unfilled bread for just a few seconds, but the magic is in the cold, creamy center.
Frequently Asked Questions About Italian Chocolate Maritozzi Bread
When you’re tackling a wonderful recipe like this, questions always pop up. I’ve gathered the ones I hear most often about perfecting these classic Roman maritozzi and baking other traditional Italian pastries at home! If you’re looking for more ideas after mastering these, check out my guide to authentic Italian dessert recipes.
Can I make the dough ahead of time?
Oh, yes, you absolutely can finesse that homemade maritozzi dough! This is a rich, brioche-style dough, which means it loves the cold. After you finish the kneading step and the dough is smooth, you can place the oiled and covered bowl into the fridge for a slow, cold fermentation. Give it 12 to 24 hours. Just remember, when you pull it out, you need to let it come to room temperature for 1 to 2 hours before you punch it down and shape it. It deepens the flavor beautifully!
What if I don’t have active dry yeast?
Don’t worry if your pantry has instant yeast instead! They are usually interchangeable, but instant yeast doesn’t need that foamy activation step. Just mix the instant yeast directly in with your dry ingredients (flour, sugar, salt). You can skip step one entirely! Though, I still recommend adding the milk and yeast to the rest of the wet ingredients separately at first, just to keep things neat.
Can I use a different chocolate filling?
Of course! While the chocolate pastry cream is rich, you can certainly pivot based on what you love. If you want something super quick, a simple mixture of powdered sugar, a pinch of salt, and a few tablespoons of cocoa powder whisked into your heavy cream works wonders. Or, if you have some Nutella hanging around, that makes a fantastic, slightly less traditional, but equally delicious filling!
PrintItalian Chocolate Maritozzi Bread

Make soft, sweet Roman Maritozzi buns with a rich, dark chocolate cream filling. This recipe guides you through the sweet yeast dough and proper assembly for authentic Italian dessert.
- Prep Time: 45 min
- Cook Time: 18 min
- Total Time: 143 min
- Yield: 8 servings 1x
- Category: Dessert
- Method: Baking
- Cuisine: Italian
- Diet: Vegetarian
Ingredients
- 1 cup whole milk, warmed to 105-115°F
- 2 1/4 teaspoons active dry yeast
- 1/4 cup granulated sugar plus 1 teaspoon for yeast
- 3 1/2 cups all-purpose flour, plus more for dusting
- 1/2 teaspoon salt
- 2 large eggs, room temperature
- 4 tablespoons unsalted butter, softened
- 1 large egg yolk, for egg wash
- 1 tablespoon heavy cream, for egg wash
- 1/2 cup heavy whipping cream, cold
- 1/4 cup powdered sugar
- 1/2 cup dark chocolate ganache or pastry cream
Instructions
- Activate the yeast: In a small bowl, combine the warm milk, 1 teaspoon of sugar, and the yeast. Let it sit for 5 to 10 minutes until foamy.
- Mix the dough: In a large bowl or stand mixer, whisk together the flour, remaining 1/4 cup sugar, and salt. Add the yeast mixture, eggs, and softened butter.
- Knead the dough: Mix on low speed until combined, then increase speed to medium-low and knead for 8 to 10 minutes until the dough is smooth and elastic. It will be slightly sticky.
- First rise: Place the dough in a lightly oiled bowl, turning to coat. Cover the bowl with plastic wrap and let it rise in a warm place for 1 to 1.5 hours, or until doubled in size.
- Shape the buns: Gently punch down the dough. Divide it into 8 equal pieces. Roll each piece into a smooth ball. Place the balls on a baking sheet lined with parchment paper, leaving 2 inches between them.
- Second rise: Cover the shaped buns loosely and let them rise again for 30 to 45 minutes until puffy.
- Preheat and bake: Preheat your oven to 375°F (190°C). Whisk the egg yolk and cream together for the egg wash. Brush the tops of the buns lightly. Bake for 15 to 18 minutes, or until golden brown.
- Cool completely: Transfer the baked maritozzi to a wire rack and let them cool fully before filling.
- Prepare the filling: If using whipped cream, beat the cold heavy cream and powdered sugar until stiff peaks form. If using pre-made chocolate pastry cream, ensure it is chilled.
- Fill the maritozzi: Using a serrated knife, slice each cooled bun horizontally almost all the way through, creating a hinge. Gently spread the chocolate filling inside the cut, pressing the top half down slightly to secure the cream.
Notes
- For the softest brioche texture, ensure your butter and eggs are at room temperature before mixing.
- If you prefer a richer filling, fold 2 tablespoons of melted, cooled dark chocolate into the whipped cream before piping.
- To achieve the classic look, use a piping bag with a large round tip to pipe the filling generously into the center cut of the bun.
Nutrition
- Serving Size: 1 bun
- Calories: 350
- Sugar: 22
- Sodium: 180
- Fat: 16
- Saturated Fat: 9
- Unsaturated Fat: 7
- Trans Fat: 0
- Carbohydrates: 45
- Fiber: 2
- Protein: 7
- Cholesterol: 65