
Oh my gosh, you’ve seen them, haven’t you? Those stunning, luxurious, utterly decadent **dubai chocolate balls** that have taken over every feed? They look like they belong in a royal jewel box, not on my kitchen counter, but trust me—they are surprisingly simple to whip up! If you loved how easy my no-bake tiramisu cheesecake was, you are going to be shocked by these.
That’s why I’m sharing my absolute favorite way to make them: this is my foolproof, totally fuss-free, no-bake recipe. Forget turning on your oven; we are making these rich, bite-sized treats right here on the stovetop and in the fridge. They offer that gourmet look that makes guests think you spent hours slaving away, but I promise you, they are designed for the modern home cook. Get ready to delight everyone at your next gathering with these incredible chocolate spheres!
- Why You Must Make These No-Bake Dubai Chocolate Balls
- Gathering Ingredients for Your Dubai Chocolate Balls
- Step-by-Step Instructions to Make Dubai Chocolate Balls at Home
- Tips for Achieving Perfect Dubai Chocolate Balls
- Middle Eastern Inspired Sweets: Variations for Your Dubai Chocolate Balls
- Storage and Serving Suggestions for Decadent Chocolate Treats
- Frequently Asked Questions About Making Dubai Chocolate Balls
- Estimated Nutritional Data for Your Rich Chocolate Bites
- Share Your Decadent Dubai Chocolate Balls Experience
Why You Must Make These No-Bake Dubai Chocolate Balls
I know what you’re thinking: “Another viral dessert? It’s probably complicated.” Nope! That’s the beauty of this method. I developed this recipe specifically so you don’t need fussy baking skills—we are making these incredible **decadent chocolate treats** completely chill-based. Seriously, if you can stir and chill, you can master this recipe for easy gourmet chocolates.
- They deliver major luxury for minimal effort. You get that high-end, gourmet look without the high-end stress!
- No oven required, which means less heat in your kitchen and fewer dishes to scrub later. Hello, win-win!
- These are completely make-ahead which saves you so much time when planning a party or event.
Simple, Satisfying Flavor Profile
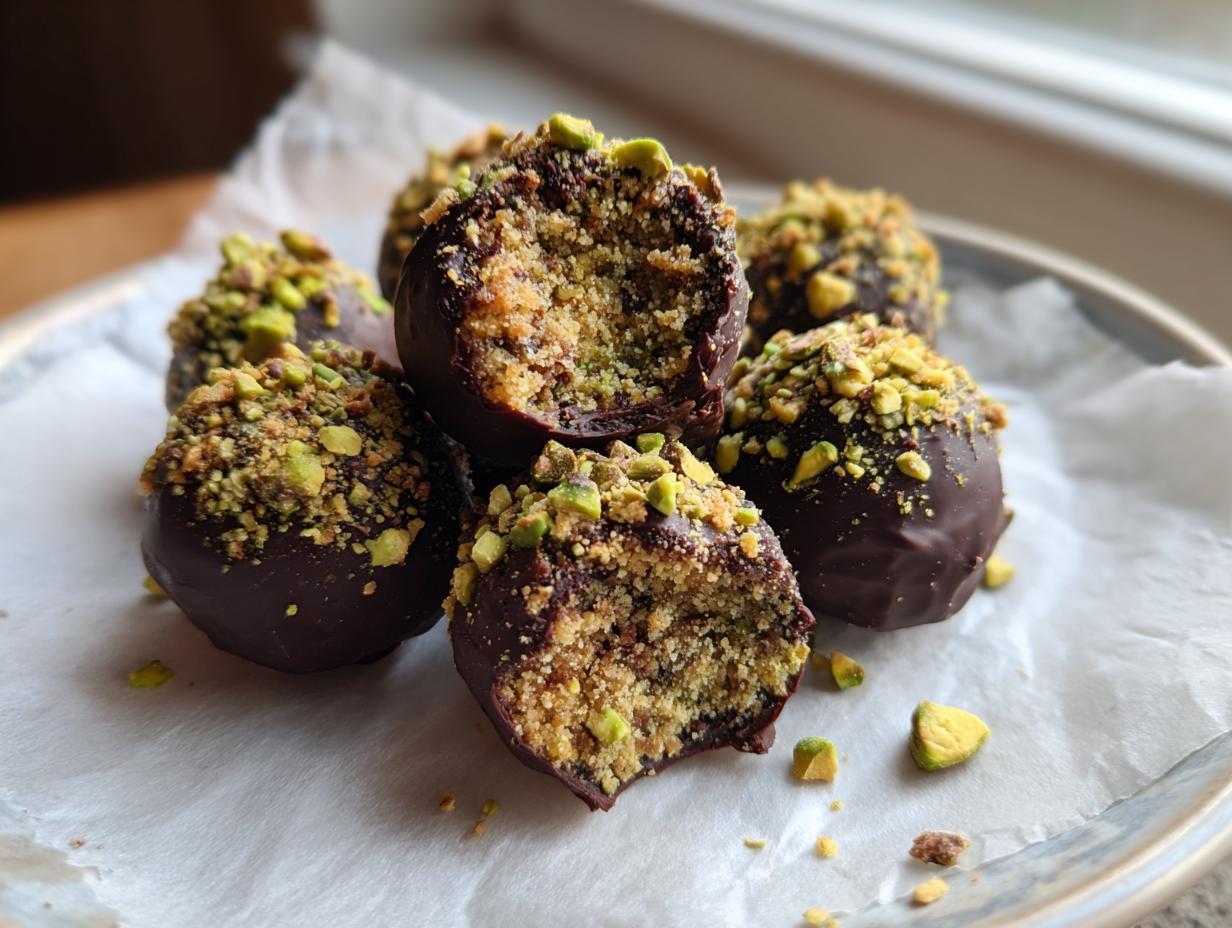
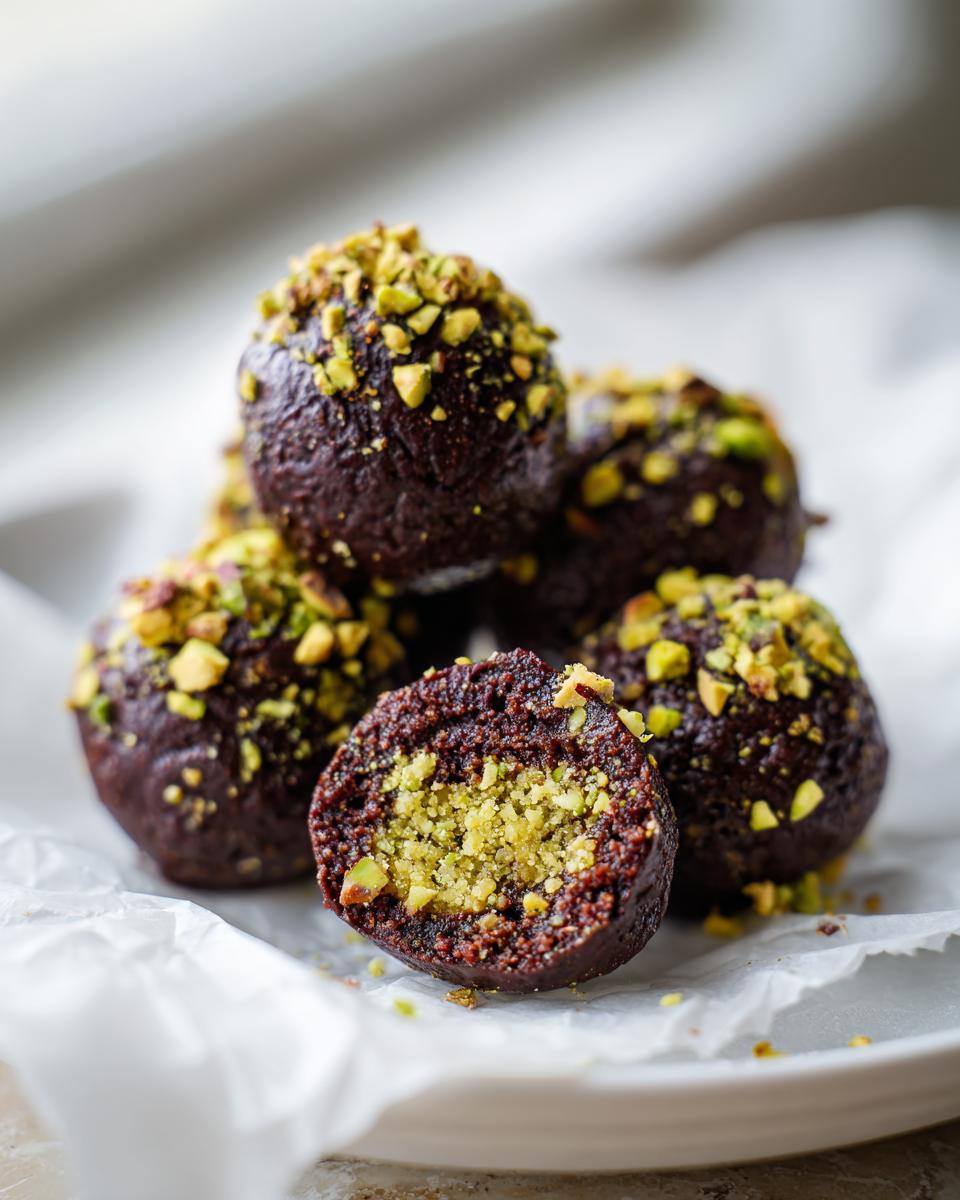
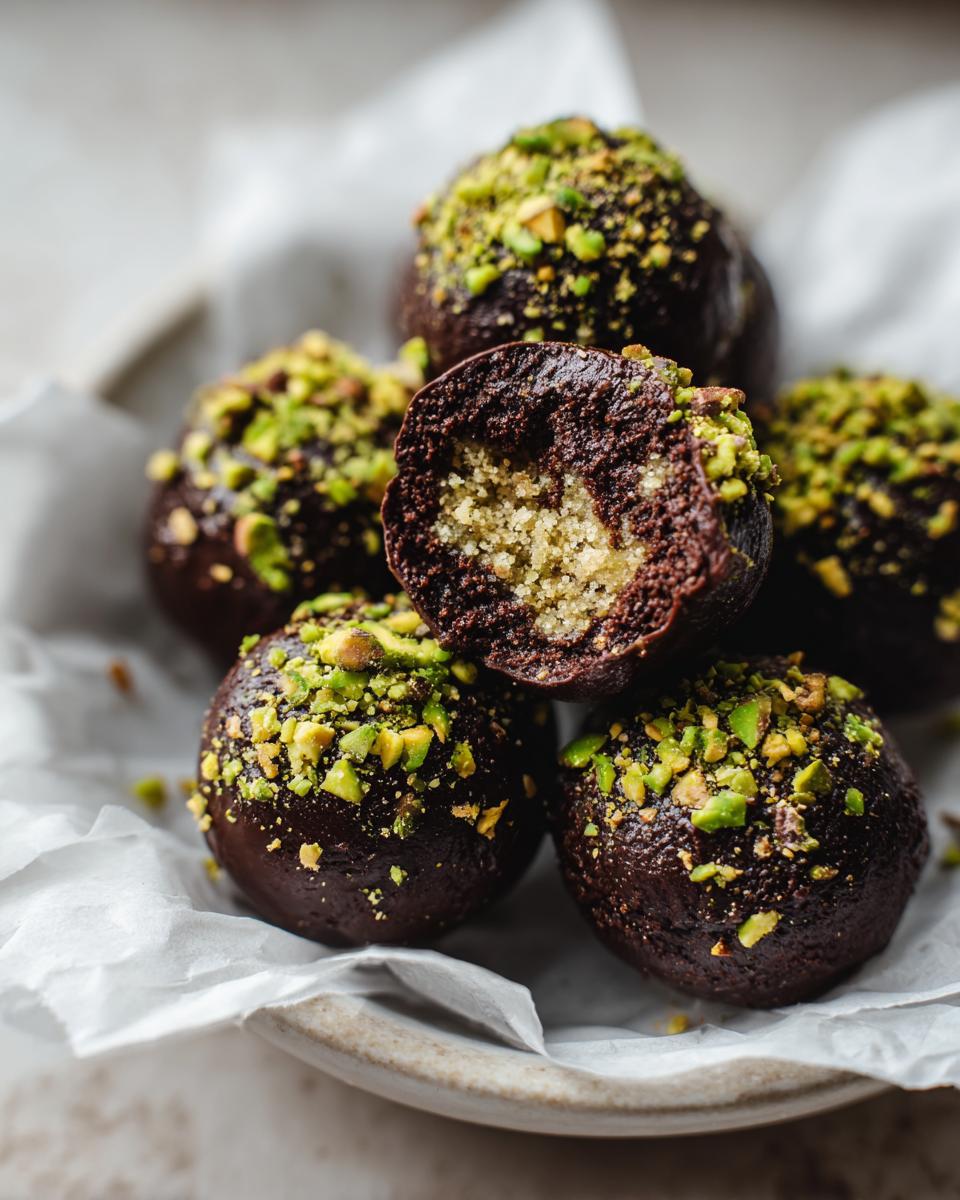
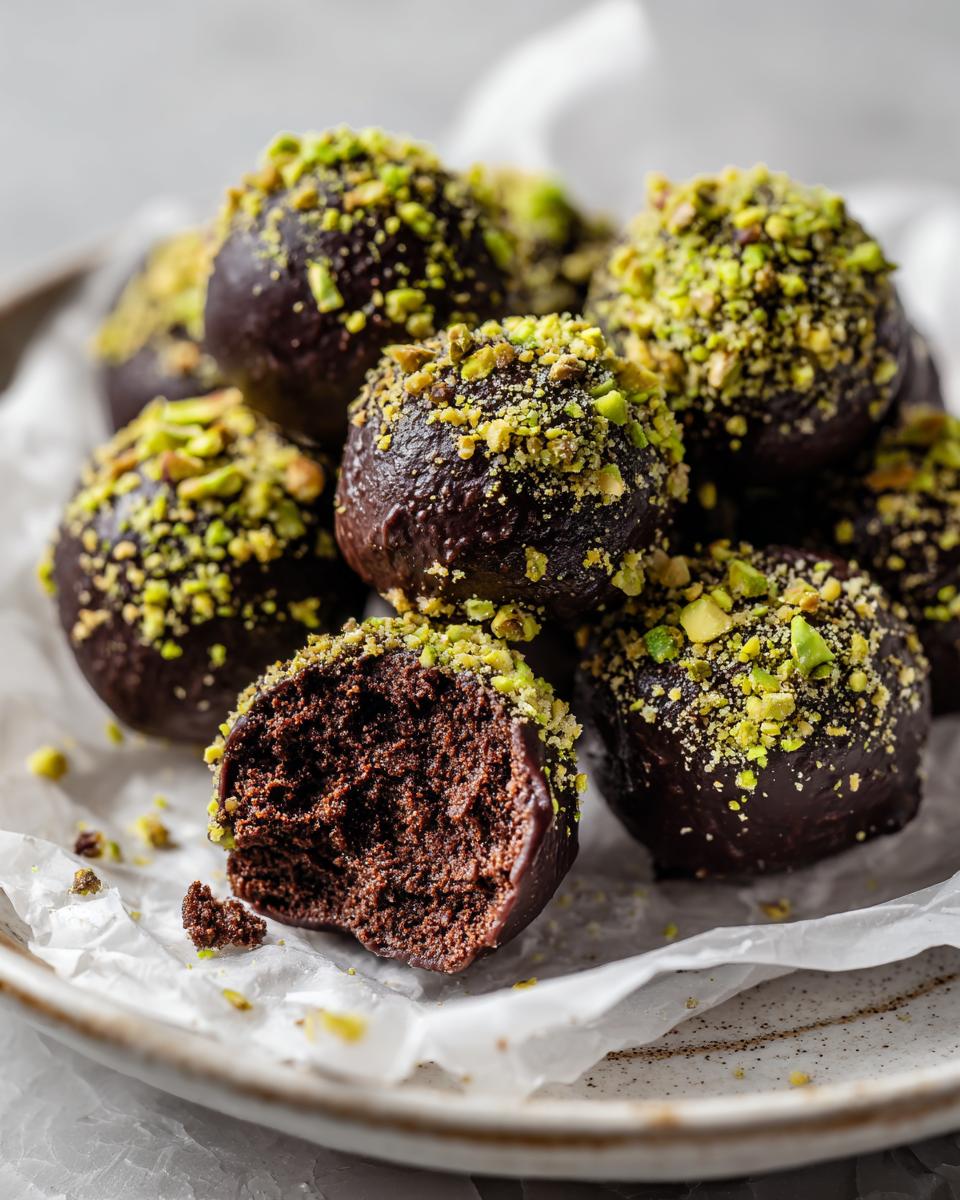
The real magic here is the texture clash. You get this wonderfully rich, fudgy, and intensely creamy chocolate base—honestly, this is one of my favorite creamy chocolate balls recipe versions because the condensed milk makes it so smooth! Then, you bite through that hard shell and hit that satisfying crunch from the ground pistachios and biscuits. That contrast—soft inside, crisp outside—is what makes these so addictive. It’s truly a textural masterpiece, darling.
Perfect Quick Dessert Recipes for Parties
When you need quick dessert recipes for parties, these luxurious bite sized desserts are your answer. Because they are no-bake and rely on chilling time, you can make them days in advance. When you’re getting ready for guests, the last thing you want is a complex baking schedule. These just come together, chill out, get dipped, and you’re done! You just set them on a platter, and boom, instant showstopper.
Gathering Ingredients for Your Dubai Chocolate Balls
Alright, the fun part! Because these are no-bake, the quality of what you put into the filling really shines through. We aren’t hiding anything under a golden-brown crust here; we are showcasing the pure, decadent nature of chocolate and pistachio. Don’t skimp on the core elements if you want that truly authentic, rich flavor profile.
I know you’re probably already thinking about how fast we can get this mixed. We keep the chilling time separate, so gather everything now, and the mixing process is a total breeze. You can check out some of my other easy, one-bowl recipes like my peanut butter pretzel bark if you’re loving this quick approach!
Key Components for the Creamy Chocolate Balls Recipe
This list covers everything needed for that velvety center—the part that melts in your mouth before you hit that crunch. Listen closely on the crushing instructions; they matter! You need true texture here:
- We start with 1 cup of semi-sweet chocolate chips and mix them with 1 tablespoon of coconut oil. This combination melts down beautifully smooth for the base.
- Next up is our secret weapon for rich sweetness: 1 (14 ounce) can of sweetened condensed milk. Don’t substitute this! It keeps the filling incredibly creamy and stable.
- Then come the flavor anchors: 1/2 cup of unsweetened cocoa powder, 1/4 teaspoon of fine sea salt (don’t skip the salt, it deepens the chocolate flavor!), and 1 teaspoon of vanilla extract.
- For texture, we need 1 cup of finely crushed plain biscuits—think digestive or graham crackers, crushed until they resemble fine sand.
- And the star, the pistachio! You need 1/2 cup of finely ground pistachios mixed right into this base, plus a little extra for sprinkling later.
- Finally, if you want that signature texture twist, grab 1/4 cup of finely crushed kataifi pastry threads. They add an amazing, light crispiness!
Essential Chocolate Coating Tips
The coating is what makes these the legendary **dubai chocolate balls** everyone is obsessing over. For this recipe, you are going to need 10 ounces of high-quality dark chocolate. I really stress “high-quality” here. You want chocolate that melts evenly and sets with a nice snap and a gorgeous, glossy finish. Don’t cheap out on the coating chocolate; it’s the beautiful dress these treats wear!
When we get to melting the coating, remember how I talked about that gloss? Using good melting chocolate is half the battle. We’ll talk more about adding something extra later to ensure zero dullness, but for now, just source good dark chocolate chips or finely chopped bars.
Step-by-Step Instructions to Make Dubai Chocolate Balls at Home
Okay, we’ve got our ingredients ready, and now it’s time for the fun part! Since these are no-bake, the steps are mostly mixing and waiting—which means you can totally blast your favorite playlist while you work on the mixing portion. I just love how this recipe proves you don’t need a fancy oven setup to make something that tastes this expensive. Remember, patience during the chilling stages is the secret handshake here; don’t rush the rest!
Creating the Rich, No-Bake Chocolate Filling
We start by building that amazing, creamy center that defines these homemade chocolate spheres. Grab a medium, microwave-safe bowl. You’ll combine your semi-sweet chocolate chips and the coconut oil. Microwave this combination in short bursts—thirty seconds at a time—stirring well between each burst until it’s absolutely smooth and glossy. This melts the base beautifully! If you’re looking for other uses for melted chocolate, check out my recipe for easy creamy chocolate fondue recipe.
Once your chocolate base is melted and happy, toss in the sweetened condensed milk, your cocoa powder, salt, and vanilla extract. Whisk this vigorously until every streak of powder is gone and you have a uniform, gorgeous chocolate mixture. This is where the richness comes from! Now, fold in those crushed biscuits, the ground pistachios, and whisper in those crushed kataifi threads if you snagged some for extra crunch. Mix just until everything is incorporated—don’t overmix!
This is the step that makes or breaks homemade chocolate truffles: Chilling! Cover that bowl up tightly and slide it right into the refrigerator. You need this mixture to firm up significantly, so plan for at least 2 whole hours in there. Seriously, don’t try to rush this part!
Forming and Chilling the Chocolate Truffles
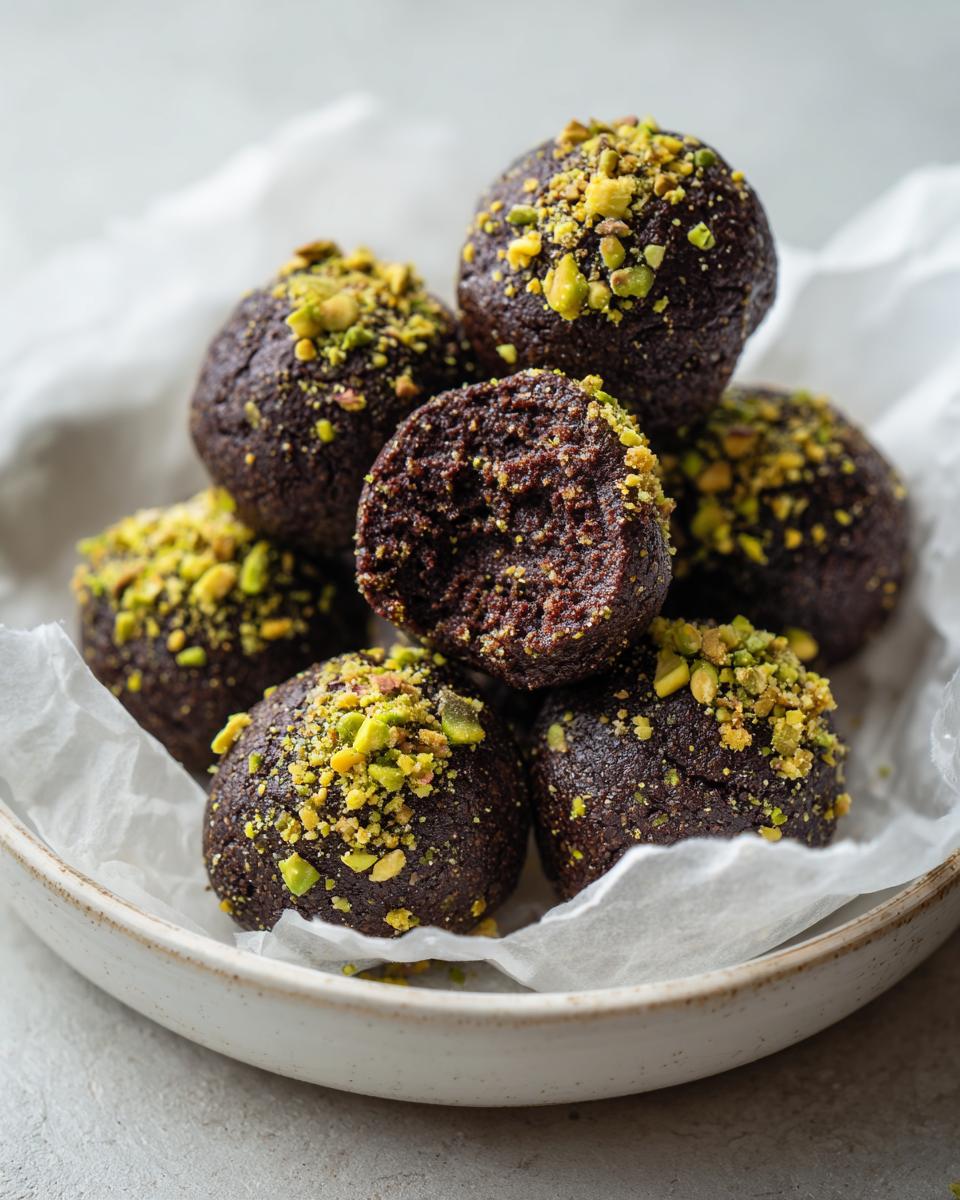
After a couple of hours, your dough-like filling should be firm enough to handle without getting hopelessly stuck to your fingers. Grab a small spoon or a 1-inch cookie scoop—being consistent here helps them look professional! Scoop out the mixture and roll it firmly between the palms of your hands to create smooth, even balls. Place these perfectly formed beauties onto a baking sheet lined with parchment paper.
Now, we chill them again! This second chill is absolutely vital before dipping. It firms up the exterior just enough so that when they hit that warm melted chocolate, they don’t immediately dissolve or crumble. Pop the tray back into the fridge for another 30 minutes minimum. If your kitchen is warm, take a quick peek at the notes to see how to stop them from getting sticky while you work!
Mastering the Glossy Chocolate Coating
This is where we bring in the external showstopper. Melt your 10 ounces of high-quality dark chocolate. I prefer using a double boiler for this because it gives me the most gentle heat, but you can certainly use the microwave if you keep the bursts short—think 20 seconds this time, stirring well every time until it’s completely smooth, shiny, and easy to pour. We want that perfect texture for these chocolate coating tips!
Take your firm, chilled balls out. Fully immerse one ball in the melted coating, using a fork to gently turn it until it’s evenly covered. Lift it out, tap the fork carefully against the side of the bowl to let any extra chocolate drip away—we don’t want giant pooling puddles on the bottom of our treat. Place it back on that parchment-lined sheet. Here’s the crucial finishing touch: before the chocolate sets (and I mean *immediately*), sprinkle the top with a few reserved ground pistachios. Repeat this dipping and garnishing dance until every one of your dubai chocolate balls is dressed in its dark chocolate coat. Let them set up, and they’re ready to go! Feel free to check out this great tip from another baker on making delicious Dubai chocolate balls at home while you wait for the chocolate to harden!
Tips for Achieving Perfect Dubai Chocolate Balls
Even with the best intentions and the right measurements, sometimes our treats decide to have a little personality crisis mid-process, right? That’s totally normal! When you’re dealing with lots of fat and chocolate, small temperature changes can throw things off. Don’t panic if something seems slightly wrong. My goal here is to make sure you get that picture-perfect result, every single time, ensuring that creamy texture we all obsess over.
Remember those notes I shared about things that seem small but make a huge difference? We’re pulling those secrets out now to guarantee success! Whether it’s getting that stunning look or keeping the filling workable, these little tricks are game-changers for making your rich chocolate bites look amazing, whether you’re making them for yourself or trying to impress guests.
Troubleshooting Common Issues with Dubai Chocolate Balls
Let’s talk about the two biggest potential hiccups when making these no bake chocolate truffles—the filling getting soft and the coating looking sad and dull.
First, if your filling mixture gets too soft while you are trying to roll those spheres? Stop immediately! Don’t try to power through it; you’ll just have sticky hands and sad, lumpy balls. Just pop the bowl back into the refrigerator for about 15 minutes. That short chill allows the residual fats to firm up enough so you can handle them again. Keeping the balls firm during rolling is key to a professional look!
Now, for the outside! We want that beautiful, high-end shine, but sometimes melted chocolate can look dull or streaky once it sets. To stop that dullness and guarantee that perfect, glossy finish, you need to stir exactly 1 teaspoon of vegetable shortening or cocoa butter right into your melted dark chocolate right before you dip. I promise you, this tiny addition stabilizes the chocolate while it cools, making your homemade chocolate spheres look like they came from a professional chocolatier. It’s my absolute favorite trick when making any creamy dessert that requires a coating!
Middle Eastern Inspired Sweets: Variations for Your Dubai Chocolate Balls
Part of the fun of taking on a popular international recipe like these **dubai chocolate balls** is making it truly *yours*. While the combination of creamy filling, rich chocolate shell, and pistachio crunch is iconic, these sweets really lean into those incredible Middle Eastern dessert flavors. If you love how these Middle Eastern inspired sweets taste but want to tweak the flavor profile slightly, I have some fantastic ideas!
Since we already have that glorious nutty base with the pistachios, we are just looking to boost the aromatic complexity. You mentioned the kunefe filling being popular, and while this recipe skips the actual pastry layer for simplicity, we can borrow its soul! Try adding a tiny pinch of spice to the filling mixture before chilling.
My favorite little secret—which I pulled straight from my notes on authentic spice blends—is adding a touch of cardamom. Just about 1/4 teaspoon of ground cardamom mixed in with the cocoa powder offers this warm, citrusy lift that works miracles with chocolate and pistachio. It transforms these from just great chocolate truffles into something truly exotic and memorable. You absolutely have to try it next time!
If you’re a big fan of pistachio flavor, you might also love my recipe for easy bakery moist pistachio muffins; it uses high-quality pistachios that give you a great bang for your buck in terms of flavor. For these chocolate balls, though, don’t be afraid to experiment with other finely ground nuts in place of some of the pistachios, like almonds or hazelnuts, if you have someone in the family who prefers a different flavor profile. Just keep the total amount of dry additions about the same so you don’t mess up that perfect chillable texture. For more inspiration on how to elevate these beautiful chocolate spheres, definitely check out this take on Gourmet Pistachio Chocolate Spheres Dubai Style!
Storage and Serving Suggestions for Decadent Chocolate Treats
Now that you’ve successfully dunked and garnished perhaps the most beautiful batch of **dubai chocolate balls** you’ve ever made, the final question is: how do we keep them perfect until serving time? Since these are no-bake and loaded with condensed milk and chocolate, storage is simple, but there are a few tricks to keep that coating pristine.
First things first: the setting time. You want the chocolate shell to be fully hardened before you move them anywhere. I usually let them sit out on the counter for about an hour after dipping, just to let the shell set completely at room temperature. If you happen to be making these on a super hot, humid day, you might need a quick 15-minute chill, but be warned—humidity can cause condensation when you take them out later!
For storing these **fancy chocolate confections**, an airtight container is your very best friend. You absolutely can store them at cool room temperature for up to three days, and honestly, I find the texture is best then—the filling stays perfectly soft. If you need to keep them longer—say, up to a week—go ahead and pop them in the fridge. Just make sure they are truly sealed tight so they don’t absorb any funny smells from the fridge!
When it’s time to serve these **rich chocolate bites**, presentation is everything. Because they look so unbelievably luxurious, they truly only need a beautiful platter and maybe a little dusting of powdered sugar or extra crushed pistachios right before they hit the table. They pair fantastically with a hot, strong cup of coffee or espresso, cutting through that richness perfectly. They also make a stunning addition to any holiday dessert spread or as a little something sweet alongside my classic apple crisp for contrast!
Frequently Asked Questions About Making Dubai Chocolate Balls
I totally get it! When you’re trying a new, famous recipe like these **dubai chocolate balls**, you always have a few lingering questions. Since we’re focusing on making this process simple—making **chocolate balls at home** without any baking fuss—I’ve rounded up the most common things people ask me. If you’ve mastered the rolling and dipping, these final pointers should seal the deal on perfection!
Can I skip the kataifi threads in this recipe?
Oh, absolutely! While I love the authentic, delicate crunch the kataifi threads bring—it makes them so interesting!—they are totally optional. If you can’t find them or just aren’t feeling that extra texture element, don’t sweat it for a second. The crushed biscuits we mix into the filling give you plenty of texture already, making them fantastic **no bake chocolate truffles** even without the threads. This recipe works beautifully, no matter what!
What is the best way to store these homemade chocolate spheres?
Since these are rich, fudgy, and contain chocolate that can melt easily, storage needs a little attention! My top tip for your homemade chocolate spheres is keeping them in an airtight container. I find that if you store them in the fridge, they last the longest—we’re talking 5 to 7 days easily, maybe even longer because of that condensed milk! Just try to let them sit out for about 10 minutes before serving so the filling softens up just a touch. That’s when they achieve peak creaminess!
Can I substitute the condensed milk for something else in these creamy chocolate balls?
That’s a tough one, because honestly, the sweetened condensed milk is doing so much heavy lifting here! It’s what binds everything, keeps the filling sweet, and guarantees that signature smooth, dense texture we are aiming for in these creamy chocolate balls recipe. If you absolutely must substitute it for dietary reasons, you could explore a very thick date paste or perhaps a good quality dulce de leche for a different flavor angle.
But I have to give you the honest truth from my kitchen: your results will likely vary because condensed milk is a specific kind of sugar syrup that sets just right when chilled. If you use something else, you might need to adjust your chilling times a bit. But for the first time making them? Stick to the can; you won’t regret the authentic results!
Need more quick answers as you bake? Feel free to browse through tips on my easy moist pumpkin bread recipe section; sometimes success in baking is just knowing the little tricks!
Estimated Nutritional Data for Your Rich Chocolate Bites
Okay, listen up! We are making **decadent chocolate treats** here, right? They are rich, they are luxurious, and they are absolutely worth every single bite. But since you asked about the finer details of consuming these incredible **dubai chocolate balls**, here is the estimate based on how I measure things out in my kitchen. I developed this recipe to bring you indulgence without major worry, but remember: these are estimates!
Because we are using rich chocolate and condensed milk, these are certainly treats and not your everyday salad! I’m sharing this based on a yield of about 20 balls. If you end up making smaller or larger ones, obviously, the numbers will change. Also, remember that the specific brand of dark chocolate coating you use can bump those fat or sugar numbers up or down a tiny bit. It’s just an estimate, so don’t stress too much over it!
For more useful info on quick meals when you aren’t baking up a storm, check out my ideas for quick healthy lunch ideas!
| Nutrient | Amount (Per Ball) |
|---|---|
| Serving Size | 1 ball |
| Calories | 210 |
| Sugar | 18g |
| Fat | 14g |
| Saturated Fat | 8g |
| Sodium | 35mg |
| Carbohydrates | 20g |
| Protein | 3g |
See? Worth every crumb! These are incredibly rich, fudgy, and satisfying. Enjoy them guilt-free!
Share Your Decadent Dubai Chocolate Balls Experience
Now that you’ve successfully navigated the chilling, rolling, and that tricky dunking process to create these stunning **dubai chocolate balls**, I really want to hear about it! Making food is always better when it’s shared, and as a home cook myself, seeing your creations is genuinely the best part of running Cooking Zenith. Did you manage to get that beautiful glossy finish on your chocolate coating? Did your family even wait long enough for them to set before trying one?
I truly hope these **easy gourmet chocolates** bring a little bit of that luxurious, decadent joy into your week. Seriously, don’t be shy! Drop a comment down below and let me know how they turned out. Did you try my suggestion of adding cardamom, or did you stick to the classic pistachio crunch? I love reading your feedback!
If you snapped a photo of your beautiful batch—and I know you did, because these are stunning—please tag me on social media! Seeing our community create these **rich chocolate bites** together is exactly what I dreamed of when I started this whole journey. You can reach me via my contact page if you have any private questions, but please, shout out your successes in the comments! Happy baking… or rather, happy *no-baking*!
PrintNo-Bake Decadent Dubai Chocolate Balls with Pistachio Crunch
Create these luxurious, viral Dubai Chocolate Balls at home with this easy, no-bake recipe. These rich, bite-sized treats feature a creamy interior and a satisfying pistachio crunch, perfect for impressing guests.
- Prep Time: 25 min
- Cook Time: 5 min
- Total Time: 2 hours 30 min
- Yield: About 20 balls 1x
- Category: Dessert
- Method: No-Bake
- Cuisine: Middle Eastern Inspired
- Diet: Vegetarian
Ingredients
- 1 cup semi-sweet chocolate chips
- 1 tablespoon coconut oil
- 1 (14 ounce) can sweetened condensed milk
- 1/2 cup unsweetened cocoa powder
- 1/4 teaspoon fine sea salt
- 1 teaspoon vanilla extract
- 1 cup finely crushed plain biscuits (like digestive or graham crackers)
- 1/2 cup finely ground pistachios, plus 2 tablespoons for garnish
- 1/4 cup finely crushed kataifi pastry threads (optional, for crunch)
- 10 ounces high-quality dark chocolate, for coating
Instructions
- Prepare the filling base: In a medium, microwave-safe bowl, combine the semi-sweet chocolate chips and coconut oil. Microwave in 30-second intervals, stirring until smooth.
- Add the sweetened condensed milk, cocoa powder, salt, and vanilla extract to the melted chocolate mixture. Stir until completely combined and smooth.
- Fold in the crushed biscuits, ground pistachios, and crushed kataifi threads (if using) until evenly distributed throughout the mixture.
- Cover the bowl and chill the mixture in the refrigerator for at least 2 hours, or until firm enough to handle.
- Once chilled, scoop out the mixture using a small spoon or a 1-inch cookie scoop. Roll the mixture firmly between your palms to form smooth, uniform balls. Place the formed balls on a parchment-lined baking sheet.
- Return the balls to the refrigerator for another 30 minutes to firm up before coating.
- Melt the dark chocolate coating: Place the dark chocolate in a clean, dry bowl. Melt using a double boiler or in the microwave in 20-second bursts, stirring well after each interval until the chocolate is completely smooth and glossy.
- Dip each chilled chocolate ball into the melted dark chocolate, ensuring it is fully coated. Use a fork to lift the ball out, tapping the fork gently on the side of the bowl to let excess chocolate drip off.
- Place the coated ball back onto the parchment-lined sheet. Immediately sprinkle the top with a few extra ground pistachios before the chocolate sets.
- Allow the Dubai Chocolate Balls to set completely at room temperature or chill briefly in the refrigerator until the coating is hard. Store in an airtight container.
Notes
- For a glossy chocolate finish, stir 1 teaspoon of vegetable shortening or cocoa butter into the melted dark chocolate coating. This helps prevent dullness.
- If you prefer a richer, Middle Eastern flavor, add 1/4 teaspoon of ground cardamom to the filling mixture.
- If the filling becomes too soft while rolling, return it to the refrigerator for 15 minutes before continuing.
Nutrition
- Serving Size: 1 ball
- Calories: 210
- Sugar: 18
- Sodium: 35
- Fat: 14
- Saturated Fat: 8
- Unsaturated Fat: 6
- Trans Fat: 0.1
- Carbohydrates: 20
- Fiber: 1
- Protein: 3
- Cholesterol: 10