
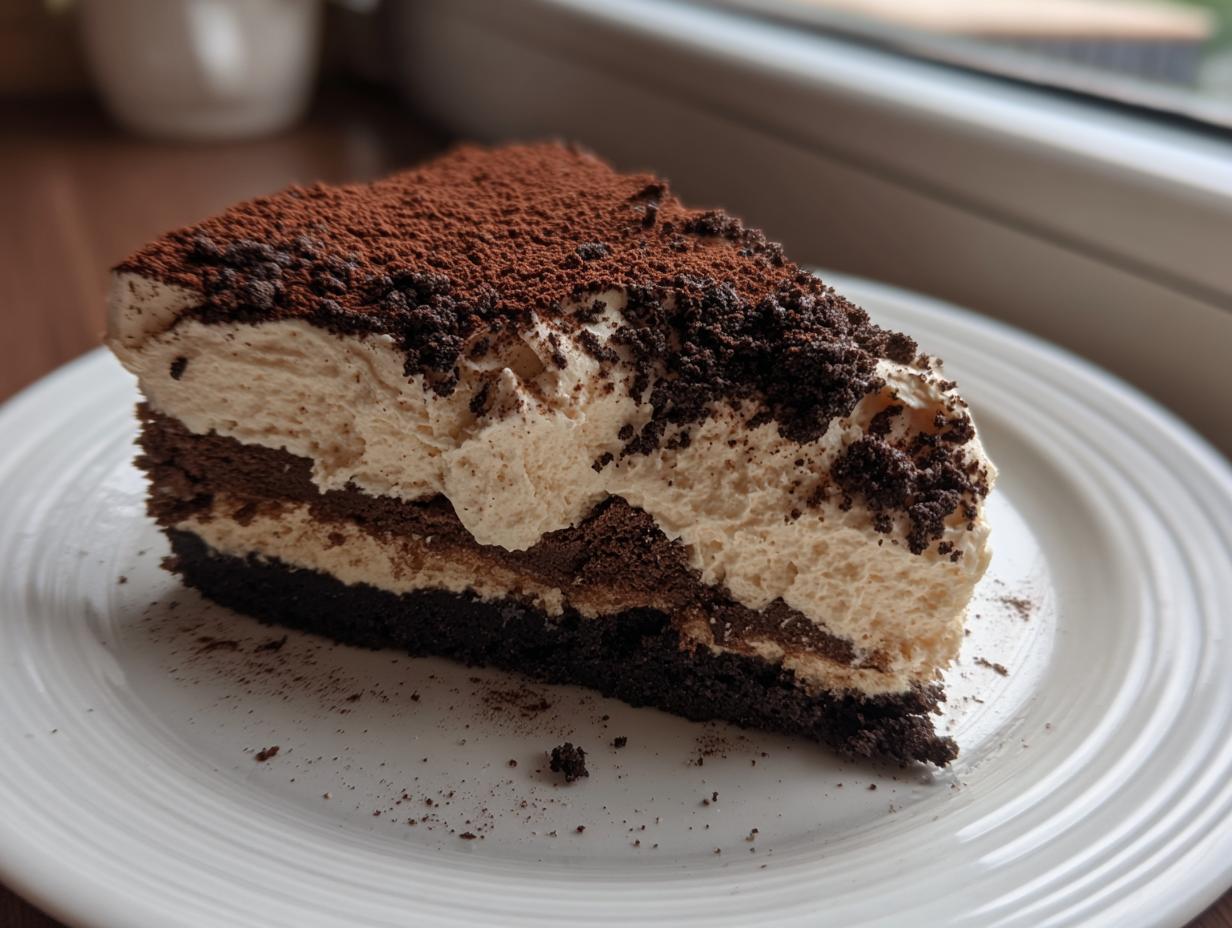
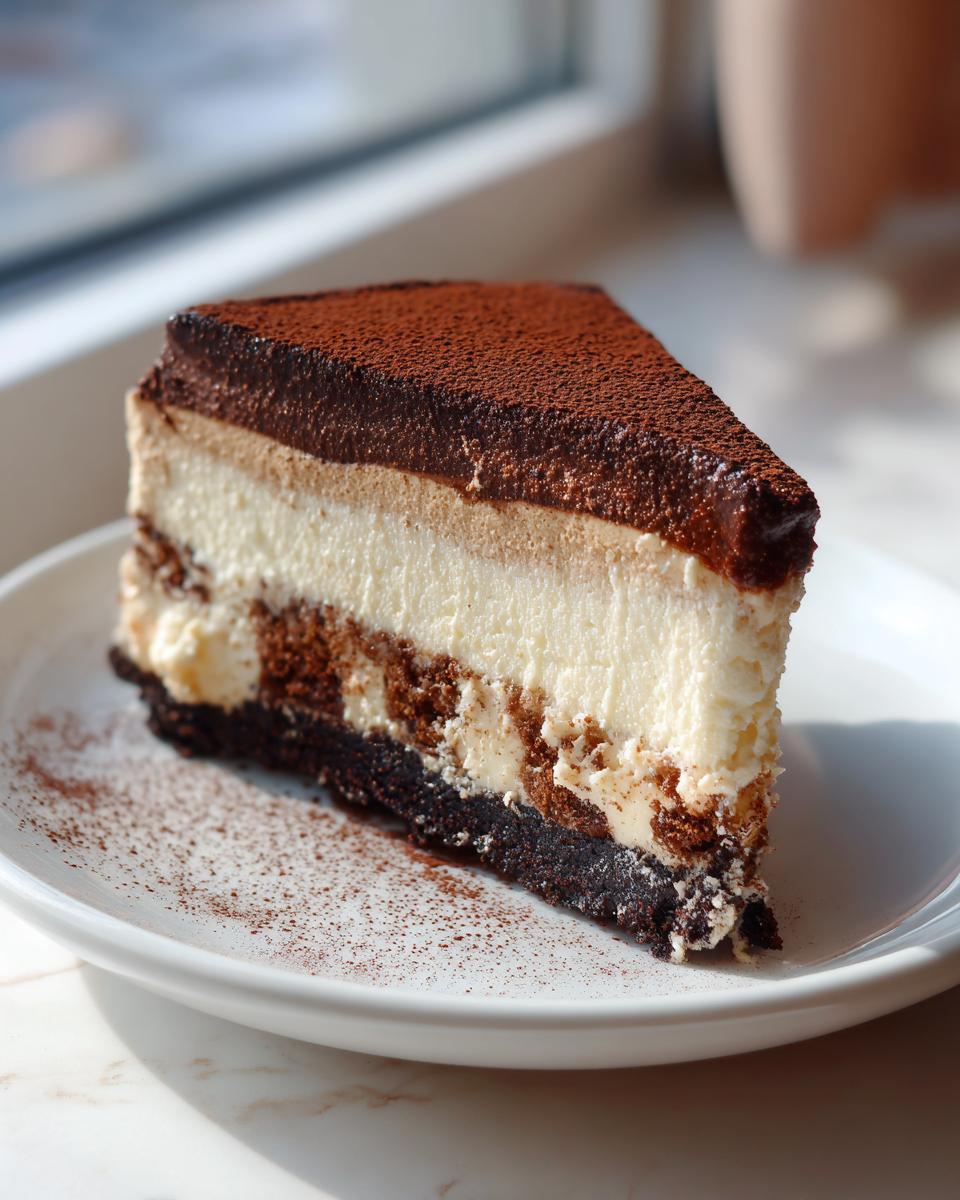
When you truly crave something special, why choose just one Italian favorite? I love merging classic desserts, and when you bring the velvety smoothness of a rich cheesecake together with the coffee-soaked indulgence of tiramisu, magic happens. Friends, get ready for the best tiramisu cheesecake you’ll ever make. Seriously, this recipe looks like it took days, but the secret is that it requires zero oven time! That’s right—it’s a completely no-bake showstopper, which means you can whip it up today and serve it at your dinner party tomorrow with total confidence.
- Why This No Bake Tiramisu Cheesecake Recipe Works For You
- Gathering Ingredients for Your Tiramisu Cheesecake Recipe
- Step-by-Step Instructions for No Bake Tiramisu Cheesecake
- Expert Tips for the Best Tiramisu Cheesecake
- Mascarpone Cheesecake Variations and Substitutions
- Serving Suggestions for This Italian Dessert Fusion
- Storage and Make-Ahead Tips for Tiramisu Cheesecake
- Frequently Asked Questions About Tiramisu Cheesecake
- Estimated Nutritional Data for This Decadent Dessert
- Share Your Tiramisu Cheesecake Creations
- Estimated Nutritional Data for This Decadent Dessert
- Share Your Tiramisu Cheesecake Creations
Why This No Bake Tiramisu Cheesecake Recipe Works For You
I get it—sometimes you want to impress without having to hover over a temperamental oven. That’s why this recipe is my go-to when company is coming over! It delivers that gourmet feel you’re looking for but keeps things totally low-stress for you, the home cook.
- It’s unbelievably easy to make ahead of time, meaning your hosting day is actually relaxing!
- You get that deeply satisfying coffee flavor married perfectly with luxurious, creamy cheese layers.
- This recipe is essentially foolproof since there’s no baking involved to worry about cracking or burning.
Thinking about trying smaller portions later? Check out my guide on easy no bake mini desserts for portion control ideas!
Effortless Assembly: A True No Bake Cheesecake
There is zero oven time required, which is a huge relief, especially during the summer! We rely entirely on the refrigerator to do the heavy lifting here. Once everything is mixed and layered, you just let time chill it into that gorgeous, sturdy, and utterly silky smooth cheesecake everyone craves. No cracks, no fuss—just pure, chilled perfection waiting for you.
The Ultimate Tiramisu Cheesecake Flavor Combination
This fusion is what makes this dessert famous at every potluck I attend. We’re taking the bold, slightly bitter notes of strong espresso and wrapping them in the dreamy sweetness of the mascarpone cream. Adding that creamy cheesecake element just dials up the decadence factor. Every bite of this tiramisu cheesecake hits that perfect balance: bold, sweet, and deeply comforting. It’s truly Italian dessert fusion at its absolute best!
Gathering Ingredients for Your Tiramisu Cheesecake Recipe
Okay, let’s talk supplies! Since this is a no-bake treat, ingredient quality really shines through, especially with the dairy. My biggest tip, and I can’t stress this enough for a silky smooth cheesecake result, is making sure your cream cheese and mascarpone are completely softened to room temperature. If they are cold, you wind up with frustrating little lumps, and we are aiming for pure elegance here!
You’ll notice we use espresso twice—once mixed into the filling for flavor, and again separately for soaking the ladyfingers. That double-duty coffee magic is what pulls the classic tiramisu flavor forward!
For the Chocolate Cookie Crust
We need a dark, rich base to contrast all that creamy filling, so ditch the plain graham crackers this time! Here’s what you need crust-wise:
- 1 1/2 cups chocolate cookie crumbs (like Oreos, filling removed if you want it less sweet!)
- 1/4 cup granulated sugar (just a touch to help it set)
- 6 tablespoons unsalted butter, melted until totally liquid
For the Creamy Mascarpone Filling
This is where the decadent texture comes from. Remember, the heavy cream needs to be ice cold to whip up correctly, so toss that in the fridge while you soften the cheese!
- 1 1/2 cups heavy cream, very cold
- 1 teaspoon vanilla extract
- 16 ounces cream cheese, softened perfectly
- 8 ounces mascarpone cheese, also softened
- 1 cup powdered sugar (this dissolves beautifully!)
- 1/4 cup strong brewed espresso, cooled down completely
- 2 tablespoons coffee liqueur (this is optional, but boy, does it add depth!)
For the Espresso Soaked Ladyfingers Layer
This layer is the defining moment that turns a simple cream dessert into something truly Italian-inspired. You need these components:
- 1 package (7 ounces) ladyfingers (the soft kind, not the hard biscotti type!)
- 1/2 cup strong brewed espresso, cooled for dipping
Step-by-Step Instructions for No Bake Tiramisu Cheesecake
We’ve got all our components ready to go, so now it’s time for assembly! Don’t stress over making this look perfect; remember, we’re aiming for that “rustic elegance” look, and that beautiful layer of cocoa powder dust at the end covers up any little imperfections. This truly is one of the best easy make ahead desserts because all the messy magic happens before any guests even arrive! If you love easy, creamy mains while you wait for dessert to chill, you have to check out my recipe for easy creamy shrimp enchiladas!
Preparing and Chilling the Crust
First things first, let’s get that chocolatey foundation set. In a bowl, you should mix the chocolate cookie crumbs and the granulated sugar together until they’re combined. Then, pour in that melted butter and stir it until every last crumb looks evenly moistened and sandy. Press this mixture down firmly and evenly into the bottom of your springform pan. I use the bottom of a dry measuring cup to really pack it in tight. Pop that pan into the fridge for at least 15 minutes while we tackle the filling.
Creating the Silky Smooth Cheesecake Filling
We have to treat our two main dairy components separately for maximum texture! In one bowl, beat that ice-cold heavy cream with the vanilla extract until you get stiff peaks—you want it holding its shape firmly. Set that aside. In a separate, large bowl, beat your softened cream cheese, mascarpone, and powdered sugar. You have to beat this mixture until it’s completely smooth. Seriously, scrape down the sides halfway through to make sure there are absolutely no cream cheese lumps hiding out. Once smooth, mix in your 1/4 cup of espresso and the liqueur if you’re using it. Finally, gently fold in your whipped cream using a spatula. Cut down the middle and fold up the sides; this keeps all that gorgeous air we whipped in!
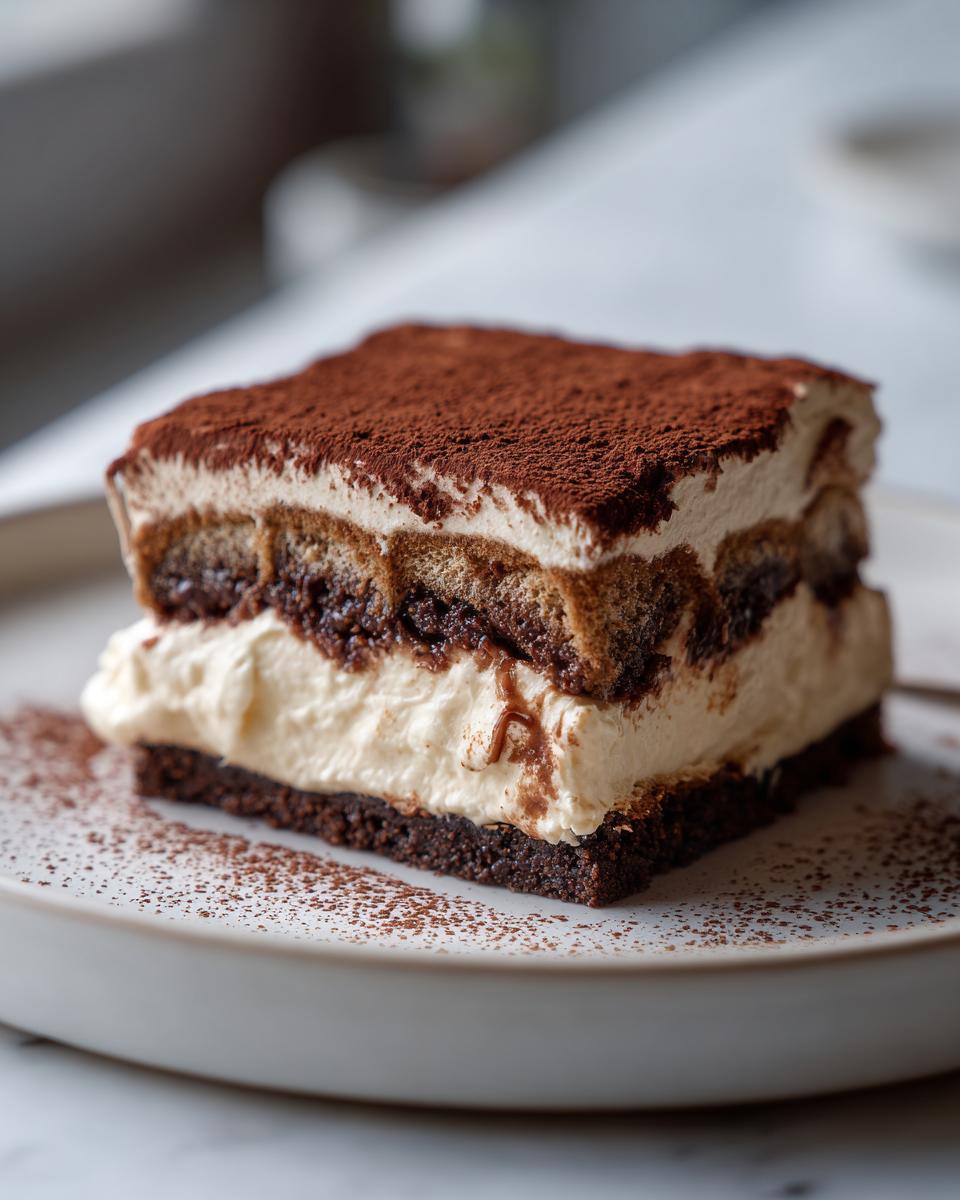
Assembling the Layers of Tiramisu Cheesecake
This is the fun layering part! Take your cold espresso soaking liquid and dip your ladyfingers in—and I mean a very quick dip! They soak up liquid like sponges, and if you leave them too long, the whole thing turns soupy. Arrange half of those slightly damp ladyfingers neatly over your chilled crust. Spread half of your creamy mascarpone filling right over that layer. Then, do another layer of dipped ladyfingers, followed by the rest of the filling on top. Smooth the top gently with an offset spatula.
Setting and Finishing Your Tiramisu Inspired Dessert
Cover the pan loosely with plastic wrap—don’t let the wrap touch the surface of the filling, or it’ll stick! Pop it into the refrigerator for a minimum of 6 hours, but honestly, if you can leave it overnight, the structure firms up even better and the coffee flavor really melds. When you’re ready to serve this stunning tiramisu inspired dessert, carefully remove the springform ring. Don’t forget the grand finale: dust the entire top generously with unsweetened cocoa powder. It looks amazing and adds that classic bitterness!
Expert Tips for the Best Tiramisu Cheesecake
Listen, making a good dessert is one thing, but making one that completely knocks people’s socks off? That requires knowing a few little secrets! I’ve tried this tiramisu cheesecake every way imaginable, and these little tweaks are what help you move from “pretty good” to “I need that recipe immediately.” Trust me when I say these small steps make a huge difference in the final texture and flavor profile.
You can also read about how I handle other tricky flavors in my crème brûlée cheesecake post!
Ingredient Adjustments for Stronger Coffee Dessert Recipe Flavor
If you’re a true coffee lover—and I assume you are if you’re making this!—you might want a deeper, slightly more adult espresso punch. My handwritten notes from my mentor suggest this little trick: skip the 1/4 cup of brewed coffee in the filling and instead dissolve 1 teaspoon of instant espresso powder into just a tablespoon of very hot water before mixing it in. The powdered version is much more concentrated and really amps up that coffee dessert recipe intensity without adding any extra liquid that could throw off the texture. It’s awesome!
Also, if you happen to skip the optional coffee liqueur in the main filling, I always substitute it by beating in 1 teaspoon of instant espresso powder directly when blending the cheeses. It fills that flavor gap perfectly.
Achieving a Truly Creamy Cheesecake Texture
Texture is EVERYTHING in a no-bake dessert. If your cream cheese or mascarpone is even slightly cold, you run the risk of a grainy filling, and nobody wants to bite into lumpy sweetness! Make sure they sit out on the counter until they are truly pliable—you should be able to press a finger into them easily without resistance. When you’re mixing these cheeses with the powdered sugar, stop your mixer every minute or so. I mean it! Grab a rubber spatula and scrape down the sides AND the bottom of the bowl thoroughly. Those hard-to-reach bits at the bottom tend to stay lumpy, and we want this creamy cheesecake to be totally homogenous before we fold in that airy whipped cream. It’s worth the extra 30 seconds!
For more inspiration on mastering creamy textures, check out what my friends over at Made by Sweeney do with their fillings!
Mascarpone Cheesecake Variations and Substitutions
Look, I respect the recipe as written, but I also know we all pull from different pantries! Sometimes you have to make do with what you have on hand, and that’s totally okay for this tiramisu cheesecake. Making substitutions usually just changes the dessert profile slightly, which can be fun, especially if you make it again!
If you’re looking for new ways to approach this Italian dessert fusion, I have a few tried-and-true swaps that keep the spirit of the dessert alive. You can explore more ideas on making unique versions, like how I did with my pecan pie cheesecake!
Crust Swaps for Your Tiramisu Cheesecake
If you’re out of chocolate cookies, don’t panic! The goal of the crust is twofold: structure and a slightly bitter contrast. If chocolate wafers aren’t available, you can absolutely swap them out for classic graham crackers. They will yield a sweeter, lighter crust. For a real flavor kick, try using gingersnaps! The spice from the ginger blends surprisingly beautifully with the coffee notes in the filling. Just crush them up and proceed as normal with the butter and sugar.
Handling the Coffee Element
That coffee liqueur is optional, and I know some folks skip alcohol entirely. If you leave it out, you need to make sure you don’t lose that rich coffee highlight in the filling. If you skipped the liqueur, I’d strongly recommend using that instant espresso powder trick you learned about earlier—maybe even up the amount slightly! Another fun twist that doesn’t involve coffee liqueur but adds a nice warmth is using a teaspoon of good quality vanilla extract or even a splash of dark rum extract for a slightly different, warming note. You can see how Olives + Thyme handles their espresso soak if you want to get really fancy with the coffee.
Serving Suggestions for This Italian Dessert Fusion
Now that you’ve made this gorgeous, chilled creation, let’s talk about how to make it shine when you serve it up! Since this is such a rich, Italian dessert fusion, it definitely deserves a little extra love when it hits the table. This isn’t just something you quickly eat standing over the sink; this is a centerpiece dessert meant to be admired before devoured!
Elegant Plating Techniques
That cocoa dusting is a fantastic start, but you can take it up a notch easily. If you are feeling like splurging a little extra presentation effort, grab a vegetable peeler and shave a few curls of high-quality dark chocolate right over the top after the cocoa powder. Those little shards of chocolate catch the light beautifully contrasting with the dark brown dust.
Another trick I love is to serve individual slices on small, white dessert plates. Before placing the slice down, take a little squeeze bottle and create a light drizzle of warmed chocolate sauce across the empty part of the plate. It makes the plate look instantly more refined. You can even drizzle a tiny bit of extra cold espresso around the base for visual appeal!
Beverage Pairings
What you drink with this coffee dessert seriously changes how it tastes on your palate. Since our dessert is intense and creamy, you want something either strong enough to cut through that richness or sweet enough to complement it.
If you’re serving this after a big dinner party, a strong cup of black coffee or an espresso is always a winner—it enhances the coffee notes we built into the layers. For something a bit more indulgent, a small glass of Vin Santo or a quality Port makes a lovely partner. And, of course, if you feel like shaking up a little something celebratory, remember you can always whip up a batch of my famous lemon drop martinis to serve alongside!
Storage and Make-Ahead Tips for Tiramisu Cheesecake
This is honestly one of the best parts about making this tiramisu cheesecake: it is designed for make-ahead success! When you’re planning a big dinner party or holiday meal, anything you can finish a day early is a lifesaver, right? The good news is that this dessert actually tastes better the longer it sits in the fridge. It’s not like a cake that starts to dry out; the texture just gets silkier and the coffee flavor deepens into the cream layers.
You can find more of my favorite recipes that save you time in the kitchen here, like my guide to easy make ahead dessert options!
Optimal Chilling Period for Tiramisu Cheesecake
While 6 hours is the absolute minimum chilling time I list in the instructions—just enough so the filling sets firm—I strongly, highly, enthusiastically recommend letting this chill overnight. Seriously, if you can leave it covered in the fridge for 10 to 12 hours, you will be rewarded! During that extended chill time, two magical things happen. First, the structure sets up so firmly that when you take the springform ring off, it releases perfectly clean every time. Second, and more importantly for flavor, the espresso from the soaked ladyfingers gently seeps into the mascarpone filling. It’s not overpoweringly coffee, but it gives it that beautiful, complex flavor you expect from classic tiramisu. You can see how essential chilling is over at Cooking Free as well!
Freezing This Creamy Cheesecake
Can you freeze this creamy cheesecake? Yes, you absolutely can! This is perfect if you make it way ahead of time or have leftovers you want to save for later. The trick here is wrapping it *before* you dust it with cocoa powder, because cocoa powder can sometimes get clumpy or absorb freezer smells.
Once the cheesecake is completely firm (after chilling overnight), carefully remove the springform ring. Wrap the whole thing tightly—first in a layer of plastic wrap, and then another layer of heavy-duty aluminum foil. It’s layered protection against freezer burn. When you are ready to enjoy it, transfer the wrapped cheesecake directly to the refrigerator about 24 hours before you plan to serve it so it can slowly thaw. Once it’s totally defrosted, just dust it with fresh cocoa powder, and it’s ready to go!
Frequently Asked Questions About Tiramisu Cheesecake
I know you might have lingering questions once you dive into making this layered masterpiece. That’s totally normal! When you’re merging two classic desserts like this, you want to nail the technique. I’ve pulled together the questions I get asked most often about achieving that perfect, decadent result every time.
You can also find extra inspiration for other amazing crusts, like my best chewy cookie cake, in my recipe archives!
Can I make a baked version of this dessert?
That’s a great question! This specific recipe I’ve shared is designed to be a rich, no bake cheesecake, meaning it relies on chilling to set up that gorgeous, silky smooth texture. Baked cheesecakes are wonderful too, but they require a totally different approach involving eggs, an oven, and usually a water bath to prevent cracking. If you want a baked experience, you’ll need to search specifically for a ‘Baked Tiramisu Cheesecake’ recipe, as the ingredient ratios change quite a bit when you add heat!
What if I want a stronger coffee flavor in my dessert?
Oh, I love a coffee lover! As we talked about in the expert tips, the best way to intensify that coffee dessert recipe flavor without adding extra liquid is by swapping out the brewed espresso for instant espresso powder. When you mix the cheese filling, dissolve about a teaspoon of that powder into just a tiny bit of hot water first, let it cool slightly, and then beat it into the mascarpone and cream cheese base. It punches up the coffee notes beautifully without any soggy consequences!
How do I prevent the ladyfingers from getting too soggy?
This is the single most critical step when assembling the layers! Ladyfingers are sponges, and if you treat them like they are sponges, they will make your dessert soupy. Remember, they need just a quick kiss of liquid, not a full bath! I dip each cookie, using tongs or my fingers, into the cool espresso for just one quick second on the top side, and one quick second on the bottom side. That’s it! They should still feel structurally sound; the espresso will wick through as the whole dessert chills, resulting in that wonderfully moist, but never wet, layer of espresso soaked ladyfingers.
Estimated Nutritional Data for This Decadent Dessert
Because this is such a luxurious combination—blending mascarpone, cream cheese, and rich cookie crust—it is definitely on the indulgent side! Please keep in mind that these figures are always just estimates based on the ingredients listed, and they can change slightly depending on brands and precise measurements used. But for those of you tracking macros or just curious about what you are enjoying, here is a rough breakdown for one slice of this decadent dessert:
- Serving Size: 1 slice
- Calories: 450
- Sugar: 30g
- Sodium: 250mg
- Fat: 32g
- Saturated Fat: 19g
- Carbohydrates: 35g
- Protein: 7g
Share Your Tiramisu Cheesecake Creations
I swear, seeing your successes is the best part of my job! When you make this incredible tiramisu cheesecake fusion at home, I want to see how it turns out for you. Did you add an extra dusting of cocoa? Did you use Kahlua in the soak? Let me know!
Head down to the comments below and tell me how the chilling process went, or rate the recipe so other home cooks can gain confidence trying it out. If you post pictures on social media, please tag me so I can share your beautiful work! And if you’re looking for another easy crowd-pleaser that you can prep ahead, take a peek at my easy cheesy pasta bake for dinner!
PrintNo Bake Tiramisu Cheesecake with Espresso-Soaked Ladyfingers
Create a decadent fusion dessert combining creamy cheesecake with the coffee and mascarpone flavors of classic tiramisu. This no-bake recipe uses espresso-soaked ladyfingers for an indulgent, make-ahead treat perfect for dinner parties.
- Prep Time: 35 min
- Cook Time: 0 min
- Total Time: 6 hours 35 min
- Yield: 10 servings 1x
- Category: Dessert
- Method: No Bake
- Cuisine: Italian Fusion
- Diet: Vegetarian
Ingredients
- 1 1/2 cups chocolate cookie crumbs
- 1/4 cup granulated sugar (for crust)
- 6 tablespoons unsalted butter, melted
- 1 1/2 cups heavy cream, cold
- 1 teaspoon vanilla extract
- 16 ounces cream cheese, softened
- 8 ounces mascarpone cheese, softened
- 1 cup powdered sugar
- 1/4 cup strong brewed espresso, cooled
- 2 tablespoons coffee liqueur (optional)
- 1 package (7 ounces) ladyfingers
- 1/2 cup strong brewed espresso, cooled (for soaking)
- Unsweetened cocoa powder, for dusting
Instructions
- Prepare the crust: Mix the chocolate cookie crumbs and 1/4 cup granulated sugar in a bowl. Pour in the melted butter and mix until the crumbs are evenly moistened. Press the mixture firmly into the bottom of a 9-inch springform pan. Chill the crust for at least 15 minutes while you prepare the filling.
- Whip the cream: In a medium bowl, beat the cold heavy cream and vanilla extract with an electric mixer until stiff peaks form. Set aside.
- Make the cheesecake filling: In a large bowl, beat the softened cream cheese, mascarpone cheese, and powdered sugar until the mixture is completely smooth and creamy. Scrape down the sides of the bowl as needed.
- Add coffee flavor: Beat in the 1/4 cup cooled espresso and coffee liqueur (if using) until just combined. Do not overmix.
- Fold in whipped cream: Gently fold the whipped heavy cream into the mascarpone mixture using a spatula until no streaks remain. This keeps the filling light and airy.
- Assemble the layers: Dip each ladyfinger briefly into the 1/2 cup of soaking espresso, ensuring they are moist but not soggy. Arrange a single layer of the soaked ladyfingers over the chilled crust.
- Spread half of the cheesecake filling over the ladyfingers. Create a second layer by arranging another layer of espresso-soaked ladyfingers on top of the filling.
- Top with the remaining cheesecake filling and smooth the top surface with an offset spatula.
- Chill: Cover the pan loosely with plastic wrap and refrigerate for at least 6 hours, or preferably overnight, until the cheesecake is firm.
- Serve: Before serving, carefully remove the springform ring. Dust the top generously with unsweetened cocoa powder. Slice and serve this decadent dessert.
Notes
- For a richer coffee flavor, use espresso powder dissolved in hot water instead of brewed espresso.
- If you skip the coffee liqueur, add 1 teaspoon of instant espresso powder directly to the cheesecake filling mixture.
- Use a chocolate wafer cookie crust if you do not have chocolate cookie crumbs available.
Nutrition
- Serving Size: 1 slice
- Calories: 450
- Sugar: 30g
- Sodium: 250mg
- Fat: 32g
- Saturated Fat: 19g
- Unsaturated Fat: 13g
- Trans Fat: 0.5g
- Carbohydrates: 35g
- Fiber: 1g
- Protein: 7g
- Cholesterol: 110mg