
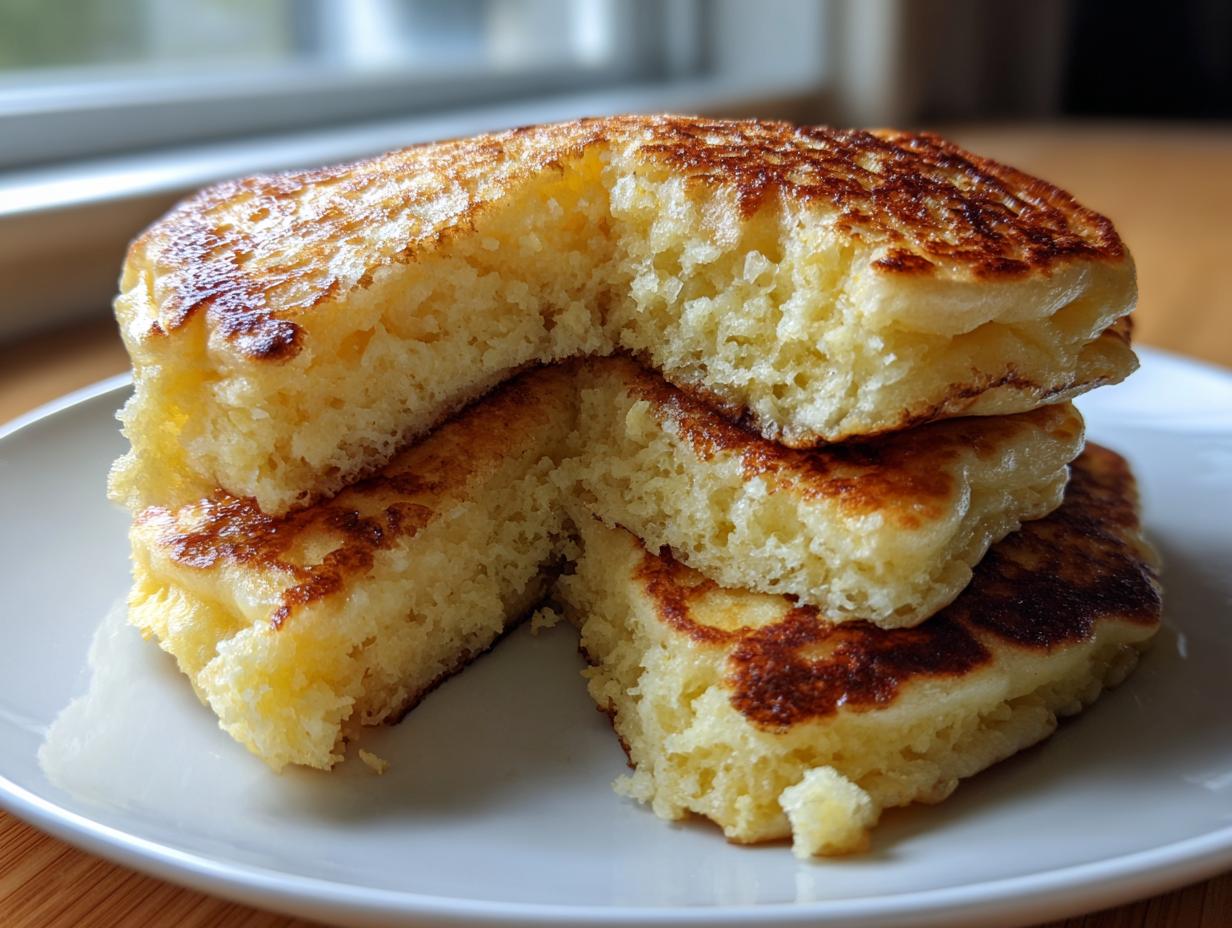
There is nothing, absolutely nothing, that beats the smell of sizzling butter promising a weekend morning full of comfort. For me, that smell means one thing: reaching for the real buttermilk. Forget those thin, sad, ordinary flapjacks; we are talking about the definitive, Old-Fashioned Fluffy Buttermilk Pancake Recipe here! In my kitchen, these buttermilk pancakes are sacred. They are the bedrock of a good morning. When I was growing up, my dad insisted that perfect breakfast wasn’t just about feeding us; it was about setting the tone for the whole day. This recipe is the one I finally perfected after years of tweaking, and I promise you, it creates beautifully tender, impossibly light stacks every single time. Get your griddle hot; we’re about to make memories! If you want to see some of my other go-to breakfast ideas, you can check out my thoughts on classic old-fashioned pancakes here.
- Why This is the Best Buttermilk Pancakes Recipe You Will Ever Make
- Ingredients for Classic Buttermilk Pancakes
- How to Make Fluffy Buttermilk Pancakes From Scratch
- Essential Buttermilk Pancake Tips for Light and Fluffy Results
- Making Buttermilk Pancakes From Scratch Substitutions
- Serving Suggestions for Your Homemade Buttermilk Pancakes
- Storage and Reheating Instructions for Buttermilk Pancakes
- Frequently Asked Questions About Classic Buttermilk Pancakes
- Share Your Morning Pancakes Ideas
Why This is the Best Buttermilk Pancakes Recipe You Will Ever Make
It all comes down to the chemistry, trust me! This isn’t just mixing ingredients; it’s creating a reaction that guarantees lift. The magic in the best buttermilk pancakes comes from combining the acidic buttermilk with the baking soda we use. That slight tang reacts immediately, producing carbon dioxide bubbles that get trapped by the flour and eggs.
If you skip the rest time, you lose that power! When you let the batter sit for those few minutes, you are guaranteeing light and fluffy pancakes that stack beautifully. This recipe balances the tanginess perfectly so they aren’t too sour, just perfectly bright and airy. If you are looking for more ideas to simplify your mornings, I have compiled a list of easy breakfast recipes that might inspire you!
Ingredients for Classic Buttermilk Pancakes
Grab your measuring cups! To make these classic buttermilk pancakes truly stand out, you need the right stuff. We use 2 cups of plain flour, 4 tablespoons of melted unsalted butter, and two large eggs. Don’t forget the sugar and the leaveners—baking powder and baking soda are both crucial here for that height!
But the star? It has to be the 2 cups of real buttermilk. Please, don’t try to skimp here; the flavor is unmatched. If you’ve run out, I put notes in the main recipe about how to whip up a substitute, but real buttermilk makes these homemade buttermilk pancakes the absolute best.
How to Make Fluffy Buttermilk Pancakes From Scratch
Alright, let’s get cooking! Making truly fluffy buttermilk pancakes from scratch is easy once you follow this flow. We are keeping our wet and dry ingredients separate right up until the last minute. This control is what separates a great pancake from a rubbery disk, so pay attention to the timing!
Mixing the Dry and Wet Components
First up, grab your big bowl and whisk together everything dry: the flour, sugar, baking powder, baking soda, and salt. Make sure they are totally incorporated—no clumps of baking soda allowed! In a separate, slightly smaller bowl, you’ll mix the wet stuff. Just lightly whisk those two eggs into the 2 cups of buttermilk. I mean *lightly*; we don’t want foam, just a marriage of the two.
Creating the Perfect Buttermilk Pancakes Batter
Now for the critical moment. Pour that liquid mixture right into the dry ingredients. Take your whisk and mix them together gently. Stop mixing the moment you see the flour streaks disappear! Seriously, a few little lumps are your best friend here. Overmixing is the enemy because it develops gluten and kills the fluff. Once mixed, stir in that reserved melted butter. Then, step away! Let that batter rest on the counter for about 5 to 10 minutes. That resting time is when the baking magic happens, readying your buttermilk pancakes for the heat.
Griddle Setup and Cooking Your Buttermilk Pancakes
Get your griddle heated up on medium. A common mistake is heat that’s too high, which burns the outside before the inside cooks. You want medium heat. Grease it lightly—just enough so nothing sticks. Pour about a quarter cup of batter per pancake. Wait patiently! You know they are ready to flip when you see bubbles popping all over the top surface, and those edges look nice and set, not wet. Flip them quickly and cook for just a minute or two more until they are beautifully golden brown underneath. If you’re experimenting with different batter ideas, this technique works great, though you might want to check out my sourdough discard pancake methods for a totally different flavor profile!
Essential Buttermilk Pancake Tips for Light and Fluffy Results
Now that you have the method down, let’s talk about these little secrets that turn a good stack into perfect buttermilk pancakes. My biggest piece of advice—and this is one of the most important buttermilk pancake tips—is about temperature. Try to use your buttermilk and eggs when they are closer to room temperature. Cold ingredients sometimes resist that initial mixing, which can lead to lumps that you end up overmixing to smooth out.
The second rule is carved into my spatula: NEVER press down on the pancake after you flip it! I see people do this all the time, thinking it helps it cook evenly, but you are squeezing out all that gorgeous, captured air. You’re essentially deflate your beautiful pancake! Let it cook on its own steam. If you are looking for more ideas to simplify your mornings, remember that easy breakfast recipes like this one can always be expanded upon!

Also, when keeping a batch warm, don’t just stack them up hot or they’ll get soggy from the steam. Keep them in a single layer on a baking sheet inside a low oven, around 200°F, while you finish off the rest of that amazing batter. You deserve a big platter of perfectly hot pancakes!
Making Buttermilk Pancakes From Scratch Substitutions
Okay, let’s talk reality for a second. You wake up craving a towering stack of these things, but you open the fridge and—gasp—zero real buttermilk! Don’t panic or throw in the towel on breakfast. We’ve all been there, and this is where a little pantry magic comes in handy. You absolutely can fake it, and honestly, the results for these buttermilk pancakes are surprisingly close to the real deal.
Here is the trick I rely on when I’m in a pinch: take 2 cups of regular whole milk or 2% milk and stir in 2 tablespoons of white vinegar or fresh lemon juice. Give it a gentle little stir and then just let it sit on the counter for about five minutes. It will start to curdle slightly—that’s the acid working, just like real buttermilk does! Once it looks a little thickened and slightly separated, that’s your homemade soured milk ready to go.
Use that mixture exactly where the recipe calls for buttermilk in the wet ingredients. It gives you that necessary acidity to react with our baking soda, ensuring you still get those high, fluffy results, even if it’s an emergency batch. See? Never let a missing ingredient ruin a perfectly good morning!
Serving Suggestions for Your Homemade Buttermilk Pancakes
You’ve done the hard work, and now it’s time for the fun part! Nothing tops a stack of these homemade buttermilk pancakes right off the griddle. Of course, the absolute classic treat is a generous drizzle of the best, purest real maple syrup you can find. Skip the imitation stuff; the flavor difference is night and day!
But don’t stop there! I love piling on vibrant bowls of fresh berries—strawberries, blueberries, maybe even raspberries if they are in season. For something richer, a dollop of homemade whipped cream or a slow-melting pat of good quality butter is divine. If you’re feeling ambitious, a sprinkle of toasted pecans adds a wonderful crunch. Think about what makes your morning special, and pile it on!
Storage and Reheating Instructions for Buttermilk Pancakes
Look, sometimes you just make too many, or maybe you just want a second breakfast ready to go tomorrow morning. That’s fine! These buttermilk pancakes freeze wonderfully, which is a game-changer for busy weekdays. If you have leftovers, cool them completely on a wire rack first—this is important so they don’t steam themselves soggy in the container.
Once totally cool, layer them between squares of wax paper or parchment paper. Then, place the stack into a heavy-duty freezer bag or an airtight container. They should last great in the freezer for about two months. Don’t worry about that slight size difference in the bags; they’ll still taste amazing when reheated later!
When you’re ready to eat them again, reheating is where technique matters to maintain that fluffy quality. The microwave is fast, sure, but it makes things chewy! Try to avoid it if you can. The absolute best way is popping them straight into the toaster or a preheated 350°F oven for just a few minutes until heated through. That keeps the texture just like they came fresh off the griddle.
Frequently Asked Questions About Classic Buttermilk Pancakes
Why are my buttermilk pancakes coming out flat instead of fluffy?
This usually comes down to two main issues! First, check your leaveners. If your baking powder or baking soda are old, they won’t create the lift we need. Second, and more often, people overmix the batter. If you whisk until it’s perfectly smooth, you deflate all those lovely air bubbles we worked so hard to create. A few lumps are absolutely fine, so stop mixing once the flour is barely incorporated! If you love quick solutions, I have tons of other easy breakfast recipes for non-fluffy days.
Can I substitute regular milk for buttermilk in this recipe?
You certainly can in an emergency, but it changes the flavor and texture slightly because you lose that essential acidity. If you use regular milk, you need to add something acidic back in to activate the baking soda, which is what makes these classic buttermilk pancakes so tender. Just use the substitution trick I mentioned earlier: add a splash of lemon juice or vinegar to the milk and let it sit for five minutes.
What is the main difference between these and regular pancakes?
The main difference is the tang and the resulting tenderness! Regular pancakes often rely only on baking powder for their rise. Because we use buttermilk, we introduce an acid, which lets us use baking soda as well, giving you a double dose of lift power! Plus, the slight tang from the buttermilk just cuts through the sweetness of the syrup beautifully.
How long should I let the batter rest before cooking?
I specify 5 to 10 minutes, and I really mean it. This rest period is vital for activating the leavening agents. If you skip it, your buttermilk pancakes will be noticeably flatter. Don’t overthink it while it rests; just walk away and let the science do the heavy lifting!
Share Your Morning Pancakes Ideas
Whew! That’s everything you need to bake the most glorious homemade buttermilk pancakes. Now, the best part: telling me how it went! Did you stick to the classic butter and syrup, or did you get wild with toppings? Leave a rating for the recipe below, or shoot me a message using my contact page if you have any other morning pancakes ideas. Happy flipping!
PrintClassic Fluffy Buttermilk Pancakes from Scratch
Make light and fluffy buttermilk pancakes using this simple recipe. This method delivers traditional flavor and perfect texture every time you cook breakfast.
- Prep Time: 10 min
- Cook Time: 15 min
- Total Time: 25 min
- Yield: About 12 pancakes 1x
- Category: Breakfast
- Method: Griddling
- Cuisine: American
- Diet: Vegetarian
Ingredients
- 2 cups all-purpose flour
- 2 tablespoons granulated sugar
- 2 teaspoons baking powder
- 1 teaspoon baking soda
- 1 teaspoon salt
- 2 cups buttermilk
- 2 large eggs
- 4 tablespoons unsalted butter, melted, plus more for the griddle
Instructions
- Combine the dry ingredients: In a large bowl, whisk together the flour, sugar, baking powder, baking soda, and salt.
- Combine the wet ingredients: In a separate medium bowl, whisk together the buttermilk and eggs until just combined.
- Mix the batter: Pour the wet ingredients into the dry ingredients. Gently whisk until the batter is mostly smooth. Do not overmix; a few small lumps are fine. Stir in the 4 tablespoons of melted butter.
- Rest the batter: Let the batter rest at room temperature for 5 to 10 minutes. This allows the baking soda and baking powder to activate, creating fluffier pancakes.
- Heat the griddle: Heat a griddle or large non-stick skillet over medium heat. Lightly grease the surface with butter or cooking spray. The griddle is ready when a drop of water sizzles and evaporates quickly.
- Cook the pancakes: Pour about 1/4 cup of batter onto the hot griddle for each pancake. Cook for 2 to 3 minutes per side. You know it is time to flip when bubbles appear on the surface and the edges look set.
- Flip and finish: Flip the pancakes and cook for another 1 to 2 minutes until golden brown and cooked through.
- Serve immediately: Serve your homemade buttermilk pancakes hot with your favorite toppings.
Notes
- For the best results, use real buttermilk. If you do not have buttermilk, mix 2 tablespoons of white vinegar or lemon juice into 2 cups of regular milk and let it sit for 5 minutes before using.
- Do not press down on the pancakes with your spatula after flipping; this releases the air and makes them flat.
- Keep cooked pancakes warm in a single layer on a baking sheet in a 200°F oven while you finish the batch.
Nutrition
- Serving Size: 1 pancake
- Calories: 180
- Sugar: 4
- Sodium: 350
- Fat: 6
- Saturated Fat: 3
- Unsaturated Fat: 3
- Trans Fat: 0
- Carbohydrates: 27
- Fiber: 1
- Protein: 6
- Cholesterol: 50