
Does the thought of getting dinner on the table on a Tuesday night fill you with dread? I totally get it. Life moves fast, but that doesn’t mean our meals have to taste like they were rushed! That’s why I’ve taken everything we love about tearing into a perfectly wrapped, messy, flavor-packed burrito and transformed it into something far better for a cozy family spread: the **burrito bake**.
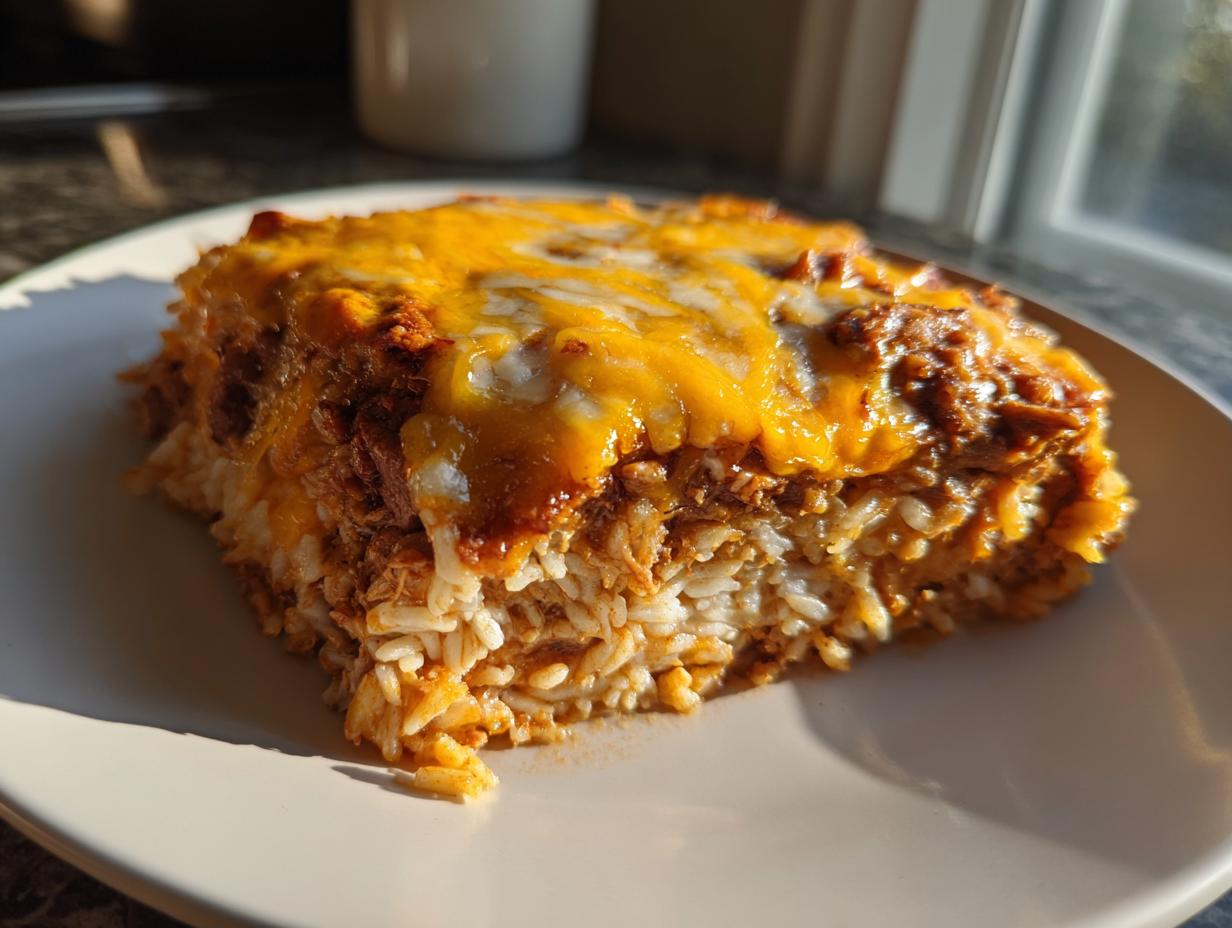
This Easy Chicken Burrito Bake Casserole is the definition of culinary confidence on a busy night. There’s no rolling, no awkward foil wrapping—just layering delicious ingredients until they bake into a unified, bubbly, unbelievably cheesy hug in a 9×13 dish. Trust me when I say this is the easiest, most comforting baked burrito dish you’re going to discover. We’re taking those weeknight struggles and turning them into a memorable, simple Tex-Mex celebration!
- Why This Chicken Burrito Bake Recipe is Your New Weeknight Hero
- Gathering Ingredients for Your Simple Layered Burrito Dinner
- Step-by-Step Instructions for the Perfect Burrito Bake
- Expert Tips for the Best Burrito Bake Every Time
- Make-Ahead and Freezer Friendly Burrito Casserole Options
- Serving Suggestions for Your Hearty Dinner Bake
- Storage and Reheating Instructions for Leftover Burrito Bake
- Frequently Asked Questions About This Cheesy Burrito Casserole
- Nutritional Estimate for One Serving of Burrito Bake
Why This Chicken Burrito Bake Recipe is Your New Weeknight Hero
When I first started developing casseroles, I realized the magic isn’t just in making food faster—it’s how the flavors marry while they bake! In this dish, all those beautiful Tex-Mex spices, the smoky enchilada sauce, beans, and cheese all get happy together in the oven. That melding process creates a depth of flavor you just can’t get from quickly assembling a standard burrito. It truly elevates the experience!
- It’s designed completely for speed: Prep rockets through in just 15 minutes.
- Cleanup is a breeze since everything lands in one baking dish.
- The layered structure keeps every forkful interesting—no boring, single-texture casserole here!
If you love the ease of our simple chicken enchiladas but need something even faster, this is your answer.
Quick Prep for a Family Friendly Burrito Bake
Seriously, 15 minutes. That’s it. Because we’re using pre-shredded chicken and canned beans, there’s virtually no chopping involved. You’re just mixing and layering. This is the secret weapon for those evenings when you walk in the door at 6 PM and need something hearty on the table by 7. It’s the definition of a quick Mexican bake that actually tastes like you spent hours on it.
The Ultimate Comfort Food Casserole
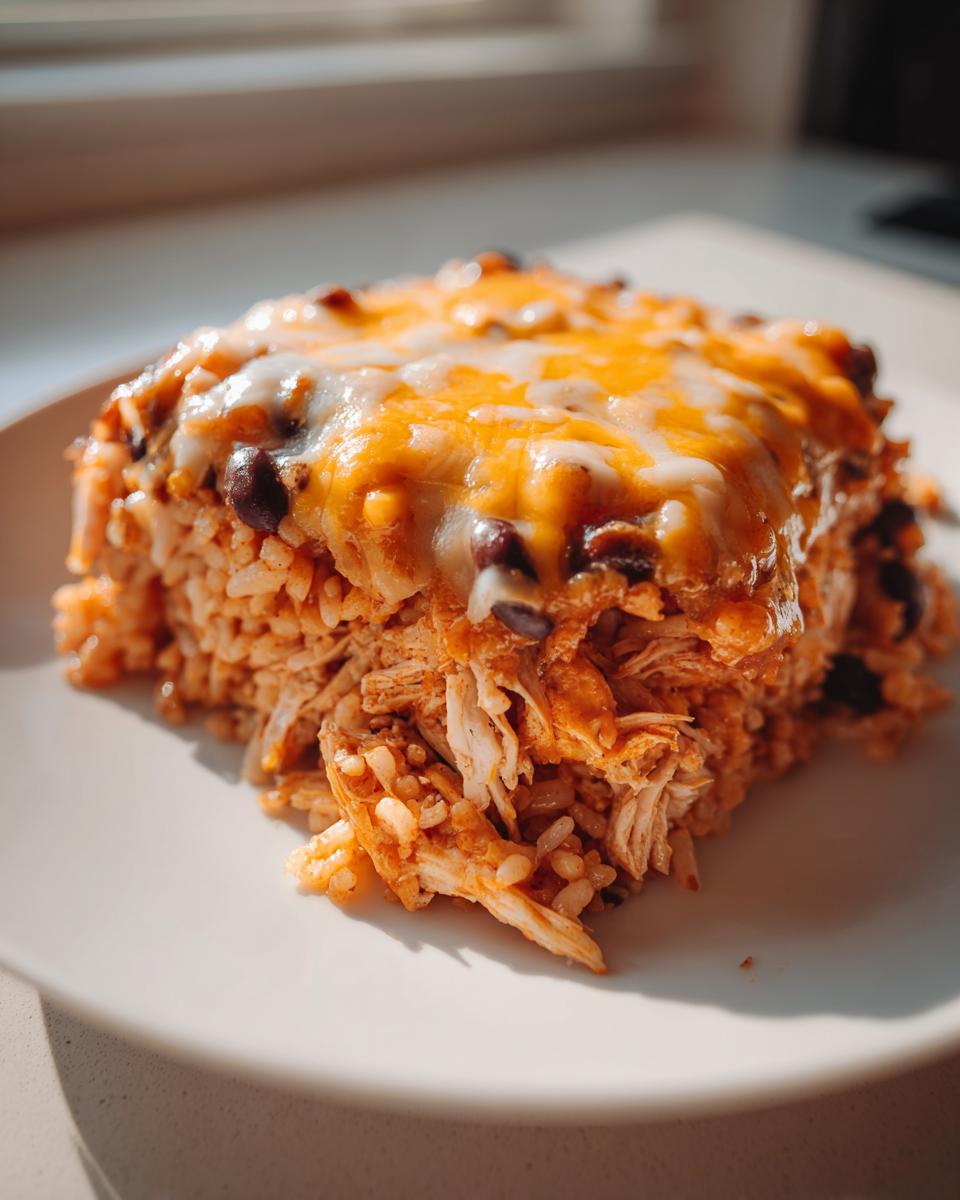
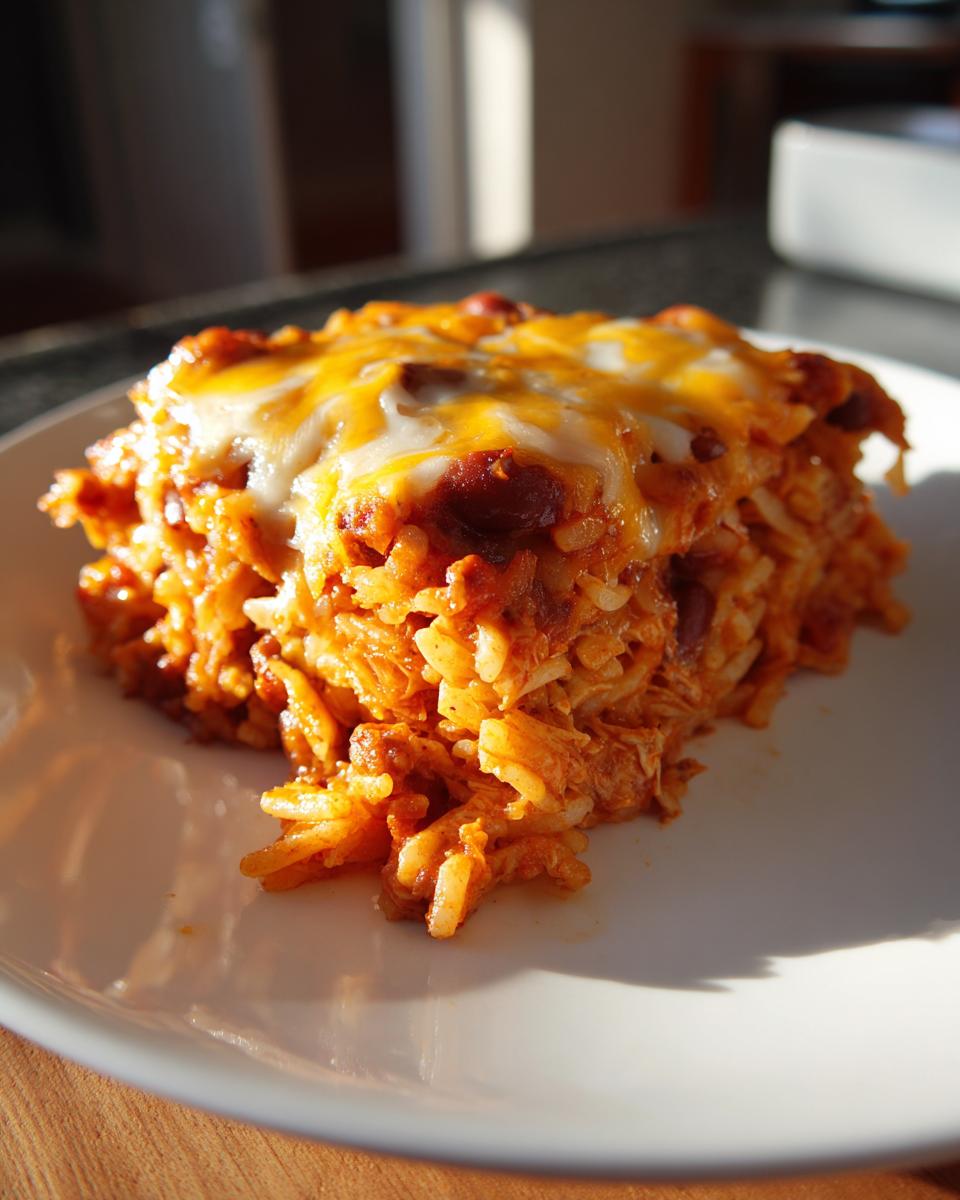
For me, comfort food means warmth, cheese, and the inability to stop eating it. This **burrito bake** delivers! It’s hearty thanks to the beans and rice, incredibly satisfying because of the sour cream layer, and topped with that glorious blanket of melted cheese we all crave. Knowing I can serve something this rich and flavorful on a tough Wednesday—that’s what brings the joy back to cooking for me.
Gathering Ingredients for Your Simple Layered Burrito Dinner
I always say that success in a **burrito bake recipe** starts with having everything ready before you even think about turning on the oven. Since this is a quick Mexican bake, we are relying on smart shortcuts, which is why pre-cooked, shredded chicken is a total game-changer! You really don’t need to fuss with raw meat here; grab your cooked chicken and let’s assemble this magic.
You’re going to need a few staples you probably already have, plus a good, bright red enchilada sauce. If you happen to have leftover cilantro lime rice lying around from last night, even better! Here are the exact players we’re bringing to the party:
- One tablespoon of good olive oil to start things off.
- One pound of boneless, skinless chicken breasts, already cooked and shredded—don’t skip the pre-cooking!
- One 10-ounce can of red enchilada sauce.
- One 15-ounce can of black beans, make sure they are rinsed and drained well.
- One 10-ounce can of diced tomatoes and green chilies, undrained for that lovely sauce base.
- One cup of white rice that’s already cooked.
- One teaspoon of chili powder, half a teaspoon of cumin, and a quarter teaspoon of garlic powder for seasoning.
- One cup of sour cream—this is for our creamy middle layer!
- Eight small flour tortillas, which we’ll cut into little 1-inch pieces.
- Two cups of that delicious, Mexican cheese blend, shredded.
- And if you want a little pop of color, half a cup of fresh chopped cilantro for garnish, but that’s totally optional!
Step-by-Step Instructions for the Perfect Burrito Bake
Okay, now for the fun part! This **burrito bake recipe** is all about building flavor layers in the dish itself. Don’t rush this part; while it’s assembly, the way you layer everything makes a huge difference in how moist and robust the final casserole is. We want every forkful to have a little bit of everything!
Before we mix anything, make sure your oven is ready to go. We’re aiming for 375 degrees Fahrenheit. Grab that 9×13 dish—the standard size is perfect—and just quickly grease it up with a little oil or cooking spray. It prevents that annoying sticking around the edges.
Preparing the Base and Mixing the Burrito Bake Filling
Step two is where we create the hearty heart of this dish. Grab the biggest bowl you own! We’re throwing in that gorgeous shredded chicken, the whole can of enchilada sauce (don’t drain that!), those well-rinsed black beans, the undrained tomatoes and chilies, your cup of cooked rice, and all those spices—the chili powder, cumin, and garlic powder.
Now, mix this gently until everything looks happy and evenly coated. You want the rice grains covered in that red sauce and seasoning. This seasoned mixture is going straight into the bottom of your prepared dish. Spread it out so it forms a nice, flat, even base. If you’re interested in making homemade Mexican rice to use here, check out my recipe for easy Mexican rice!
Layering for Maximum Cheesy Burrito Casserole Results
This is my favorite step because it’s what separates a regular pile of ingredients from a stunning, layered **cheesy burrito casserole**. Take half of those tiny tortilla pieces you cut up and scatter them right over that chicken base. They’ll soften up beautifully while baking, acting like little pasta layers.
Next, mix your cup of sour cream with just half a cup of that shredded cheese until it’s all combined in a separate little bowl. Spread that creamy mixture evenly over the tortillas. That layer is pure gold! Then, you top that sour cream layer with the rest of your chicken mixture, and sprinkle the remaining cut tortillas right on top of that.
Finally, take the remaining 1 1/2 cups of cheese and cover the entire top surface like a cozy winter blanket. Make sure you get the edges so they melt down nicely!
Baking and Resting the Easy Burrito Casserole
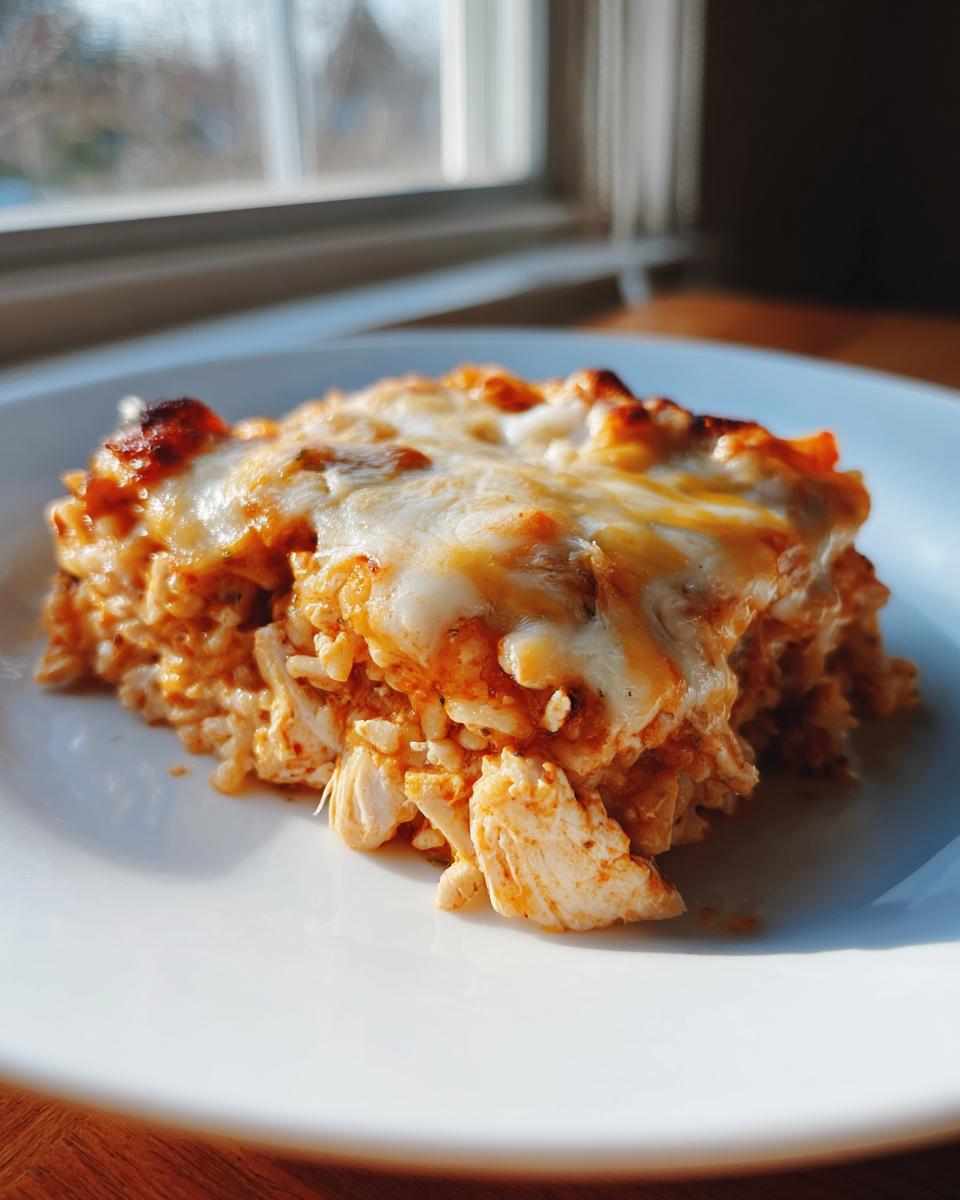
Into the oven it goes! We’re baking this **Easy Burrito Casserole** for about 25 to 30 minutes. You’ll know it’s done when the edges are bubbling aggressively and that cheese blanket on top is perfectly melted and starting to get little spots of golden brown. Don’t pull it out too early!
The absolute most important step after it comes out? Wait! You must let the **Easy Burrito Casserole** rest on the counter for a solid 5 minutes. If you slice into it immediately, all that delicious filling will run out onto your plate. That short rest allows everything to set up so you get perfect squares. Garnish with cilantro, then dig in!
Expert Tips for the Best Burrito Bake Every Time
Even the simplest recipes, like our favorite **burrito bake** here, benefit from a little expert fine-tuning. Look, I’m not a professional chef; I’m just someone who cooks for my family every single night. And through trial and error, I’ve learned a few tricks that make these weeknight casserole dinners really shine. Mostly, it comes down to managing moisture and flavor boosters!
If you want to turn this into something truly amazing—maybe you’re making it for a potluck instead of just Tuesday night—you can tweak the spices a little. A tiny dash of smoked paprika or stirring in a spoonful of pepper jack cheese with your topping can really kick up the flavor profile. I find that when I make my Mexican cornbread, a little smoked spice makes all the difference in Tex-Mex dishes, and it works here too!
Protein Swaps for Your Baked Burrito Dish
While this recipe calls for chicken because it’s so easy to shred leftover meat, I know not everyone always has chicken on hand. Good news: this **baked burrito dish** is super adaptable! If you prefer ground beef or ground turkey, you absolutely can swap that protein out.
Here’s the important part, though, and please listen closely: If you use ground meat, you must brown it first in a skillet. Cook it all the way through, and then drain *all* the fat off before you ever mix it into the big bowl with your sauce and onions. Excess grease makes a casserole soggy, and we don’t want soggy. Once it’s drained and dry, toss it right in with the other filling ingredients, and proceed exactly as written!
Make-Ahead and Freezer Friendly Burrito Casserole Options
One of the biggest wins for any **weeknight casserole dinner** is the ability to make it when you *do* have time, so you can enjoy it when you *don’t*. This **burrito bake** is fantastic for batch cooking! If you’re looking for a great **meal prep casserole idea**, this should absolutely be on your list.
You can assemble this entire **Freezer Friendly Burrito Casserole** right up until the final cheese topping goes on. Mix all the filling, layer the tortillas and the sour cream mixture just as we talked about, but stop before you sprinkle that last layer of cheese on top. Cover it tightly—and I mean *tightly*—with plastic wrap, and then maybe a layer of foil over that, especially if freezing for longer than two weeks.
When you’re ready to bake it straight from the freezer, the main thing to remember is that it’s going to take longer to heat through. You need to add about 10 to 15 extra minutes to the cooking time. If you have the foresight, pulling it out the night before and letting it thaw slowly in the refrigerator is even better; just cover it tightly during the thaw!
This kind of make-ahead meal is such a lifesaver. It’s similar to how I prepare my make-ahead cheesy egg bakes for busy weekend mornings. Having that ready-to-go backup means ordering takeout is never an option!
Serving Suggestions for Your Hearty Dinner Bake
You’ve pulled this magnificent **burrito bake** out of the oven, and it’s bubbly, golden, and smelling like heaven, right? Fantastic! But before you dive in, think about what’s going to balance out all that richness. A super cheesy, hearty dinner bake begs for something cool, creamy, or zesty on the side. It takes this comforting casserole from great to *absolutely unforgettable*.
I always keep a few toppings stocked because every member of my family likes something slightly different. Seriously, setting up a little self-serve topping bar turns dinner into a fun event, and it makes this **hearty dinner bake** feel way more special than a regular weeknight meal.
Here are the things I always put out on the table when we serve this:
- Fresh Salsa or Pico de Gallo: You need that acidity and crunch! The tomatoes and onions cut right through the fat from the cheese and sour cream.
- Guacamole or Sliced Avocado: Creamy on creamy seems decadent, but avocado adds healthy fats and this beautiful fresh flavor that just pairs perfectly with cumin and chili powder.
- Queso Fresco or Cotija Cheese: Sometimes you want a finishing cheese that doesn’t melt. Crumbly, salty queso fresco on top of the melted cheese offers an amazing texture contrast.
- Extra Sour Cream or Plain Greek Yogurt: This is non-negotiable for cooling things down. If you happen to have some fun dips ready, like my whipped ricotta dip, you can sneak that in too—it’s unexpectedly great with Tex-Mex spices!
- Thinly Sliced Jalapeños: For those of us who need a little fire! A tiny sprinkle of fresh or pickled jalapeños adds the perfect kick without overwhelming the whole dish.
Don’t forget a simple side salad with a lime vinaigrette if you want to sneak some greens in. But honestly, just these toppings alone make this **cheesy burrito casserole** feel complete!
Storage and Reheating Instructions for Leftover Burrito Bake
Listen, I really hope you have leftovers, because this **burrito bake** tastes amazing the next day! It’s one of those comfort food casseroles where the flavors actually deepen overnight. But, we have to treat leftovers right so they don’t turn into a sad, dry mess when you try to reheat them later.
For the fridge, you want to be quick. Let the casserole cool down a bit after you serve the first round, but don’t leave it sitting out for more than two hours. Pop any remaining portions into an airtight container. Stored properly, your **burrito bake** will stay good for about 3 to 4 days. Any longer than that, and you risk losing that great texture we worked so hard to achieve.
When you’re ready for round two, you have two main routes depending on how much time you have. I usually prefer the oven method if I’m having it as a proper lunch or dinner reheat, but the microwave is perfect for a quick snack!
Reheating in the Oven (Best Texture)
If you’re reheating a bigger portion, maybe four squares at once, the oven is your best friend. Preheat that oven to a gentle 350 degrees Fahrenheit. You don’t want screaming hot heat, or the edges will dry out before the middle thaws. Place your portion in an oven-safe dish—you don’t need to grease it again.
Here’s the trick to keep it moist: Cover it loosely with foil. This traps the steam but still allows the cheese on top to crisp up a tiny bit if you leave it uncovered for the last 5 minutes. It usually takes about 15 to 20 minutes, depending on how cold the dish was. Check it until it’s hot all the way through!
Quick Reheating in the Microwave
If you just need one serving right now, the microwave wins. Put a single serving on a microwave-safe plate. I recommend placing a paper towel *on top* of the portion before microwaving. Trust me on this one—it absorbs some of the escaping moisture that can make reheating a casserole rubbery or tough.
Microwave in short bursts—say, 45 seconds at a time, stir gently if you can manage it (especially if you have lots of little tortilla pieces), and repeat. Always check the center temperature. This whole process should take about 1.5 to 2 minutes maximum to get that **cheesy burrito casserole** bubbly again.
Frequently Asked Questions About This Cheesy Burrito Casserole
It’s totally normal to have questions when you’re trying a new **burrito bake recipe**! When I first started cooking, I always read the FAQ section twice just to be sure I wasn’t missing any crucial steps. Here are some of the questions I hear most often about turning this into the best **weeknight casserole dinner** possible for *your* kitchen.
Can I make this a beef burrito bake instead of chicken?
Oh, absolutely! You can definitely swap the chicken out for beef. If you do, I highly recommend using lean ground beef—like 90/10 or leaner. You’ll brown that meat first in a skillet, drain off every drop of fat you can, and then proceed exactly as we did with the shredded chicken. It just adds that wonderfully rich flavor everyone loves in a traditional Tex-Mex dish!
How can I make this a truly one pan burrito bake?
That’s a great question because we all hate scrubbing multiple bowls! While this recipe *does* require one mixing bowl (so you can get that sour cream blend right and coat the chicken evenly), the entire cooking process takes place in just one 9×13 baking dish. Realistically, for a layered **cheesy burrito casserole**, you need that mixing bowl unless you’re okay with dumping ingredients directly into the pan unevenly. But I promise, that one extra bowl is so worth it for the perfect texture; it keeps the cleanup minimal compared to making traditional rice and chicken separately!
What is the best way to make this recipe vegetarian?
I love making vegetarian versions of dishes like this! It’s super simple to turn this **burrito bake** into a hearty vegetarian favorite. My top suggestion is to keep the rice and beans, but skip the chicken entirely. Instead, grab two cans of black beans (so you have 3 total, counting the one in the recipe) and use an extra can of corn, or substitute the chicken weight with a sturdy plant-based ground substitute—just cook that substitute first before mixing it in, just like you would meat. You’ll still get that fantastic texture!
For more ideas on single-dish comfort meals that reduce cleanup, you might want to check out my thoughts on making a creamy beef pasta that stays entirely in one pot!
Nutritional Estimate for One Serving of Burrito Bake
I always make sure to include the nutrition breakdown because we all want to know what we’re serving up, right? Knowing the numbers doesn’t mean you skip out on the flavor, though! Remember, since this is a home-cooked **burrito bake**, these figures are just an estimate based on the exact quantities listed in the recipe above—your specific brand of cheese or sour cream might change things slightly.
This estimate is based on dividing the entire recipe into 6 generous servings:
- Serving Size: 1 serving
- Calories: 550
- Fat: 28g (with 15g saturated fat)
- Carbohydrates: 45g
- Protein: 35g
- Sodium: 850mg
- Sugar: 6g
It’s a powerhouse of protein and flavor that still keeps the sugar low! That’s why this **easy burrito casserole** is such a great staple for satisfying cravings without wrecking your week.
PrintEasy Chicken Burrito Bake Casserole

Make this easy chicken burrito bake for a comforting, family-friendly dinner. This baked casserole combines seasoned chicken, rice, beans, and plenty of cheese for a satisfying Tex-Mex meal perfect for busy weeknights or meal prep.
- Prep Time: 15 min
- Cook Time: 30 min
- Total Time: 45 min
- Yield: 6 servings 1x
- Category: Dinner
- Method: Baking
- Cuisine: Tex-Mex
- Diet: Vegetarian
Ingredients
- 1 tablespoon olive oil
- 1 pound boneless, skinless chicken breasts, cooked and shredded
- 1 (10 ounce) can red enchilada sauce
- 1 (15 ounce) can black beans, rinsed and drained
- 1 (10 ounce) can diced tomatoes and green chilies, undrained
- 1 cup cooked white rice
- 1 teaspoon chili powder
- 1/2 teaspoon ground cumin
- 1/4 teaspoon garlic powder
- 1 cup sour cream
- 8 small flour tortillas, cut into 1-inch pieces
- 2 cups shredded Mexican cheese blend
- 1/2 cup chopped fresh cilantro, for garnish (optional)
Instructions
- Preheat your oven to 375 degrees Fahrenheit. Lightly grease a 9×13 inch baking dish.
- In a large bowl, combine the shredded chicken, enchilada sauce, black beans, diced tomatoes and green chilies, cooked rice, chili powder, cumin, and garlic powder. Mix until all ingredients are evenly coated.
- In a separate small bowl, mix the sour cream with 1/2 cup of the shredded cheese until combined.
- Spread half of the chicken mixture evenly over the bottom of the prepared baking dish.
- Scatter half of the cut tortilla pieces over the chicken layer.
- Spread the sour cream mixture evenly over the tortilla layer.
- Top with the remaining chicken mixture and the remaining tortilla pieces.
- Sprinkle the remaining 1 1/2 cups of shredded cheese over the top layer.
- Bake for 25 to 30 minutes, or until the casserole is bubbly and the cheese is melted and lightly golden brown.
- Let the burrito bake rest for 5 minutes before cutting into servings. Garnish with fresh cilantro, if desired.
Notes
- For freezer-friendly preparation, assemble the casserole completely, cover tightly with foil, and freeze for up to 3 months. Thaw overnight in the refrigerator before baking, adding 10-15 minutes to the bake time.
- You can substitute ground beef or ground turkey for the chicken. Brown the meat first and drain any excess fat before mixing with the other ingredients.
- Serve this cheesy burrito casserole with salsa, guacamole, or extra sour cream on the side.
Nutrition
- Serving Size: 1 serving
- Calories: 550
- Sugar: 6
- Sodium: 850
- Fat: 28
- Saturated Fat: 15
- Unsaturated Fat: 13
- Trans Fat: 1
- Carbohydrates: 45
- Fiber: 7
- Protein: 35
- Cholesterol: 95