

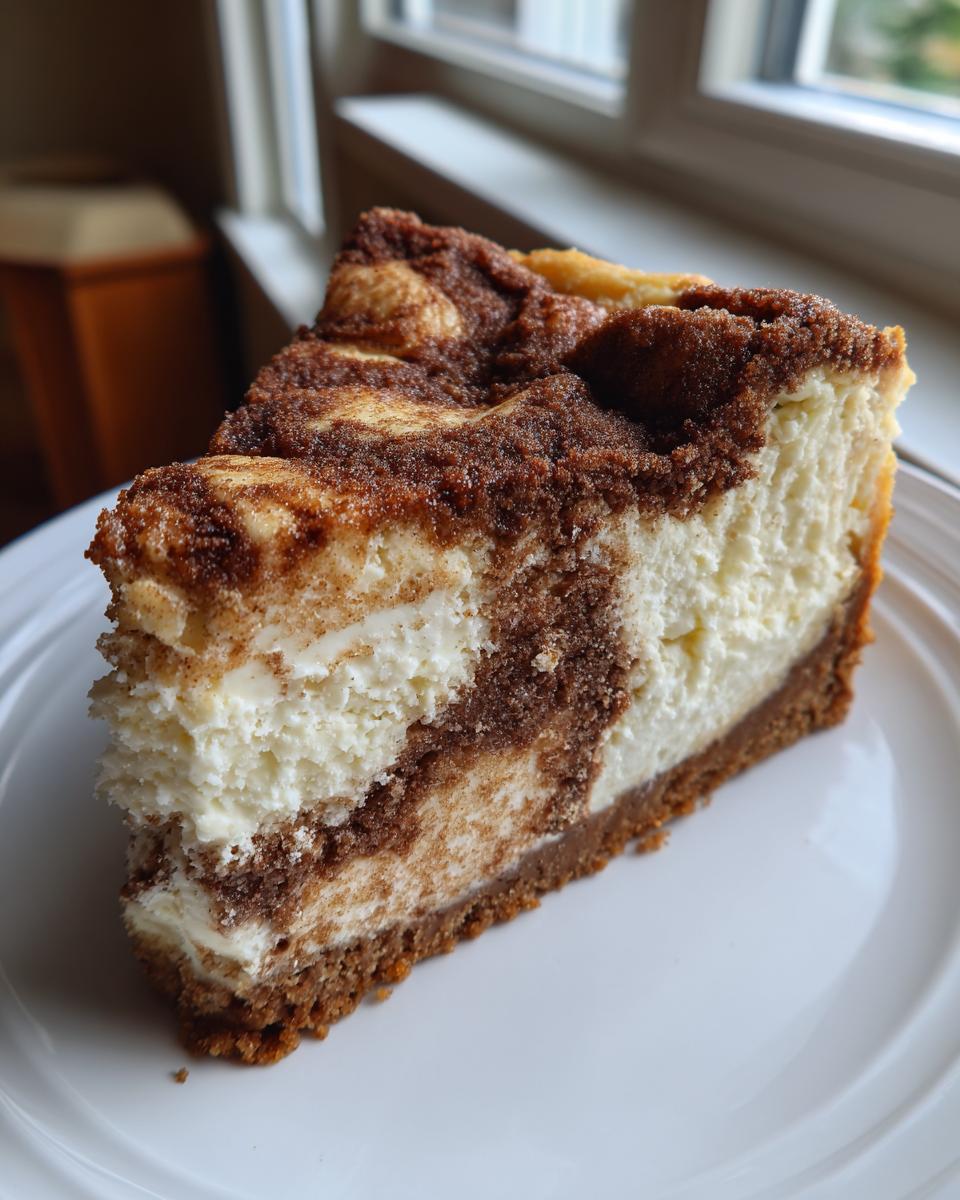
Oh, the joy of a good dessert mashup! When I first thought about blending two of the most beloved American comfort treats—the warm, spicy snickerdoodle cookie and the luscious, decadent cheesecake—I knew I had a winner on my hands. This recipe isn’t just another hybrid; trust me, this is truly the best, creamiest snickerdoodle cheesecake you will ever scoop up with a fork. When I was developing this, I kept thinking about my dad, who always adored snickerdoodles but thought cheesecake was too fussy. This recipe simplifies the fuss and maximizes the happy flavors! It’s rich, it swirls perfectly, and honestly, it tastes like a cozy hug.
- Why This Creamy Snickerdoodle Cheesecake is a Dessert Table Showstopper
- Ingredients for the Ultimate Snickerdoodle Cheesecake Recipe
- Step-by-Step Easy Cheesecake Instructions for Snickerdoodle Cheesecake
- Tips for Perfect Cinnamon Sugar Cheesecake Texture
- Making Your Snickerdoodle Cheesecake Festive for Holidays
- Storage and Reheating Instructions for Snickerdoodle Cheesecake
- Ingredient Notes and Substitutions for Snickerdoodle Cheesecake
- Frequently Asked Questions About This Dessert
- Estimated Nutritional Information
- Share Your Snickerdoodle Cheesecake Creations
Why This Creamy Snickerdoodle Cheesecake is a Dessert Table Showstopper
I promise you, when you bring this dessert out, people will stop talking—that’s how good it is! It’s the ultimate cookie cheesecake mashup. We get the familiar comfort of that cinnamon-sugar magic, but wrapped up in a beautiful, towering cheesecake package. It instantly becomes the dessert table showstopper at any gathering, whether it’s a big holiday or just a Thursday night when you need a little extra joy.
Don’t let the combination scare you off; it’s surprisingly straightforward, designed for the regular home baker, not some fancy culinary school grad. You get all the flavor complexity without, you know, making two separate desserts!
Achieving Velvety Cheesecake Filling
The texture is everything here. I will never understand those grainy, crumbly cheesecakes. We are aiming for pure luxury! The secret to that stunningly velvety cheesecake filling is simple, but you have to follow the rules: make absolutely sure your cream cheese is ridiculously soft—leave it out for hours! And please, for the love of all that is creamy, don’t beat the eggs in for too long. Overmixing adds air, and air creates cracks and a less smooth finish. We want dense, smooth, and dreamy, like silk!
If you love that spiced goodness in different forms, you should definitely check out my recipe for Cinnamon Roll Cheesecake too; it’s a different beast, but just as cozy!
Ingredients for the Ultimate Snickerdoodle Cheesecake Recipe
Okay, let’s talk about what makes this work. If you want that incredibly satisfying, rich flavor that tastes just like the best cookie you’ve ever had, you have to be precise with your components. I’ve listed everything out below, just like I write on my own recipe cards. Make sure you grab everything before you start mixing, because when you get to the filling stage, things move quickly!
Remember what I always say: incredible flavor starts with measuring correctly. Don’t eyeball the spices, they are really important here for that signature warmth!
For the Cinnamon Crumb Crust
This is where the cookie experience begins! We need a solid base to hold all that creamy goodness, and this simple crust packs a spicy punch. Make sure you use graham cracker crumbs—no substitutes, please!
- 1 1/2 cups graham cracker crumbs
- 1/4 cup granulated sugar
- 1 teaspoon ground cinnamon
- 6 tablespoons unsalted butter, melted
For the Snickerdoodle Cheesecake Filling
This is the heart of the recipe, and this section needs your full attention. Using room temperature cream cheese is non-negotiable if you want that beautifully smooth final product. Also, note we are using four large eggs. Don’t skimp on the dairy!
- 3 (8 ounce) packages cream cheese, softened
- 1 1/2 cups granulated sugar
- 1/4 cup all-purpose flour
- 2 teaspoons vanilla extract
- 1 teaspoon ground cinnamon
- 1/4 teaspoon ground nutmeg
- 4 large eggs
- 1/2 cup sour cream
For the Cinnamon Swirl and Topping
This little mix is pure gold. It is used layered throughout the batter for that beautiful, intense cinnamon flavor in every bite, and we reserve some to sprinkle right on top during baking. It bakes up crunchy and sweet!
- For the Swirl/Topping: 1/2 cup brown sugar
- 1 teaspoon ground cinnamon
- 2 tablespoons butter, melted
Step-by-Step Easy Cheesecake Instructions for Snickerdoodle Cheesecake
Now for the fun part! We’re taking all these lovely ingredients and turning them into magic. This is where you need your *Easy Cheesecake Instructions* because, let’s be honest, cheesecakes can be temperamental. But with this method, you’re going to get a perfect bake every single time. I use my trusty electric mixer, but Grandma did this by hand, so you owe it to yourself to enjoy the power of electricity!
Preparing the Cinnamon Crumb Crust and Water Bath Setup
First things first, let’s get the oven heated up to 350°F (175°C). While that warms up, take your 9-inch springform pan and wrap the outside base tightly, like a little mummy, with heavy-duty aluminum foil. I usually do two or three layers of foil because water bath leakage is the absolute worst thing that can happen to a good dessert!
Next, mix up that crust mixture—graham crackers, sugar, cinnamon, and that melted butter. Press it down firmly into the bottom of your prepared pan. We bake this crust for just 10 minutes to set it up nicely. Once it comes out, set it aside for just a moment to cool slightly while we get the filling ready.
The water bath (Step 7) is our insurance policy against cracks. Once the cake is assembled, you place that foil-wrapped pan inside a larger roasting pan. Then, very carefully, pour hot water into the big roasting pan until it comes about halfway up the sides of the springform. This steamy environment keeps things gentle and moist inside the oven for that perfect bake.
Mixing the Velvety Cheesecake Filling for Snickerdoodle Cheesecake
This step is all about smooth incorporation! Start by taking your softened cream cheese and beating it until it’s visibly smooth—no lumps allowed if you want that velvety cheesecake filling. Gradually add in the 1 1/2 cups of sugar and the flour, mixing until just combined. Remember what I always preach about temperature? If your cream cheese and eggs are room temperature, this mixes beautifully and easily!
Now, add the vanilla, the teaspoon of cinnamon, and the nutmeg. Incorporate those spices fully. Then, the eggs go in—and this is key for that supreme creaminess—*one at a time*. You want each egg just mixed in before you add the next. Seriously, don’t overwork it here! Finish by gently folding in the sour cream until the batter looks uniformly pale yellow and silky. You’re looking for a beautiful, thick batter, ready for layering.
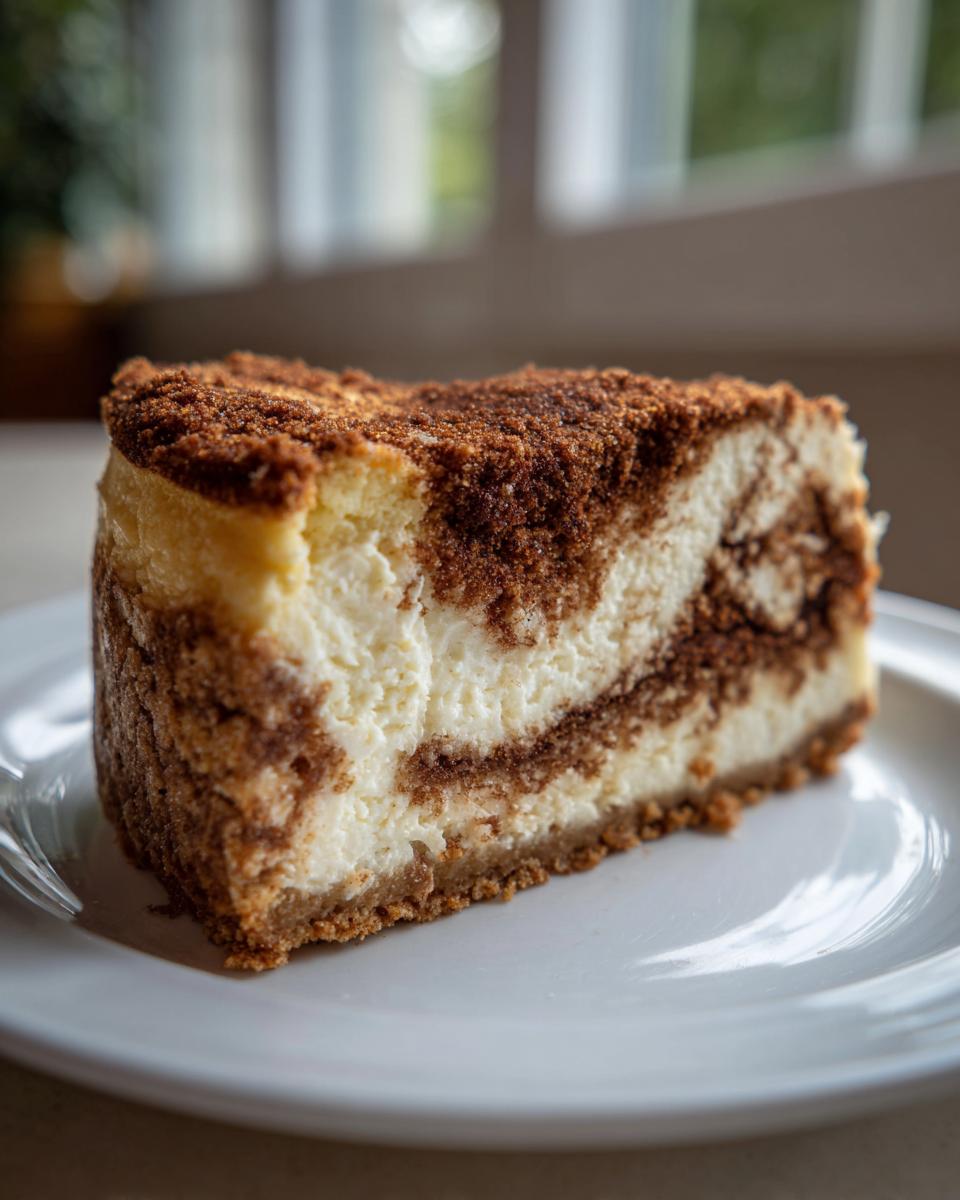
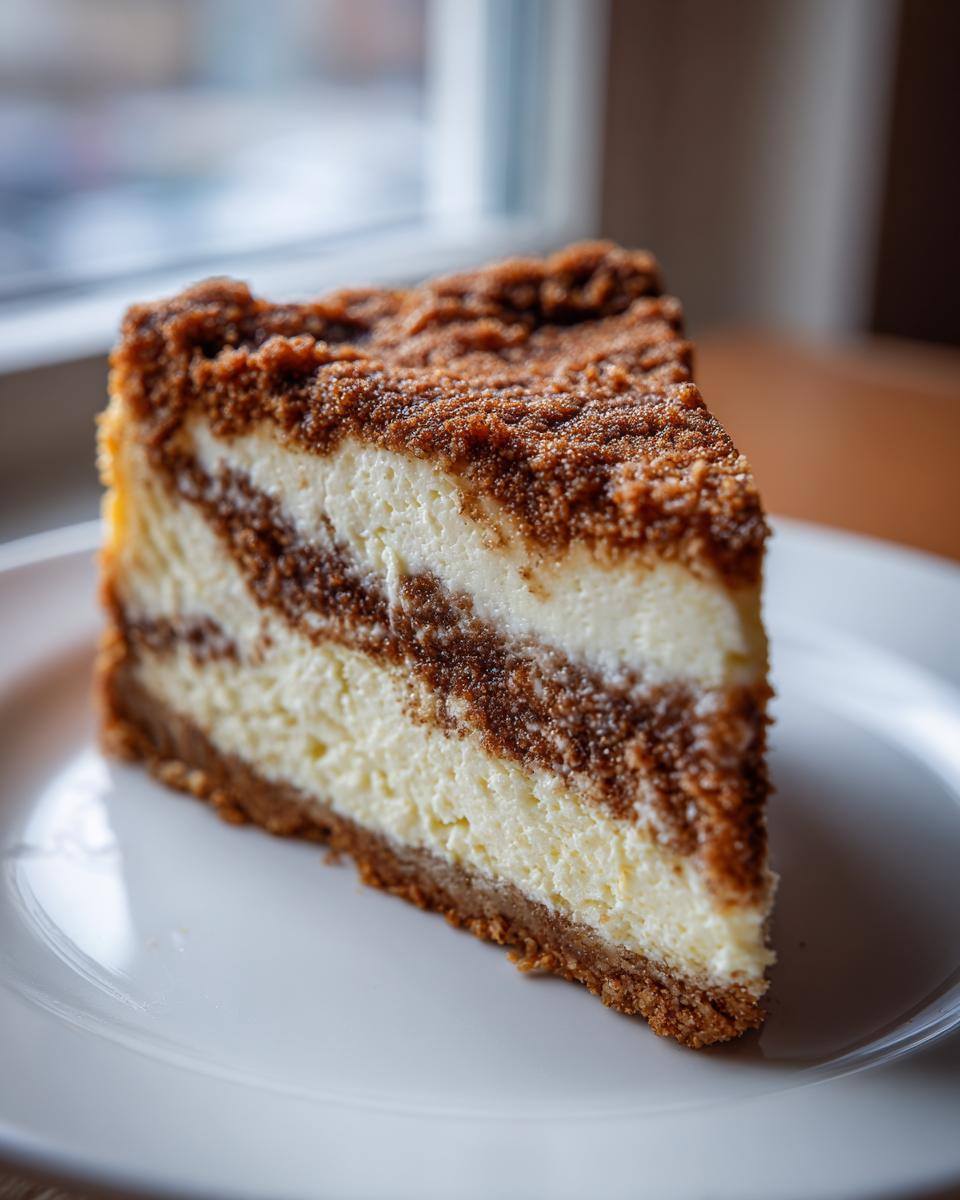
Layering happens next (Step 6): pour about half the batter over that cooled crust, then sprinkle half of your reserved cinnamon swirl mixture right on top. Then, gently spoon the remaining batter over that layer and sprinkle the rest of the cinnamon mix right on the top surface. If you’re feeling artsy, you can use a knife to give it a quick swirl, but I find just sprinkling it on top gives you the best speckled look after baking!
Baking and Cooling the Snickerdoodle Cheesecake
Now, slide that roasting pan into the 350°F oven, sitting in its hot water bath. You’re looking at 60 to 75 minutes. The visual cue is crucial: the edges should look set and firm, but the very center should still have a gentle, noticeable jiggle when you nudge the pan. If it looks completely solid, it’s probably overbaked, oops!
The slow cool-down is perhaps the most critical (and often skipped!) step. Once the time is up, turn the oven off completely. Don’t remove the cake yet! Just crack the oven door open—use a wooden spoon to prop it if needed. Let the cheesecake sit in that gradually cooling environment for a full hour. This slow temperature change is what prevents severe cracking. After that hour, remove it from the water bath and foil and let it chill completely on the rack.
Finally, transfer it to the fridge. Seriously, don’t even think about slicing it for at least 6 hours, but ideally, let it rest overnight. That chilling time is what solidifies the texture and lets those spiced flavors really settle in, turning it into the glorious final product you were hoping for. For more tips on getting that classic, crack-free style, check out my guide to making classic creamy cheesecake; the rules are the same!
If you want to see a fabulous example of a gorgeous bake, check out this one I saw—it looked absolutely amazing: The Best Snickerdoodle Cheesecake.
Tips for Perfect Cinnamon Sugar Cheesecake Texture
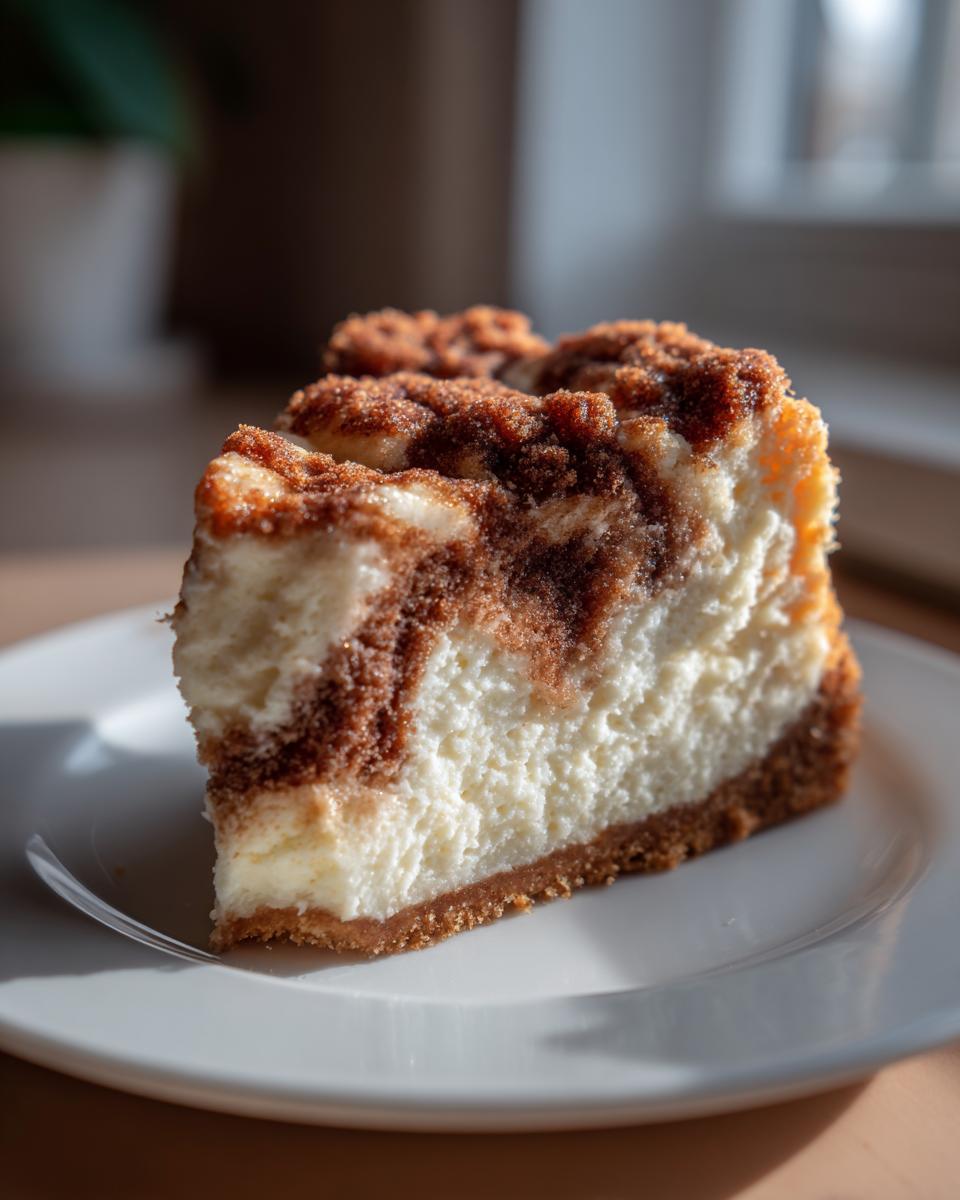
Okay, we’ve mastered the oven bath and the chilling time, but let’s focus for a minute on the *feel* of this dessert. Because if you mess up the texture, you’re missing the whole point of a great cinnamon sugar cheesecake blend! It should shimmer when you cut it, not crumble apart. We are aiming for that top-tier experience, the kind that rivals the best homemade cinnamon buns in terms of cozy satisfaction.
Ingredient Temperature and Mixing for Snickerdoodle Cheesecake
I cannot stress this enough: your ingredients must be happy before they meet! If your cream cheese is cold, it will never blend smoothly. You’ll end up mixing it for an eternity, trying to beat out lumps, and guess what happens when you mix too long? You introduce air, and air equals cracks later on, which ruins that smooth finish we associate with the best cheesecake recipes.
So, room temperature cream cheese, room temperature eggs, room temperature sour cream—that’s the golden rule. When everything is the same lovely, soft temperature, they emulsify beautifully when mixed, creating that perfect texture right from the start. Trust me, cutting your prep time in half by skipping the warming step just adds stress later!
The second part of texture control is the mixing speed, especially once those eggs are in. Use low speed! You want gentle persuasion, not furious agitation. A light, brief mix until *just* incorporated is all you need. If you see a hint of flour streak, stop the mixer! It’s going to get beaten into oblivion by the time it hits that cinnamon swirl layer anyway.
Mastering the Cinnamon Swirl Dessert Technique
The swirl is what makes this dessert visually and flavor-wise unique. That little crumbly topping we reserved? Drip it gently over the top layer of batter. If you want a more dramatic look, grab a thin butter or offset spatula—not a sharp knife, which can drag the crust up—and gently swirl it no more than an inch deep. Do not dig to the bottom!
If you swirl too deeply, you’ll mix the heavy cinnamon sugar into the light batter, and when it bakes, that dense cinnamon mix will often sink right through the entire structure, leaving you with a heavy blob. We are aiming for a distinct, beautiful cinnamon swirl dessert pattern on top and just throughout that upper half. For more inspiration on incorporating spices this way, you can look at tutorials for beautiful bakes like this Snickerdoodle Cheesecake recipe.
The goal is contrast! We want the pure, smooth cheesecake flavor punctuated by pockets of intense, buttery cinnamon flavor. A light hand makes all the difference here.
Making Your Snickerdoodle Cheesecake Festive for Holidays
While this creamy treat is absolutely perfect for a simple Sunday gathering, the warm spices and comforting flavor profile make it an absolute natural fit for seasonal celebrations. We know that people are always hunting for new Thanksgiving cheesecake options or something special for the Christmas cookie spread, and this is it! This snickerdoodle cheesecake steps up beautifully onto any festive table.
The beautiful thing about this flavor combination is that it leans perfectly into that cozy, crisp-weather vibe. It’s not overly specific to one season, but it screams warm hugs and fireplaces, which is exactly what we want when the weather turns chilly. It’s much less fussy than trying to perfectly layer a dozen colors!
If you are doing a full holiday spread and need some other citrus-spiced options, you might want to check out my recipe for Cranberry Orange Cheesecake Recipe; it pairs wonderfully as a slightly brighter contrast to the deep cinnamon here. But honestly, the cinnamon sugar crust just sings during Christmas baking season.
If you’re looking for specific ideas on presentation for festive gatherings where only the fanciest holiday cheesecakes will do, I found a great inspiration piece showing how lovely these can look for Christmas—you can peek at some presentation ideas over here for gorgeous visual reference!
Just remember the long chill time! Plan ahead, because this beauty needs that overnight rest to achieve that perfect decadent set before your big holiday meal—it’s worth every minute of patience, I promise!
Storage and Reheating Instructions for Snickerdoodle Cheesecake
You probably won’t have many leftovers of this snickerdoodle cheesecake—I know I never do! But just in case you manage to save a slice (or six), proper storage is super important to keep that wonderful texture intact until you get to enjoy it next.
Since this is a rich, baked cheesecake, treating it gently is key. Once it’s completely chilled—and I mean fully set, please—you need to cover that pan or that slice tightly. I prefer plastic wrap pressed lightly against the surface, followed by a layer of foil wrapped around the whole thing to keep out any fridge smells. Store it in the refrigerator, and it will be fantastic for up to five days. Because of the high dairy content, don’t push your luck much past that!
Now, let’s talk about warming it up, because this is where people often go wrong with cheesecake. Please, please, please do not try to microwave these slices! Microwaving ruins that beautiful, creamy structure we worked so hard to achieve, turning it grainy and hot in spots. Seriously, don’t do it unless you absolutely must.
The best way to enjoy this dessert is either straight from the fridge when it’s delightfully cold and firm, or you can let it sit out on the counter for about 30 to 45 minutes before serving. That small bit of time allows it to warm up just slightly, softening the texture and letting those glorious cinnamon-sugar notes really bloom on your tongue. It tastes like you just took it out of the chilling zone, but with a much warmer flavor profile. It’s truly marvelous served cool!
Ingredient Notes and Substitutions for Snickerdoodle Cheesecake
Even the most dedicated bakers sometimes run out of a pantry staple, right? It happens to me all the time—I’ll have everything ready, and suddenly realize I’m out of sour cream! This section is where we tackle those little kitchen emergencies so your snickerdoodle cheesecake project doesn’t get derailed.
My philosophy is about understanding the *function* of the ingredient, which really helps when you need to make a swap. If we know what that ingredient is supposed to be doing—balancing the richness, adding moisture, or binding everything together—we can find a good substitute. It’s all part of building your confidence in the kitchen, which is what Cooking Zenith is all about!
What to Use Instead of Sour Cream
If you’re stuck without sour cream, don’t panic! The sour cream does two main things: it adds necessary liquid but also a crucial acidic tang that cuts through the richness of all that cream cheese. Two fantastic substitutes, in equal measure, are plain Greek yogurt or crème fraîche. Both offer that lovely tanginess and moisture while keeping the filling texture wonderfully silky.
If you happen to be making this for someone who needs a slightly less tangy flavor, simple heavy cream mixed with a teaspoon of white vinegar or lemon juice left to sit for five minutes works in a pinch. Just be careful not to overbeat when you add that acidic mixture to the batter!
Crust Alternatives for Cinnamon Sugar Cheesecake
While the recipe calls for classic graham cracker crumbs to get that rich, buttery base, I know sometimes people prefer different textures or might need to sub based on what they have. If you don’t have graham crackers, digestive biscuits are a very close second and work beautifully for this cinnamon sugar cheesecake base. They crush up similarly and give a great, slightly nutty undertone.
For a wilder, crunchier texture, especially if you are aiming for something really special (maybe a more gourmet treat?), you could try pulsing up some vanilla wafers or even shortbread cookies for the base instead of graham crackers. Just remember, if your cookie is sweeter than a graham cracker, maybe cut back on the added sugar in the crust mix slightly. You can always find more ideas on adapting cheesecake bases in my guide to making different kinds of creamy cheesecake.
Addressing No Bake Snickerdoodle Cheesecake Options
I need to be super clear: this specific recipe is a baked cheesecake. We need that oven time and the water bath to achieve that signature, dense, velvety set that we’ve been chasing! Those recipes that skip the long bake usually rely on stabilized whipped cream or added gelatin to set up, which creates a much lighter, almost mousse-like texture, and frankly, it just doesn’t capture the true baked richness of a classic cheesecake.
If you absolutely need a no bake snickerdoodle cheesecake variation because you can’t turn on the oven, my advice would be to look for a recipe using a condensed milk or heavy cream base that has gelatin mixed in for stability. You can still use this recipe’s cinnamon sugar mixture for the crust and the swirl topping, but the actual filling base would need a complete overhaul to set correctly without heat. Otherwise, stick to the baked version; it’s worth the hour in the oven!
Frequently Asked Questions About This Dessert
When you’re dealing with a mashup dessert as amazing as this snickerdoodle cheesecake, people always have questions! It’s natural when you’re trying to combine two beloved classics. I’ve gathered the most common things folks ask me after trying this recipe, hoping to save you a trip to the comments section!
Can I make this a Cinnamon Roll Cheesecake?
That’s a fun thought! While this recipe captures the core cozy cinnamon-sugar flavor profile of a snickerdoodle, it’s not quite the same as a true Cinnamon Swirl Dessert inspired by a cinnamon roll. A cinnamon roll typically uses a yeasted dough and carries a heavier load of spices, often paired with cream cheese frosting *on top* rather than a swirl inside the filling.
This recipe locks in the snickerdoodle’s slightly tangy, sugary cookie flavor within the creamy cheesecake matrix. If you are really craving that big, gooey cinnamon roll punch, I actually have a dedicated recipe for that over on my site—you might enjoy checking out my Cinnamon Roll Cheesecake if you want to go that route! For this, though, we stick to that softer, more sophisticated spiced cookie flavor.
How do I prevent my cheesecake from cracking?
Ah, the dreaded crack! This is the number one worry for anyone making a creamy cheesecake, and it all comes down to temperature consistency. You must treat your cheesecake gently during its transition from hot to cold.
First, remember the water bath—that steamy environment keeps the top and sides from baking faster and drying out. Secondly, and this is my best trick for avoiding cracks, you must follow that slow cooling process inside the powered-off oven for a full hour. Dramatic temperature drops are what cause the filling to contract too fast and split.
If you look around online, you’ll see loads of people worrying about cracks, but honestly, the slow cool-down handles 90% of the problem. Even if you get a tiny, hairline fracture, don’t worry! A little topping or glaze will cover it right up, and the taste of this snickerdoodle cheesecake won’t change one bit. A fellow blogger had some gorgeous photos after hers cooled perfectly; you can see their results over at justworthi.com!
Estimated Nutritional Information
You know, when a dessert tastes this incredible, sometimes I try not to look too closely at the numbers! But for those of you who like to keep track while enjoying your well-deserved treat, here is the general breakdown for one generous slice of this gorgeous snickerdoodle cheesecake.
Remember, these are just estimates, right? They are based on standard measurements and commercial brand ingredients. If you use extra-rich sour cream or a different type of graham cracker, those final numbers might shift around a bit. But this gives you a great ballpark idea of what you’re digging into!
- Serving Size: 1 slice
- Calories: Approximately 450
- Fat: About 28g
- Saturated Fat: Around 17g
- Carbohydrates: Roughly 42g
- Sugar: At about 35g (That’s where all the cinnamon-sugar goodness lives!)
- Protein: About 7g
- Cholesterol: Approximately 120mg
See? Comfort food goals! It’s rich, satisfying, and perfect for sharing (or not sharing, I won’t judge!). Don’t let these numbers stop you; life is too short to skip a homemade cheesecake, especially one that tastes like a giant, creamy snickerdoodle!
Share Your Snickerdoodle Cheesecake Creations
Well, that’s it! You’ve made it through the most decadent, warmly spiced, and downright creamy dessert fusion you’ll ever encounter. I truly hope you loved the process just as much as I love sharing it with you. Remember, cooking in a home kitchen is about so much more than just following steps; it’s about making something that brings you and the people you love a moment of pure, buttery joy.
Now that your magnificent snickerdoodle cheesecake is chilled and ready to slice, I desperately want to see what you came up with! Did your swirl look like a marble masterpiece? Did you manage to snag a slice before your family devoured the whole thing? Don’t be shy!
We are all home cooks here, building traditions together in our own kitchens, so please jump down into the comments below. Tell me your favorite part of this recipe, and please, please rate it using that nifty 5-star system right under this post. Your feedback helps other home bakers feel confident tackling this recipe next!
And if you snapped a picture—and I know you did because it’s gorgeous—tag me on social media! Seeing your creations pop up is honestly the best part of running this site; it proves that extraordinary flavor truly can come from simple effort. If you ran into any last-minute snags or need an extra bit of advice, you can always reach out directly on the Contact Page!
Happy baking, friends. I’m already excited to read all about how much your house smells like warm cinnamon!
PrintThe Best Creamy Snickerdoodle Cheesecake with Cinnamon Crumb Crust
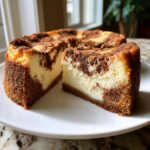
Make this rich, creamy Snickerdoodle Cheesecake that combines the classic cinnamon-sugar flavor of snickerdoodle cookies with a smooth cheesecake base. It features a spiced crumb crust and a cinnamon swirl filling.
- Prep Time: 30 min
- Cook Time: 75 min
- Total Time: 9 hours 45 min
- Yield: 12 servings 1x
- Category: Dessert
- Method: Baking
- Cuisine: American
- Diet: Vegetarian
Ingredients
- 1 1/2 cups graham cracker crumbs
- 1/4 cup granulated sugar
- 1 teaspoon ground cinnamon
- 6 tablespoons unsalted butter, melted
- 3 (8 ounce) packages cream cheese, softened
- 1 1/2 cups granulated sugar
- 1/4 cup all-purpose flour
- 2 teaspoons vanilla extract
- 1 teaspoon ground cinnamon
- 1/4 teaspoon ground nutmeg
- 4 large eggs
- 1/2 cup sour cream
- For the Swirl/Topping: 1/2 cup brown sugar, 1 teaspoon ground cinnamon, 2 tablespoons butter, melted
Instructions
- Preheat your oven to 350°F (175°C). Wrap the outside of a 9-inch springform pan tightly with heavy-duty aluminum foil.
- Prepare the crust: Mix graham cracker crumbs, 1/4 cup sugar, 1 teaspoon cinnamon, and melted butter until combined. Press the mixture firmly into the bottom of the prepared springform pan. Bake for 10 minutes. Set aside to cool slightly.
- Prepare the cinnamon swirl mixture: In a small bowl, combine the brown sugar, 1 teaspoon cinnamon, and 2 tablespoons melted butter. Mix until crumbly. Set aside.
- Prepare the cheesecake filling: In a large bowl, beat the softened cream cheese with an electric mixer until smooth. Gradually beat in 1 1/2 cups sugar and flour until just combined.
- Mix in vanilla extract, 1 teaspoon cinnamon, and nutmeg. Beat in the eggs one at a time, mixing just until each egg is incorporated. Mix in the sour cream until the batter is smooth. Do not overmix.
- Pour half of the cheesecake batter over the cooled crust. Sprinkle half of the reserved cinnamon swirl mixture over the batter. Gently pour the remaining batter on top. Sprinkle the remaining cinnamon swirl mixture over the top layer.
- Create a water bath: Place the foil-wrapped springform pan into a larger roasting pan. Carefully pour hot water into the roasting pan until the water reaches halfway up the sides of the springform pan.
- Bake for 60 to 75 minutes, or until the edges are set but the center still has a slight jiggle.
- Turn off the oven, crack the oven door open slightly, and let the cheesecake cool inside the oven for 1 hour. This prevents cracking.
- Remove the cheesecake from the water bath and foil. Let it cool completely on a wire rack.
- Chill the cheesecake in the refrigerator for at least 6 hours, or preferably overnight, before slicing and serving.
Notes
- For the creamiest texture, ensure your cream cheese and eggs are at room temperature before starting.
- If you want a thicker cinnamon swirl, you can gently swirl the top layer with a knife before baking.
- This cheesecake is excellent served cold directly from the refrigerator.
Nutrition
- Serving Size: 1 slice
- Calories: 450
- Sugar: 35g
- Sodium: 300mg
- Fat: 28g
- Saturated Fat: 17g
- Unsaturated Fat: 11g
- Trans Fat: 0.5g
- Carbohydrates: 42g
- Fiber: 1g
- Protein: 7g
- Cholesterol: 120mg