
Honestly, sometimes life gets busy, and you desperately need a dessert that looks like you spent hours on it but only took five minutes of actual work. Right? I live by the philosophy that baking should be joyful, not stressful, and the ultimate expression of that simplicity is this amazing cherry dump cake. If you’ve ever stared into your pantry feeling panicked about a last-minute potluck or just needing a serious weeknight sweet treat, this is your answer. As a home cook, not a pastry chef, I developed this recipe because I needed maximum gooey, bubbly payoff with zero fuss. Trust me, this dump cake is foolproof; you literally just dump the ingredients, and magic happens in the oven!
- Why This Is the Best Cherry Dump Cake You Will Ever Make
- Gathering Ingredients for Your Easy Cherry Dump Cake Recipe
- Foolproof Instructions for the Perfect Cherry Dump Cake
- Tips for Success with Your Buttery Topping Cake Recipe
- Serving Suggestions for a Warm Dessert With Ice Cream
- Storage and Reheating Instructions for Leftover Cherry Dump Cake
- Variations on the Classic Cherry Dump Cake
- Frequently Asked Questions About This Quick Cherry Dessert
- Share Your Experience Making This Easy Cherry Dump Cake Recipe
Why This Is the Best Cherry Dump Cake You Will Ever Make
Look, when I say foolproof dump cake, I mean it. This isn’t some recipe you need to watch ten YouTube videos to master. I needed a dessert for an impromptu get-together years ago, and all I had was canned filling, a box of cake mix, and butter. I threw it together, heart pounding, thinking it would be a disaster. Boy, was I wrong! It came out of the oven smelling incredible—that warm, buttery aroma just fills the house. The texture? Pure bliss. It’s the best, most reliable, gooey cherry dessert you’ll ever need.
The Magic of a 3 Ingredient Dessert
Seriously, just three things: cherries, cake mix, and butter. That’s it! This feature makes it the ultimate last minute dessert idea. You don’t even need eggs or oil; the pie filling handles the moisture! Because there’s absolutely no mixing required—no bowls, no whisk, no electric mixer needed—cleanup is a dream. It’s the perfect solution when you realize dessert is needed five minutes before the doorbell rings.
Gathering Ingredients for Your Easy Cherry Dump Cake Recipe
Okay, let’s talk about what you need to grab from the pantry. This is where the magic of the dump cake really shines because the ingredient list is so short! You’re not going hunting for specialty items; we’re using staples that create maximum flavor with minimal fuss. Remember, the precision here isn’t in measuring delicate flour mixtures; it’s in getting the can sizes right!
For the ultimate sweet, bubbly result, here is exactly what you need:
- 1 (21 ounce) can cherry pie filling (Make sure it’s the filling, not just plain cherries!)
- 1 (15.25 ounce) box yellow cake mix (Any brand works, honestly, but stick to the basics for this foolproof version.)
- 1 cup (2 sticks) unsalted butter, melted (This is key for that beautifully crisp and buttery topping.)
Ingredient Notes and Simple Substitutions
While the core recipe is glorious in its simplicity, if you want to play around a little, I totally support it! My notes on the recipe card tell you exactly what happens if you change things up. For instance, that yellow cake mix? If you prefer a slightly less sweet, maybe cleaner flavor, a white cake mix is a wonderful substitute. Or, if you’re feeling a little more decadent, don’t tell anyone, but using a chocolate cake mix gives you a delicious, surprising chocolate cherry dump cake every time!
Now, about that butter. The recipe calls for melted butter—pouring it over the dry mix ensures it seeps down and creates those lovely, moist pockets as it bakes. But if you want a topping that is a little more crumbly, almost like a cobbler crust, you can use cold butter cut into small cubes instead of melting it first. That leads us nicely into another favorite variation: if you swap out about half that cherry filling for a can of drained, crushed pineapple, you get the famous pineapple cherry dump cake. It’s tangy, sweet, and just as easy!
Foolproof Instructions for the Perfect Cherry Dump Cake
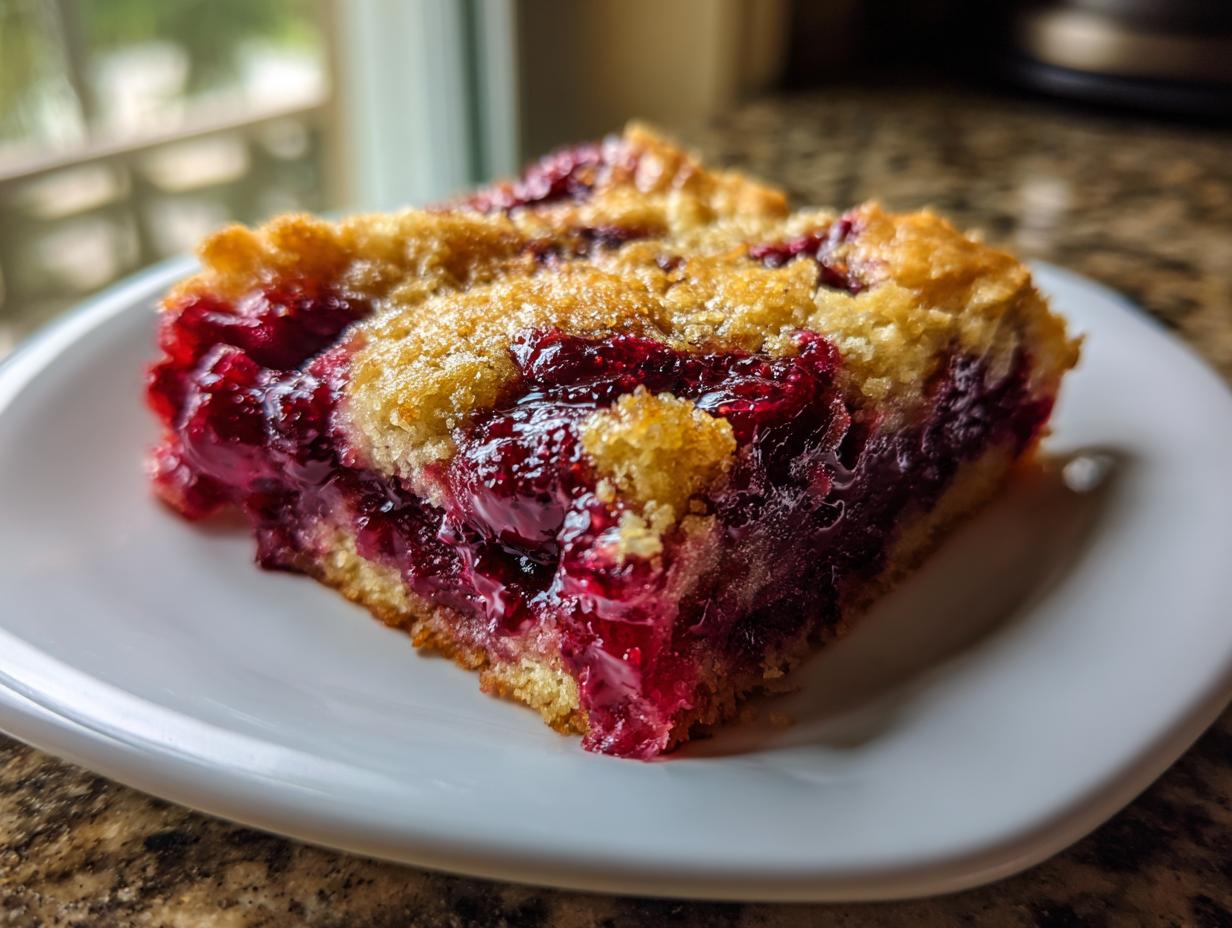
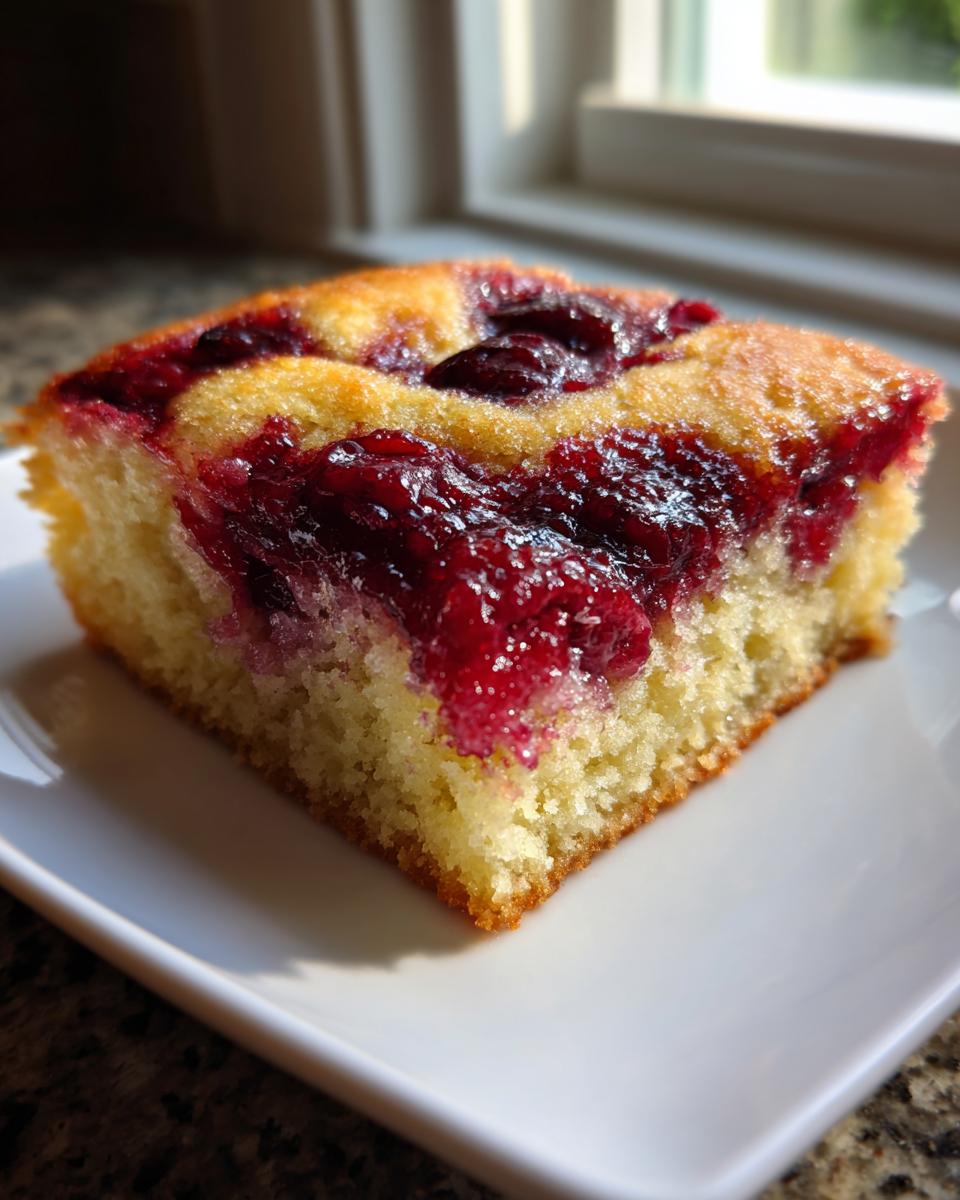
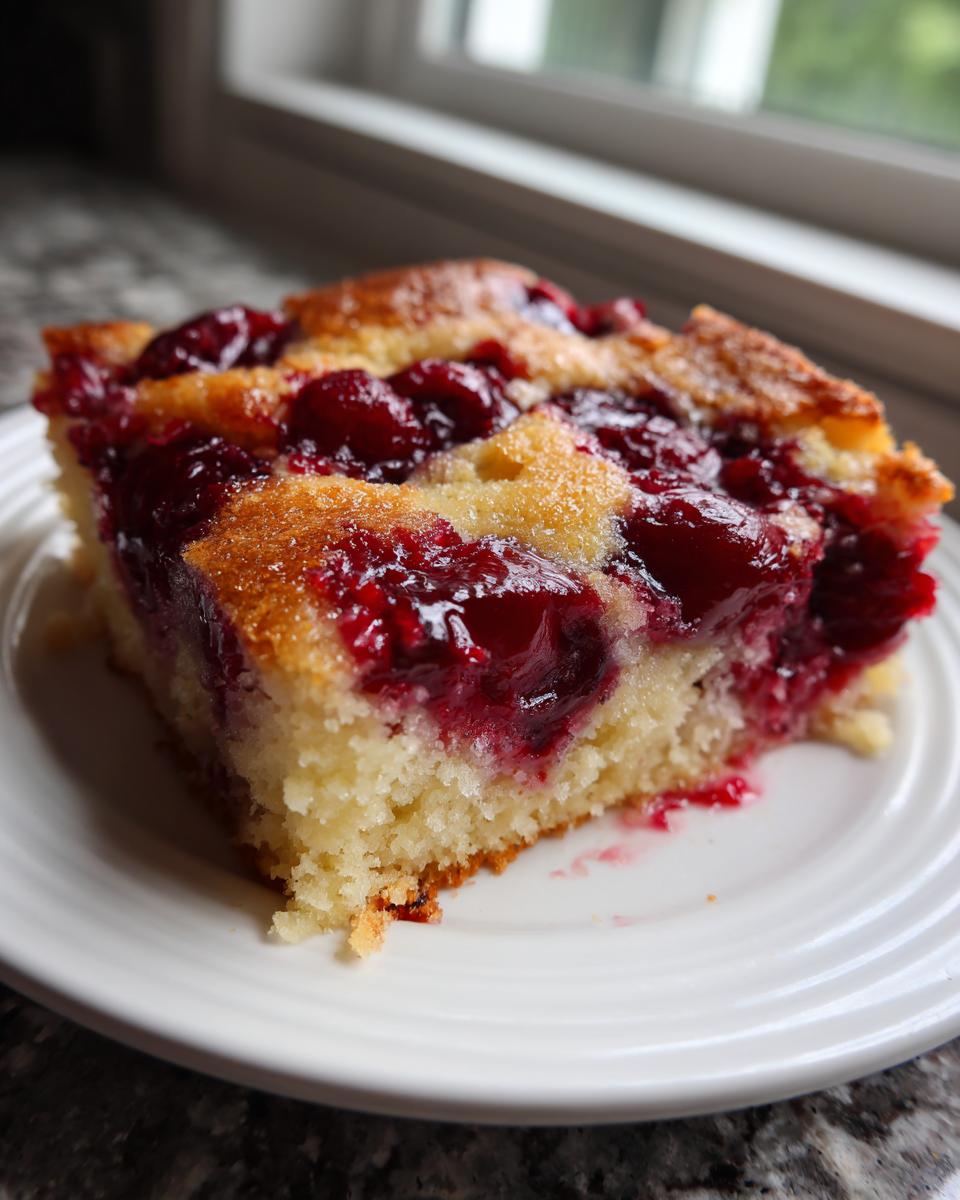
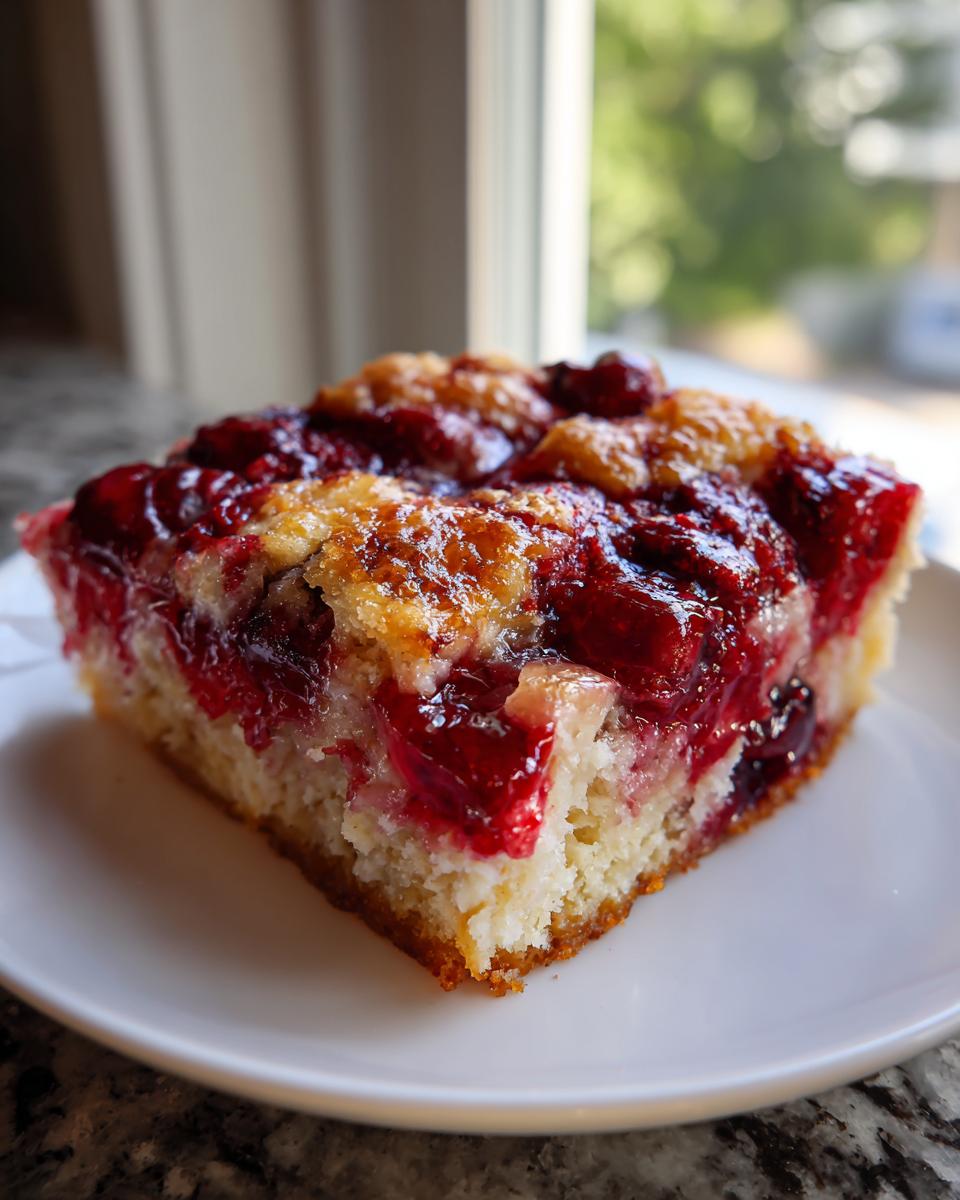
Okay, this is the fun part—the part where you get to live up to the name! When I first made this simple dump cake with cake mix, I kept looking at the instructions, waiting for the part where I had to get out my electric mixer or use a fancy offset spatula. Nope! This is pure culinary laziness in the best possible way. The entire goal here is layering; we want distinct textures when it comes out of the oven, so the cake on top stays crisp over those hot, bubbly cherries underneath. Don’t fight the name; just dump it and forget it for a while!
Before we even open a can, grab your 9×13 inch baking dish. Trust me, start your oven immediately—we want it at 350 degrees F so it’s nice and hot when the cake goes in. Preheat first; rushing the temperature is the only way this dessert goes wrong!
Preparing the Dish and Layering the Cherry Dump Cake
It’s so satisfying to start layering this dessert. First things first: pour that entire can of cherry pie filling right into your prepared dish. You don’t need to be meticulous here, but just spread it around gently so it covers the bottom of the pan evenly. We want to make sure no dish surface is left bare to burn.
Next, take your dry yellow cake mix. Here’s the crucial step for achieving that lovely, slightly crisp, buttery topping: sprinkle the entire dry mix evenly over the cherries. And I mean *evenly*. This is your crust! Please, for the love of dessert, **do not mix them together**. If you start stirring now, you’ll end up with a dense, bizarre cherry bread instead of a glorious dump cake. Resist the urge!
Baking Time and Checking Your Cherry Dump Cake
Once the cake mix blanket is laid out, grab that melted butter you prepared—it should still be warm but not scorching hot. Slowly drizzle that butter all over the dry cake mix. It’s totally okay if it doesn’t cover every single speck of dry mix; some spots might resist the butter, and that’s exactly what you want! Those drier spots will turn golden and slightly crunchy during the bake, offering the perfect textural contrast to the cherries below. You can find some great tips on how baking temperatures affect texture if you’re curious about the science, but honestly, setting it and forgetting it works best here.
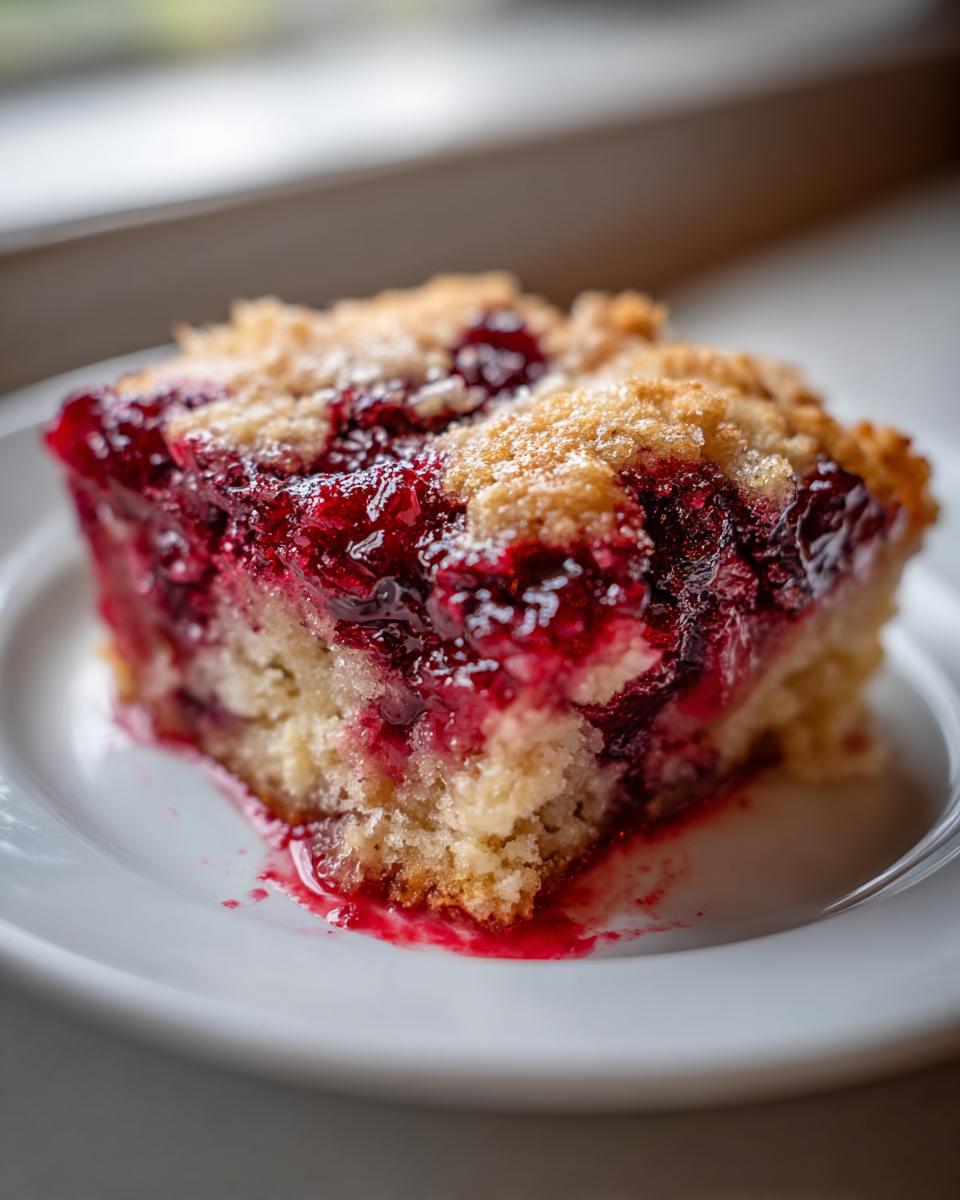
The baking time is usually between 45 to 55 minutes at 350 degrees F. How do you know it’s done? You look for two things that signal perfection. First, the topping should be a gorgeous, deep golden brown color. Second, you should see the cherry filling actively bubbling up around the edges of the dish. If you see those lava-like bubbles, you are golden! If it hasn’t hit the 45-minute mark yet, just give it five more minutes, but don’t overbake it, or you’ll lose that essential gooey texture.
Tips for Success with Your Buttery Topping Cake Recipe
Even though the cherry dump cake is designed to be simple, Aria’s secret is that even the easiest recipes benefit from a few non-negotiable rules! These little steps are what take this from “okay” to “wait, how did you make this so fast?” The texture is everything here—we want a lovely contrast between that crisp top crust and the hot, thick fruit beneath.
First off, while I mentioned melted butter creates that traditional gooeyness, if you prefer that crisp ‘cobbler’ texture that holds up better for potlucks, try using cold, cubed butter instead of melted. When you scatter the cold butter bits over the dry cake mix, they bake up into little crunchy pockets. It’s a totally different but equally delicious experience! Remember, these little tweaks are what elevate your everyday cooking.
My absolute biggest tip for getting that perfect, slightly dense but still tender topping involves the resting period. I know, you’re eager to slather ice cream on it the second it comes out of the oven, but DON’T! That hot cherry filling is basically magma right now. Let the cake sit on your counter for at least 15 to 20 minutes after it comes out of the oven. This rest time allows the filling to thicken up properly. If you cut into it too soon, the runny cherry layer will just slide out all over the place, and you lose that gorgeous, cohesive slice. Think of it like letting a great moist banana bread cool just enough so it doesn’t fall apart when you slice it.
Finally, don’t be afraid of a little uneven browning! If you see some spots on the cake mix topping are darker than others, that’s actually perfect. It means the butter found those spots and caramelized, which adds so much depth of flavor to what is essentially just cake mix. If you see the edges are getting too dark before the middle looks done, just toss a loose piece of aluminum foil over the top for the last ten minutes of baking. Easy peasy!
Serving Suggestions for a Warm Dessert With Ice Cream
Okay, the hardest part—waiting for it to cool—is over! Now comes the absolute best part of enjoying any truly great, simple fruit dessert: how you serve it. This cherry dump cake was practically *born* to be served warm. I mean, you can eat it cold the next day (and I certainly have!), but nothing beats that first bite when the topping is still slightly crisp and the cherry filling is molten lava beneath it.
The number one, non-negotiable pairing in my house is vanilla ice cream. Seriously, ditch the fancy stuff. You need that sharp, cold, creamy vanilla melting right into the warm, tart-sweet fruit underneath. Watch how quickly that scoop disappears into the gooey pockets created by the butter in the topping! It’s pure, comforting nostalgia on a plate.
But listen, if you don’t keep vanilla on hand, or you just want a lighter touch, a big dollop of freshly whipped cream works beautifully too. The cream melts slower than ice cream, so you get that nice, fluffy mouthfeel contrasting the baked crust. And if you’re serving this after a big dinner and want to make it look a little extra special without any work? Just grab your sifter and dust the top lightly with powdered sugar, or better yet, a gentle shake of cinnamon. That really bumps up the aroma without adding any real effort. This cake is so good, you can toss a spoonful of cinnamon-forward spice on top if you’re feeling ambitious, but honestly, simple is best here!
Storage and Reheating Instructions for Leftover Cherry Dump Cake
Let’s be real: sometimes, this amazing dessert actually lasts past the first night. If you find yourself with leftovers of this fantastic cherry dump cake, don’t worry! Storing it right keeps that topping from getting overly soggy before you’re ready for round two.
The key to leftovers is containment. Once the cake has cooled down a bit—and remember, let it sit for that 20 minutes we talked about so it firms up—you need to cover it well. I generally use plastic wrap directly over the top of the cake, followed by the lid of the baking dish, or I transfer the slices into an airtight container. If you just loosely cover the whole dish, the moisture from the cooling fruit tends to steam the crust and make it gummy too fast.
How long does it last? Truthfully, I prefer to eat it within three days. You can keep this covered on the counter for about a day if your kitchen isn’t too hot, but honestly, I usually pop the whole dish into the fridge to be safe, especially since it contains fruit filling. It’s perfectly fine in the fridge for up to four days.
When you’re ready for another square, you have two choices, depending on how you like that topping:
- The Quick Fix (Microwave): If you want that gooey, molten texture immediately, the microwave is your friend. Pop a slice on a plate and heat it for about 20 to 30 seconds. It’ll be soft, steamy, and just like you pulled it right out of the oven. You lose a little crispness on top, but the convenience is unbeatable.
- The Crisp Revival (Oven): If you really miss that buttery crispness we worked so hard for, reheat it in the oven. Wrap the slice loosely in foil (this prevents the top from burning while the center warms) and bake at 300 degrees F for about 10 minutes. You can also just carefully place the uncovered slice on a baking sheet for about 8 minutes to bring the topping back to life, just like you would with leftover oatmeal cookies!
Just remember, like most fruit bakes, it tastes best when it’s warm. Whether you’re having it for breakfast the next day (don’t judge!) or as an evening snack, reheating is the secret to enjoying those leftovers!
Variations on the Classic Cherry Dump Cake
The beauty of a recipe based on simply layering ingredients is that it begs to be customized! Once you’ve mastered the original cherry dump cake—the one with the yellow cake mix—you realize the formula is solid. That means we can swap out flavors and even change the cooking method completely! I always encourage home cooks to experiment because that’s how the best new traditions start. If you’re hosting a crowd, maybe you want to try something richer, or maybe you need a hands-off method while you’re busy with the main course.
Since you already know how fantastic the chocolate chip version of our baked goods are—check out my gooey cinnamon rolls—it makes sense to pair chocolate with those bright cherries. The Chocolate Cherry Dump Cake is a showstopper. You still follow the exact same layering process, but instead of plain yellow cake mix, you use chocolate cake mix down over the cherries. You can find a great version of this over at Chocolate Cherry Dump Cake! That rich, dark chocolate melts into the tart filling, and seriously, it eats like a fancy bakery dessert. It’s decadent without demanding any extra effort, which is the sweet spot for me!
Then there’s the combination I mentioned earlier: the pineapple cherry dump cake. This one is fantastic in the summer because it tastes a little brighter. You just drain one can of crushed pineapple well—don’t skip the draining step, or it gets too watery—and layer that right over the cherry filling before topping with the cake mix and butter. It gives the whole thing a lovely tropical tang. And if you’re looking for that slightly crisp, less uniform topping, that’s when you pivot and call it a Cherry Cobbler Dump Cake by using cubed, cold butter instead of melted butter across the top layer!
Making a Slow Cooker Cherry Dump Cake
If you want to keep your oven free for roasting or baking bread, guess what? This recipe transitions beautifully to the slow cooker! When searching for Crockpot Dump Cake Recipes, you’ll find people using this exact formula. The good news is the layering stays identical: cherries on the bottom, cake mix sprinkled over, and butter drizzled on top. Easy peasy!
However, the cooking time changes dramatically because the heat comes from all sides in the slow cooker. You’ll set your Crockpot to LOW and let it run for about 3 to 4 hours, or HIGH for about 2 to 2.5 hours. You’re looking for that same bubbling from the edges, but the top won’t brown like it does in the oven, so you have to rely more on the bubbling and steam release. You can actually place a clean kitchen towel under the lid before you put it on; this catches condensation so it doesn’t drip back down and make your topping soggy. It’s a little trick that makes the slow cooker version a real winner whenever you need an all-day dessert!
Frequently Asked Questions About This Quick Cherry Dessert
I get so many questions about this recipe, especially since it’s so simple, people often wonder if they’ve missed a trick! Never worry, that’s what I’m here for. I want every cook, whether you’re making a vegan banana bread or this easy dessert, to feel totally confident. Here are the things I hear most often about making this quick cherry dessert.
Can I use fresh cherries instead of canned pie filling?
That’s a great question, especially if you have a summer bounty of cherries! While you absolutely *could* use fresh cherries, you need to remember that the canned pie filling does more than just provide the fruit flavor—it brings the necessary liquid, sugar, and thickening agents all in one go. If you use fresh cherries, you’d need to toss them with sugar and a thickener like cornstarch before putting them in the pan. Honestly, for a true, authentic, foolproof dump cake experience, stick to the canned filling. It cuts the prep time from 20 minutes down to zero!
What kind of cake mix works best for the cherry dump cake?
For the absolute classic experience—the one that tastes like your grandma used to make it—yellow cake mix is the way to go. It has that familiar, slightly vanilla, buttery flavor that pairs perfectly with the tart cherries. However, white cake mix works just as beautifully, giving you a slightly lighter crust flavor. If you want to get a bit wild, as I mentioned, chocolate cake mix is phenomenal! But whatever you grab, just make sure you are buying the dry cake mix box, not a pre-made batter! We need that dry powder to mix with the melted butter.
Does this easy dessert need to be refrigerated?
This is important, especially if you’re taking leftovers to a party! Because this is a fruit-filled bake, once it has cooled completely—and I mean completely—it should be refrigerated if you plan to keep it for more than 24 hours. The high sugar content acts as a preservative, so it’s okay on the counter for a short time, but the fridge is safer for longer storage. When reheating, remember your options: the microwave gives you that gooey texture, while the oven brings back the buttery crispness on top!
Is this a good option for potluck desserts easy?
It is hands-down one of the best potluck desserts easy to bring! Why? Because it travels incredibly well, and it tastes amazing even if it sits out for an hour or two (covered, of course!). Plus, it’s easy to scoop and serve, which makes cleanup simple for the host. People always rave about how good it tastes, and they are always shocked when I tell them it took five minutes to assemble. It’s a guaranteed winner!
Share Your Experience Making This Easy Cherry Dump Cake Recipe
Whew! Now that you have the full lowdown on how to whip up the most satisfying, fuss-free cherry dump cake known to humankind, I genuinely want to hear from you. This recipe isn’t just about the ingredients; it’s about how it fits into your busy life and how you make these simple components your own.
Did you try the Chocolate Cherry version? Maybe you swapped in pineapple for a brighter, tangier dessert? Tell me everything! The best part of blogging is seeing how you all adapt these foundational recipes. Drop a comment below, let me know if you served it warm with ice cream (you should!), and please, please give it a star rating if you loved how easy and delicious this turned out.
If you’ve made this for a gathering, share how many people asked for the recipe! It feels wonderful to know that this recipe, which started as my emergency pivot, is helping other home cooks create something special without breaking a sweat. I’m always looking for new ways to tweak things, so hearing your successes (or even your troubleshooting questions!) helps me build out great articles like this one on creamy stovetop oatmeal!
If you’re sharing pictures on social media, tag me! And if you’re looking for a few more opinions on why this easy cherry dump cake recipe just works so well, go ahead and check out what others are saying. Happy baking, and remember: extraordinary flavor doesn’t require extravagant effort!
PrintEasiest 3-Ingredient Cherry Dump Cake Recipe

Make this foolproof cherry dump cake using only three simple ingredients. This quick cherry dessert bakes up warm, gooey, and buttery, making it a perfect last-minute idea for potlucks or weeknight sweet treats.
- Prep Time: 5 min
- Cook Time: 50 min
- Total Time: 55 min
- Yield: 8 servings 1x
- Category: Dessert
- Method: Baking
- Cuisine: American
- Diet: Vegetarian
Ingredients
- 1 (21 ounce) can cherry pie filling
- 1 (15.25 ounce) box yellow cake mix
- 1 cup (2 sticks) unsalted butter, melted
Instructions
- Preheat your oven to 350 degrees F. Lightly grease a 9×13 inch baking dish.
- Pour the entire can of cherry pie filling into the prepared baking dish. Spread the filling evenly across the bottom.
- Sprinkle the dry yellow cake mix evenly over the cherry pie filling layer. Do not mix the layers.
- Pour the melted butter evenly over the dry cake mix layer. You do not need to cover every spot; the butter will spread during baking.
- Bake for 45 to 55 minutes, or until the topping is golden brown and the cherry filling is bubbly around the edges.
- Let the dump cake cool slightly before serving warm, ideally with vanilla ice cream.
Notes
- For a richer flavor, substitute the yellow cake mix with white cake mix or even chocolate cake mix for a chocolate cherry dump cake variation.
- If you prefer a crispier topping, use cold, cubed butter instead of melted butter, though melted butter yields a more traditional gooey texture.
- This recipe works well as a summer fruit dump cake; try substituting half the cherry filling with crushed pineapple for a pineapple cherry dump cake.
Nutrition
- Serving Size: 1 slice
- Calories: 410
- Sugar: 45
- Sodium: 350
- Fat: 22
- Saturated Fat: 14
- Unsaturated Fat: 8
- Trans Fat: 0.5
- Carbohydrates: 55
- Fiber: 1
- Protein: 3
- Cholesterol: 60