
It drives me crazy when people think cooking has to be difficult! We take humble ingredients—like lemons that might otherwise be destined for the compost bin—and transform them into something truly luxurious. That’s the whole spirit of what we do here at Cooking Zenith. Forget those rock-hard, overly bitter citrus candies you’ve tried before. I’ve spent ages in my own kitchen, testing ratios until I perfected the candied lemon peel that is absolutely the chewiest, sweetest treat you can imagine. Aria Thompson has tested this method countless times to ensure it’s foolproof, proving that gourmet flavor is always within reach for the everyday cook.
- Why This Homemade Candied Lemon Peel Recipe Works So Well
- Gathering Ingredients for Perfect Candied Lemon Peel
- How to Prepare Lemon Strips for Candied Lemon Peel
- Simmering the Peels in Simple Syrup for Candied Lemon Peel
- The Crucial Soaking Period for Chewy Candied Lemon Peel Instructions
- Drying and Coating the Final Candied Lemon Peel
- Storage and Uses for Candied Lemon Peel
- Troubleshooting Common Issues in Candied Citrus Making
- Frequently Asked Questions About Candied Lemon Peel
Why This Homemade Candied Lemon Peel Recipe Works So Well
Honestly, the absolute best part about making your own citrus treats is controlling the final texture. So many store-bought versions are either too hard or too sticky. This homemade candied lemon peel recipe cuts right through that frustration by focusing on two things: eliminating bitterness and maximizing chewiness. You get that beautiful, glistening result without needing professional equipment!
- Seriously Low Bitterness: We put in the extra work blanching the peels three times. You won’t believe the difference it makes!
- That Perfect Chew Factor: Flavor soaks in, but texture stays just right.
- It’s So Straightforward: If you can boil water, you can absolutely master this.
I love sneaking these into my classic orange cake recipe because they add such a bright punch. If you love bright citrus desserts, you know what I mean!
Achieving Chewy Candied Lemon Peel Instructions
The secret to the chewiness, truly, is time. After cooking the peels in the thick syrup, we let them chill out and soak. That extended soak—ideally overnight—allows the sugar to fully penetrate the peel structure. It finishes drawing moisture out of the peel and locks in the sweetness. Don’t rush that soak time! It’s what separates a good candied lemon peel from a truly heavenly one.
Gathering Ingredients for Perfect Candied Lemon Peel
Okay, listen up, because choosing the right lemons is the first big step in preserving lemon rinds in sugar successfully. Since we are using the entire zest and rind, I strongly recommend using organic lemons if you can find them. Those conventional ones can carry a lot of wax or residual pesticides, and we don’t want that seeping into our sweet snack!
You only need four main components, but the measurements have to be right to get that perfect consistency. Here’s what you need for about a cup of finished peel:
- 4 large lemons (organic preferred—I can’t stress this enough!)
- 4 cups water, divided (we use this for blanching and simmering)
- 4 cups granulated sugar, divided (this is what makes the magic happen)
- 1/4 cup extra granulated sugar for coating
Ingredient Notes and Substitutions
The standard ratio we are aiming for in that cooking syrup is one-to-one, which means equal parts sugar and water by volume in the main cooking phase (though we start with slightly more water for the initial boil). This ratio creates a thick syrup that won’t crystallize easily and perfectly infuses the peels.
Now, about the lemons—be generous! Four lemons yield a decent amount, but trust me, you’ll want more once you taste the finished product. You can totally try this with oranges or grapefruit too, but you might need to adjust the blanching time for thicker rinds. For this specific recipe, though, stick to lemons first. They have the strongest flavor backbone to stand up to all that sugar!
How to Prepare Lemon Strips for Candied Lemon Peel
Okay, this first part requires a steady hand, but don’t panic! We are stripping the lemon down to its flavor core. First, give those gorgeous lemons a really good scrub—I mean, really scrub them down—since we’re using the rind. Snip off the little ends so you have a flat surface to work with. Then, using a sharp knife, slice them lengthwise right into quarters, going from top to bottom.
Next, you’re going to liberate the peel from the segments. I usually just use my fingers or a small spoon to gently pry the peel away from the fruit inside. Save those fruit segments for some amazing lemonade or a drizzle on a cake! Now, cut those big quarter pieces into strips. Aim for about 1/4 inch wide. If you’re worried about that white pith making things too bitter—and lots of folks are—take a small paring knife and gently scrape out some of the white stuff from the inside of the peel after you cut your strips. This is your secret to an easy candied lemon peel no pith flavor profile.
The Essential Blanching Process for Candied Lemon Peel
This is where we politely tell the bitterness to hit the road! Do not skip this, trust me. Take your prepared strips and put them in a saucepan, cover them completely with cold water. Bring that right up to a rolling boil over high heat. As soon as it boils hard, dump it all out into the sink. You need to do this whole process—cover with fresh cold water, bring to a boil, drain—a total of three times. Three times! It perfectly mellows the rind so you’re left with pure, bright lemon flavor ready to absorb syrup.
Simmering the Peels in Simple Syrup for Candied Lemon Peel
Now for the transformation part! We’re taking those blanched, slightly soft peels and giving them the sweet bath they deserve. Pop those strips back into your clean saucepan. Add 3 cups of water and 3 cups of sugar—that’s our basic, powerful simple syrup foundation. Give it a gentle stir to make sure the sugar starts dissolving, but don’t get too aggressive with stirring later on.
Get this mixture up to a boil over medium-high heat. Once it’s bubbling away nicely, you need to immediately dial that heat way down. I’m talking about a very lazy, gentle simmer. We’re not making candy here; we’re infusing! You want the mixture to bubble just occasionally, not furiously.
You need to let this simmer, uncovered, for a good 45 to 60 minutes. Seriously, set your timer. If your peels look pale, keep going. The visual cue you’re waiting for is twofold: first, the peels themselves will start looking glossy and translucent—that means the sugar is penetrating! Second, that liquid around them will reduce down, becoming much thicker, almost like thin honey. Don’t stop just because the time is up; check for that translucency!
If you’re making something really fancy later, perhaps for a gourmet topping, simmer until that syrup is really thick. Resist the urge to stir constantly, as that can sometimes break them up. A nice, slow reduction is exactly what we want at this stage!
The Crucial Soaking Period for Chewy Candied Lemon Peel Instructions
Okay, this is where patience gets rewarded, and this step is absolutely why folks end up with that perfect, yielding texture. Once your peels are translucent and the syrup has reduced, you need to take the whole pot off the heat. They look amazing, right? Glossy and begging to be eaten, but if you drain them now, they’ll be too sugary on the outside and maybe a little brittle on the inside.
We need prolonged contact with that sweet, magical syrup. I always leave mine right in the pot, letting them cool completely at room temperature for at least an hour. But if you can swing it, honestly, cover the whole thing and stick it in the fridge overnight. Letting them soak for 12 to 24 hours is the real secret behind those satisfying, chewy candied lemon peel instructions you’ve been looking for.
When you’re finally ready to move on, you’ll drain them using a fine-mesh sieve. Be sure you save that leftover lemon syrup—don’t even think about dumping it! That’s concentrated flavor gold. You can use it to sweeten an iced tea, drizzle over a pound cake, or even jazz up a vinaigrette. If you’ve got leftover citrus syrup from any other lemon recipes, you know how good this stuff is!
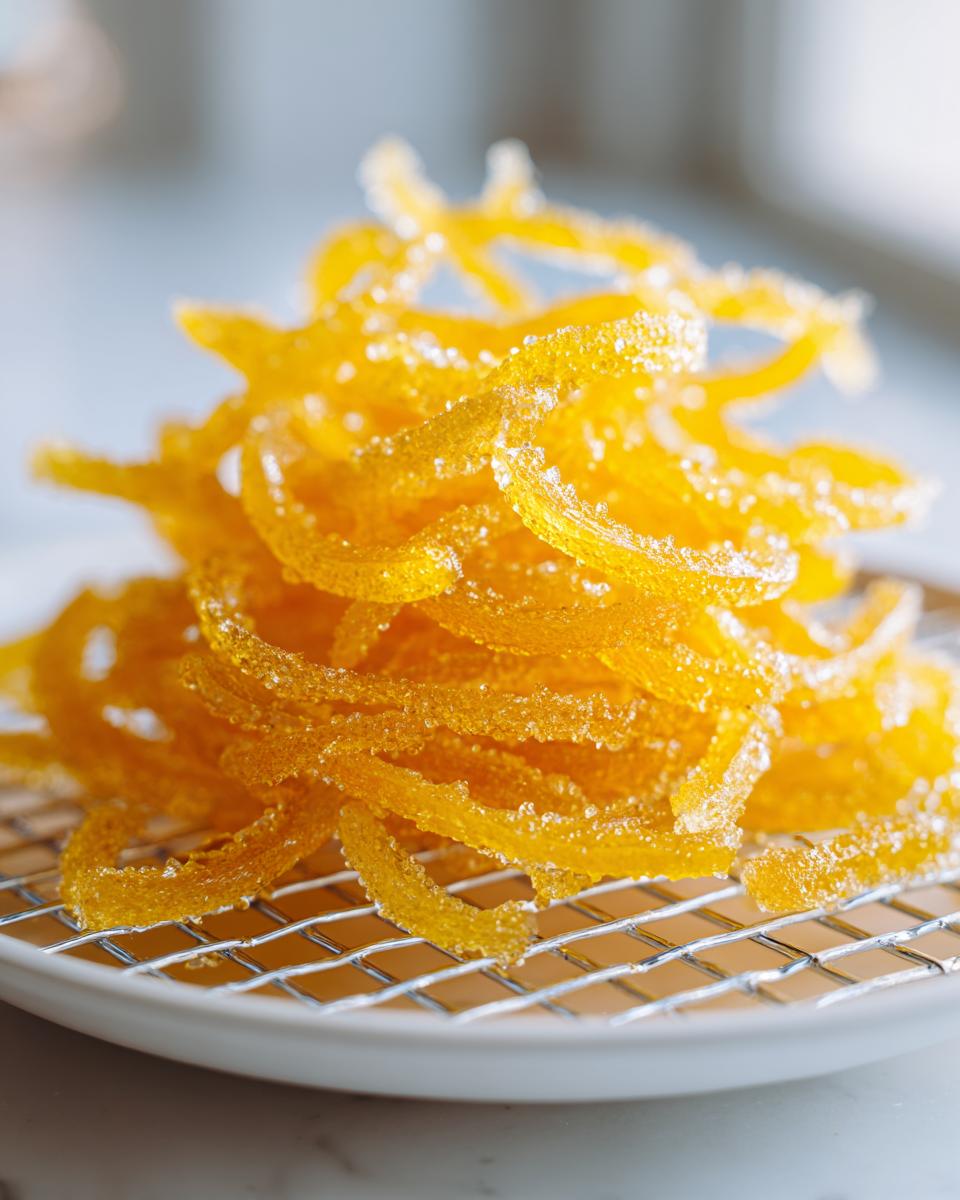
Drying and Coating the Final Candied Lemon Peel
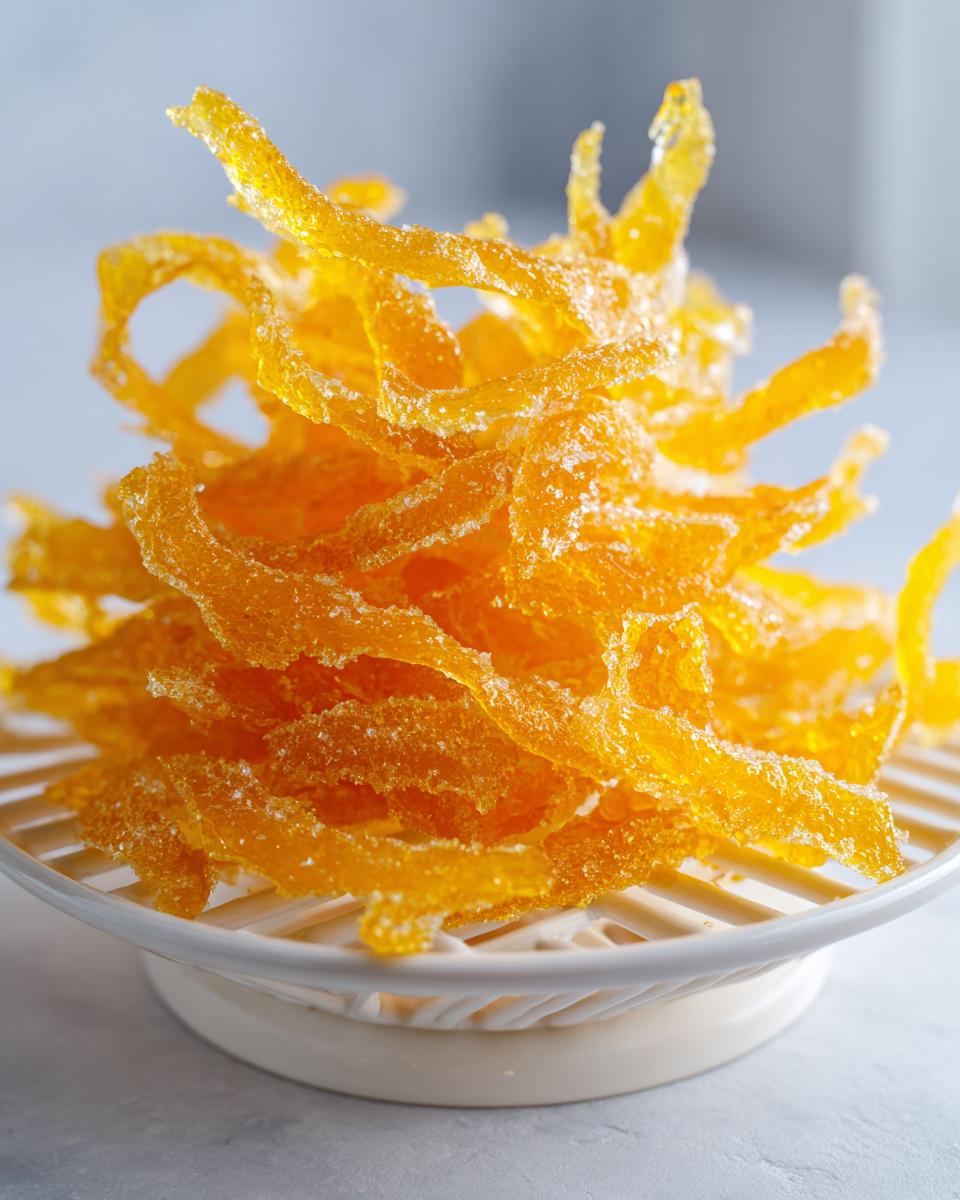
We’re almost there! The peels are beautiful, sweet, and infused, but right out of the syrup, they are way too sticky to handle or store properly. The goal here is to get them tacky enough to hold crystal sugar, but not bone dry.
First, drain those beauties really well using a fine-mesh sieve. Let them sit there for a few minutes so the excess syrup drips off. Next, you need a drying station! Spread the drained peels out in a single, non-touching layer across a wire rack. Make sure that rack is sitting over a baking sheet lined with parchment paper underneath—this catches any drips and keeps your counter clean, which is always a win in my book.
Let these air-dry at room temperature for several hours. You want them dry enough that when you touch them lightly, they feel only slightly tacky, not sticky wet. If you rush this step, they’ll clump together in the jar later, and nobody wants a big block of candied lemon! This initial drying phase is crucial for getting that beautiful sugar crust.
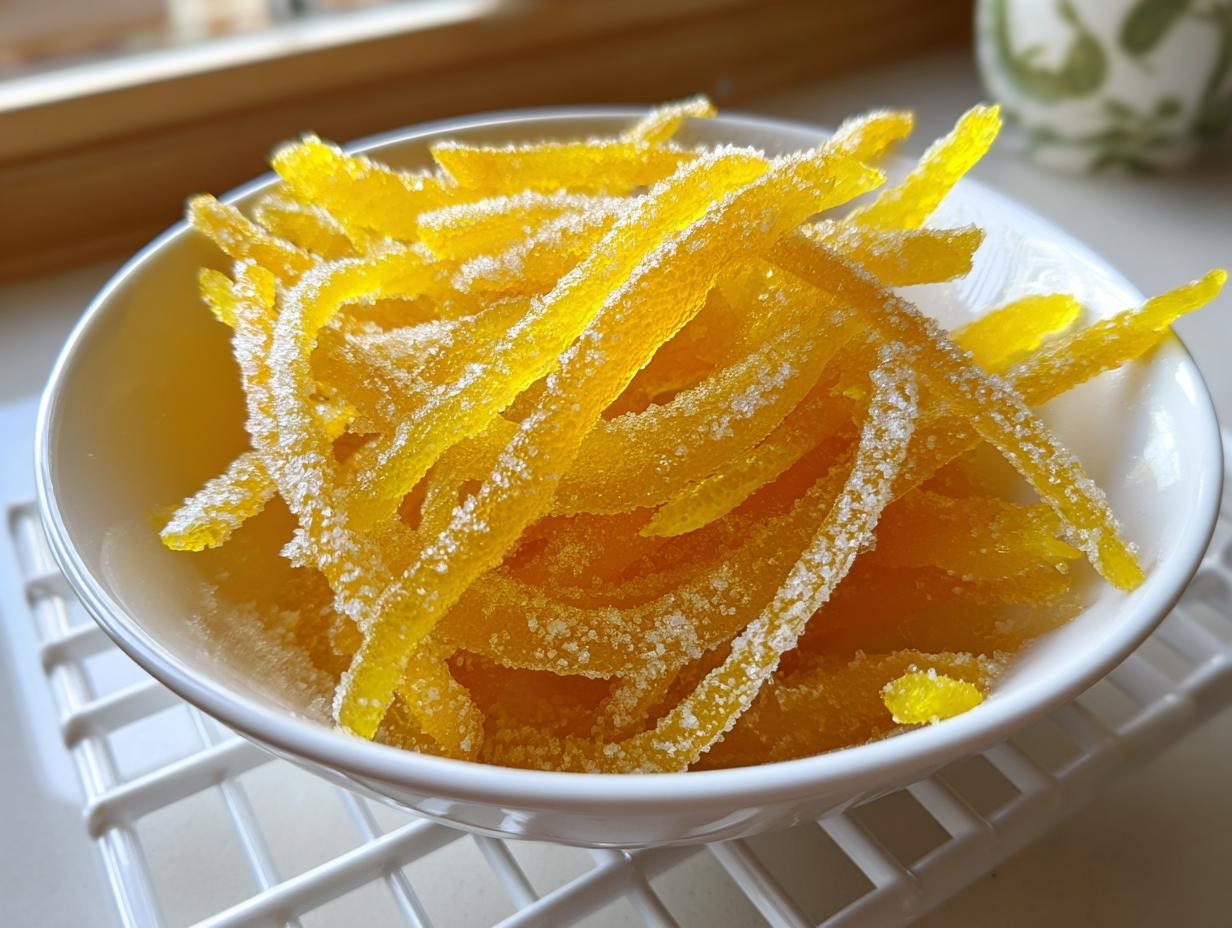
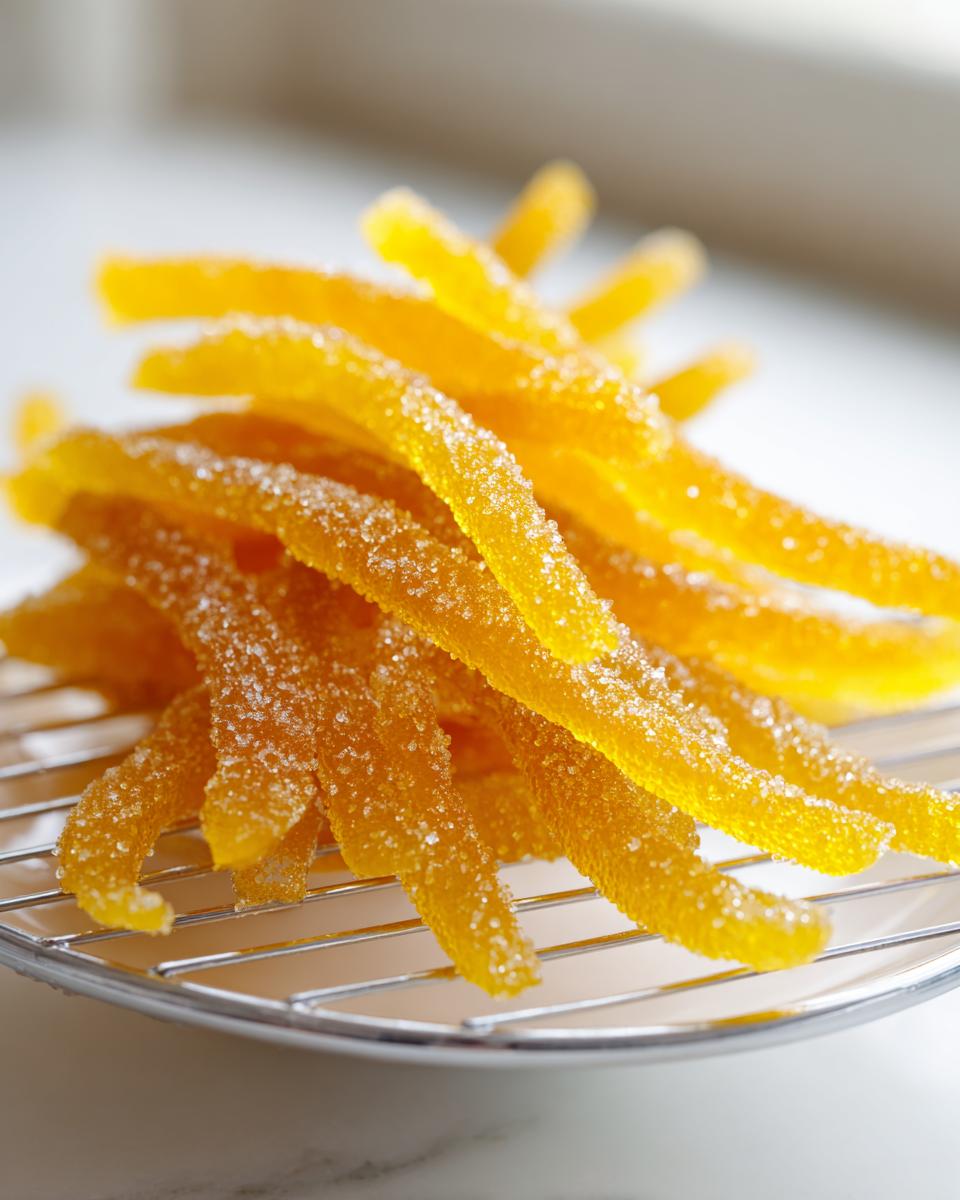
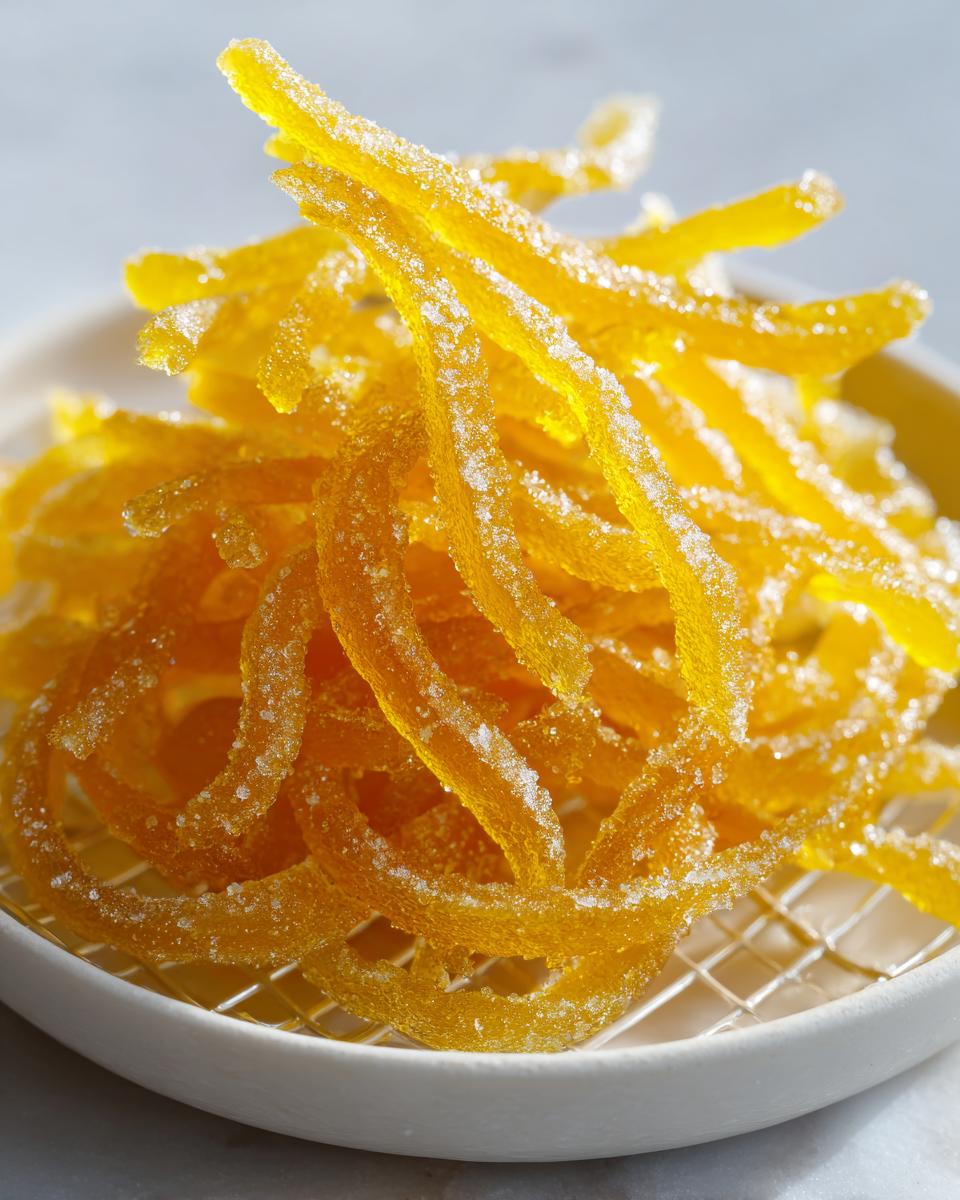
Once they feel tacky—and check them often!—it’s tossing time. Put that last 1/4 cup of granulated sugar into a small bowl and gently toss the peels around until every single piece is coated in a lovely, sparkling layer. This coating both improves the texture and helps preserve them further.
Now, here’s the trick if you jump the gun like I sometimes do: If you toss them in sugar and they still feel gummy after an hour, don’t panic. Just put that wire rack—with the peels still on it—into a very low oven, maybe 200°F, for about 10 minutes. They just need a tiny bit of help setting up! Once they come out, let them cool completely, and then you can toss them in sugar again if needed. They should dry completely on that rack for a full 12 to 24 hours before you ever seal them up tight.
Storage and Uses for Candied Lemon Peel
Alright, you’ve made it through the blanching, the simmering, the soaking, and the sugar toss! Now we have to protect this gorgeous work. The absolute number one rule for storage is this: make sure those pieces are completely dry to the touch before they ever see the inside of an airtight container. If there is any residual moisture when you seal them up, you’re going to end up with a sticky, moldy mess. I store mine in a glass jar with a tight lid on the counter, and they last for weeks, sometimes months, especially since we cooked them down into such a thick syrup initially.
But the best part isn’t keeping them; it’s using them! The uses for candied lemon peel are practically endless. Honestly, I think they are fantastic just standing alone as a sweet snack, but they really shine when you incorporate them into other things. I chop a handful of these up finely and fold them right into my shortbread dough—the buttery cookie pairs unbelievably well with the bright, intense lemon.
It’s amazing how something so simple elevates your baking. If you’re looking for a real showstopper, check out how intensely flavored these make my ultimate moist carrot cake. You won’t believe the flavor boost they provide!
Gourmet Candied Fruit Recipe Applications
When you want to bring out the fancy side of your candied citrus, you have to try dipping! Melt down some really good quality dark chocolate—the slight bitterness of the cocoa is the perfect foil for the sweet peel. Dip half of a strip, let it set on parchment paper, and suddenly you have a beautiful, slightly rustic treat worthy of any holiday platter. This moves it right into that special gourmet candied fruit recipe category. They are also incredible finely chopped and sprinkled over a glass of sparkling wine or used as a sophisticated garnish on top of scones or yeasted coffee cakes. They truly taste like concentrated sunshine!
Troubleshooting Common Issues in Candied Citrus Making
Look, even in my home kitchen, things sometimes go sideways, right? That’s totally normal when you’re messing around with sugars and fruit rinds. This entire candied citrus making guide wouldn’t be complete if I didn’t talk you through what to do when things don’t look exactly like my glossy finished product right away. Don’t let a little culinary hiccup derail you; we can fix almost anything!
The most common complaint I hear is: “Aria, my peels are sticky even after drying!” If you’ve passed the 24-hour mark and you still feel a slight tackiness when you pick one up, it means you didn’t let all that heavy syrup evaporate fully. Don’t despair! Remember that low oven trick I mentioned? Pull out your wire rack (with the peels still spread out) and pop it back in the oven at that super low 200°F for another 10 to 15 minutes. Keep an eye on them! As soon as they feel dry to the touch, pull them out, let them cool completely, and then give them one last toss in fresh sugar. That usually locks in the dryness perfectly.
The other issue? Toughness. If your peels feel harder than you expected, it usually means two things. Either you simmered them for too long in the syrup until the sugar completely calcified the outside, or—and this is more likely—you didn’t let them soak long enough! If they are tough but aren’t brittle, try putting them back into *just* hot water (no sugar) for about an hour. Sometimes that slight rehydration helps soften them up before you finish cooling and drying. Remember, that long soak time is what keeps them pliable and chewy, not hard as rocks!
Frequently Asked Questions About Candied Lemon Peel
I know when you’re wading through a recipe, sometimes the specific little questions pop up right when you need them. I’ve pulled together the most common things people ask me about this process. Hopefully, this covers any remaining doubts so you can dive into making your own batch of sweet lemon peel snack!
Can I make candied lemon peel without the pith?
You totally can, and a lot of people prefer it! Remember how I told you to scrape some of the white pith off after you cut the strips? Doing that helps pull out some more of that inherent bitterness, leaving you with a purer, sweeter lemon flavor profile. It actually makes the final product taste much closer to that sweet lemon peel snack folks love. The trade-off is that removing too much pith means less substance, so you might need to cook the peels for the full 60 minutes to ensure they fully absorb the syrup and stay soft rather than drying out too quickly.
Can I skip the blanching step completely?
Oh, heavens no, please don’t! That’s like skipping the seasoning on a chicken breast—it just won’t taste right! Skipping the three rounds of boiling and draining means you are leaving loads of bitter pith oils in the rind. If you skip it, you are going to end up with a piece of fruit rind that is intensely sour and bitter, not sweet and candied. That blanching step is non-negotiable if you want that perfect result for your preserving lemon rinds in sugar project!
What is the best way to candy lemon slices?
This recipe is written for strips because they dry and coat much more evenly, which helps achieve that perfect chew. However, if you have pretty thin-skinned lemons and you want to candy whole slices—maybe you’re making a gorgeous topping for a lemon lavender cake—you absolutely can! Just make sure those slices are thin, maybe 1/8 of an inch maximum. You might need to increase your initial blanching time slightly because the center pith is wider, and definitely increase your simmering time, as the thick slices need longer to become translucent.
How long do homemade candied lemon peels last?
If you let them dry thoroughly—and I mean *completely* dry after that final sugar toss—they last surprisingly long! Stored in a clean, airtight jar at cool room temperature, they can easily last 3 to 4 weeks, sometimes longer. The high sugar content is a great preservative, but moisture is the enemy. Seriously, if you’re worried about storage, just keep them in the fridge; they’ll last for months that way, though they might be slightly less chewy when eaten cold.
PrintSimple Candied Lemon Peel Recipe

Learn how to make chewy, sweet candied lemon peel at home using a straightforward process. This guide covers preparation, simmering in simple syrup, and drying for a perfect gourmet candied fruit snack.
- Prep Time: 20 min
- Cook Time: 1 hr 15 min
- Total Time: 2 hr 35 min
- Yield: About 1 cup 1x
- Category: Dessert Component
- Method: Stovetop Simmering
- Cuisine: American
- Diet: Vegetarian
Ingredients
- 4 large lemons (organic preferred)
- 4 cups water, divided
- 4 cups granulated sugar, divided
- 1/4 cup extra granulated sugar for coating
Instructions
- Wash the lemons thoroughly. Use a sharp knife to cut off the ends. Slice the lemons lengthwise into quarters, from top to bottom.
- Use a small spoon or your fingers to gently separate the peel from the fruit segments. You can save the fruit for juice or other uses. You only need the white pith and yellow zest.
- Cut the peels into thin strips, about 1/4 inch wide. If you want less bitterness, you can scrape some of the white pith off the inside of the peel using a small knife.
- Place the lemon strips in a medium saucepan and cover with cold water. Bring to a boil over high heat, then immediately drain the water. This step removes some bitterness. Repeat this boiling and draining process two more times (three times total).
- Return the blanched peels to the clean saucepan. Add 3 cups of water and 3 cups of sugar. Stir gently to combine.
- Bring the mixture to a boil over medium-high heat, then reduce the heat to maintain a gentle simmer. Cook uncovered for 45 to 60 minutes, stirring occasionally. The peels should become translucent and tender, and the liquid should reduce to a thick syrup.
- Remove the saucepan from the heat. Let the peels soak in the syrup for at least 1 hour, or preferably overnight, to absorb more sweetness.
- Drain the peels using a fine-mesh sieve, reserving the leftover lemon syrup for another use (like sweetening tea or cocktails).
- Spread the drained peels in a single layer on a wire rack set over a baking sheet lined with parchment paper. Let them air dry for several hours at room temperature until they are no longer sticky to the touch.
- Toss the slightly dried peels in the remaining 1/4 cup of granulated sugar until fully coated.
- Allow the sugar-coated lemon peel to dry completely on the rack for another 12 to 24 hours before storing.
Notes
- For a chewier texture, simmer the peels for the full 60 minutes until the syrup is very thick before soaking.
- If the peels feel sticky after the initial drying, return them to a low oven (200°F) for 10 minutes to dry further, then toss in sugar again.
- Use this homemade candied lemon peel as a garnish for cakes, stir into cookie dough, or dip half of each piece in melted dark chocolate for a gourmet treat.
Nutrition
- Serving Size: 1 tbsp
- Calories: 105
- Sugar: 26g
- Sodium: 0mg
- Fat: 0g
- Saturated Fat: 0g
- Unsaturated Fat: 0g
- Trans Fat: 0g
- Carbohydrates: 27g
- Fiber: 1g
- Protein: 0g
- Cholesterol: 0mg