
If you think preserving food means endless canning under boiling heat, let me show you a much cooler, quieter way to pack flavor and gut-healthy benefits into your pantry! I’m Aria, and here at Cooking Zenith, we believe in letting nature do the heavy lifting. Forget complicated steps; we’re diving straight into making incredible fermented figs and walnuts using a simple, honey-based lacto-fermentation method. This technique instantly turns humble ingredients into potent, probiotic rich fig snacks that taste amazing. Trust me, once you see how easy it is to ferment figs at home, you’ll feel that surge of culinary confidence I always talk about. This recipe is truly the definition of elevating your everyday storage habits! You can read more about my philosophy over on my About Page.
- Why You Will Love This Fermented Figs and Walnuts Recipe
- Essential Ingredients for Lacto-Fermented Figs and Walnuts
- Step-by-Step Guide: How to Ferment Figs and Walnuts at Home
- Flavor Profile and Uses for Fermented Figs and Walnuts
- Ingredient Notes and Substitutions for fermented figs and walnuts
- Tips for Perfect Fermented Figs and Walnuts
- Storage and Reheating Instructions for fermented figs and walnuts
- Frequently Asked Questions About Fermented Figs and Walnuts
- Understanding the Health Aspects of fermented figs and walnuts
Why You Will Love This Fermented Figs and Walnuts Recipe
Honestly, this recipe is going straight to the top of my “easiest keepers” list. You’re going to love how little effort it takes to get such a complex reward. We’re talking maximum flavor impact for minimum fuss!
- You’re making true probiotic rich fig snacks! Fermentation means boosting the good stuff for your gut, and that’s always a win for me.
- Seriously, there’s no cooking involved—none! It’s just mixing, submerging, and waiting. Perfect for those hot summer days when you don’t want to turn on the stove.
- The texture you get is just wild: plump, tangy figs paired with crunchy nuts that have soaked up all that complex honey flavor. It’s a real treat.
- This is brilliant for preserving figs naturally, keeping them safe and delicious for months just sitting in the fridge.
For more ideas on packing amazing flavor into simple routines, check out my guide on healthy snack ideas!
Essential Ingredients for Lacto-Fermented Figs and Walnuts
When you’re doing any kind of fermentation, especially something as delicate as this, the quality of your ingredients really shines through. Luckily, this recipe for fermented figs and walnuts keeps the ingredient list short and sweet. You probably have most of this already!
Here is exactly what you’ll need for one pint jar. Remember, precision matters when we’re inviting friendly bacteria to the party:
- 1 cup dried figs, halved (Make sure they aren’t the super shiny, artificially coated ones—we want the natural sugar power!)
- 1/2 cup raw walnuts
- 1 cup raw honey (This is fuel for our bacteria, so please don’t use highly processed stuff here!)
- 1/2 cup filtered, non-chlorinated water (Chlorine kills the good guys, so tap water is a no-go.)
- 1/4 teaspoon non-iodized sea salt (Iodine can inhibit the fermentation process, which would be a crying shame.)
I always say, if you can make a great homemade teriyaki sauce, you can certainly master this quick assembly. It’s all about using the right building blocks!
Step-by-Step Guide: How to Ferment Figs and Walnuts at Home
Okay, this is where the magic happens! I promise this whole process to figure out exactly how to ferment figs at home is far less fussy than that fancy sourdough starter you might be nursing. Since we are using honey instead of a salt-only brine, we are dealing with a slower, wild fermentation that takes place just on your counter. Keep things clean, keep everything submerged, and you’ll be done in under 15 minutes of active work!
Preparing the Jar and Mixing the Brine for fermented figs and walnuts
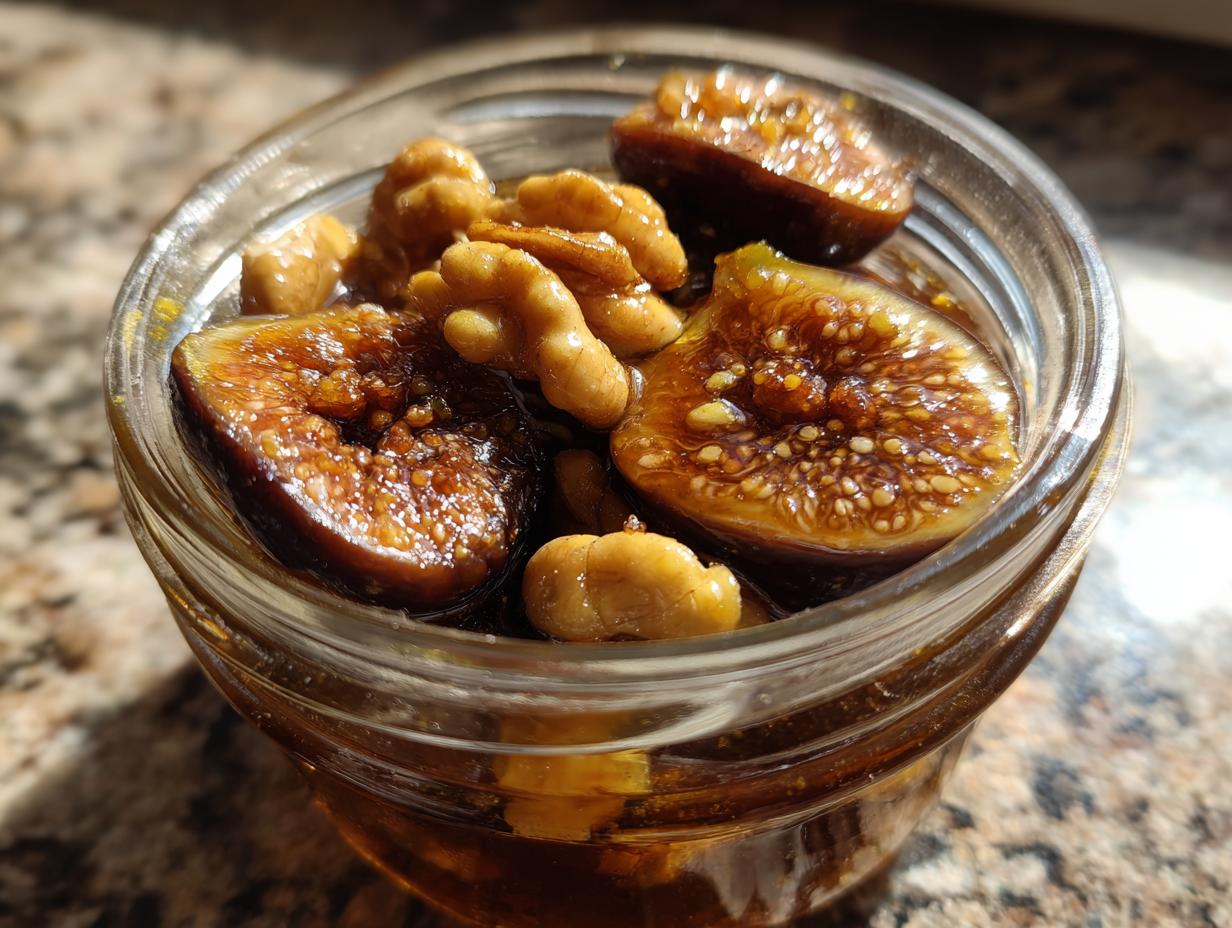
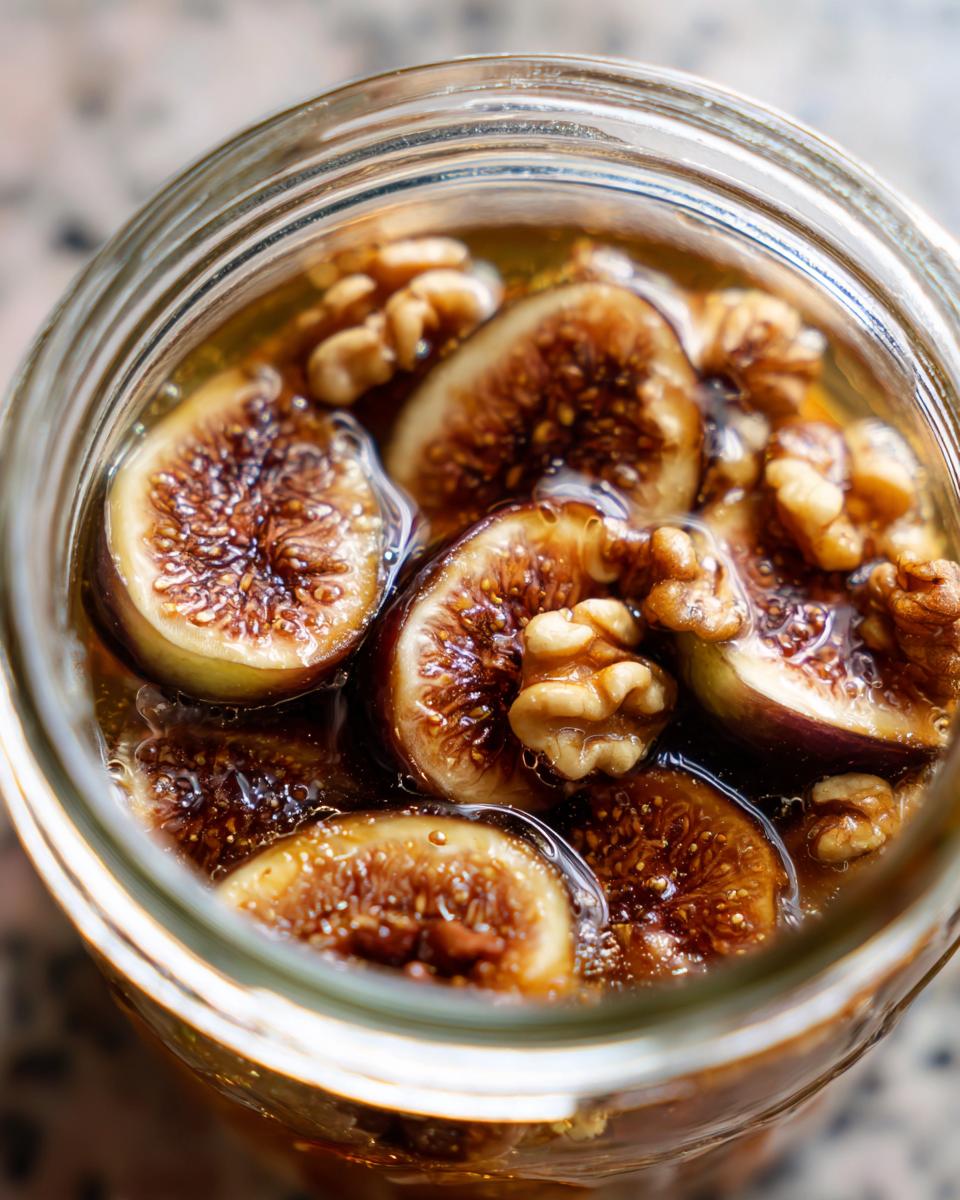
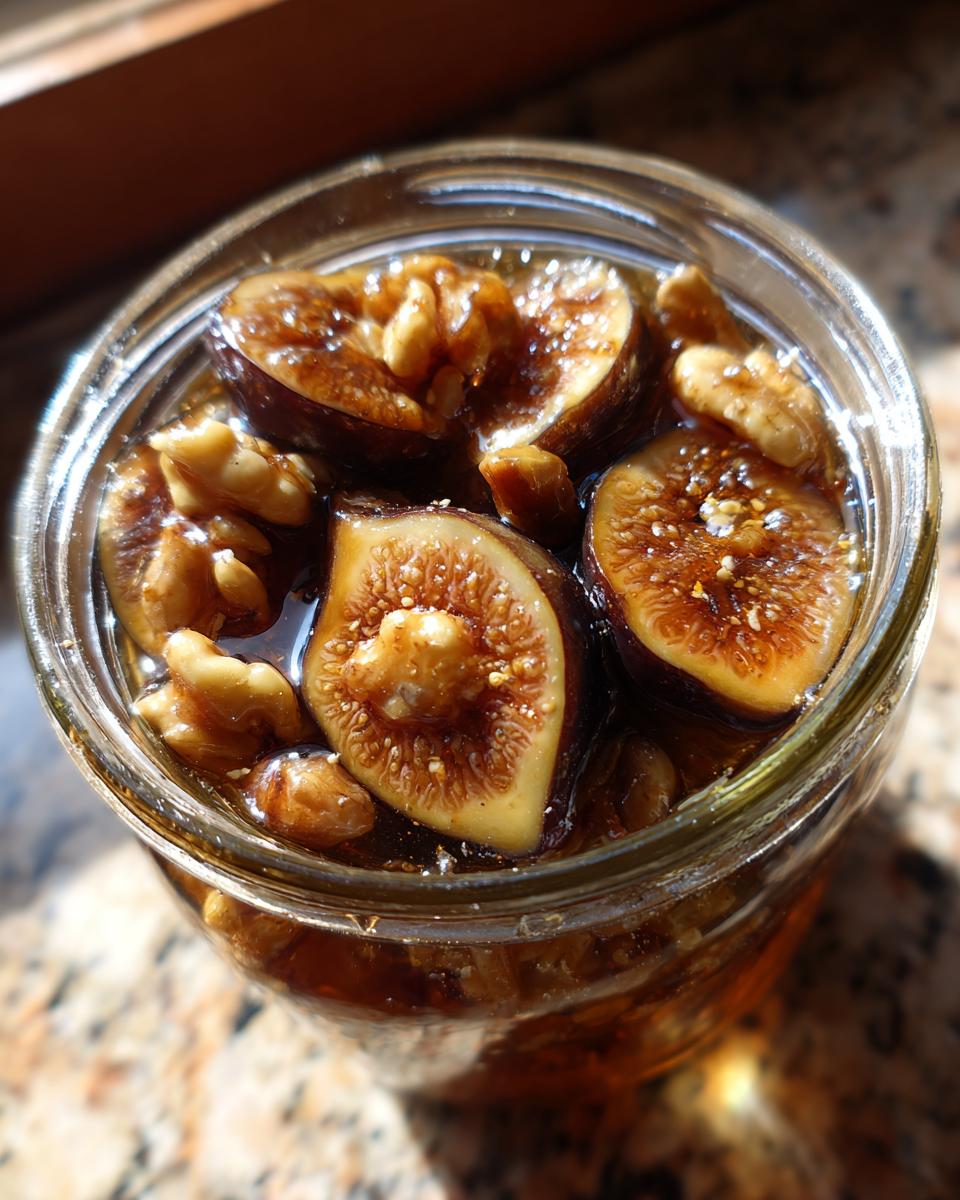
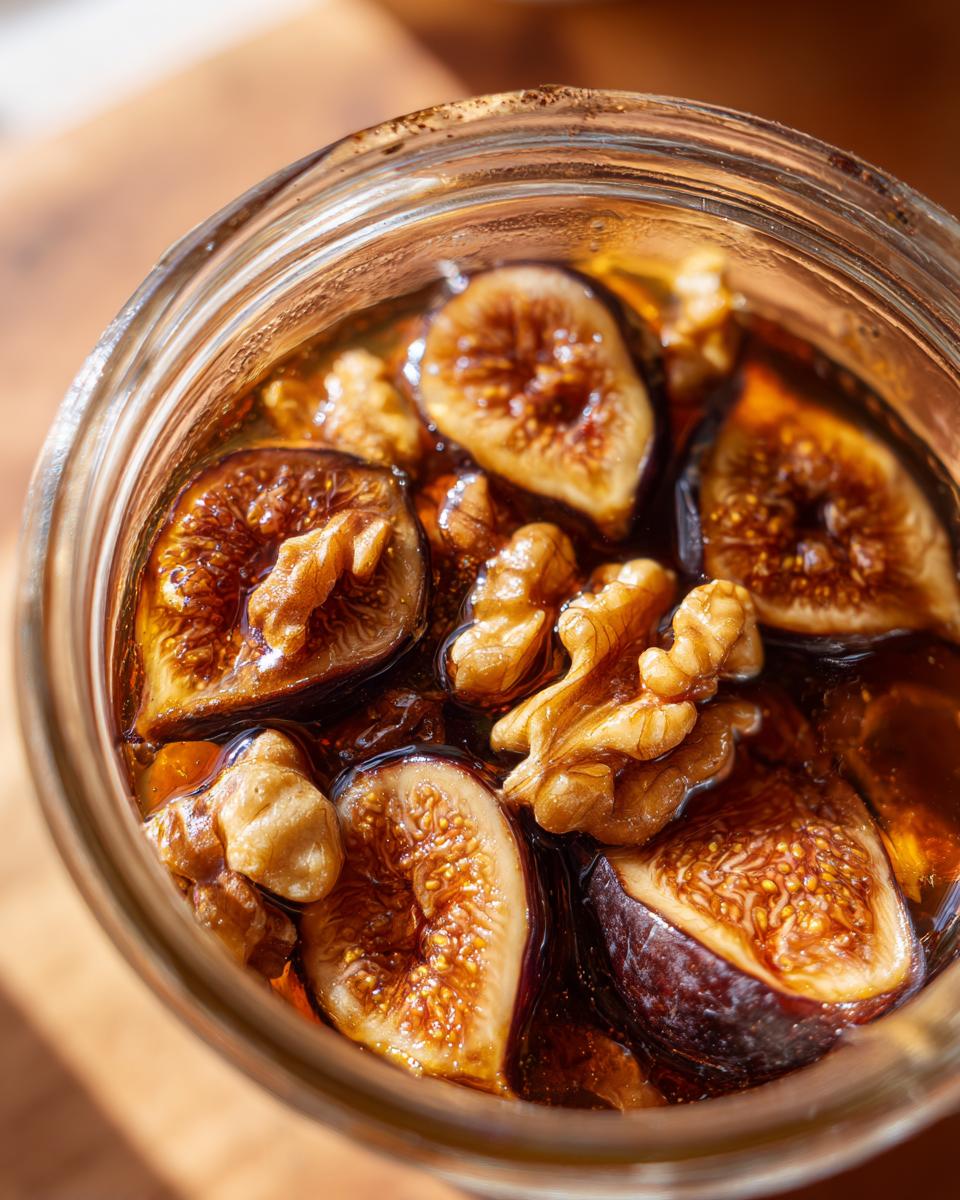
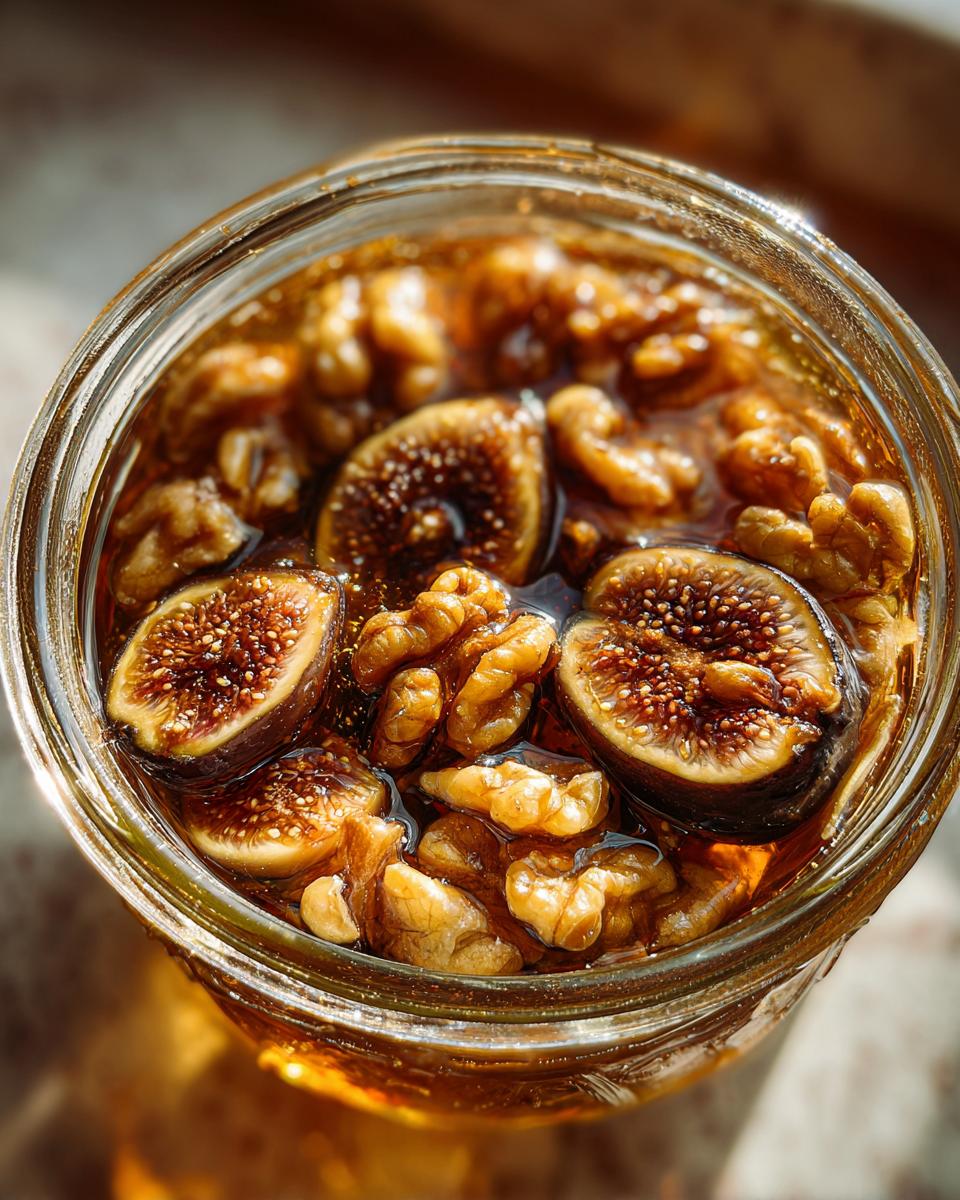
First, grab your cleanest pint-sized glass jar. Don’t skip the cleaning step, we want the good bacteria only! Combine your halved dried figs and the raw walnuts right into that jar. Now, for the brine: In a separate little bowl, whisk together your raw honey, filtered water, and sea salt. You need to whisk until honestly, every last grain of salt has disappeared into that sweet liquid. That honey-water mixture is our perfect environment for fermentation.
Submerging and Initial Fermentation of fermented figs and walnuts
Pour that gorgeous honey brine right over the figs and walnuts in the jar. This is critical: make sure those pieces of fruit and nut are totally covered by the liquid. Use a fermentation weight if you have one, or just stick a tiny square of plastic wrap over the opening and seal it with a rubber band. This lets gas escape but keeps dust out. Now, tuck the jar away somewhere room temperature—my kitchen counter, away from the direct sun, is perfect. We let this hang out for 5 to 7 days. My tip? Keep an eye out for tiny bubbles clinging to the sides of the jar; that’s your sign that the happy bacteria are working hard!
Tasting and Stopping the Fermentation for your fermented figs and walnuts
After five days, it’s taste testing time! Gently pull one fig out and try it. If it’s already tangy enough for you, great! If you like it a little sharper, let it sit for another day or two. Once the flavor hits that sweet spot—that perfect balance between sweet and tart—it’s time to stop the action. Seal that jar tight with its regular lid and move it straight into the refrigerator. This chill instantly slows down the fermentation process, keeping your amazing beginner fermentation projects fruit safe for up to three months!
Flavor Profile and Uses for Fermented Figs and Walnuts
So, what exactly are you eating after all that waiting? Well, the flavor profile fermented figs develop is honestly what keeps me coming back to this recipe. It’s so much deeper than just a plain dried fig!
The initial sweetness of the honey settles down, replaced by this wonderful, slow-building tanginess—it’s subtle, but completely addictive. The walnuts get soft enough to bite through easily but still retain a little body, absorbing that complex, sweet-sour honey flavor beautifully. It’s earthy, fruity, and just begging to be paired with something sharp.
I absolutely love using these as a healthy fermented topping! Try spooning a few over Greek yogurt for breakfast, or my favorite way: setting them out on a cheese board alongside some sharp cheddar or fresh goat cheese. They make any platter look instantly gourmet, and they taste like you spent all day preparing a delicacy. If you’re looking for more cheese board inspiration, check out my recipe for Maple Bacon Goat Cheese Crostini; these figs would be incredible alongside it!
Ingredient Notes and Substitutions for fermented figs and walnuts
When we talk about preserving figs naturally, we have to be very honest about the quality of the stuff going into the jar. My notes from the original trials were emphatic about certain things, especially regarding the figs themselves. If you skip these tiny details, you risk a batch that just doesn’t bubble right!
First, let’s circle back to the figs. You absolutely need dried figs here. Fresh figs have a different sugar and water content, and while you *can* ferment them, they spoil much faster and often need a saltier brine to stop them from turning mushy. Dried figs provide that concentrated sugar punch we need to feed the wild cultures properly.
Now, about that honey—it’s your fermentation powerhouse. If you absolutely cannot get your hands on raw honey, you could try maple syrup instead. Maple syrup works because it also contains necessary trace minerals for the bacteria to thrive. However, Fair warning: maple syrup gives a noticeably different, richer, almost smoky undertone compared to the clean finish you get from honey. It’s a trade-off, but technically doable!
And please, please pay attention to the safety notes I mentioned earlier about mold. If you see anything white floating on top after a few days, skim it off gently right away—sometimes that’s harmless kahm yeast, but better safe than sorry! If you ever see black, green, or fuzzy spots, that batch is gone. Toss it immediately. We are making probiotic snacks, not science experiments we aren’t sure about, right? We want that healthy activity, not spoilage. If you’re already obsessed with honey, you have to try my recipe for easy honey butter recipe!
Tips for Perfect Fermented Figs and Walnuts
You’ve got the recipe, you’ve got the ingredients—now let’s get into the nuances that take this from ‘good’ to ‘oh my gosh, I have to make this again’ territory. Getting that perfect balance when we’re preserving figs naturally is all about environmental control. Seriously, these little jars are sensitive souls!
Here are a few things I learned through trial and error that will just make your life easier:
- Temperature is King: The ideal range for this wild fermentation is snuggly between 68°F and 72°F. If your kitchen is cold (like, below 65°F), the fermentation might stall completely, and you’ll end up with sweet honey-soaked figs, not tangy ones. If your kitchen is blasting heat (over 78°F), you run a higher risk of pushing the fermentation too fast, which increases the chance of weird surface growth. Find a cool cupboard away from the oven!
- Don’t Be Shy About Pressing Down: That honey brine has to completely cover everything, and I mean everything. If you have nuts poking out, they are exposed to air, and that’s how fuzzy mold starts its vacation spot. Once a day for the first two days, gently press the contents down with a clean chopstick or spoon until they are fully submerged again. It’s a quick check that saves the whole batch.
- Listen to the Bubbles: Remember how I mentioned seeing bubbles? Don’t panic if you don’t see huge, rolling activity after just 24 hours. Honey is thicker than a standard saltwater brine, so it takes longer for those carbon dioxide gases to work their way out. If you don’t see any sign of life by Day 4, check your temperature. If the temp is good, just give it a little more time. Patience is the main tool in fermentation, I swear!
Trusting the process and giving it the right environment is the secret sauce. For more thoughtful ways to put your harvest to good use, you should read my thoughts on preserving harvest figs techniques!
Storage and Reheating Instructions for fermented figs and walnuts
The best news here is that once your fermented figs and walnuts hit that flavor sweet spot, you just put the lid on tight and slide them into the fridge! That cold temperature basically presses the pause button on the entire show. They’ll keep beautifully in that sealed jar for up to three months—sometimes even longer, but I’ve never had a batch last that long because they disappear!
Because these are intended to be a cool, tangy, savory-sweet item, you rarely need to reheat them. They are fantastic right out of the fridge spooned over ice cream or as a vibrant addition to a cheese board. However, if you decided to use them as part of a baked good or maybe thin them out slightly to pour over something warm, they can handle a very gentle warm-up. Think of them as one of those fabulous, low-effort sweet fermented condiments that you can pull out any time you need a blast of complex flavor!
For more background on using these types of amazing flavor boosters, check out my post on sweet fermented condiments!
Frequently Asked Questions About Fermented Figs and Walnuts
I always get so many questions when I share these unique recipes! It’s natural to have a few doubts when you’re trying something new, especially something involving wild fermentation. Don’t worry, I’ve put together answers to the most common things people ask me about making their own flavorful fermented figs and walnuts.
Is it safe if my fermented figs and walnuts smell a little vinegary?
That vinegary scent is usually just a sign of good activity! When those beneficial bacteria work, they produce lactic acid, which gives that classic tangy zip we look for. If the smell is sharp, but otherwise clean—not rotten or sulfuric—you’re probably doing great! It means you’ve achieved a nice tang in your probiotic rich fig snacks. If the smell is truly off, throw it out, but a little vinegar smell is expected as the flavor develops!
Can I use fresh figs instead of dried figs for this recipe?
You certainly *can* try to use fresh figs, but I strongly recommend sticking to dried figs for this honey brine method. Fresh figs are much higher in water content, and they don’t have that concentrated sugar level that dried figs provide. When I’ve tested fresh figs, they tend to break down into mush much faster than the walnuts, and it drastically changes the fermentation timeline. Dried figs are the reliable choice for this probiotic rich fig snacks!
What are the main probiotic benefits I get from this?
The primary health perk comes from the fact that we are using raw honey and allowing wild bacteria to flourish in a low-acid environment. This process creates a living food full of diverse microbes. Eating these regularly is a fantastic way to support your gut health through delicious, minimally processed additions to your diet. Think of it as a tiny, sweet daily boost!
How long should this take if my kitchen is cold?
If your environment dips below 65°F, expect the fermentation for your lacto fermented walnuts and fruit to slow down considerably. It might take 10 days instead of 7. My best advice here is patience. Don’t rush it by moving it to a warmer spot, or you risk stressing the culture. If you’re worried about the cold, look into using a seedling heat mat set on a very low setting, but generally, just allowing extra time while maintaining safety standards is the best path for slow fermentation.
For comprehensive methods on other fruit ferments, take a look at my guide on whole food fermentation recipes!
Understanding the Health Aspects of fermented figs and walnuts
I always try to frame these creations around feeling good, not just tasting good! When we talk about our fermented figs and walnuts, we are seriously hitting the jackpot with whole food goodness. The figs bring tons of natural fiber, which is amazing for keeping things moving smoothly in your system, and they are packed with those natural minerals.
Then you’ve got the walnuts—my favorite source of healthy fats that fuel your brain. And, of course, the entire fermentation process cranks up the probiotic count, making this a living food that supports your gut health every time you snack on it. It’s not medicine, but it’s certainly a delicious way to eat whole ingredients!
If you’re looking for ways to slip more of these nutrient-dense foods into your day, check out some of my suggestions for easy breakfast recipes!
PrintLacto-Fermented Figs and Walnuts in Honey
Make probiotic rich fig snacks by lacto fermenting dried figs and walnuts in a simple honey brine. This recipe preserves figs naturally and creates a sweet fermented condiment.
- Prep Time: 15 min
- Cook Time: 0 min
- Total Time: 15 min
- Yield: About 1.5 cups 1x
- Category: Preserves
- Method: Lacto-Fermentation
- Cuisine: American
- Diet: Vegetarian
Ingredients
- 1 cup dried figs, halved
- 1/2 cup raw walnuts
- 1 cup raw honey
- 1/2 cup filtered, non-chlorinated water
- 1/4 teaspoon non-iodized sea salt
Instructions
- Combine the figs and walnuts in a clean, pint-sized glass jar.
- In a separate bowl, whisk together the honey, water, and salt until the salt dissolves completely. This creates your brine.
- Pour the honey brine over the figs and walnuts in the jar. Press the fruit and nuts down gently to ensure they are fully submerged under the liquid.
- Place a fermentation weight on top if you have one, or use a small piece of plastic wrap secured with a rubber band over the jar opening to keep debris out while allowing gases to escape.
- Leave the jar at room temperature (68-72°F) for 5 to 7 days for the wild fermentation process to begin. You may see small bubbles forming.
- After 5 days, taste a fig. If you prefer a tangier flavor, let it ferment for another 1 to 2 days.
- Once the flavor is to your liking, seal the jar tightly and transfer it to the refrigerator. This stops the fermentation.
- Refrigerate for up to 3 months.
Notes
- Use dried figs, as they provide enough natural sugar to feed the beneficial bacteria.
- If you see white mold on the surface, discard the batch. If you see dark spots or fuzz, skim the surface immediately.
- The flavor profile will be sweet, slightly tangy, and complex, with the walnuts absorbing some of the honey flavor.
- This makes a healthy fermented topping for yogurt or cheese boards.
Nutrition
- Serving Size: 1/4 cup
- Calories: 350
- Sugar: 45
- Sodium: 150
- Fat: 15
- Saturated Fat: 2
- Unsaturated Fat: 13
- Trans Fat: 0
- Carbohydrates: 55
- Fiber: 6
- Protein: 5
- Cholesterol: 0