
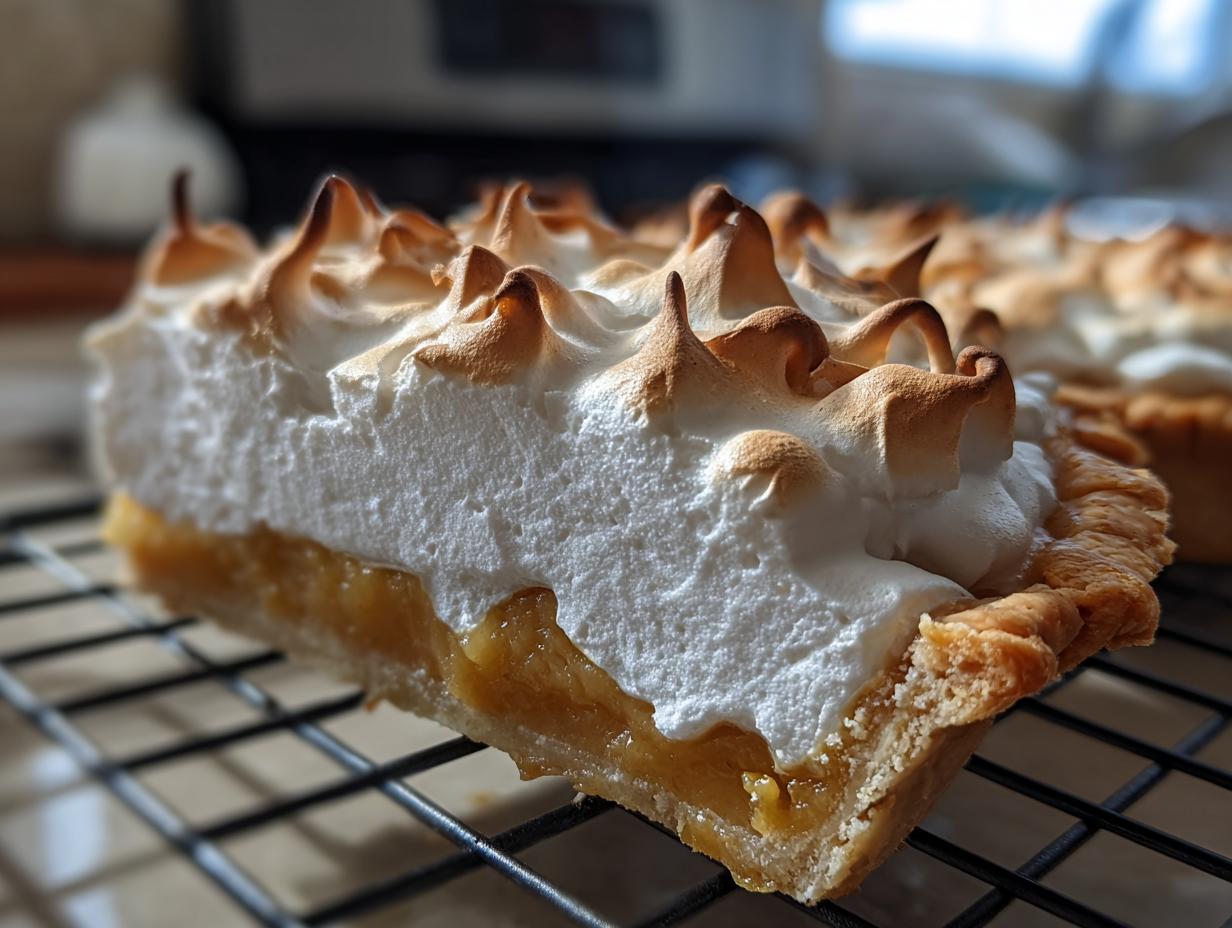
Oh, there’s just nothing that whispers “home” quite like a truly classic, deeply nostalgic dessert, is there? If you’re like me, sometimes you just crave that rich, sweet taste that takes you right back to your childhood kitchen. Forget those overly complicated modern treats! Today, we are making the gold standard: my **Classic Homemade Butterscotch Pie** recipe, finished with the dreamiest, cloud-like meringue you’ve ever seen. This is truly the best butterscotch dessert you’ll ever whip up, made entirely from scratch. For me, these old-fashioned pies are where I find my culinary comfort, and I’m so thrilled to share the secrets behind this incredibly silky, unforgettable filling with you!
- Why This Classic Homemade butterscotch pie Recipe Stands Out (Best butterscotch Dessert)
- Gathering Ingredients for Your butterscotch pie Recipe
- Step-by-Step Instructions for the Perfect butterscotch pie
- Tips for Success with Old Fashioned Pie Recipes
- Ingredient Notes and Substitutions for your Creamy Butterscotch Pie
- Serving Suggestions for this Nostalgic Desserts Favorite
- Storage and Reheating Instructions for Homemade butterscotch pie
- Frequently Asked Questions About Making Butterscotch Pie
- Share Your Culinary Confidence
Why This Classic Homemade butterscotch pie Recipe Stands Out (Best butterscotch Dessert)
There are so many ways to rush through a dessert, but not with this pie. When you’re aiming for truly nostalgic desserts, you have to slow down and make things right. This recipe separates itself from the quick fixes you see everywhere else. We are building flavor layer by layer!
- The filling is truly from scratch pie filling; we ditch the box mixes entirely because they just can’t replicate that depth of flavor. Plus, learning these pudding techniques will help you master other classics, like my recipe for creamy old-fashioned rice pudding!
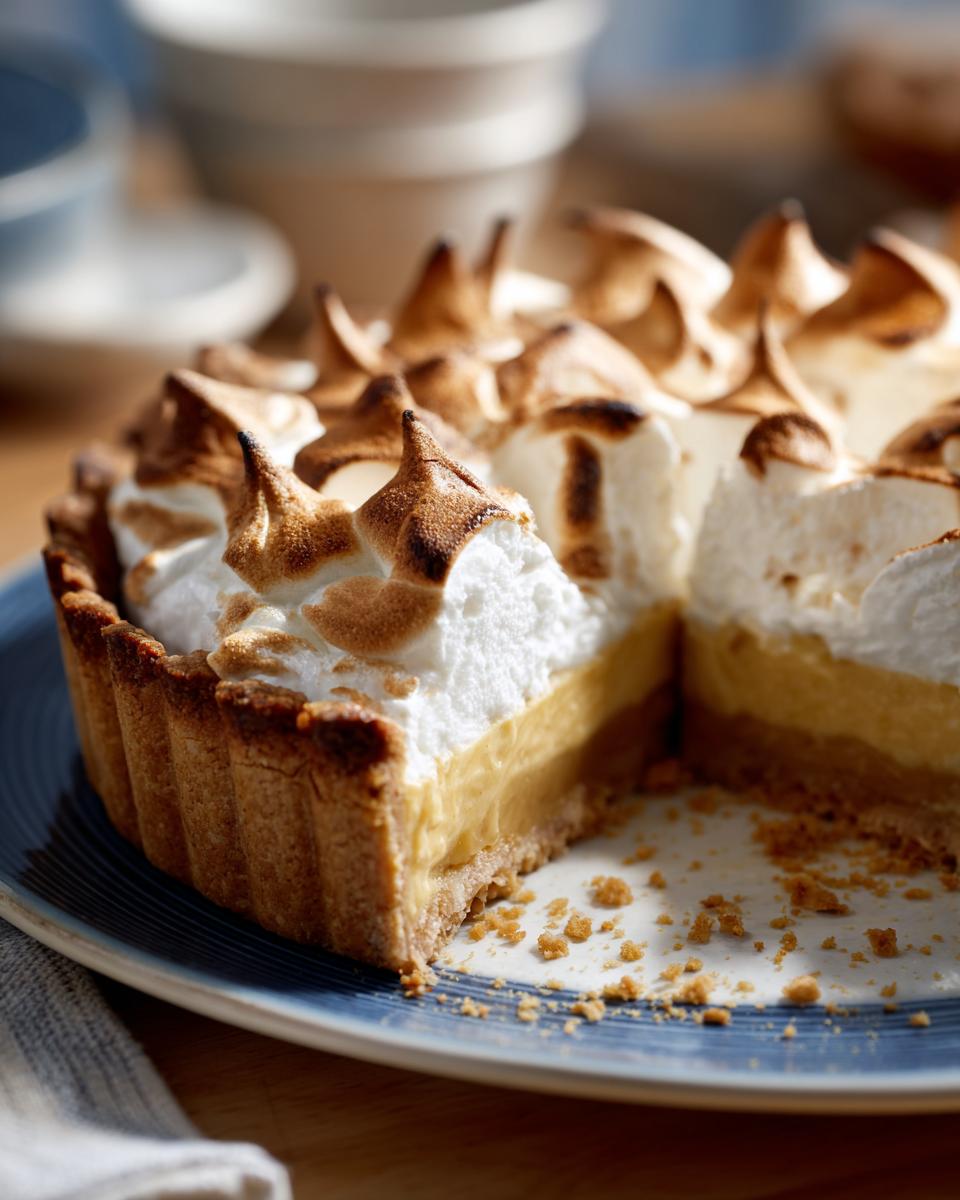
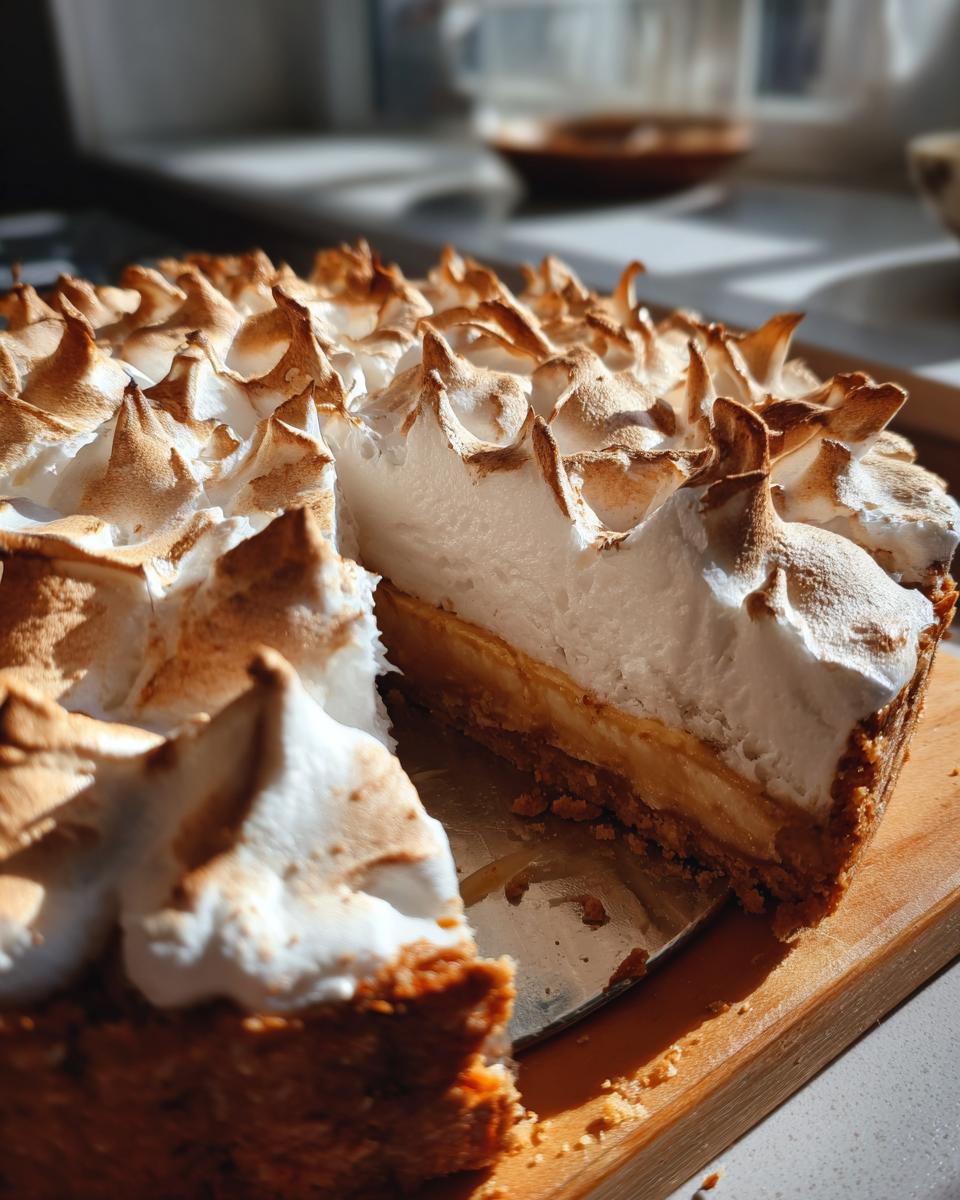
- That meringue? It’s not just a topping; it’s perfectly toasted and glossy, turning every slice into part of a holiday pie ideas spread.
- It results in one of those spectacular, show-stopping Southern pie recipes that everyone begs you to bring to the potluck.
Achieving Rich and Creamy Pies Texture
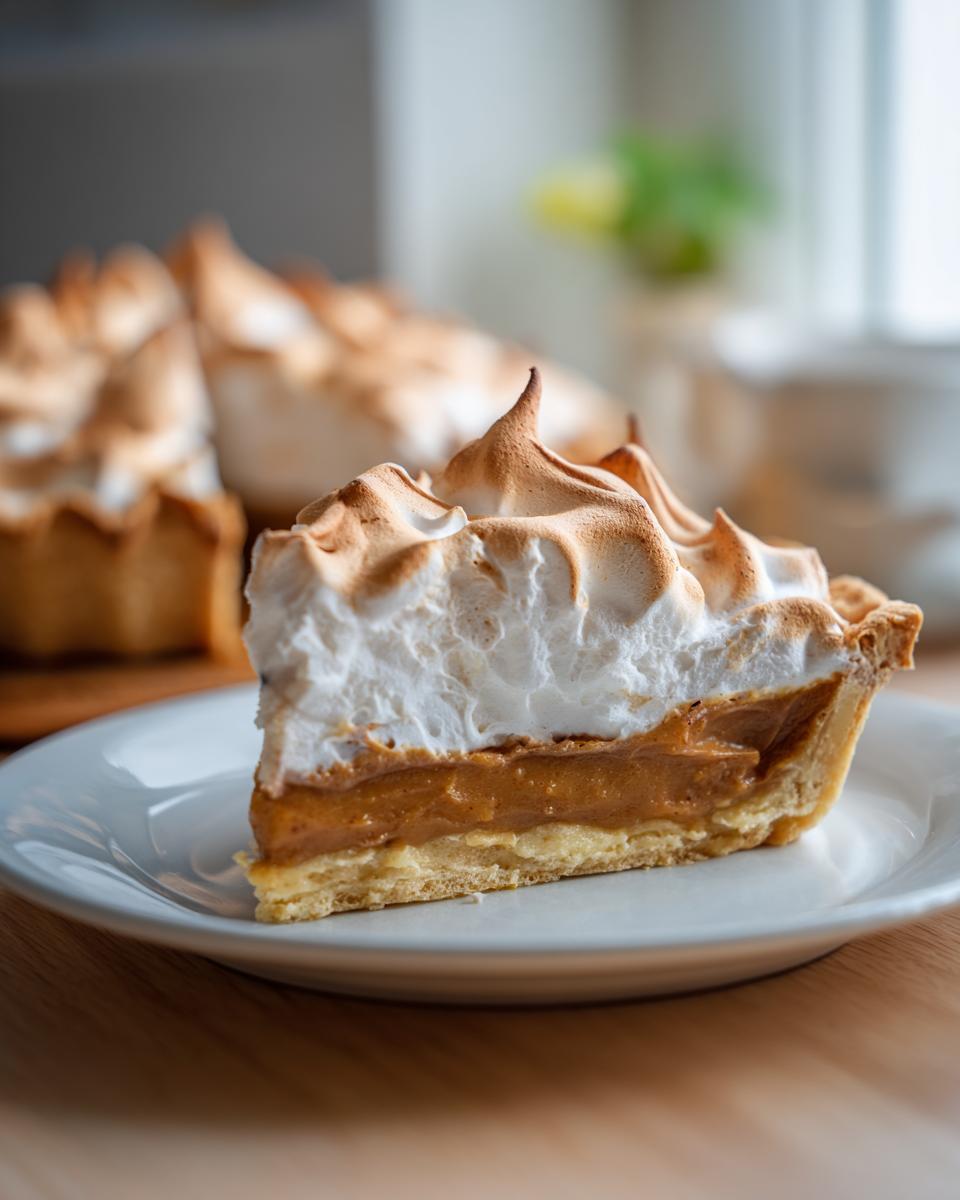
This is where we earn the ‘creamy butterscotch pie’ title. Most pudding pies rely on cornstarch and instant powder, which is fine for a Tuesday, but not for a masterpiece! Here, we go the extra mile by using half-and-half—it adds necessary richness that regular milk just can’t deliver. The real secret sauce, though, is tempering the egg yolks. You slowly introduce heat to the yolks, which prevents them from scrambling into little yellow bits. This technique ensures you get that incredibly smooth, uniform texture for rich and creamy pies, every single time.
Mastering the Flaky Crust Pies Foundation
You can’t build a truly memorable tower on a weak foundation, right? That’s exactly how I feel about the crust for this butterscotch pie. While I totally get it if you need to use a store-bought crust for a quick treat—I do it myself sometimes!—a homemade, flaky crust pies version really elevates this dessert. Since the filling is so rich and soft, you need that slight resistance and buttery crunch from a perfectly pre-baked shell. Trust me, taking the time (or using that great pre-made one!) sets the stage for that incredible filling.
Gathering Ingredients for Your butterscotch pie Recipe
Okay, now that you know *why* this recipe is going to change your dessert game, let’s talk ingredients! When you’re making something this nostalgic and scratch-made, the quality of what you put in really matters. We need three main groups of things: the vessel (the crust), the heart of the pie (the glorious filling), and the crowning glory (the meringue). Don’t skip noticing the little details here, like the fact that the brown sugar should be packed down, or that the egg whites need to be room temperature! Those tiny instructions are how we ensure this butterscotch pie sets up beautifully.
For the Silky From Scratch Pie Filling
This part is where all that buttery, caramelized flavor starts. I always splurge a little on good quality butter here—it makes such a difference in the final taste! And remember that half-and-half we talked about? It’s key for that decadent texture. This is everything you need for the main event:
- 1 pre-made or homemade flaky pie crust (9-inch)—bake this until it’s just lightly golden before you start the filling!
- 1 1/2 cups packed light brown sugar
- 1/2 cup all-purpose flour
- 1/4 teaspoon salt
- 1/2 cup unsalted butter, cut into pieces
- 2 cups half-and-half or whole milk (I always lean towards the half-and-half for richness!)
- 4 large egg yolks, lightly beaten
- 1 teaspoon vanilla extract
For the Meringue Topping
If you want that tall, billowy topping that browns up perfectly in the oven, you need patience with these ingredients. A little grease or water in your bowl is the enemy of high meringue peaks! Since we are making this from scratch, you might want to check out my guide on foolproof meringue cookies for extra tips on technique, but for the pie, you just need:
- 4 large egg whites, room temperature (super important!)
- 1/4 teaspoon cream of tartar (this helps stabilize those peaks)
- 1/2 cup granulated sugar
Step-by-Step Instructions for the Perfect butterscotch pie
Alright, deep breath! This is where we put it all together for that crowd-pleasing texture everyone talks about. Don’t let the word ‘tempering’ scare you off; it’s really just being slow and careful, which is exactly what my kitchen philosophy is all about! We start with the heat on, but we keep a watchful eye on things. Remember to have your crust ready and waiting—it should at least be warm before we pour this beautiful filling in. And speaking of beautiful components, if you ever need a smooth, fluffy accompaniment for another dessert, learning how to make my vanilla buttercream is a real confidence booster!
Preparing the Caramelized Sugar Pie Base
First thing’s first: set your oven to 350°F (175°C) and get that 9-inch crust baked off until it’s looking just slightly golden. While that cools a bit, grab a medium saucepan. I want you to whisk together the brown sugar, flour, and salt until they look like one uniform powder. Next, *slowly* whisk in the half-and-half until everything is smooth, then toss in your butter pieces. Now, turn the heat up to medium and stir constantly! We cook this until it gets thick enough to coat the back of a spoon, which takes about 8 to 10 minutes. Pay attention here—we want it thick, but we really don’t want it boiling rapidly! Once it’s thick, pull it off the heat right away.
This next part is crucial: the tempering! In a separate little bowl, lightly beat your four egg yolks. Now, take about half a cup of that hot butterscotch mixture and drizzle it into the yolks *while you whisk the yolks constantly*. This brings the temperature up gently. Once that’s done, pour the slightly warmed yolk mixture right back into the main saucepan. Pop it back on low heat for just one more minute, stirring like crazy—no boiling! Pull it off for good, stir in that vanilla extract, and pour that wonderful, silky butterscotch pie filling immediately into your pre-baked crust.
Creating the Meringue Topped Pies Finish
Time for that gorgeous topping! While the filling is still hot—and I mean really hot—you can start your meringue. Use a clean, grease-free bowl, and beat those room temperature egg whites and cream of tartar until they form soft peaks. Now, very slowly, drizzle in that granulated sugar while you keep beating until you hit stiff, glossy peaks. Don’t stop until they look like shiny mountains! Carefully spread that meringue over that hot filling. You *must* make sure it touches the edges of the crust all the way around; this is what stops it from shrinking and weeping later. Pop the whole thing into the oven for about 10 to 15 minutes until the peaks are nicely golden brown. The final, toughest step? Let it cool completely on a wire rack for at least three hours. Seriously, don’t cut it early, or all your hard work melts!
Tips for Success with Old Fashioned Pie Recipes
So, you’ve mastered the mixing and you’ve got that beautiful filling poured in. Wonderful! But with these rich, custard-style desserts, we sometimes run into a few classic snags. These old fashioned pie recipes require just a little extra respect for temperature and timing. Don’t worry if your first attempt isn’t perfect, because I’ve gathered the wisdom from my own mishaps to help you navigate these tricky spots!
First, let’s talk about the filling setting up. You absolutely must let this pie cool completely, and I mean *cool*. If you slice into this butterscotch pie when it’s even slightly warm, you’ll end up with soup, not slices. It needs those few hours on the counter to really firm up its custard structure. It’s torture waiting, but it’s the only way to get those perfect squares.
Second biggest hurdle: the meringue. If you want that gorgeous, cloud-like topping to stay put without shrinking or weeping that sugary water, you need two things, which I mentioned before but they bear repeating: 1) Absolutely grease-free bowl and beaters for the egg whites, and 2) Seal the meringue right to the edges of the crust where it touches the filling. That seal traps the moisture in and keeps the meringue happy. If you want to check out how to make other simple sauces perfectly, I have a great resource for easy homemade teriyaki sauce that teaches a similar principle of careful temperature management.
Finally, remember the heat comes off the stove *before* you add the yolks back in. I know it seems counterintuitive when you’re cooking, but you are just gently warming them through to thicken after tempering, not cooking them solid! Pull it, stir, and you’re good to go. That vigilance is what makes these scratch desserts so rewarding!
Ingredient Notes and Substitutions for your Creamy Butterscotch Pie
When you’re working with such a classic, Old Fashioned Pie Recipes flavor profile, I always want to give you options! Maybe you’re out of half-and-half, or maybe you just want to skip the meringue drama—totally fair! The beauty of making something this delicious at home is that you can tweak it slightly to fit your pantry or your schedule. We absolutely want perfect results, but we also want to make this one of those easy pie recipes you return to again and again.
If you are looking to make this into one of the ultimate rich and creamy pies possible, I highly suggest using heavy cream instead of the half-and-half listed. I noted in the recipe you can swap out one cup of the half-and-half for heavy cream. Seriously, if you want that decadent texture to sing, use the cream! It adds a velvety richness that is just divine alongside that deep brown sugar flavor.

Now for the quick fix—because sometimes life moves too fast for meringue! If you’re a beginner or just short on time, don’t sweat the egg whites. You can skip the whole meringue process entirely and instead use whipped topping. Once the filling is completely cool—and I mean stone cold—just spread about two cups of stabilized whipped topping right over the top. It gives you that lovely light contrast without the baking step. In fact, if you check out my recipe for easy homemade teriyaki sauce, you’ll see I always advocate for smart shortcuts where they don’t sacrifice the core flavor—and a whipped topping finish on this butterscotch pie is a perfect example of that!
Serving Suggestions for this Nostalgic Desserts Favorite
Now that you’ve got this incredibly rich and sweet custard sitting pretty in its perfect crust, the next question is: what do we serve alongside it? Since this is such a decadent, warm flavor—that caramelized brown sugar and vanilla note—we need something to cut through that richness, right? We want contrast, texture, and maybe a little something extra special for the holidays or a big family dinner.
My go-to for this **butterscotch pie** is almost always something crunchy. Those gorgeous, sugary desserts crave a textural counterpoint. If you want to go all-in on homemade goodness, you absolutely have to try making a batch of my cinnamon sugar pecans! They are ridiculously easy, and sprinkling those warm, spiced nuts over the slice of cool, creamy pie is just heaven. It gives you that satisfying crunch that a soft meringue just can’t bring.
If you’re not completely worn out from making the pie itself and want a light finish, skip the extra garnish and just serve it with a dollop of fresh, lightly sweetened whipped cream. The lightness of the cream cuts the richness of the butterscotch filling perfectly. Make sure you use good quality vanilla in that cream, too, because even simple things shine in a well-made dessert!
If you’re serving this after a heavy meal, maybe a tiny side of tart fruit would be nice. Think a spoonful of fresh raspberries or perhaps even thinly sliced Granny Smith apples (no sugar needed!). The slight acidity brightens up the palate after all that brown sugar goodness. Honestly, though?
If you bake this pie right, sometimes the best suggestion is just a cup of strong coffee and a quiet moment to enjoy that slice all by itself!
Storage and Reheating Instructions for Homemade butterscotch pie
Okay, you’ve done the hard work—you tempered the eggs, you whipped the meringue peaks just right, and you resisted cutting into it for three long hours. Now you have leftovers (which, let’s be honest, is the best part!). Since this spectacular butterscotch pie is packed full of custard and egg yolks, proper storage is absolutely non-negotiable. Please do not leave this beauty sitting out on the counter tempting fate!
Because we have that beautiful meringue topping, storage takes a little finesse. If you are planning on eating the whole thing within about 24 hours, covering the pie loosely with plastic wrap and moving it straight into the refrigerator is fine. Be careful not to let the plastic touch the meringue, or you’ll deflate those lovely peaks! If you have serious leftovers, or if it’s a hot day, I actually recommend slicing the meringue off before chilling. If you take the meringue off, you can cover the remaining filling tightly with plastic wrap—make sure that wrap is touching the surface of the filling to prevent a skin from forming, just like you do with pudding.
The custard base itself will keep wonderfully in the fridge for three to four days when covered properly. When you’re ready to eat that cold slice, just make sure it sits out on the counter for about 20 minutes before slicing. This lets it lose that hard chill and lets the texture soften up just a tiny bit so you can really appreciate that smooth, creamy butterscotch flavor.
Now, about reheating: Nope. Just don’t do it! Baked custards and meringue pies do not appreciate a return trip to the oven or microwave. The heat breaks down the texture, you’ll have runny filling, and your meringue will turn into a sad, soggy mess. This pie is designed to be enjoyed chilled or slightly tempered; save the reheating for your casseroles!
Frequently Asked Questions About Making Butterscotch Pie
I know sometimes the path to dessert perfection has a few bumps, especially when you’re dealing with custard fillings and fussy meringue! It’s natural to have questions, and I want to make sure you feel totally confident tackling this classic. Since we already covered the crucial cooling time, let’s tackle some of the other things I hear my friends ask most often about achieving a truly show-stopping butterscotch pie.
Can I make a No Bake Butterscotch Pie using this method?
That’s a great question, especially when you’re looking for quick dessert treats! Honestly, this specific recipe isn’t designed for a no-bake approach. Why? Because we rely on the egg yolks cooking gently in that sugar mixture to set the whole thing into a firm custard, and we need that final 10-minute bake to set the meringue. If you skip the bake, you just have lovely, thick pudding, not a sliceable pie!
However, I totally get the no-bake craving! If you need a simpler dessert right now, you can absolutely use this filling right up until the point where you add the yolks back in. Once the base is cooked and cooled completely—and I mean fully cool—you can fold in some stabilized whipped cream, pour it into a graham cracker crust, and chill it until firm. That gives you a lovely No Bake Butterscotch Pie texture, though you miss out on that baked meringue magic described in the main recipe. If you’re looking for a different chilled approach entirely, you might enjoy looking at my guide on creamy no-bake cheesecakes!
What is the secret to preventing the meringue from shrinking or weeping on my pie?
Ah, the dreaded meringue weep! This is the number one complaint I hear about meringue topped pies, but we covered the two most essential fixes in the main instructions, so let’s repeat them because they are that vital. First, your equipment. Any trace of grease or yolk in your bowl when whipping the whites means they won’t reach their full potential. They need to be perfectly clean and dry for volume!
Second, the seal! You must, must, *must* spread that meringue out so it fully seals against the crust edge all the way around the pie plate. If there’s any gap where the hot filling peeks out underneath—even a tiny sliver—steam builds up, separates from the meringue, and causes that ugly weeping. By making sure that meringue kisses the crust border everywhere, you trap the steam *inside* the meringue where it can help brown the peaks without leaking onto your beautiful filling. It’s all about the seal!
Is this similar to the famous Dolly Parton Dessert recipe?
Isn’t it funny how everyone wants a taste of the stars’ kitchens? Yes, I’ve looked at several versions often floating around out there claiming to be Dolly Parton’s famous take on the dessert! They are definitely in the same family—this recipe honors that deep, comforting style of Southern pie recipes that she is famous for. However, my focus here, as always, is on taking a classic—whether it’s a celebrity favorite or a decades-old family tradition—and refining the technique using the best scratch methods to get that perfect, silky result. You’ll find that mixing brown sugar and butter this way gives you a depth of flavor that is truly comparable to anything you’d find in a famous cookbook. If you want to check out the details of her specific spin on things, you can always read more over at Dolly Parton’s Butterscotch Pie resource!
Share Your Culinary Confidence
Whew! We did it. You’ve conquered the tempering, you’ve tamed the meringue, and now you have one of the most satisfying, nostalgic desserts you can ask for sitting on your counter waiting to set. I hope making this classic homemade butterscotch pie felt less like following complicated instructions and more like falling back into a treasured tradition. That’s exactly what I aim for here at Cooking Zenith!
Now, I sincerely need to hear from you! Did this recipe live up to the hype? Was the filling as silky and rich as you dreamed? Please don’t be shy—leave a rating below! If you ran into any little hiccups, or maybe discovered a brilliant shortcut yourself, drop a comment so we can all learn together. We build culinary confidence as a community!
I love seeing your beautiful results! If you made this pie, snap a picture and share it on social media—tag me so I can see your perfect meringue peaks! And if you’re looking for another simple, feel-good, highly rewarding recipe to try next, you absolutely have to check out my guide for soft and chewy peanut butter cookies. Happy baking, friend!
PrintClassic Homemade Butterscotch Pie with Meringue Topping

Make this rich and creamy homemade butterscotch pie. This old-fashioned recipe features a silky filling made from scratch and is topped with a dreamy meringue, making it a satisfying nostalgic dessert.
- Prep Time: 20 min
- Cook Time: 25 min
- Total Time: 3 hours 45 min
- Yield: 8 servings 1x
- Category: Dessert
- Method: Baking
- Cuisine: American
- Diet: Vegetarian
Ingredients
- 1 pre-made or homemade flaky pie crust (9-inch)
- 1 1/2 cups packed light brown sugar
- 1/2 cup all-purpose flour
- 1/4 teaspoon salt
- 1/2 cup unsalted butter, cut into pieces
- 2 cups half-and-half or whole milk
- 4 large egg yolks, lightly beaten
- 1 teaspoon vanilla extract
- For the Meringue:
- 4 large egg whites, room temperature
- 1/4 teaspoon cream of tartar
- 1/2 cup granulated sugar
Instructions
- Preheat your oven to 350°F (175°C). If using a homemade crust, bake it according to your preferred method until lightly golden, then set aside to cool slightly.
- In a medium saucepan, whisk together the brown sugar, flour, and salt.
- Gradually whisk in the half-and-half until smooth. Add the butter pieces.
- Cook the mixture over medium heat, stirring constantly, until the butter melts and the mixture thickens enough to coat the back of a spoon. This takes about 8 to 10 minutes. Do not let it boil rapidly.
- Remove the saucepan from the heat. In a separate bowl, lightly whisk the egg yolks. Slowly temper the yolks by whisking about 1/2 cup of the hot butterscotch mixture into the yolks.
- Pour the tempered yolk mixture back into the saucepan with the remaining butterscotch filling. Return the pan to low heat and cook for 1 minute, stirring constantly. Do not boil.
- Remove from heat and stir in the vanilla extract. Pour the hot filling immediately into the pre-baked pie crust.
- Prepare the meringue: In a clean, grease-free bowl, beat the egg whites and cream of tartar with an electric mixer until soft peaks form. Gradually add the granulated sugar, beating until stiff, glossy peaks form.
- Spread the meringue evenly over the hot filling, making sure the meringue touches the edges of the crust all around to prevent shrinking.
- Bake for 10 to 15 minutes, or until the meringue is lightly golden brown.
- Cool the pie completely on a wire rack at room temperature for at least 3 hours before slicing. This allows the filling to set properly.
Notes
- For a richer flavor, substitute 1 cup of the half-and-half with heavy cream.
- To prevent weeping in the meringue, make sure your mixing bowl and beaters are completely free of any grease or yolk residue.
- If you prefer a quicker topping, substitute the meringue with 2 cups of stabilized whipped topping spread over the cooled filling.
Nutrition
- Serving Size: 1 slice
- Calories: 410
- Sugar: 45g
- Sodium: 250mg
- Fat: 22g
- Saturated Fat: 13g
- Unsaturated Fat: 9g
- Trans Fat: 0.5g
- Carbohydrates: 52g
- Fiber: 1g
- Protein: 6g
- Cholesterol: 130mg