
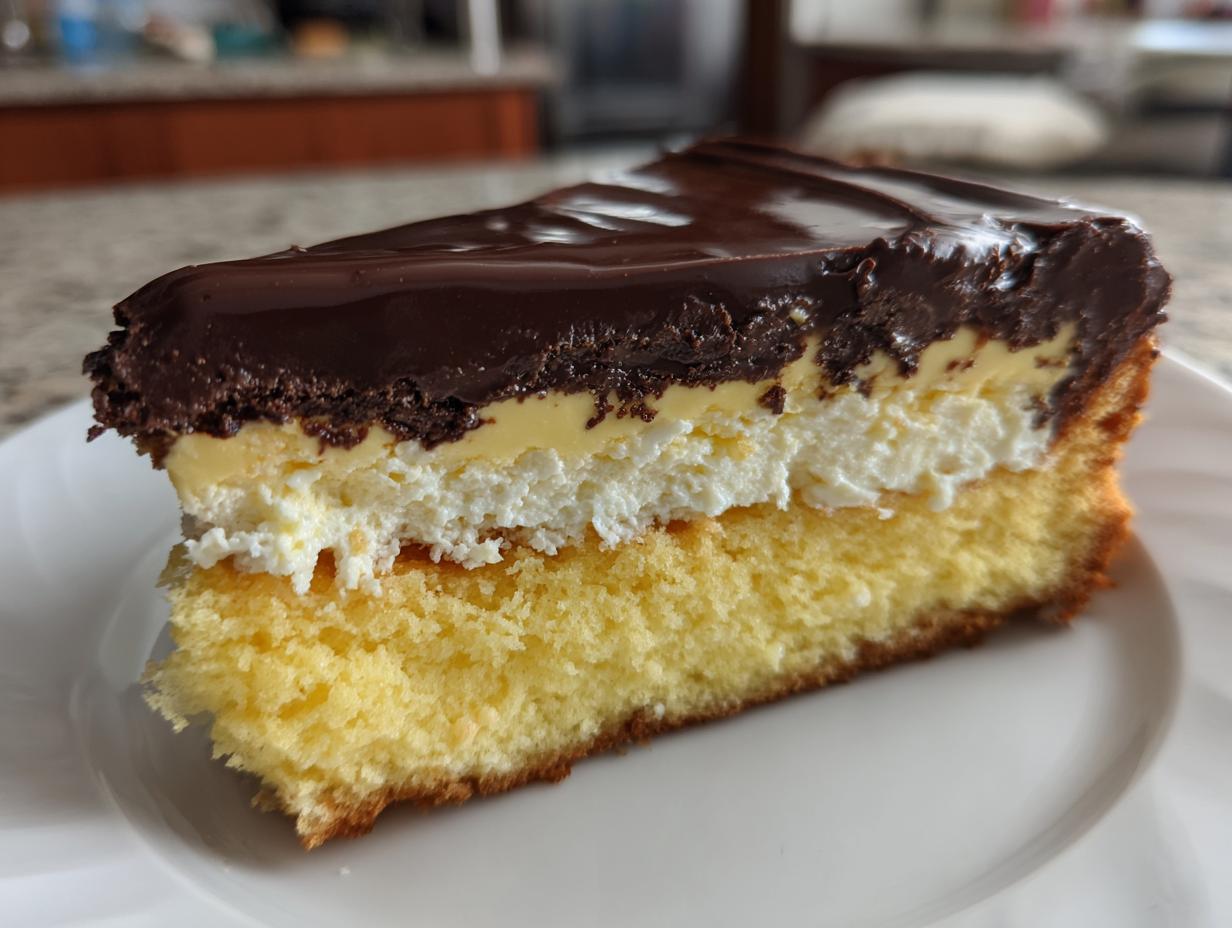
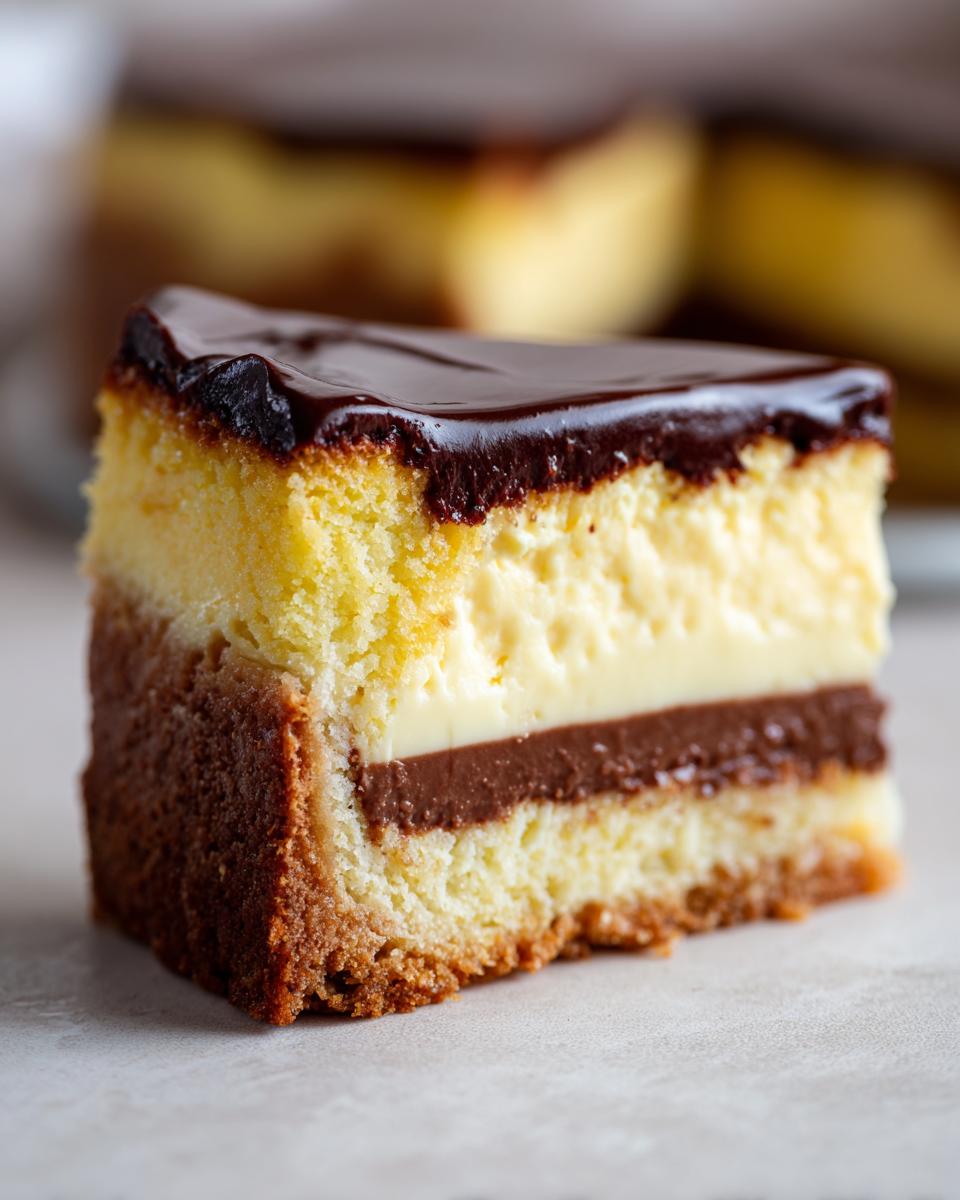
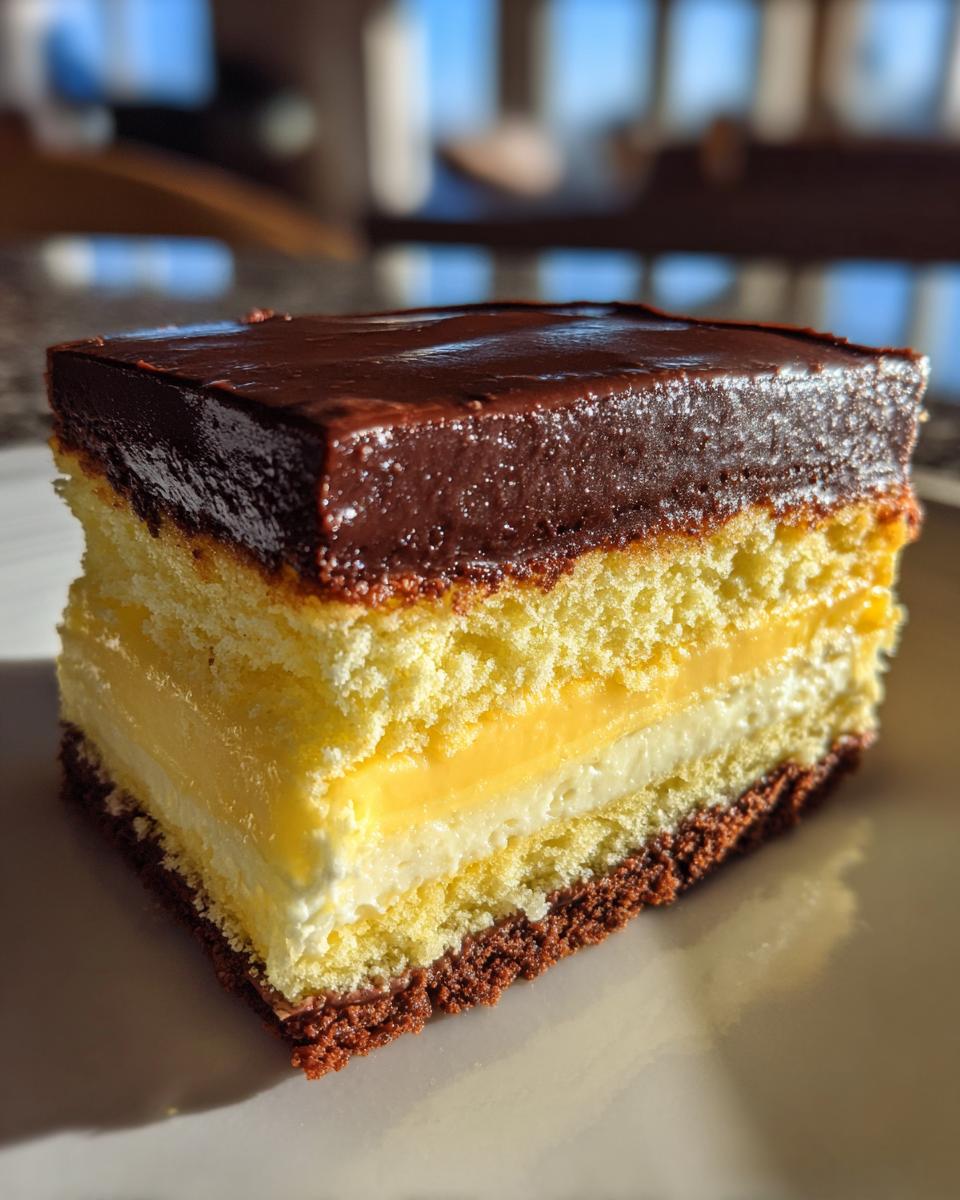
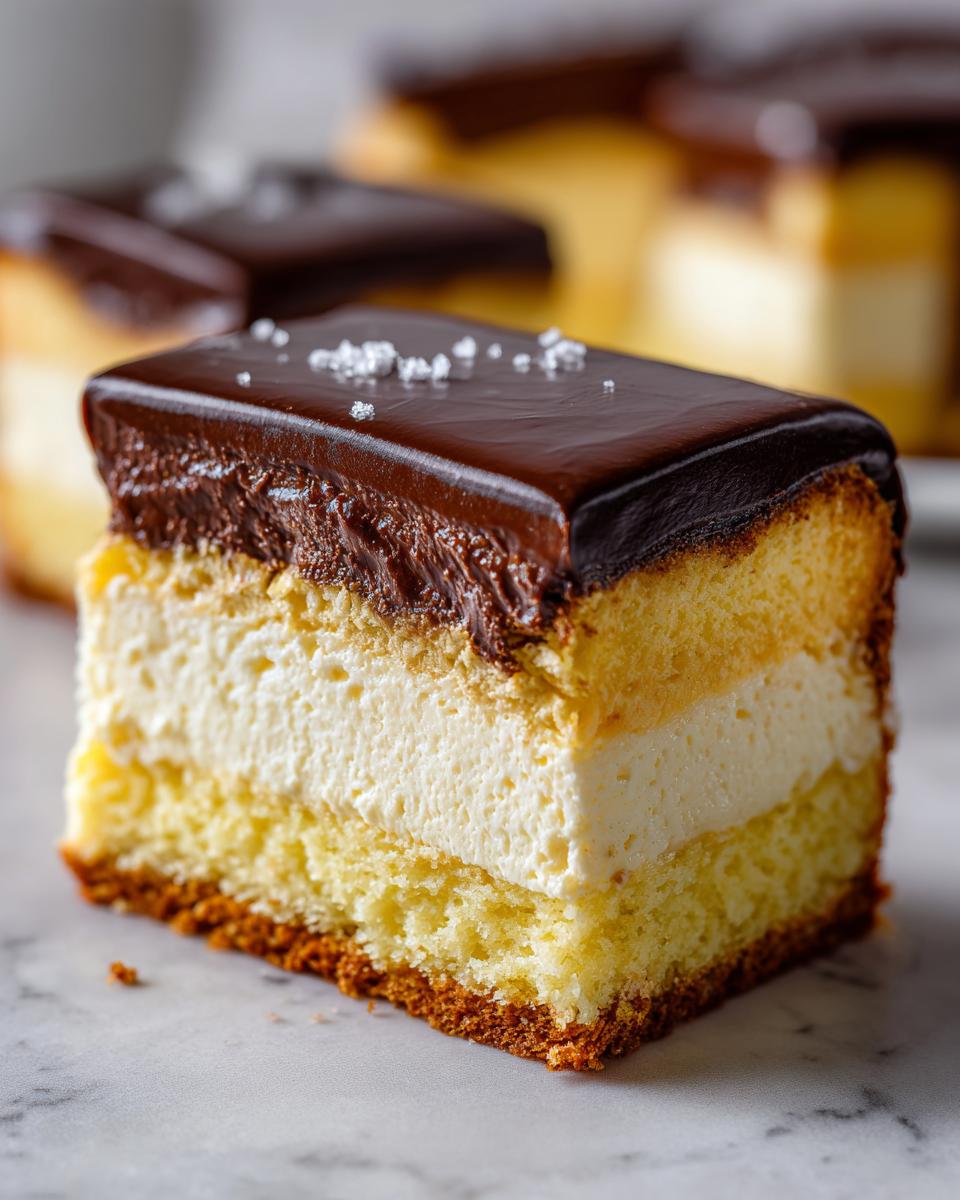
Isn’t it the best when two absolute icons of dessert decide to share a stage? That’s exactly what we have here! If you’re like me, you spend way too much time dreaming about merging desserts, and after some serious testing in my kitchen—trust me, there were a few failed attempts!—I landed on what I now call the ultimate boston cream pie cheesecake. It takes the velvety, tangy richness of a classic baked cheesecake, gives it a light vanilla cake crust, layers in smooth pastry cream, and drowns it all in that perfect, glossy chocolate ganache. It’s decadent, it’s impressive, and honestly, it’s just fun to make something this ambitious!
- Why This Boston Cream Pie Cheesecake Is a Must-Try Dessert
- Gathering Ingredients for Your Boston Cream Pie Cheesecake
- Step-by-Step Instructions for the **Boston Cream Pie Cheesecake**
- Tips for the Perfect Boston Cream Pie Cheesecake Texture
- Ingredient Spotlight: Mastering the Vanilla Custard Cheesecake Filling
- Serving Suggestions for Your Gourmet Cheesecake Variations
- Storing Your Boston Cream Pie Cheesecake
- Frequently Asked Questions About This Dessert
- Sharing Your Boston Cream Pie Cheesecake Creations
Why This Boston Cream Pie Cheesecake Is a Must-Try Dessert
I know what you’re thinking: why mess with traditional recipes? Because sometimes, the fusion is just better! This dessert is one of those rare times. It really hits all the right notes. If you enjoyed pairing flavors in my recipe for tiramisu cookie cups, just wait until you try this!
- It’s the ultimate flavor profile: that unmistakable vanilla cake meets rich, creamy cheesecake.
- As far as cheesecake hybrid desserts go, this one is visually stunning—a true showstopper on any table.
- You get amazing textural contrast, from the slightly crunchy crust to the smooth layers of filling. If you love decadent layered desserts built for wow-factor, this is it.
Gathering Ingredients for Your Boston Cream Pie Cheesecake
Okay, since we are dealing with four distinct layers here, we need to organize our ingredients list. Don’t let the length scare you! Most of this is just standard baking stuff. My number one piece of advice, especially for creamy baked cheesecake tutorials, is this: your cream cheese absolutely must be soft! I mean, room temperature soft. If it’s cold, you’ll end up with lumps, and we worked too hard for lumps.
For the Yellow Cake Crust
- 1 1/2 cups yellow cake mix crumbs (Yes, use the dry mix crumbs! It gives that perfect classic flavor.)
- 1/2 cup unsalted butter, melted
For the Creamy Cheesecake Layer
- 1 (8 ounce) package cream cheese, softened (We need two packages total, so this one is for the first half of the batter.)
- 8 ounces cream cheese, softened (This is your second package—gotta be precise!)
- 1 cup granulated sugar
- 1/2 cup sour cream
- 1 teaspoon vanilla extract
- 3 large eggs
- 1/2 cup all-purpose flour
For the Vanilla Custard Filling
- 1 cup prepared vanilla pastry cream (If you’re skipping making this from scratch, thick vanilla pudding works in a pinch, though the texture changes slightly.)
For the Chocolate Ganache Topping
- 1 cup semi-sweet chocolate chips
- 1/2 cup heavy cream
- 1 tablespoon light corn syrup (optional, but I always use it for that mirror-like shine!)
Step-by-Step Instructions for the **Boston Cream Pie Cheesecake**
Okay, let’s get baking! Because we have so many awesome layers in this boston cream pie cheesecake, the process is sequential. You have to take your time, especially when setting up the water bath—that’s the secret weapon against cracks! If you’re trying this for the first time, remember to treat your batter gently. It’s worth it when you see the beautiful layers! For more insights on gentle baking, check out my tips for creme brulee cheesecake.
Preparing the Crust and Preheating
First things first, get that oven preheated to 325 degrees F and make sure your 9-inch springform pan is greased lightly. Now for the crust: mix up those yellow cake mix crumbs with the melted butter until it’s all nicely combined. Press that mixture firmly and evenly across the bottom of your pan. We just need it to set up a bit, so pop it in the oven for exactly 10 minutes. Let it cool down just a touch while you move on to the good stuff.
Mixing the Cheesecake Batter (Do Not Overmix)
This part requires a gentle hand! Beat your softened cream cheese and sugar until they are completely smooth—no graininess allowed. Next, add your sour cream and vanilla, just mixing on low until it comes together. Now, the eggs: add them one at a time, and I mean *one at a time*. Mix briefly after each one, just until you can’t see the yolk anymore. Finally, gently fold in the flour. Seriously, stop mixing as soon as those white streaks disappear. Overmixing cheesecake batter is our number one enemy!
Layering and Setting Up the Water Bath
Time to build! Pour about half of your lovely cheesecake batter right over that cooled crust. Next, drop spoonfuls of your vanilla pastry cream on top; it should sit nicely in the center. Gently, gently pour the remaining batter on top to cover the pastry cream layer. Now, the water bath setup: tightly wrap the outside bottom of your springform pan with heavy-duty foil—don’t skimp on this! Place that wrapped pan into a larger roasting pan and pour in hot water until it comes about halfway up the sides of your cheesecake pan. This steam bath is crucial for even baking!
Baking and Slow Cooling the Boston Cream Pie Cheesecake
Bake this beauty for about 55 to 65 minutes. You’re looking for edges that are firm, but the center should still have the tiniest bit of a wobble. When that time is up, turn the oven *off*. Don’t open the door yet! Crack it open just a bit and leave your cheesecake snoozing inside for a full hour. This slow drama prevents sudden temperature drops, which means no cracks! After the hour, carefully remove it from the water bath, let it cool on the counter, and then chill it for a minimum of 6 hours, but overnight is always best.
Making the Chocolate Glaze and Finishing
Once chilled, it’s time for the grand finale! Put your semi-sweet chocolate chips in a heatproof bowl. In a small saucepan, heat the heavy cream and optional corn syrup until it just starts to simmer. Pour that hot cream right over the chips and let it sit for five minutes—don’t touch it! Then, whisk it slowly until you have one smooth, glorious, glossy chocolate ganache. Pour this right over your set cheesecake, making sure it drips down prettily, and pop it back in the fridge until that chocolate is firm enough to slice.
Tips for the Perfect Boston Cream Pie Cheesecake Texture
Achieving that flawless, crack-free surface is the ultimate challenge when baking cheesecake, right? This method is designed for a truly creamy baked cheesecake tutorial success story, but I always have a couple of extra tricks up my sleeve. First, you absolutely must remember the room-temperature cream cheese note above. If you don’t, you are fighting a losing battle against lumps before you even hit the oven!
The water bath and the slow cool-down in the turned-off oven are non-negotiable—they’re how we maintain even baking. But here’s a little secret from my testing notes: when you finally go to slice it, take the cheesecake out of the fridge about 15 to 20 minutes beforehand. Letting it sit out slightly makes the ganache a little softer, which means it won’t crack and shatter when your knife goes through it. For more fail-proof tips on creamy bakes, check out what I learned for the white chocolate cheesecake!
Ingredient Spotlight: Mastering the Vanilla Custard Cheesecake Filling
This layer is truly what separates this dessert from just being a chocolate-topped cheesecake. That layer of smooth, cold pastry cream is the heart of the Boston Cream Pie experience we’re channeling here. If you’re buying pre-made, that’s totally fine—it keeps things moving! But I want you to know exactly what you’re working with when we talk about that vanilla custard cheesecake filling.
The structure of this cheesecake needs that pastry cream to be quite thick, remember? If you decide to make your own—and I highly recommend you try it sometime, like in my classic banana cream pie custard—make sure you cook it down until it’s really stiff. It needs to be able to support that final layer of cheesecake batter on top without slumping during the bake. A thinner custard will just melt right into the batter! It adds such a unique, silky contrast to the density of the cheese layer, and it’s worth the little extra effort.
Serving Suggestions for Your Gourmet Cheesecake Variations
This dessert is already a showstopper, so serving it requires very little fuss. Honestly, it looks incredible all by itself with that glossy chocolate top! If you want to dress it up a tiny bit more for a special gathering, I love keeping the plate simple. A light dusting of unsweetened cocoa powder right before you serve it adds a lovely color contrast.

If you’re pairing this with a beverage, think about cutting through that richness. A slightly tart coffee drink, like the spiced cold brew from my pumpkin cream cold brew recipe, is wonderful. A few fresh raspberries or tart cherries placed artfully on the side also provide a nice acidic break. That’s all you need for the most impressive dessert presentation!
Storing Your Boston Cream Pie Cheesecake
I know you won’t want to wait to eat this masterpiece, but seriously, resist! The cheesecake needs a solid chill time—at least six hours, but overnight is always better once that ganache is on top and set. Once it’s completely firm, cover your springform pan loosely with plastic wrap but make sure the wrap isn’t actually touching that beautiful chocolate glaze, or it’ll stick and ruin your hard work!
This dessert is just packed with moisture and fat, which is fantastic for flavor but means you need to keep it cold. It lasts really well in the fridge, usually about four to five days tucked away safely. Honestly, the flavor deepens slightly by day two, which is just lovely.
Now, here’s that final texture tip I mentioned for the best experience: don’t serve it straight from the very coldest part of the fridge. If you pull out a slice and let it sit on the plate for about 20 minutes before you dig in, that cheesecake will soften up just a hair, and it becomes much creamier. You taste all those gorgeous layers—the cake, the custard, the cheese—so much better when it’s not rock solid!
Frequently Asked Questions About This Dessert
I get so many great questions whenever I roll out a big, layered recipe like this! It shows me you’re seriously planning to tackle this ultimate comfort food mashup, and I love that. Let’s clear up a few things about making this the best gourmet cheesecake variation you’ve ever attempted.
Can I make a No bake Boston Cream Pie cheesecake version?
Oh, the tempting idea of no-bake! You absolutely *could* swap out the baked crust and the baked cheesecake filling for refrigerator-style fillings. However, I need to be straight with you: the texture just won’t capture the glorious dense body we get from baking the eggs slowly, especially combined with the pastry cream in the middle. This recipe really relies on that gentle oven time to set properly. If you are looking for guaranteed no-bake success, you might want to check out my recipe for the no-bake tiramisu cheesecake instead where that style is intended!
What if I don’t have yellow cake mix for the crust?
That’s totally fine! Life happens, and sometimes you run out of that specific box mix. Since we want to stick close to that classic light, vanilla-forward flavor profile that mimics actual Boston Cream Pie, you have a couple of excellent paths for your yellow cake crust dessert recipes alternative. My favorite swap is using about 2 cups of vanilla wafer crumbs—you know, the Nilla Wafers type—mixed with a little bit of extra sugar and that melted butter. That gives you a wonderfully sweet, sturdy base. Alternatively, a very simple shortbread crumb works beautifully, adding a nice buttery snap that contrasts well with the soft filling above it.
Sharing Your Boston Cream Pie Cheesecake Creations
Now that you’ve conquered this amazing hybrid dessert, I genuinely want to hear every single detail!
Seriously, did the pastry cream set perfectly? Did your kitchen smell like a fancy bakery when you poured that glossy ganache? Don’t keep all that culinary glory to yourself! Please take a quick moment to leave a rating for the recipe using the stars provided below. That feedback helps me know exactly what’s working in your kitchen.
And if you took photos—and I bet you did, because this boston cream pie cheesecake is gorgeous—tag me on social media! Seeing your creations is the absolute best part of running Cooking Zenith. It proves that amazing flavor doesn’t need complicated fancy training; it just needs someone like you willing to bring curiosity and confidence to the table. Head over to the About Aria Thompson page if you want to read more about that kitchen philosophy. Now go enjoy that slice!
PrintBoston Cream Pie Cheesecake
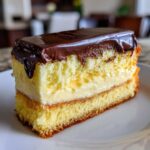
A rich, creamy baked cheesecake featuring a vanilla cake base, smooth pastry cream filling, and a decadent chocolate ganache topping, combining two classic American desserts.
- Prep Time: 30 min
- Cook Time: 65 min
- Total Time: 105 min
- Yield: 12 servings 1x
- Category: Dessert
- Method: Baking
- Cuisine: American
- Diet: Vegetarian
Ingredients
- 1 1/2 cups yellow cake mix crumbs (for crust)
- 1/2 cup unsalted butter, melted
- 1 (8 ounce) package cream cheese, softened
- 8 ounces cream cheese, softened
- 1 cup granulated sugar
- 1/2 cup sour cream
- 1 teaspoon vanilla extract
- 3 large eggs
- 1/2 cup all-purpose flour
- 1 cup prepared vanilla pastry cream (for filling layer)
- 1 cup semi-sweet chocolate chips
- 1/2 cup heavy cream
- 1 tablespoon light corn syrup (optional, for shine)
Instructions
- Preheat your oven to 325 degrees F. Lightly grease a 9-inch springform pan.
- Prepare the crust: Mix the yellow cake mix crumbs and melted butter until fully combined. Press the mixture evenly into the bottom of the prepared springform pan. Bake for 10 minutes. Let cool slightly.
- Prepare the cheesecake batter: In a large bowl, beat the softened cream cheese and sugar until smooth. Add the sour cream and vanilla extract, mixing until just combined. Beat in the eggs one at a time, mixing on low speed after each addition until just incorporated. Do not overmix.
- Gently fold in the flour until no streaks remain. Pour half of the cheesecake batter over the cooled crust.
- Spoon the prepared vanilla pastry cream evenly over the batter layer. Gently pour the remaining cheesecake batter over the pastry cream layer.
- Create a water bath: Wrap the outside bottom of the springform pan tightly with heavy-duty aluminum foil. Place the wrapped pan into a larger roasting pan. Carefully pour hot water into the roasting pan until it reaches halfway up the sides of the springform pan.
- Bake for 55 to 65 minutes, or until the edges are set and the center has a slight jiggle.
- Turn off the oven, crack the oven door open slightly, and let the cheesecake cool inside the oven for 1 hour. This slow cooling helps prevent cracks.
- Remove the cheesecake from the water bath and foil. Cool completely on a wire rack, then chill in the refrigerator for at least 6 hours, preferably overnight.
- Prepare the chocolate ganache: Place the chocolate chips in a heatproof bowl. Heat the heavy cream and corn syrup (if using) in a small saucepan until simmering. Pour the hot cream over the chocolate chips. Let stand for 5 minutes, then whisk until smooth and glossy.
- Pour the chocolate ganache over the chilled cheesecake, spreading it evenly to the edges. Chill again until the ganache is set before slicing and serving.
Notes
- For the best texture, ensure your cream cheese is fully softened to room temperature before mixing.
- If you do not have pastry cream, you can substitute it with a thick layer of vanilla pudding, though the texture will be slightly different.
- To prevent the chocolate ganache from cracking when sliced, allow the cheesecake to sit at room temperature for 15 minutes before cutting.
Nutrition
- Serving Size: 1 slice
- Calories: 450
- Sugar: 35
- Sodium: 250
- Fat: 30
- Saturated Fat: 18
- Unsaturated Fat: 10
- Trans Fat: 0.5
- Carbohydrates: 40
- Fiber: 1
- Protein: 8
- Cholesterol: 110