

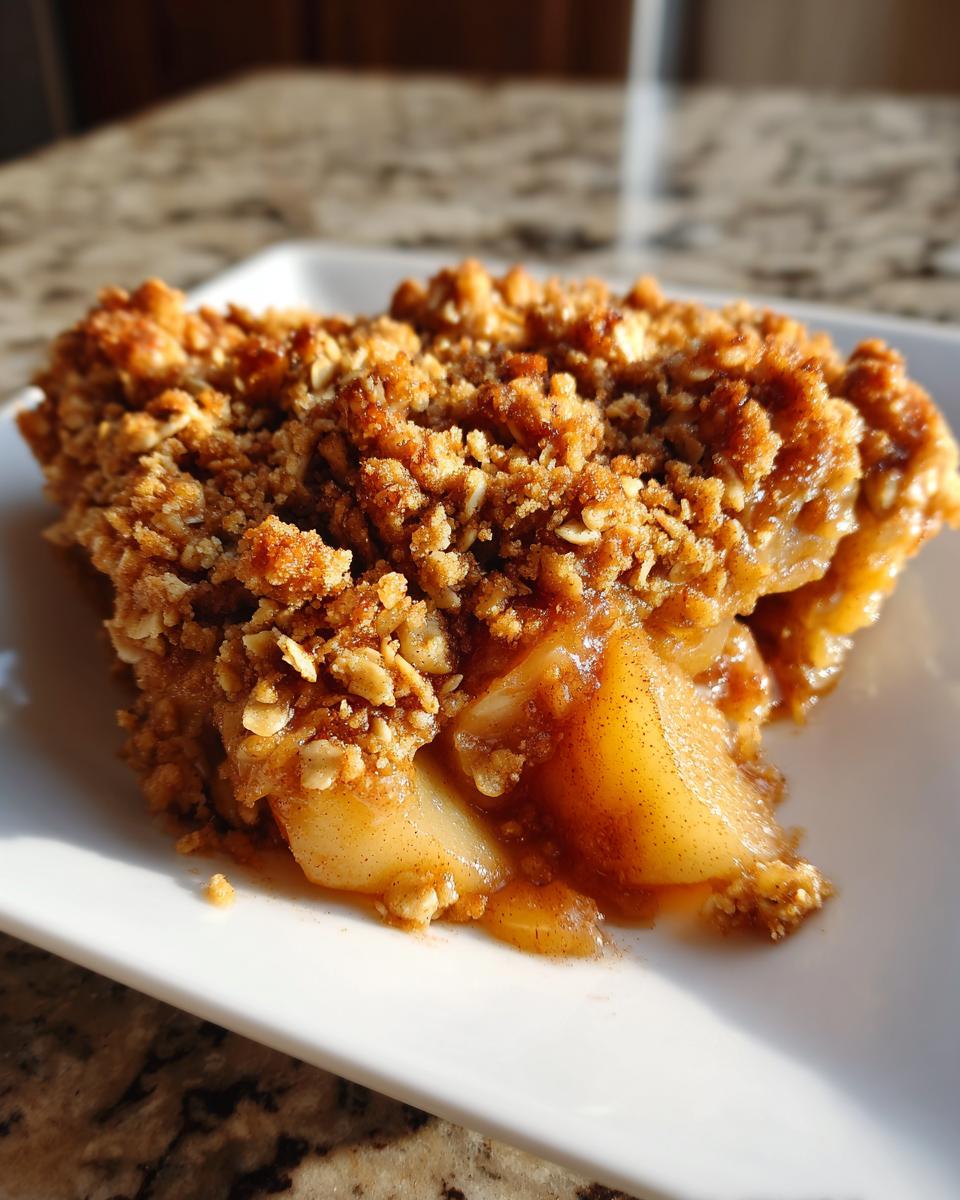
When the air gets that first real crisp chill, my heart immediately turns to cozy treats, and nothing whispers ‘home’ quite like a bubbling fruit dessert straight from the oven. Forget fussy pies; when I need that instant comfort, I reach for my absolute favorite: The Ultimate Easy Cinnamon Pear Crisp with Buttery Oat Topping. This isn’t some complicated, modern take, either. It’s how I remember enjoying simple, honest baking as a kid. It takes maybe fifteen minutes to pull together, and the aroma of warm spiced pears fills the entire house! If you love that classic baked fruit flavor, you should definitely check out my thoughts on the best classic apple crisp recipe, but today we focus on pears. Trust me when I say this simple pear crisp recipe has become my go-to for everything from weeknight treats to casual weekend gatherings.
- Why This Easy Pear Crisp Recipe Works Every Time
- Gathering Ingredients for Your Cinnamon Pear Crisp
- Expert Tips for the Best Pear Crisp Topping
- Step-by-Step Instructions for Your Baked Pear Dessert
- Making Variations on the Classic Fruit Crisp
- Serving Suggestions for This Cozy Fall Dessert
- Storage and Reheating Your Homemade Pear Dessert
- Frequently Asked Questions About the Pear Crisp Recipe
- Nutritional Estimates for This Classic Fruit Crisp
Why This Easy Pear Crisp Recipe Works Every Time
I’ve tried nearly every rustic fruit dessert out there, and what I keep coming back to is how utterly reliable this easy pear crisp recipe is. It doesn’t demand perfect technique or rare ingredients; it just asks for some fruit and oats and gives you back something wonderful. It’s proof that incredible food doesn’t have to be hard, which is why I call it my favorite simple dessert recipe.
-
Quick Prep for Your Pear Crisp
Seriously, you’re looking at maybe 15 minutes of actual hands-on time before this goes into the oven. That’s why this is my go-to answer when someone asks me for a quick baked fruit recipe right before dinner. Just slice the pears, toss them with cinnamon, and whip up the topping while the oven heats up. Done!
-
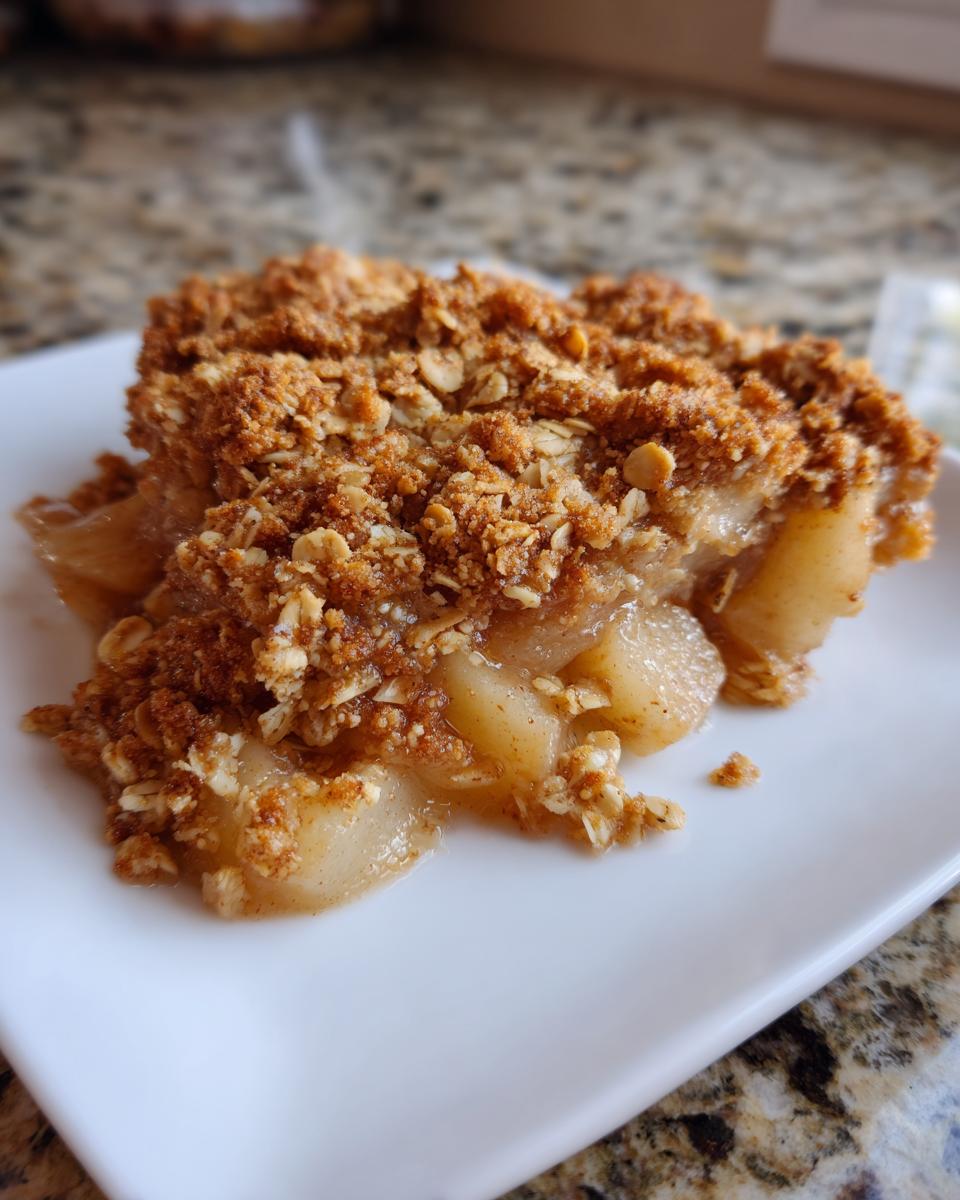
The Perfect Buttery Crisp Topping
The magic is in the contrast, right? You want the pears underneath to be perfectly tender and juicy, and the topping needs to deliver that necessary crunch. This buttery crisp topping uses good, cold butter to achieve that perfect golden texture that just crumbles deliciously when you cut into it. You won’t want to skip this part!
If you want another super easy go-to that uses a similar crumble concept, you absolutely have to check out my thoughts on chewy oatmeal bars. They have that same addictive crunchy texture!
Gathering Ingredients for Your Cinnamon Pear Crisp
The secret to any truly great homemade pear dessert is starting with quality components, even for something as simple as this cinnamon pear crisp. Since this is a quick baked fruit recipe, the ingredients don’t have long to develop deep flavor, so make sure those pears are ripe but still firm enough to hold their shape when baked. We are dividing everything into two easy groups: the filling that gets nice and saucy, and the topping that becomes that golden, crunchy heaven.
You might want to check out my guide on making homemade cinnamon butter if you want to boost the flavor even more, but these base ingredients are perfect on their own!
For the Warm Spiced Pears Filling
This is where we build that wonderful base layer of flavor. Remember, for those juicy baked pears you want, don’t skip the lemon juice—it brightens everything right up!
- 6 medium ripe pears, peeled, cored, and sliced
- 1/4 cup granulated sugar
- 1 tablespoon lemon juice
- 1 teaspoon ground cinnamon
- 1/4 teaspoon ground nutmeg
For the Oat Crumble Topping
When making this topping, the most crucial thing you can do is make sure you’re using very cold butter. That coldness is what creates those lovely little pockets of crunch in your oat crumble topping!
- 1/2 cup all-purpose flour
- 1/2 cup packed brown sugar
- 1/2 cup rolled oats
- 1/4 teaspoon salt
- 1/2 cup (1 stick) cold unsalted butter, cut into small pieces
Expert Tips for the Best Pear Crisp Topping
Okay, let’s talk about the topping, because honestly, that’s the star of the show, right? Anyone can slice some pears, but turning humble oats and flour into that golden, crunchy layer that makes a pear crisp legendary? That takes just a tiny bit of know-how. This is where we separate the good crisps from the *great* crisps. We really want to nail this oat crumble topping texture.
Achieving the Right Crumb Texture
When you mix the dry ingredients—flour, brown sugar, oats, and salt—you have to treat that cold butter with respect. It needs to stay cold! I usually grab my trusty pastry blender, but if you don’t have one, use your fingertips. You’re rubbing or cutting that butter into the dry mix until it looks like coarse crumbs. Don’t stress about perfection here; we are actually aiming for things to look a little uneven.
Why? Those little pea-sized chunks of butter are crucial! When they hit the heat of the oven, they melt and create steam, which results in those pockets of incredible flaky crunch throughout your topping. If you overwork it until it’s uniformly sandy, you lose that essential texture in the final pear crisp. Stop mixing the second you see those different-sized crumbs—that’s the spot where you know you’ve struck gold!

Step-by-Step Instructions for Your Baked Pear Dessert
Now that we have our fruit beautifully spiced and our topping perfectly crumbly, it’s time to assemble this gorgeous baked pear dessert! I find the assembly process incredibly therapeutic, and watching those spices work their magic in the oven is just the best part of baking. This recipe is designed for pure simplicity, so follow these steps, and I promise you’ll end up with the most divine, juicy baked pears under a crunchy blanket.
Preparing the Pears and Dish
First things first, get that oven heated up! You want to preheat to 375 degrees Fahrenheit. While that’s heating, lightly grease your 8×8 inch baking dish—I sometimes use non-stick spray, but a little butter always tastes better than a sticking cake, you know?
Take that bowl of spiced, sliced pears you already mixed up and spread them out in an even layer across your prepared dish. They should look gorgeous and wet from the sugar and cinnamon; that’s exactly what we want to see for maximum juiciness!
Assembling and Baking the Pear Crisp
Next, generously sprinkle that amazing oat topping evenly over the pear filling. Try not to pack it down too much; we want air in there to get it crisp!
Now, slide it into the hot oven and bake for about 35 to 45 minutes. You’ll know it’s done when the topping is beautifully golden brown and you see the fruit bubbling happily around the edges. I always check the middle for good measure!
This is a tough one, but you have to let it rest! Take the finished pear crisp out and let it sit on the counter for at least 15 minutes. This lets those juices thicken up, so you get the perfect scoopable texture rather than letting everything run right out onto the plate. Serve it warm, maybe with a scoop of vanilla ice cream; that’s mandatory, in my book!
If you’re looking for another quick topping idea after you’ve mastered this one, you should definitely look at how I handle toppings for my crispy apple fritters—it shares some of that texture DNA!
Making Variations on the Classic Fruit Crisp
You know, once you master the basic pear crisp template, the fun part is tweaking it to use whatever is seasonal or what’s hiding in the pantry. That’s the beauty of a classic fruit crisp, isn’t it? It’s so flexible! I love experimenting with mine, especially when I have friends coming over who have different tastes. It really shows off your confidence in the kitchen when you can riff on a great base recipe like this one.
Adding Apples or Cranberries to Your Pear Crisp
My absolute favorite swap is turning this into an apple pear crisp. If you find yourself with a few overly firm pears and a couple of tart apples sitting around, go for it! I usually swap two of the main pears for two medium apples—I prefer keeping the ratio heavy on the pears still, but that combination offers such a wonderful texture.
And if you’re looking for a real holiday feel, tossing in some tart cranberries adds a bright pop that cuts through the sweetness of the topping. I actually have a wonderful cranberry orange cookie recipe you might love, but for fall baking, the cranberry pear crisp is fantastic. I saw a really beautiful rustic version over at this site that used them, and it inspired me to always keep a bag of frozen ones handy!
Elevating the Flavor with Brown Butter Crisp Topping
If you want to take this simple dessert and instantly elevate it to something memorable without changing the fruit at all, focus on the topping and introduce brown butter. Yes, it’s one extra step, but oh my goodness, the nutty depth it adds is unbelievable. We talked about how cold butter is key for texture, but when you melt that butter first until it smells nutty and turns that lovely amber color—that’s what creates an amazing brown butter crisp topping.
It changes the entire profile of the buttery crisp topping from simply sweet and buttery to something richly complex. It pairs especially well if you decide to add toasted pecans or walnuts to the crumble mix. It really turns a cozy fall dessert into something truly sophisticated!
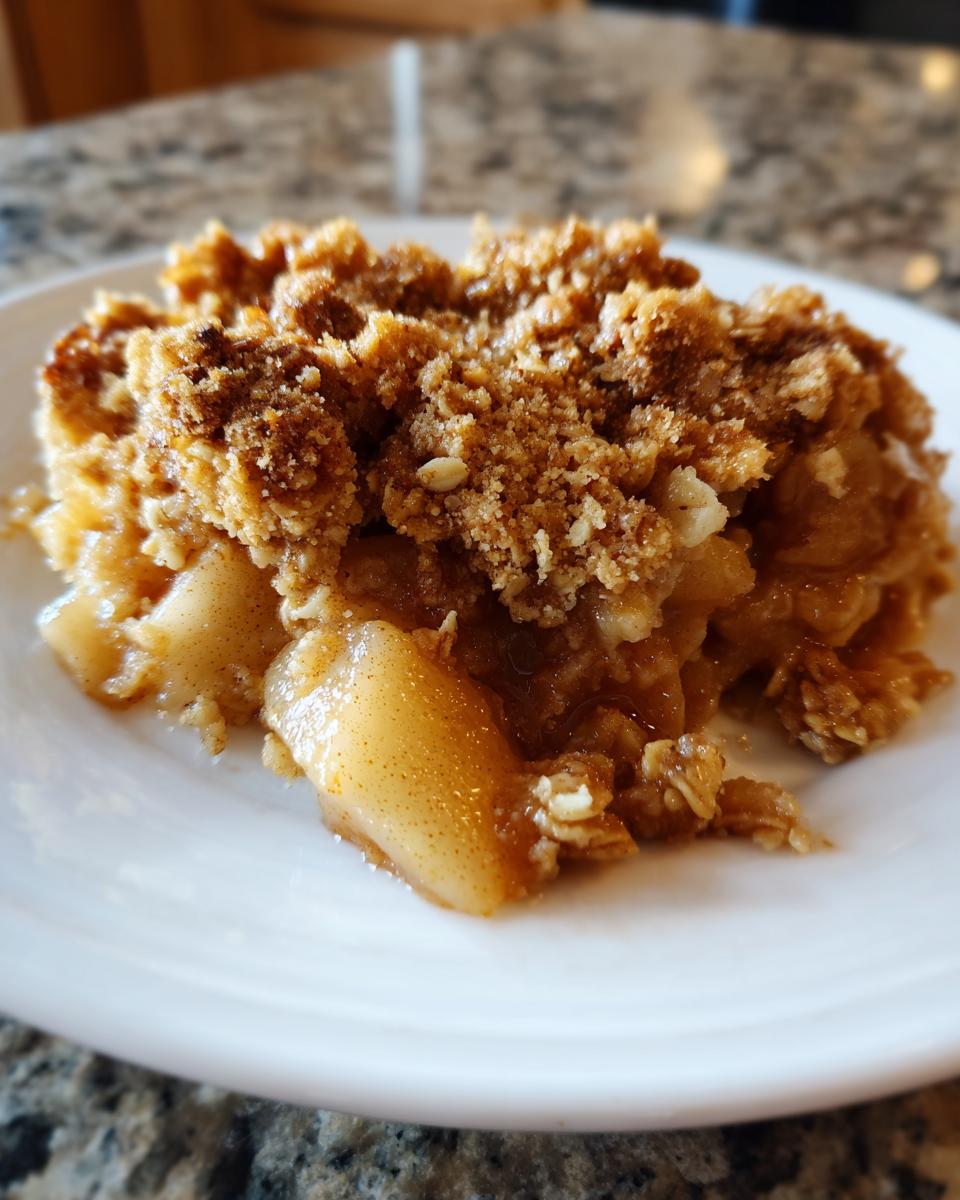
Serving Suggestions for This Cozy Fall Dessert
When you pull this gorgeous pear crisp out of the oven and the kitchen smells like cinnamon and warm brown sugar, you’ve achieved peak comfort food baking! The anticipation is half the fun, but how you serve it truly elevates this cozy fall dessert from a simple snack to a proper event. I always think that since the preparation is so easy, we should dress up the presentation just a little bit.
Of course, you can eat it straight from the baking dish with a spoon in front of the TV—no judgment here! But if company is coming, or you just want to treat yourself right, you need a cool counterpoint to that warm fruit.
My number one suggestion, always, is vanilla ice cream. That cold, creamy texture melting over the hot, spiced pears and crunchy topping? Perfection. Seriously, don’t skip the ice cream for the first serving!
If you’re serving it for brunch or a slightly less decadent ending, I highly recommend a dollop of freshly whipped cream, maybe stabilized with a touch of powdered sugar. It’s lighter than ice cream but still gives you that lovely textural contrast. If the pears are already quite sweet, sometimes I’ll even pull out my recipe for creamy mashed potatoes—just kidding! (But maybe you could try some ultra-thick Greek yogurt if you need a tangy balance!)
If you want an extra layer of flavor, try sprinkling a tiny pinch of flaky sea salt right over the ice cream scoop just before serving. It sounds crazy, I know, but the salt suddenly makes that cinnamon and brown sugar flavor pop! It’s simple, but it feels like something a professional pastry chef would do, and it’s so easy.
Storage and Reheating Your Homemade Pear Dessert
When you inevitably have leftovers of this amazing homemade pear dessert—and you might, if you manage to save any—storing it right is key to preserving that glorious crunch. Don’t worry, this crisp travels well!
You can leave any leftover pear crisp on the counter, covered tightly with foil or plastic wrap, for up to a day if your kitchen isn’t too warm. After that, pop it into the fridge. It’s still perfectly good for three or four days. The topping will soften a bit, but that’s okay!
For reheating, please, please promise me you’ll use the oven instead of the microwave. The microwave makes the topping soggy, and we worked too hard on that crunch! Pop a serving or the whole dish back into a 350-degree oven for about 10 minutes until it’s heated through and the top looks a little crisper again. If you’re reheating a single scoop, a minute or two in a toaster oven works wonders, too. If you ever need help making great make-ahead dishes, my guide on easy sweet potato casserole has tons of great make-ahead advice!
Frequently Asked Questions About the Pear Crisp Recipe
It’s totally normal to have questions when you’re trying a new recipe, even one as simple as this pear crisp! I get so many messages asking about fruit substitutions or how to make sure the topping stays perfect, even after a busy week. I’ve gathered the most common things people ask me about this classic fruit crisp right here so you can bake this with total confidence.
What is the best type of pear for a pear crisp?
That is such a good question! Since we want those juicy baked pears to be tender but not turn into total mush, you need a fruit that holds its shape beautifully under heat. I highly recommend using Bosc or Anjou pears. They have a great texture for baking. You should definitely avoid super soft pears, like Bartlett if they are already very ripe, because they tend to break down too much while baking.
Can I make this pear crisp ahead of time?
You absolutely can prep components ahead of time, which makes cutting down on your kitchen time even easier! I suggest prepping the spiced pear filling and keeping it covered tightly in the fridge. You can also mix up the dry ingredients for the buttery crisp topping and keep that sealed up too. You should only cut the cold butter in right before you plan to bake. Don’t assemble the whole thing and let it sit, though—that makes the topping soggy! If you’re looking for a full easy dessert under an hour, do the prep the night before so you can just assemble and bake! You can find more tips on that whole concept in my guide on quick baking when time is tight.
Can I use gluten-free oats in this pear crisp?
Yes, you totally can! This recipe is already so flexible, and swapping out the oats is simple. If you need a gluten-free version for your oat crumble topping, just make sure you buy rolled oats that are specifically certified gluten-free. The rest of the ingredients—flour, sugar, butter—are usually fine, but double-checking those oats is the one step I insist on for safety!
Nutritional Estimates for This Classic Fruit Crisp
Now, I have to give the usual disclaimer here because my kitchen isn’t a professional lab! These numbers are estimates based on the ingredients listed, and they can definitely change depending on how ripe your pears truly were or if you opted for the brown butter variation. But hey, this pear crisp is meant to be enjoyed as a comfort food baking treat, not tracked on a spreadsheet! Still, for those of you who like to keep an eye on things, here’s a general idea of what one serving of this classic fruit crisp delivers.
If you’re looking for ways to lighten up other recipes in your arsenal but still need that amazing flavor, peek at my guide on simple dessert recipe techniques for ideas on reducing sugar!
- **Serving Size:** 1 serving
- **Calories:** 350
- **Sugar:** 25g (That’s the natural sweetness and the brown sugar working their magic!)
- **Sodium:** 120mg
- **Fat:** 18g
- **Saturated Fat:** 11g
- **Unsaturated Fat:** 7g
- **Trans Fat:** 0g (No questionable stuff in my kitchen, I promise!)
- **Carbohydrates:** 48g
- **Fiber:** 5g
- **Protein:** 4g
- **Cholesterol:** 45mg
The Ultimate Easy Cinnamon Pear Crisp with Buttery Oat Topping
Make this easy pear crisp featuring tender, warm spiced pears under a crunchy, buttery oat topping. It is a simple, comforting dessert perfect for fall.
- Prep Time: 15 min
- Cook Time: 40 min
- Total Time: 55 min
- Yield: 6 servings 1x
- Category: Dessert
- Method: Baking
- Cuisine: American
- Diet: Vegetarian
Ingredients
- 6 medium ripe pears, peeled, cored, and sliced
- 1/4 cup granulated sugar
- 1 tablespoon lemon juice
- 1 teaspoon ground cinnamon
- 1/4 teaspoon ground nutmeg
- 1/2 cup all-purpose flour
- 1/2 cup packed brown sugar
- 1/2 cup rolled oats
- 1/4 teaspoon salt
- 1/2 cup (1 stick) cold unsalted butter, cut into small pieces
Instructions
- Preheat your oven to 375 degrees Fahrenheit. Lightly grease an 8×8 inch baking dish.
- In a large bowl, combine the sliced pears, granulated sugar, lemon juice, cinnamon, and nutmeg. Toss gently to coat the pears evenly.
- Spread the spiced pear mixture into the prepared baking dish.
- In a separate medium bowl, prepare the topping. Combine the flour, brown sugar, rolled oats, and salt.
- Cut in the cold butter using a pastry blender or your fingertips until the mixture resembles coarse crumbs. Do not overmix; some pea-sized pieces of butter are fine.
- Sprinkle the oat topping evenly over the pear filling.
- Bake for 35 to 45 minutes, or until the topping is golden brown and the fruit filling is bubbling around the edges.
- Let the pear crisp cool for at least 15 minutes before serving. Serve warm.
Notes
- For an apple pear crisp, substitute two of the pears with two firm apples, such as Honeycrisp or Granny Smith.
- To make a walnut pear crisp, add 1/2 cup of chopped walnuts to the oat topping mixture.
- If you prefer a richer flavor, substitute the butter in the topping with 1/2 cup of browned butter.
Nutrition
- Serving Size: 1 serving
- Calories: 350
- Sugar: 25g
- Sodium: 120mg
- Fat: 18g
- Saturated Fat: 11g
- Unsaturated Fat: 7g
- Trans Fat: 0g
- Carbohydrates: 48g
- Fiber: 5g
- Protein: 4g
- Cholesterol: 45mg