
There’s just something magical about those classic American desserts, right? They taste like holidays, family road trips, and pure comfort. If you feel like I do, you’re probably here chasing that perfect slice—the one with a shatteringly flaky crust hugging a filling that’s just bursting with sweet-tart fruit. Well, trust me, I spent years chasing that dream, just like Aria Thompson did mastering her family favorites before starting Cooking Zenith. I finally cracked the code for what I truly believe is the best homemade blackberry pie recipe you’ll ever meet. We’re focusing on that buttery crust and the juiciest berry center possible!
- Why This Homemade Blackberry Pie Recipe Works (EEAT Focus)
- Ingredients for the Best Blackberry Pie
- Flaky Pie Crust Tutorial: Making the Buttery Pie Crust
- Assembling the Juicy Berry Filling for Your Blackberry Pie
- Step-by-Step Instructions to Assemble Your Blackberry Pie
- Baking the Classic Fruit Pie to Golden Perfection
- The Critical Cooling Phase for Setting Your Blackberry Pie
- Tips for an Old Fashioned Blackberry Pie Success
- Frequently Asked Questions About Blackberry Pie
- Estimated Nutritional Data for Blackberry Pie
Why This Homemade Blackberry Pie Recipe Works (EEAT Focus)
When you’re aiming for a truly amazing blackberry pie, you can’t cut corners—and that’s why this recipe holds up! We stick to an old-fashioned method that ensures everything tastes authentic and made with care. The foundation here is that all-butter crust; I absolutely swore by keeping my butter ice cold because that is the secret to achieving genuine flakiness. You won’t find any shortcuts here because this is a real homemade blackberry pie.
Also, the filling isn’t just sweet; it’s perfectly balanced so you get that delicious sweet-tart punch that makes a great classic fruit pie stand out. Because we use the right thickener and the right technique, this pie truly sets up perfectly, giving you confidence every time you bake it. You can check out more tips on my best berry pie recipe flaky crust if you want more confidence boosters!
Ingredients for the Best Blackberry Pie
Okay, let’s talk about what you need before we start wrestling with the dough. Getting the right stuff is half the battle! For this blackberry pie, ingredients are key, especially when that cold butter hits the flour. Remember, you want everything for that buttery pie crust to be as cold as possible—that’s how we lock in the flakiness. Don’t even think about using room-temperature butter here; it just won’t work!
- 2 1/2 cups all-purpose flour
- 1 teaspoon salt
- 1 cup (that’s two full sticks!) unsalted butter, absolutely very cold and cubed small
- 1/2 cup ice water, plus maybe a tiny splash more if your dough looks grumpy
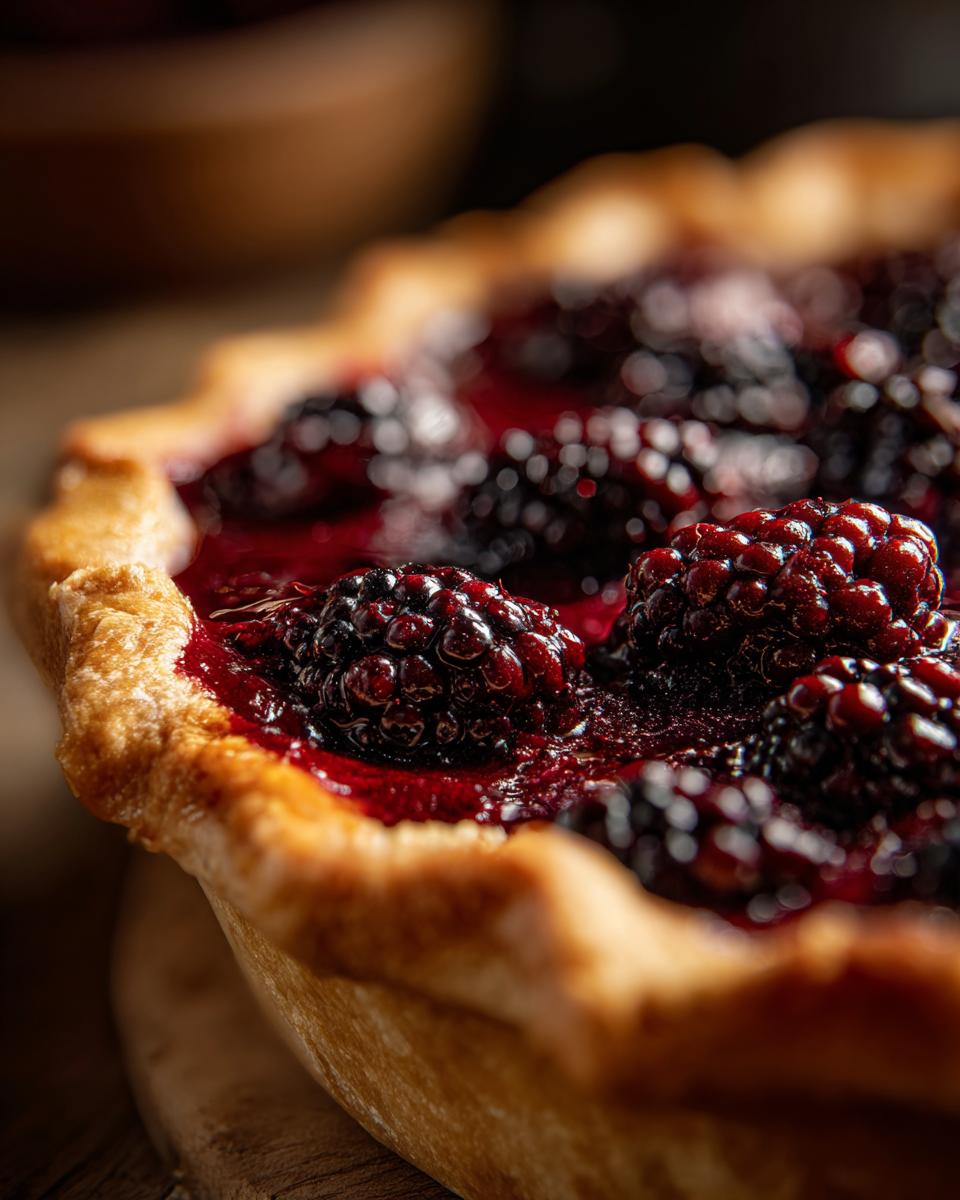
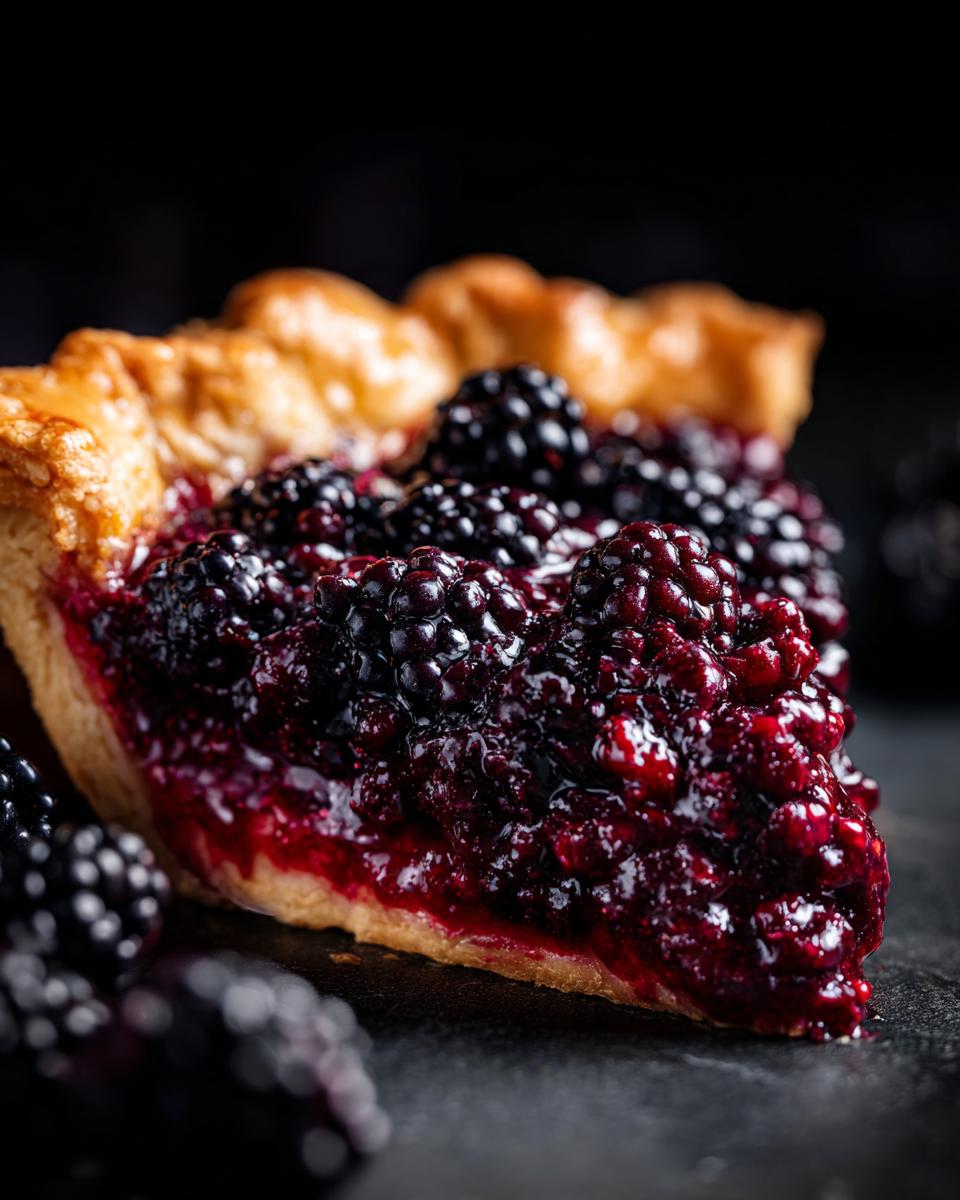
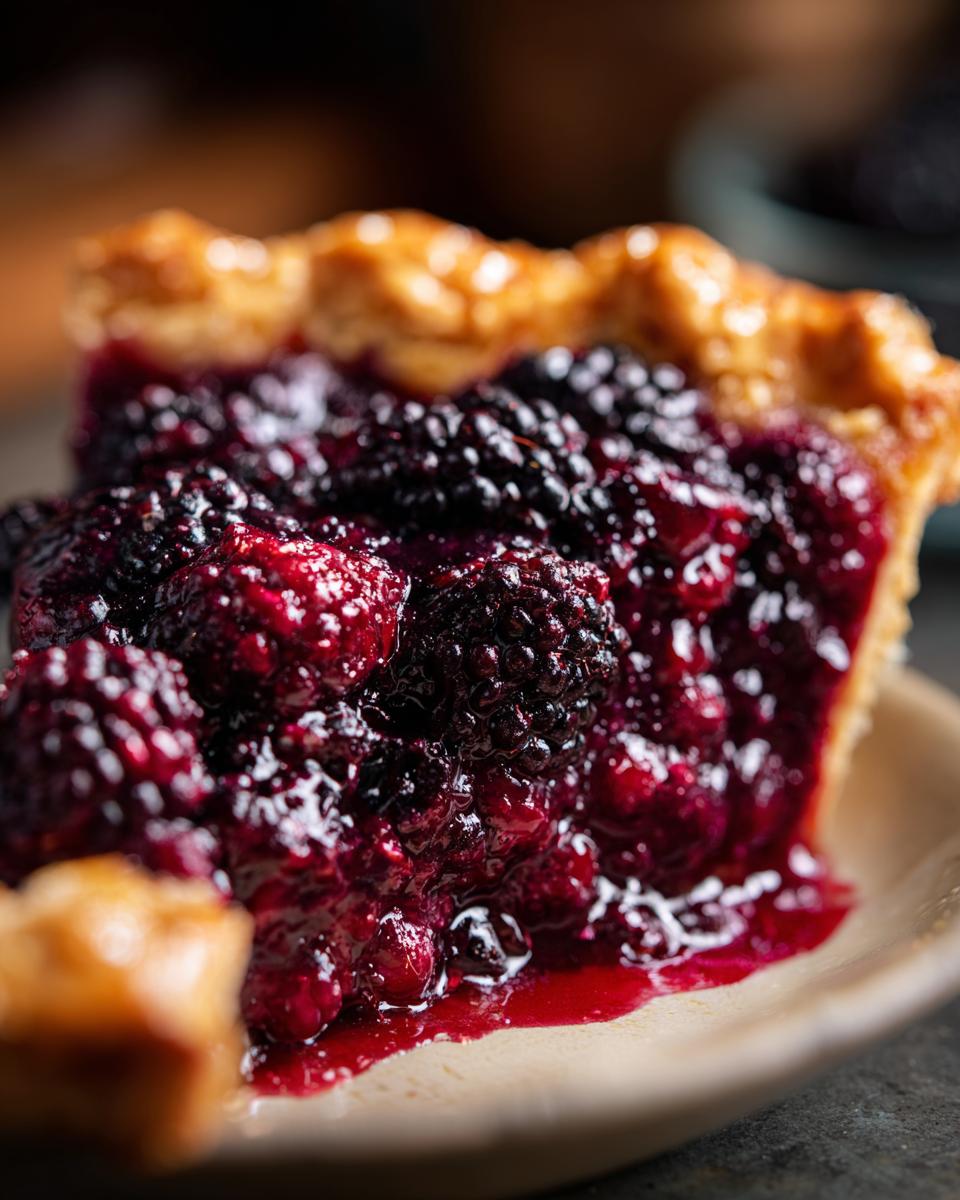
- 6 cups fresh or frozen blackberries (If you use frozen, please, please don’t thaw them first!)
- 1 1/2 cups granulated sugar
- 1/4 cup cornstarch (This is our secret weapon for a thick filling!)
- 1 tablespoon lemon juice
- 1/4 teaspoon ground cinnamon
- 1 large egg, beaten well (for that beautiful shine on top)
- 1 tablespoon coarse sugar (for sprinkling—it gives such a nice crunch!)
Flaky Pie Crust Tutorial: Making the Buttery Pie Crust
This is where the magic starts, folks! If you want that gorgeous, shatteringly crisp exterior for your blackberry pie, you have to treat the dough right. We aren’t aiming for soft bread here; we want layers! That’s why keeping everything brutally cold is my number one rule for this buttery pie crust. When you cut in that butter—remember, pea-sized pieces are what you’re aiming for—you are actually creating the pockets that turn into steam during baking, which results in all that flaky texture we adore.
When you mix in the water, only add enough until it just barely hangs together. Stop mixing the second you see dust disappear! If you overmix, those beautiful butter chunks break down, you develop gluten too much, and suddenly, bam! You have bread dough instead of pastry. It’s easy to see why people think this takes special skill, but really, it’s just about temperature control. Keep cooling things down, and you’re golden. For more tips on mastering tough doughs, check out my guide on how to make foolproof Yorkshire pudding—the cold rule applies there too!
Chilling the Dough for Perfect Blackberry Pie
Once you’ve got those two disks wrapped up, they MUST go straight into the fridge for at least sixty minutes. I know, I know, waiting is the hardest part when you want pie! But that chilling time is non-negotiable. It allows the gluten we developed while mixing to fully relax, making the dough easier to roll out without snapping back on you. More importantly, it re-solidifies the butter. Hard butter equals steam pockets, and steam pockets equal the flakiest blackberry pie structure you can imagine!
Assembling the Juicy Berry Filling for Your Blackberry Pie
Now for the best part—let’s get those berries ready! This step is super simple, but listen closely: we need to be gentle here. Grab a large bowl and combine all your blackberries, the sugar, the cornstarch, the lemon juice, and that little bit of cinnamon. I want you to use a big spoon or a rubber spatula, and just gently fold everything together. Don’t mash them! We want an amazing, juicy berry filling, not purple mush, for our blackberry pie.

If you’re using frozen berries—which is totally fine, by the way, especially when fresh ones are hard to find—make sure you toss them in the mixture straight from the freezer! Don’t waste time letting them get soft first. Set this beautiful bowl of fruit aside while you tackle rolling out that bottom crust. This allows the sugar to start drawing out just a tiny bit of juice and helps the cornstarch start doing its job early. If you want more tips on handling frozen fruit in pies, you should check out my go-to guide on cherry pie filling recipe from frozen cherries; the same rules apply!
Step-by-Step Instructions to Assemble Your Blackberry Pie
All that chilling is over! It’s time to bring your gorgeous, cold dough disks together with that vibrant berry filling. First things first: take one disk out and roll it on a lightly floured surface until you have a circle about 12 inches across—remember, you need that extra wiggle room for the sloped sides of the pie plate. Gently lay this into a 9-inch pie plate. Don’t stretch it! Trim the edge so you have about an inch hanging over the side, and pop the whole thing back into the fridge while you focus on the lid.
Now for the top crust. You can roll out the second disk into a full circle—but if you do, remember to slice a few vents in the middle so steam can escape your blackberry pie! Or, if you’re feeling fancy, you can cut strips to make a stunning lattice top pie.
Once that top is on, whether solid or woven, you need to seal everything up. Crimp those edges firmly between your fingers or press them with a fork to make sure no juicy goodness escapes while baking.
Almost done assembling! But first, presentation! Brush the entire top surface lightly with that beaten egg wash—this gives us that gorgeous, deep golden color we crave. Then, just sprinkle generously with that coarse sugar. That crunch against the soft crust is the best part! Back into the fridge one last time while you crank up that oven; we want a cold pie going into a hot oven for maximum flakiness.
Baking the Classic Fruit Pie to Golden Perfection
Alright, we’re past the assembly stage, and now it’s time for the heat! This is where a lot of people panic about the crust burning before the middle bubbles, but I have the trick that makes this classic fruit pie foolproof. We start hot! Slap that beauty in a 400°F oven for the first 20 minutes. That initial blast of heat sets your bottom crust and gets the butter expanding rapidly in the top crust, really locking in those layers of flaky pastry.
After those initial 20 minutes, you’re going to lower that temperature down to 375°F and let it bake for another 30 to 40 minutes. If you see those lovely edges starting to look too dark before the filling is bubbling up thick and gorgeous, just grab a tiny piece of foil and drape it loosely over the perimeter. It’s my favorite baking trick from my dad—a literal shield for the crust! Keep an eye on it through the vents; when it’s bubbling deeply, you’re winning. Need ideas for your next fruit bake? You might adore my chewy caramel apple pie cookies sometime!
If you ever want to read about wilder adventures in berry baking, this piece on wild blackberry pie is just magical!
The Critical Cooling Phase for Setting Your Blackberry Pie
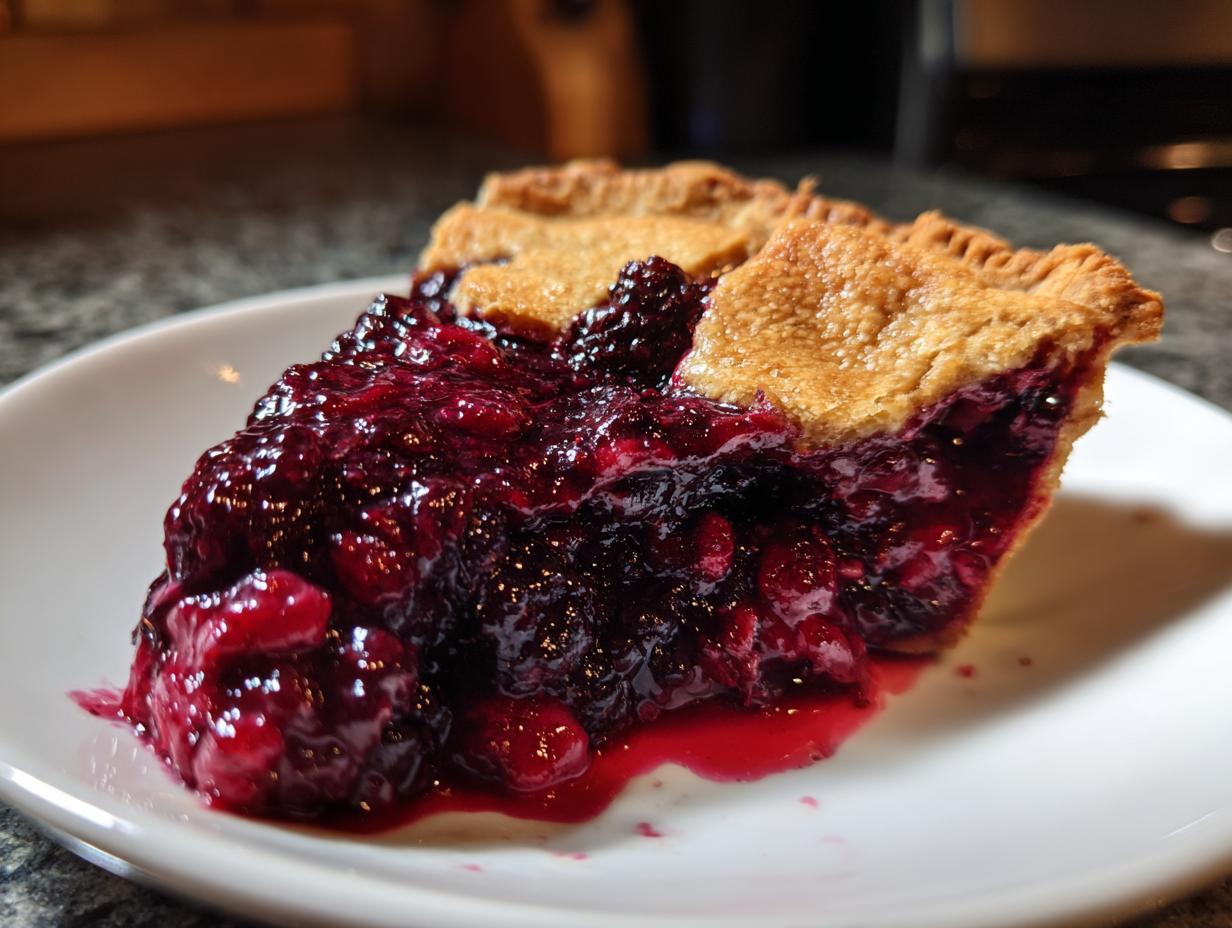
Okay, friend, this is the hardest part, but you cannot skip it—seriously, don’t even try! When your beautiful blackberry pie comes out of that oven, it looks perfect, but the filling is basically molten lava right now. You absolutely must let it cool on a wire rack for a minimum of four hours before you even think about cutting into it.
I know you want that first slice immediately, but trust me on this! That cooling time is non-negotiable because it lets the cornstarch in the mixture fully hydrate and thicken. If you slice it too early, that glorious, juicy berry filling just rushes right out onto the plate, and you end up with soup instead of pie! Patience pays off; a fully set slice is worth every single minute you wait.
Tips for an Old Fashioned Blackberry Pie Success
We’re aiming for that comforting, perfect slice we remember from childhood, right? To get that true old fashioned dessert flavor and texture without any fuss, I always stick back to Grandma’s simple rules. These aren’t complicated steps; they are just little habits that make a massive difference in your finished homemade blackberry pie!
My first tip, and I can’t stress this enough, is all about temperature. For that perfect, flaky crust? Keep your butter rock hard coming straight from the freezer, and your water must be bursting with ice. If your kitchen is warm, mix the dry ingredients while the butter is chilling one last time. That cold is what creates glorious layers!
Next, let’s talk about what you’re putting inside. If you’re using fresh blackberries, make sure they are perfectly ripe, but if you have to grab frozen ones, that’s totally fine! Just remember my cardinal rule mentioned earlier: don’t thaw them out. Toss them directly into the sugar and cornstarch mixture when they are rock hard. Thawing them first just turns them into mushy pools of liquid before they ever hit the oven.
Also, never be tempted to dump all your thickener into the center of the berries! Gently fold it in evenly so that the cornstarch coats every berry just a bit. This prevents those dreaded pockets of floury sludge at the bottom after cooling. Want more advice on making classic recipes foolproof? I have some extra pointers over in my guide for old-fashioned pancakes where temperature control is also key!
If you want to read about another fantastic, perfectly set pie, check out this lovely slice described over at Well Plated—it always gives me ideas for my next bake!
Frequently Asked Questions About Blackberry Pie
I know sometimes after reading a whole recipe, you still have those little nagging questions! Don’t worry about it; that’s totally normal. Here are the things I hear most often about making the perfect blackberry pie. If you have another question, feel free to drop me a note!
Can I use frozen blackberries in this easy blackberry pie recipe?
Absolutely yes! You totally can use frozen ones, and it makes this easy blackberry pie recipe perfect for year-round baking. The trick, as I mentioned, is not to thaw them first! Mix the frozen berries right into the sugar and cornstarch mixture. They might look a little frosty, but they’ll release their juices perfectly while baking.
How do I prevent my pie from being soupy?
Being soupy is the absolute worst, isn’t it? We tackle that in two ways here. First, we use the right amount of cornstarch—don’t try to sneak less in! Make sure you’re measuring that 1/4 cup correctly. Second, and this is huge, you must let your blackberry pie cool for the full four hours! The filling needs that time off the heat to fully set up thanks to the thickener. Don’t rush it if you want those clean slices!
What is the best way to serve this American comfort food baking staple?
This American comfort food baking masterpiece is fantastic on its own, of course, served at room temperature. But if you ask me (and I hope you are!), nothing beats a warm slice topped with a scoop of high-quality vanilla bean ice cream. The contrast between the warm, tart pie and the cold, sweet cream is unbeatable. A swipe of homemade whipped cream works beautifully too, especially if you whip a little lemon zest into the cream for an extra bright flavor pop!
If you’re looking for more quick, simple recipes that bring joy to your kitchen, take a peek at my roundup of easy breakfast recipes! Sometimes the best discoveries happen when you’re just whipping something up quickly.
Estimated Nutritional Data for Blackberry Pie
Now, since this is a delicious, old-fashioned treat made with real butter and sugar, it’s certainly best enjoyed in moderation—but goodness knows, one slice is worth every single calorie! Please keep in mind that these figures are just estimates based on the ingredients listed. If you use different amounts of sugar or butter, these numbers will definitely change.
Here is the breakdown we calculated for one slice of this incredible blackberry pie:
- Serving Size: 1 slice
- Calories: 350
- Sugar: 35g
- Sodium: 150mg
- Fat: 18g
- Saturated Fat: 10g
- Unsaturated Fat: 8g
- Trans Fat: 0g
- Carbohydrates: 48g
- Fiber: 4g
- Protein: 4g
- Cholesterol: 45mg
See? A perfect snapshot of indulgence! Enjoy every bite!
PrintThe Best Homemade Blackberry Pie Recipe with Flaky Crust

Follow this recipe for a classic, old-fashioned blackberry pie featuring a buttery, flaky crust and a perfectly sweet and tart, juicy filling. This is a staple American comfort food baking recipe.
- Prep Time: 45 min
- Cook Time: 50 min
- Total Time: 1 hr 35 min
- Yield: 8 servings 1x
- Category: Dessert
- Method: Baking
- Cuisine: American
- Diet: Vegetarian
Ingredients
- 2 1/2 cups all-purpose flour
- 1 teaspoon salt
- 1 cup (2 sticks) unsalted butter, very cold and cubed
- 1/2 cup ice water, plus more if needed
- 6 cups fresh or frozen blackberries (do not thaw if frozen)
- 1 1/2 cups granulated sugar
- 1/4 cup cornstarch
- 1 tablespoon lemon juice
- 1/4 teaspoon ground cinnamon
- 1 large egg, beaten (for egg wash)
- 1 tablespoon coarse sugar (for sprinkling)
Instructions
- Prepare the Pie Crust: In a large bowl, whisk together the flour and salt. Cut in the cold butter using a pastry blender or your fingers until the mixture resembles coarse crumbs with some pea-sized pieces of butter remaining.
- Gradually add the ice water, one tablespoon at a time, mixing until the dough just comes together. Do not overmix. Divide the dough in half, flatten each half into a disk, wrap in plastic, and chill for at least 1 hour.
- Prepare the Filling: In a separate bowl, gently combine the blackberries, granulated sugar, cornstarch, lemon juice, and cinnamon. Set aside while you roll out the bottom crust.
- Assemble the Bottom Crust: On a lightly floured surface, roll out one disk of dough into a 12-inch circle. Carefully transfer the dough to a 9-inch pie plate. Trim the edges, leaving a 1-inch overhang. Place the pie plate in the refrigerator.
- Assemble the Top Crust: Roll out the second disk of dough. You can cut strips to create a lattice top or cut one large circle for a solid top (cut vents if using a solid top). Return the top crust to the refrigerator.
- Fill the Pie: Pour the blackberry filling into the chilled bottom crust. Dot the top of the berries with a few small pieces of leftover cold butter, if desired.
- Top the Pie: Place the lattice or solid top crust over the filling. Crimp the edges of the top and bottom crusts together to seal. Brush the top crust lightly with the beaten egg wash and sprinkle with coarse sugar.
- Bake the Pie: Preheat your oven to 400°F (200°C). Place the pie on a baking sheet to catch any drips. Bake for 20 minutes at 400°F.
- Reduce the heat to 375°F (190°C) and continue baking for another 30 to 40 minutes, or until the crust is golden brown and the filling is bubbling thickly. If the edges brown too quickly, cover them loosely with foil.
- Cool Completely: Remove the pie from the oven. You must let the pie cool completely on a wire rack for at least 4 hours before slicing. This allows the juicy filling to set properly.
Notes
- For a truly flaky pie crust, keep all your ingredients, especially the butter and water, very cold.
- If you use frozen berries, do not thaw them before mixing with the sugar and thickener.
- Serve this classic fruit pie warm or at room temperature with vanilla ice cream.
Nutrition
- Serving Size: 1 slice
- Calories: 350
- Sugar: 35g
- Sodium: 150mg
- Fat: 18g
- Saturated Fat: 10g
- Unsaturated Fat: 8g
- Trans Fat: 0g
- Carbohydrates: 48g
- Fiber: 4g
- Protein: 4g
- Cholesterol: 45mg