

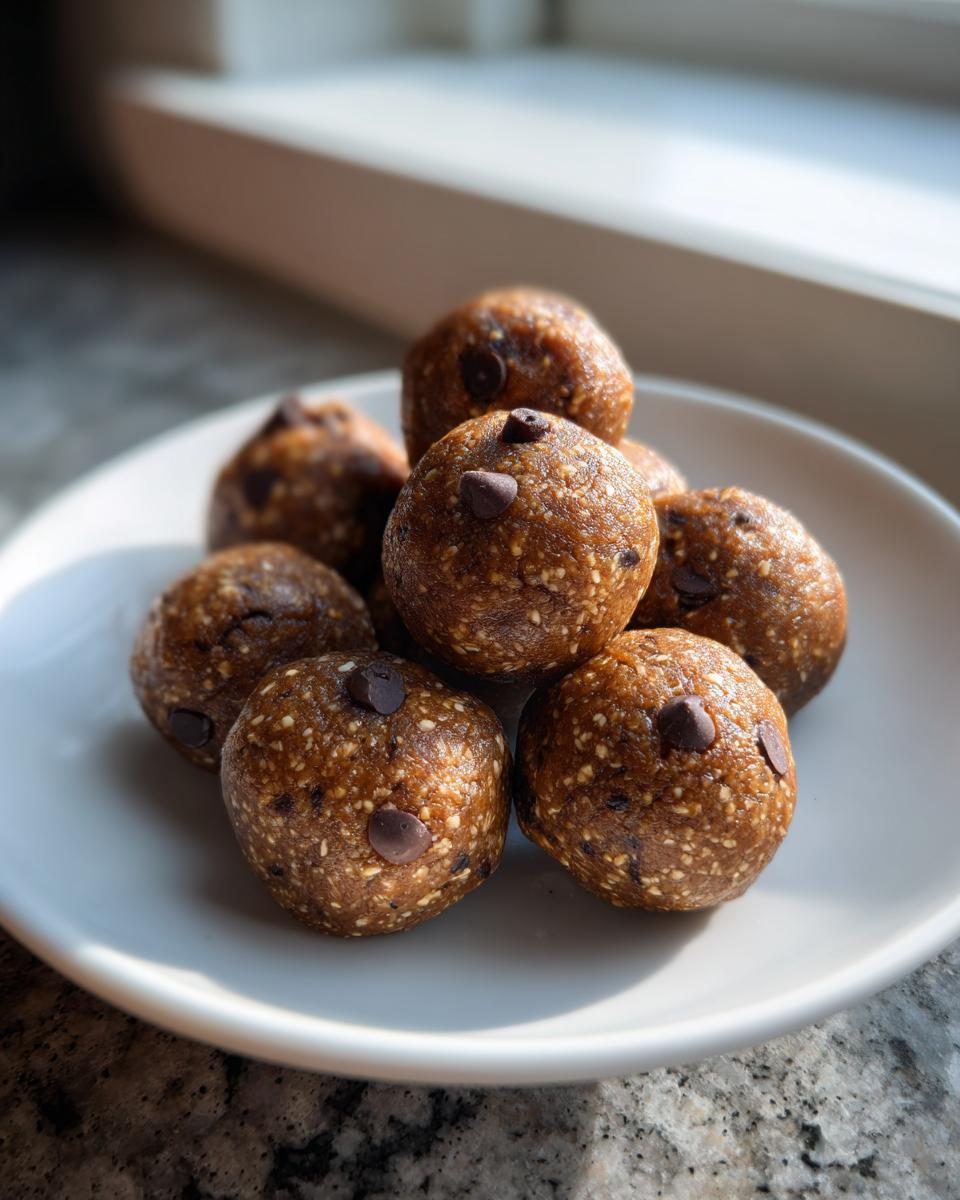
Oh, are you running on empty? I totally get it. When life gets super hectic—juggling work, errands, or trying to fit in a workout—you need fuel, and you need it *now*. That’s where my go-to comes in: the **Ultimate Easy No-Bake Peanut Butter Protein Balls Recipe**. Seriously, these are the answer to every busy day. I’m Aria, and I’m a firm believer that gourmet flavor shouldn’t mean hours over the stove. These bites are completely foolproof, which is why I spent so much time developing them. They use simple ingredients you probably already have, and they are ready faster than you can decide what to order for takeout. Trust me, these protein balls are about to become your new secret weapon for sustained energy!
Check out more of my favorite quick ways to keep things simple and healthy in the kitchen over on my page for healthy snack ideas.
- Why These Are the Best No-Bake Protein Balls for Your Routine
- Gathering Ingredients for Your Peanut Butter Protein Balls
- Step-by-Step Instructions for Easy Protein Balls Recipe
- Tips for Perfect Chewy Protein Balls Every Time
- Ingredient Substitutions for Protein Balls
- Storage and Make Ahead Snacks Instructions for Protein Balls
- Frequently Asked Questions About Protein Balls
- Estimated Nutritional Data for These Protein Balls
- Share Your Experience Making These Protein Balls
Why These Are the Best No-Bake Protein Balls for Your Routine
I know you’re busy, so I’m only sharing recipes that actually make your life easier. These specific **protein balls** just work every single time, whether I need a quick bite or I’m prepping snacks for the whole week. They fit perfectly into a healthy lifestyle without feeling like a chore! If you’re looking for ways to speed up other parts of your routine, some of my quick healthy lunch ideas might help too!
-
Quick Energy Bites Ready in Minutes
Honestly, the prep time clocks in at just ten minutes. That’s it! You just dump everything in a bowl, stir, and roll. They fly out of the kitchen so fast they barely have time to stick together!
-
Perfect Post Workout Fuel and Meal Prep Snacks
Because they are loaded with good stuff, these are my absolute favorite **Post Workout Fuel**. Plus, they are fantastic **Meal Prep Snacks**. Make a big batch on Sunday, and you’re set for the week without having to cook anything else!
-
Simple Protein Balls Using Pantry Staples
There are no weird specialty supplements here, folks. These are the **Simple Protein Balls** that rely on oats, peanut butter, and protein powder—stuff I always have on hand. No need for emergency grocery runs!
Gathering Ingredients for Your Peanut Butter Protein Balls
Okay, let’s talk ingredients because the magic in these **Peanut Butter Balls** really does come down to using the right stuff. Remember, since there’s no baking involved, the quality of what you mix together is what sets the final texture!
Ingredient Clarity and Preparation Notes
First up, grab one solid cup of rolled oats—don’t use the instant kind, we need that structure! For the peanut butter, you can certainly use crunchy if you want a textural surprise, but creamy really helps hold everything together smoothly. Make sure your protein powder is vanilla flavored; it blends best with these flavors. Crucially, your flaxseed needs to be ground, or sometimes called “flax meal,” so it can properly bind everything up. If you decide you absolutely must have chocolate, the mini chocolate chips are totally optional, but oh so good!
Step-by-Step Instructions for Easy Protein Balls Recipe
This is my absolute favorite part because it’s where you see the magic truly happen without turning on the oven! Since this is a no-bake situation, we’re relying 100% on sticky binders, so stirring correctly is key to getting those perfect homemade **protein balls**. You can check out some of my other quick solutions for busy mornings, like these easy breakfast recipes, but nothing beats these energy bites for speed!
Mixing the Base of Your Protein Balls
Start by grabbing a nice roomy bowl. You’re going to gently combine all the dry stuff—the oats, protein powder, and flaxseed—first. Then, add in your peanut butter, honey, and vanilla extract. Now, you need to get in there and mix! I usually use a sturdy spatula at first, then switch to my hands because you need to feel when it’s right. Keep mixing until everything is uniform and you have this lovely, sticky dough. If you’re finding it super dry and crumbly, don’t panic! Add water or milk just one teaspoon at a time. Seriously, use restraint, because too much liquid and they won’t hold their shape later.
Rolling and Setting the Protein Balls
Once you have that perfect sticky dough, fold in those chocolate chips if you’re using them—make sure they are distributed well. Now for the rolling! Scoop out small portions and roll them tightly between your palms into little balls, aiming for about one inch across. They are small, so they are very satisfying as **No Bake Energy Bites**! Place them onto a parchment-lined sheet. This step is non-negotiable: you *must* chill them! Pop them in the fridge for at least 30 minutes. That chilling time lets the oats and flax absorb the moisture and helps them firm up so they aren’t messy to handle.

Tips for Perfect Chewy Protein Balls Every Time
Even with a no-bake recipe, there’s a little bit of kitchen chemistry involved to get that perfect soft, chewy texture. I learned this the hard way with batches that crumbled everywhere! Building that structure correctly ensures you have perfect **healthy protein snacks** all week long. We want them to be firm enough to handle but soft enough to melt in your mouth, right?
For more little tricks that make everyday cooking easier, you can always check out my main resource page for healthy snack ideas.
Adjusting Consistency for Your Protein Balls
The ingredients you use—especially your protein powder and your peanut butter—can wildly change how sticky the dough is. If your mixture looks too crumbly after you mix it, that means it’s thirsty! Add liquid (water or milk) just half a teaspoon at a time. You mix it in, wait ten seconds, and check again. Stop adding liquid the second the dough just begins to hold together when you squeeze a bit.
Now, if you went a little too enthusiastic with the liquid and your dough is sloppy, don’t toss it! This is where you need a dry balance. Add an extra tablespoon of protein powder or a tablespoon of oats—whichever you have more of. Stir that in completely. It will absorb that extra moisture and get you back to that perfect rollable stage.
Maximizing Flavor in Your Oatmeal Protein Bites
Here’s a little trick I picked up that takes these **Oatmeal Protein Bites** from good to great: toast your oats! You don’t have to do this, but wow, does it add depth. Just spread your rolled oats on a dry skillet over medium-low heat for about five minutes. Stir them constantly until they smell nutty and are just starting to turn a light golden brown.
Let them cool completely before mixing them in, otherwise, they will melt your nut butter! Toasting the oats just gives a slightly deeper, almost roasted background note that really elevates the flavor profile of the whole batch. It’s totally optional, but I think it makes a huge difference!
Ingredient Substitutions for Protein Balls
I always want everyone to be able to enjoy these, no matter what’s in their pantry or what allergies they might be navigating. Life is too short to skip out on a **quick energy bite** just because you’re out of one ingredient! That’s why these **protein balls** are so wonderfully versatile. Don’t stress if you need to swap something out—we can almost always make it work.
Nut Butter Swaps for Peanut Butter Balls
Peanut butter is classic for a reason—it binds beautifully and tastes exactly like dessert. But if you or someone you’re feeding has a nut allergy, or maybe you just ran out of the jar, don’t worry! You can swap the peanut butter directly for an equal amount of almond butter. It works perfectly and keeps that rich, satisfying base. If you need a full peanut-free option, sunflower seed butter is my second favorite go-to. It might change the final color slightly, but the texture holds up just the same in these **Peanut Butter Balls**.
Sweetener Variations for High Protein Treats
The recipe calls for honey, which I love because it’s sticky and natural. However, if you’re keeping things strictly vegan, just swap that honey out for the exact same amount of maple syrup. They are completely interchangeable in the mixture! Maple syrup gives a slightly different, maybe deeper, flavor, but you won’t lose any binding power.
Now, if you found your protein powder was a bit bitter, or you just really love that super sweet flavor profile, you can absolutely beef up the sweetness. Once your balls are mixed and ready to roll, you can stir in one or two tablespoons of plain powdered sugar. This really pushes them into the realm of **High Protein Treats** that taste almost like candy!
Storage and Make Ahead Snacks Instructions for Protein Balls
This is where these amazing **protein balls** truly shine for people like us who keep busy schedules! The fact that you can make them ahead of time and they hold up so well is half the reason I love them so much. They are the ultimate **make ahead snacks** because they are built to last!
Since these only take 10 minutes to mix up, I often plan to double or triple the batch just so I don’t have to think about healthy fueling for the next week or two. Ready to streamline your routine? You can browse through some of my favorite simple weeknight dinners for more ways to save time!
Here’s the breakdown on keeping them fresh:
- Refrigeration: You can absolutely keep these in an airtight container right in the fridge. They are good to go for about one full week. I’ve tested this extensively—they stay soft, chewy, and perfectly ready to grab.
- Freezing for Longer Storage: If you made a huge batch and know you won’t get through them in seven days, pop them in the freezer! Place the rolled balls on a parchment-lined baking sheet and freeze them solid for about an hour. Once they are hard, transfer them to a freezer-safe Ziploc bag or container. They last great for up to three months!
- Thawing Tip: The best part? No weird thawing process needed. If you pull them out of the freezer, usually just 10 to 15 minutes on the counter is enough to bring them back to that perfect soft, chewy consistency. They are seriously wonderful straight from the fridge, too, if you prefer a slightly firmer texture!
Frequently Asked Questions About Protein Balls
I always get questions when people first try this recipe because they are so different from the dense bars you buy at the store! Since these **protein balls** are so simple, people often wonder about easy little tweaks. I’ve gathered the most common things folks ask about to make sure your first batch is a huge success!
Can I make these protein balls without protein powder?
Oh, absolutely you can! I developed this specific recipe to hit that high protein goal, but if you leave out the powder, they turn into wonderful, wholesome **energy bites**. Since you’re removing a dry component, you might need to add just a tiny splash of water or milk—maybe a teaspoon—to get that perfect sticky dough consistency again. Just adjust the binders until they hold together nicely!
Are these considered Low Calorie Protein Bites?
That’s a great question, especially if you’re watching macros closely! Based on the standard recipe, they come out to roughly 120 calories per ball. For something that tastes like dessert and keeps you full for hours, I think that’s fantastic! While “low calorie” means different things to everyone, these are definitely nutrient-dense compared to grabbing a processed candy bar, making them excellent **Low Calorie Protein Bites** for a smart snack.
How do I ensure my protein balls are chewy?
Chewiness is all about balance and chilling! You want the right ratio of oats plus flaxseed mixed with your binders—the peanut butter and honey. If you chill them too long, they can get a bit hard, almost like fudge. I keep mine refrigerated, but if you take them out about five minutes before eating, they soften right back up to that ideal, satisfyingly chewy texture. Don’t freeze them if you want maximum chewiness!
Estimated Nutritional Data for These Protein Balls
I always like to be upfront about what we are putting into our bodies, even with simple snacks like these **protein balls**. Knowing the basic numbers helps you fit them perfectly into your daily goals, whether you’re tracking for post-workout recovery or just balancing out your day. Nutrition is important, but remember, this isn’t a science lab—it’s my kitchen!
For one standard-sized bite (we generally yield about 16 balls from the batch), here are the nutrition estimates based on using standard rolled oats, creamy peanut butter, and vanilla whey protein:
Serving Size: 1 ball
- Calories: 120
- Protein: 8g
- Fat: 7g
- Carbohydrates: 12g
- Sugar: 5g
- Fiber: 2g
Now, here’s my important disclaimer, like you’d see on any good recipe card: these numbers are just estimates! The exact amount of fat might change if you use natural peanut butter that separates easily, or your protein powder could drastically change the sugar count. If you use almond butter instead of peanut butter, those numbers will shift a bit too. This is just a solid baseline to show you how fantastic these **high protein treats** are for filling you up!
Share Your Experience Making These Protein Balls
Alright friends, that’s all the knowledge transfer I have for you on creating the ultimate batch of **protein balls**! Now it’s your turn to get mixing. I truly hope these become the lifesaver for busy mornings or afternoon slumps that they are for me and my family. These **Healthy Protein Snacks** are meant to be shared and customized!
I would absolutely love to hear how they turned out for you! Did you keep them classic, or did you get adventurous with your add-ins? Head over to the comments section below and give the recipe a rating—I’m always aiming for five stars from folks who actually made them!
It helps me so much to know what you loved. Did you use almond butter instead? Were the mini chocolate chips the perfect addition? Or maybe you used them as your pre-run energy boost? Drop me a line via my contact page and tell me everything!
PrintEasy No-Bake Peanut Butter Protein Balls

Make these simple, no-bake protein balls using oats and peanut butter for a quick, healthy snack or post-workout fuel. They require no cooking and are perfect for meal prep.
- Prep Time: 10 min
- Cook Time: 0 min
- Total Time: 10 min
- Yield: About 16 servings 1x
- Category: Snack
- Method: No-Bake
- Cuisine: American
- Diet: Vegetarian
Ingredients
- 1 cup rolled oats
- 1/2 cup peanut butter (creamy or crunchy)
- 1/2 cup vanilla protein powder
- 1/4 cup honey or maple syrup
- 1/4 cup ground flaxseed or chia seeds
- 1 teaspoon vanilla extract
- 1/4 cup mini chocolate chips (optional)
Instructions
- Combine the rolled oats, peanut butter, protein powder, honey, flaxseed, and vanilla extract in a medium mixing bowl.
- Mix all ingredients thoroughly until a uniform, sticky dough forms. If the mixture seems too dry, add a teaspoon of water or milk at a time until it holds together.
- Stir in the mini chocolate chips, if using.
- Roll the mixture into small, uniform balls, about 1 inch in diameter.
- Place the finished protein balls on a plate or baking sheet lined with parchment paper.
- Refrigerate for at least 30 minutes to firm up before serving.
Notes
- Store these protein balls in an airtight container in the refrigerator for up to one week.
- For a different flavor, substitute almond butter or sunflower seed butter for peanut butter.
- If you prefer a sweeter bite, add 1-2 tablespoons of powdered sugar to the mix.
Nutrition
- Serving Size: 1 ball
- Calories: 120
- Sugar: 5
- Sodium: 60
- Fat: 7
- Saturated Fat: 1.5
- Unsaturated Fat: 5.5
- Trans Fat: 0
- Carbohydrates: 12
- Fiber: 2
- Protein: 8
- Cholesterol: 0