
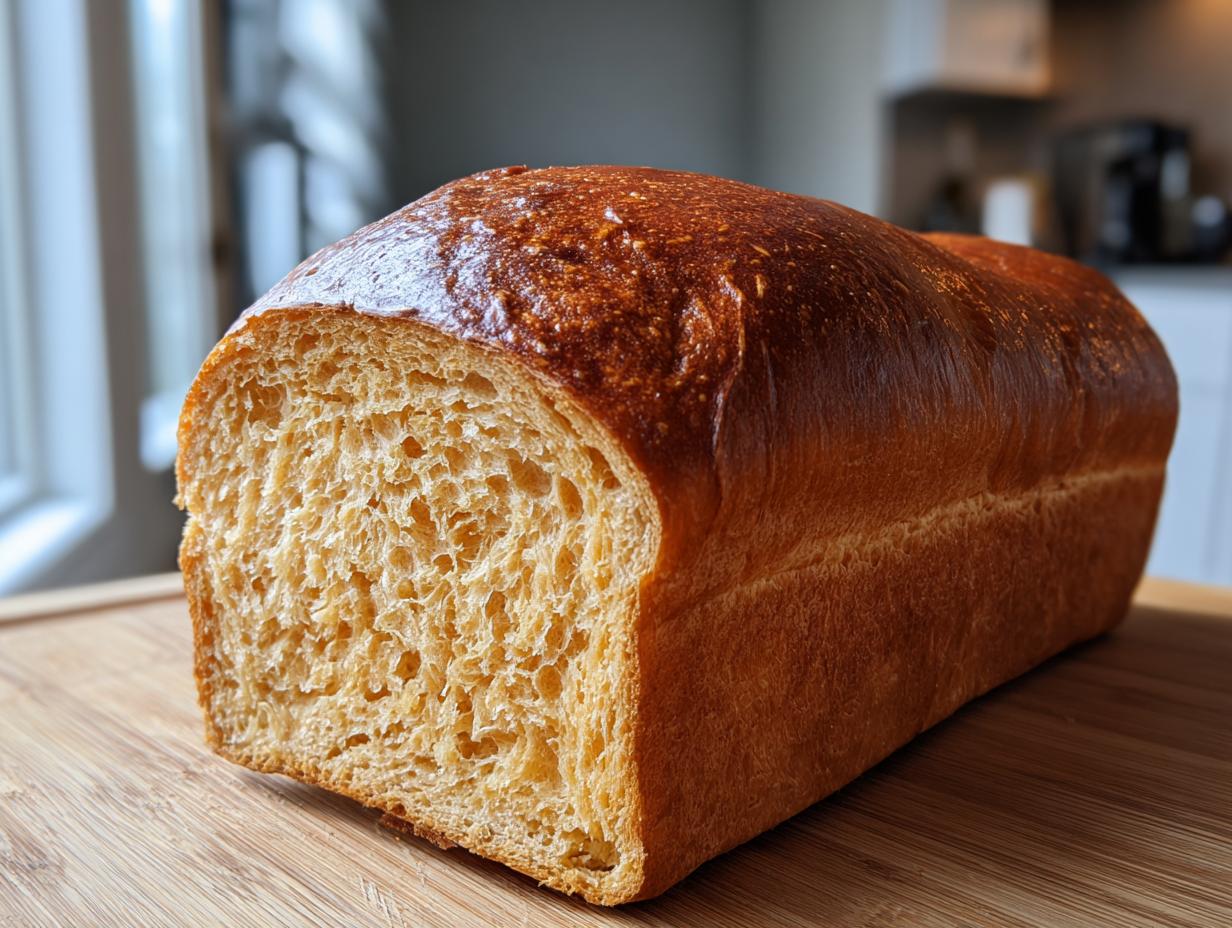
Oh, friends, let me tell you something wonderful: nothing quite smells like home like a loaf of freshly baked bread, and that smell is 100 times better when it’s whole wheat bread you made with your own two hands! Store-bought loaves are fine, I guess, but they always have that slightly *sad* texture, don’t they? I developed this Soft Honey Whole Wheat Sandwich Loaf because I needed something wholesome for lunchboxes that still melted in your mouth.
This particular recipe is my absolute go-to for achieving that incredibly soft, tender crumb you want in a whole wheat sandwich loaf, beautifully sweetened just naturally with honey. If you are done with dry, crumbly loaves that taste more like cardboard than comfort, you are going to love this. Trust me, once you smell this baking, you won’t ever go back!
- Why This Soft Honey Whole Wheat Bread Recipe Works for You
- Gathering Ingredients for Your Whole Wheat Bread
- Step-by-Step Instructions to Make Whole Wheat Bread
- Tips for Baking the Best Whole Wheat Bread
- Storing Your Homemade Whole Wheat Bread
- Variations on This Whole Wheat Bread Recipe
- Frequently Asked Questions About Whole Wheat Bread
- Nutritional Estimates for This Wholesome Bread Recipe
- Share Your Homemade Whole Wheat Bread Success
Why This Soft Honey Whole Wheat Bread Recipe Works for You
I know what you are thinking: whole wheat bread is always dense, right? Wrong! That’s the main reason this recipe is such a keeper. It’s designed to fix all those frustrating baking moments. This is an easy whole wheat bread recipe that delivers on flavor without adding hours to your baking time. It’s perfect for everyday toast, but sturdy enough for thick sandwiches. When you want quick, wholesome options for your morning table, check out my easy breakfast recipes!
- This recipe gives you that incredible, soft whole wheat bread texture without needing hours of hard work.
- It’s a step-by-step guide that feels manageable, even if you’re new to baking yeast breads.
- The result is a hearty, wholesome loaf that tastes fantastic and is great for the whole family.
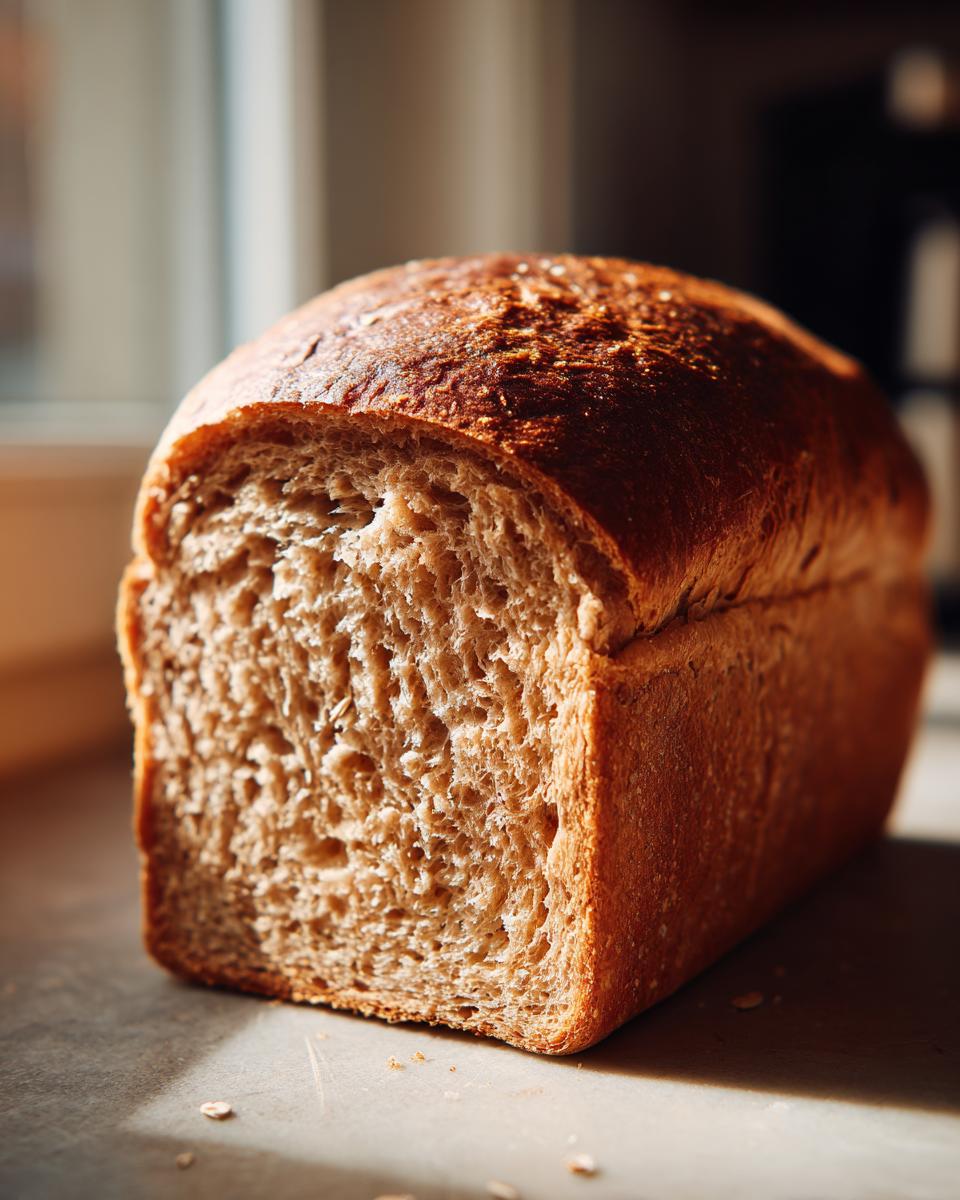
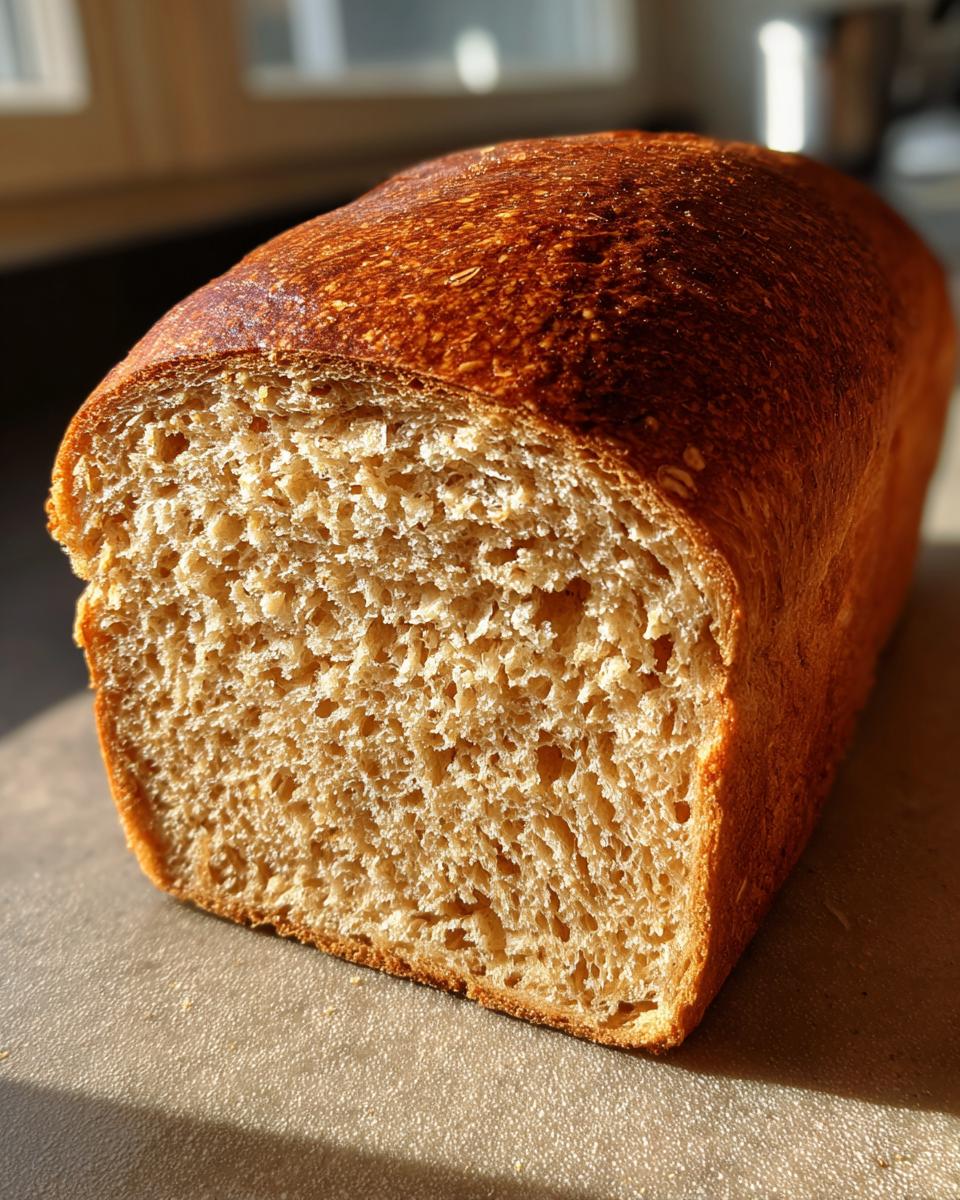
Achieving the Perfect Tender Crumb
Here’s the deal: if you go 100 percent whole wheat, the loaf can get chewy fast. I sneak in just a little bit of all-purpose flour—about half a cup—and it makes all the difference! It lets that nutty whole wheat flavor shine while keeping the structure gorgeously tender. It’s my little secret for the softest homemade bread!

The Sweetness of Honey Whole Wheat Bread
We skip those strange additives found in store-bought loaves and rely on honey for our sweetness. Not only does it taste divine, but honey is amazing at locking in moisture. This is why you get a superior whole wheat bread slice that stays fresh longer!
Gathering Ingredients for Your Whole Wheat Bread
Okay, let’s talk about what you need before we get our hands dusty! Getting the ingredients right is half the battle, especially when working with whole grains. You want that beautiful nutty flavor from quality whole wheat flour, but remember, we are aiming for that sandwich-soft texture, so we’re mixing things up a bit!
We’re using simple, good ingredients here—nothing fancy required! You’ll need yeast, of course, honey for that touch of sweetness, a bit of butter for richness, salt, and our two flour types. Keep your ingredients at room temperature, where possible, unless the recipe specifically calls for warm water, like the yeast does.
Flour Selection for Homemade Whole Wheat Bread
We are using a blend here! You need three cups of whole wheat flour, but don’t skip the half cup of all-purpose flour. That AP flour is what gives the bread that lovely stretch and stops it from baking up too heavy. Now, if you absolutely must make a 100 percent whole wheat bread loaf (and I totally get wanting that extra health punch!), just substitute the AP flour measure for more whole wheat. Just know it will be slightly denser—but still delicious!
Activating the Yeast for Your Whole Wheat Bread
This is the step where beginners often panic, but don’t! Your yeast needs a nice little bath to wake up. The most crucial detail is the water temperature: it needs to be warm, folks, between 105°F and 115°F. Any colder and your yeast will nap; too hot, and you’ll accidentally kill it! Stir that yeast into the warm water and add a pinch of that honey—it’s like breakfast for them. If it gets foamy after about five minutes, you’re good to go! If it just sits there looking sad, you’ll need to start over with fresh yeast.
Step-by-Step Instructions to Make Whole Wheat Bread
Alright, let’s stop chatting and start baking! This is where the magic happens, and you’ll see just how straightforward making whole wheat bread really is. We need to get cozy with our dough, but don’t worry if it feels a little sticky at first; that’s totally normal when baking from scratch.
Mixing and Kneading the Whole Wheat Dough
Once your yeast is bubbly and happy, stir in the honey, melted butter, and salt. Now, dump in the flours gradually. Mix it until it looks shaggy—you know, kind of furry and messy? Then, you need to get it onto a lightly floured surface and really work it. You’re looking for 8 to 10 full minutes of kneading. I love this part because you can feel the dough transforming under your hands! It starts sticky and stubborn, but ends up smooth, springs back when you poke it, and feels elastic. That’s your sign to stop!
First Rise: Developing Flavor in Your Whole Wheat Bread
Toss that beautiful ball of dough into a bowl you’ve oiled up lightly—make sure to turn it over so the top is slick too. Cover it up tight, and find the warmest, draft-free spot in your kitchen. This first rise is where the flavor deepens. It needs 1 to 1.5 hours. Honestly, there is nothing more satisfying than checking on dough that has doubled its size. It’s proof that your hard work is paying off!
Shaping and Second Proofing for a Perfect Whole Wheat Sandwich Loaf
Gently punch the air out—don’t just smash it, be gentle! Shape it into a neat log and tuck it seam-side down into your greased 9×5 loaf pan. It needs one last nap, this second rise, for about 30 to 45 minutes. You want it to peak about an inch above the rim of the pan. I always tell people to get their oven preheating during the last 15 minutes of this rise so it’s perfectly ready when the dough is!
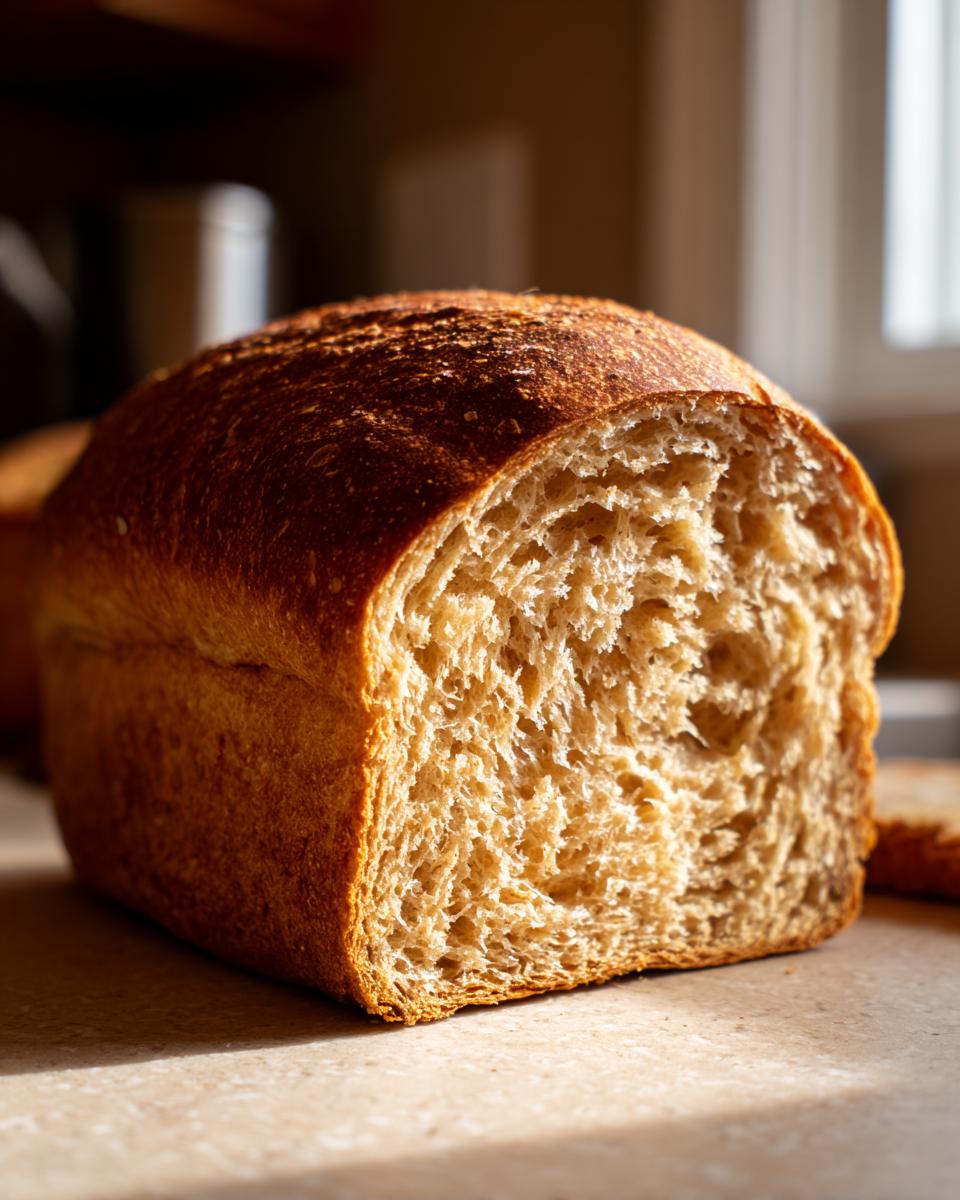
Baking and Cooling Your Whole Wheat Bread
Fire it up to 375°F (190°C)! Bake this lovely whole wheat sandwich loaf for 30 to 35 minutes until the top is a gorgeous golden brown. If you have a thermometer, aim for 200°F internally—that guarantees it’s fully baked. Please, please, please—and this is Aria’s biggest plea—get that loaf out of the pan right away and let it cool completely on a wire rack. If you slice into it hot, all that trapped steam escapes, and you ruin that perfectly soft texture we worked so hard for. You can check out my guide on making homemade bread bowls for more tips on temperature control!
Tips for Baking the Best Whole Wheat Bread
Baking is a learning process, and even though this recipe is straightforward, sometimes little things throw us off course! We want that perfect whole wheat bread every time, right? Don’t stress if your first loaf isn’t perfect; that just means you’ve got room to grow as a baker. If you want to see a recipe where a little bit of deviation is encouraged, check out my guide on easy 1-hour homemade French bread.
Also, remember that you can totally skip the loaf pan if you want something heartier! If you’re aiming for a rustic whole wheat bread vibe, just shape this dough into a nice round boule and bake it directly on a preheated baking stone or sheet pan. Give it a nice spritz of water halfway through baking to help that crust set beautifully—you might like the results over on Savory Realm!
Troubleshooting Dense Whole Wheat Bread
If your beautiful dough flattened instead of rose proud, we need to figure out why. The main suspects are usually sneaky. Did you knead long enough? If you stop before that 8-minute mark, the gluten structure won’t be strong enough to hold the gas from the yeast, leading to density. Second, check your rising times; under-proofing means the yeast hasn’t done its job yet. And finally, if you went heavy on the 100% whole wheat flour substitution, that extra bran starts cutting the gluten strands, which always results in a slightly heavier slice. Just remember those three things for next time!
Storing Your Homemade Whole Wheat Bread
I know you want to demolish the whole loaf the second it comes out of the oven—trust me, I’ve been there! But to keep that gorgeous, soft texture we worked so hard for in this whole wheat sandwich loaf, you have to let it cool completely! Slicing while warm traps moisture in the wrong spots, making it gummy.
Once totally cool, wrap it up tightly in plastic wrap or a reusable bread bag. Keep it on the counter for about 3-4 days. Whole wheat bread tends to dry out a touch faster than white bread, so if you know you won’t finish it, slice it up now and pop the extras in the freezer! It freezes beautifully.
Variations on This Whole Wheat Bread Recipe
Just because we have this perfect template for a whole wheat bread doesn’t mean we can’t have some fun with it! Once you nail the basic kneading and rising (which you absolutely will!), you can start twisting the recipe just slightly to keep things interesting week after week. I love making simple swaps that change the character of the loaf without messing up the structure too much.
If you tried my honey bran muffins recipe, you know how much I love adding a little texture. Try stirring in maybe a half cup of mixed seeds—sunflower, flax, maybe even some poppy seeds—right when you add the last bit of flour. This gives you a lovely, slightly crunchy bite. If you add too many heavy seeds, though, you might notice the lift is slightly reduced, so don’t go overboard!
And speaking of flavor swaps, honey is fantastic, but if you are feeling deep and dark, swap the honey out for molasses! Molasses gives the whole wheat bread a richer, almost dark rye flavor profile. It makes the crust look fantastic, too. Just know that molasses is stronger than honey, so you might need to use slightly less or add maybe a tiny splash more liquid, depending on which brand you use. Enjoy experimenting!
Frequently Asked Questions About Whole Wheat Bread
I totally get it; when you’re trying homemade whole wheat bread for the first time, you have questions! It’s like learning a new language, but I promise once you get the hang of the rising, you’ll feel like a pro. I’ve collected the questions I get asked most often when I teach my friends the basics of beginner bread baking so you can feel confident tackling this recipe.
Can I make this an easy no knead whole wheat bread?
That’s a great question! While this particular recipe is designed around the kneading time (8-10 minutes) to get that superior, soft texture perfect for a sandwich loaf, you *can* try a no-knead approach. If you go that route, you’ll need a much wetter dough and probably skip straight to baking it in a Dutch oven. Just know, you’ll end up with a heartier, more rustic whole wheat bread, which is delicious too, but it won’t have that pillowy softness we’re aiming for here. Stick to the kneading for this recipe!
How do I ensure my whole wheat sandwich loaf is fluffy?
Fluffiness comes down to two main things: kneading and the second rise. First, you must get that dough smooth and elastic during the kneading phase—that builds the structure. Second, that second proofing in the pan is non-negotiable! Don’t rush it. You want that dough to crest nicely above the rim. If you’re aiming for a loaf that’s great for sandwiches and toasts up beautifully, respecting those rise times is key. For more on my philosophy and why I love sharing these home-tested recipes, feel free to check out my About Page!
Nutritional Estimates for This Wholesome Bread Recipe
Now, before you go slathering this beautiful loaf in butter and jam, let’s quickly talk numbers. Since this is a wonderfully wholesome bread recipe, it’s good to know what you’re tucking into. I ran these numbers based on standard measurements, but hey, we all know that when you bake at home, things change a little based on the exact type of whole wheat flour or the exact amount of honey you spoon in!
Think of these figures as a fun guideline, not gospel. They are calculated based on 16 slices per loaf, because who can stop at just one slice of warm, fresh homemade whole wheat bread? Certainly not me!
- Serving Size: 1 slice
- Calories: 130
- Sugar: 4g (That’s mostly the natural sweetness from the honey!)
- Sodium: 180mg
- Fat: 3g
- Carbohydrates: 23g
- Fiber: 3g (That’s the good stuff from the whole grains!)
- Protein: 5g
So, there you have it! A satisfying, flavorful slice of healthy homemade bread that fits beautifully into your day. Just remember, these are estimates, as my measurements always seem to vary slightly depending on how hungry I am when I pour the honey!
Share Your Homemade Whole Wheat Bread Success
Honestly, seeing your creations is my absolute favorite part of sharing these recipes! I put my heart into developing this whole wheat bread to be soft and perfect for your table, and I just love knowing it worked for you, too.
Once you’ve pulled that beautiful golden loaf out of the oven, I would be thrilled if you popped back here and left a rating for the recipe. Did you find it easy? Did your family devour it? Tell me everything!
And if you snapped a picture of your perfectly risen loaf—maybe one cooling on the rack or stacked high for sandwiches—please share it! Tag me on social media if you can! It truly makes my day to see your successes and know that my passion for home baking is translating into delicious moments in your kitchen. If you have any last-minute questions that popped up while baking, don’t hesitate to reach out through my Contact Page!
PrintSoft Honey Whole Wheat Sandwich Loaf

Bake a soft, wholesome whole wheat bread loaf sweetened with honey, perfect for everyday sandwiches and toast. This recipe guides you to a tender crumb and a satisfying crust.
- Prep Time: 20 min
- Cook Time: 35 min
- Total Time: 1 hour 55 min
- Yield: 1 loaf 1x
- Category: Baking
- Method: Kneading and Baking
- Cuisine: American
- Diet: Vegetarian
Ingredients
- 1 cup warm water (105-115°F)
- 2 1/4 teaspoons active dry yeast
- 1/4 cup honey
- 2 tablespoons unsalted butter, melted
- 1 1/2 teaspoons salt
- 3 cups whole wheat flour, plus more for dusting
- 1/2 cup all-purpose flour (for a softer crumb)
Instructions
- In a large bowl, combine the warm water and yeast. Let it sit for 5 minutes until foamy.
- Stir the honey, melted butter, and salt into the yeast mixture.
- Gradually add the whole wheat flour and all-purpose flour, mixing until a shaggy dough forms.
- Turn the dough out onto a lightly floured surface. Knead for 8 to 10 minutes until the dough is smooth and elastic.
- Lightly grease a large bowl. Place the dough in the bowl, turning to coat. Cover the bowl with plastic wrap or a clean towel.
- Let the dough rise in a warm place for 1 to 1.5 hours, or until doubled in size.
- Gently punch down the risen dough. Shape it into a uniform loaf and place it seam-side down in a greased 9×5 inch loaf pan.
- Cover the pan loosely and let the dough rise again for 30 to 45 minutes, or until it crests about 1 inch over the rim of the pan.
- Preheat your oven to 375°F (190°C) during the last 15 minutes of the second rise.
- Bake for 30 to 35 minutes, or until the top is golden brown and the internal temperature reaches 200°F (93°C).
- Remove the loaf from the pan immediately and let it cool completely on a wire rack before slicing for the best texture.
Notes
- For a 100 percent whole wheat bread, substitute the all-purpose flour with more whole wheat flour, but expect a slightly denser loaf.
- If you prefer a rustic whole wheat bread, you can bake this free-form on a baking stone instead of in a loaf pan.
- To achieve the softest texture, brush the top of the loaf with melted butter immediately after it comes out of the oven.
Nutrition
- Serving Size: 1 slice
- Calories: 130
- Sugar: 4
- Sodium: 180
- Fat: 3
- Saturated Fat: 1
- Unsaturated Fat: 2
- Trans Fat: 0
- Carbohydrates: 23
- Fiber: 3
- Protein: 5
- Cholesterol: 5