
The holidays are a whirlwind, aren’t they? Between wrapping gifts, tracking down the perfect wrapping paper, and trying to remember who you promised to bake for this year, it feels like there’s just no time for complicated kitchen projects! That’s why I developed this Ultra Easy 4-Ingredient peppermint bark. Trust me, this recipe is pure magic. It’s speedy, it’s no-bake, and it looks absolutely stunning when you stack it on a platter for gifting. If you’re feeling the squeeze of holiday time, you need this confidence booster in your arsenal. We’re making something extraordinary with almost zero effort—that’s the Cooking Zenith promise!
- Why This 4-Ingredient Peppermint Bark is Your New Holiday Favorite
- Gathering Ingredients for Perfect Peppermint Bark
- How to Make Ultra Easy Peppermint Bark: Step-by-Step Instructions
- Tips for Perfect Peppermint Bark Every Time
- Variations: Customizing Your Festive Holiday Chocolate Bark
- Storage and Gifting: Keeping Your Peppermint Bark Fresh
- Frequently Asked Questions About Making Peppermint Bark
- Understanding the Nutrition in Your Peppermint Bark
- Share Your Festive Holiday Treats
Why This 4-Ingredient Peppermint Bark is Your New Holiday Favorite
When the holiday rush hits, you don’t need fussy recipes that demand an afternoon in the kitchen. That’s why I adore this version. It’s designed specifically for the modern home cook who wants maximum festive impact with minimum stress. You get that amazing, layered look without ever turning on the oven!
Seriously, this is a lifesaver for those last-minute neighbor gifts or for filling up that spot on the cookie exchange platter. Here’s why I think you’re going to love relying on this recipe:
- It takes about 15 minutes of active prep time. That’s less time than it takes to wrap one awkward present!
- It is 100% no-bake. We are just melting and chilling here—no tricky oven temperatures or cooling racks required.
- It relies on just four core ingredients that you probably already have in your pantry or can grab in one quick stop.
- It breaks into beautiful, irregular pieces, making every single shard look artisan. If you loved how easy the chocolate crinkle cookies were, this is even simpler. It’s perfect for gifting right out of the container.
Gathering Ingredients for Perfect Peppermint Bark
Okay, let’s talk ingredients. Because this is a 4-ingredient recipe, we can’t afford to skimp or substitute! You need quality here, as the flavor really shines through. You’ll need 12 ounces of dark chocolate and 12 ounces of white chocolate. I usually use chips because they melt so smoothly, but chopped bars work too, just melt them slower!
The real flavor agents are easy to source. Grab 1 teaspoon of peppermint extract—this is potent, so measure carefully! And finally, you need 1 cup of crushed candy canes, plus a little extra for sprinkling on top. Remember, for great results, just like with my cream cheese dip, the quality of your base matters!
How to Make Ultra Easy Peppermint Bark: Step-by-Step Instructions
This is where the magic happens, and I promise, it’s so easy it feels like cheating! The key to truly flawless, professional-looking bark is managing your timing, especially when dealing with chocolate. If you want the best results, treat your chocolate kindly!
Preparing the Pan and Melting the Dark Chocolate Layer
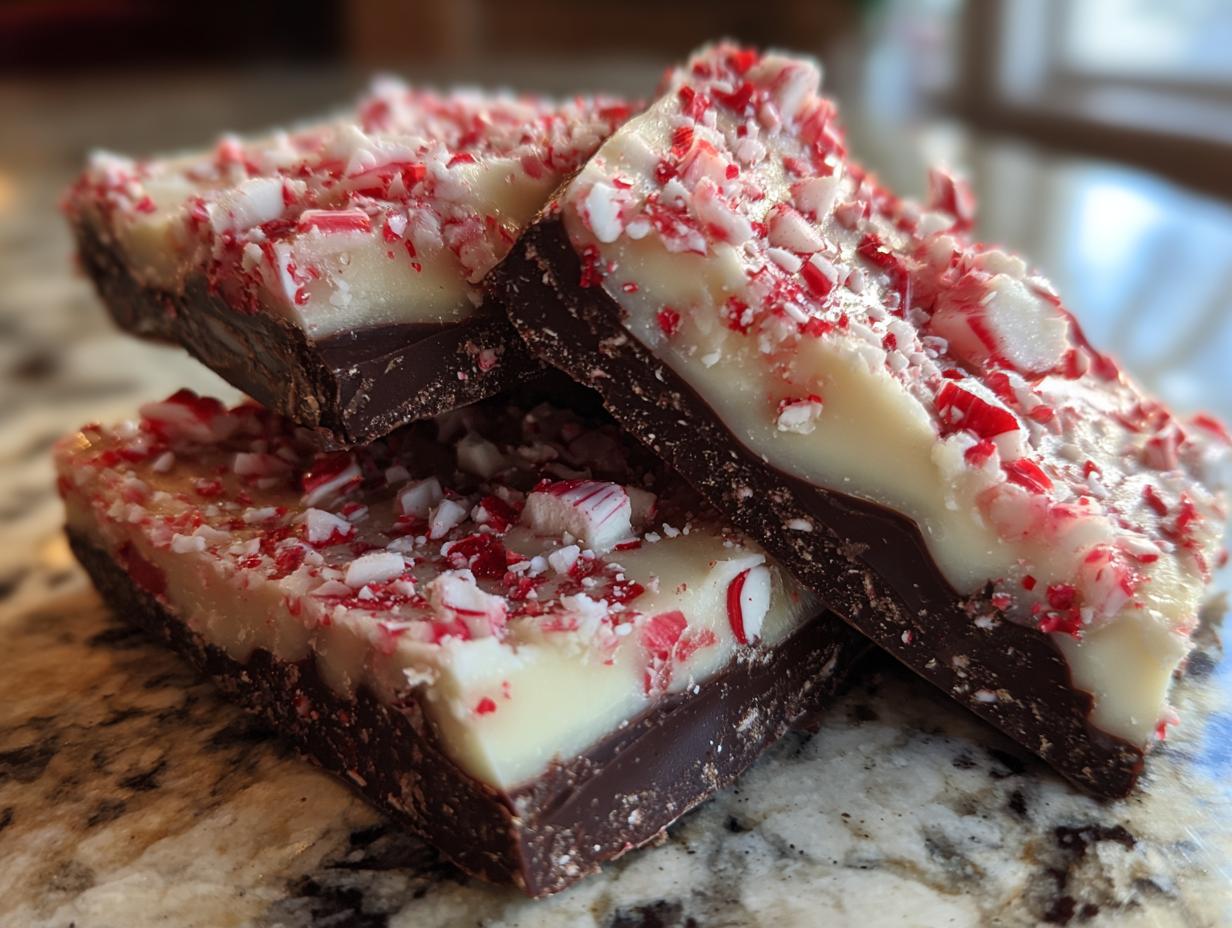
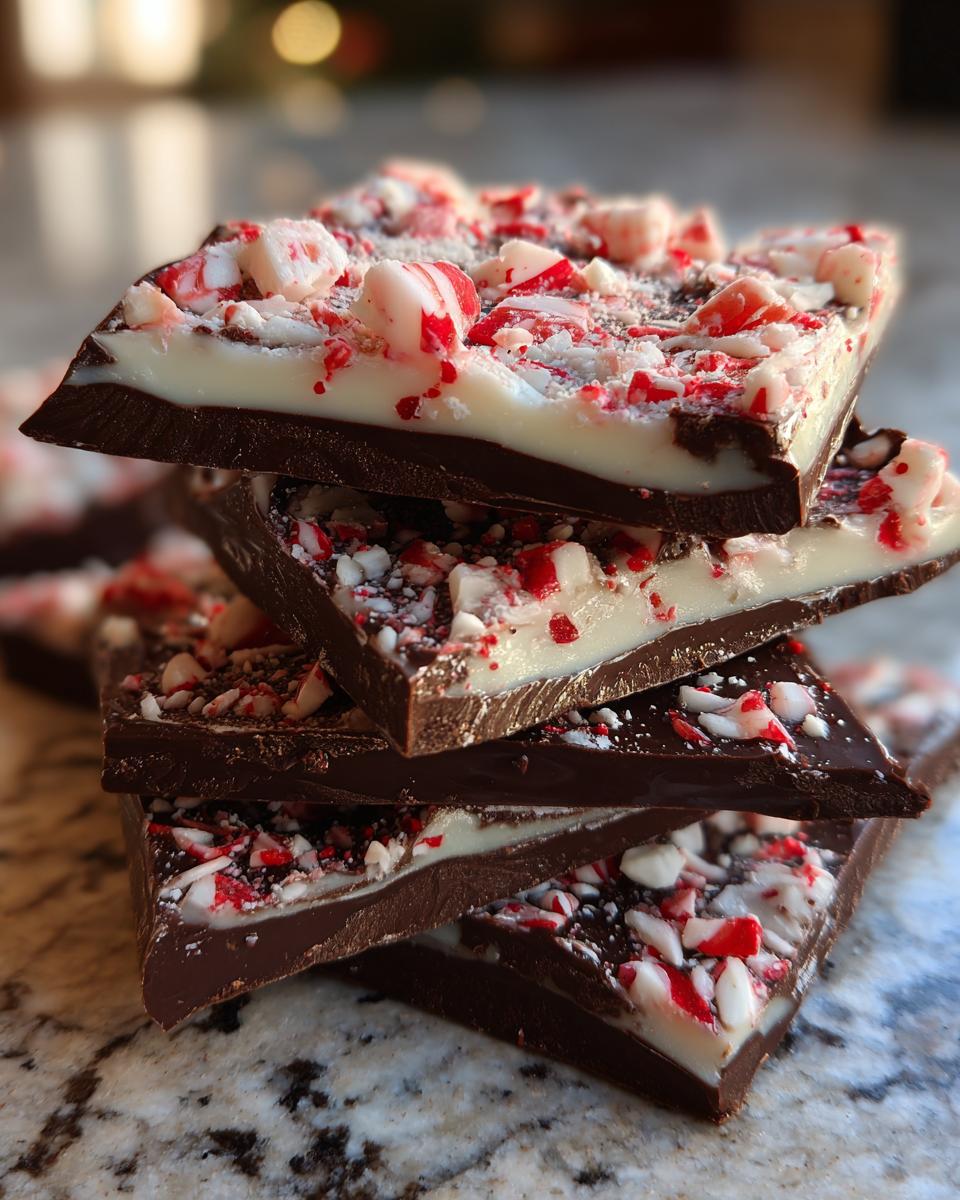
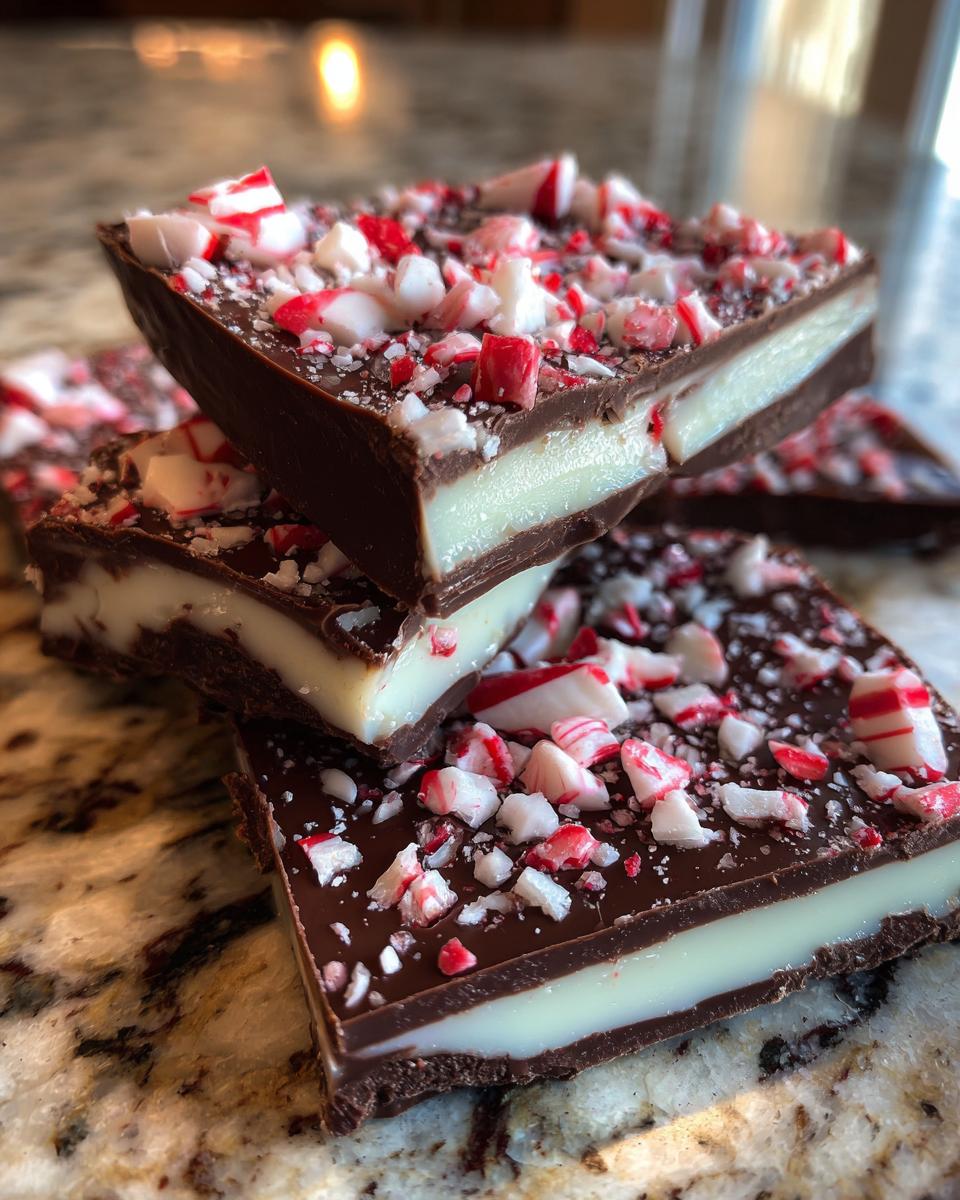
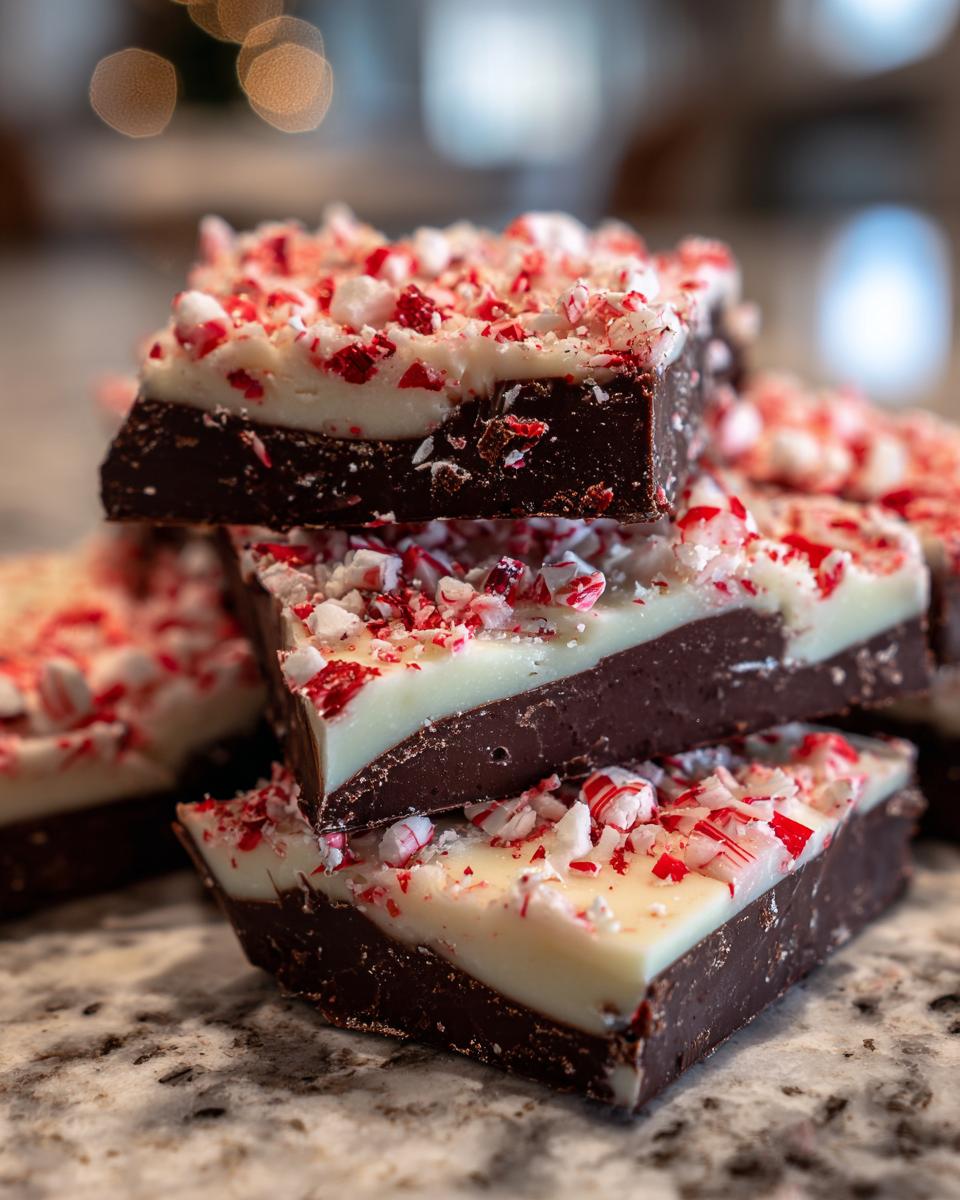
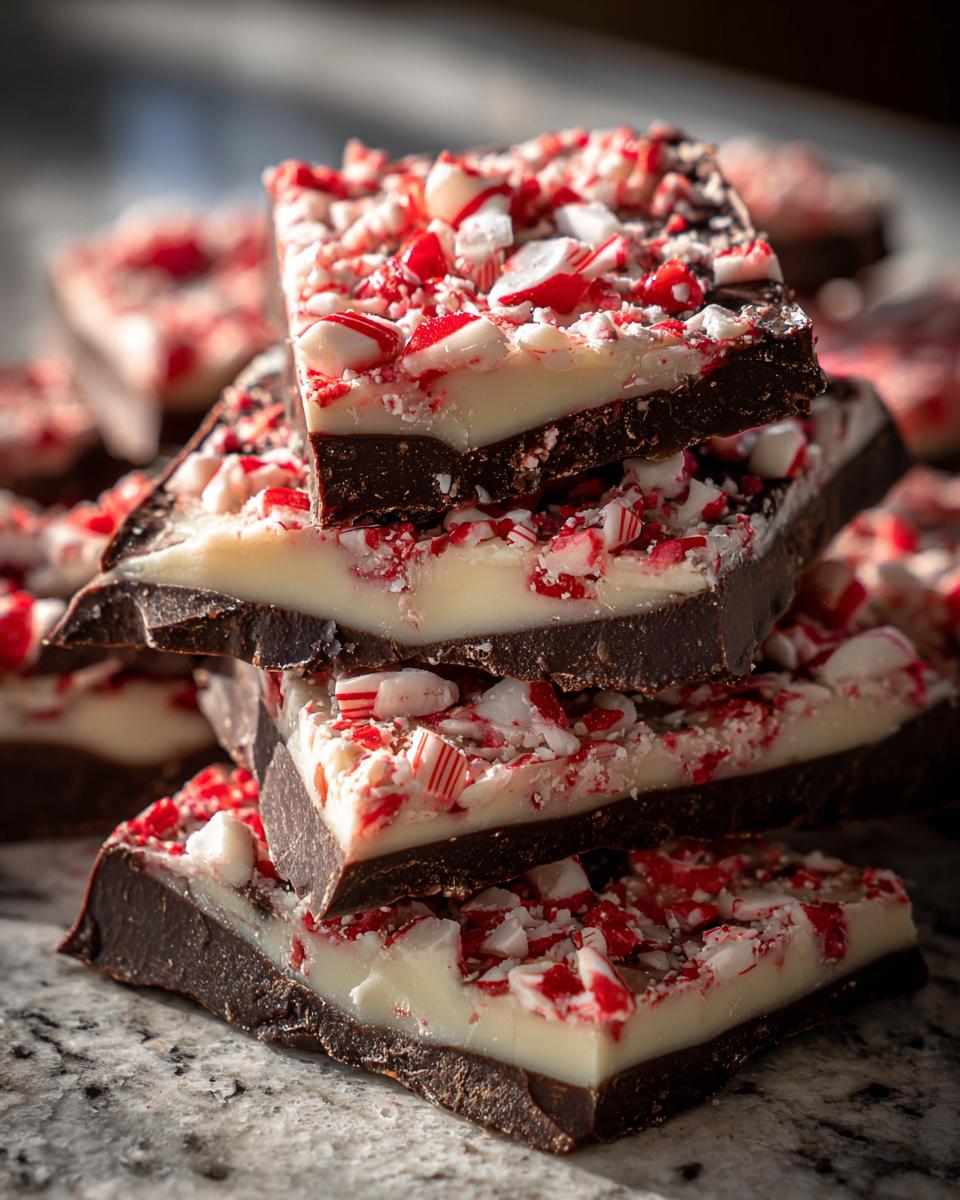
First things first: grab an 8×8 inch pan and line it with parchment paper. Make sure you have an overhang on the sides; trust me, this little bit of overhang is your handle for lifting the finished bark out later. Now for the dark chocolate. I melt mine in short bursts in the microwave. Use 30-second intervals, stirring really well after every single one. If you rush this step, you risk scorching it, and nobody wants grainy chocolate! Pour that smooth dark layer into your prepared pan and use an offset spatula to spread it out so it’s even across the bottom. Then, pop that pan into the freezer for just 10 minutes to let it grab hold and set up firm.
Creating the White Chocolate Peppermint Bark Topping
While that dark layer is chilling, melt your white chocolate using the same careful 30-second interval method. White chocolate is a little more delicate than dark, so watch it closely! Once it’s silky smooth, stir in that teaspoon of peppermint extract until it’s totally combined. This is the fun part: pour that white mixture right over your set dark layer and smooth it out quickly. You need to act fast here! Immediately sprinkle that cup of crushed candy canes all over the top. Gently press them down just a tiny bit so they stick when they chill. If you wait too long, they’ll just sit on top and fall off later!
Setting and Breaking Your Homemade Peppermint Bark
We’re almost done! We need this to solidify completely, so back into the freezer it goes for at least 30 minutes. Don’t try to rush it by cranking the temperature! Once it’s rock hard—like a frozen chocolate chip for your hand—use those parchment paper handles to lift the whole slab out of the pan. Now, you break it. I never cut the bark; I use my hands to snap it into irregular, rustic pieces. That’s what gives it that beautiful, homemade, artisan look, much like the cookie bars I make when I want something easy but impressive!
Tips for Perfect Peppermint Bark Every Time
Even though this is a super simple recipe, there are a few little secrets I use—my little kitchen hacks—that take it from good to ‘Wow, did you buy this?’ The recipe card called these ‘must-dos,’ and after trying it my way, you’ll see why! These little tweaks really nail that elevated, homemade feel.
First, let’s talk about the candy canes. If you want that perfect sprinkle, don’t use a food processor; it turns them into dust before you can stop! I just pop the whole canes into a heavy-duty zip-top bag and crush them using the bottom of a sturdy pan or a rolling pin. It gives you those lovely uneven chunks, which I prefer. Next, for those who want something a little more grown-up, try making a salted peppermint chocolate bark. Just sprinkle 1/2 teaspoon of flaky sea salt right over the wet white chocolate layer before it chills. The salt cuts the sweetness beautifully.
Also, if you’re channeling that fancy store-bought vibe—you know, the William Sonoma inspired look—make sure you use a high-quality dark chocolate for that base layer. The better the dark chocolate, the richer that foundation is going to be. If you enjoy that deeper flavor profile, you might also love how I use great chocolate in my saltine cracker toffee recipe!
Variations: Customizing Your Festive Holiday Chocolate Bark
While this 4-ingredient recipe is my go-to for speed, sometimes you just want to shake things up during the holidays, right? Don’t feel tied down to the dark chocolate base! If you prefer a sweeter profile that really lets that white chocolate and mint sing, go ahead and swap the dark chocolate for milk chocolate. It gives the final peppermint bark a softer, creamier overall look.
For those of you who like a surprising little twist, try mixing in a tiny hint of flavoring with your peppermint extract. I’ve done a quarter teaspoon of vanilla extract or even a splash of espresso powder dissolved into the white chocolate. Wow, that deepens the flavor profile beautifully! You can also switch up the toppings instead of relying only on candy canes. Chopped pecans or even a sprinkle of festive red and green sprinkles over the top makes for a great homemade look. If you love streusel toppings, you might want to try the fun additions I put on my coffee cake cookies, but applied here!
Storage and Gifting: Keeping Your Peppermint Bark Fresh
The best part about this peppermint bark is that it travels so well, making it the absolute perfect candidate for your cookie exchanges or as part of your next round of easy holiday gifting ideas. Since there’s no creamy filling, storage is super simple!
Keep your bark in an airtight container. I find that storing it at cool room temperature is perfect for up to a week—the chocolate stays crisp and the mint stays strong. If your house is warm, or if you’re making it weeks ahead, pop it into the fridge. If you refrigerate it, just remember to pull it out about 20 minutes before serving so the chocolate layers soften just slightly!
For gifting, I love layering the pieces between sheets of wax paper and tying the whole stack with a festive red ribbon. It looks professional, feels homemade, and shows everyone you care without any of the baking fuss!
Frequently Asked Questions About Making Peppermint Bark
I get so many questions once the holidays roll around about this recipe, and honestly, that just proves how much everybody loves a great, easy No Bake Christmas Candy! I’ve pulled together the most common things folks ask when they’re whipping up a batch of this bark, especially those trying to nail that Copycat Costco Peppermint Bark version.
Can I use different types of chocolate for this peppermint bark?
Absolutely! Feel free to play around. If you swap the dark chocolate for milk chocolate, your layers will be sweeter and softer visually—it’s a slightly milder look than the classic contrast. You can even use semi-sweet; just remember that if you want that intense, deep base layer that cuts the sweetness of the white topping, sticking to darker chocolate is the way to go. Keep the white chocolate layer for the top, though, because that’s what makes it look so festive!
Why is my peppermint extract making the white chocolate seize?
This is a common snag with chocolate, especially white chocolate. Extract is often water-based, and introducing just a teaspoon of water into melted chocolate can make it go from smooth to grainy and thick—that’s called seizing. My tip for you, based on my own kitchen trials, is to use the specified small amount of extract, or, if you find your chocolate is still being fussy, switch to peppermint oil next time. Oils are fat-soluble, so they won’t cause seizing, and they give you that vibrant mint punch without the texture drama. We want smooth sailing!
How long does this simple Christmas dessert last?
Because this is pure chocolate, it lasts really well! If you keep it sealed up in an airtight container at a cool room temperature, it should be fantastic for about a week. If your house runs warm, or if you need to make it way ahead of time, go ahead and chill it. It holds up beautifully in the fridge for up to three weeks. If you ever need help with longer storage solutions, you can check my advice on freezing things like my honey garlic chicken—storage is always crucial!
Understanding the Nutrition in Your Peppermint Bark
I know, I know, when we’re deep in the holiday baking zone, we aren’t really thinking about macros—we’re thinking about whether Aunt Carol will actually eat that cookie! But since so many of you ask about the breakdown of these festive treats, I pulled the estimated nutrition facts for you right here. Remember, this is just a fun guide, not a strict diet plan, and the actual numbers can shift based on the exact chocolate chips you use or how thick you spread your layers.
This data breaks down based on yielding about 16 generous pieces of bark, but use these numbers as a baseline. It’s always important to be transparent about what goes into our favorite recipes, even the super simple ones like this chicken thigh recipe I sometimes make on weeknights!
- Serving Size: 1 piece
- Calories: Around 180 calories
- Sugar: Approximately 18g (Those candy canes add up!)
- Fat: Roughly 12g total fat
- Saturated Fat: About 7g
- Carbohydrates: Around 19g
- Protein: A small contribution at about 2g
- Sodium: Low, around 25mg
See? Nothing too scary here! It’s rich because it’s chocolate, but it’s so satisfying that you really only need one piece to get that perfect minty fix. Enjoy it guilt-free as part of your holiday celebrations!
Share Your Festive Holiday Treats
That’s it! You just made the easiest, most impressive peppermint bark imaginable. Now that your kitchen smells like Christmas and your house is stocked with homemade goodies for gifting, I want to hear all about it! Honestly, seeing you all succeed with these simple recipes is the absolute best part of my job here at Cooking Zenith.
Did you try the salted caramel variation? Which chocolate did you use for your base layer? Don’t be shy; drop a comment below letting me know how this 4-ingredient wonder worked out for your holiday plans. If you snapped a picture of your brilliantly shattered bark pieces—maybe stacked up next to your taco pinwheels at your party—tag me on social media!
Please take a quick moment to give this recipe a rating (five stars if you think it saved your holiday gift stash!), and let’s keep sharing that joy of simple, confident cooking all season long. Happy baking, friends!
PrintUltra Easy 4-Ingredient Peppermint Bark (Copycat Costco Style)

Make this simple, no-bake peppermint bark using only four ingredients. This recipe creates festive layers of dark and white chocolate topped with crushed candy canes, perfect for holiday gifting or cookie exchanges.
- Prep Time: 15 min
- Cook Time: 5 min
- Total Time: 50 min
- Yield: About 16 servings 1x
- Category: Dessert
- Method: No Bake
- Cuisine: American
- Diet: Vegetarian
Ingredients
- 12 ounces dark chocolate, chopped or chips
- 12 ounces white chocolate, chopped or chips
- 1 teaspoon peppermint extract
- 1 cup crushed candy canes (plus extra for topping)
Instructions
- Line an 8×8 inch baking pan with parchment paper, leaving an overhang on the sides for easy removal.
- Melt the dark chocolate in a microwave-safe bowl in 30-second intervals, stirring well after each interval until smooth. Do not overheat.
- Pour the melted dark chocolate into the prepared pan. Spread it into an even layer using an offset spatula.
- Place the pan in the freezer for 10 minutes to allow the dark chocolate layer to set completely.
- While the dark layer sets, melt the white chocolate in a separate microwave-safe bowl using 30-second intervals, stirring until smooth.
- Stir the peppermint extract into the melted white chocolate until combined.
- Pour the white chocolate mixture over the set dark chocolate layer. Spread evenly.
- Immediately sprinkle the 1 cup of crushed candy canes over the wet white chocolate layer. Gently press them in slightly.
- Return the pan to the freezer for at least 30 minutes, or until the bark is completely firm.
- Once firm, lift the bark out of the pan using the parchment paper overhang. Break the bark into irregular pieces. Store in an airtight container at room temperature or in the refrigerator.
Notes
- For a salted peppermint chocolate bark variation, sprinkle 1/2 teaspoon of flaky sea salt over the white chocolate layer before chilling.
- If you prefer a William Sonoma inspired version, use high-quality bittersweet chocolate for the base layer.
- To crush candy canes easily, place them in a sturdy zip-top bag and use a rolling pin or the bottom of a heavy pan.
Nutrition
- Serving Size: 1 piece
- Calories: 180
- Sugar: 18g
- Sodium: 25mg
- Fat: 12g
- Saturated Fat: 7g
- Unsaturated Fat: 5g
- Trans Fat: 0g
- Carbohydrates: 19g
- Fiber: 1g
- Protein: 2g
- Cholesterol: 10mg