
There’s just something magical about a tiny dessert, isn’t there? They feel instantly celebratory, yet they give you perfect portion control—which let’s be honest, is always a bonus! When I started Cooking Zenith, it was because I wanted to take impressive desserts, like the classic New York cheesecake, and bring them down to a manageable, fun size. That’s how we land on these perfect mini cheesecakes. This guide isn’t just one recipe; it’s your complete ticket to success, covering everything from a rich, baked classic to a lightning-fast no-bake option you can whip up tonight. Trust me, making these little bites is guaranteed to make any gathering feel special!
- Why You Will Love Making These Mini Cheesecakes
- Essential Ingredients for Perfect Mini Cheesecakes
- The Best Mini Cheesecake Crust: Preparation and Tips
- Crafting the Creamy Filling for Your Mini Cheesecakes
- Step-by-Step Instructions for Baked Mini Cheesecakes Tutorial
- Making No Bake Mini Cheesecakes: Quick Individual Desserts
- Expert Tips for Perfect Mini Cheesecake Assembly Guide
- Frequently Asked Questions About Mini Cheesecakes
- Storage and Serving Your Individual Dessert Recipes
Why You Will Love Making These Mini Cheesecakes
I truly believe that making individual cheesecakes is the smartest way to serve dessert, especially when guests are involved. There’s no messy slicing, and everyone gets a perfectly formed bite of creamy goodness. It takes the stress right out of entertaining!
- Convenience is king! These use a standard muffin tin, which most of us already have on hand.
- Perfect portion control—they really are the ultimate individual dessert recipes for entertaining.
- They are incredibly versatile; you can switch up the crust or topping for every batch of mini cheesecakes.
- Whether baked or no-bake, they always look elegant coming out of the oven or fridge!
Essential Ingredients for Perfect Mini Cheesecakes
Okay, let’s get down to brass tacks. The beauty of excellent **mini cheesecakes** is that they use the exact same creamy, luxurious components as a full-sized one. The key here is quality and making sure everything is at the right temperature—especially that cream cheese!
For the crust, you’ll need 1 1/2 cups of graham cracker crumbs, 1/4 cup of granulated sugar just to sweeten it up, and 6 tablespoons of unsalted butter, melted until it’s perfectly liquid. Easy, right?
Now for the filling! We need 16 ounces of cream cheese—and this needs to be fully softened, please! Then grab 1/2 cup of granulated sugar, 1 teaspoon of vanilla extract, and 1/4 cup of sour cream or heavy cream for that professional smoothness. If you’re going the baked route, don’t forget 2 large eggs. Just seeing these amounts makes me excited for the texture we’re about to create!
The Best Mini Cheesecake Crust: Preparation and Tips
Everyone asks me what the secret is to a crust that doesn’t crumble when you pick up your **mini cheesecakes**. Honestly? It’s all about the press! We need to create a concrete base for that creamy filling, whether we are making small batch cheesecake dessert or a full one.
First thing’s first: mix your crumbs (I’m using graham crackers today, but feel free to use those crushed Oreos for a chocolate kick!) with the sugar and that lovely melted butter. You need to press this mixture firmly into the bottom of your lined muffin cups. Press down hard—use the back of a spoon or even the bottom of a shot glass! A firm press keeps everything together when they chill or bake.
Pre-Baking vs. Chilling the Crust for Mini Cheesecakes
This is where you decide your path! If you are making the baked treats, you’ll pop those crusts into a 350°F oven for about 8 minutes. This tiny pre-bake makes the crust sturdy; I promise it’s worth the extra five minutes. But, if you’re going the no-bake route, you just need to pop those crusts into the fridge to firm up while you whip up the filling. Skipping the pre-bake keeps things super fast for those quick individual desserts!
Crafting the Creamy Filling for Your Mini Cheesecakes
Now for the star of the show—that gorgeously creamy filling! This step is where we really build the texture, and it’s nearly identical whether you are aiming for baked or **no bake mini cheesecakes**.
First, take your softened cream cheese. It absolutely must be soft, or you’ll end up with lumps, and nobody wants a lumpy cheesecake, right? Beat that until it’s silky smooth on its own. Then, we gradually add that 1/2 cup of sugar, the vanilla, and your cream or sour cream. Mix this until everything is beautifully combined and looks homogeneous—no streaks allowed!
Here’s where the paths diverge slightly, and listen closely if you plan on baking these gems. For the baked version, you need to beat in the eggs one at a time. This is my most important tip for avoiding those frustrating cracks on top of your **mini cheesecakes**! Once the eggs go in, you must stop overmixing. Seriously, stop! Overbeating just whips too much air into the batter, and when that air escapes in the oven, CRACK! If you’re making those amazing chocolate mini cheesecakes, this is when you’d gently fold in your cocoa powder, just enough to swirl the colors if you’re feeling fancy.
Once everything is gently combined, you move right on to filling those prepared crusts, making sure you don’t go past three-quarters full.
Step-by-Step Instructions for Baked Mini Cheesecakes Tutorial
Alright, if you chose the baked route—which gives you that classic, dense New York-style texture—this is where the baking magic happens. We’ve got the crust pre-baked and the creamy, egg-infused filling ready to go into those muffin cups. Remember, filling them only about three-quarters full prevents them from spilling over as they rise slightly.
For these **baked mini cheesecakes tutorial** steps, you’ll want your oven set to 325°F (160°C). We are actually baking them a little cooler than the crust, which promotes a gentler set. Pop those tins in, and set your timer for 18 to 22 minutes. Now, this is important: don’t look for a completely solid center!
I learned this the hard way early on. My first few batches came out gritty because I baked them until they looked like rocks. The absolute key to that velvety, dreamy texture is the ‘wobble.’ When they are done, the edges should look totally set, but the very center needs to have a tiny, gelatinous wobble when you gently shake the pan. Don’t be scared of it; that wobble is pure creaminess waiting to happen!
Once you spot that wobble, pull them out immediately. Set the muffin tin on a wire rack. Allowing them to cool down slowly on the counter helps immensely in preventing sudden temperature drops that cause cracks. This slow cool down is crucial, and honestly, I just leave them there for an hour or two until they are just warm to the touch.
After that initial cool down, they absolutely need time to set up properly. We’re aiming for the best results possible, so pop them into the refrigerator. You’ll want them chilled for at least four hours, but I always tell people, if you can wait until the next day, you’ll be rewarded tenfold! This final chill firms up that tender center perfectly. You’ll see how easy it is to manage these desserts made in muffin tins once you master the wobble test.
Making No Bake Mini Cheesecakes: Quick Individual Desserts
Now, if you’re anything like me during a sudden craving fit, waiting for the oven to preheat just isn’t an option! That’s when we turn to the blissfully easy route of **no bake mini cheesecakes**. These are the fastest way to get a satisfying, creamy treat on the table, making them the ultimate choice for quick individual desserts when company arrives unexpectedly!
The preparation is almost identical up until the baking step. You create your crust exactly as we discussed, but instead of that 8-minute pre-bake, you just pop those tins straight into the freezer or fridge to firm up while you mix the filling. Remember, since there are no eggs, you don’t need to worry about baking at all!
Once your crusts are chilled solid, fill them with the cream cheese mixture—the same one we made without the eggs, of course. Then, cover them gently and transfer them straight to the refrigerator. Because we aren’t baking them, they need a longer chilling time to set up properly, usually 4 to 6 hours minimum, but overnight is always better. Seriously, these are so simple, it feels like cheating!
Expert Tips for Perfect Mini Cheesecake Assembly Guide
We’ve mixed, we’ve baked (or chilled!), and now we are at the grand finale of our **mini cheesecake assembly guide**. This stage is deceptively simple, but if you rush it, you might compromise the structural integrity we worked so hard to build. The cooling and chilling phases are non-negotiable for the best texture, whether you made the baked version or the **no bake mini cheesecakes**.
Once your baked treats have done their slow cool-down on the counter, get them into the fridge. I cannot stress this enough: minimum four hours of chilling. If you try to serve them too soon, they will be goopy and soft, and you’ll wonder what went wrong! Overnight is truly the gold standard for achieving that perfect, dense mouthfeel that mimics a high-end bakery experience. This final chill is what makes this cupcake sized cheesecake recipe truly amazing.
For removal, the liners you used earlier are your best friends! Gently peel the paper away from the sides. If you used mini springform pans, be super careful unlatching the sides. A pro tip for that flawless, smooth top surface, especially on the baked ones? After they’ve cooled on the rack, but *before* they go into the fridge, running a thin offset spatula gently around the edges can help if you notice any slight sticking that might tear the surface when removed.
Creative Mini Cheesecake Toppings Ideas
So, you’re planning **mini cheesecakes for parties**, and you want to wow your guests? Skip the basic drizzle! The beauty of making these small treats is that you can create a topping station and let everyone customize their own dessert. It’s fun, interactive, and looks incredible scattered across a platter.
For a tangy punch, simply whip up a quick lemon curd or even just grate fresh orange zest right over the top just before serving. If you want pure decadence, a thick chocolate ganache works wonders. I love making a quick salted caramel sauce, letting it cool until it’s thick, and then spooning a small dollop right in the center.
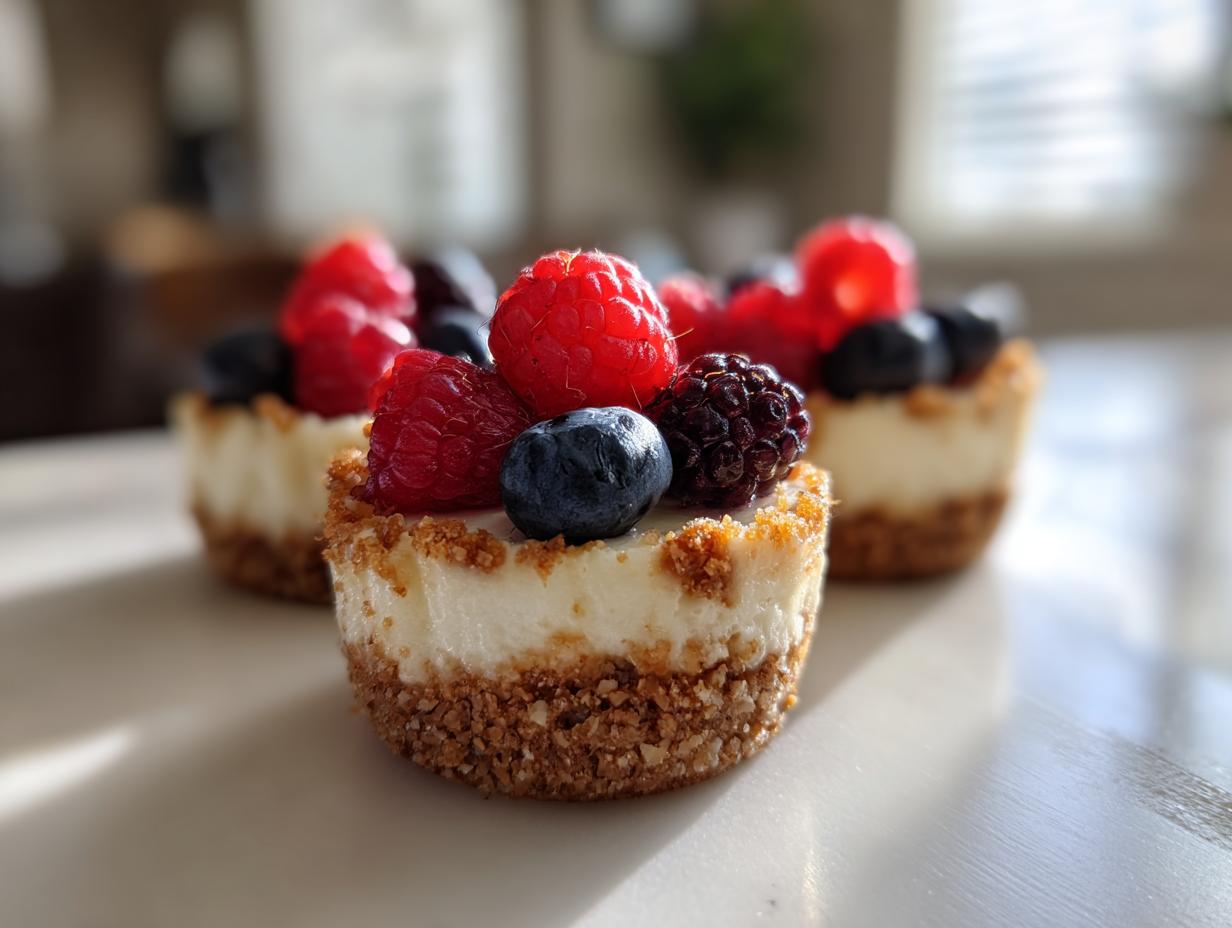
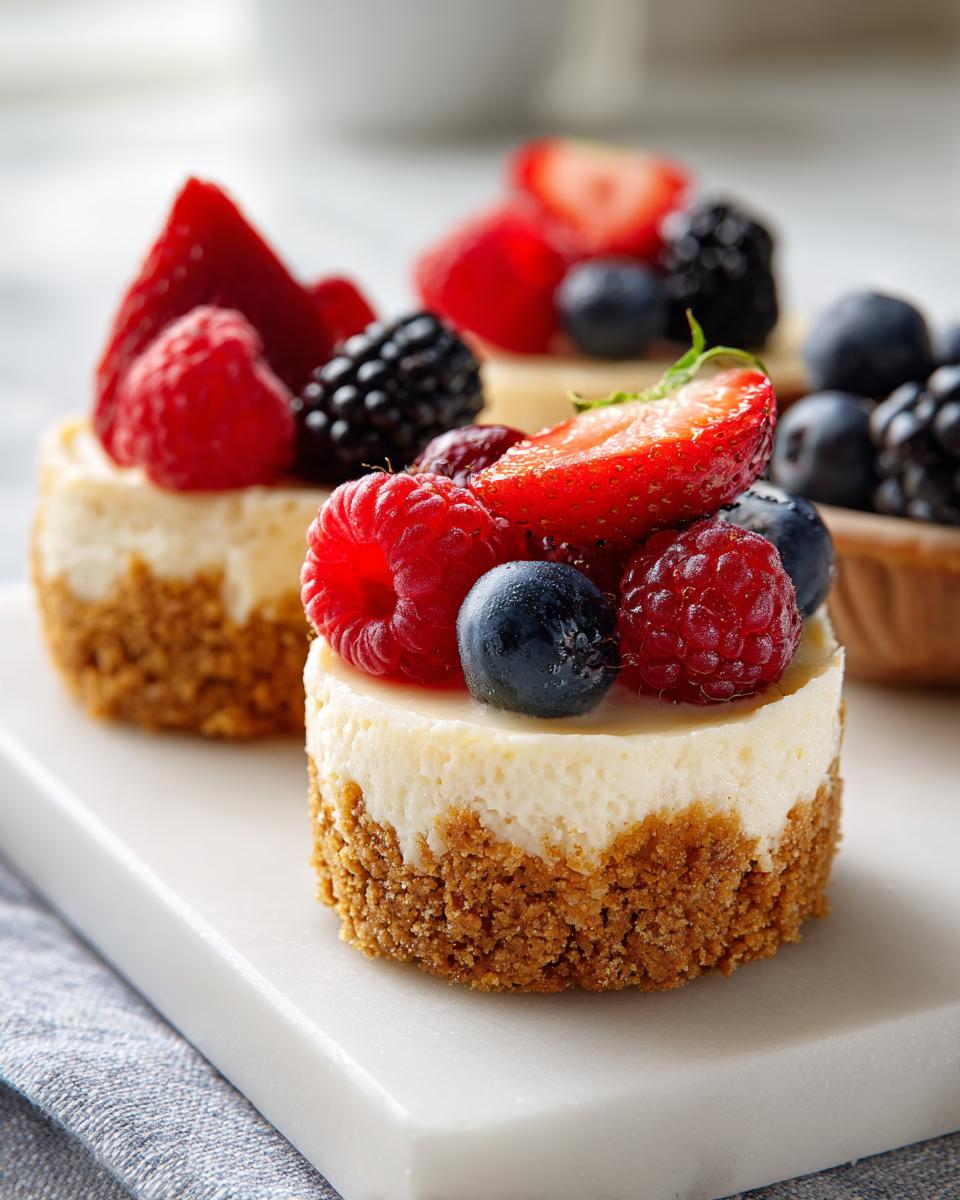
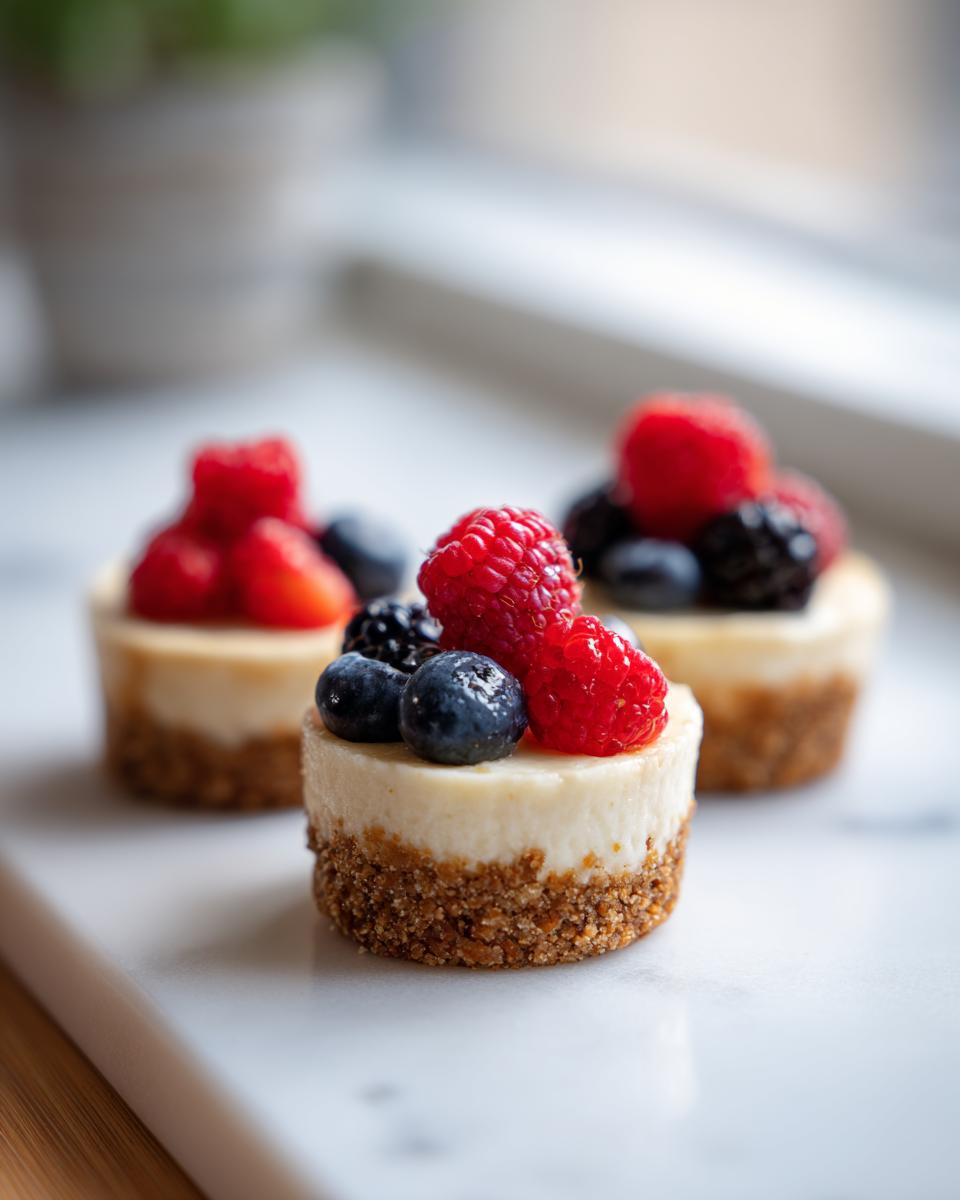
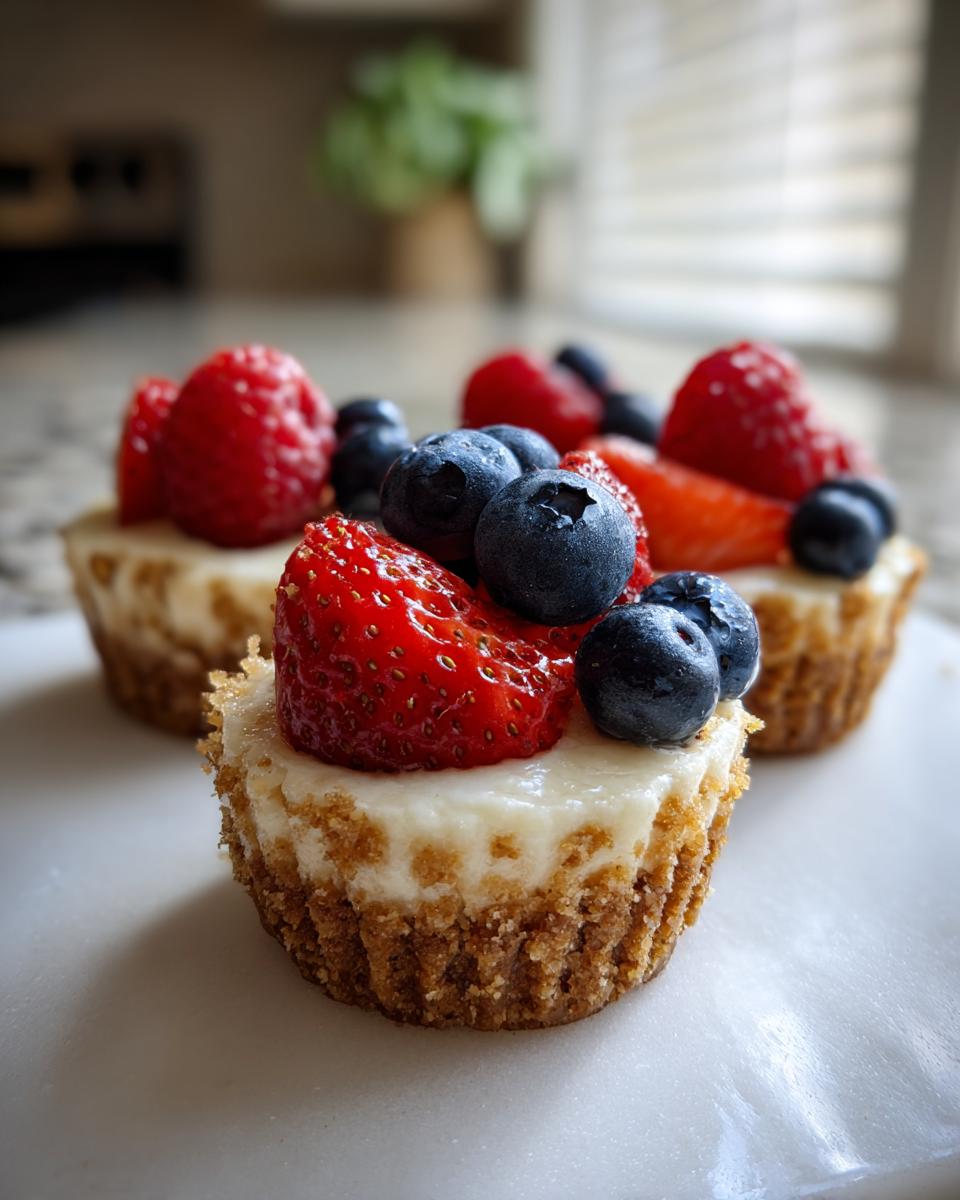
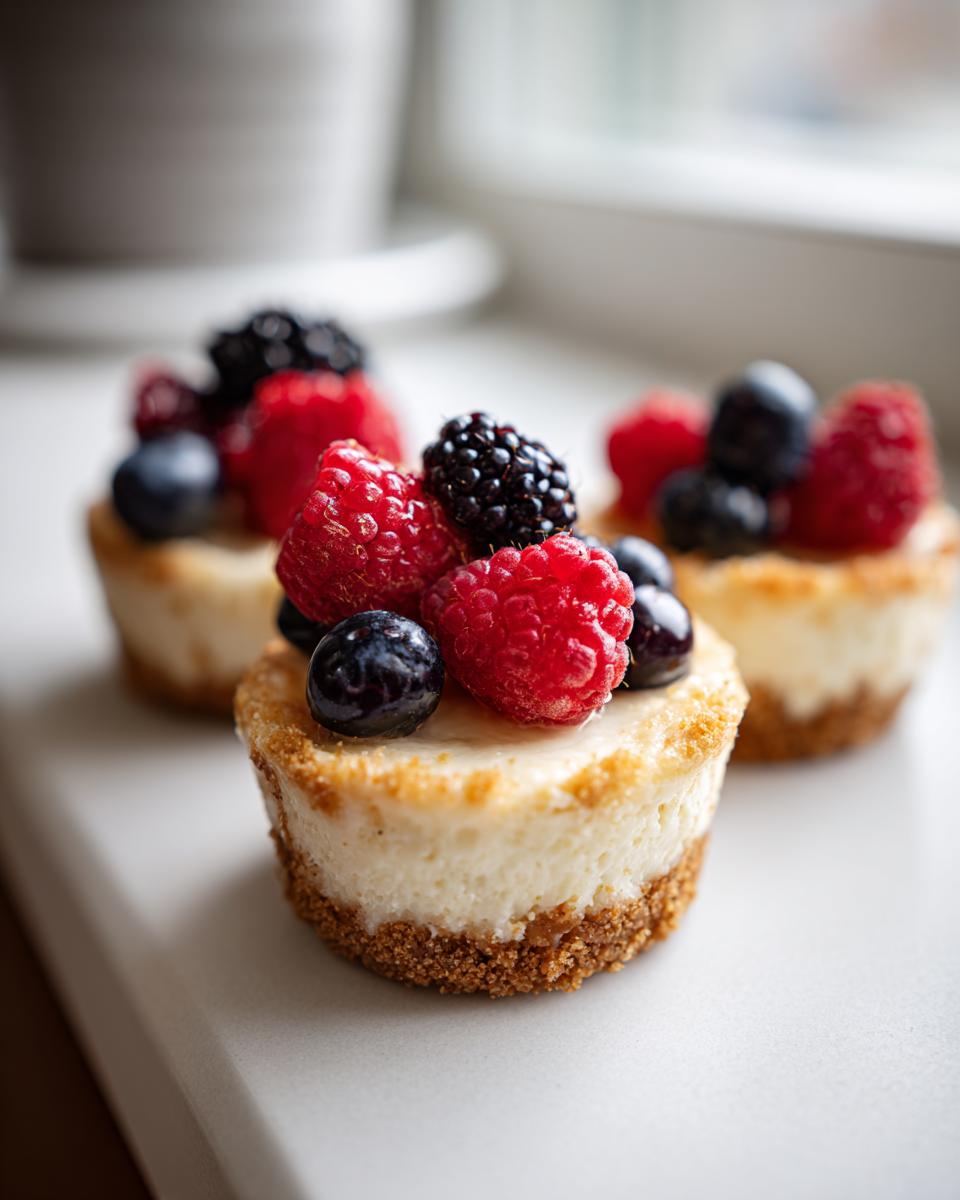
If you’re going for the fruit route, don’t just throw on a slice of strawberry. Try making simple fruit purees! Mix raspberries or blueberries with just a teaspoon of sugar and a tiny squeeze of lemon juice, heat for two minutes until slightly broken down, and cool. A spoonful of that vibrant puree makes your **individual cheesecakes** look like they came from a pastry shop!
Frequently Asked Questions About Mini Cheesecakes
I know when I first tried making these, I had a million little questions buzzing around my head. It’s those tiny details that separate a good cheesecake from a *great* one! So, let’s tackle the biggest concerns I hear about my **mini cheesecakes**!
Can I skip the water bath for baked mini cheesecakes?
Oh, the eternal water bath debate! In a full-sized cheesecake, I’d say absolutely not—a water bath (bain-marie) is crucial for slow, even cooking that keeps the surface smooth. But here’s the good news for those making **baked mini cheesecakes**: because they are so small and cook so quickly, the risk of cracking due to dryness is much lower! I’ve tested this extensively for my quick individual desserts guide. If you are baking them at the lower temperature of 325°F (160°C) and stop when you see that little wobble, you can usually skip the messy water bath setup. Just make sure your liners are secure!
How long do individual cheesecakes last in the fridge?
This is the best part about having **individual cheesecakes**! Because they are single servings, they are easier to store and keep fresh. If you keep them well covered—and I mean *really* well covered, maybe even placing them in an airtight container so the liner doesn’t stick to the topping—they will stay delicious for about 4 to 5 days in the refrigerator. They honestly taste best on day two, after that full chill sets in!
Can I use different types of cream cheese for these recipes?
You definitely can experiment, but for the absolute *best* texture, stick to full-fat, brick-style cream cheese. That high-fat content is what gives you that incredibly rich mouthfeel we are aiming for in a classic cheesecake. Low-fat versions often have too much water and can result in a softer, almost curd-like filling, which isn’t our goal here. If you are making the **no bake mini cheesecakes**, using the full-fat version is even more critical for firmness!
Why is my no-bake filling still soft after chilling?
If your **no bake mini cheesecakes** are refusing to firm up, chances are we missed a crucial step related to temperature or ingredients. First, was your cream cheese completely softened before you started mixing? If it was cool, it won’t incorporate the sugar properly. Second, did you use sour cream or heavy cream? Heavy cream, when whipped slightly before adding, can help stabilize the filling a bit more than sour cream. If you chilled them for less than 4 hours, just give them more time! They need a solid chill cycle to fully set without the heat of the oven doing the work for them.
Storage and Serving Your Individual Dessert Recipes
Phew! We made it! Now you have a cooling rack full of gorgeous, individual desserts ready for their final chill. Storing these **mini cheesecakes** properly is easy, but there’s one thing you need to keep in mind, especially if you’ve gone wild with toppings.
For any leftovers—and I mean *if* you have leftovers because these barely last an hour at my house—you need an airtight container. Place them inside gently, making sure the sides don’t touch too much. They are perfectly happy in the refrigerator for up to five days. I’ve never tried to reheat a cheesecake; honestly, the texture is best cold, so skip the microwave entirely!
When it comes to presentation for serving at your next event, remember that small things matter in big ways. If you’re using plain liners, peel them off right before serving so the rich crust shows. For real impact regarding your easy mini cheesecake bites, line a tiered serving platter or a wooden board with parchment paper, scatter some fresh mint leaves around the base of the platter, and arrange those beautiful **mini cheesecakes** on top. A little greenery makes everything look instantly professional when presenting your **individual dessert recipes**!
PrintPerfect Mini Cheesecakes: A Beginner’s Guide to Baked and No-Bake Bites

Learn how to make perfect individual cheesecakes using simple methods. This guide covers classic baked versions and easy no-bake options, ideal for parties or quick individual desserts.
- Prep Time: 20 min
- Cook Time: 22 min
- Total Time: 42 min
- Yield: 12 servings 1x
- Category: Dessert
- Method: Baking/No-Bake
- Cuisine: American
- Diet: Vegetarian
Ingredients
- 1 1/2 cups graham cracker crumbs
- 1/4 cup granulated sugar (for crust)
- 6 tablespoons unsalted butter, melted
- 16 ounces cream cheese, softened
- 1/2 cup granulated sugar (for filling)
- 2 large eggs (for baked version only)
- 1 teaspoon vanilla extract
- 1/4 cup sour cream or heavy cream
- Optional Toppings: Fresh berries, chocolate ganache, lemon zest
Instructions
- Prepare the crust: Combine graham cracker crumbs, 1/4 cup sugar, and melted butter. Press firmly into the bottoms of 12 lined standard muffin cups or mini springform pans.
- For No-Bake Version: Chill the crusts for 15 minutes while preparing the filling.
- For Baked Version: Bake the crusts at 350°F (175°C) for 8 minutes. Let cool slightly.
- Prepare the filling: Beat the softened cream cheese until smooth. Add 1/2 cup sugar, vanilla, and sour cream; mix until just combined.
- For Baked Version: Beat in eggs one at a time until blended. Do not overmix.
- Fill the cups: Spoon or pipe the filling evenly over the chilled or pre-baked crusts, filling each cup about three-quarters full.
- Bake (if making baked version): Bake at 325°F (160°C) for 18-22 minutes, or until the edges are set but the centers still have a slight wobble.
- Cool and Chill: Let the cheesecakes cool completely on a wire rack. For best results, refrigerate for at least 4 hours, or preferably overnight, before serving.
- Serve: Carefully remove the mini cheesecakes from the tins. Top with your choice of toppings before serving your individual dessert recipes entertaining.
Notes
- For an Oreo crust, substitute 1 1/2 cups of finely crushed Oreo cookies for the graham crackers.
- To prevent cracking in baked mini cheesecakes, avoid overbeating the batter once the eggs are added.
- For easy removal, use liners in your muffin tin or lightly spray the pans with non-stick spray before pressing in the crust.
- If you want chocolate mini cheesecakes, mix 2 tablespoons of cocoa powder into the cream cheese mixture before adding the eggs.
Nutrition
- Serving Size: 1 mini cheesecake
- Calories: 250
- Sugar: 18
- Sodium: 150
- Fat: 18
- Saturated Fat: 11
- Unsaturated Fat: 7
- Trans Fat: 0
- Carbohydrates: 19
- Fiber: 1
- Protein: 4
- Cholesterol: 55