
Isn’t there just something soul-satisfying about reaching for a dessert that instantly brings you back to childhood? For me, that means something rich, chewy, and utterly comforting—and nothing beats the legendary magic cookie bars. Wow, these bars are pure alchemy at work! They are ridiculously easy to assemble, requiring zero fancy mixing bowls or complicated steps, yet they taste like they took all day. Here at Cooking Zenith, Aria Thompson is committed to giving you foolproof recipes, and this one is the benchmark. Forget the dry, crumbly disappointments you might have tried before—this is the ultimate classic, reliable version of magic cookie bars where gooey reigns supreme.
- Why This is The Ultimate Classic magic cookie bars Recipe
- Gathering Ingredients for Your magic cookie bars
- Step-by-Step Instructions to Make easy magic cookie bars recipe
- Tips for Success with Your magic cookie bars
- Storage and Make Ahead magic cookie bars
- Variations on the Classic magic cookie bars
- Frequently Asked Questions About magic cookie bars
- Estimated Nutrition for magic cookie bars
- Share Your magic cookie bars Creations
Why This is The Ultimate Classic magic cookie bars Recipe
I truly believe this is the best easy magic cookie bars recipe you’ll ever try. What makes it superior is the technique: perfect layering and that glorious can of milk binding everything together! We aren’t messing around with drying everything out here; we target that incredible, gooey texture that makes this a true classic dessert bars favorite. This method bypasses the dreaded ‘too dry’ or ‘too sticky’ pitfalls I’ve seen plague other attempts at this simple layered dessert.
Other Names for magic cookie bars: Seven Layer Bars and Hello Dollies
You might know these beauties by a different name, and that’s perfectly normal! Depending on where you grew up, you might see them called “seven layer bars,” which just describes the architecture of the treat perfectly. Others knew them growing up as “Hello Dollies.” Honestly, whatever you call them, the result—a chewy, chocolatey, nutty dream—is always worth it. You can check out another great take on them at this resource when you’re done here!
Gathering Ingredients for Your magic cookie bars
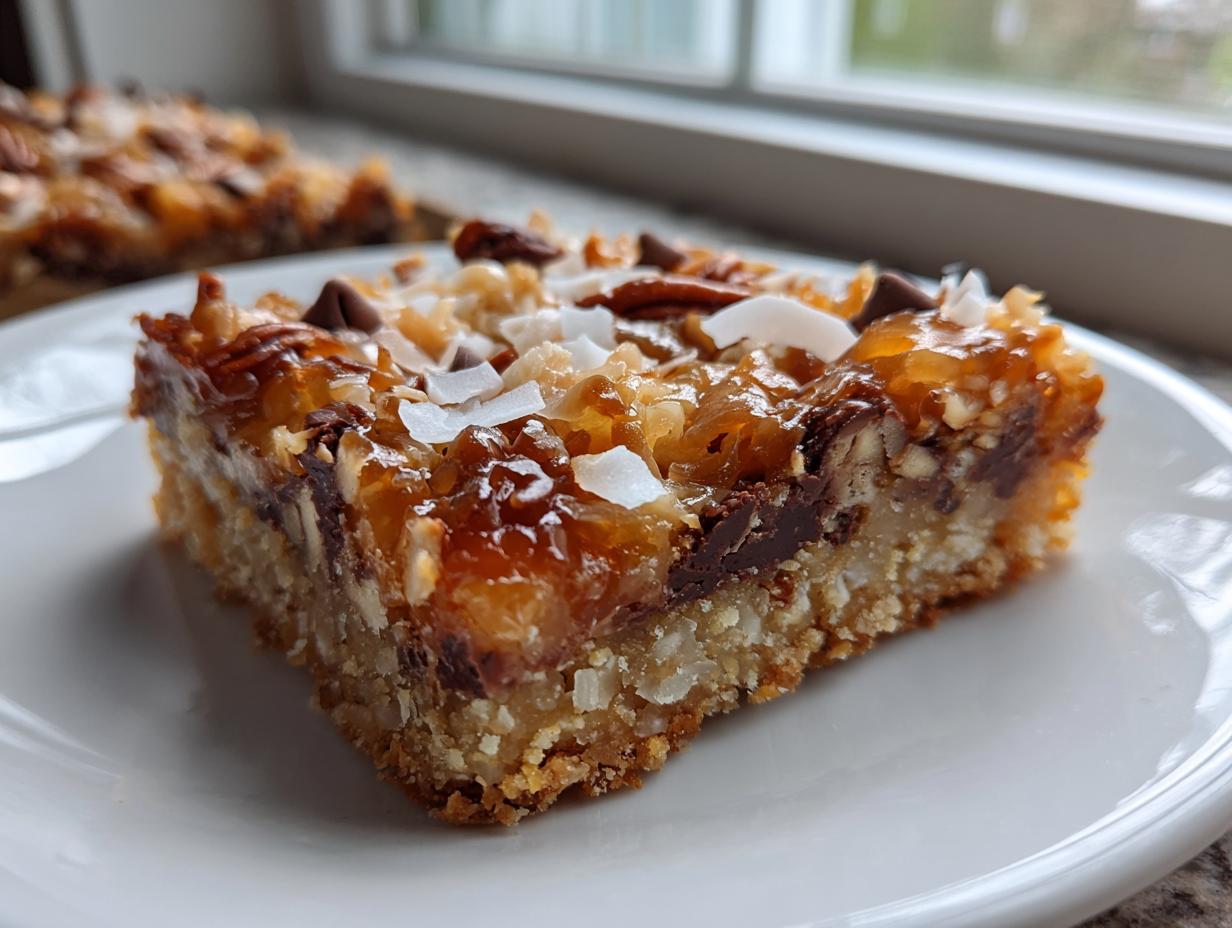
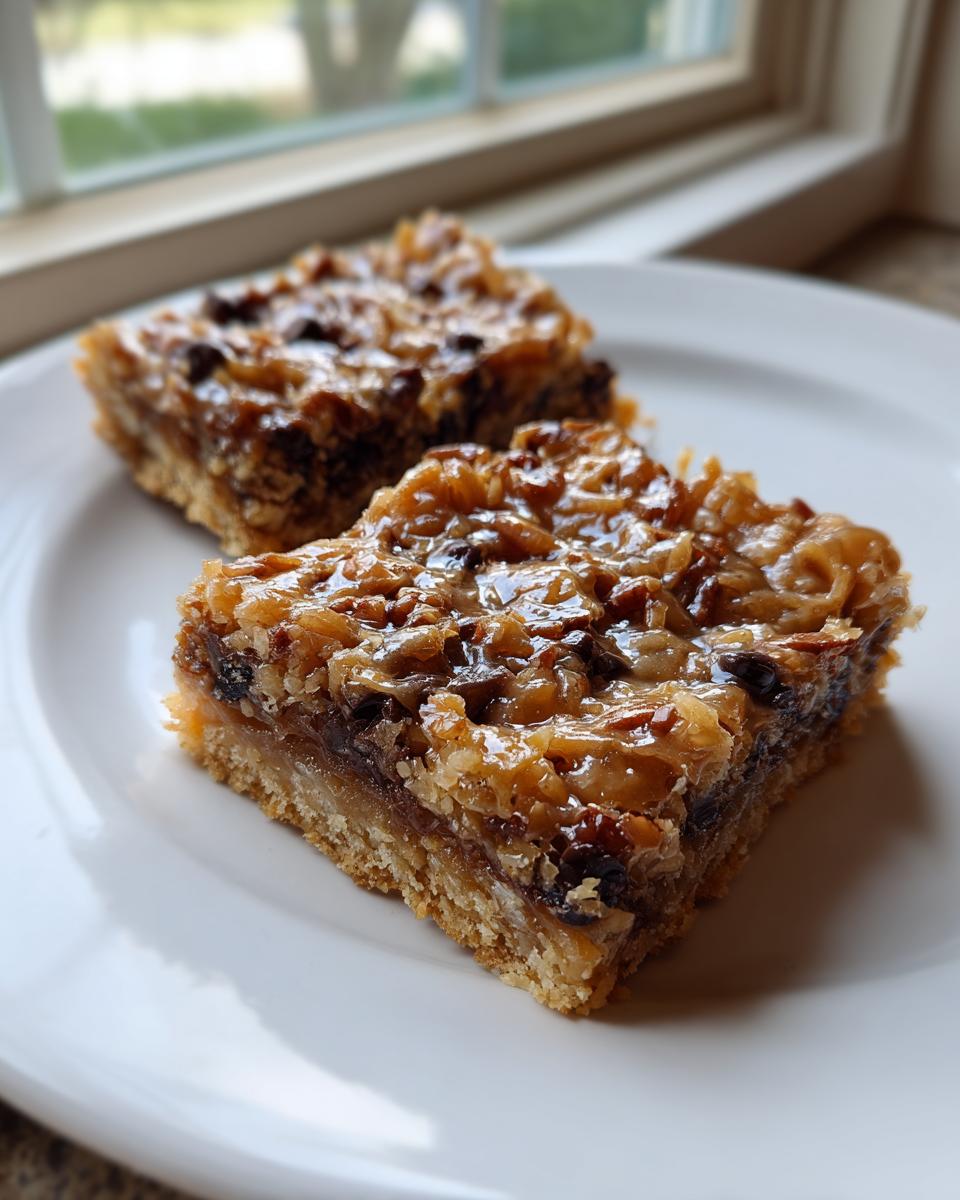
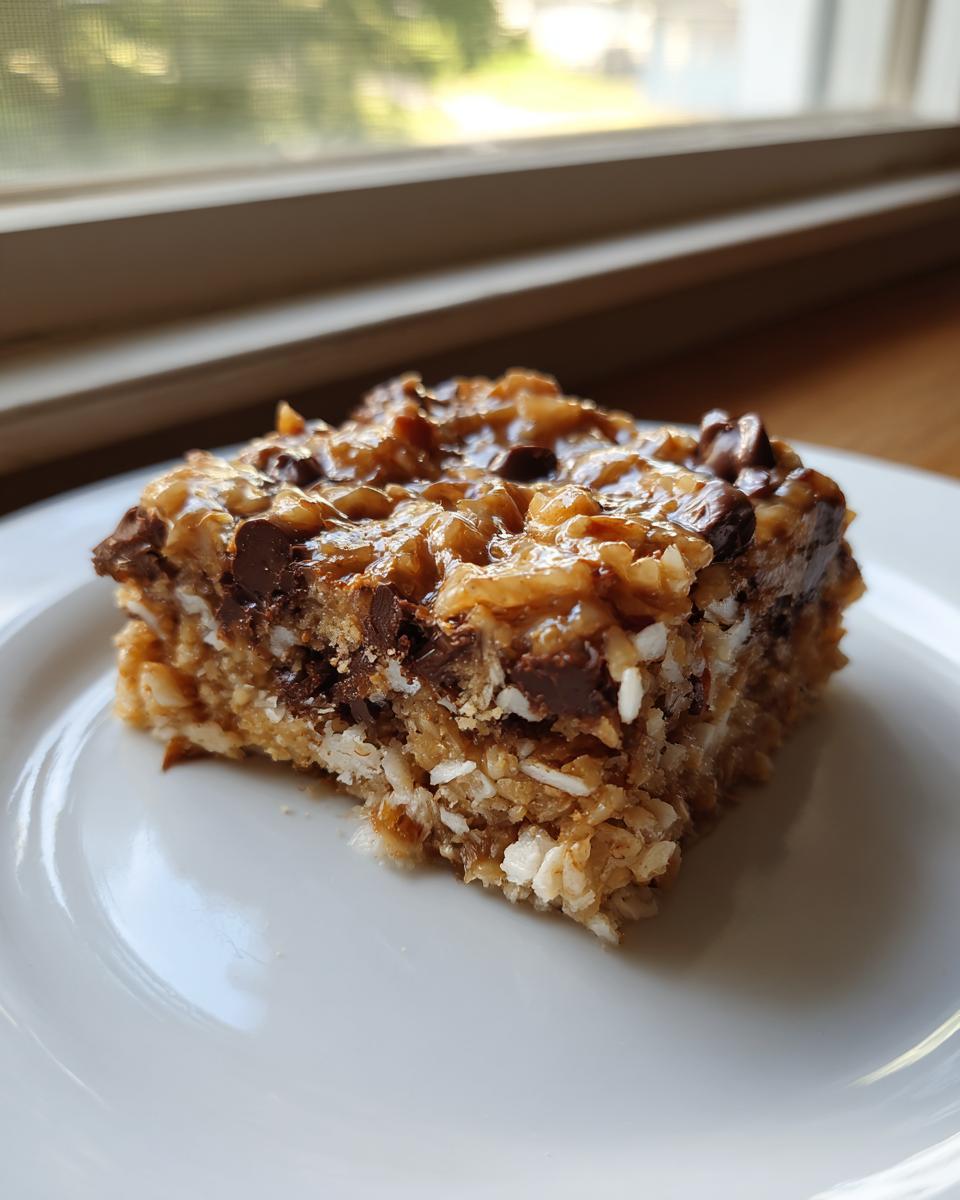
This recipe works because the ingredients are simple, but you have to treat them right! We are building layers here, and each one adds to that incredible texture. First, you absolutely must have your graham cracker crumbs sorted out—mixed perfectly with that melted butter for your base. Then come the superstars: chocolate chips, sweetened coconut flakes, and those crunchy chopped pecans. Don’t forget the real MVP of this entire operation: the sweetened condensed milk. That liquid gold is what holds these bars together when they bake; it’s non-negotiable for that gooey factor!
Ingredient Notes and Substitutions for magic cookie bars
If you’re aiming for the best coconut pecan bars, make sure your coconut is the sweetened flake variety—it melts better! I know some people skip the optional butterscotch chips, and that’s fine, but they do add a lovely caramel note. If pecans aren’t your favorite, walnuts are a delicious texture swap, or even slivered almonds work in a pinch. Now, here’s a little secret: for a deeper, almost toffee-like flavor in the crust, try swapping half the melted butter for melted butter mixed with a couple of spoonfuls of packed brown sugar. Trust me, it makes the base sing!
Step-by-Step Instructions to Make easy magic cookie bars recipe
The beauty of this recipe is how easily the steps flow together. It’s practically assembly, not difficult baking! First things first—get that oven hot! We need it at 350 degrees F (175 degrees C). And listen, I always line my 9×13 pan with parchment paper beforehand, making sure I leave an overhang on the sides. This little trick is worth its weight in gold later when you need to lift these out!
Next, tackle the crust. Just mix your graham cracker crumbs with the melted butter until everything looks like wet sand. Then press it down—and I mean really press it! Use the bottom of a measuring cup to get that crust nice and firm in the pan. This strong foundation is what keeps your **quick bar cookies** from turning into a pile of rubble later!
Now for the fun part: layering! You need to go in order; don’t just dump it all in there. Sprinkle the chocolate chips first, then the flaked coconut, followed by your chopped nuts. If you’re throwing in those optional butterscotch chips, this is where they go too. Don’t stir anything! We want distinct layers here.
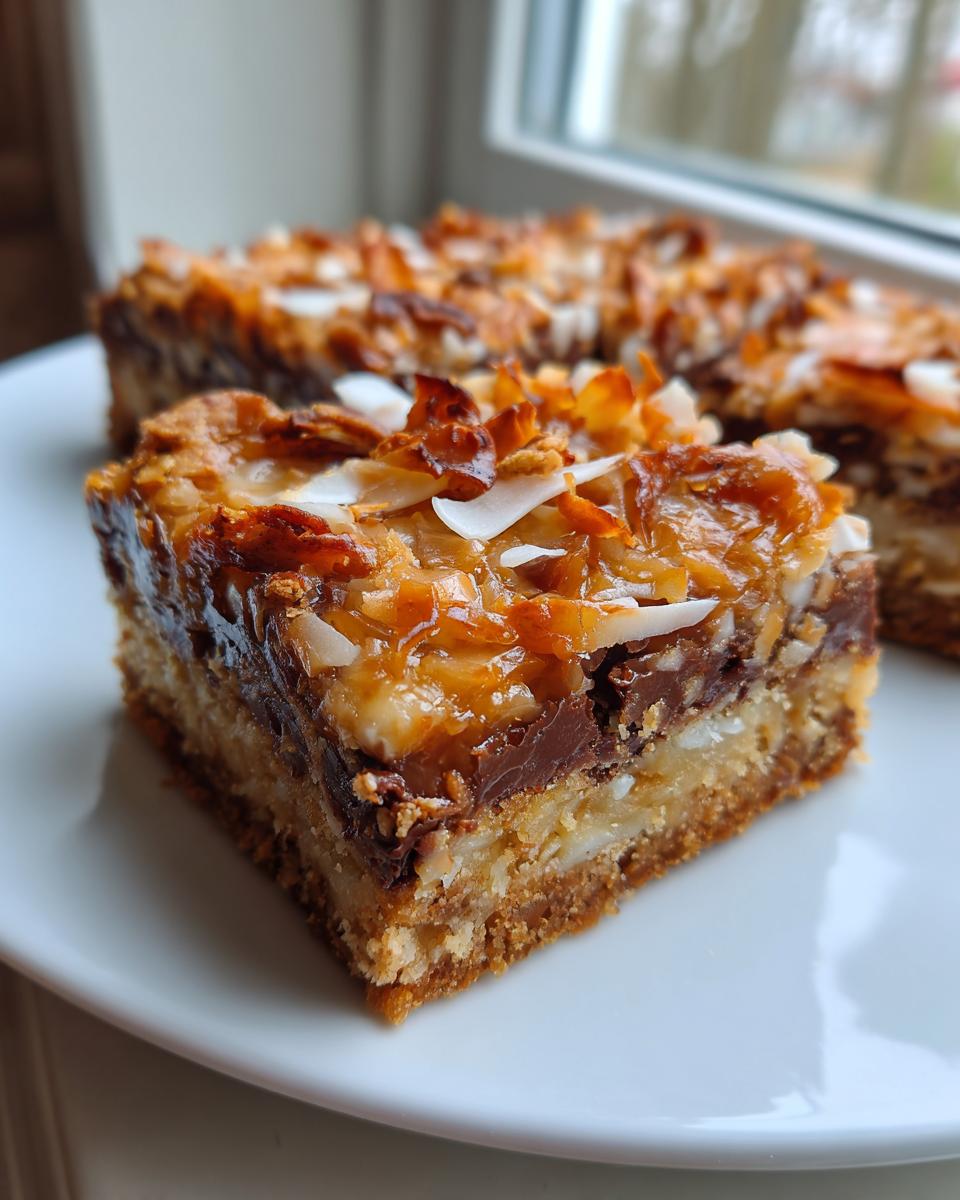
Finally, take that entire can of sweetened condensed milk and slowly pour it evenly over the top of all your dry ingredients. This is the moment of truth! Do not stir the layers together, please. That milk needs to drizzle and settle all by itself, enveloping every other ingredient to create that signature gooey consistency. You’re almost done!
Achieving the Gooey Texture in magic cookie bars
Bake your creation for about 25 to 30 minutes. You’re looking for the edges to get kissed with golden brown color and you should see that milk bubbling happily everywhere—it looks mesmerizing! But here is my biggest piece of advice for getting the legendary chewiness and making sure these *magic cookie bars* never fall apart: cooling is crucial. Don’t rush it! You have to let these cool completely on the rack. If you try to cut them warm, they’ll collapse because the milk hasn’t fully set up yet. Seriously, if you want those impossibly neat squares, slide them into the fridge for at least two hours after they’ve cooled on the counter. That chilling step solidifies that gooey center just enough for perfect slicing every single time. You can find some great related baking tips over at this site!
Tips for Success with Your magic cookie bars
I know these are called *quick bar cookies*, and truly, the assembly is lightning fast, but the success of this **classic dessert bars** recipe rests entirely on patience during the cooling phase. If you walk away from the oven thinking you’re done, you are only halfway there! Cutting these too soon is the number one mistake everyone makes. Trust me, I’ve been there. One Christmas, I was so excited to share these with neighbors that I tried slicing them while they were still warm from the pan. What resulted wasn’t neat squares; it was a glorious, sticky mess that ended up eaten with a fork right out of the baking dish!

The condensed milk needs time and cold air to firm up properly, transforming from a liquid blanket into that rich, chewy caramel layer we love. So, the mantra is always: bake, wait, then chill. For the absolute cleanest cuts, line that pan with parchment paper like we talked about, making sure you have good overhang handles. Once the bars are totally cool on the counter, use those parchment handles to lift the whole slab onto a cutting board. From there, a long, sharp knife—maybe even a gentle sawing motion—will give you perfect edges, every single time.
Also, if you’re trying to make them even *more* classic, consider adding a touch of vanilla extract right into the condensed milk before you drizzle it over the top. It just rounds out that sweetness beautifully. If you want to explore other highly reliable baked goods, you should check out my guide on perfecting those soft and chewy snickerdoodles over at this recipe page!
Storage and Make Ahead magic cookie bars
One of the best things about these **make ahead cookie bars** is that they are fabulous for prepping early! Because they are so sturdy once cooled and chilled—thanks to that lovely milk glaze—they are absolute superstars when it comes to **holiday bar recipes**. You want to store them in a truly airtight container. I usually layer them with a piece of parchment or wax paper between the layers so the sticky tops don’t fuse together. They are perfectly happy sitting on your counter for two to three days! If you need them to last longer, pop the airtight container in the fridge; they hold up beautifully there for a week. Honestly, they are even better the next day, so feel free to bake a whole batch for convenience!
If you’re whipping up a batch of my frosting soon, you’ll find that even my vanilla buttercream keeps well next to these bars, though I often skip frosting these entirely! For more general tips on keeping treats fresh, check out the experts over at Weeknight Dishes.
Variations on the Classic magic cookie bars
So you’ve mastered the base recipe—amazing! But once you understand the balance of layers, you realize this foundation is just begging for fun tweaks. The real magic of these bars is how adaptable they are. I always encourage new bakers to think of this as a fantastic pantry-cleaner, which is probably why I love creating my famed kitchen sink cookies too; sometimes you just have to throw everything in!
If pecans aren’t your thing, or you just want to mix things up, swap them out! Peanut butter lovers, you absolutely have to try substituting half your chocolate chips for peanut butter chips. The salty-sweet combo with the creamy condensed milk is absolutely wild. Or maybe you swap the semi-sweet chips for milk chocolate chips? Go for it! It makes a slightly sweeter, almost softer bar.
Thinking about flavor complexity? Add-ins like dried fruit are fantastic here. Orange zest mixed into the crust gives a sunny note that cuts through the richness perfectly. Or, try adding a little dried cranberry or even some finely chopped dried apricot when you layer the nuts. A little tartness goes a long way!
And don’t feel chained to the baking chips either. White chocolate chips melt beautifully and add a vanilla creaminess. If you want to add actual texture, a sprinkle of mini marshmallows right before the condensed milk goes on—don’t stir them in!—will create a chewy, puffy layer once baked. See? Easy swaps, huge payoff. That’s what baking should be about!
Frequently Asked Questions About magic cookie bars
I know that when you’re making a truly classic recipe like this, you sometimes have questions popping up right when you open the pan! It happens to me too. Here are the answers to the ones I hear the most about getting these **easy dessert recipe** bars perfect.
Can I use low-fat sweetened condensed milk?
Oh, that’s a tough one, and the answer is generally no, not if you want that signature gooey result! The full-fat version is necessary because the fat content in the regular sweetened condensed milk helps the mixture set up correctly when baked. Using a light or low-fat version often results in a much soggier final product that just won’t firm up properly when cooling. Stick to the full-fat can for these!
Can I make these into no bake magic cookie bars?
Sadly, no, you really can’t make these a traditional **no bake magic cookie bars** recipe. The magic in the name comes from that glorious chemical reaction when the heat hits the sweetened condensed milk layer! It needs the oven to bubble and set around all the chips and coconut. Without baking, you’d just have crunchy crumbs soaked in liquid milk, which isn’t nearly as delicious.
What is the best way to guarantee clean cuts?
We talked about this a bit, but it bears repeating because it’s vital for neat squares! Don’t even *think* about slicing them until they are completely and totally cool—and I mean chilled! Pop them into the refrigerator for a few hours after they cool on the counter. Once they are firm, lift them out using the parchment overhang we added earlier, and use a big, sharp knife. Seeing those clean edges makes them look so professional, perfect for **holiday bar recipes**!
Are these bars great for cookie exchanges or gifting?
They are fantastic! Because they hold up so well when properly cooled, they travel beautifully and store wonderfully, making them a go-to for gift-giving. For an extra touch, you can find more great tips on making treats like these at Snack On Meat, or review my pizza dough tips over at this other recipe!
Estimated Nutrition for magic cookie bars
Now, I know most of us don’t bust out the calculator when we’re grabbing a **classic dessert bar**, but I always like to give a general idea of what’s in these goodies for those who like to track things. Since these **magic cookie bars** are layered with butter, condensed milk, chocolate, and nuts, they are definitely a rich treat! I always say, if you’re making something this good, you should enjoy it without guilt, but here’s the breakdown based on the standard recipe proportions; I use this guide for my own healthier dinner sides sometimes to balance things out!
Keep in mind that these numbers are only estimates, because honestly, who knows exactly how much of the condensed milk clings during the pour? The exact brands of chocolate chips or butter you use can shift these figures a bit. But for a standard square serving size, here’s what you’re looking at:
- Serving Size: 1 bar
- Calories: 210
- Fat: 13g
- Carbohydrates: 22g
- Protein: 3g
- Sugar: 18g
- Saturated Fat: 7g
- Cholesterol: 15mg
So yes, they are sweet, they have fat because we use real butter and pecans, but they are also satisfying and perfectly portioned for a decadent treat. That’s the magic! If you serve these thick, you might get fewer servings, naturally increasing the numbers, so be mindful when you’re slicing them up for the holidays!
Share Your magic cookie bars Creations
Wow, we made it through! Now that you’ve baked these incredible **magic cookie bars**, I seriously want to see what you came up with! This is the part where we connect, because baking is so much better when you can share the results.
If this recipe worked its magic for you—if you loved that gooey texture or maybe you tweaked the nuts and found a new favorite combination—please, please let me know! Head down to the comments below and give this recipe a solid five stars if you agree it’s the ultimate layered dessert. Tell me which layer is your absolute favorite! Are you a coconut purist, or did you add butterscotch chips like I suggested?
And if you took a gorgeous picture of your perfectly set, clean-cut squares, I’d be thrilled if you shared it on social media! Tag me so I can squeal with delight over your baking success. If you’re looking to get in touch with questions about this recipe or anything else on the site, you can always reach me through the contact form. I’m cheering you on! Be sure to check out the advice on cutting cleanly in that guide I referenced from Best Baking Recipes, too!
PrintThe Ultimate Classic Magic Cookie Bars (7-Layer Bars)
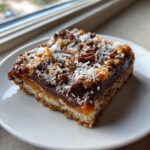
Make these irresistibly easy Magic Cookie Bars, also known as Seven Layer Bars or Hello Dollies. This recipe uses sweetened condensed milk to create a perfectly gooey, chewy dessert bar with a buttery graham cracker crust.
- Prep Time: 15 min
- Cook Time: 30 min
- Total Time: 45 min
- Yield: 24 servings 1x
- Category: Dessert
- Method: Baking
- Cuisine: American
- Diet: Vegetarian
Ingredients
- 1 1/2 cups graham cracker crumbs
- 1/2 cup unsalted butter, melted
- 1 (14 ounce) can sweetened condensed milk
- 1 cup semi-sweet chocolate chips
- 1 cup flaked coconut, sweetened
- 1 cup chopped pecans or walnuts
- 1/2 cup butterscotch chips (optional)
Instructions
- Preheat your oven to 350 degrees F (175 degrees C). Line a 9×13 inch baking pan with parchment paper, leaving an overhang on the sides for easy removal.
- In a medium bowl, mix the graham cracker crumbs and melted butter until the crumbs are evenly moistened.
- Press the crumb mixture firmly and evenly into the bottom of the prepared baking pan to form the crust.
- Sprinkle the chocolate chips evenly over the crust.
- Next, sprinkle the flaked coconut evenly over the chocolate chips.
- Sprinkle the chopped pecans or walnuts over the coconut layer. If using, sprinkle the butterscotch chips over the nuts.
- Slowly pour the entire can of sweetened condensed milk evenly over all the layered ingredients. Do not stir.
- Bake for 25 to 30 minutes, or until the edges are lightly golden brown and the condensed milk is bubbly.
- Remove the pan from the oven and let the bars cool completely in the pan on a wire rack. Cooling is essential for clean cutting.
- Once completely cool, use the parchment paper overhang to lift the bars from the pan. Cut into squares.
Notes
- For bars that do not fall apart, cool them completely, preferably chilling them in the refrigerator for at least two hours before slicing.
- You can substitute the pecans with other nuts or use an equal amount of mini marshmallows for a different texture.
- This recipe works well for holiday bar recipes and make ahead cookie bars since they store well.
- If you want a richer crust flavor, use 1/4 cup of melted butter and 1/4 cup of packed light brown sugar mixed with the graham crumbs.
Nutrition
- Serving Size: 1 bar
- Calories: 210
- Sugar: 18
- Sodium: 85
- Fat: 13
- Saturated Fat: 7
- Unsaturated Fat: 6
- Trans Fat: 0.1
- Carbohydrates: 22
- Fiber: 1
- Protein: 3
- Cholesterol: 15