

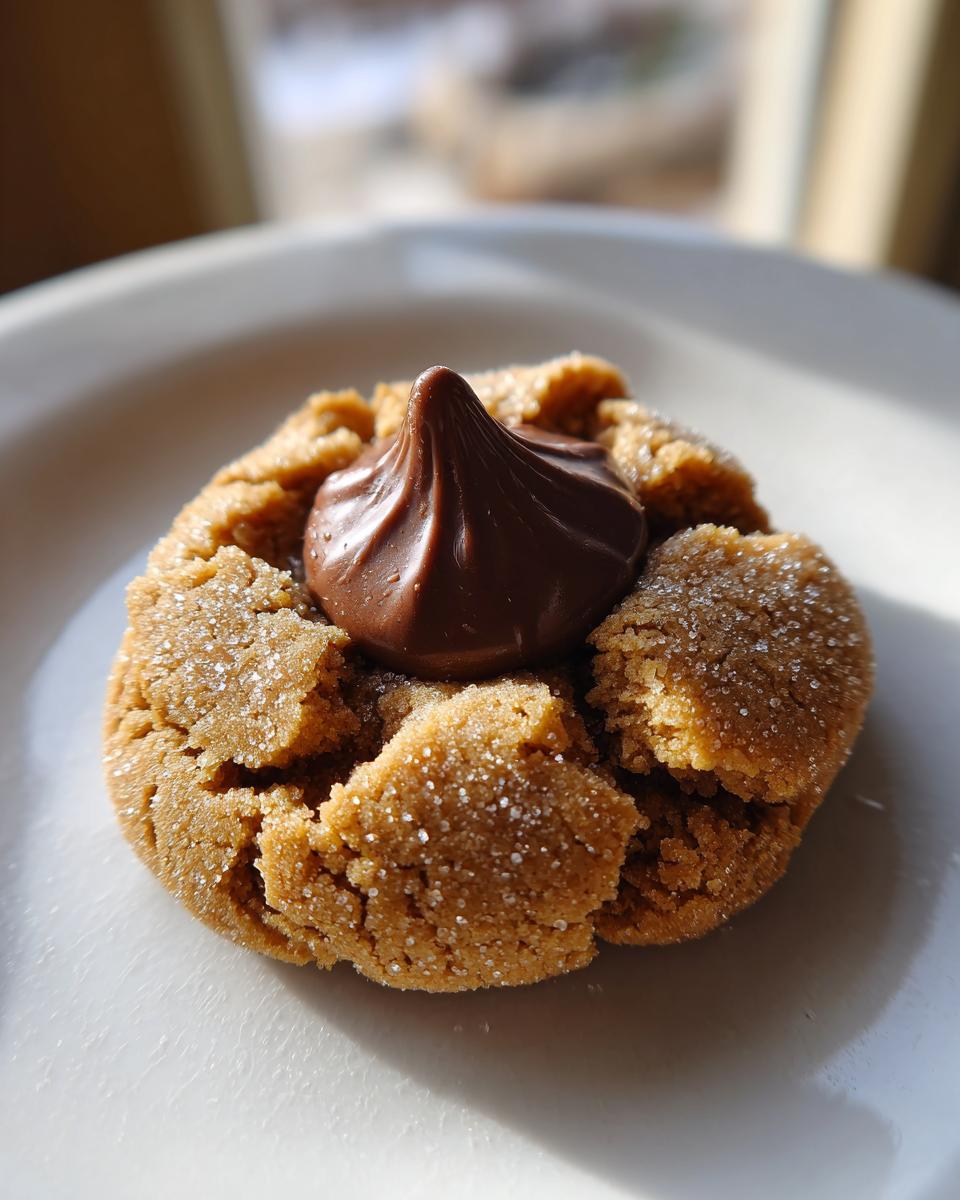
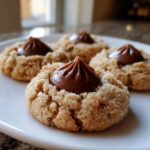
If there’s one cookie that instantly screams comfort, that recognizable sugary-salty duo that belongs on every holiday platter, it has to be the classic Peanut Butter Blossoms. We aren’t talking about a fancy, complicated dessert here—we’re talking about a certified Holiday Baking Staple that is just pure joy. These treats, often simply called kiss cookies, are beloved for that recognizable chocolate peak sitting right in the center of a perfectly cracked peanut butter base. I’ve tested this exact recipe countless times right here in my home kitchen, Aria Thompson’s kitchen, making sure it’s absolutely foolproof for you, whether you’re baking solo or getting the kids involved!
We’re using a classic formula that results in a soft and chewy cookie every single time, especially when you follow the timing for pressing that warm chocolate Kiss in. Trust me, once you master this method, they’ll become your go-to! It’s amazing how something so simple can feel so classic, much like my favorite spiced persimmon cookies which always bring the smell of fall indoors.
- Why These Classic Kiss Cookies Are a Holiday Baking Staple
- Gathering Your Ingredients for the Best Homemade Kiss Cookies
- Step-by-Step Instructions for Easy Chocolate Kiss Cookies
- Tips for Perfect Classic Hershey Kiss Cookies Every Time
- Blossom Cookie Variations: Beyond Peanut Butter Kiss Cookies
- Storage and Serving Suggestions for Your Kiss Cookies
- Frequently Asked Questions About Kiss Cookies
- Estimated Nutritional Snapshot for Classic Kiss Cookies
- Share Your Homemade Kiss Cookies Creations
Why These Classic Kiss Cookies Are a Holiday Baking Staple
Honestly, these are the cookies I look forward to making the most when the weather finally cools down. They’re the ultimate Soft Holiday Cookies because they stay delightfully chewy—they don’t dry out waiting for folks to arrive! For me, these Peanut Butter Chocolate Cookies aren’t just a recipe; they’re tradition. My dad actually banned me from bringing any other cookie to the family Christmas party once he realized this recipe existed. He claimed the combination was too addictive! It’s the sweet, slightly crackled peanut butter cookie holding that shiny chocolate friend that just makes everyone stop and smile.
I love seeing people’s faces when they realize just how easy these are to make from scratch. They seem elegant with that little chocolate hat, but they are built for speed and maximum payoff. If you want to see how others are making these favorites perfect, check out this classic take from Beyond the Butter; it really highlights that gorgeous cracked look when showing off their Peanut Butter Blossoms. Speaking of perfect pairings, these cookies are almost as comforting as a warm dip, like my creamy classic cheese fondue!
The Perfect Peanut Butter to Chocolate Ratio in Kiss Cookies
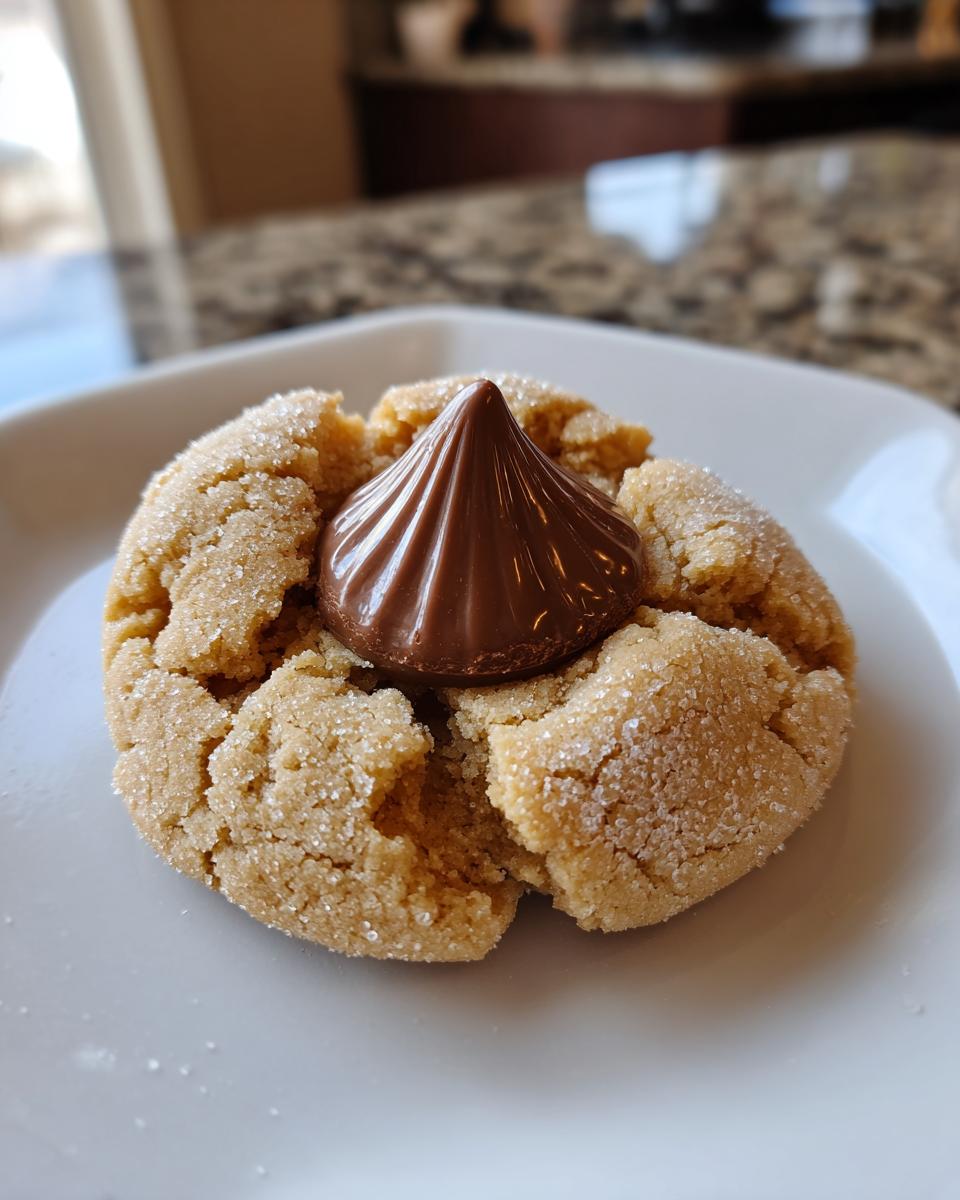
That balance is what makes these famous, truly. You need that slight hit of saltiness from the creamy peanut butter dough to cut through the overwhelming sweetness of the milk chocolate Hershey’s Kiss. It’s a magic trick in cookie form! When you bite in, you get that immediate soft chewiness followed by the familiar snap of good chocolate. It’s comforting, familiar, and absolutely worth making a double batch.
Gathering Your Ingredients for the Best Homemade Kiss Cookies
When we talk about making the Best Homemade Kiss Cookies, it all comes down to respecting the quality of what you put into that dough. This isn’t the place to skimp or substitute the basics, or you might end up with a crumbly disaster instead of that gorgeous, chewy base we’re aiming for! I always lay all my ingredients out first—it’s my little way of making sure I don’t miss that all-important little bit of baking soda. Having everything ready means we can mix, roll, and get these beautiful treats into the oven lightning fast, which is great because these don’t need any chilling time!
Remember, this recipe hits that perfect spot between simple and spectacular, but only if we stick to the mission list. If you’re already prepping your pantry, you might want to check out my thoughts on making easy 4-ingredient homemade cheese crackers while you’re gathering supplies!
Ingredient Clarity for Perfect Peanut Butter Kiss Cookies
Here is exactly what you need to grab for about three dozen of these beauties. Pay close attention to those preparation notes, especially for the peanut butter and the sugar!
- 1 cup unsalted butter, and seriously, make sure it’s softened to room temperature.
- ¾ cup smooth, creamy peanut butter—none of that natural stuff that separates unless you want to adjust your flour!
- ¾ cup granulated sugar, plus another ¼ cup waiting separately for rolling.
- ¾ cup packed light brown sugar. Don’t scoop it lightly; pack it in there for moisture!
- 2 large eggs, room temperature is ideal.
- 1 teaspoon vanilla extract.
- 2 ¼ cups all-purpose flour.
- 1 teaspoon baking soda.
- ½ teaspoon salt.
- About 72 milk chocolate Hershey’s Kisses, and this is key: they must be completely unwrapped before you start baking!
When you get to the rolling stage, your goal is truly consistent dough balls—aim for a perfect 1-inch ball size. This consistency is what ensures they all bake at the same rate, giving you that uniform, cracked look we love under the chocolate.
Step-by-Step Instructions for Easy Chocolate Kiss Cookies
We need to move fast once the dough is mixed, but don’t rush the first part! These are such Easy Chocolate Kiss Cookies, but they rely on a few moments of patience up front to make sure the texture is absolutely spot on. Think soft, chewy Peanut Butter Blossoms, not hard peanut butter discs! Make sure those baking sheets are lined with parchment paper first—it’s my secret for zero sticking, especially since we want these to stay pristine for that chocolate topping.
If you’re looking for other quick baking wins that don’t require waiting around for dough to chill, you absolutely have to check out my recipe for easy breakfast cookies. Now, back to these stars!
Mixing the Dough for Chewy Peanut Butter Cookies
Get that stand mixer going! Or grab your hand mixer—it works just fine. We start by creaming the softened butter, both sugars, and the peanut butter together. You’re mixing until that entire bowl looks light and fluffy; this is where we start building the air pockets that make them wonderfully soft. Next, introduce the eggs. Beat them in one at a time, waiting until the first one is mixed in before adding the second. A quick splash of vanilla and you’re ready for the dry goods!
Whisk your flour, baking soda, and salt in a separate bowl—always mix your dry things first! Now, add this dry mixture to the wet ingredients gradually. And here is a major tip for getting those Chewy Peanut Butter Cookies: Mix only until you see the streaks disappear. Seriously, stop mixing right when the last bit of flour gets incorporated. Overmixing at this stage is how you accidentally make crackers!
The Crucial Step: Rolling and Baking Your Kiss Cookies
Once the dough is barely combined, set up your separate shallow dish with that reserved ¼ cup of granulated sugar. Take generous spoonfuls of dough and roll them into those nice, even 1-inch balls we talked about. Rolling them completely in that extra sugar gives the cookies that beautiful, signature crackled appearance once they bake—it’s not just for looks, it sets the outer texture perfectly!
Pop them onto your lined sheets, giving them about two inches of space because they will spread a tiny bit. Thirty-seven-five degrees Fahrenheit is the magic number. Bake these for just 8 to 10 minutes. Look for the visual cue: the edges should look set, but the center still looks a little puffy and maybe even slightly underdone. If you check other great takes online, like this one from Spend With Pennies, you’ll see they all focus on that very short baking time for beautiful cookies!
Pressing the Kiss: Achieving the Classic Blossom Shape
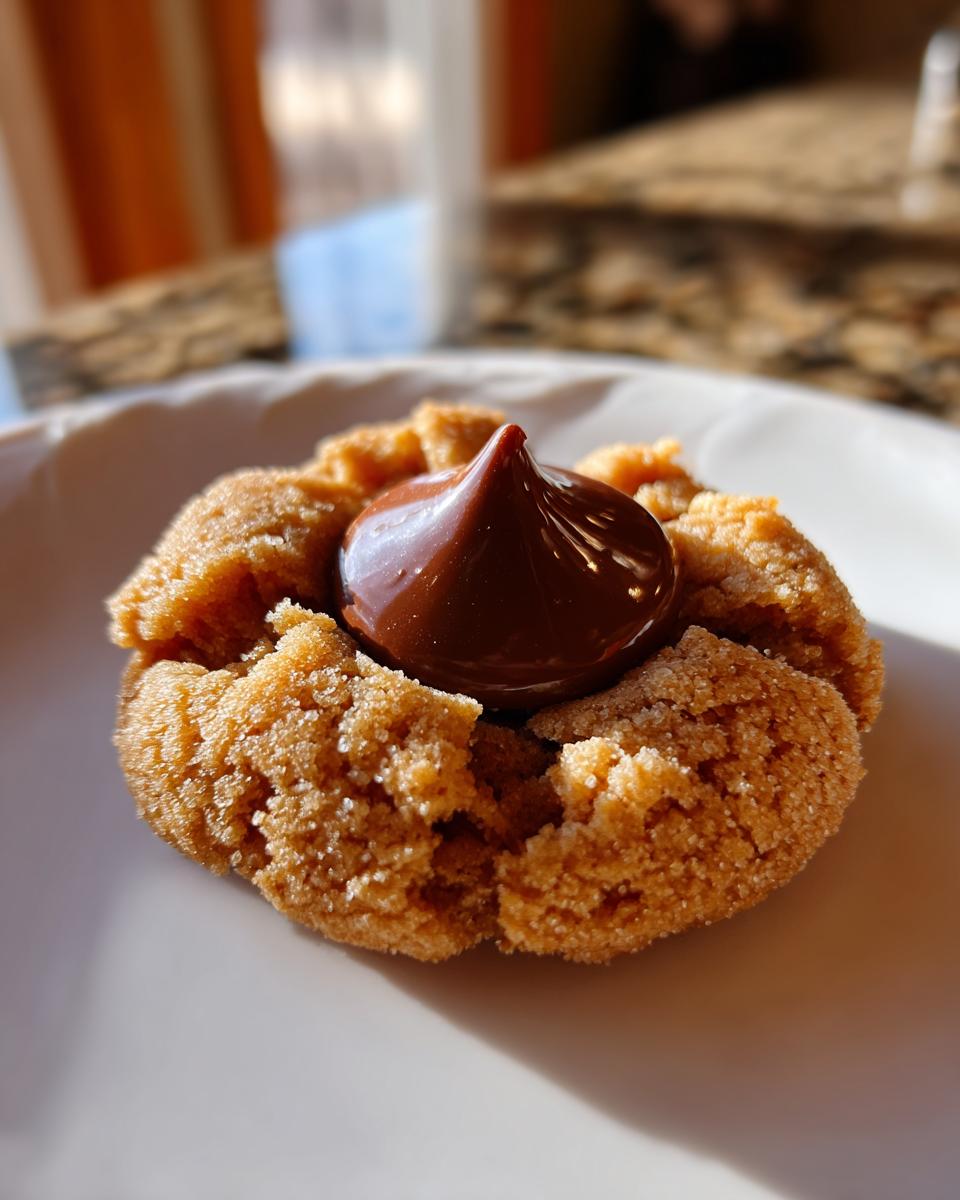
This timing is everything, so have your unwrapped Kisses ready right next to the oven! You must press the Kiss into the center of that cookie the second it comes out. Don’t wait for them to cool, or you’ll end up with sad, cracked cookies. The residual heat from the piping hot peanut butter cookie is what melts the bottom of the Kiss just enough to adhere perfectly.
Gently but firmly press the tip of the Kiss straight down until the cookie dough cracks around the base. Don’t push so hard that you stick your finger into the tray, of course! Once they are decorated, leave them right on that hot baking sheet for about five minutes. That brief rest lets the chocolate firm up just enough so when you move them to the rack, the classic, perfect Kiss Cookies shape stays exactly where you put it.
Tips for Perfect Classic Hershey Kiss Cookies Every Time
Even with a foolproof recipe, sometimes little hiccups happen, right? That’s why mastering the troubleshooting section is key to securing that perfect, Gooey Center Cookies look every single time you pull a batch out. A lot of home bakers run into the same two issues, but I’ve got my own little tricks for getting around them without sacrificing that perfect peanut butter base.
Troubleshooting Common Kiss Cookies Issues
The number one complaint I hear is that the chocolate Kisses crack the cookie when they press them in. I’m telling you, that happens when the cookie has cooled even a little bit! You have to be ready right out of the oven. If the dough gets overworked when mixing, you might end up with cookies that are too dense and they won’t crack nicely around the Kiss base. So, when you add those dry ingredients, stop mixing as soon as you can’t see white streaks anymore—seriously, that dough is ready for rolling then!
Making Kiss Cookies Ahead of Time
These are fantastic make-ahead cookies, which is why they are my Christmas heroes! You can absolutely chill the dough balls. If you roll them into balls and put them on a sheet in the fridge for about 30 minutes, that helps them stay a bit puffier before baking. If you chill them longer, say overnight, just let them sit on the counter for about 15 minutes before baking, otherwise, you’ll need to add an extra minute or two to the baking time. Finished cookies? Store them in an airtight container at room temperature. They honestly stay perfectly soft for almost a week, which never happens in my house!
If you want inspiration for making other kinds of gorgeous cookies that look complicated but really aren’t, you must try my lemon crinkle cookies next; they have that beautiful, cracked exterior too!
Blossom Cookie Variations: Beyond Peanut Butter Kiss Cookies
Okay, look, I adore my classic peanut butter base. It’s the gold standard, right? But once you nail the technique—especially that 8-minute bake time and the immediate Kiss press—you realize this dough format is just begging for new flavors! You don’t have to stick to just peanut butter and chocolate to rock the whole Kiss Cookies trend. Once you get that buttery, soft cookie down, you can swap out the flavorings for something completely different.
This opens up a whole world of fun, especially for holidays where you need different colors or flavors on the platter. I’ve seen some incredible ideas circulating, and a few of these I’ve tested myself. My absolute favorites for festive spreads include making a batch using my basic melt-in-your-mouth butter cookie dough as the base instead of peanut butter. If you need another seasonal favorite, my rich classic persimmon cookies are amazing too!
For something bright and beautiful, you have to try switching up the flavor profile entirely. For Valentine’s Day, using a Red Velvet Kiss Cookies dough base is stunning. You just add a touch of cocoa powder and some red food coloring to a standard sugar base until you get that deep, velvety color. Top that with a neutral Hershey’s Hug or a milk chocolate Kiss, and bam—instant holiday showstopper!
Another simple switch is going for a cinnamon-sugar coating instead of plain granulated sugar, turning your base into a sort of Sugar Cookie with Kiss Topping hybrid. If you follow the same rolling process, but mix that ¼ cup of sugar for rolling with a teaspoon of cinnamon, you get a flavor reminiscent of a Snickerdoodle, but with that beloved chocolate signature in the middle. Speaking of which, if you want to see how Rachel does a dedicated cinnamon version, her take on Snickerdoodle Kiss Cookies is fantastic for inspiration!
Don’t forget exploring chocolate on chocolate! If you use a good chocolate cookie dough (just add about ¼ cup of cocoa powder to the flour mix), you get wonderfully rich Chocolate Center Cookies. These are almost fudgy right out of the oven, and they look ultra-decadent sitting on a plate. The key across all these variations is the pressing step—no matter the flavor, you must press that fresh Kiss in immediately!
Storage and Serving Suggestions for Your Kiss Cookies
And just like that, we’re done! Or are we? Well, the baking is done, but now we have to manage the excitement of having three dozen perfect, chocolate-crowned cookies sitting on the counter. These are phenomenal Kid Friendly Cookie Recipes because they are so easy to store and they freeze wonderfully, which is great if you need to bake ahead for those super busy holiday weeks.
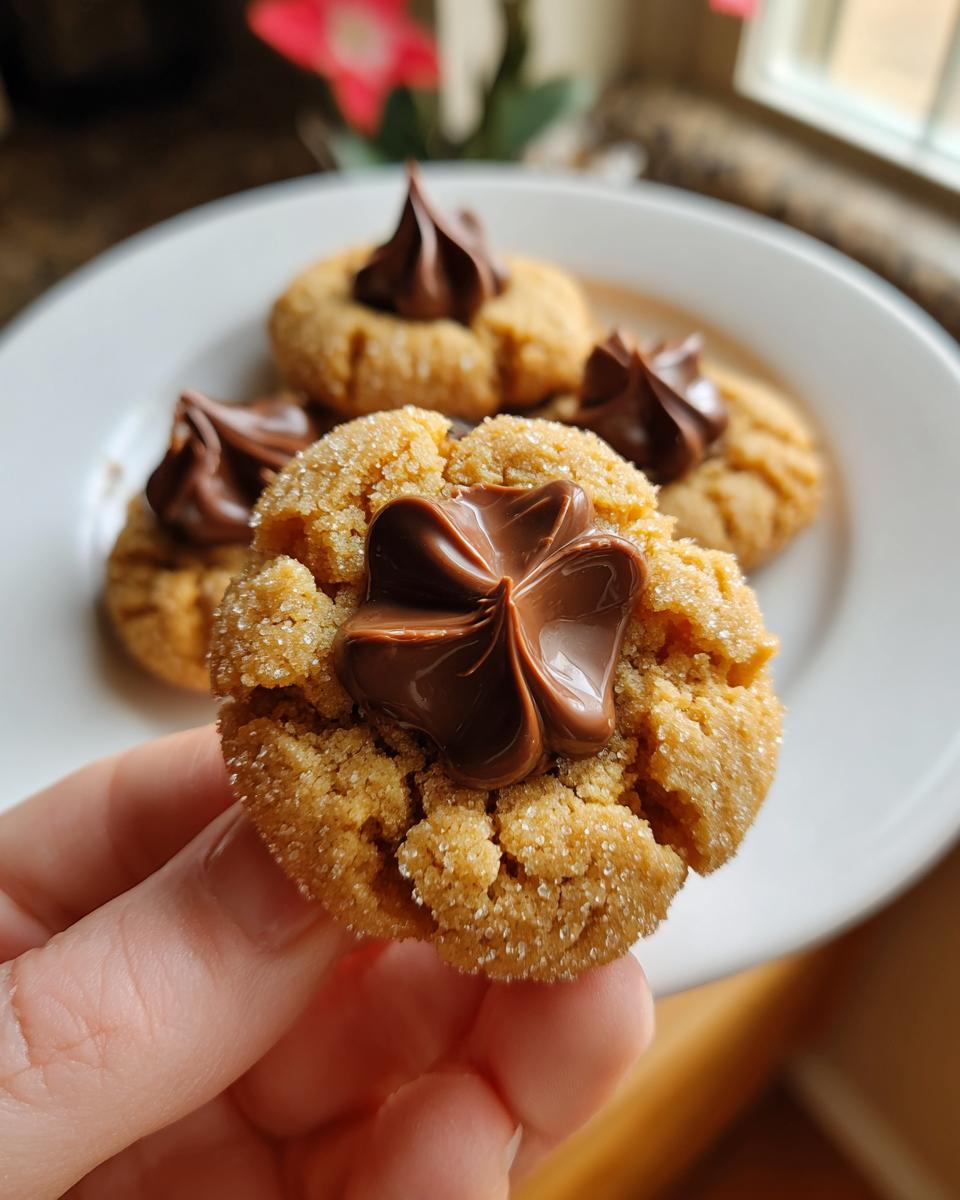
For immediate devouring—which, let’s be honest, is usually what happens—these Peanut Butter Blossoms look amazing piled high on a pedestal or mixed into a tray with bolder colors like green and red cookies if you’re hosting a big festive event. They add that wonderful, earthy brown contrast to any holiday spread.
If you manage to have any leftovers (I usually have to hide mine to ensure they last past Christmas Eve!), store them in a single layer or separated by parchment paper in a truly airtight container. They hold their texture beautifully at room temperature for at least five to seven days. Honestly, they stay softer than most cookies because of the peanut butter base!
If you pull them out of the container and they seem just a *tiny* bit stiff, don’t worry about reheating them completely. Just pop one or two on a small plate in the microwave for about 5 to 7 seconds. That little burst of warmth softens the chocolate just enough to make it gooey again without turning it liquid. It’s the perfect trick when you need a satisfying, warm cookie fix instantly!
When you’re prepping your party spread and need some non-alcoholic options to go alongside these treats, you absolutely have to check out my recipe for Thanksgiving punch that everyone loves; it’s fantastic for pairing with rich cookies like these!
Frequently Asked Questions About Kiss Cookies
I always get so many questions when people see this recipe! It’s funny how such a simple cookie can have so many little mysteries surrounding it. Don’t worry about asking; I’ve included answers here to make sure your batch of Peanut Butter Blossoms runs as smoothly as mine does. I really want you to feel confident in making these!
Can I skip rolling the dough in sugar for my kiss cookies?
You technically *can*, but please don’t, if you can help it! That rolling step is what gives the peanut butter cookie its iconic look—those beautiful, rough cracks that form on the surface when the cookie bakes and spreads. If you skip coating your dough balls in that extra granulated sugar, your cookies will likely bake up much smoother, maybe even a little shiny, and they won’t have that classic texture fans expect. It’s a must-do for authentic kiss cookies!
What is the best type of chocolate to use for the center of these cookies?
The classic choice, and the star of the show in this recipe, is definitely the standard milk chocolate Hershey’s Kiss. However, if you want to mix things up with your Chocolate Center Cookies, you have options! Hershey’s Hugs (the white chocolate/milk chocolate swirl) are gorgeous, especially for holiday platters. I also love using simple dark chocolate Kisses if I want a deeper flavor that stands up better to the creamy peanut butter. Just make sure you’re using solid baking chocolates designed to hold their shape during a quick press.
Can I use no-chill cookie dough for these kiss cookies?
Yes, absolutely! That’s one of the huge perks of this specific recipe—it checks the box for the quickest batch you can pull off. We mix it, roll it, and bake it right away. This recipe is definitely a prime example of excellent No Chill Cookie Dough. Because the butter is creamed well and the dough components are balanced, you don’t need that hour or two of chilling that some other drop cookies require. That means you can decide you want Christmas Cookie Recipes at 8 PM, and have them ready to eat before bed!
If you’re looking for more quick wins in the kitchen that save you time, take a peek at my guide for the quickest easy breakfast recipes—sometimes saving prep time in the morning is just as important as saving it in the afternoon!
Estimated Nutritional Snapshot for Classic Kiss Cookies
Now, I know what you’re thinking: This is peanut butter, and this is chocolate—how bad can it be? Well, every indulgence needs context, right? The beauty of these Classic Hershey Kiss Cookies is that they are made from scratch. That means we control the ingredients, but they are still wonderfully rich because they rely on butter and peanut butter for that incredible, chewy texture!
It’s important to remember that these numbers are just estimates based on the standard ingredient amounts listed, like those classic 1-inch dough balls. When you’re serving them up for your holiday baking marathon, just know you’re enjoying a truly satisfying treat.
Here is a general idea of what you’re looking at for a single serving cookie:
- Calories: Around 180 per cookie.
- Fat: About 10 grams total. We get most of that from the butter and peanut butter, which gives us that amazing softness!
- Carbohydrates: Roughly 21 grams, mostly coming from the sugars we use for structure and that outer roll.
- Protein: A nice bonus of about 4 grams, thanks to that peanut butter!
Don’t stress too much about the numbers, though. When you’re sharing homemade cookies with family, the real nutrition comes from the joy of sharing them. Make them because they taste amazing and bring back wonderful memories—that’s the essential ingredient here!
Share Your Homemade Kiss Cookies Creations
Whew! We’ve mixed, we’ve rolled, and we’ve pressed those perfect chocolate hats onto our beautiful peanut butter bases. Now for the best part of being a home cook: sharing the bounty! I truly hope these instructions make your kitchen smell like the best kind of holiday magic. Since these Classic Peanut Butter Blossoms are my absolute favorite—maybe you even agree they deserve five stars if you followed along!
I love hearing about your successes! Did you try the milk chocolate Kisses, or did you switch to the dark ones for a richer flavor? Tell me what you thought about the texture. Did they stay wonderfully soft and chewy like mine do?
If you followed these tips and ended up with a stunning batch of these kiss cookies, please, please come back and leave a comment below. Sharing your experience helps build up the confidence of other home bakers who might be nervous tackling a classic for the first time. Your feedback is invaluable!
And if you snap a picture of your platter—especially those lovely cracked edges around the Kiss—I would totally love to see it! Tag me or DM me on Instagram if you have one to share. Or, if you just want to say hello or have a nagging question about substitutions, my contact page is always open for you. Just pop over to my contact page. Happy baking, friends, and enjoy every single crumb of these beauties!
PrintClassic Peanut Butter Kiss Cookies (Peanut Butter Blossoms)
Make the classic Peanut Butter Blossoms, a soft and chewy peanut butter cookie topped with a melted chocolate kiss. This recipe is a holiday baking staple and simple to prepare.
- Prep Time: 20 min
- Cook Time: 10 min
- Total Time: 30 min
- Yield: About 3 dozen cookies 1x
- Category: Dessert
- Method: Baking
- Cuisine: American
- Diet: Vegetarian
Ingredients
- 1 cup unsalted butter, softened
- 3/4 cup creamy peanut butter
- 3/4 cup granulated sugar, plus 1/4 cup for rolling
- 3/4 cup packed light brown sugar
- 2 large eggs
- 1 teaspoon vanilla extract
- 2 1/4 cups all-purpose flour
- 1 teaspoon baking soda
- 1/2 teaspoon salt
- About 72 milk chocolate Hershey’s Kisses, unwrapped
Instructions
- Preheat your oven to 375 degrees Fahrenheit. Line baking sheets with parchment paper.
- In a large bowl, cream together the softened butter, peanut butter, granulated sugar, and brown sugar until the mixture is light and fluffy.
- Beat in the eggs one at a time, then mix in the vanilla extract.
- In a separate bowl, whisk together the flour, baking soda, and salt. Gradually add the dry ingredients to the wet ingredients, mixing until just combined. Do not overmix the dough.
- Place the remaining 1/4 cup of granulated sugar in a shallow dish.
- Roll the cookie dough into 1-inch balls. Roll each ball in the extra sugar to coat completely.
- Place the sugared dough balls about 2 inches apart on the prepared baking sheets.
- Bake for 8 to 10 minutes, or until the edges are lightly set. The cookies will look slightly puffed.
- Immediately upon removing the cookies from the oven, gently press one unwrapped Hershey’s Kiss into the center of each warm cookie. The residual heat will soften the chocolate.
- Let the cookies cool on the baking sheet for 5 minutes before transferring them to a wire rack to cool completely. The chocolate will set as they cool.
Notes
- For the best ‘blossom’ shape, press the Kiss into the cookie right when it comes out of the oven. If the cookie cools too much, the chocolate may crack the cookie when you press it in.
- You can substitute milk chocolate Kisses with Hershey’s Hugs or dark chocolate Kisses for variation.
- If you prefer a chewier cookie, slightly underbake them by about one minute.
Nutrition
- Serving Size: 1 cookie
- Calories: 180
- Sugar: 15
- Sodium: 110
- Fat: 10
- Saturated Fat: 5
- Unsaturated Fat: 5
- Trans Fat: 0
- Carbohydrates: 21
- Fiber: 1
- Protein: 4
- Cholesterol: 25