
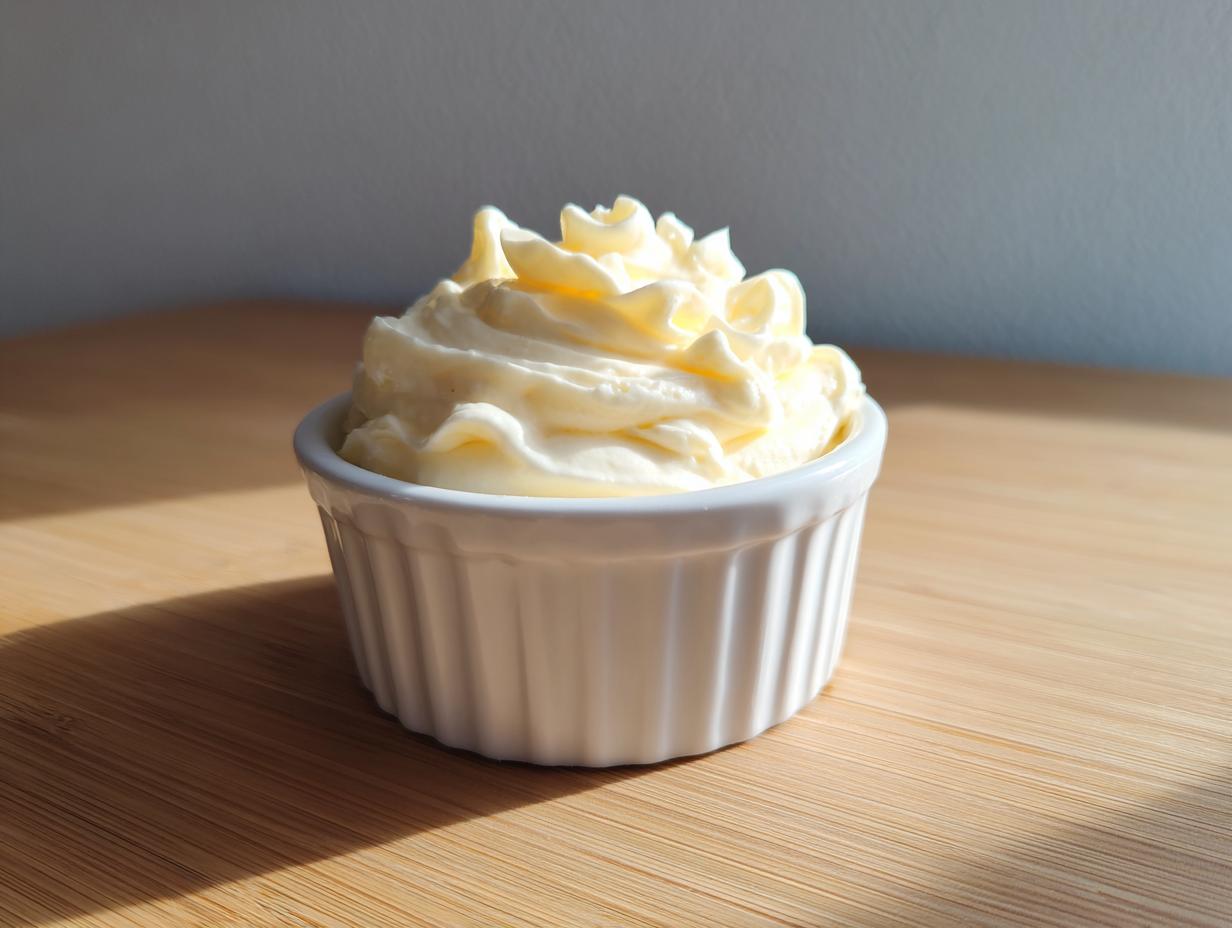
You know, the stuff you buy in a jar just doesn’t compare to what you can whip up in five minutes right on your counter. Honestly, moving past store-bought jars and making your own condiments is where true cooking confidence starts! It’s about taking back control of what goes into your food, and that’s exactly what we love doing here at Cooking Zenith. Today, we aren’t messing around with complicated steps; we’re diving straight into the definitive guide for making perfect homemade mayonnaise olive oil. This recipe is straightforward, reliable, and lets the clean, rich flavor of good olive oil shine through. Trust me, just like Aria always says over at Cooking Zenith, demystifying a classic technique like this brings such a huge sense of culinary accomplishment. Get ready to change how you view mayonnaise forever!
- Why You Will Love This Homemade Mayonnaise Olive Oil Recipe
- Essential Ingredients for Rich and Creamy Homemade Mayonnaise Olive Oil
- Step-by-Step Instructions for Homemade Mayonnaise Olive Oil Success
- Tips for Success When Making Homemade Mayonnaise Olive Oil
- Homemade Mayonnaise Troubleshooting Tips: Fixing Broken Olive Oil Mayo
- Flavor Variations for Your DIY Mayonnaise from Scratch
- Storage and Shelf Life of Freshly Made Condiment Ideas
- Serving Suggestions for Homemade Mayonnaise Olive Oil
- Understanding Your Homemade Condiments
- Frequently Asked Questions About Making Olive Oil Mayo
Why You Will Love This Homemade Mayonnaise Olive Oil Recipe
Honestly, this recipe is just spectacular. Once you taste the difference, you’ll never go back to the jarred stuff. It’s so satisfying knowing exactly what you’re eating!
- The texture is unbelievably rich and creamy—perfect for your favorite sandwiches.
- You have complete control! This is a no sugar added mayonnaise recipe, which I love.
- It tastes so fresh, miles better than anything mass-produced.
- You can customize the acidity and the oil flavor exactly how you want it.
Essential Ingredients for Rich and Creamy Homemade Mayonnaise Olive Oil
Getting this right starts way before you even pick up the whisk, I promise! We need a few specific things so we can successfully make this homemade mayonnaise olive oil magic happen. You’ll need two lovely, large egg yolks, and they absolutely must be at room temperature—this is non-negotiable for a stable emulsion. Next up is the flavor base: a teaspoon of Dijon mustard, which doesn’t just add taste but acts as a wonderful emulsifier, too. We brighten it all up with about a teaspoon of fresh lemon juice, plus maybe a splash more later if you like it tangy, and a half teaspoon of white wine vinegar.
Finally, the star: the oil. The recipe calls for a full cup of extra virgin olive oil, but hold on a second before you pour in that strong, peppery stuff! And for the seasoning? We just need a quarter teaspoon of fine sea salt to start.
Ingredient Notes and Substitution Guidance
Let’s talk temperature because it’s so important for successful emulsifying oil and eggs for mayo. If your egg yolks are cold, they just won’t bind with the oil properly, and you’ll end up with a runny mess instead of that thick, rich texture we are aiming for. So, pull those yolks out about 30 minutes before you start!
Now, about that olive oil. Extra virgin olive oil is fantastic for making healthy homemade condiments, and the fact that our recipe is a no sugar added mayonnaise recipe is a huge win. However, pure EVOO can sometimes be overwhelmingly bitter or grassy when stabilized into mayo. If you’re using a very strong EVOO, I highly recommend mixing it! Use half EVOO and substitute the other half with a neutral oil, like avocado oil or grapeseed oil. This gives you the health benefits and a little hint of olive flavor, without overpowering the beautiful tang from the lemon and vinegar.
Step-by-Step Instructions for Homemade Mayonnaise Olive Oil Success
Alright, the moment of truth! This is where we use that careful prep work to create something truly special. I always get a bit competitive with my whisk here—it’s a race against the clock, but a slow, steady race! Before you start whisking, make sure your bowl is stable. If your bowl slides around, stick a damp paper towel underneath it. Trust me, you don’t want to be chasing a sliding bowl while trying to slowly incorporate oil!
Here’s the process, just like the recipe card says:
- You’re going to start by getting your yolks, mustard, lemon juice, vinegar, and salt vigorously whisked together in that bowl for about a solid minute. You’re looking for them to lighten up in color and get just a bit thick.
- Now, pay close attention! This next step defines the success of your homemade mayonnaise olive oil. You need to start adding the olive oil drop by excruciatingly slow drop. Think single drops, waiting for each one to incorporate before the next one goes in.
- Keep that whisk moving fast and furiously! Once you’ve added about a quarter cup of oil and you see it starting to really thicken up—like mayonnaise is actually forming—you can breathe a tiny sigh of relief.
- Now that you’ve established that bond, you can ease up just slightly on the whisk speed, but only slightly! Transition to a very thin, steady drizzle of the remaining oil. Don’t dump it! Keep that stream thin until every last drop is incorporated.
- Once it’s all in there and beautifully thick, taste it! Add a tiny pinch more salt or a squeeze more lemon if it needs waking up.
- Finally, don’t eat it all right away! Seriously, it needs time. Transfer it to an airtight container and let it chill in the fridge for at least an hour so it sets up completely firm.
Achieving the Perfect Emulsion: The Key to Homemade Mayonnaise Olive Oil
The success of your Emulsifying Oil and Eggs for Mayo hinges entirely on those first additions. When they say drop by drop, they mean it! You are teaching the fat molecules (the olive oil) how to bond with the water molecules (the yolks and acid). If you rush this, the oil just sits on top of the yolks instead of integrating, and boom—you have soup. Whisk quickly in a circular motion to incorporate those first few drops.
When you transition to a drizzle, picture the thinnest stream of water coming out of a faucet. That’s the speed you need. If you notice the mixture looking looser or glossy instead of creamy and matte, stop pouring immediately, whisk like mad for a moment until it tightens up again, and then resume that super-thin drizzle. If you want to explore flavor additions later, like making a beautiful Garlic Aioli Using Olive Oil, make sure the base emulsion is perfect first!

Tips for Success When Making Homemade Mayonnaise Olive Oil
I’ve made this batch of homemade mayonnaise olive oil probably a hundred times now, and I’ve learned a few little secrets that really elevate the result from good to wow. These aren’t complicated tricks, but they are the things that Aria always stresses when she talks about mastering any Best Homemade Mayonnaise Recipe.
First, and I can’t say this enough: Room temperature is your friend! If you’re rushing and your egg yolks are cold, stop what you’re doing before you even start adding the oil. I wait until they feel completely neutral to the touch. Cold eggs make the process twice as hard, and you risk breaking that emulsion before it even starts. It’s worth the extra 15 minutes of waiting time, believe me.
Second, think about your whisking intensity when we talk about Emulsifying Oil and Eggs for Mayo. You need energy! It’s not a gentle stir; it’s a focused, constant movement, especially in those first critical five minutes. If you’re using a hand whisk, don’t be afraid to use both arms and really get that air incorporated.
Third, be brave with the finishing flavors. After you’ve incorporated all the oil, don’t just settle for the starting salt amount. Now is the time to taste (go ahead, lick the spoon!). Dash in a little more lemon juice or vinegar until the flavor “pops.” A great mayonnaise should taste bright, not fatty, and that brightness comes from adjusting the acid at the very end.
Finally, remember that blending oils idea? If you use 100% EVOO, the flavor is intense. If you decide later you want something lighter for your next batch of Healthy Homemade Condiments, try a 50/50 mix of your favorite extra virgin and a flavorless oil like avocado. This allows you to control the overall flavor profile perfectly every single time, which is the beauty of making your own!
Homemade Mayonnaise Troubleshooting Tips: Fixing Broken Olive Oil Mayo
Okay, take a deep breath. It happens to the best of us, even when making homemade mayonnaise olive oil. You’re whisking away happily, you get a little too enthusiastic with the drizzle, and suddenly, that gorgeous, creamy emulsion turns oily, grainy, and runny. Don’t scrape it out! That oily puddle is salvageable. These Homemade Mayonnaise Troubleshooting Tips are your lifeline when your mayo breaks.
The good news is that the ingredients are still there; they just got scared and panicked! The key to fixing it is reintroducing a fresh, strong emulsifying agent to persuade the broken oil and egg mixture to bond again. This is exactly what an extra egg yolk is for.
Here is the foolproof fix. Grab a completely clean, dry bowl—no oil residue or stray mayonnaise allowed!
- First, place one (yes, just one!) fresh egg yolk into that clean bowl. If you’re feeling nervous, grab a tiny bit of Dijon mustard and whisk it with that fresh yolk first.
- Now, grab your broken mayonnaise mixture. You’re going to treat this separated mixture exactly like you treated the oil in the first place.
- Start adding the broken mayonnaise to the fresh yolk mixture one teaspoon at a time. I mean teaspoon! Whisk constantly and vigorously after every single addition.
- As you whisk in that first spoonful of broken mayo, you should see the mixture perk up and start to look creamy again. It’s like magic, I swear!
- Once you’ve got about half of the broken batch incorporated and it looks like thick, beautiful, DIY Mayonnaise from Scratch again, you can increase the speed to a thin, steady stream for the rest of the mixture.
In less than two minutes, you’ll have a full bowl of perfect mayonnaise again, maybe even a little extra since you added that fresh yolk! You just need patience and that trusty whisk. If, by some terrible chance, it breaks a second time, you use that newly fixed mayo as your starting liquid and use another fresh yolk to shock it back into submission. It almost never fails!
Flavor Variations for Your DIY Mayonnaise from Scratch
Now that you have mastered the foundation of your homemade mayonnaise olive oil, the real fun begins! This is where you stop following instructions and start cooking with intuition. Since you’re making this from scratch, you can customize it however you like. My absolute favorite thing to do with this rich base is turn it into a quick, punchy aioli. Forget buying expensive jars; this is so much better!
For an incredible **Garlic Aioli Using Olive Oil**, simply take about a cup of your freshly made mayo and stir in two cloves of garlic that you’ve first mashed into a paste with a pinch of salt using a mortar and pestle. That extra step of salting the garlic paste before adding it dissolves the harsh bite and makes it incredibly creamy when mixed in.
If you’re feeling very green and fresh, try folding in a tablespoon of finely chopped fresh herbs after the mayo has chilled. Dill, chives, and tarragon work beautifully with the slight earthiness of the olive oil. Or, if you want something with a little kick for dipping those fries, you can always whip up a spicy version—take a look at my recipe for the perfect creamy dip base right here! See? Making your own condiments is just a gateway to endless flavor possibilities.
Storage and Shelf Life of Freshly Made Condiment Ideas
Okay, you’ve done it! You have this gorgeous, rich, and creamy batch of homemade mayonnaise olive oil. Since we skipped all the preservatives and stabilizers big companies use, we need to treat this special condiment with a bit more respect than the stuff from the grocery aisle. Your first instruction, as per the steps, is to transfer it immediately. Don’t let it sit around in the mixing bowl!
Get yourself a clean, airtight container. A glass jar works perfectly, but any small container with a tight-fitting lid will do the trick. Make sure that container is totally dry before you scoop in your mayonnaise. Once it’s inside, seal it up tightly. This is crucial because, honestly, who doesn’t love sampling the product while they clean up? We need to seal it up so it doesn’t pick up any weird smells from the fridge.
Next comes the chilling part. Remember how the instructions told you to let it chill for at least an hour to fully set? That time in the cold is essential for texture, but it’s also important for safety, since we are dealing with raw egg yolks here. Because it’s made fresh, you’ll want to use up this batch of DIY Mayonnaise from Scratch within about seven to ten days, tops. I usually make a fresh batch every week anyway because it tastes so much better when it’s truly fresh! Always keep it stored in the coldest part of your refrigerator, not the door where the temperature fluctuates all the time. Storing your freshly made condiment ideas properly means you get the best flavor and peace of mind every single time you pull out that jar!
Serving Suggestions for Homemade Mayonnaise Olive Oil
Gosh, what *can’t* you use this incredible homemade mayonnaise olive oil on? Once you’ve got that beautiful, rich jar pulled out of the fridge, the possibilities are truly endless. I find that because this is so much brighter and fresher than the stuff you buy, it instantly elevates whatever it touches. It’s the easiest way to start treating yourself to better food!
First off, forget about using it on a plain ol’ turkey sandwich. This mayo deserves better! Slather a thick layer on your next BLT—the way the olive oil flavor mixes with fresh tomato acidity is just heaven. It completely changes the whole sandwich game. You won’t want to go back to regular mayo, I promise you that.
My second favorite use, which is probably not a shocker since we talked about troubleshooting, is using it for dipping. Forget those boring bottled sauces! This homemade version (especially if you turned it into a garlic aioli like I mentioned earlier) is absolutely magnificent for dipping everything. Especially if you serve it alongside some crispy, perfectly seasoned potato wedges. You can find my favorite way to make those crispy potatoes just here—the combination is killer!
And don’t forget its use as a base! It’s the quickest way to whip up a stellar dressing. Take a couple of tablespoons of your fresh mayo, thin it out with a little water or buttermilk, add some cracked black pepper and whatever herbs you have—boom! Instant, creamy Caesar or ranch dressing. It’s so fast, and since you know exactly what went into that base, you feel great about serving it to your family. Honestly, making this DIY Mayonnaise from Scratch just encourages your creativity!
Understanding Your Homemade Condiments
Why go through the little bit of effort when you can just grab that big jar off the shelf? It really comes down to two things when you’re making something like this amazing DIY Mayonnaise from Scratch: control and flavor. Store-bought versions, even the expensive ones, are loaded with stabilizers and sometimes sugars just so they can sit on a shelf for six months without separating. I just can’t get behind that!
When you make your own homemade mayonnaise olive oil, you get an unparalleled fresh flavor. It’s bright, it’s zesty, and it tastes like food should taste. Plus, you get to decide every ingredient detail, which is why this fits perfectly into our philosophy of creating Healthy Homemade Condiments. You control the salt, you pick the oil, and you know exactly how long it’s been sitting around. It’s about elevating the everyday squeeze of sauce on your plate, making even a simple meal feel special. If you’re looking for more ways to upgrade your simple meals, check out some of my favorite healthy snack ideas! It’s all connected!
Frequently Asked Questions About Making Olive Oil Mayo
These are the questions I hear all the time when I send people my recipe for homemade mayonnaise olive oil! It’s totally normal to have a few doubts when you’re attempting a new sauce from scratch. Don’t worry, there are no silly questions here—just clear answers to get you making the Best Homemade Mayonnaise Recipe right now.
Can I use only extra virgin olive oil in this DIY Mayonnaise from Scratch?
Yes, you absolutely can, but I highly caution you against it unless you absolutely LOVE that very strong, sometimes bitter, grassy flavor! While it’s tempting to use only the healthiest oil available, straight EVOO combined with egg yolk can sometimes yield a mayo that tastes too pungent for everyday use. That’s why I push the 50/50 blend option. If you are using only olive oil, make sure it’s a lighter, sweeter variety, not the super peppery finishing oil you usually drizzle on pasta.
How soon does this mayonnaise need to be refrigerated, and how long does it last?
Because this is a real Egg Yolk Mayonnaise Recipe without any preservatives, it needs to be refrigerated right away! After you finish mixing, pop it into the fridge for that hour to set up, and then keep it chilled constantly. Since it contains raw egg, you want to be cautious. We recommend using it up within about 7 to 10 days maximum. If you notice any off smells or mold, toss it immediately, but honestly, the flavor is usually best within the first week when it’s truly fresh!
What is the Best Oil for Homemade Mayo if I dislike strong olive oil flavor?
If you’re looking for the Best Oil for Homemade Mayo but you’re sensitive to the flavor of straight extra virgin olive oil, definitely use a blend! My personal favorite is mixing half of a good quality, milder EVOO with half avocado oil. Avocado oil is fantastic because it has a very neutral, clean taste, but it provides all the richness you need for that Rich and Creamy Homemade Mayo texture. Combining them lets you enjoy the benefits of olive oil without getting that overpowering bite.
Can I use an immersion blender for this Egg Yolk Mayonnaise Recipe?
That’s a great question! Yes, you absolutely can use an immersion blender, and it will get you a mayonnaise much faster than whisking by hand. Immersion blenders are brilliant for making mayonnaise quickly because they force the emulsification incredibly efficiently. However, the reason I detailed the whisking method in the main steps is that it gives you far more control over adding the oil slowly, especially when using olive oil. With an immersion blender, it’s so easy to dump too much oil in too fast, ruining that delicate stage of Emulsifying Oil and Eggs for Mayo. If you use the stick blender, start the oil stream even slower than you think you need to!
Can I make this recipe without Dijon mustard?
You could skip the mustard, but I really advise against it! Dijon mustard is one of the most effective natural emulsifiers we can add to the base. It helps stabilize the bond between the fat and the water in the yolks. If you skip it, you are running a much higher risk of the mixture breaking, especially when using olive oil. If you absolutely can’t use Dijon due to an allergy, a tiny bit of other emulsifiers like xanthan gum (seriously tiny, like 1/8 tsp) can sometimes work, but honestly, the mustard is the best tool for this job!
PrintBest Homemade Mayonnaise Recipe Using Olive Oil
Make rich and creamy homemade mayonnaise from scratch using olive oil. This guide provides clear steps for perfect emulsification and troubleshooting tips for your DIY mayonnaise.
- Prep Time: 10 min
- Cook Time: 0 min
- Total Time: 10 min
- Yield: About 1 cup 1x
- Category: Condiment
- Method: Whisking/Emulsification
- Cuisine: American
- Diet: Low Fat
Ingredients
- 2 large egg yolks, room temperature
- 1 teaspoon Dijon mustard
- 1 teaspoon fresh lemon juice, plus more to taste
- 1/2 teaspoon white wine vinegar
- 1/4 teaspoon fine sea salt
- 1 cup extra virgin olive oil (or a blend of olive oil and a neutral oil like avocado)
Instructions
- Place the egg yolks, Dijon mustard, lemon juice, white wine vinegar, and salt into a medium bowl.
- Whisk these ingredients together vigorously until they are pale yellow and slightly thickened. This takes about one minute.
- Begin adding the olive oil drop by drop while whisking constantly and quickly. This initial slow addition is crucial for starting the emulsion.
- Once the mixture thickens noticeably after adding about 1/4 cup of oil, you can increase the oil stream to a very thin, steady drizzle while continuing to whisk without stopping.
- Continue whisking and slowly adding the remaining oil until all the oil is incorporated and the mayonnaise is thick and holds soft peaks.
- Taste the mayonnaise and adjust seasoning with more salt or lemon juice if needed.
- Transfer the finished mayonnaise to an airtight container and refrigerate for at least one hour before serving to allow it to fully set.
Notes
- If your mayonnaise separates (breaks), place one fresh egg yolk in a clean bowl. Slowly whisk in the broken mixture, one teaspoon at a time, until it re-emulsifies.
- Using room temperature ingredients helps the emulsion form more easily.
- For a milder flavor, use half olive oil and half a neutral oil like avocado or grapeseed oil.
- This recipe makes a no sugar added mayonnaise.
Nutrition
- Serving Size: 1 tablespoon
- Calories: 90
- Sugar: 0
- Sodium: 50
- Fat: 10
- Saturated Fat: 1.5
- Unsaturated Fat: 8.5
- Trans Fat: 0
- Carbohydrates: 0
- Fiber: 0
- Protein: 0.5
- Cholesterol: 30